1
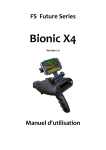
FS Future Series
Bionic X4
Version 1.0
User's Manual
Any information contained in these operating instructions may be changed without prior notice.
OKM does not make any warranty for this document. This also applies without limitation to implied assurances of
merchantability and fitness for a specific purpose. OKM does not assume any responsibility for errors in this manual
or for any incidental or consequential damage or loss associated with the delivery, exploitation or usage of this
material.
This documentation is available "as presented" and without any kind of warranty. In no circumstances OKM takes
responsibility for lost profits, usage or data loss, interruption of business activities or all kind of other indirectly
damages, which developed because of errors in this documentation. This instruction manual and all other stored
media, which are delivered with this package should only be used for this product. Program copies are allowed only
for security- and safety purposes. The resale of these programs, in original or changed form, is absolutely forbidden.
This manual may not be copied, duplicated or translated into another language, neither in part nor completely, over
the copyright matters without the prior written consent of OKM.
Copyright ©2002 – 2011 OKM GmbH. All rights reserved.
3
Table of contents
1 Introduction ........................................................................................................................................... 5
1.1 Preface ........................................................................................................................................... 6
1.2 Important Notes ............................................................................................................................. 7
1.2.1 General Notes ........................................................................................................................ 7
1.2.2 Surrounding Area ................................................................................................................... 7
1.2.3 Voltage / Power Supply ........................................................................................................... 7
1.2.4 Maintenance and Services ..................................................................................................... 7
1.2.5 Danger of Explosion during Excavation ................................................................................. 8
2 Technical specifications ......................................................................................................................... 9
2.1 Control Unit ................................................................................................................................. 10
2.2 Laser ............................................................................................................................................ 10
2.3 Data Transfer ............................................................................................................................... 10
3 Scope of delivery .................................................................................................................................. 11
4 Control elements .................................................................................................................................. 13
4.1 Control Unit ................................................................................................................................. 14
4.2 Wireless Headphones ................................................................................................................... 16
5 Assembly .............................................................................................................................................. 17
6 Operating modes .................................................................................................................................. 21
6.1 Bionic Scan .................................................................................................................................. 23
6.1.1 Calibration ........................................................................................................................... 23
6.1.2 Processing a scan ................................................................................................................. 24
6.1.3 Scan with activated Smart Phone ......................................................................................... 25
6.2 Ionic Scan .................................................................................................................................... 28
6.2.1 Calibration ........................................................................................................................... 28
6.2.2 Processing a scan ................................................................................................................. 28
6.2.3 Scan with activated Smart Phone ......................................................................................... 29
6.3 LED Light ..................................................................................................................................... 30
6.4 Laser ............................................................................................................................................ 30
OKM GmbH
www.okmmetaldetectors.com
4
Table of figures
Figure
Figure
Figure
Figure
Figure
Figure
Figure
Figure
Figure
Figure
Figure
Figure
Figure
Figure
Figure
Figure
Figure
Figure
Figure
Figure
Figure
4.1: Control elements of Bionic X4 ..............................................................................................
4.2: Control elements of wireless headphones ............................................................................
5.1: Connecting the Power Pack with the device .........................................................................
5.2: Switch on the Power Pack ....................................................................................................
5.3: Switch on the Smart Phone ..................................................................................................
5.4: Place the Smart Phone into the holder .................................................................................
5.5: Run the application on the Smart Phone ..............................................................................
5.6: Connecting the USB cable to the device ...............................................................................
5.7: Connecting the USB cable to the Smart Phone ....................................................................
5.8: Switch on the Bionic X4 .......................................................................................................
5.9: Start the measurement .........................................................................................................
6.1: Complete menu structure .....................................................................................................
6.2: Contact between operators hand and the electrodes ...........................................................
6.3: Calibrating the device in bionic mode ..................................................................................
6.4: Measurement with the Bionic X4 ..........................................................................................
6.5: Triangulating with the Bionic X4 ..........................................................................................
6.6: Screenshot of the Smart Phone ............................................................................................
6.7: Starting the cross bearing ....................................................................................................
6.8: Completing the cross bearing ...............................................................................................
6.9: Calibrating the device onto a gold object in ionic mode .......................................................
6.10: Measurement in ionic mode ...............................................................................................
OKM GmbH
www.okmmetaldetectors.com
14
16
18
18
18
19
19
19
20
20
20
22
23
23
24
25
25
26
26
28
29
1 Introduction
CHAPTER 1
Introduction
6
Introduction
1.1 Preface
Dear Customer,
First of all we would like to thank you in choosing a product manufactured by OKM. The present product
is based on a measuring method to detect gold objects that are a distance away from the operator. The
longer the object is buried in the ground the better and deeper it can be located by the device.
With our team of specialists we guarantee that our products are under recurrent control. Our specialists
are constantly implementing new developments in terms of further quality improvements for you. Of
course by selling our products we cannot guarantee that you will make a find during your research. The
recognition of hidden objects and structures depends on a huge number of factors – as you are already
aware of. Determining factors like the dielectric constant of the ground, the grade of mineralization and
the dimensions of an object relating to its depth size and displacement. Especially in very wet soils like
clay and sand with high conductivity or attenuation of the ground. In certain conditions recording of the
measured results can be falsified strongly.
For more information regarding where this equipment has been used and operated, please visit our web
site. Our equipment is constantly being tested and when improvements or upgrades are available, we
will list them also on our web site.
It is necessary for our company to protect our developments and all of the information learned during
the “Research and Development” phases in creating our technology. We strive to stay within the given
framework of legislation, patents and trademark registration.
Please take the time to read this User Manual and familiarize yourself with the operation, functionality
and how to utilize the Bionic X4. We also offer training for your equipment in our factory and on-site
training is also available. We strive to maintain a worldwide dealer network for assistance and support.
Please visit our web site for more information.
OKM GmbH
www.okmmetaldetectors.com
Introduction
7
1.2 Important Notes
Prior to using the Bionic X4 and its accessories, please read these operating instructions carefully.
These instructions give information on how to properly use the detector and potential sources where
precautions should be taken.
1.2.1 General Notes
Being an electronic device, the Bionic X4 has to be treated with caution and treated with care as with
any electronic device. Any failure to observe the safety precautions given or any use for purposes other
than the ones it is designed for may result in damage or destruction of the processing unit and/or its
accessories or connected components.
The device has a built in anti-tampering module which will destroy the unit if it is improperly opened.
There are no end user serviceable parts on the inside of the unit.
1.2.2 Surrounding Area
When moving this unit from a cold place to a warmer place, watch out for condensation. Do not
immediately operate the unit until any possible condensation has evaporated. The unit is not weather
proof and water, moisture or condensation can destroy the unit.
Avoid strong magnetic fields, which may occur in places where there are large electric motors or
unshielded loudspeakers. Try to avoid using this equipment within 50 meters (150 ft) of this type of
equipment.
Avoid using this equipment around active military installations and airports or where there may be other
devices that may hamper the signals received. Radars for aircraft, boats and weather reporting may
lower the units capabilities.
1.2.3 Voltage / Power Supply
The power supply should not be outside the indicated range of values. Use only approved chargers,
batteries and rechargeable batteries which are included in the scope of delivery.
Never use the 115/230 Volt mains supply.
1.2.4 Maintenance and Services
In this section you will learn how to maintain your measuring instrument with all of its included
accessories. This will keep it in good condition a long time and you will be able to get good measuring
results.
The following list indicates what you absolutely should avoid:
OKM GmbH
www.okmmetaldetectors.com
8
Introduction
•
penetrating water
•
strong dirt and dust deposits
•
hard impacts
•
strong magnetic fields
•
strong microwave fields
•
high and long lasting heat effect like leaving unit in the sun on a hot day
To clean your device please use a dry soft cloth. To avoid any damage you should always transport the
device and accessories in the appropriate carrying cases.
Prior to using your Bionic X4 please be sure that all batteries and accumulators are fully charged. Also
allow the batteries to completely discharge before recharging them, regardless if you are working with
the external battery or with internal accumulators. This way your batteries will have a long and durable
life.
1.2.5 Danger of Explosion during Excavation
Unfortunately, the last two world wars also made the ground in many places of the world a potentially
explosive scrap heap. A host of those lethal relics are still buried in the ground. Do not start digging and
hacking for an object wildly when you receive a signal of a piece of metal from your device. Firstly, you
might indeed cause irreparable damage to a truly rare find, and secondly, there is a chance that the
object reacts in an insulted way and strikes back.
Note the color of the ground close to the surface. A red or reddish color of the ground is an indicator of
rust traces. As regards to the finds themselves, you should definitely pay attention to their shape.
Curved or round objects should be a sign of alarm, especially if buttons, rings or little pegs can be
identified or felt. The same applies to recognizable ammunition or bullets and shells. Leave that stuff
alone and where it is, do not touch anything and, most importantly, do not take any of those items home
with you. The killing machines of war made use of many diabolical inventions such as rocker fuses, acid
fuses and ball fuses. Those components have been rusting away in the course of time, and the slightest
movement may cause parts of them to break and be triggered. Even seemingly harmless objects such as
cartridges or large ammunition are anything but that. Explosives may have become crystalline over time,
that is, sugar-like crystals within them have formed, they are still dangerous and should be regarded as
a potential killer.
Moving such an object may cause those crystals to produce friction, leading to an explosion. If you come
across such relics, mark the place and do not fail to report the find to the police or proper authority.
Such objects always pose a danger to the life of hikers, walkers, farmers, children and animals.
OKM GmbH
www.okmmetaldetectors.com
2 Technical specifications
CHAPTER 2
Technical specifications
10
Technical specifications
The following technical indications are medial values. During operation small variations are quite
possible. Technical changes due to development are also possible.
2.1 Control Unit
Dimensions (H x W x D) .............................................................................................. 260 x 140 x 220 mm
Weight ................................................................................................................................... approx. 780 g
Display ..................................................................................................................................... LCD display
Voltage ............................................................................................................................................ 12 VDC
Operating time (no smart phone at USB) ......................................................................... approx. 16 hours
Operating time (smart phone at USB) ................................................................................ approx. 8 hours
Operating temperature ........................................................................................................ 0 °C to +70 °C
Feedback .......................................................................................................................... acoustical, visual
Processor ..................................................................................................... Atmel AtMega CPU, 14,7 MHz
2.2 Laser
Laser beam distance ................................................................................................................. max. 150 m
Laser output .............................................................................................................................. max. 3 mW
Emitted wavelength ........................................................................................................................ 650 nm
Laser class ....................................................................................................................... 3R (EN 60 825-1)
Operating temperature ...................................................................................................... 15 °C to +35 °C
2.3 Data Transfer
Technology ...................................................................................................................... Bluetooth, class 1
Frequency ........................................................................................................................ 2.4 – 2.4835 GHz
Maximum Transfer Rate .................................................................................................................. 1 Mbps
Receiving Sensitivity ...................................................................................................................... -85 dBm
Maximum Range ......................................................................................................................... max. 10 m
OKM GmbH
www.okmmetaldetectors.com
3 Scope of delivery
CHAPTER 3
Scope of delivery
12
Scope of delivery
In the following section you can find all standard equipment and optional parts of the Bionic X4.
Description
Quantity
Control unit
1
Wireless headphones including 2 batteries (AAA)
1
Android Smart Phone and included accessories
1
Power Pack incl. charger and traveling adapter
1
User manual
1
Carrying case
1
Table 1: Scope of delivery
OKM GmbH
www.okmmetaldetectors.com
4 Control elements
CHAPTER 4
Control elements
In this section you will learn more about the fundamental use of all control elements for this measuring
instrument. All connections, inputs and outputs are explained in detail.
14
Control elements
4.1 Control Unit
Figure 4.1 shows all the control elements of the Bionic X4.
Holder for
Android Smart Phone
LED lights
Display
Power on/off
button
Laser pointer
Green multi-function button
Calibration
Control
USB port for Android
Smart Phone
Handle button
Handle
Electrodes
Connector for external
Power Pack
Figure 4.1: Control elements of Bionic X4
Handle with electrodes: When using the device you have to take hold of the handle. Especially in the
bionic mode you have to make sure that your hand has contact with the electrodes on both sides of the
handle. Those electrodes are used to measure your body's bio-energy which influences the whole
measurement.
Connector for Power Pack: The Bionic X4 has no internal batteries but uses the external Power Pack.
Additional information about the usage and care of the Power Pack you may find in the separate
description.
OKM GmbH
www.okmmetaldetectors.com
Control elements
15
Power on/off button: Use the power on/off button to power your device on and off. In case of any
critical situation you can switch off your device at any time. The functionality of the device will not be
affected.
Handle button: In the first place the handle button is used to navigate through the single menu items.
If you are using the Android Smart Phone this button is also used to fix the current scan directions
which is visible in the screen.
Additional information about that procedure you may find in chapter 6.1.3 „Scan with activated Smart
Phone“ on page 25.
Green multi-function button: The green multi-function button is used to confirm the current menu
selection and to start and stop the measurements. It is also used to switch the LED lights and the laser
pointer on and off.
Display: In the display of the device you will see all of the available menus and several status messages,
i.e. the calibration and the measurement results.
Calibration Control: This regulator is used to calibrate the device during the bionic measurement to
adjust it for the current environment.
Holder for Smart Phone: When using the Bionic X4 you have the possibility to connect it with an
Android Smart Phone to have additional graphical options for directional reference. Just place the Smart
Phone into the attached holder.
USB port: The USB port may be used to charge the Android Smart Phone. If you are using the Smart
Phone for your measurements you just need to connect it via USB cable with the device to reach a
longer working time, since the Smart Phone is charged while working. The USB port is always powered
on as long as the Power Pack is switched on, even when the Bionic X4 is powered off.
LED lights: You may use the LED lights during searches at night.
Laser pointer: The laser pointer can be used at night searches for optical directional reference. The
laser pointer is just some additional tool to assist you in determining the position of located objects.
Please pay attention to the security information in chapter 6.4 on page 30.
OKM GmbH
www.okmmetaldetectors.com
16
Control elements
4.2 Wireless Headphones
Figure 4.2 shows all control elements of the delivered wireless headphones.
Power on/off
button
Protective cap
for battery case
Volume control
Frequency
regulator
Figure 4.2: Control elements of wireless headphones
To use the delivered wireless headphones, you should insert two fully charged type AAA rechargeable or
alkaline batteries inside the battery case. Remove the battery cover on the left site "L" and insert the
batteries into the battery case. Please make a note to insert the batteries correctly. Now place the
protective cap again on the battery case and press carefully until it snaps into place.
Power on the wireless headphones with the power on/off button (ON/OFF) and find the correct channel
with the frequency regulator (TUNE). The device Bionic X4 should be powered on and release an
acoustic signal during this adjustment.
Via the volume control (VOL) you can regulate the volume of the headphones.
OKM GmbH
www.okmmetaldetectors.com
5 Assembly
CHAPTER 5
Assembly
In this section is explained how to assemble the device and how to prepare a measurement.
18
Assembly
Before you can use the device Bionic X4 for a field measurement you should do some preparations.
Please pay attention to the following steps!
Step 1
Connect the cable of the Power Pack with the
device.
Figure 5.1: Connecting the Power Pack with the device
Step 2
Switch on your Power Pack. The LED on your
Power Pack should light up in green now.
If the LED shows red, you have to charge the
Power Pack first.
Figure 5.2: Switch on the Power Pack
Step 3
If you decide to work with Smart Phone you
have to switch it on and follow the next steps.
If you decide to work without Smart Phone
you have to continue with step 8!
Figure 5.3: Switch on the Smart Phone
OKM GmbH
www.okmmetaldetectors.com
Assembly
19
Step 4
After powering on the Smart Phone, you have
to place it into the holder.
Avoid hard impact or other damages.
Figure 5.4: Place the Smart Phone into the holder
Step 5
Now run the application on the Smart Phone
by touching the Bionic icon with your finger.
You should turn the holder into the required
position and fix it with the two knurled
screws.
Figure 5.5: Run the application on the Smart Phone
Step 6
For charging the Smart Phone while working
with the device you have to connect the big
end of the USB cable with the USB port of the
device and ...
Figure 5.6: Connecting the USB cable to the device
OKM GmbH
www.okmmetaldetectors.com
20
Assembly
Step 7
… the small end with the USB port of the
Smart Phone.
Charging the Smart Phone is also possible
with the Bionic X4 switched off. As soon as
the USB cable is connected and the Power
Pack is switched on charging takes place.
Figure 5.7: Connecting the USB cable to the Smart Phone
Step 8
Switch on the Bionic X4 by using the power
on/off button.
Figure 5.8: Switch on the Bionic X4
Step 9
After switching on the device, the menu item
„Bionic Scan“ appears in the display.
Now your device is prepared for the first
measurement.
Figure 5.9: Start the measurement
OKM GmbH
www.okmmetaldetectors.com
6 Operating modes
CHAPTER 6
Operating modes
In this section you will learn more about operating the device. Every operating mode will be explained in
a proper subsection.
22
Operating modes
The device supports the following functions and operating modes, which you can select from the main
menu of the control unit:
•
Bionic Scan
Measurement based on the bio-energy of the human body as well as the magnetic field of earth.
•
Ionic Scan
Measurement for long time buried gold objects.
•
LED Light
Switch the LED lights on and off.
•
Laser
Switch the laser pointer on and off.
To switch between the menu items you have to press the handle button. Push it one time to get to the
next menu item. The complete menu structure is displayed in figure 6.1.
Figure 6.1: Complete menu structure
OKM GmbH
www.okmmetaldetectors.com
Operating modes
23
6.1 Bionic Scan
In order to make a scan with the Bionic X4 first turn on the unit with the power button located on the
left side. After switching on the unit you will see in the display „Bionic Scan | Start ->“. Confirm this
function by pushing on the green multi-function button. Then the Bionic X4 will have to be calibrated to
your body's own natural bio-energy.
6.1.1 Calibration
In order to calibrate the Bionic X4 be sure that your hands are in contact with the electrodes. Figure 6.2
shows an example of how to hold the unit.
RIGHT
WRONG
Figure 6.2: Contact between operators hand and the electrodes
Turn the calibration control from one side to the other very slowly until a higher value is seen. The
upper value of 255 is too high and must be lower. For the optimum range a good setting is between 220
and 254. This value will make the unit very sensitive to buried gold.
Figure 6.3: Calibrating the device in bionic mode
The higher the unit is calibrated to the more exact it will look for gold. Wait then a couple of seconds so
that the value is stable before pushing the green button. The shown frequency needs to be stable before
OKM GmbH
www.okmmetaldetectors.com
24
Operating modes
pushing the green button.
On another note, it is very important that your hand does not lose contact with the electrodes while
making a measurement. If contact is lost, then it is possible to receive a false signal. It is important to
practice holding the unit comfortably, not too tight and not too loose. While calibrating the unit it is
extremely important to keep the same pressure on the electrodes. In the event that the signal is broken
during the calibration, then it must be repeated.
As soon as the optimum calibrated value is reached, then confirm the setting by depressing the green
button. In the display will be shown "Bionic Scan | - NO – ". In the event that the display constantly
switches between “ - NO - “ and “ - YES “ very quickly then most likely you will have to calibrate the unit
again and check your grip so that it is not too tight or change your location for you might be too close to
a gold object.
6.1.2 Processing a scan
After you have successfully calibrated the unit and the operating mode is active, you can begin your
scan. In a left to right and horizontal to downward motion (as shown in Figure 6.4) move the Bionic X4.
Do not move the unit too quickly, slowly so it has the time to detect the gold within the bionic stream.
Figure 6.4: Measurement with the Bionic X4
As soon as the Bionic X4 has detected an anomaly, you will hear an acoustic signal and in the display you
will see "Bionic Scan | - YES - ". You will need to conduct a control scans on the object by repeating it
from various directions. When the object has a constant signal then you have most likely located its
position. With the Bionic X4 you can then take a photograph of the direction in order to see the probable
target. Move to a new position, approx 25 to 500 m from the original, as shown in Figure 6.5.
Repeat the measurement including the calibration of the unit. When the same positive signals are
received then you can point the direction of the location of highest probability. Afterward press on the
green button again to return to the main menu so that you can complete the triangulation and locate the
object.
OKM GmbH
www.okmmetaldetectors.com
Operating modes
25
25 – 500 m
Figure 6.5: Triangulating with the Bionic X4
Should the object be at a greater distance, it will be necessary to travel closer to the object to get a
better reading. So travel closer to the object, repeat the scans including calibration to narrow down the
cross hairs. Of course it is better to use multiple positions in order to better locate your item.
6.1.3 Scan with activated Smart Phone
As written earlier, you can conduct the scans without the Smart Phone. When using the Smart Phone
and the integrated camera, you can get assistance and an exact direction from the Smart Phone
application which will help you greatly in locating the target. As soon as the application is started on the
Smart Phone, you will have an image similar to the one shown in Figure 6.6.
Compass
Bluetooth
Symbol
N
NE
E
SE
S
SW
W
NW
Figure 6.6: Screenshot of the Smart Phone
OKM GmbH
www.okmmetaldetectors.com
North
North East
East
South East
South
South West
West
North West
26
Operating modes
On the top portion of the screen you will find a digital compass which will show the compass direction.
This will show you the direction that the Bionic X4 is pointed at. When the Bluetooth on the Smart Phone
is activated (the Bluetooth symbol can be seen in the upper left hand corner of the Smart Phone) then
there is an active data exchange in process between Bionic X4 and the Smart Phone. When the
connection is active, you can push the trigger on the hand grip (handle button) at any time to take a
picture to complete the triangulation as shown in Figure 6.7.
1. Picture
Figure 6.7: Starting the cross bearing
As soon as you have located a possible object then the symbol
of gold coins will be displayed. This is
the correct direction for the first picture to be taken. Wait until the symbol is stable then squeeze the
trigger on the hand grip to take the image.
Then afterward you can change your position and begin a new scan. Again like the previous scan wait
until you have the symbol and it has stabilized to take the second image. Afterward in the Smart Phone
display, as shown in Figure 6.8 , you will see the images.
1. Picture
2. Picture
Figure 6.8: Completing the cross bearing
There on the display the image will be see on the Smart Phone display and then you can study the
OKM GmbH
www.okmmetaldetectors.com
Operating modes
27
results to ensure that the directions are correct. There where the two images are a triangulation can be
made and this will be the point of highest probability. Clicking again the trigger on the hand grip will
clear the images so that you can begin again.
OKM GmbH
www.okmmetaldetectors.com
28
Operating modes
6.2 Ionic Scan
The Ionic Mode of the Bionic X4 is specialized for the location of gold objects that have been buried for a
long time. The longer the object has been buried the better it can be read. For the search of freshly
buried objects we recommend the use of the Bionic mode.
To use the Bionic X4 in the Ionic mode, switch the unit on. After the unit has been turned on, click on
trigger on the hand grip until you have reached the menu entry of “Ionic Scan | Start ->”. Then push on
the green multi-function button.
6.2.1 Calibration
The next step is to calibrate the Bionic X4 on the desired object (gold) within the Ionic stream. Use an
adequate amount of gold to receive a good signal and complete the Bionic X4 calibration. The use of a
physical gold object will assist the unit in its calibration of the ionic stream.
Gold object for
calibration
Figure 6.9: Calibrating the device onto a gold object in ionic mode
The unit will calibrate itself automatically for the chosen ionic stream (field). Please pay particular
attention to the background that it is clear of any foreign objects or debris. Foreign objects or debris can
potentially disrupt the ionic stream, limiting the capabilities of the Ionic mode. Confirm the calibration
by pushing on the green button.
6.2.2 Processing a scan
At this moment the scan can be conducted and the previous technique as explained in the Bionic mode is
the same as in the Ionic Mode. The main difference is that when using the Ionic mode that you must not
be in contact with the electrodes on the hand grip. The Ionic mode does not require human contact.
The one item to take note of is that when using the Ionic mode the searchable area is limited to the
South. You will need to have the North at your back. The limited search area is from the South East (SE)
to the South West (SW).
OKM GmbH
www.okmmetaldetectors.com
Operating modes
29
In Figure 6.10 the area is shown. The user can slowly move the Bionic X4 from the SE to the SW being
sure to keep the North always on their back. Using the unit outside of this area may give the user an
incorrect reading.
S
SE
SW
N
Figure 6.10: Measurement in ionic mode
In order to end the scan, push the green button again and this will return you to the main menu. Again
like that in the Bionic mode, a minimum of two scans from two different direction will have to be done to
correctly triangulate the buried object.
6.2.3 Scan with activated Smart Phone
When you have the Smart Phone connected, the same for the Ionic mode pertains as with the Bionic
mode. You can depress the trigger on the hand grip (handle button) to take an image of the direction to
better locating the cross hairs.
Another advantage to using the Smart Phone with its included digital compass is to remain within the SE
to SW area. The compass will show you which direction you are pointed ensuring that you can keep
North to your back.
OKM GmbH
www.okmmetaldetectors.com
30
Operating modes
6.3 LED Light
Press the handle button several times until the display shows the function „LED Light“. Now you can
switch the LED light on by pushing the green button. Another push on the green button switches the
LED light off again.
6.4 Laser
Press the handle button several times until the display shows the function „Laser“. Now you can switch
the laser on by pushing the green button. Another push on the green button switches the laser off again.
Never look into the laser beam and never point it at people or animals. Laser
radiation can cause damage to eyes or skin.
Lasers should never be used by children. They are not toys.
This product is equipped with a class 3R laser according to EN 60 825-1:2007.
Never open the device. Any adjustment or service work is only to be carried out
by qualified personnel who are familiar with the risks involved. Improperly made adjustments may
result in hazardous laser radiation.
During operation of the device, the laser has to be directed in such a way that no person is located
within the range of projection and that unwanted reflected rays (e.g. due to reflecting objects) do not
get into the range of any person.
OKM GmbH
www.okmmetaldetectors.com