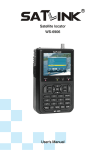
1
WS-6933
USER‘S MANUAL
CONTENT
1. GUIDE..................................................................................................1
1.1 Important Safety Instructions............................................1
1.2 Unpacking...................................................................................2
1.3 PRODUCT OVERVIEW & ILLUSTRATION......................2
2. OUTLINE............................................................................................4
3. THE MENU OSD INSTRUCTION..............................................4
3.1 Antenna Setup.........................................................................5
3.2 Find Satellite.............................................................................5
3.3 Satellite Setup..........................................................................6
3.4 Transponder Setup................................................................7
3.5 Calculate Angle.......................................................................7
3.6 System Setup............................................................................8
4. Technical Specification..............................................................9
Digital Satellite Finder
1. GUIDE
1.1 Important Safety Instructions
Thank you for choosing our product. Before installation,
we would like to remind you some notes, which is very
important for operating safely and properly, as follows:
gBe sure to read this user manual before starting your
operation.
gYou must install the dish with correct direction and angle.
If the dish is not working properly, contact your local
dealer.
gWhen the unit is suddenly moved to a hot area from a
cold area, it may cause some problems. In that case, turn
off the power, and turn on again after 1-2 hours.
gKeep meter placed in clean space with sufficient
ventilation.
gDo not cover the meter with or place it on a unit that
emits heat.
gClean the case by a soft cloth with a little washing liquid.
gDo not remove the cover.
gDo not let the unit exposed to extreme heat, cold or
humid conditions.
gNo liquids or any other materials to come inside of the
unit.
1
Digital Satellite Finder
1.2 Unpacking
Open the package and make sure it includes all below items,
if any missing, please contact the reseller for replacement.
1.Digital SatelliteMeter
2.User’s manual
3.USB cable
4.Adaptor
5.Silicone case
1.3 PRODUCT OVERVIEW&ILLUSTRATION
2
Digital Satellite Finder
NO
1
2
3
4
5
6
7
8
Description
Power Switch
LNB IN
LCD Screen
USB Port
DC Slot
Digital tube
Power
22KHZ
9
13V
10
18V
11
12
13
14
15
16
17
18
19
20
LOCK
Charger
OK
RETURN
◄
▼
►
▲
Torch
Cover
FUNCTION
Turn on/off meter
Connect to satellite antenna cable
Video display
Connect to PC
Connect to Adaptor Input
Quality shows
Power indicator light
22Khz indicator light
Vertical polarization voltage output
light
Horizontal polarization voltage output
light
Signal lock indicator light
Charger indicator light OK KEY
RETURN KEY
Right KEY
DOWN KEY
Left KEY
Up KEY
Torch The battery cover
3
Digital Satellite Finder
2. OUTLINE
gDigital
meter for signal strength and quality
and Light Alarm for Locking Signal
gAuto Calculate Angle of AZ ,EL
gSupports DISEQC 1.0/1.1 ,0/22khz Tone
gBeep Integrated
gLNB short protect
g7.4V/800mAh Li-Ion Battery Included
gSoftware upgrade via USB port
gEasy to carry
gSound
3. THE MENU OSD INSTRUCTION
If you have installed and connected the cables of the
meter,open the power switch, into the main menu.
gAntenna
gFind
Setup
Satellite
gSatellite
Setup
gTransponder
gSystem
Setup
Setup
Press the keys of ▲▼to move the cursor up or down in
the menu interface, then use OK key to confirm a selection.
4
Digital Satellite Finder
3.1 Antenna Setup
Sat Name: press ◄► key to select satellite
LNB Type:press ◄► key to select LNB Type
Low Freq: press ◄► key to select Low Freq or press OK
key; then use the ▲▼key to input the value
Hi Freq: press ◄► key to select HiFreq or press OK key;
then use the ▲▼key to input the value
22K: press ◄► key to switch the 22K tone; if you select
universal type the 22K setting is auto
DiSEqC1.0 1.1:press ◄► key to switch LNB port
LNB Power: press ◄► key to switch LNB power on /off.
When all of settings are ok; press RETURN key, then press
OK key for save the edit.
3.2 Find Satellite
In the first line, we can press left or right key to switch the
satellite.
5
Digital Satellite Finder
In the second line, we can press left or right key to switch
TP; then press ok key, we can use up or down key to edit
TP frequency.
In the third line, we can press ok key, then edit Symbol rate.
In the fourth line, we can press left or right key to select
h or v polar.
When all of settings are ok, we can check the LNB signal.
3.3 Satellite Setup
1. Add Satellite
2. Edit Satellite
3. Delete Satellite
Add Satellite: the setting, refer to Antenna Setup.
Edit Satellite: press ◄► key to page up /down; then press
▲▼ key to select the satellite; press ok key to edit satellite
6
Digital Satellite Finder
setting, refer to Antenna Setup.
Delete Satellite: refer to Edit Satellite then press ok key to
delete satellite.
3.4 Transponder Setup
1. Add Transponder
2. Edit Transponder
3. Delete Transponder
Please refer to Satellite Setup
3.5 Calculate Angle
Press▲▼ key to move the cursor, then press OK key to
select the option. Press ▲▼ to input value press ◄► to
set east/west or north/south. The bottom of the screen can
get the parameters of the satellite.
7
Digital Satellite Finder
3.6 System Setup
The first line is the SW Ver
The second line is the Hardware serial number.
Set language: switch the system language.
Key press Beep: switch the key Beep.
Signal Lock Beep: switch beep alarm.
Flashlight: switch flashlight .
Signal Strength: select the signal unit
8
Digital Satellite Finder
4. Technical Specification
TRANSMISSION STANDARDS
DVB- S/S2
SATELLITE INPUT/DEMODULATION
Connector Type
F Type
Input Frequency
950 to 2150 MHz
Signal Input Level
- 65 to -25 dBm
Band Switch Control
22KHz
LNB Supply
13V/18V, IMax 300mA
Demodulation Type
QPSK\8PSK
Symbol Rate
2<Rs<45M band(SCPC/MCPC)
LCD FEATURES
LCD Type
FSTN Positive transflective
Number of Dots
128 x64
Active area (WxH)
59.6x43 mm2
DATA SERVICE PORT
Connector
USB
Data protocol
POWER SUPPLY
Li-Ion Battery
Adapter
USB to RS-232
7.4V/800mAh
OUTPUT :DC12V/1A,
INTUPT :100-240VAC 50/60Hz
Max. 5W
Power consumption
PHYSICAL CHARACERSTICS
Size (W x D x H)
Net Weight
8x16x4(cm3)
0.25kg
9
USER‘S MANUAL