1
TM
Xtra-S
Xtra-S
C
User manual
Over view
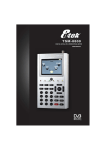
Thank you for selecting 8dTek.
To obtain the best performance of XTRA-S, please
refer to the functionality guidelines in this user manual.
The technical specifications and operating methods
depicted in this manual are subject to change
without prior notice. In case of inquires and up to
date information, kindly visit http://www.8dtek.com.
s
1
SPCM
MENU
OK
ON
OFF
The signal finding menu will be shown when you
press the menu key.
13
C
DSF-8800
SAT JET
12
13/18V DC
Max 500mA
QUALITY
F1
Hold on the ON key until the boot logo is shown,
the system will be boot on.
14
RS232
6
7
8
LNB IN
Xtra-S
TM
5
Startup(Signal finding)
9
AV IN/OUT
10
11
5
6
7
8
9
10
11
12
13
14
15
16
DC
1
2
3
4
+
16
2
4
15
SPEAKER
LOCK
CHARGE STATUS
3
Green LED Line: Indicate signal Quality
Lock LED : Indicate signal lock status
Charge Status:Indicate charging & on/off status
Speaker: Sound and indicate signal lock status
Button F1: Switch between AV In and AV Out
under TV mode, or switch to System Setting
under Main Menu
Button SPCM: Shortcuts for spectrum, see OSD
2-3
Button Menu: Shortcuts for enter and exit OSD
1-3
Button Ok: Selection confirmation
Button Up/Down: Item Selection
Button On: Power on the meter
Button Off: Power off the meter
LCD: Play the video and display UI
F type Connector: Connect to dish for signal
input
Rs232 Connector: Port for s/w upgrading
AV Connector: Port for AV In and AV Out
DC Connector: Port for power charging
1)SATELLITE NAME: The name of satellite Press Ok to view
the satellite list for selection and use [▲▼] key to scroll
through the satellite,and press OK again to confirm the
selection.
2)LNB TYPE: LNB value list
Press OK to view the LNB type list and [▲ ▼]key to scroll
through the LNB value,and press OK again to confirm
the selection.
The type selection depends on the LNB fixed on the dish.
3)DiSEqC 1.0&1.1: DiSEqC switch option
Press OK to view the DiSEqC option list and [▲▼] key to
scroll through the option, and press OK agian to confirm
the selection.
Port A, PortB , PortC ,Port D is for DiSEqC1.0
1/16,2/16.....16/16 is for DiSEqC1.1
4)TRANSPONDER: The parameters of the transponder Press
Press OK to view the transponder list and[▲▼]key to scroll
through the transponder, and press OK again to confirm
the selection or add a new transponder.
8)SCAN START: Launch the search
Press OK to launch the search when the signal is locked.
9)QUALITY: Indicate the signal quality
10)LEVEL: Indicate the signal strength.
11)S/N: Indicate signal to noise ratio
12)BER : Indicate the bit error rate
13)SATELLITE NAME BY NIT: Auto detect detect the
satellite name and degree by nit.
Spectrum
5)DELETE TP: delete a transponder
Press the SPCM key in the signal finding menu, the
spectrum will be shown as the following menu
Press F1 to delete the current focus transponder.
6)ADD NEW TRANSPONDER: add a new transponder
to current satellite.
Press F1 to move the cursor.
Press [UP/DOWN] to change the number or polarization.
Press OK to confirm add the new transponder.
Press MENU to cancel the change.
7)SCAN TYPE: Scan channel type
Press OK to view the scan list and[▲▼]key to scroll
through the type , and press OK again to confirm
the selection.
The signal level of each frequency is displayed vertically,
the lower frequencies appear at the left of the screen
and the higher ones at the right. The spectrum level
will increase suddenly to a certain data, and cover for
a certain width, it will means that a transponder signal.
A transponder spectrum data will cover a certain width,
and the spectrum level will increase suddenly to a certain
width.
System setup
Press F1 key in the signal finding menu, the system setup
menu will be shown:
Specification
System capabilities
Fully DVB compliant
Connector
Frequency range
LNB/Tuner input
For DVB-S
-65dBm~-25dBm
LNB supply
13/18V,max500mA
2)OSD TRANSPARENT: The transparent of the
OSD Press OK to view the setting list and[▲▼]
key to scroll through , and press OK again to
confirm the selection.
3)SLEEP TIMER: The finder will switch off in specify
time.Press OK to view the setting list and[▲▼]
key to scroll through , and press OK again to
Front end
Demodulator
For DVB-S
System resource
2Mbps~45Mbps
Yes
Spectral inversion
Auto conversion
Processor
32bit processor
SDRAM
8Mbytes
FLASH
1Mbyte
MPEG 2
Video decoder
4)LOCK BEEP: The signal lock beeping
Press OK to view the setting list and[▲▼]
5)FACTORY DEFAULT: To delete all the user
setting Press OK to make the factory default,
all the usesetting will be deleted.
Symbol rate
SCPCandMCPC Capable
22KHz
QPSK
EEPROM
confirm the selection.
key to scroll through , and press OK again to
confirm the selection.
950MHz-2150MHz
Signal lever
LNB switch control
1)VOLUME: The volume of the speaker in playing
channel Press OK to view the volume list and[▲▼]
key to scroll through , and press OK again to
confirm the selection.
Yes
F type, male
Data Rate
Main Proflie@Main Level
up to 15M bits/s
Resolution
720*576,720*480
Video format
PAL/NTSC/SECAM
MPEG 1 layer 1&2
MPEG Audio
Type
Sampling rates
Serial data interface
Power supply
6)VERSION; Software and hardware information
Panel connectors
Physical Specification
Mono
32,44.1 and 48KHz
Connector
USB type
Li-oN Battery
2350 mA
Supply voltage
13.3Volt
charger
90-240V
Digital tuner input
Size
Weight(Net)
F type, male
102x34x180 (mm)
0.9 Kg
5)CANCELLA TP: Selezione per cancellare un transponder.
Premere F1 per cancellare il transponder selezionato.
6)AGGIUNGI TP: Selezione per aggiungere un nuovo
transponder sul satellite selezionato.