Transcript
FLP95005- Pool Chair(FL95002) User Manual (Front- Eng)- For CTC
Size: 588mm x 210mm (Folded: 147mm x 210)
USER MANUAL
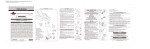
Parts Diagram
Getting Started
Fig. 1
Fig. 7
CARE INSTRUCTIONS
When you use the MOTORIZED BOAT for the first time, the
Inflatable needs to be assembled and the battery needs to be
charged. Follow the instructions in “Battery Use”, for charging
and connection.
IMPORTANT: Keep all packaging for future reference
Model No. FL95002
1. Slide the Steering Sleeve into the hole in the Inflatable
from the top. (See Fig. 1)
2. Use a pump (not included) to blow up the inflatable in the
sequence shown (See Fig. 2). 1 inside floor channel A,
2 inside floor channel B, 3 inside front wall 4 outside top at
the back of the boat. Close the valve for each chamber
once inflated.
THIS IS NOT A LIFESAVING DEVICE
CAUTION
NOTE: Recommended inflated pressure is 0.2 psi.
ELECTRICALLY OPERATED PRODUCT
Disassemble and wash all of the components in fresh water after use
to avoid corrosion and unnecessary wear and tear.
Fig. 2
1
2
3
4
WARNING
1
2
3
4
5
6
7
8
9
10
Inflatable
Steering Unit
On/Off Trigger
Master Switch
Steering Column
Steering Column Sleeve
Nozzle
Battery Door
Battery Door Seal
Inflatable Repair kit
and Air Release Tubes
11 Rechargeable Battery
12 Charger
13 Rear Grille
Fig. 3
For battery charging follow these instructions.
1. Always ensure that the Master Switch is OFF (See Fig. 7).
2. Always ensure that the unit is out of the water and placed
in a dry area.
3. Unscrew the Battery Door using a coin or similar to
remove. (See Fig. 8).
4. Allow two minutes for any gasses to dissipate.
5. Take out the battery from the Battery Compartment.
6. Connect the Battery to the Charger. (See Fig. 9)
7. Plug the Charger into mains, and turns on the supply.
8. Charging will take 6-10 hours for a fully discharged battery.
when the battery is charging the LED on the charger turns
RED. When the battery is charged the LED turns GREEN.
9. Unplug the Charger from the mains.
10. Unplug the battery from the charger.
11. Connect the battery and install it, making sure to insert it
the right way around (See Fig. 10, A), and all wires are
moved clear of the screw area (See Fig. 10, B).
12. Make sure the seal and sealing surfaces are clean and
lubricated before replacing the Battery Door ‘ (See Fig.11).
Use silicon grease to lubricate the seal - this can be
purchased from your local hardware store.
13. Replace the Battery Door and turn the Battery Door Screw
making sure it is tightened completely. (Se Fig. 12).
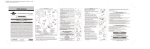
Fig. 4
5. Make sure the Nozzle and the Steering unit are correctly
aligned. (See Fig. 5)
1. Charge the battery before use - refer to ”Battery Use” for
instructions.
2. Place the MOTORIZED BOAT in the water.
3. When ready to set off, turn the Master Switch to the ON
position
(See Fig. 6).
4. Pull the trigger to start, turn the steering unit to maneuver
and release the trigger to stop. (See Fig. 6)
Fig. 5
Fig. 6
WARNING: Please disassemble, properly pack into the
box / carrybag and store in in-house area while not in use.
DO NOT storage in garage, outside open area or outdoor
during the Fall/winter season.
REPLACING A FLAT BATTERY
TRIGGER
FLUID® and the LIQUID DRIP logo are trademarks of Stallion Sport or its affiliates, used under licence to Stallion (asia) Ltd.
FLP95005
ATTENTION
Fig. 9
CHARGING THE PROPELLER BATTERY
4. Attached the Steering Unit to the Steering Column. You will
hear a ‘Click’ sound once it has been correctly connected
(See Fig. 5).
TO USE THE MOTORIZED BOAT FOLLOW
THESE INSTRUCTIONS
Fig. 8
Battery Use
3B. Slide the Steering Column / Nozzle from the bottom of the
inflatable through the Steering Sleeve. You will hear a
“Click” sound once it has completely passed through the
Steering Sleeve (See Fig. 4).
TIP: If the Steering Column Sleeve is stuck, pour some water to
lubricate and then push it down.
ALWAYS DRY ALL COMPONENTS BEFORE STORING
ALWAYS RECHARGE THE BATTERY WITHIN 24 HOURS
OF USE
ALWAYS RECHARGE THE BATTERY EVERY 3 MONTHS
AND AFTER USE
Ensure every valve on the inflatable is
completely sealed after inflation.
Inspect all valves every 2 hours after inflation
Always inspect the pressure of the inflatable
when in use.
3A. Connect the Steering Column to the Nozzle (See Fig. 3).
You will hear a “Click” sound once it has been correctly
connected.
Not recommended for children under 8 years of age.As with all electrical products,
precautions should be observed during handling and used to reduce the risk of electric shock.
Read the User Manual carefully before using this product. ● This is not a lifesaving device.
● DO NOT leave children unattended while in use. ● Always wear a coast guard approved
personal floatation device. ● Use in a pool or in calm water and close to shore. ● DO NOT use
in open waters, high winds, rapid current, dangerous tides, in waves, wakes or in bad weather
conditions as it may not allow you to come back to shore. ● NEVER stick body parts, clothing
or other objects in the vicinity of the propeller. ● DO NOT wear loose or flowing clothing or
equipment that could be drawn into the Propeller. ● Particular care should be exercised when
using this product near any body with long hair. Users with long hair should tie it up or wear a
swimming cap when using this product. ● Always charge battery to its fullest before using this
product. Ensure sufficient battery charge remains for return to shore. ● ALWAYS inspect the
swimming area to ensure it is free of hazards or obstacles such as boats and swimmers before
using this product. ● Be aware of appropriate water levels, tidal changes, dangerous currents,
weather changes and strong offshore winds. Always scout unfamiliar water. ● DO NOT use
alcohol or mind-altering drugs prior to using this product. ● DO NOT operate this product out
of the water to avoid damage. ● ALWAYS keep this product out of direct sunlight when not in
use. HEAT KILLS BATTERIES. ● Children under 8 years old should NEVER operate this
product. ● DO NOT ride over swimmers or other objects. ● DO NOT use at night or in low light
situations. ● This product is to be operated only when fully assembled in accordance with the
instructions. ● NEVER leave in or near water when not in use. ● NEVER tow from any vehicle
● Adults should inflate the chambers in numbered sequence. ● NEVER allow diving into this
product ● Not for use of more than 2 people, not exceeding 200lbs/90kgs. ● DO NOT turn up
side down of this product while in use. ● Please disassemble, properly pack into the
box/carrybag and store in in-house area while not in use. ● DO NOT store in garage, outside
open area or outdoor during the Fall/Winter season. ● Filled with cold air only. ● DO NOT over
inflate or use high pressure pump to inflate. ● Inflate the small chambers slowly.
ALWAYS WASH ALL COMPONENTS IN CLEAN FRESH
WATER AFTER USE
To assemble the MOTORIZED BOAT follow these
instructions.
RAIDER MOTORIZED BOAT
2. Remove the flat battery.
3. Install and connect the charged battery.
4. Follow steps 12 to 13 above.
To replace a flat battery with a fully charged battery, follow
these instructions.
1. Follow the steps 1 to 5 above.
Fig. 10
Battery and Charger Care
1. The battery should be recharged as soon as possible after use.
2. If this product is not used for extended periods, the battery should be removed from the
unit and charged overnight, every three months.
3. Only use the charger supplied with this product.
4. Never place the battery in a sealed container when charging.
5. Never short-circuit the battery or battery cable.
6. Never place/store the battery near a radiator/fire, etc.
7. To store the battery, remove it from the Battery Compartment and keep in a place that is
dry and cool with the rest of the unit in the original box.
8. Rechargeable batteries are to be removed from the Battery Compartment before being
charged.
9. Rechargeable batteries are only be charged under adult supervision.
10. The battery charger should be required examined by an adult for potential hazard, such
as damage to the cable or cord, plug, encloser or other parts, and that, in the event of
damage, the charger must not be used until that damage has been properly removed.
11. Remove the battery from the battery compartment immediately after use.
12. Dirt and sand can damage the seals in the battery compartment. Always ensure that the
seals are cleaned and lubricated before closing and sealing the cover.
REPAIRING THE INFLATABLE
Fig. 11
A repair kit is included in case the inflatable is accidentally punctured, to repair:
1. Locate the puncture - this can be done by inflating the inflatable and looking for air bubbles.
2. Deflate the inflatable and make sure it is completely dry.
3. Clean punctured area and dry the area.
4. Using inflatable repair kit apply glue around punctured area.
5. Use repair PVC sheet, cut so it is 5mm bigger around the punctured area.
6. Stick the repair sheet on top of the punctured area.
7. Let it dry for 2 hours.
8. Inflate the inflatable and check there is no air leakage before use.
WARNING
Fig. 12
Lead acid battery generates explosive gasses.
Use, recharge and store in a well ventilated area.
BATTERY LIFE-CYCLE
THIS BATTERY TYPE IS DESIGNED TO BE RECHARGED UP TO 200
TIMES OR 2 YEARS AFTER PURCHASE, WHICHEVER COMES FIRST.
IMPORTANT
ALWAYS RECHARGE THE BATTERY WITHIN 24 HOURS OF USE
ALWAYS RECHARGE THE BATTERY EVERY 3 MONTHS AND AFTER USE
DISPOSE OF THE BATTERY ACCORDING TO MUNICIPAL
LAWS AND REGULATION