1
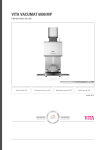
VITA vPad easy
Operating manual
VITA shade taking
VITA shade communication
VITA shade reproduction
VITA shade control
Date of issue: 06.13
VITA shade, VITA made.
VITA vPad easy
Table of contents
1Introduction
4
1.1 General information
1.2 Copyright
4
4
2 Scope of delivery
5
3 Technical information
5
3.1 Dimensions / weight 5
3.2 Electrical data 5
3.3 Ambient conditions
5
4 Intended use
6
5 Operation and cleaning of the control unit
6
5.1 Warranty and liability
6
5.2 Spare parts
6
5.3 Safety signs
6
6 Safety functions
7
7
6.1 Power supply failure
7 Automatic temperature calibration
7
7.1Service
7
8 First-time use
8
8
8.1 Device connections
9 Description of the control unit
9
9.1 Display – description
9
9.2 Starting standby
9
9.3 Switching off the device
9
9.4 Fast cooling to standby temperature
9
9.5 Selecting and starting the firing program
10
9.6 Changing program values – entering new ones
10
9.7 Lift buttons
12
9.8Keypad
12
10Service-Programme
13
11 Error messages
15
12 Firing tables
16
12.1 VITA VM ®717
12.2 VITA VM®918
12.3 VITA VM®9 on VITABLOCS®19
12.4 VITA VM®1320
12.5 VITA VM®1521
12.6 VITA VMK MASTER®22
12.7 VITA TITANKERAMIK
23
12.8 VITA OMEGA 900
24
12.9 VITA VMK 95
25
13 Alphabetical index
26
3
VITA vPad easy
1Introduction
1.1 General information
Dear Customer,
Thank you for deciding to purchase a VITA vPad easy to operate and control
your VITA VACUMAT 6000 M.
Please read this user manual carefully before using!
The user manual is an important aid for operating the device successfully
and safely.
The user manual contains important information on how to use the device
safely, appropriately and efficiently. Following the instructions in this manual
will help prevent risks, reduce repair costs and downtime, and increase the
reliability and service life of the device.
All of the illustrations and drawings in this user manual are intended for
general explanatory purposes only, and are not intended to be authoritative
with regards to the detailed construction of the device.
This user manual must be kept with the device at all times. It must be read and
followed by all persons responsible for working with/on the device, for example
in relation to:
•
•
•
•
Operation
Troubleshooting work routines
Cleaning
Servicing (maintenance, inspection, repairs).
1.2Copyright
Important copyright information:
© Copyright 2011, VITA Zahnfabrik. All rights reserved.
This document and/or the software, data and information referenced or
contained herein contain confidential and proprietary information of VITA
Zahnfabrik. This document does not convey or represent any right or license
to use any software, data or information, any right or license to use any
intellectual property rights, any right or obligation on the part of VITA
Zahnfabrik to provide support or other services in connection therewith.
Any right or license to use any software data, information or other intellectual
property rights of Vita Zahnfabrik or any obligation to provide support must
be conveyed by separate written agreement with Vita Zahnfabrik.
4
VITA vPad easy
2 Scope of delivery
2.1 Device supplied in special box including:
• 1 VITA vPad easy
• 1 user manual
3Technical Information
VITA vPad easy control unit with a 200-program storage capacity
3.1Dimensions / weight
VITA vPad easy
•Width: 235 mm
•Depth: 156 mm
•Height: 150 mm
•Weight: 0.6 kg
•Housing: Plastic
3.2Electrical data
48 V of DC power is supplied to the VITA VACUMAT 6000 M through the
connection cable.
Mains connection: 230 Volts, 50/60 Hz
3.3Ambient conditions
•Ambient temperature: 2°C to 40°C
•Relative humidity max. 80% at 31°C
5
VITA vPad easy
4 Intended use
Basis for the device design
The device is constructed according to state-of-the-art design and recognized
safety regulations. However, inappropriate use may result in the risk of injury or
death, as well as damage to the device and other valuable property.
Unauthorized modes of operation
Operation of the device with power sources, products, etc., which are subject
to hazardous material regulations or that may represent a negative impact on
the health of the operating personnel, and the use of user-modified equipment,
are not permitted.
Authorized modes of operation
Operation of the device is only permitted if this user manual has been read
and understood in full and the procedures described in it have been observed.
Any other or additional use, e.g., the processing of products other than those
for which it is intended, as well as the handling of hazardous materials or
substances that may be harmful to one's health, is considered to be contrary
to the intended use as specified in this manual.
The manufacturer/supplier is not liable for any damage resulting from such
unauthorized use. The risk of such use is borne exclusively by the user.
5 Operation and cleaning of the control unit
Do not operate the control unit with sharp or hot objects;
this will result in damage to the touch screen.
Damage to the touch screen attributable to improper handling during
operation or cleaning is excluded from the warranty coverage.
5.1 Warranty and liability
The warranty and liability are established in accordance with the terms and
conditions set out in the contract.
In the event of modifications to the software that are made without
the knowledge and approval of VITA Zahnfabrik H. Rauter GmbH & Co. KG,
all liability and warranty claims are invalidated.
5.2 Spare parts
All spare parts must meet the technical requirements set out by the
manufacturer. This is always ensured by the use of original VITA spare parts.
5.3 Safety signs
Before using the device for the first time, please observe the safety information
for the VITA VACUMAT 6000 M (see safety information in the VITA VACUMAT
6000 M user manual).
6
VITA vPad easy
6 Safety functions
When the furnace is used with a VITA vPad easy control unit, it has the
following safety and monitoring features:
•
•
•
•
•
Temperature sensor monitoring
Temperature monitoring
Vacuum monitoring
Power failure protection
Lift monitoring
6.1 Power supply failure
The device is equipped with power supply failure protection. This component
prevents program interruption and subsequent misfiring in the event of a brief
power failure. Power supply failure protection takes effect as soon as the
power supply fails when a firing program is running.
Power failure time less than approx. 15 sec.
The program continues to run uninterrupted. However, the display will not be
operational during this period. The display shows the running program again
after the power supply program interruption has started.
Power failure time longer than approx. 15 sec.
The program is interrupted, and the display is no longer operational. After the power
supply is reconnected, the display shows the power failure for informational purposes.
Attention! After the power supply has started, the time required
to switch the control unit back on again is approx. 20 sec.
7 Automatic temperature calibration
Automatic temperature calibration is performed by the processor after each
start of a firing program. The temperature calibration examines and corrects
any deviations in temperature measurement and temperature control that have
occurred in the electronic components. This calibration is performed at approx.
5 msec intervals, without affecting the general timing sequence. Therefore,
even when the device operates for long periods of time, constant temperature
sensing of +/- 1°C is achieved.
7.1Service
For more information about the device, please visit our website:
http://www.vita-zahnfabrik.com
Software updates can be downloaded under Services / Equipment
Servicing. Moreover there is also a registration possibility for the VITA
Update Messenger Devices to be automatically informed by email about new
information on the device.
Technical questions and questions about repair and warranty services
can be sent to the following email address:
[email protected]
Phone: +49 (0) 7761 / 562-105, -106, -101
7
VITA vPad easy
8 First-time use
Please consult the setup and first-time use instructions in the
VITA VACUMAT 6000 M user manual.
•
•
•
•
•
Connect control unit with connection cable to VITA VACUMAT 6000 M
and to VITA vPad easy control unit.
Plug in the vacuum pump.
Attach the vacuum tube to the vacuum pump.
Connect the power supply cable.
Switch on the device using the main switch.
The lift moves to the lower position, then to the upper position and back
to the lower position (lift distance measurement).
For information about the individual connections, see point 8.1
Warning! Attach the firing socket to the lift plate.
Operating the device without a firing socket can damage the device due to the
severe effects of the heat.
8.1 Device connections
(see also the VITA VACUMAT 6000 M user manual)
Status display
Green – device in standby mode
Blue – program active
Red – error
Control unit connection
for VITA vPad
comfort /excellence / clinical
or Switchbox
Device fuses
Vacuum pump connection
Connection for
VITA vPad easy
Power connection
Main switch
Vacuum connection
8
VITA vPad easy
9 Description of the control unit
LED description
LED assignment on the firing curve, from left to right:
• Pre-drying time and temperature
•Pre-vacuum
• Main vacuum
• Temperature rise
• End temperature and holding time for end temperature
• Cooldown temperature
• Cooldown temperature holding time
9.1 Display – description
The 2-line display has the following functions:
Upper line – program number and firing chamber temperature displays.
Lower line – program values, temperature, time and vacuum displays.
After switching on the device, the firing chamber temperature is displayed
in the upper right part of the screen.
9.2 Starting Standby
Enter program no. 00 and press the # button to activate: The lift moves in and is
heated to standby temperature. Use the STOP button to terminate the Standby mode.
The standby temperature can be selected from a range of 200°C – 800°C,
using service program no. 201.
If the device is switched on using the main switch and the standby mode is
started, the lift moves to the upper position and remains open for approx. 10
minutes with an opening of approx. 2-3 cm, permitting the condensation in
the insulation to evaporate.
After reaching the standby temperature and remaining constant for 5 min.,
the device is closed.
9.3 Switching off the device
Enter program no. 01 and press the # button to activate: The lift moves in and the
display reads STAND. The device can be switched off using the main switch.
9.4 Fast cooling to standby temperature
Enter program no. 02 and press the # button to activate: The vacuum pump is switched on.
If the firing chamber temperature is higher than the standby temperature,
the lift remains in the lower position and the pump is switched on; after the
standby temperature minus 50°C is reached, the lift is moved in and heated to
the standby temperature.
9
VITA vPad easy
9.5 Selecting and starting the firing program
Enter the program no.
and confirm with the # button
Start the program using the START button
The lower lines of the display show:
• Pre-drying time
• Rise time
• End temperature holding time
• Cooldown holding time
Keyboard functions for a running program
Press when a program is running
The display shows the pre-drying and end temperatures.
Press when a program is running
The display shows firing times.
Press only when a program is running
The display shows the vacuum value and time.
Press when a program is running
The display shows the cooldown temperature.
Press when a program is running
Firing program running is terminated.
9.6 Changing program values – entering new ones
The program values can be checked and/or changed after the firing program
has been selected.
Enter the program selection, i.e. program no. 1-200,
confirm with the # button and
Press the Set button. The pre-drying LED flashes.
The display shows the pre-drying time and temperature.
Press the Time button – the pre-drying time flashes.
Change the time using the keypad and confirm the value with the # button.
Entry ranges: pre-drying time 0 – 40:00 min/sec.
Press the Temperature button - the temperature display flashes.
Change the temperature using the keypad and confirm the value with the #
button. Entry ranges: pre-drying temperature 200°C – 800°C
Press the Save button – the set mode is terminated –
press the Start button – the program starts
or check/change additional program values.
10
VITA vPad easy
Enter the program selection, i.e. program no. 1-200,
confirm with the # button and
Press the Set button –
the pre-vacuum LED flashes.
Press the Time button – the pre-vacuum time flashes.
Change the time using the keypad and confirm the value with the # button.
Entry ranges: pre-vacuum 0 – 30:00 min/sec.
Press the Save button – the set mode is terminated –
press the Start button – the program starts.
or check/change additional program values.
Press the Set button –
the main vacuum LED flashes.
Press the Time button – the main vacuum time flashes.
Change the time using the keypad and confirm the value with the # button.
Max. vacuum time: Temperature rise time plus end temperature holding time.
Press the Save button – the set mode is terminated –
Press the Start button – the program starts.
or check/change additional program values.
Press the Set button–
the temperature rise LED flashes.
Press the Time button – the rise time flashes.
Change the time using the keypad and confirm the value with the # button.
Entry ranges: 03:00 to 40:00 min/sec. or 20°C/min. – 120°C/min.
If a temperature or time value is entered that falls outside the permitted
value range, ERROR and the previous value will be displayed again.
When increasing the temperature, service program no. 203 also provides
the option of selecting an entry for a temperature rise in °C/min.
(see point 10, service program no. 203).
If a value for the temperature rise is entered in min/sec. and the calculated
temperature rise is below 20°C/min. or exceeds the max. value of 120°C,
a valid rise time in min/sec. is entered automatically.
If the pre-drying temperature or the firing temperature are changed after
entering the temperature rise, the °C/min. value is retained, and the time in
min/sec. is adjusted.
Press the Save button – the set mode is terminated –
press the Start button – the program starts.
or check/change additional program values.
11
VITA vPad easy
Enter the program selection, i.e. program no. 1-200,
confirm with the # button and
Press the Set button –
the end temperature LED flashes
Press the Temperature button – the temperature display flashes.
Change the temperature using the keypad and confirm the value with the # button.
Entry ranges: end temperature max. 1,200°C
Press the Time button – the holding time for the end temperature flashes.
Change the time using the keypad and confirm the value with the # button.
Press the Save button – the set mode is terminated –
press the Start button – the program starts.
or check/change additional program values.
Press the Set button –
the cooldown temperature LED flashes.
Press the Temperature button – the temperature display flashes.
Change the temperature using the keypad and confirm the value with the # button.
Entry ranges: 200°C – 800°C
Press the Save button – the set mode is terminated –
press the Start button – the program starts.
or check/change additional program values.
Press the Set button – the cooldown holding time LED flashes.
Change the time using the keypad and confirm the value with the # button.
Entry ranges: holding time 0 – 40:00 min/sec.
Press the Save button – the set mode is terminated –
press the Start button – the program starts.
9.7 Lift buttons
Lift buttons Up/Down
Buttons are active if no firing program or service program has been selected.
9.8Keypad
0 – 9 = enter temperature and time values
# = Confirm
* = Clear
12
VITA vPad easy
10 Service programs
All of the programs listed in the table can be selected by entering the listed
program number on the keypad and confirming it with the # button.
Prog. no.
Program
Entry / Description
Display
201 – #
Standby
temperature
Press Temperature button – value flashes
Enter a value and confirm with the #
button.
Display shows standby temperature
Entry range: 200°C - 800°C
202 – #
Temperature
calibration
Press Temperature button – value flashes
Enter a value and confirm with the #
button.
The display shows value
Entry range: +/- 20°C
Enter using the keypad
The Set button selects the minus sign.
Finish by pressing the Save button.
203 – #
Change rise
temperature
204 – #
Unassigned
205 – #
Set lift positions
for pre-drying and
cooldown
Select rise in °C or min/sec using Set button
Press the Save button to finish.
Interval time
Entry range: 20 sec. - 2 min.
The display shows the interval time
and
Pre-drying position 1
Lift position 1
Entry range: 0 - 30%
Press the Set button:
Pre-drying position 2
Entry range: 30 - 50%
The display shows lift position 2
Press the Set button:
Lift interval time
Pre-drying position 3
Entry range: 50 - 80%
The display shows lift position 3
Press the Set button:
Cooldown lift position
Entry range: 0 - 80%
The display shows lift position 4
Finish by pressing the Save button.
The display shows the firing chamber
temperature.
13
VITA vPad easy
Prog. no.
Program
Entry / Description
Display
206 – #
Lift speed
Press the Time button – the value
flashes on the display. Enter the value
and confirm with the # button.
Entry range: 0 - 99
The display shows the value entered.
Press the Save button.
207 – #
Initializing
All the time and temperature values
shown in the VITA firing table are input
into the memory.
The display shows the firing chamber
temperature.
The display shows
'Programs'.
Warning: Third-party programs will be
deleted.
208 – #
Signaling
Press the Set button.
Option 1 = Signal program is run once.
Option 2 = Continuous end signal
program.
Finish by pressing the Save button.
209 – #
Reset to factory
settings
The display shows the firing chamber
temperature.
The display shows the hours of
operation.
Operation hours
counter
Finish by pressing the STOP button.
210 – #
The display shows 1 or 2.
Factory settings for
• lift speed
• temperature calibration
• signaling program end
The display shows the firing chamber
temperature.
The display shows the firing chamber
temperature.
Program runs automatically and signals
the end with a sequence of beeps
214 – #
14
Software version
Finish by pressing the STOP button
Display shows software version.
VITA vPad easy
11 Error messages
Error
Elimination
1
Lift is blocked
Clean lift mechanism
2
Defective fan
Check fan connection – replace fan
3
Vacuum is not calibrated
Clean lift plate seal, clean
Check lift plate
Check vacuum pump
4
Vacuum is not achieved
Check vacuum pump
5
Defective temperature sensor
Replace temperature sensor
6
Unassigned
7
Unassigned
8
Unassigned
9
Software update has failed
Error no.
Reinstall software update
15
VITA vPad easy
12 Firing tables
Please note:
When using dental ceramics, the firing result largely depends on the individual firing procedure of the user, i.e. among other aspects
on the type of furnace, the location of the temperature sensor, the firing tray as well as the size of the workpiece during the firing
cycles.
Our application-technical recommendations for the firing temperatures (regardless whether they have been provided orally, in writing
or in the form of practical instructions) are based on numerous own experiences and tests. The user, however, should consider this
information only to provide basic values.
If surface, transparency and degree of gloss should not correspond to the firing result that is achieved under optimal conditions,
the firing procedure must be adjusted correspondingly. The crucial factors for the firing procedure are not the firing temperature
displayed by the furnace but the appearance and the surface condition of the firing object after the firing process.
Explanation of firing parameters
Predr. °C
min.
min.
°C/min.
approx.
Temp. °C
min.
°C/min.
16
Start temperature
Predrying time in min, closing time
Heating time in min
Temperature rise rate in degrees Celsius per minute
End temperature
Holding time for end temperature
Cooldown temperature
min.
Vacuum holding time in min
VAC min.
Vacuum holding time in min
VITA vPad easy
12.1VITA VM®7
Program
Predrying °C
min.
min.
61
MARGIN firing
500
6.00
7.40
60
62
EFFECT LINER firing
500
6.00
8.11
63
1st dentine firing
500
6.00
64
2nd dentine firing
500
65
Stains fixation firing
66
Glaze firing
Temp.
°C/min. approx °C
min.
VAC
min.
960
1.00
7.40
55
950
1.00
8.11
7.27
55
910
1.00
7.27
6.00
7.16
55
900
1.00
7.16
500
6.00
3.00
100
800
0.00
–
500
0.00
5.00
80
900
1.00
–
67
Glaze firing with VITA AKZENT Plus 500
4.00
5.00
80
900
1.00
–
68
Corrective firing with COR
500
4.00
6.00
55
830
1.00
6.00
Prog.-No.
When using dental ceramics, the firing result largely depends on the individual firing procedure of the user, i.e. among other aspects
on the type of furnace, the location of the temperature sensor, the firing tray as well as the size of the workpiece during the firing
cycles.
Our application-technical recommendations for the firing temperatures (regardless whether they have been provided orally, in writing
or in the form of practical instructions) are based on numerous own experiences and tests. The user, however, should consider this
information only to provide basic values.
If surface, transparency and degree of gloss should not correspond to the firing result that is achieved under optimal conditions, the
firing procedure must be adjusted correspondingly. The crucial factors for the firing procedure are not the firing temperature displayed
by the furnace but the appearance and the surface condition of the firing object after the firing process.
17
VITA vPad easy
12.2VITA VM® 9
Prog.
Program
Nr.
Predrying °C
min.
min.
Temp.
°C/min. approx °C
min.
°C
min.
VAC
min.
48
Cleaning firing
500
3.00
6.00
33
700
5.00
–
–
–
49
Regeneration firing
500
0.00
5.00
100
1000 15.00
–
–
–
52
BASE DENTINE Wash firing *
500
2.00
8.11
60
950
1.00
–
–
8.11
53
MARGIN firing
500
6.00
8.21
55
960
1.00
–
–
8.21
54
EFFECT LINER firing
500
6.00
7.49
55
930
1.00
–
–
7.49
55
1st dentine firing
500
6.00
7.27
55
910
1.00 600** 0.01
7.27
56
2nd dentine firing
500
6.00
7.16
55
900
1.00 600** 0.01
7.16
57
Glaze firing
500
0.00
5.00
80
900
1.00 600** 0.01
–
58
Glaze firing
VITA AKZENT Plus
500
4.00
5.00
80
900
1.00 600** 0.01
–
59
Correction firing with COR
500
4.00 4.20
60
760
1.00 500** 0.01
4.20
* For colored VITA In-Ceram YZ please carry out a BASE DENTINE Wash firing.
ATTENTION: Do not carry out this firing for non-colored VITA In-Ceram YZ.
** Long-term cooling down to the respective temperature is recommended for the last ceramic firing process;
the lift position for VITA VACUMAT furnaces should be > 75%.
When using dental ceramics, the firing result largely depends on the individual firing procedure of the user, i.e. among other
aspects on the type of furnace, the location of the temperature sensor, the firing tray as well as the size of the workpiece during
the firing cycles.
Our application-technical recommendations (regardless whether they have been provided orally, in writing or in the form
of practical instructions) are based on numerous own experiences and tests. The user, however, should consider this information
only to provide basic values.
If surface, transparency and degree of gloss should not correspond to the firing result that is achieved under optimal
conditions, the firing procedure must be adjusted correspondingly. The crucial factors for the firing procedure are not the firing
temperature displayed by the furnace but the appearance and the surface condition of the firing object after the firing process.
18
VITA vPad easy
12.3VITA VM® 9 on VITABLOCS®
Program
Predrying °C
min.
min.
42
Stains-fixation
VITA AKZENT Plus
500
4.00
4.45
80
880
1.00
–
43
1st individualization firing
VITA VM 9
500
6.00
7.49
55
930
1.00
7.49
500
6.00
7.38
55
920
1.00
7.38
Prog.-No.
44
2nd individualization firing
VITA VM 9
45
Glaze firing
VITA AKZENT Plus,
VITA AKZENT Plus Glaze,
VITA AKZENT Plus Glaze Spray,
VITA AKZENT Plus finishing agent
46
Glaze firing
VITA GLAZE LT powder
500
47
Correction firing
with VITA VM 9 COR
104
Glaze firing
VITA GLAZE LT Paste
500
Temp.
°C/min. approx °C
min.
VAC
min.
5004.005.15 80 920 1.00 –
4.00
3.30
80
780
1.00
–
500 4.004.40 60 780 1.004.40
6.00
3.30
80
780
1.00
–
When using dental ceramics, the firing result largely depends on the individual firing procedure of the user, i.e. among other aspects
on the type of furnace, the location of the temperature sensor, the firing tray as well as the size of the workpiece during the firing
cycles.
Our application-technical recommendations (regardless whether they have been provided orally, in writing or in the form of practical
instructions) are based on numerous own experiences and tests. The user, however, should consider this information only to provide
basic values.
If surface, transparency and degree of gloss should not correspond to the firing result that is achieved under optimal
conditions, the firing procedure must be adjusted correspondingly. The crucial factors for the firing procedure are not the firing
temperature displayed by the furnace but the appearance and the surface condi tion of the firing object after the firing process.
19
VITA vPad easy
12.4VITA VM®13
Prog.-No.
Program
Predrying °C
min.
min.
Temp.
°C/min. approx °C
min.
VAC
min.
26
Oxidation firing
27
WASH OPAQUE firing
500
2.00
5.12
75
890
2.00
5.12
28
WASH OPAQUE PASTE firing
500
4.00
5.12
75
890
2.00
5.12
29
OPAQUE firing
500
2.00
5.12
75
890
1.00
5.12
30
OPAQUE PASTE firing
500
4.00
5.12
75
890
1.00
5.12
31
500
2.00
5.52
75
940
2.00
5.52
500
4.00
5.52
75
940
2.00
5.52
500
2.00
5.36
75
920
1.00
5.36
34
WASH OPAQUE firing with
non-precious alloys
WASH OPAQUE PASTE firing with
non-precious alloys
OPAQUE firing
with non-precious alloys
OPAQUE PASTE firing
with non-precious alloys
500
4.00
5.36
75
920
1.00
5.36
35
MARGIN firing
500
6.00
7.05
55
890
2.00
7.05
36
EFFECT LINER firing
5006.007.05 55 8901.007.05
37
1st dentine firing
500
6.00
6.55
55
880
1.00
6.55
38
2nd dentine firing
500
6.00
6.44
55
870
1.00
6.44
39
Glaze firing
500
0.00
4.45
80
880
2.00
–
40
Glaze firing VITA AKZENT Plus
500
4.00
4.45
80
880
1.00
–
41
Correction firing with COR
500
4.00
6.00
50
800
1.00
6.00
32
33
Follow the instructions of the alloy manufacturer!
When using dental ceramics, the firing result largely depends on the individual firing procedure of the user, i.e. among other aspects
on the type of furnace, the location of the temperature sensor, the firing tray as well as the size of the workpiece during the firing
cycles.
Our application-technical recommendations (regardless whether they have been provided orally, in writing or in the form of practical
instructions) are based on numerous own experiences and tests. The user, however, should consider this information only to provide
basic values.
If surface, transparency and degree of gloss should not correspond to the firing result that is achieved under optimal
conditions, the firing procedure must be adjusted correspondingly. The crucial factors for the firing procedure are not the firing
temperature displayed by the furnace but the appearance and the surface condition of the firing object after the firing process.
20
VITA vPad easy
12.5VITA VM®15
Prog.-No.
Program
Predrying °C
min.
min.
Temp.
°C/min. approx °C
min.
VAC
min.
14
Oxidation firing
15
WASH OPAQUE firing
400
2.00
6.00
70
820
1.00
6.00
16
WASH OPAQUE PASTE firing
400
6.00
6.00
70
820
1.00
6.00
17
OPAQUE firing
400
2.00
6.00
70
820
1.00
6.00
18
OPAQUE PASTE firing
400
6.00
6.00
70
820
1.00
6.00
19
MARGIN firing
400
6.00
8.12
50
810
1.00
8.12
20
EFFECT LINER firing
400
6.00
8.12
50
810
1.00
8.12
21
1st dentine firing
400
6.00
8.00
50
800
1.00
8.00
22
2nd dentine firing
400
6.00
7.48
50
790
1.00
7.48
23
Glaze firing VITA AKZENT Plus
400
4.00
4.52
80
790
1.00
–
24
Glaze firing VITA GLAZE LT
400
4.00
4.45
80
780
1.00
–
25
Correction firing with COR
400
4.00
7.00
50
750
1.00
7.00
103
Glaze firing
400
0.00
4.52
80
790
1.00
–
Follow the instructions of the alloy manufacturer!
When using dental ceramics, the firing result largely depends on the individual firing procedure of the user, i.e. among other aspects
on the type of furnace, the location of the temperature sensor, the firing tray as well as the size of the workpiece during the firing
cycles.
Our application-technical recommendations for the firing temperatures (regardless whether they have been provided orally, in writing
or in the form of practical instructions) are based on numerous own experiences and tests. The user, however, should consider this
information only to provide basic values.
If surface, transparency and degree of gloss should not correspond to the firing result that is achieved under optimal conditions, the
firing procedure must be adjusted correspondingly. The crucial factors for the firing procedure are not the firing temperature displayed
by the furnace but the appearance and the surface condition of the firing object after the firing process.
21
VITA vPad easy
12.6VITA VMK MASTER®
Prog.-No.
Program
Predrying °C
min.
min.
Temp.
°C/min. approx °C
min.
VAC
min.
90
Oxidation firing
91
WASH firing
500
2.00
5.45
80
960
1.00
5.45
92
PASTE WASH firing
500
6.00
5.45
80
960
1.00
5.45
93
OPAQUE firing
500
2.00
5.38
80
950
1.00
5.38
94
PASTE OPAQUE firing
500
6.00
5.38
80
950
1.00
5.38
95
MARGIN firing
500
6.00
8.00
55
940
1.00
8.00
96
LUMINARY firing
500
6.00
8.00
55
940
1.00
8.00
97
Stains fixation firing
500
4.00
4.45
80
880
1.00
4.45
98
1st dentine firing
500
6.00
7.49
55
930
1.00
7.49
99
2nd dentine firing
500
6.00
7.38
55
920
1.00
7.38
100
Glaze firing
500
0.00
5.15
80
920
1.00
–
101
Glaze firing VITA AKZENT Plus
500
4.00
5.15
80
920
1.00
–
102
Correction firing with COR
500
6.00
6.33
55
860
1.00
6.33
Follow the instructions of the alloy manufacturer!
Please note:
When using dental ceramics, the firing result largely depends on the individual firing procedure of the user, i.e. among other aspects
on the type of furnace, the location of the temperature sensor, the firing tray as well as the size of the workpiece during the firing
cycles.
Our application-technical recommendations for the firing temperatures (regardless whether they have been provided orally, in writing
or in the form of practical instructions) are based on numerous own experiences and tests. The user, however, should consider this
information only to provide basic values.
If surface, transparency and degree of gloss should not correspond to the firing result that is achieved under optimal conditions, the
firing procedure must be adjusted correspondingly. The crucial factors for the firing procedure are not the firing temperature displayed
by the furnace but the appearance and the surface condition of the firing object after the firing process.
22
VITA vPad easy
12.7VITA TITANKERAMIK
Prog.
Program
No.
Predrying °C
min.
min.
Temp.
°C/min. approx °C
min.
°C
min.
VAC
min.
69
Paste bonder firing
400
6.00
6.00
67
800
1.00
–
–
7.00
70
Powder bonder firing
400
2.00
6.00
67
800
1.00
–
–
7.00
71
Opaque firing
400
2.00
4.00
98
790
1.00 400*
0.01
5.00
72
Shoulder firing
400
6.00
7.00
53
770
1.00 400*
0.01
8.00
76
Stains fixation firing
400
4.00
3.00
100
700
1.00 400*
0.01
–
73
1st dentine firing
400
6.00
7.00
53
770
1.00 400*
0.01
8.00
74
2nd dentine firing
400
6.00
7.00
53
770
1.00 400*
0.01
8.00
75
Glaze firing
400
0.00
4.00
93
770
1.00 400*
0.01
5.00
77
Glaze firing VITA AKZENT Plus 400
4.00
4.00
93
770
1.00 400*
0.01
5.00
From the opaque firing on, all firings should be carried out with full vacuum (incl. holding time)
* Long-term cooling down to 400°C is especially recommended for massive restorations.
When using dental ceramics, the firing result largely depends on the individual firing procedure of the user, i.e. among other
aspects on the type of furnace, the location of the temperature sensor, the firing tray as well as the size of the workpiece during
the firing cycles.
Our application-technical recommendations for the firing temperatures (regardless whether they have been provided orally,
in writing or in the form of practical instructions) are based on numerous own experiences and tests. The user, however, should
consider this information only to provide basic values.
If surface, transparency and degree of gloss should not correspond to the firing result that is achieved under optimal conditions,
the firing procedure must be adjusted correspondingly. The crucial factors for the firing procedure are not the firing temperature
displayed by the furnace but the appearance and the surface condition of the firing object after the firing process.
23
VITA vPad easy
12.8VITA OMEGA 900
Prog.-No.
Program
Predrying °C
min.
min.
Temp.
°C/min. approx °C
min.
VAC
min.
78
Oxidation firing
79
WASH OPAQUE powder
600
2.00
4.00
75
900
2.00
4.00
80
WASH OPAQUE paste
500
6.00
6.00
67
900
3.00
6.00
81
OPAQUE powder
600
2.00
4.00
75
900
1.00
4.00
82
OPAQUE paste
500
6.00
6.00
67
900
2.00
6.00
83
MARGIN firing
600
6.00
6.00
50
900
2.00
6.00
84
1st dentine firing
600
6.00
6.00
50
900
1.00
6.00
85
2nd dentine firing
600
6.00
6.00
48
890
1.00
6.00
86
Correction firing with COR
600
4.00
6.00
33
800
1.00
6.00
87
Glaze firing
600
–
4.00
75
900
2.00
–
88
Glaze firing VITA AKZENT Plus Fluid 600
4.00
4.00
75
900
2.00
–
89
Glaze firing VITA AKZENT Plus Glaze 600
4.00
4.00
75
900
1.00
–
Follow the instructions of the alloy manufacturer!
When using dental ceramics, the firing result largely depends on the individual firing procedure of the user, i.e. among other aspects
on the type of furnace, the location of the temperature sensor, the firing tray as well as the size of the workpiece during the firing
cycles.
Our application-technical recommendations for the firing temperatures (regardless whether they have been provided orally, in writing
or in the form of practical instructions) are based on numerous own experiences and tests. The user, however, should consider this
information only to provide basic values.
If surface, transparency and degree of gloss should not correspond to the firing result that is achieved under optimal conditions, the
firing procedure must be adjusted correspondingly. The crucial factors for the firing procedure are not the firing temperature displayed
by the furnace but the appearance and the surface condition of the firing object after the firing process.
To obtain an optimum metal/ceramic bond, the ceramic should be under slight compressive strain. A good end result also depends on
the size of the restoration to be fired, the type, hardness and thermal conductivity of the alloy used, and particularly on the way in
which each individual technician carries out the firing.
Very good results have been achieved for many years when the thermal expansion coefficient of the alloy – measured from
25°C – 600°C – has been between 14.0 and 14.4 x 10 -6 x K-1 and that of the VITA OMEGA 900 Metal Ceramics measured
from 25°C – 500°C between 13.4 – 13.9 x 10 -6 x K-1. If the TEC value of the alloy is higher, the temperature range between
900°C – 700°C must not be passed in less than three minutes during the cooling phase.
24
VITA vPad easy
12.9VITA VMK 95
Prog.-No.
Program
Predrying °C
min.
min.
Temp.
°C/min. approx °C
min.
VAC
min.
1
Oxidation firing
2
WASH OPAQUE firing (powder)
600
2.00
4.00
88
950
1.00
4.00
3
WASH OPAQUE firing (paste)
500
6.00
6.00
75
950
1.00
6.00
4
OPAQUE firing (powder)
600
2.00
4.00
83
930
1.00
4.00
5
OPAQUE firing (paste)
500
6.00
6.00
72
930
1.00
6.00
6
Margin porcelain firing
600
6.00
6.00
55
930
1.00
6.00
7
1st dentine firing
600
6.00
6.00
55
930
1.00
6.00
8
2nd dentine firing
600
6.00
6.00
55
930
1.00
6.00
9
3rd dentine firing
600
6.00
6.00
53
920
1.00
6.00
10
Correction firing with COR
600
4.00
6.00
50
900
1.00
–
11
Glaze firing
600
–
4.00
83
930
1.00
–
12
Glaze firing with AKZENT Fluid
600
4.00
4.00
83
930
1.00
–
13
Glaze firing with AKZENT Glaze
600
4.00
4.00
75
900
1.00
–
Follow the instructions of the alloy manufacturer!
When using dental ceramics, the firing result largely depends on the individual firing procedure of the user, i.e. among other aspects
on the type of furnace, the location of the temperature sensor, the firing tray as well as the size of the workpiece during the firing
cycles.
Our application-technical recommendations for the firing temperatures (regardless whether they have been provided orally, in writing
or in the form of practical instructions) are based on numerous own experiences and tests. The user, however, should consider this
information only to provide basic values.
If surface, transparency and degree of gloss should not correspond to the firing result that is achieved under optimal conditions, the
firing procedure must be adjusted correspondingly. The crucial factors for the firing procedure are not the firing temperature displayed
by the furnace but the appearance and the surface condition of the firing object after the firing process.
To obtain an optimum metal/ceramic bond, the ceramic should be under slight compressive strain. A good end result also depends on
the size of the restoration to be fired, the type, hardness and thermal conductivity of the alloy used, and particularly on the way in
which each individual technician carries out the firing.
Very good results have been achieved for many years when the thermal expansion coefficient of the alloy – measured from
25 °C – 600 °C – has been between 14.0 and 14.4 x 10 -6 x K-1 and that of the VITA VMK 95 Metal Ceramics measured
from 25 °C – 500 °C between 13,4 – 13,9 x 10 -6 x K-1. If the TEC value of the alloy is higher, the temperature range between
900°C to 700°C must not be passed in less than three minutes during the cooling phase.
25
VITA vPad easy
13 Alphabetical index
A
Ambient conditions
5
Authorized modes of operation
6
Automatic temperature
calibration7
C
Changing program values
10
Cooldown holding time
10
Copyright4
D
Device connections
8
Dimensions/weight5
Display – description
9
E
Electrical data
End temperature holding time
5
10
F
Factory settings
Fast cooling
First-time use
14
9
8
I
Initializing14
Installation and first-time use
6, 8
Intended use
6
K
Keypad12
L
LED description
9
Liability6
Lift buttons
12
Lift interval time
13
Lift positions
13
Lift speed
14
O
Operation and cleaning
of the control unit Operation hours counter 26
6
14
P
Power failure protection Power supply failure Power supply failure time Pre-drying temperature Pre-drying time 7
7
7
11
10
R
Rise time 10
S
Safety functions Safety signs Scope of delivery Selecting and starting the
firing program Service Service programs Signaling Spare parts Standby Starting Standby Status display Switching off the device T
Technical information Temperature calibration 7
6
5
10
7
13
14
6
13
9
8
9
5
7, 13
U
Unauthorized modes of operation 6
V
VITA OMEGA 900
24
VITA TITANKERAMIK
23
VITA VM®1320
VITA VM®1521
VITA VM®717
VITA VM®918
VITA VM®9 auf VITABLOCS®19
VITA VMK Master
22
VITA vPad easy
5
W
Warranty 6
With the unique VITA SYSTEM 3D-MASTER all natural tooth
shades are systematically determined and completely reproduced.
1620 E - 0613 (X.) S - Version (01)
Please note: Our products must be used in accordance with the instructions for use.
We accept no liability for any damage resulting from incorrect handling or usage.
The user is furthermore obliged to check the product before use with regard to its
suitability for the intended area of application. We cannot accept any liability if the
product is used in conjunction with materials and equipment from other manufacturers that are not compatible or not authorized for use with our product. Furthermore,
our liability for the accuracy of this information is independent of the legal basis and,
in as far as legally permissible, shall always be limited to the value as invoiced of the
goods supplied, excluding value-added tax. In particular, as far as legally permissible,
we do not assume any liability for loss of earnings, indirect damages, ensuing damages or for third-party claims against the purchaser. Claims for damages based on fault
liability (culpa in contrahendo, breach of contract, unlawful acts, etc.) can only be
made in the case of intent or gross negligence. The VITA Modulbox is not necessarily a component of the product.
Date of issue of this information: 06.13
VITA Zahnfabrik H. Rauter GmbH & Co.KG
Postfach 1338 · D-79704 Bad Säckingen · Germany
Tel. +49(0)7761/562-0 · Fax +49(0)7761/562-299
Hotline: Tel. +49(0)7761/562-222 · Fax +49(0)7761/562-446
www.vita-zahnfabrik.com · [email protected]
facebook.com/vita.zahnfabrik