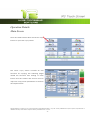
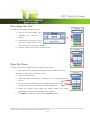
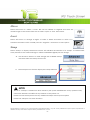
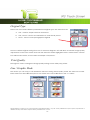
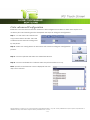
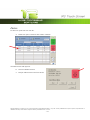
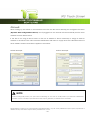
1
IPS Touch Screen Version A1 *145PVDI4DSFFO Contents User Login/Quick Search ............................................................................................................................................................ 9 Copy Mode – Monochrome ................................................................................................................................................... 10 Main Screen ........................................................................................................................................................................ 10 Simple Copying .................................................................................................................................................................. 12 Select Mono Copy Mode ................................................................................................................................................ 12 Select Size Mode................................................................................................................................................................ 13 Select Original Image Type ............................................................................................................................................. 14 Copy Count ........................................................................................................................................................................ 15 Media ................................................................................................................................................................................... 16 Length .................................................................................................................................................................................. 17 Size ........................................................................................................................................................................................ 18 Insert Original ...................................................................................................................................................................... 18 Operation Details ....................................................................................................................................................................... 19 Main Screen ........................................................................................................................................................................ 19 Original................................................................................................................................................................................. 20 Original Size Mode ............................................................................................................................................................. 20 Original Type ....................................................................................................................................................................... 20 Quality .................................................................................................................................................................................. 21 Automatic ........................................................................................................................................................................... 21 Density.................................................................................................................................................................................. 21 Threshold.............................................................................................................................................................................. 21 Sharpness ............................................................................................................................................................................ 22 Dither .................................................................................................................................................................................... 22 Copy Count ........................................................................................................................................................................ 23 Arrows - Count Increase / Decrease ............................................................................................................................. 23 Number Pad - Count Increase / Decrease .................................................................................................................. 23 Set Copy .............................................................................................................................................................................. 24 Clear ..................................................................................................................................................................................... 25 Concurrent Print ................................................................................................................................................................. 25 Set Copy Editor................................................................................................................................................................... 26 Preset Schemes .................................................................................................................................................................. 26 Advanced Options............................................................................................................................................................ 27 Mirror..................................................................................................................................................................................... 27 Invert..................................................................................................................................................................................... 27 Copy Quality Settings ....................................................................................................................................................... 28 Fold ....................................................................................................................................................................................... 28 Stamp ................................................................................................................................................................................... 29 Lead Edge Adjustment ..................................................................................................................................................... 30 Trailing Edge Adjustment .................................................................................................................................................. 31 Width .................................................................................................................................................................................... 32 Auto ...................................................................................................................................................................................... 32 Manual Roll Selection ....................................................................................................................................................... 33 Enabling Cutsheet ............................................................................................................................................................. 33 Cut Sheet............................................................................................................................................................................. 34 Copying to Multiple Cutsheets ....................................................................................................................................... 35 This information is solely for use of Personnel and Authorized Dealers. No part of this publication may be copied, reproduced or distributed in any form without express written permission from. 2011. -1- *145PVDI4DSFFO Media Remaining .............................................................................................................................................................. 35 Installing Roll Media ........................................................................................................................................................... 36 Length .................................................................................................................................................................................. 37 Auto ...................................................................................................................................................................................... 37 Standard .............................................................................................................................................................................. 37 Zoom .................................................................................................................................................................................... 39 Preset Percentages ........................................................................................................................................................... 39 Percentage Key Pad ........................................................................................................................................................ 40 Page Size Zoom .................................................................................................................................................................. 40 Auto Zoom .......................................................................................................................................................................... 41 Clear ..................................................................................................................................................................................... 41 Start....................................................................................................................................................................................... 41 View Last.............................................................................................................................................................................. 41 Recall Job ........................................................................................................................................................................... 41 Stop / Reset ......................................................................................................................................................................... 42 Interrupt ............................................................................................................................................................................... 42 Log Off ................................................................................................................................................................................. 42 Select Scan Mode ............................................................................................................................................................. 43 Main Screen ........................................................................................................................................................................ 43 Simple Scanning ................................................................................................................................................................ 45 Select Size Mode................................................................................................................................................................ 45 Select Original Image Type ............................................................................................................................................. 46 Select Format ..................................................................................................................................................................... 47 Select Mailbox .................................................................................................................................................................... 48 Insert Original ...................................................................................................................................................................... 49 Retrieve the File .................................................................................................................................................................. 49 Operation Details ....................................................................................................................................................................... 50 Main Screen ........................................................................................................................................................................ 50 Original................................................................................................................................................................................. 51 Original Size Mode ............................................................................................................................................................. 51 Original Type ....................................................................................................................................................................... 51 Original Size ......................................................................................................................................................................... 52 Automatic Size ................................................................................................................................................................... 52 Exact Size ............................................................................................................................................................................. 52 Manual Size ......................................................................................................................................................................... 52 Hard Drive Space Monitor ............................................................................................................................................... 54 Rotation ............................................................................................................................................................................... 54 Quality .................................................................................................................................................................................. 54 Automatic ........................................................................................................................................................................... 54 Density.................................................................................................................................................................................. 55 Threshold.............................................................................................................................................................................. 55 Sharpness ............................................................................................................................................................................ 55 Dither .................................................................................................................................................................................... 56 DPI ......................................................................................................................................................................................... 56 Format .................................................................................................................................................................................. 57 Preset Schemes .................................................................................................................................................................. 58 Advanced Settings ............................................................................................................................................................ 58 Mirror..................................................................................................................................................................................... 59 This information is solely for use of Personnel and Authorized Dealers. No part of this publication may be copied, reproduced or distributed in any form without express written permission from. 2011. -2- *145PVDI4DSFFO Invert..................................................................................................................................................................................... 59 Stamp ................................................................................................................................................................................... 59 Leading Edge Adjustment ............................................................................................................................................... 60 Trailing Edge Adjustment .................................................................................................................................................. 61 Print Enabled – Concurrent Print ..................................................................................................................................... 62 Mailbox Command Center ..................................................................................................................................................... 62 Selecting a Mailbox........................................................................................................................................................... 62 Creating a New Mailbox .................................................................................................................................................. 63 IPS Mailbox .......................................................................................................................................................................... 64 SMB Setup .................................................................................................................................................................................... 64 Share Setup – Workstation/Server................................................................................................................................... 64 Network Location (SMB/CIFS) – IPS Setup ..................................................................................................................... 65 Scan to File – Image Naming .......................................................................................................................................... 69 Create a Mailbox with Naming Convention ................................................................................................................ 70 FTP Locations ...................................................................................................................................................................... 71 Adding FTP Mailbox Location from PrintNET ................................................................................................................. 71 Delete a mailbox ............................................................................................................................................................... 72 Removing a Mailbox ......................................................................................................................................................... 72 Edit ........................................................................................................................................................................................ 73 Start....................................................................................................................................................................................... 73 Reset / Stop ......................................................................................................................................................................... 73 Re-Scan ............................................................................................................................................................................... 73 View Last.............................................................................................................................................................................. 73 Log Off ................................................................................................................................................................................. 73 Mono File-to-Print ....................................................................................................................................................................... 74 Copy Mode – Color (2420/9124/8124 Only) ......................................................................................................................... 77 Main Screen - General ..................................................................................................................................................... 77 Simple Copying .................................................................................................................................................................. 79 Select Copy Mode ............................................................................................................................................................ 79 Select Size Mode................................................................................................................................................................ 80 Select Original Image Type ............................................................................................................................................. 81 Print Quality ......................................................................................................................................................................... 82 Copy Count ........................................................................................................................................................................ 83 Original Size ......................................................................................................................................................................... 84 Size Select............................................................................................................................................................................ 85 Insert Original ...................................................................................................................................................................... 85 Operation Details ....................................................................................................................................................................... 86 Main Screen ........................................................................................................................................................................ 86 Original................................................................................................................................................................................. 86 Original Size Mode ............................................................................................................................................................. 86 Original Type ....................................................................................................................................................................... 87 Print Quality ......................................................................................................................................................................... 87 Line / Graphic Mode ........................................................................................................................................................ 87 Draft / Normal / High Quality........................................................................................................................................... 88 Copy Count ........................................................................................................................................................................ 88 Arrows - Count Increase / Decrease ............................................................................................................................. 88 Number Pad - Count Increase / Decrease .................................................................................................................. 89 Set Copy .............................................................................................................................................................................. 89 This information is solely for use of Personnel and Authorized Dealers. No part of this publication may be copied, reproduced or distributed in any form without express written permission from. 2011. -3- *145PVDI4DSFFO Clear ..................................................................................................................................................................................... 89 Preset Schemes .................................................................................................................................................................. 89 Advanced Settings ............................................................................................................................................................ 90 Mirror..................................................................................................................................................................................... 90 Invert..................................................................................................................................................................................... 90 Leading Edge Adjustment ............................................................................................................................................... 91 Trailing Edge Adjustment .................................................................................................................................................. 92 Original Size ......................................................................................................................................................................... 93 Auto ...................................................................................................................................................................................... 93 Manual ................................................................................................................................................................................. 93 Custom................................................................................................................................................................................. 94 Rotation ............................................................................................................................................................................... 95 Size – Zoom .......................................................................................................................................................................... 95 Preset Percentages ........................................................................................................................................................... 96 Percentage Key Pad ........................................................................................................................................................ 96 Page Size Zoom .................................................................................................................................................................. 97 Clear ..................................................................................................................................................................................... 98 Start....................................................................................................................................................................................... 98 View Last.............................................................................................................................................................................. 98 Recall Job ........................................................................................................................................................................... 98 Stop / Reset ......................................................................................................................................................................... 98 Interrupt ............................................................................................................................................................................... 99 Log Off ................................................................................................................................................................................. 99 Main Screen ...................................................................................................................................................................... 101 Simple Scanning .............................................................................................................................................................. 103 Select Scan Mode ........................................................................................................................................................... 103 Select Size Mode.............................................................................................................................................................. 103 Select Original Image Type ........................................................................................................................................... 104 Select Format ................................................................................................................................................................... 104 Select Mailbox .................................................................................................................................................................. 105 Insert Original .................................................................................................................................................................... 105 Retrieve the File ................................................................................................................................................................ 105 Operation Details ..................................................................................................................................................................... 106 Main Screen ...................................................................................................................................................................... 106 Original............................................................................................................................................................................... 106 Original Size Mode ........................................................................................................................................................... 106 Original Type ..................................................................................................................................................................... 107 Original Size ....................................................................................................................................................................... 107 Automatic Size ................................................................................................................................................................. 107 Manual Size ....................................................................................................................................................................... 108 Hard Drive Space Monitor ............................................................................................................................................. 109 Rotation ............................................................................................................................................................................. 109 DPI ....................................................................................................................................................................................... 109 Format ................................................................................................................................................................................ 109 Preset Schemes ................................................................................................................................................................ 110 Advanced Settings .......................................................................................................................................................... 110 Mirror................................................................................................................................................................................... 111 Invert................................................................................................................................................................................... 111 This information is solely for use of Personnel and Authorized Dealers. No part of this publication may be copied, reproduced or distributed in any form without express written permission from. 2011. -4- *145PVDI4DSFFO Leading Edge Adjustment ............................................................................................................................................. 112 Trailing Edge Adjustment ................................................................................................................................................ 113 Mailbox .............................................................................................................................................................................. 114 Start..................................................................................................................................................................................... 114 Reset / Stop ....................................................................................................................................................................... 114 Re-Scan ............................................................................................................................................................................. 114 View Last............................................................................................................................................................................ 114 Log Off ............................................................................................................................................................................... 114 Copy Mode – Color Advanced ............................................................................................................................................ 115 Color advanced Configuration .................................................................................................................................... 116 Simple Copying ................................................................................................................................................................ 121 General Tab ...................................................................................................................................................................... 121 Copies ................................................................................................................................................................................ 122 Original Size ....................................................................................................................................................................... 122 Collated Set ...................................................................................................................................................................... 123 Printer ................................................................................................................................................................................. 124 Brightness ........................................................................................................................................................................... 126 Misc Tab .............................................................................................................................................................................. 127 Scanner ................................................................................................................................................................................ 128 Scan Preview .................................................................................................................................................................... 128 Auto Start........................................................................................................................................................................... 130 Automatic Deskew .......................................................................................................................................................... 130 Label .................................................................................................................................................................................... 130 Margins ................................................................................................................................................................................ 130 Paneling Tab ..................................................................................................................................................................... 131 Print Queue Tab ................................................................................................................................................................... 131 General Tab ...................................................................................................................................................................... 133 File Format ......................................................................................................................................................................... 133 Resolution .......................................................................................................................................................................... 133 Destination ........................................................................................................................................................................... 134 File Name .......................................................................................................................................................................... 136 Filters ................................................................................................................................................................................... 137 Brightness ........................................................................................................................................................................... 137 Misc Tab .............................................................................................................................................................................. 138 Scanner ................................................................................................................................................................................ 139 Scan Preview .................................................................................................................................................................... 139 Auto Start........................................................................................................................................................................... 141 Automatic Deskew .......................................................................................................................................................... 141 Original Size ....................................................................................................................................................................... 141 Rotation ................................................................................................................................................................................ 142 General Tab ...................................................................................................................................................................... 145 Color Tab ........................................................................................................................................................................... 145 Misc Tab ............................................................................................................................................................................. 146 RIP Preview ........................................................................................................................................................................ 146 Paneling Tab ..................................................................................................................................................................... 148 Print Queue Tab ................................................................................................................................................................... 148 Main Screen ...................................................................................................................................................................... 149 Operation Details............................................................................................................................................................. 151 This information is solely for use of Personnel and Authorized Dealers. No part of this publication may be copied, reproduced or distributed in any form without express written permission from. 2011. -5- *145PVDI4DSFFO Job List - Main Screen ..................................................................................................................................................... 151 Requester .......................................................................................................................................................................... 152 Job Number ...................................................................................................................................................................... 152 Status .................................................................................................................................................................................. 153 Type .................................................................................................................................................................................... 153 Total .................................................................................................................................................................................... 153 Delete ................................................................................................................................................................................ 154 Change Media Type in Print Job .................................................................................................................................. 155 To Top ................................................................................................................................................................................. 156 Pause.................................................................................................................................................................................. 157 Page Scroll ........................................................................................................................................................................ 157 Media Information ........................................................................................................................................................... 157 Change Media Information .......................................................................................................................................... 158 Job History ......................................................................................................................................................................... 159 “?” Screen ................................................................................................................................................................................. 161 Configuration Screen ...................................................................................................................................................... 161 Overview ........................................................................................................................................................................... 161 “?” Screen – General ...................................................................................................................................................... 162 Main Screen - Details ...................................................................................................................................................... 163 Information Region .......................................................................................................................................................... 163 Meter A .............................................................................................................................................................................. 163 Total Run ............................................................................................................................................................................ 164 Custom Meter ................................................................................................................................................................... 164 Scan Count ....................................................................................................................................................................... 164 Scan Count- Temp .......................................................................................................................................................... 164 Software version ............................................................................................................................................................... 165 Firmware Version .............................................................................................................................................................. 165 Printer EPROM ................................................................................................................................................................... 165 IPS Number ........................................................................................................................................................................ 165 Machine Serial Number .................................................................................................................................................. 165 Supplier / Technical Support ......................................................................................................................................... 165 Setting up the Dealer configured Website ................................................................................................................. 166 User Guides ....................................................................................................................................................................... 168 Configuration 1 ................................................................................................................................................................ 169 Page 1 ................................................................................................................................................................................ 170 Copy Levels ...................................................................................................................................................................... 170 Printer Density ................................................................................................................................................................... 170 Image Enhancement Level ........................................................................................................................................... 170 Power Save Settings ........................................................................................................................................................ 170 Page 2 ........................................................................................................................................................................................ 172 Transfer Support ............................................................................................................................................................... 173 Low Room Temperature ................................................................................................................................................. 173 High Print Coverage ........................................................................................................................................................ 173 Toner Supply ..................................................................................................................................................................... 173 Image Expansion ............................................................................................................................................................. 174 L/L Environment ................................................................................................................................................................ 174 H/H Environment .............................................................................................................................................................. 174 Stacking ............................................................................................................................................................................. 175 This information is solely for use of Personnel and Authorized Dealers. No part of this publication may be copied, reproduced or distributed in any form without express written permission from. 2011. -6- *145PVDI4DSFFO Media QC Print ................................................................................................................................................................. 175 Master Lead / Trail Adjustment ..................................................................................................................................... 175 Page 3 ........................................................................................................................................................................................ 176 Media Zoom ..................................................................................................................................................................... 176 Scanner Speed................................................................................................................................................................. 176 Scanner White Balance.................................................................................................................................................. 176 Page 4 ........................................................................................................................................................................................ 177 Roll Adjustment................................................................................................................................................................. 177 Configuration 2......................................................................................................................................................................... 178 Page 1 ........................................................................................................................................................................................ 178 Reset Timer ........................................................................................................................................................................ 178 English or Metric Units ...................................................................................................................................................... 178 Default Mode ................................................................................................................................................................... 179 Fold ..................................................................................................................................................................................... 179 Cut Sheet........................................................................................................................................................................... 179 Interrupt ............................................................................................................................................................................. 179 Collate ............................................................................................................................................................................... 179 Reset Job Info ................................................................................................................................................................... 180 Page 2 ........................................................................................................................................................................................ 180 Planwell Easyprint/Abacus............................................................................................................................................. 180 Color File Compression (Direct Color Only) ................................................................................................................ 180 Page 3 ........................................................................................................................................................................................ 181 Reboot IPS ......................................................................................................................................................................... 181 Current Time...................................................................................................................................................................... 181 Monochrome Quality Settings ...................................................................................................................................... 181 Test pattern ....................................................................................................................................................................... 181 Options............................................................................................................................................................................... 182 Network ............................................................................................................................................................................. 183 Page 4 ........................................................................................................................................................................................ 184 Language.......................................................................................................................................................................... 184 Other Buttons ............................................................................................................................................................................ 184 Service ............................................................................................................................................................................... 184 Print This Screen ................................................................................................................................................................ 184 Hide/Show Versions ......................................................................................................................................................... 184 This information is solely for use of Personnel and Authorized Dealers. No part of this publication may be copied, reproduced or distributed in any form without express written permission from. 2011. -7- *145PVDI4DSFFO )PNF4DSFFO No. Name Function 1 Mono Copy This button directs the user to the mono Copy screen 2 Mono Scan to File This button directs the user to the mono Scan screen 3 Mono File to Print This button directs the user to the mono Print screen 4 Color Copy This button directs the user to the Color Copy screen 5 Color Scan to File This button directs the user to the Color Scan screen 6 Color File to Print This button directs the user to the Color Print screen 7 Print Queue This button opens the Job Queue screen 8 Help This button directs the user to the Help/information screen 9 Log in This button directs the user to the main login screen 10 Scanner Online Indicates current scanner status 11 Printer online Indicates current printer status 12 Toner Status Indicates current toner status 13 Roll Information Displays size, type, and amount remaining of media This information is solely for use of Personnel and Authorized Dealers. No part of this publication may be copied, reproduced or distributed in any form without express written permission from. 2011. -8- *145PVDI4DSFFO 6TFS-PHJO2VJDL4FBSDI Administrators have the ability to require users to log in to the system in order to use it. It is possible to make all or just specific fields required. An integrated search feature within the 7.0 IPS software allows operators to quickly drill down to the information they need right at the touchscreen interface! By selecting the search button below any of the accounting fields on the IPS touchscreen, operators may instantly search for a specific name, job number or project description to immediately resume wide format document productivity. This information is solely for use of Personnel and Authorized Dealers. No part of this publication may be copied, reproduced or distributed in any form without express written permission from. 2011. -9- *145PVDI4DSFFO $PQZ.PEF.POPDISPNF Main Screen Note: Depending on the model purchased, your screens may have 1, 2 or 4 roll selections and the model number may be different. This does not change the overall operation of the Digital Copy/Scan/Print System. This information is solely for use of Personnel and Authorized Dealers. No part of this publication may be copied, reproduced or distributed in any form without express written permission from. 2011. - 10 - *145PVDI4DSFFO No. Name Function 1 Original Type User Selects the type of original to copy. Also select Eng/Arch Modes here. (Color Copy is selected here if enabled) 2 Media Width Displays Media type and quantity installed. Includes Cut Sheet Functions and Media Selection 3 Image Quality Select Auto or Manual Image adjustments 4 Copy Count Select the quantity of prints and sets designation. 5 Presets Allows for the saving of settings as individual presets or as the default setting 6 Advanced Settings Invert , mirror, stamps, folds, and edge adjustments preformed / displayed in this button (sub screen) 7 Reset Clears the image buffer and resets the system to default settings. 8 View Last The last scan / job can be viewed 9 Recall/Edit Job Images can be recalled and edited from the last job for reprint. Please note that a time limit may be set to recall or this feature may be disabled by the administrator to prevent any unauthorized copies. 10 Log Off Displayed if Accounting enabled to Log off current user 11 Zoom Manual and automatic zoom ratios set. 12 Cut Mode Sets the length of the copy 13 Home Returns to the Home screen 14 Set Options Choose from Copy, Set Copy and Set Copy Concurrent Print This information is solely for use of Personnel and Authorized Dealers. No part of this publication may be copied, reproduced or distributed in any form without express written permission from. 2011. - 11 - *145PVDI4DSFFO Simple Copying To copy, please follow these basic steps. The following chapters have details on adjustments and parameters that the user can change to modify the copies as required. Select Mono Copy Mode On the upper left region of the Operator Panel, select “COPY”. This information is solely for use of Personnel and Authorized Dealers. No part of this publication may be copied, reproduced or distributed in any form without express written permission from. 2011. - 12 - *145PVDI4DSFFO Select Size Mode Select whether the document is an engineering or architectural size document. This will allow the automatic width detection to function. Engineering widths = 34, 22, 17, 11, and 8.5 inches Architecture widths = 36, 30, 24, 18, 12, and 9 inches This information is solely for use of Personnel and Authorized Dealers. No part of this publication may be copied, reproduced or distributed in any form without express written permission from. 2011. - 13 - *145PVDI4DSFFO Select Original Image Type Set the original image type you will copy. The selections are: Line- used for simple line documents Line / Photo- used for a combination of lines & photos documents Grayscale- used for a combination of lines & areas of shade (CAD) originals Photo- used for photographic originals This will allow automatic image quality adjustments for the scan. This information is solely for use of Personnel and Authorized Dealers. No part of this publication may be copied, reproduced or distributed in any form without express written permission from. 2011. - 14 - *145PVDI4DSFFO Copy Count Press the arrow buttons to scroll through the number of copies required or press on the actual number to set the quantity with the number pad. This information is solely for use of Personnel and Authorized Dealers. No part of this publication may be copied, reproduced or distributed in any form without express written permission from. 2011. - 15 - *145PVDI4DSFFO Media Select automatic (for best possible fit) or manual roll selection for a specific roll size. This information is solely for use of Personnel and Authorized Dealers. No part of this publication may be copied, reproduced or distributed in any form without express written permission from. 2011. - 16 - *145PVDI4DSFFO Length Select Auto for automatic cut length (to the length of the original) or Standard Cut for a manual length. (A number pad will request the desired length to be entered) This information is solely for use of Personnel and Authorized Dealers. No part of this publication may be copied, reproduced or distributed in any form without express written permission from. 2011. - 17 - *145PVDI4DSFFO Size Select a. AutoZoom to automatically zoom to the width of paper or b. press the arrow keys to scroll through presets ratios or c. Press on the Zoom number to manually enter a percentage or on the key pad or choose from page size to page size. Insert Original Using the guides on the feed table, center the original face up and push forward until the accepts it. The system will automatically commence to copy. While this occurs the image will be displayed on the Operator Panel for your reference. This information is solely for use of Personnel and Authorized Dealers. No part of this publication may be copied, reproduced or distributed in any form without express written permission from. 2011. - 18 - *145PVDI4DSFFO Operation Details Main Screen From the HOME screen select the Mono Copy button to open the Copy screen. The Mono Copy screen contains all user functions for copying. The following pages details the functions and settings of each button and sub screens that can be used to adjust the copy mode parameters to achieve the required result. This information is solely for use of Personnel and Authorized Dealers. No part of this publication may be copied, reproduced or distributed in any form without express written permission from. 2011. - 19 - *145PVDI4DSFFO Original This region allows the setting of the Size Mode (Engineering or Architectural) & the original image type. Original Size Mode These buttons are used to select the Size Mode of Engineering or Architectural. This will allow the automatic width detection system to determine the image width when an original is placed in the . Engineering widths = 34, 22, 17, 11, and 8.5 inches Architectural widths = 36, 30, 24, 18, 12, and 9 inches Original Type Select one of the four different predetermined original types. The selections are: Line- used for simple line documents Line / Photo- used for a combination of lines & photos documents Grayscale- used for a combination of lines & areas of shade (CAD) originals Photo- used for photographic originals Press the desired original setting from one of the four diagrams. This will allow automatic image quality adjustments for the next scan. Please note that the selection will be highlighted with a “black circle” and the icon will become white, as in the above example “Grayscale”. This information is solely for use of Personnel and Authorized Dealers. No part of this publication may be copied, reproduced or distributed in any form without express written permission from. 2011. - 20 - *145PVDI4DSFFO Quality This region is used to change the image quality settings from the automatic setting. Automatic For most copies, “Auto” should be selected. This will allow the copier to automatically determine the best image settings without any user intervention (please also note “Original” in 2.2) Density To override the “Automatic” settings, “Density” can be adjusted. Deselect “Auto” to enable “Density”. Pressing the arrows manually adjusts the background density. This will suppress or enhance the background from the original. Threshold To override the “Automatic” settings, “Threshold” can be adjusted. Deselect “Auto” to enable “Threshold”. Pressing the arrows manually adjusts the threshold. This will suppress or enhance the lines and images from the original. This information is solely for use of Personnel and Authorized Dealers. No part of this publication may be copied, reproduced or distributed in any form without express written permission from. 2011. - 21 - *145PVDI4DSFFO Sharpness To override the “Automatic” settings, “Sharpness” can be adjusted. Deselect “Auto” to enable “Sharpness”. Pressing the arrows manually adjusts the line sharpness to remove rough lines or when photos are copied to allow for smoother graduations. Dither To override the “Automatic” settings, “Dither” can be adjusted. Deselect “Auto” to enable “Dither”. By pressing the dither button the following selections are available (selections will vary depending on the Original Type selected), a. Dither 1 b. Dither 2 c. Dither 3 d. Photo Dither 1 e. Photo Dither 2 This will change how the dots are arranged to create the final image of the copy. For fine lines a “Course” dither pattern may be desired. For Photos “None” may be desired. This information is solely for use of Personnel and Authorized Dealers. No part of this publication may be copied, reproduced or distributed in any form without express written permission from. 2011. - 22 - *145PVDI4DSFFO Copy Count In this region the number of copies, and set copy / collation can be set. Arrows - Count Increase / Decrease Use the arrows to increase or decrease the total numbers of copies desired by one with each press of the button. Number Pad - Count Increase / Decrease Press the “number of copies” value (which is a button) to set the desired number of copies using a number pad. This will allow the quick entry of larger numbers. a. Press the numbers for the quantity desired. (up to 999) b. Select “Enter”. c. If an entry error was made press “C” to start again. d. If you wish to close the screen without changing the quantity press “Cancel”. This information is solely for use of Personnel and Authorized Dealers. No part of this publication may be copied, reproduced or distributed in any form without express written permission from. 2011. - 23 - *145PVDI4DSFFO Set Copy a. To enable collated sets or copy sets to be printed select the Set Copy button. b. As originals are scanned, the total number in the set is displayed. c. Copying will not commence until the set is closed. To close a set, press the start button. The set with the total number of copies will be printed. An example of Set Copy: 3 originals with 3 sets or copies Originals 1 2 3 Copies This information is solely for use of Personnel and Authorized Dealers. No part of this publication may be copied, reproduced or distributed in any form without express written permission from. 2011. - 24 - *145PVDI4DSFFO Clear Press the clear button to reset the quantity to “1”. Concurrent Print Set Copy/Concurrent Print will allow a user to receive a check print with each scanned image while creating a temporary set copy for multiple copies. While in the COPY menu, touch the Set Copy button in order to access Set Copy/Concurrent Print. 1. Touch the Set Copy button to access the Set Copy/Concurrent Print feature. 2. Select the Now available “Concurrent Print” button 3. Set Copy/Concurrent Print will begin the set creation process. 4. Please insert the first original and begin the scanning process 5. The first original will copy begin to print immediately (if there are no network print jobs currently processing) 6. Each subsequent copy will receive a check print until the entire set has been scanned 7. Press the Start button to begin the set copy printing process Note: If a user has selected 5 sets for concurrent print, only 4 will be printed once the Start button has been pressed. The first set of the 5 has already been printed with the check print of each scanned original. This information is solely for use of Personnel and Authorized Dealers. No part of this publication may be copied, reproduced or distributed in any form without express written permission from. 2011. - 25 - *145PVDI4DSFFO Set Copy Editor Set Copy Editor allows the user to scan in a set of files in any order and rearrange them after they have been scanned prior to printing them out. Original set of scanned files out of order. x Files can be manipulated for the proper print order with a simple drag and drop on the touch screen. x Drag and zoom to a specific area on the file. Original set of scanned files rearranged for correct print order. x Undo – Undo the order in which the files have been arranged. x Redo – Put files back the way they were arranged. x Accept – Accept the order the files have been rearranged. Preset Schemes Preset Schemes allow the user to set up and save multiple schemes (unlimited number) to go along with the different types of files being used. Schemes can be named relevant names and then later restored again when needed. Preset being used is displayed above preset buttons. This information is solely for use of Personnel and Authorized Dealers. No part of this publication may be copied, reproduced or distributed in any form without express written permission from. 2011. - 26 - *145PVDI4DSFFO Selecting Restore brings up the “Please Pick a Copy Scheme” allowing the user to choose from multiple saved schemes. Advanced Options The Advanced Options section contains the additional parameters on a sub screen: a. Mirror b. Invert c. Fold (if optional device connected) d. Stamp (Water Mark) e. Lead Edge Adjustment f. Trail Edge Adjustment g. Print Quality Draft (200 DPI) h. Print Quality Normal (300 DPI) i. Print Quality – Quality (600DPI) Mirror Select this button to “mirror” a scan. This can be utilized on originals that may have the actual image on the reverse side such as older “sepia” or “film” documents. Invert Select this button to change a region of white to black and visa versa of a scanned document. This is normally used for “negative” documents or “blue prints”. This information is solely for use of Personnel and Authorized Dealers. No part of this publication may be copied, reproduced or distributed in any form without express written permission from. 2011. - 27 - *145PVDI4DSFFO Copy Quality Settings On the IPS COPY screen, it is possible to select varying copy quality settings in addition to Original type settings. Change Copy Quality Settings a. Touch the arrows to select between Quality, Normal and Draft. b. Select the desired Print Quality. x Draft mode will decrease the scanner DPI while increasing scanning speed x Quality mode will increase the scanner DPI while decreasing scanning speed Note: Quality is the default value Fold Select “Fold” to display the fold sub screen (button will be available if Fold option is turned on in “Configuration Screen”). This will allow the selection of a “Fold Pattern” to be applied to the copy. a. Use the Arrow buttons to scroll through the available folds and select a desired fold from the list. b. The fold selected will be displayed in the Advanced Options section. c. Select OK. This information is solely for use of Personnel and Authorized Dealers. No part of this publication may be copied, reproduced or distributed in any form without express written permission from. 2011. - 28 - *145PVDI4DSFFO NOTE The list of “Folds” is loaded into Copy Mode by the system administrator or key operator. They cannot be altered or modified in any manner on the UI. Please contact these persons for any additional stamps that may be required. Please see “ Request” for these functions. An optional Folder must be purchased to enable these functions. Stamp Select “Stamp” to display another sub screen. This will allow the selection of a “Stamp” or “Water Mark” to be placed on the scanned image. It will be imbedded into the image. a. Use the Arrow buttons to scroll through the available stamps and select the desired stamp from the list. b. The Stamp button will now display the Advanced Options section. c. Select OK. NOTE The list of “Stamps” is loaded into Copy Mode by the system administrator or key operator. They cannot be altered or modified in any manner on the printer’s UI. Please contact these persons for any additional stamps that may be required. Please see “Request” for these functions. This information is solely for use of Personnel and Authorized Dealers. No part of this publication may be copied, reproduced or distributed in any form without express written permission from. 2011. - 29 - *145PVDI4DSFFO Lead Edge Adjustment The trailing edge of each copy can be altered. (+/- 4”) a. Additional void area can be placed on the bottom of a copy or b. Image can be removed (such as a binding strip or a file hanger) Leading Edge + Leading Edge - Copy Original Original Copy Deleted image Added margin To adjust the Leading Edge, use the arrows to denote the quantity you wish to add or remove. Touch the value displayed area to reset the quantity. Lead Edge adjustment is a value of +/- 4” and is an actual addition or subtraction of media. This information is solely for use of Personnel and Authorized Dealers. No part of this publication may be copied, reproduced or distributed in any form without express written permission from. 2011. - 30 - *145PVDI4DSFFO Trailing Edge Adjustment The trailing edge of each copy can be altered. (+/- 4”) c. Additional void area can be placed on the bottom of a copy or d. Image can be removed (such as a binding strip or a file hanger) Trail Edge + Trail Edge - Copy Original Original Copy Deleted trailing image Added trailing margin To adjust the Trailing Edge, use the arrows to denote the quantity you wish to add or remove. Touch the value displayed area to reset the quantity. Make any of the required adjustments / selections and press “OK” to accept. The selections will now be displayed on the main Scan screen. Lead Edge adjustment is a value of +/- 4” and is an actual addition or subtraction of media. This information is solely for use of Personnel and Authorized Dealers. No part of this publication may be copied, reproduced or distributed in any form without express written permission from. 2011. - 31 - *145PVDI4DSFFO Width This region allows automatic or manual roll selection, roll size display, cut sheet media, the roll amount remaining and to set the installed media type and width. Auto This default setting allows the copier to automatically select the best media roll width to print the image onto. It selects the roll noting the amount of image area to prevent surplus media consumption. (Applies to the option - two or more rolls model) Example: 22” original 36” and 24” bond media installed Original is 22” wide 36” installed Excess non-imaged media 24” Installed Has the best image to media fit therefore this roll will be used This information is solely for use of Personnel and Authorized Dealers. No part of this publication may be copied, reproduced or distributed in any form without express written permission from. 2011. - 32 - *145PVDI4DSFFO Manual Roll Selection To select a roll deck, press the roll deck desired. Note that the roll information is displayed in the roll deck button. Enabling Cutsheet Some printers are equipped with a cut sheet feeder that can be enabled in the configuration menu of the UI. This can be accomplished by following these steps 1. Select the (?) button in from the Home Screen of the user interface. 2. Select the Configuration 2 button from the Info/Help screen. 3. Using the Left/Right arrows located at the bottom of the page scroll to page one (1). 4. Change the Enable Cut Sheet button to “Yes”. This information is solely for use of Personnel and Authorized Dealers. No part of this publication may be copied, reproduced or distributed in any form without express written permission from. 2011. - 33 - *145PVDI4DSFFO Cut Sheet To copy onto a cut sheet of media: a. Select the CUT SHEET button on the main screen. b. Select the Output Size of the actual cut sheet paper that will be inserted into the Cut Sheet feeder. c. Select desired settings from the main copy screen. Feed your original (s) into the. d. Prepare Cut Sheet Feeder on your printer and WAIT until prompted by the UI. e. Insert the media into the Cut Sheet Feeder. Note: Only one cut sheet may be fed at a time & this function will time out after 3 minutes if no paper is inserted. Note: DO NOT insert the cut sheet media into the feeder while printing from a roll deck, as this may cause the printer to jam. This information is solely for use of Personnel and Authorized Dealers. No part of this publication may be copied, reproduced or distributed in any form without express written permission from. 2011. - 34 - *145PVDI4DSFFO Copying to Multiple Cutsheets a. Follow steps above (2.6.4) b. After a short period of time the Printer will beep notifying the user to insert the cutsheet into the Cutsheet feeder, the Job Info button will also be flashing. c. Once the cutsheet has been printed there will be a short pause and the printer will start to beep again. Insert the next cutsheet into the printer d. Continue for multiples. Note: Only one cutsheet may be fed at a time and will time out after 3 minutes if no paper is inserted. Note: DO NOT insert the cut sheet media into the feeder while printing from a roll deck, as this may cause the printer to jam. Media Remaining The installed roll information is displayed in the button of the particular roll deck. Beside each deck is a volume of media that currently is left on the roll of media. Indicators will display full, ¾, ½, ¼ or empty. This information is solely for use of Personnel and Authorized Dealers. No part of this publication may be copied, reproduced or distributed in any form without express written permission from. 2011. - 35 - *145PVDI4DSFFO Installing Roll Media When media is replaced or installed, a screen will automatically appear. This screen allows the setting of the media type & width. Please see the Printer manual for the procedures to replace a roll of media. a. If no changes are required, press cancel b. If changes are required from the currently settings displayed, select the correct media type and size for each deck and press OK. This screen shows 36” Film for deck one, 22” bond for Roll deck 2, 24” bond for Roll Deck 3 and 18” Bond for Roll Deck 4. Media types settings noted above can be changed at any time by pressing the Media button on the main Copy Screen. This information is solely for use of Personnel and Authorized Dealers. No part of this publication may be copied, reproduced or distributed in any form without express written permission from. 2011. - 36 - *145PVDI4DSFFO Length Two methods determine the length of the copy in the printer. These two methods are Auto (may also be known as Synchro Cut or Automatic Cut) and Standard Cut. Auto This mode allows the media length to be determined by the original length. This also takes into consideration any enlargements or reductions that are applied to an image as well, to prevent excess media without image. NOTE Auto Length works in conjunction with Auto Roll noted in 2.6.1. Standard This mode allows the media length to be determined by a standard length or a length set manually by the user with a number pad. a. Select Standard Cut. A sub screen will appear. When Standard is used, the roll must also be selected. If Auto Roll is selected in the Media region the following screen will appear, prompting the media to be selected. Select the roll. This information is solely for use of Personnel and Authorized Dealers. No part of this publication may be copied, reproduced or distributed in any form without express written permission from. 2011. - 37 - *145PVDI4DSFFO If a roll is already selected in Media, then the following screen appears now only requesting the length. b. Once the roll is determined (if so required) the length can now be set. x Standard Length x Auto Length x Custom Length c. Standard Length – use an industry standard length. Select the length and press Enter. d. Auto Length – uses the length of the original to determine the copy length. Select and press Enter. This information is solely for use of Personnel and Authorized Dealers. No part of this publication may be copied, reproduced or distributed in any form without express written permission from. 2011. - 38 - *145PVDI4DSFFO e. Custom Length – set the custom length in the key pad and press enter f. The cut length will now be displayed in the main Copy screen in the Standard Cut button. Zoom Image size / Zoom can be altered in this region on the UI. This includes automatic zooming, predetermined percentages, or ratio calculations to page size, and simply percentage increments. Preset Percentages The printer has several predetermined industry standard zoom percentages used for quick access. These can be access with the arrow buttons. The pre-programmed percentages are: 50 - 66.7 - 70.7 - 100 - 141 - 150 - 200 This information is solely for use of Personnel and Authorized Dealers. No part of this publication may be copied, reproduced or distributed in any form without express written permission from. 2011. - 39 - *145PVDI4DSFFO Percentage Key Pad To enter a percentage directly into the UI, a. Press on the Percentage value displayed (the number is a button). b. This will show a keypad to enter the value. (Please note that the button Manual on the side is a default.) c. Press the desired zoom value and press enter. Page Size Zoom To enter a zoom percentage based on pages sizes into the UI: a. Press on the Percentage value displayed (the number is a button). This will show a keypad to enter the value. b. Select Standard button. c. Select the original page size by pressing onto the original page size button. d. Please note either Engineering or Architectural mode can be utilized by pressing on the button below the original page size. e. Select the desired Copy page size. Again please note either Engineering or Architectural mode can be utilized. f. Press Enter to confirm your selections or Cancel to restart. This information is solely for use of Personnel and Authorized Dealers. No part of this publication may be copied, reproduced or distributed in any form without express written permission from. 2011. - 40 - *145PVDI4DSFFO Auto Zoom Press the Auto Zoom bottom to enable this function. Auto Zoom features works in conjunction with the roll selected to scale the image to the selected roll width. a. If a roll is selected in the Media region the zoom from the original will automatically fit the width of the selected roll. b. If a roll is not selected (Auto is currently selected), roll selection is requested prior to the function of Auto Zoom. If cut sheet is used then it will use the values set in the Cut Sheet button in Media. Clear To reset the percentage value to default, select the Auto Zoom button again. Start The copier is always set to “Auto Start”. That is when an originally is inserted into the, it will start without other user intervention. The start button is used when a job is recalled. The start button will “start” the job if depressed after ‘Recall”. (The name will change to “Re-print”) View Last The last documented scanned to be copied be viewed. Recall Job The last set or single copy can be recalled to be resized or to switch media type. After a job is recalled, make the required changes and then press “Start”. This information is solely for use of Personnel and Authorized Dealers. No part of this publication may be copied, reproduced or distributed in any form without express written permission from. 2011. - 41 - *145PVDI4DSFFO Stop / Reset This button has two functions. 1. Press the Stop button to stop the current scan. The original will be ejected automatically. If not, open Top Cover to remove the original. 2. Press the Reset button to restore the “default settings” in Copy Mode. Some of the default settings are determined in the Information / Help Screen of the UI. (see Copy Mode Configurations chapter) Interrupt Network printing can be interrupted between collated sets of documents. Press the Interrupt button to pause the queue and allow a more urgent file to be copied. For example if a file is needed right away and there is a job in the queue that has 20 sheets and 10 sets are being printed this can be interrupted when one of the sets finishes printing. After the urgent file is printed the sets will continue to print. Log Off This button only appears when “Accounting” functions are enabled. This allows the current user to cease all printer functions after the user has preformed the required copies. (After the code was entered to enable Coping) Please note that the printer will also automatically logoff from the current user after 180 seconds of no copy function activities by a user. This information is solely for use of Personnel and Authorized Dealers. No part of this publication may be copied, reproduced or distributed in any form without express written permission from. 2011. - 42 - *145PVDI4DSFFO 4DBO.PEF.POPDISPNF Select Scan Mode On the Home screen of the UI, select “Mono Scan-to-File” Main Screen This information is solely for use of Personnel and Authorized Dealers. No part of this publication may be copied, reproduced or distributed in any form without express written permission from. 2011. - 43 - *145PVDI4DSFFO No. Name Function 1 Original Type User Selects the type of original to scan. Also select either Eng/Arch Mode here. 2 Original Size Use automatic settings or manually set width, length and rotation of the images. 3 Quality Select Auto or Manual image adjustments 4 DPI Scroll through final image resolution. (DPI) 5 Format Scroll through formats the scanned file will be saved to. 6 Mailbox Select where the image will be stored after the scan (Printer, FTP, LAN PC etc). 7 Advanced Settings Invert, mirror, stamps, and edge adjustments preformed / displayed in this button (sub screen) 8 Reset / Stop Resets the system to default settings. Stops a scan in process 9 Concurrent Print Enables the ability to scan to file and get a print at the same time. 10 View Last View the last scanned image 11 Rescan Rescans the last image (replaces) 12 Disk Use Shows how much data is being stored on the IPS’s Hard drive 13 Logoff Allows the user to manually log off of the system. 14 Preset Scheme Save Multiple Scan Schemes for different File types. This information is solely for use of Personnel and Authorized Dealers. No part of this publication may be copied, reproduced or distributed in any form without express written permission from. 2011. - 44 - *145PVDI4DSFFO Simple Scanning To scan to file, please follow these basic steps. The following chapters have details on adjustments and parameters that the user can change to modify the scans. Select Size Mode Select whether the document is an engineering or architectural size document. This will allow the automatic width detection to function. Engineering widths = 34, 22, 17, 11, and 8.5 inches Architecture widths = 36, 30, 24, 18, 12, and 9 inches This information is solely for use of Personnel and Authorized Dealers. No part of this publication may be copied, reproduced or distributed in any form without express written permission from. 2011. - 45 - *145PVDI4DSFFO Select Original Image Type Set the Original Image type you will scan. The selections are: Line- used for simple line documents Line / Photo- used for a combination of lines & photos documents Grayscale- used for a combination of lines & areas of shade (CAD) originals Photo- used for photographic originals This will allow automatic image quality adjustments for the scan. This information is solely for use of Personnel and Authorized Dealers. No part of this publication may be copied, reproduced or distributed in any form without express written permission from. 2011. - 46 - *145PVDI4DSFFO Select Format Press the button to scroll through the file formats available. TIF-G4 - tif format Group 4 level compressed TLC - format compressed CAL-G4- Cals Group 4 PDF - PDF Level 3 DWF- Design Web Format (AutoCAD) Multipage TIF-G4- Tif format Group 4 level compressed Multipage PDF- PDF Level 3 Multipage DWF- Design Web Format (AutoCAD) Select the type you require which will save the file in this format. This information is solely for use of Personnel and Authorized Dealers. No part of this publication may be copied, reproduced or distributed in any form without express written permission from. 2011. - 47 - *145PVDI4DSFFO Select Mailbox Select the location to where the file will be saved. Use the “Page Arrows” to view other choices currently available. NOTE The Mailboxes are predetermined by the system administrator or key operator. Please contact these persons for any additional locations that you may require. The “Mailbox” button will allow for additional location entries. This information is solely for use of Personnel and Authorized Dealers. No part of this publication may be copied, reproduced or distributed in any form without express written permission from. 2011. - 48 - *145PVDI4DSFFO Insert Original Using the guides on the feed table, center the original face up and push forward until the 4820/9148/8148 accepts it. The 4820/9148/8148 will automatically commence to scan. While this occurs the image will be displayed on the Operator Panel for your reference. Retrieve the File Depending on the “Mailbox” you may now access your scan from a PC connected to the LAN. This includes: a. from a FTP site (using Microsoft Windows Internet Explorer or other FTP software) b. from the “ IPS Mailbox” utilizing “ Request” to access the document. c. from SMB location Please see the User Guides of these applications for details on their function. This information is solely for use of Personnel and Authorized Dealers. No part of this publication may be copied, reproduced or distributed in any form without express written permission from. 2011. - 49 - *145PVDI4DSFFO Operation Details Main Screen The main SCAN screen is selected from the Main Home user interface. This screen contains all user functions for scanning to file. The following pages detail the functions and settings of each button and sub screen that can be used to adjust the scan parameters to achieve the required result. This information is solely for use of Personnel and Authorized Dealers. No part of this publication may be copied, reproduced or distributed in any form without express written permission from. 2011. - 50 - *145PVDI4DSFFO Original This region allows the setting of the Size Mode (Engineering or Architectural) and the Original Document type. Original Size Mode These buttons are used to select the Size Mode of Engineering or Architectural & Original Image type. This will allow the automatic width detection system to determine the image width when an original is placed in the 4820/9148/8148. (Eng) Engineering widths = 34, 22, 17, 11, and 8.5 inches (Arch) Architecture widths = 36, 30, 24, 18, 12, and 9 inches Original Type Select one of the four different predetermined original types. The selections are: Line- used for simple line documents Line / Photo- used for a combination of lines & photos documents Grayscale- used for a combination of lines and areas of shade (CAD) originals Photo- used for photographic originals Press the desired original setting from one of the four diagrams. This will allow automatic image quality adjustments for the next scan. Please note that the selection will be highlighted with a “black” circle and the icon will become white, as in the above example “Grayscale”. This information is solely for use of Personnel and Authorized Dealers. No part of this publication may be copied, reproduced or distributed in any form without express written permission from. 2011. - 51 - *145PVDI4DSFFO Original Size This region is used to select the image size of the original being scanned. Automatic Size For most scans, “Automatic” should be selected. This will allow the 4820/9148/8148 to automatically determine the width & length of the scan without any user intervention. Exact Size If selected “Exact will allow for the actual size of non-standard documents to be read as the correct size. For example a sheet that is 24.8” will not be rounded up or down but read as 24.8” Manual Size To select an original size manually, select Manual & a sub screen displays all current standard page sizes. a. Select a desired size of the sheet. b. Or use “Custom” to select a width. This information is solely for use of Personnel and Authorized Dealers. No part of this publication may be copied, reproduced or distributed in any form without express written permission from. 2011. - 52 - *145PVDI4DSFFO c) Key in the desired width and then click “Accept Width.” d) Key in the desired length and then click “Enter”. e) Press “Reset” to begin again, “Enter” to accept the settings or “Cancel” to cancel “Manual” image size. This information is solely for use of Personnel and Authorized Dealers. No part of this publication may be copied, reproduced or distributed in any form without express written permission from. 2011. - 53 - *145PVDI4DSFFO f) The main Scan screen will now display the custom or manual size settings for the next image. Hard Drive Space Monitor Located on the main screen of the printer Scan mode, the Disk Use monitor provides a real-time display of remaining disk space on the printer’s hard drive. The monitor shows both the used space and the space available for image storage on the drive. Rotation The file can be saved rotated, from the actual feed direction. This can be used to reduce the scan time on certain orientation of originals, when they are archived. Press the “Rotation” button to select either one of four settings: Quality This region is used to change the image quality settings from the automatic setting. Automatic For most scans, “Auto” should be selected. This will allow the IPS to automatically determine the best image settings without any user intervention. (Please also note “Original” in 2.2) This information is solely for use of Personnel and Authorized Dealers. No part of this publication may be copied, reproduced or distributed in any form without express written permission from. 2011. - 54 - *145PVDI4DSFFO Density To override the “Automatic” settings, “Density” can be adjusted. Deselect “Auto” to enable “Density”. Pressing the arrows manually adjusts the background density. This will suppress or enhance the background from the original. Threshold To override the “Automatic” settings, “Threshold” can be adjusted. Deselect “Auto” to enable “Threshold”. Pressing the arrows manually adjusts the threshold. This will suppress or enhance the lines and images from the original. Sharpness To override the “Automatic” settings, “Sharpness” can be adjusted. Deselect “Auto” to enable “Sharpness”. Pressing the arrows manually adjusts the line sharpness to remove rough lines or when photos are scanned to allow for smoother graduations. This information is solely for use of Personnel and Authorized Dealers. No part of this publication may be copied, reproduced or distributed in any form without express written permission from. 2011. - 55 - *145PVDI4DSFFO Dither To override the “Automatic” settings, “Dither” can be adjusted. Deselect “Auto” to enable “Dither”. By pressing the dither button, a. None b. Fine c. Medium or d. Course This will change how the dots are arranged to create the final image of the scan. For fine lines a “Course” dither pattern may be desired. For Photos “None” may be desired. DPI Scroll through the DPI button to select the required scan resolution. Choices are 200, 300, 400 or 600 DPI. 300 400 This information is solely for use of Personnel and Authorized Dealers. No part of this publication may be copied, reproduced or distributed in any form without express written permission from. 2011. - 56 - *145PVDI4DSFFO Format Press the “Format” button to toggle through the file formats available. TIF-G4 - tif format Group 4 level compressed TLC - format compressed CAL-G4 - Cals Group 4 PDF - PDF Level 3 DWF - Design Web Format (AutoCAD) Multipage TIF-G4 - Tif format Group 4 level compressed Multipage PDF - PDF Level 3 Multipage DWF - Design Web Format (AutoCAD) Select the file type required to save the image into this format. For a Multipage scan, select the desired Multipage format. Start button will prompt for next original. When finished scanning, select the Close File button to finalize the multipage file. This information is solely for use of Personnel and Authorized Dealers. No part of this publication may be copied, reproduced or distributed in any form without express written permission from. 2011. - 57 - *145PVDI4DSFFO Preset Schemes Preset Schemes allow the user to set up and save multiple schemes (unlimited number) to go along with the different types of files being used. Schemes can be named relevant names and then later restored again when needed. Preset being used is displayed above preset buttons. Selecting Restore brings up the “Please Pick a Scan Scheme” allowing the user to choose from multiple saved schemes. Advanced Settings The Advanced Setting button contains the additional parameters on a sub screen: a. Invert b. Mirror c. Stamp (Water Mark) d. Lead Edge Adjustment e. Trail Edge Adjustment This information is solely for use of Personnel and Authorized Dealers. No part of this publication may be copied, reproduced or distributed in any form without express written permission from. 2011. - 58 - *145PVDI4DSFFO Mirror Select this button to “mirror” a scan. This can be utilized on originals that have the actual image on the reverse side such as older “sepia” or “film” documents. Invert Select this button to change a region of white to black and black to white of a scanned document. This is normally used for “negative” documents or “blue prints”. Stamp Select “Stamp” to display another sub screen. This will allow the selection of a “Stamp” or “Water Mark” to be placed on the scanned image. It will be embedded digitally into the image. a. Use the Arrow buttons to scroll through the available stamps and then select the stamp from the list. b. The Stamp button will now display the stamp selected. NOTE The list of “Stamps” is loaded into Scan Mode by the system administrator or key operator. They cannot be altered or modified in any manner on the printer’s UI. Please contact these persons for any additional stamps that may be required. Please see “Request” for these functions. This information is solely for use of Personnel and Authorized Dealers. No part of this publication may be copied, reproduced or distributed in any form without express written permission from. 2011. - 59 - *145PVDI4DSFFO Leading Edge Adjustment The leading edge of a scan can be altered. (+/- 4” ) a. additional void area can be placed on the lead edge of a scan or b. image can be removed (such as a binding strip or a file hanger) Leading Edge + Leading Edge - Copy Original Original Copy Deleted image Added margin To adjust the Leading Edge, use the arrows to denote the quantity you wish to add or remove. Touch the value displayed area to reset the quantity. This information is solely for use of Personnel and Authorized Dealers. No part of this publication may be copied, reproduced or distributed in any form without express written permission from. 2011. - 60 - *145PVDI4DSFFO Trailing Edge Adjustment The trailing edge of a scan can be altered. (+/- 4”) a. additional void area can be placed on the bottom of a scan or b. image can be removed (such as a binding strip or a file hanger) Trail Edge + Trail Edge - Copy Original Original Copy Deleted trailing image Added trailing margin To adjust the Trailing Edge, use the arrows to denote the quantity you wish to add or remove. Touch the value displayed area to reset the quantity. Make any of the required adjustments / selections and press “OK” to accept. The selections will now be displayed on the main Scan screen. This information is solely for use of Personnel and Authorized Dealers. No part of this publication may be copied, reproduced or distributed in any form without express written permission from. 2011. - 61 - *145PVDI4DSFFO Print Enabled – Concurrent Print This feature allows the user to Scan-to-file and print concurrently. The number of copies per scan can be set by clicking the “Print Enabled” then using the arrows to set the number of copies. Note: this functionality is not available when creating a Multipage file. .BJMCPY$PNNBOE$FOUFS This region of the Scan screen allows the user to select where the files will be placed. Selecting a Mailbox Use the arrow keys to scroll through the list as needed. Select the location by pressing on it. This information is solely for use of Personnel and Authorized Dealers. No part of this publication may be copied, reproduced or distributed in any form without express written permission from. 2011. - 62 - *145PVDI4DSFFO Creating a New Mailbox a. Press the + Button. The Mailbox Setup screen is displayed. b. Select Mailbox Name. A screen keyboard will be displayed. Enter the new Mailbox name. c. Enter the new location using standard protocols of networking for scans to the: This information is solely for use of Personnel and Authorized Dealers. No part of this publication may be copied, reproduced or distributed in any form without express written permission from. 2011. - 63 - *145PVDI4DSFFO IPS Mailbox Set a name for the location Examples: Dsmith B_Project Team_XYZ Michele Access to these folders and the scanned images is preformed from the Request application. Please see the User Guide of “Request” for the retrieval function. SMB Setup Share Setup – Workstation/Server When setting up a share at a workstation or server, it is necessary to have some information ahead of time. x User must have rights to share a folder x User must know where the access rights are held o Rights are local to the PC or Domain (Active Directory) x File and Print Sharing must be enabled within the Windows XP firewall settings x User must be able to read, write and modify the destination SMB folder x User must know login username and password This information is solely for use of Personnel and Authorized Dealers. No part of this publication may be copied, reproduced or distributed in any form without express written permission from. 2011. - 64 - *145PVDI4DSFFO Network Location (SMB/CIFS) – IPS Setup Server Message Block/Common Internet File System (SMB/CIFS) allows the user to create a semipermanent connection to a network resource for scan to file. Function Button Description Mailbox Name Descriptor to be displayed on SCAN screen (Preceded by SMB:) This will turn green when connected Destination Server/Workstation IP address or NetBIOS name of destination workstation/server Domain Name of authorization provider (Domain server or workgroup workstation) Share Path Shared resource on destination workstation/server Username Login credentials on destination workstation/server Password Password for supplied username on destination workstation/server Test SMB Maps a network drive to the destination workstation/server Within the SCAN screen, press the Mailbox button to create an SMB connection. a. Touch the SMB button to display the SMB Mailbox creation dialog. b. Press the Mailbox Name button to enter a descriptive name for the SMB scan to file location. This description will be displayed on the SCAN screen with the label of SMB:[Mailbox Name]. This information is solely for use of Personnel and Authorized Dealers. No part of this publication may be copied, reproduced or distributed in any form without express written permission from. 2011. - 65 - *145PVDI4DSFFO c. Touch Destination Server/Workstation button to enter the NetBIOS name or IP address of the destination server or workstation that the IPS will connect to in order to allow for scan to file. a. This must be a server or workstation that the IPS has access to via TCP/IP. b. Please ensure that the 4820/9148/8148 IPS has been networked properly and is “pingable” from the destination server/workstation. d. Touch Domain button to enter the client authorization information. This entry will work in conjunction with the Username/Password entries as defined in later steps. a. Some facilities will have user credentials stored on a central authorization server (Domain Controller/Active Directory Server) that will grant connection access to the IPS for shared resources. If the IPS is connecting to a workstation (WS01) that is a part of the Acme.com domain, then the user would enter Acme in the Domain section. The IPS would get authorization credentials from the SVR01 server in order to scan to the “Scans” folder on the WS01 workstation (TBurr’s PC). This information is solely for use of Personnel and Authorized Dealers. No part of this publication may be copied, reproduced or distributed in any form without express written permission from. 2011. - 66 - *145PVDI4DSFFO b. If the IPS is in a workgroup setting (No Domain Controller/Active Directory Server), the authorization credentials will be supplied by the destination workstation/server (WS06). If the user is connecting to a shared resource on a workstation (Scans folder) with the NetBIOS (computer) name of WS06, the user would input WS06 for the Domain section. The IPS would get the authorization credentials from the WS06 workstation. This information is solely for use of Personnel and Authorized Dealers. No part of this publication may be copied, reproduced or distributed in any form without express written permission from. 2011. - 67 - *145PVDI4DSFFO e. Touch the Share Path button to enter the name of the shared folder on the destination workstation or server. a. The shared folder on the destination workstation must be accessible by the user as supplied in the Username setting. b. These permissions should include the ability to write and modify on this shared folder. f. Username and Password should be set as an accessible login username from either the workgroup workstation/server or the authentication server/domain controller. g. Touching on Test SMB will make the IPS attempt to establish a connection to the destination workstation/server. a. This is a semi-permanent mapped network drive (Z:) b. The connection is established when the SMB mailbox is selected and is disconnected when: i. Switching Formats ii. Pressing the STOP button iii. Switching menus (SCAN, COPY, JOB INFO, ?) iv. Selecting another mailbox v. Creating another SMB mailbox vi. Reset timer expiration vii. Log off This information is solely for use of Personnel and Authorized Dealers. No part of this publication may be copied, reproduced or distributed in any form without express written permission from. 2011. - 68 - *145PVDI4DSFFO It is possible to scan all file formats to an SMB location. Please note that color image data is much larger and may take considerable network resources in order to transfer from the IPS to the SMB location. (A full color, 600 DPI, tiff packbit can be several gigabytes in size). When scanning multi page documents (PDF, DWF and TIFF), the images are scanned to a temporary location on the IPS & then transferred to the SMB location once the Close File button has been pressed. Scan to File – Image Naming The IPS allows the user to create a custom naming convention for files that are scanned to file. This naming convention is tied or is a part of the actual mailbox that is selected on the IPS. This can be a part of a local IPS mailbox or as an SMB (network) mailbox. In addition to a naming convention for the mailbox user also have the ability to name each individual file prior to scanning it to the desired location. When scanning, the IPS on-screen keyboard at the time of scanning, (if configured) will allow for the input of a file name before the current image is scanned to file. To set up the ability to Name files as they are being scanned do the following: 1. Create a new mailbox 2. Set up the Mailbox and select the “Manual Name” button. 3. Selecting “Manual Name” will turn this feature on for all mailboxes. 4. If a manual name is not going to be used select Cancel when the onscreen Keyboard open and the scans will be given the default naming convention of Tempxxx.xxx Note: It is necessary to have the SCAN option in order to perform this function. This information is solely for use of Personnel and Authorized Dealers. No part of this publication may be copied, reproduced or distributed in any form without express written permission from. 2011. - 69 - *145PVDI4DSFFO Create a Mailbox with Naming Convention 1. Click the SCAN button to begin the scanning process 2. Click the plus sign to add a mailbox to the IPS 3. Select either a Local or SMB mailbox destination 4. For a Local mailbox, type in the name of the local mailbox 5. For an SMB mailbox, type in the information for SMB mailbox configuration. For further information, please see the IPS user guide 6. Designate a mailbox name mask and a number sequence interval by typing in the following parameters. Type in the name of the file with the pound symbol (#) where the pound symbol will insert the numbering interval as defined in the Starting Number section. a. For each (#) a number will be placed into the file name. In the example above, the first file name would be Temp00001.ext; the next file name would be Temp00002.ext, etc. b. It is possible to place the (#) between sets of text. For instance, if the file is to be named Image1001-2006.ext and the increment is to be from 1001, then the user would input Image####-2006 in the Naming Convention section. This information is solely for use of Personnel and Authorized Dealers. No part of this publication may be copied, reproduced or distributed in any form without express written permission from. 2011. - 70 - *145PVDI4DSFFO x Use as Default Mailbox – Sets this to the Default mailbox when entering the SCAN screen x Save and Continue – Allows a user to input many mailboxes without having to enter the mailbox creation page x OK – Exits the mailbox creation page with saved changes x Cancel – Exits the mailbox creation page and terminates all current information on the page FTP Locations Please contact your network administrator for details on how to configure and load FTP locations into the printer Scan Mode. FTP locations can be set up easily through PrintNET. Please see the PrintNet Manual for details. Please see your network administrator for access to your FTP and the retrieval of the documents from the FTP. Adding FTP Mailbox Location from PrintNET Administrators now have the ability to create FTP scanning destinations directly from PrintNet. Select “FTP” from the list of available tabs to display configuration parameters. Once an SMB destination is configured, it will be displayed in the list of available destinations on the left hand side of the screen prefixed by “SMB:” Please note: Files scanned to SMB & FTP destinations cannot be seen or selected from the PrintNet interface. This information is solely for use of Personnel and Authorized Dealers. No part of this publication may be copied, reproduced or distributed in any form without express written permission from. 2011. - 71 - *145PVDI4DSFFO Delete a mailbox This will allow a user the ability to delete a Mailbox (and all of its contents) on the IPS without having to be in front of the IPS itself. Removing a Mailbox a. Select the mailbox to be deleted. b. Press the “-“ button on the main Scan screen NOTE The “Mailbox” also removes all documents images with that folder. ENSURE YOU HAVE BACKED UP OR DOWNLOADED ANY NECESSARY FILES IN THE FOLDER PRIOR TO REMOVING IT IN THE NEXT STEP! c. Press “Yes.” to remove. This information is solely for use of Personnel and Authorized Dealers. No part of this publication may be copied, reproduced or distributed in any form without express written permission from. 2011. - 72 - *145PVDI4DSFFO Edit Allows the user the ability to edit an existing mailbox Start No function at this time in Scan Mode. All scans in Scan Mode are “Auto Start”. Reset / Stop This button has two functions. 1. Press the Stop button on the UI to stop the current scan. The original will be ejected automatically. If not, open Top Cover to remove the original. 2. Press the Reset button to restore the “default settings” in Scan Mode. Some of the default settings are determined in the Information / Help Screen of the UI. (see Scan Mode Configurations chapter) Re-Scan If the scanned image was not satisfactory, you can replace the last image scan by selecting this button and proceeding with the scan procedure as normal. View Last Allows the last scan to be reviewed again on the UI. Log Off This button may be displayed if accounting is enabled. Press this button to log off the current user after scanning has been completed. This information is solely for use of Personnel and Authorized Dealers. No part of this publication may be copied, reproduced or distributed in any form without express written permission from. 2011. - 73 - *145PVDI4DSFFO .POP'JMFUP1SJOU x Click the “File-to-Print” button to print files stored locally on the printer. This includes Local Mailboxes and other folders on the hard drive. x Browse to the destination and select the file or files you want to print on the left side of the screen. x Click on a file to move it to the “Print Set Contents” where it can be previewed and either submitted or removed from the list. This information is solely for use of Personnel and Authorized Dealers. No part of this publication may be copied, reproduced or distributed in any form without express written permission from. 2011. - 74 - x *145PVDI4DSFFO Select a folder or mailbox and click the “Add All Files to Set” to add all of the files in the specified folder to the “Print Set Contents” section for previewing. x Click the “Clear Set Contents” to remove all of the files from the “Print Set Contents” section. x Click the “Fold” button to apply folding schemes. x Click the “Collate” button to enable or disable collating sets of prints. x Map Drive allows the user the ability to create a connection to a network location. x Unmap Driver allows the user to disconnect from a network location that may no long be available. This information is solely for use of Personnel and Authorized Dealers. No part of this publication may be copied, reproduced or distributed in any form without express written permission from. 2011. - 75 - x *145PVDI4DSFFO After adding files to “Print Set Contents click the “Save Job” button to save the current configuration. An onscreen keyboard will appear allowing the user the ability to name the saved file. x Click “Recall Job” to load a job configuration that was previously saved. x Edit the number of “sets” by clicking the left and right arrows. x Click the left and right arrows to change the enlarge/reduce settings for the job submittal. x Click the “X” icon to remove the file from the “Print Set Contents” list. x Click the Media button to select from available medias loaded in the Printer. x The number of files chosen, along with how many sets to be sent to the printer are displayed on the bottom of the screen. This information is solely for use of Personnel and Authorized Dealers. No part of this publication may be copied, reproduced or distributed in any form without express written permission from. 2011. - 76 - *145PVDI4DSFFO $PQZ.PEF$PMPS0OMZ Main Screen - General This information is solely for use of Personnel and Authorized Dealers. No part of this publication may be copied, reproduced or distributed in any form without express written permission from. 2011. - 77 - *145PVDI4DSFFO No. Name Function 1 Mode Select Color Mode from Mono Mode 2 Original Size Select the size of the original in length and rotation 3 Original Type User Selects the type of original to copy. Also select Eng/Arch Modes here. 4 Print Quality Select the calibrated Quality (must be calibrated prior to use) 5 Copy Count Select the quantity of prints and sets designation. 6 Advanced Settings Invert , mirror, stamps, folds, and edge adjustments preformed / displayed in this button (sub screen) 7 Reset Clears the image buffer and resets the system to default settings. 8 View Last The last scan / job can be viewed 9 Zoom Manual and automatic zoom ratios set. 10 Log Off Displayed if Accounting enabled to Log off current user 11 Preset Schemes Save Multiple Scan Schemes for different File types. 12 Rotate Choose from 0, 90, 180 and 270 degrees of rotation 13 Home Returns to the Home screen This information is solely for use of Personnel and Authorized Dealers. No part of this publication may be copied, reproduced or distributed in any form without express written permission from. 2011. - 78 - *145PVDI4DSFFO Simple Copying To copy, please follow these basic steps. The following chapters have details on adjustments and parameters that the user can change to modify the copies as required. Please note that a third party color printer, supported by, must first be calibrated in the “?” screen under the “Color Config” button. Please see the “?” Section. Select Copy Mode On the lower Main Home Screen select “COPY” and then press the Color button if not already selected. This information is solely for use of Personnel and Authorized Dealers. No part of this publication may be copied, reproduced or distributed in any form without express written permission from. 2011. - 79 - *145PVDI4DSFFO Select Size Mode Select whether the document is an engineering or architectural size document. This will allow the automatic width detection to function. Engineering widths = 34, 22, 17, 11, and 8.5 inches Architecture widths = 36, 30, 24, 18, 12, and 9 inches This information is solely for use of Personnel and Authorized Dealers. No part of this publication may be copied, reproduced or distributed in any form without express written permission from. 2011. - 80 - *145PVDI4DSFFO Select Original Image Type Set the original image type you will copy. The selections are: Line - used for simple color line documents Line / Photo - used for a combination of lines & photos color documents Photo - used for color photographic originals This will allow automatic image quality adjustments for the scan. This information is solely for use of Personnel and Authorized Dealers. No part of this publication may be copied, reproduced or distributed in any form without express written permission from. 2011. - 81 - *145PVDI4DSFFO Print Quality The model of third party color printer will determine on the available Print Quality. Select “Graphics” or “Line Art” mode and then select “Draft, Normal or High Quality” mode for the printer. Please note that each Print Quality mode must be calibrated prior to its use. Please see Color Calibration in the “?” screen for greater details. This information is solely for use of Personnel and Authorized Dealers. No part of this publication may be copied, reproduced or distributed in any form without express written permission from. 2011. - 82 - *145PVDI4DSFFO Copy Count Press the arrow buttons to scroll through the number of copies required or press on the actual number to set the quantity with the number pad. This information is solely for use of Personnel and Authorized Dealers. No part of this publication may be copied, reproduced or distributed in any form without express written permission from. 2011. - 83 - *145PVDI4DSFFO Original Size This selects automatic (for best possible fit) or manual page size selection. or This information is solely for use of Personnel and Authorized Dealers. No part of this publication may be copied, reproduced or distributed in any form without express written permission from. 2011. - 84 - *145PVDI4DSFFO Size Select a. AutoZoom to automatically zoom to the width of paper or b. Press the arrow keys to scroll through presets ratios or c. Press on the Zoom number to enter a ratio on the key pad Insert Original Using the guides on the feed table, center the original face up and push forward until the 4820/9148/8148 accepts it. The 4820/9148/8148 will automatically commence to copy. While this occurs the image will be displayed on the Operator Panel for your reference. This information is solely for use of Personnel and Authorized Dealers. No part of this publication may be copied, reproduced or distributed in any form without express written permission from. 2011. - 85 - *145PVDI4DSFFO Operation Details Main Screen The main Copy Color screen is selected with the Copy Button from the main Home Screen, then use the Color button in the upper left corner to select Color Mode. The following pages detail the functions and settings of each button and sub screen that can be used to adjust the color copy mode. Original This region allows the setting of the Size Mode (Engineering or Architectural) & the original image type. Original Size Mode This button is used to select the Size Mode of Engineering or Architectural. This will allow the automatic width detection system to determine the image width when an original is placed in the 4820/9148/8148. Engineering widths = 34, 22, 17, 11, and 8.5 inches Architectural widths = 36, 30, 24, 18, 12, and 9 inches This information is solely for use of Personnel and Authorized Dealers. No part of this publication may be copied, reproduced or distributed in any form without express written permission from. 2011. - 86 - *145PVDI4DSFFO Original Type Select one of the three different predetermined original types. The selections are: a. Line - used for simple color line documents b. Line / Photo- used for a combination of color lines & photos c. Photo - used for color photographic originals Press the desired original setting from one of the three diagrams. This will allow automatic image quality adjustments for the scan. Please note that the selection will be highlighted with a “black circle” and the icon will become white, as in the above example “Line/Photo”. Print Quality This region is used to change the image quality settings on the third party printer. Line / Graphic Mode The device you will copy to will determine the best setting. Each Quality mode has three sub modes. Each mode must be calibrated prior to use. Please see Color Calibration in the “?” screen. This information is solely for use of Personnel and Authorized Dealers. No part of this publication may be copied, reproduced or distributed in any form without express written permission from. 2011. - 87 - *145PVDI4DSFFO Draft / Normal / High Quality This controls the settings of the printer and which mode of image quality will be used on the printer. Please see third party printer guide for details. Copy Count In this region the number of copies can be set. Arrows - Count Increase / Decrease Use the arrows to increase or decrease the total numbers of copies desired by one with each press of the button. In this example the arrow was press five times to reach “6 copies”. This information is solely for use of Personnel and Authorized Dealers. No part of this publication may be copied, reproduced or distributed in any form without express written permission from. 2011. - 88 - *145PVDI4DSFFO Number Pad - Count Increase / Decrease Press the “number of copies” value (which is a button) to set the desired number of copies using a number pad. This will allow the quick entry of larger numbers. a. Press the numbers for the quantity desired. (up to 999) b. Select “Enter”. c. If an entry error was made press “C” to start again. d. If you wish to close the screen without changing the quantity press “Cancel”. Set Copy Has no function in Color Copy Mode. Clear Press the “Reset” button to reset the quantity to “1”. Preset Schemes Preset Schemes allow the user to set up and save multiple schemes (unlimited number) to go along with the different types of files being used. Schemes can be named relevant names and then later restored again when needed. Preset being used is displayed above preset buttons. This information is solely for use of Personnel and Authorized Dealers. No part of this publication may be copied, reproduced or distributed in any form without express written permission from. 2011. - 89 - *145PVDI4DSFFO Selecting Restore brings up the “Please Pick a Copy Scheme” allowing the user to choose from multiple saved schemes. Advanced Settings The Advanced Setting button contains the additional parameters on a sub screen: a. Mirror b. Invert c. Lead Edge Adjustment d. Trail Edge Adjustment Mirror Select this button to “mirror” a scan. This can be utilized on originals that have the actual image on the reverse side such as older “sepia” or “film” documents. Invert Select this button to change a region of white to black and visa versa of a scanned document. This is normally used for “negative” documents or “blue prints”. This information is solely for use of Personnel and Authorized Dealers. No part of this publication may be copied, reproduced or distributed in any form without express written permission from. 2011. - 90 - *145PVDI4DSFFO Leading Edge Adjustment The leading edge of a scan can be altered. (+/- 4”) e. additional void area can be placed on the lead edge of a scan or f. image can be removed (such as a binding strip or a file hanger) Leading Edge + Leading Edge - Copy Original Original Copy Deleted image Added margin To adjust the Leading Edge, use the arrows to denote the quantity you wish to add or remove. Touch the value displayed area to reset the quantity. This information is solely for use of Personnel and Authorized Dealers. No part of this publication may be copied, reproduced or distributed in any form without express written permission from. 2011. - 91 - *145PVDI4DSFFO Trailing Edge Adjustment The trailing edge of a scan can be altered. (+/- 4”) g. additional void area can be placed on the bottom of a scan or h. image can be removed (such as a binding strip or a file hanger) Trail Edge + Trail Edge - Copy Original Original Copy Deleted trailing image Added trailing margin To adjust the Trailing Edge, use the arrows to denote the quantity you wish to add or remove. Touch the value displayed area to reset the quantity. Make any of the required adjustments / selections and press “OK” to accept. The selections will now be displayed on the main Scan screen. This information is solely for use of Personnel and Authorized Dealers. No part of this publication may be copied, reproduced or distributed in any form without express written permission from. 2011. - 92 - *145PVDI4DSFFO Original Size This region allows automatic or manual roll detection of the original. Auto This default setting allows the 4820/9148/8148 to automatically detect the width and length of the original. Please note the correct “Original Size Mode” in 2.2.1 must be select prior to the copy. Manual To select an original size manually, select Manual & a sub screen displays all current standard page sizes. This information is solely for use of Personnel and Authorized Dealers. No part of this publication may be copied, reproduced or distributed in any form without express written permission from. 2011. - 93 - *145PVDI4DSFFO Custom This mode allows the original width and length to be determined by the number pad. Set the width of the scan. Note that these are only Standard Sizes. Set a Standard Length or Custom Length – set the Custom length in the key pad and press enter. Standard Length Custom Length The cut length will now be displayed in the Manual button. In this example 18” width and a custom length of 25.8”. This information is solely for use of Personnel and Authorized Dealers. No part of this publication may be copied, reproduced or distributed in any form without express written permission from. 2011. - 94 - *145PVDI4DSFFO Rotation Select the rotation to save copy media. This function may be void dependent on the third party printer ability in media width and auto rotate function programmed in the printer. Example: D Size copy may waste less media if printed 36” wide (if the printer so supports this size and is installed in the printer) rather than 24” wide. If the user wishes to scan the document 24” and then select a 270 degree or 90 degree rotation to print 36” width rather than 24” this can save media. Rotation available: Size – Zoom Image size / Zoom can be altered in this region of the operator panel. This includes automatic zooming, predetermined percentages, or ratio calculations to page size, and simple percentage increments. This information is solely for use of Personnel and Authorized Dealers. No part of this publication may be copied, reproduced or distributed in any form without express written permission from. 2011. - 95 - *145PVDI4DSFFO Preset Percentages The IPS has several predetermined industry standard zoom percentages used for quick access. These can be access with the arrow buttons. The pre-programmed percentages are: 50 - 66.7 - 70.7 - 100 - 141 - 150 - 200 Percentage Key Pad To enter a percentage directly: a. Press on the Percentage value displayed (the number is a button). b. This will show a keypad to enter the value (please note that the button Manual on the side is a default). c. Press the desired zoom value and press enter. This information is solely for use of Personnel and Authorized Dealers. No part of this publication may be copied, reproduced or distributed in any form without express written permission from. 2011. - 96 - *145PVDI4DSFFO Page Size Zoom To enter a zoom percentage based on pages sizes into the UI: a. Press on the Percentage value displayed (the number is a button). This will show a keypad to enter the value. b. Select Standard button. c. Select the original page size by pressing onto the original page size button. d. Please note either Engineering or Architectural mode can be utilized by pressing on the button below the original page size. e. Select the desired Copy page size. Again please note either Engineering or Architectural mode can be utilized. f. Press Enter to confirm your selections or Cancel to restart. This information is solely for use of Personnel and Authorized Dealers. No part of this publication may be copied, reproduced or distributed in any form without express written permission from. 2011. - 97 - *145PVDI4DSFFO Clear To reset the percentage value to default, press the “erase” button. Start The copier is always set to “Auto Start”. That is when an original is inserted into the 4820/9148/8148, it will start without user intervention. The start button is used when a job is recalled. The start button will “start” the job if depressed after ‘Recall” (the name will change to “Re-print”). View Last The last documented scanned to be copied be viewed. Recall Job No function in Color Copy Mode. Stop / Reset This button has two functions. 1. Press the Stop button to stop the current scan. The original will be ejected automatically. If not, open Top Cover to remove the original. 2. Press the Reset button to restore the “default settings” in Copy Mode. Some of the default settings are determined in the Information / Help Screen of the UI. (see Copy Mode Configurations chapter) This information is solely for use of Personnel and Authorized Dealers. No part of this publication may be copied, reproduced or distributed in any form without express written permission from. 2011. - 98 - *145PVDI4DSFFO Interrupt No function in Color Copy Mode. Log Off This button only appears when “Accounting” functions are enabled. This allows the current user to cease all functions after the user has preformed the required copies (after the code was entered to enable Coping). Please note that the printer will also automatically log off the current user after 180 seconds of no copy function activities by a user. This information is solely for use of Personnel and Authorized Dealers. No part of this publication may be copied, reproduced or distributed in any form without express written permission from. 2011. - 99 - *145PVDI4DSFFO 4DBO.PEF$PMPS0OMZ This information is solely for use of Personnel and Authorized Dealers. No part of this publication may be copied, reproduced or distributed in any form without express written permission from. 2011. - 100 - *145PVDI4DSFFO Main Screen This information is solely for use of Personnel and Authorized Dealers. No part of this publication may be copied, reproduced or distributed in any form without express written permission from. 2011. - 101 - *145PVDI4DSFFO No. Name Function 1 Mode Selects “Color Mode” while in Scan mode 2 Original Size Use automatic settings or manually set width, length and rotation of the image. 3 Original Type User Selects the type of original to scan. Also select either Eng/Arch Mode here. 4 Quality Select the original image type to be scanned 5 DPI Scroll through the image resolution. (DPI) 6 Format Scroll through formats the file will be saved to. 7 Advanced Settings Invert, mirror, and edge adjustments preformed / displayed with this button (sub screen) 8 Reset / Stop Resets the system to default settings. Stops a scan in process 9 Mailbox Select where the image will be stored after the scan ( printer, FTP, LAN PC etc) 10 View Last View the last scanned image 11 Rescan Rescans the last image (replaces) 12 Disk Use Show how much of the Hard driver remains available. 13 Preset Schemes Save Multiple Scan Schemes for different File types 14 Log Off Logs off user 15 Home Returns to the main Home Screen This information is solely for use of Personnel and Authorized Dealers. No part of this publication may be copied, reproduced or distributed in any form without express written permission from. 2011. - 102 - *145PVDI4DSFFO Simple Scanning To scan to file in color, please follow these basic steps. The following chapters have details on adjustments and parameters that the user can change to modify color scans. Select Scan Mode From thehome screen select “Scan to file” then select Color Mode in the upper left corner. Select Size Mode Select whether the document is an engineering or architectural size document. This will allow the automatic width detection to function. Engineering widths = 34, 22, 17, 11, and 8.5 inches Architecture widths = 36, 30, 24, 18, 12, and 9 inches This information is solely for use of Personnel and Authorized Dealers. No part of this publication may be copied, reproduced or distributed in any form without express written permission from. 2011. - 103 - *145PVDI4DSFFO Select Original Image Type Set the original Image type you will scan. The selections are: Line- used for simple color line documents Line / Photo- used for a combination of color lines & photos Photo- used for color photographic originals This will allow automatic image quality adjustments for the color scan. Select Format Press the button to scroll through the file formats available. TIF JPEG PDF Color Select a desired file format. This information is solely for use of Personnel and Authorized Dealers. No part of this publication may be copied, reproduced or distributed in any form without express written permission from. 2011. - 104 - *145PVDI4DSFFO Select Mailbox Select the location to where the file will be saved. Use the “Page Arrows” to view other choices currently available. NOTE The Mailboxes are predetermined by the system administrator or key operator. Please contact these persons for any additional locations that you may require. The “Mailbox” button will allow for additional location entries. Insert Original Using the guides on the feed table, center the original face up and push forward until the 4820/9148/8148 accepts it. The 4820/9148/8148 will automatically commence to scan. While this occurs the image will be displayed on the Operator Panel for your reference. Retrieve the File Depending on the “Mailbox” you may now access your scan from a PC connected to the LAN. This includes: a. from a FTP site (using Microsoft Windows Internet Explorer or other FTP software) b. from the “ IPS Mailbox” utilizing “ Request” to access the document. c. from SMB Location Please see the User Guides of these applications for details on their function. This information is solely for use of Personnel and Authorized Dealers. No part of this publication may be copied, reproduced or distributed in any form without express written permission from. 2011. - 105 - *145PVDI4DSFFO Operation Details Main Screen On the main “Home” screen select the “Scan to file” button then select Color Mode in the upper left corner. This screen contains all user functions for scanning to file in color. The following pages details the functions and settings of each button and sub screens that can be used to adjust the scan parameters to achieve the required result. Original This region allows the setting of the Size Mode (Engineering or Architectural) & the Original Document type. Original Size Mode This button is used to select the Size Mode of Engineering or Architectural. This will allow the automatic width detection system to determine the image width when an original is placed in the 4820/9148/8148. Engineering widths = 34, 22, 17, 11, and 8.5 inches Architectural widths = 36, 30, 24, 18, 12, and 9 inches This information is solely for use of Personnel and Authorized Dealers. No part of this publication may be copied, reproduced or distributed in any form without express written permission from. 2011. - 106 - *145PVDI4DSFFO Original Type Select one of the three different predetermined original types. The selections are: Line- used for simple color line documents Line / Photo- used for a combination of color lines & photos Photo- used for color photographic originals Press the desired original setting from one of the three diagrams. This will allow automatic image quality adjustments for the next scan. Please note that the selection will be highlighted with a “black circle” and the icon will become white, as in the above example “Line/Photo”. Original Size This region is used to select the image size of original being scanned. Automatic Size For most scans, “Automatic” should be selected. This will allow the 4820/9148/8148 to automatically determine the width and length of the scan without any user intervention. (Please also note “Original Size Mode”) This information is solely for use of Personnel and Authorized Dealers. No part of this publication may be copied, reproduced or distributed in any form without express written permission from. 2011. - 107 - *145PVDI4DSFFO Manual Size To select an original size manually, select Manual and a sub screen displays all current standard page sizes. a. Select a size or press “custom”. b. Or use Custom to select a width. c. Set the width of the scan. Note that these are only Standard Sizes. d. Set a Standard Length or Custom Length – set the Custom length in the key pad and press enter. Standard Length Custom Length This information is solely for use of Personnel and Authorized Dealers. No part of this publication may be copied, reproduced or distributed in any form without express written permission from. 2011. - 108 - *145PVDI4DSFFO e. The cut length will now be displayed in the Manual button. In this example 18” width and a custom length of 25.8”. Hard Drive Space Monitor Located on the main screen of the printer Scan mode, the Disk Use monitor provides a real-time display of remaining disk space on the printer’s hard drive. The monitor shows both the used space and the space available for image storage on the drive. Rotation The file can be saved rotated from the actual feed direction. This can be used to reduce the scan time on certain orientation of originals, when they are archived. Press the “Rotation” button to select either one of four settings: DPI Scroll through the DPI button to select the required scan resolution. Choices are 200, 300, 400 or 600 DPI. 300 400 Format This information is solely for use of Personnel and Authorized Dealers. No part of this publication may be copied, reproduced or distributed in any form without express written permission from. 2011. - 109 - *145PVDI4DSFFO Press the “Format” button to scroll through the file formats available. TIF Packbit JPEG PDF Color Select the file type required to save the image into this format. Preset Schemes Preset Schemes allow the user to set up and save multiple schemes (unlimited number) to go along with the different types of files being used. Schemes can be named relevant names and then later restored again when needed. Preset being used is displayed above preset buttons. Selecting Restore brings up the “Please Pick a Scan Scheme” allowing the user to choose from multiple saved schemes. Advanced Settings This information is solely for use of Personnel and Authorized Dealers. No part of this publication may be copied, reproduced or distributed in any form without express written permission from. 2011. - 110 - *145PVDI4DSFFO The Advanced Setting button contains the additional parameters on a sub screen: f. Mirror g. Invert h. Lead Edge Adjustment i. Trail Edge Adjustment Mirror Select this button to “mirror” a scan. This can be utilized on originals that have the actual image on the reverse side such as older “sepia” or “film” documents. Invert Select this button to change a region of white to black and vice versa of a scanned document. This is normally used for “negative” documents or “blue prints”. This information is solely for use of Personnel and Authorized Dealers. No part of this publication may be copied, reproduced or distributed in any form without express written permission from. 2011. - 111 - *145PVDI4DSFFO Leading Edge Adjustment The leading edge of a scan can be altered. (+/- 4”) j. additional void area can be placed on the lead edge of a scan or k. image can be removed (such as a binding strip or a file hanger) Leading Edge + Leading Edge - Copy Original Original Copy Deleted image Added margin To adjust the Leading Edge, use the arrows to denote the quantity you wish to add or remove. Touch the value displayed area to reset the quantity. This information is solely for use of Personnel and Authorized Dealers. No part of this publication may be copied, reproduced or distributed in any form without express written permission from. 2011. - 112 - *145PVDI4DSFFO Trailing Edge Adjustment The trailing edge of a scan can be altered. (+/- 4”) l. additional void area can be placed on the bottom of a scan or m. image can be removed (such as a binding strip or a file hanger) Trail Edge + Trail Edge - Copy Original Original Copy Deleted trailing image Added trailing margin To adjust the Trailing Edge, use the arrows to denote the quantity you wish to add or remove. Touch the value displayed area to reset the quantity. Make any of the required adjustments / selections and press “OK” to accept. The selections will now be displayed on the main Scan screen. This information is solely for use of Personnel and Authorized Dealers. No part of this publication may be copied, reproduced or distributed in any form without express written permission from. 2011. - 113 - *145PVDI4DSFFO Mailbox This region of the Scan screen allows the user to select where the color files will be placed. Please see the section titled Mailbox command center starting on page 63 for more details. Start No function at this time in Scan Mode. All scans in Scan Mode are “Auto Start”. Reset / Stop This button has two functions. 1. Press the Stop button to stop the current scan. The original will be ejected automatically. If not, open Top Cover to remove the original. 2. Press the Reset button to restore the “default settings” in Scan Mode. Some of the default settings are determined in the Information / Help Screen of the UI. (see Scan Mode Configurations chapter) Re-Scan If the scanned image was not satisfactory, you can replace the last image scan by selecting this button and proceeding with the scan procedure as normal. View Last Allows the last scan to be reviewed again on the UI. Log Off This button may be displayed if accounting is enabled. Press this button to log off the current user after the scanning has been completed. This information is solely for use of Personnel and Authorized Dealers. No part of this publication may be copied, reproduced or distributed in any form without express written permission from. 2011. - 114 - *145PVDI4DSFFO $PQZ.PEF$PMPS"EWBODFE Color advanced software is available on all Printers with the exception of the 2420/9124/8124 printer. Please see the previous two sections for instructions regarding Color Direct on the 2420/9124/8124. This information is solely for use of Personnel and Authorized Dealers. No part of this publication may be copied, reproduced or distributed in any form without express written permission from. 2011. - 115 - *145PVDI4DSFFO Color advanced Configuration Initiall the Color advanced software will need to be configured to be able to make color copies or to do direct print. The following section will explain the steps for doing this configuration. Step 1 – On the main Color advanced copy screen select the Misc. Tab and confirm that the scanner is being seen by the printer. Step 2 – Select the config button in the bottom left corner to being the configuration process. Step 3 – From the printers tab select the Add Printer Button. Step 4 – From the available list of Printers select the printer model to set up. Note: Specific manufacturers can be displayed from the drop down window. This information is solely for use of Personnel and Authorized Dealers. No part of this publication may be copied, reproduced or distributed in any form without express written permission from. 2011. - 116 - *145PVDI4DSFFO Step 5 – Enter the IP addre3ss or Host name of the printer to connect to. Step 6 – select the desired options from the placement screen. Step 7 – the Technical label is generally used for testing. Any information selected will be printed in a header on the lead edge of the output. This information is solely for use of Personnel and Authorized Dealers. No part of this publication may be copied, reproduced or distributed in any form without express written permission from. 2011. - 117 - *145PVDI4DSFFO Step 8 – Configuration and Loaded Consumables will display the current media and the ink levels for each color. Step 9 – Default Settings and Print Options allows for the selection of the quality of the output. Note: the better the quality the larger the amount of data and the longer it will take to print. Step 10 – Calibration for copy allows the user to print test targets for the selected median and perform a closed loop calibration to match the scanner and the printer. The calibration date will appear to the right of the calibrated media. Note: this will need to be done for each media that will be used in the Inkjet printer. This information is solely for use of Personnel and Authorized Dealers. No part of this publication may be copied, reproduced or distributed in any form without express written permission from. 2011. - 118 - *145PVDI4DSFFO Step 11 – Select ok to complete the setup of the inkjet printer. The installed printer will be displayed in the printers list at this time. Step 12 – Select ok to return to the main copy screen. The printer is now listed in the printers list and is ready to use. This information is solely for use of Personnel and Authorized Dealers. No part of this publication may be copied, reproduced or distributed in any form without express written permission from. 2011. - 119 - *145PVDI4DSFFO Color Copy Advanced Color advanced software is available on all Printers with the exception of the 2420/9124/8124 printer. Please see the previous two sections for instructions regarding Color Direct on the 2420/9124/8124. This information is solely for use of Personnel and Authorized Dealers. No part of this publication may be copied, reproduced or distributed in any form without express written permission from. 2011. - 120 - *145PVDI4DSFFO Simple Copying To make a direct copy to a large format printer, please follow these basic steps. The following chapters have details on adjustments and parameters that the user can change to modify the copies as required. Please note that a third party color printer, supported by , must first be calibrated. Please see the previous section that explains the steps for set up. General Tab On the General Tab the user has the ability to setup the copy the way they want to the following will explain the settings. This information is solely for use of Personnel and Authorized Dealers. No part of this publication may be copied, reproduced or distributed in any form without express written permission from. 2011. - 121 - *145PVDI4DSFFO Copies Select the number of coppiese by clicking on the Left arrow (goes down) or the Right arrow (goes up). Selecting the Number box will open a window that will allow the entering of the number of copies to be printed. Original Size The original size of the file to be copied can be detected automatically or entered manually. Selecting the button will bring up the following window. Use the scroll arrows on the right to browse the available sizes or scroll all the way to the bottom to select Custom size. This information is solely for use of Personnel and Authorized Dealers. No part of this publication may be copied, reproduced or distributed in any form without express written permission from. 2011. - 122 - *145PVDI4DSFFO Output Size The output size of the file being copied can be set to automatic or entered manually. Selecting the button will bring up the following window. Use the scroll arrows on the right to browse the available sizes or scroll all the way to the bottom to select Custom size. The percentage the original is being enlarged or reduced will be displayed to the right of the output size. Collated Set If a collated set is desired select the Start Collated Set button. Start scanning the original files and when finished select the Finish Collated Print Set button. This information is solely for use of Personnel and Authorized Dealers. No part of this publication may be copied, reproduced or distributed in any form without express written permission from. 2011. - 123 - *145PVDI4DSFFO Printer The Printer drop down arrow will allow the user to choose from multiple color printers (if set up) as well as make changes to the selected printers setting by clicking on the button. Selecting this button will bring up the following window. The following tabs are available: x Print options x Technical Label x Placement Note: these are the same settings from the initial setup of the color printer. This information is solely for use of Personnel and Authorized Dealers. No part of this publication may be copied, reproduced or distributed in any form without express written permission from. 2011. - 124 - *145PVDI4DSFFO Media The Media drop down will allow for the selection of the media to print the output on. Selecting the dropdown will bring up the following window. Note: calibrated medias will be in BLACK and un-calibrated medias will be in RED. Selecting an un-calibrated media will ask the user to calibrate the media prior to being able to use it. Selecting the button will bring up the following window. This will display the media currently in the printer and the ink levels. This information is solely for use of Personnel and Authorized Dealers. No part of this publication may be copied, reproduced or distributed in any form without express written permission from. 2011. - 125 - *145PVDI4DSFFO Filters The Filter drop down will allow for the selection of different filters that are configured and can give different output depending on the file being copied. The drop down will open the following window. Selecting the button will open the following window. From here users have the ability to make changes to: x Black Enhancement – Darkens or lightens the black lines. x Background Removal – Removes background from the final output. x Color Adjustment – adjust colors green to red and blue to yellow to affect final output. Brightness The brightness adjustment will affect overall brightness of the final output. Positive numbers for brighter output and negative numbers for darker output. This information is solely for use of Personnel and Authorized Dealers. No part of this publication may be copied, reproduced or distributed in any form without express written permission from. 2011. - 126 - *145PVDI4DSFFO Misc Tab On the Misc. Tab users have the ability to change settings that can affect the final output of the f i l e b e i n g c o p i e d ? T h ese settings are explained in this next section. This information is solely for use of Personnel and Authorized Dealers. No part of this publication may be copied, reproduced or distributed in any form without express written permission from. 2011. - 127 - *145PVDI4DSFFO Scanner The Scanner button displays the scanner that is currently connected to the Printer and the current status of the scanner. A green light shows the scanner is connected and working properly. If a scanner is not detected select the button to search for a scanner. Scan Preview Scan Preview allows the user to see the file prior to sending it to the printer. When Scan preview is selected the original will be scanned and then a preview will be displayed. Selecting OK will return to the main copy screen. Users also have the ability to copy a specific Area of Interest (AOI). There are two methods for selecting the AOI. This information is solely for use of Personnel and Authorized Dealers. No part of this publication may be copied, reproduced or distributed in any form without express written permission from. 2011. - 128 - *145PVDI4DSFFO The first method for setting the Area of interest is to touch the screen and hold and then drag a box around the specific area. This will highlight only the selected area and if Ok is selected at this point, will only scan this area. Clicking Reset AOI will return to the full screen view of the file. The second method for setting the Area of interest is to touch the screen and hold for a second or two. A menu will appear, from this window a specific paper size can be selected as the Area of interest. This will highlight the specific size selected, and if Ok is clicked at this point, only this area will be scanned Note: In both methods once the size is selected the user has the ability to drag the box around on the screen to set the position. This information is solely for use of Personnel and Authorized Dealers. No part of this publication may be copied, reproduced or distributed in any form without express written permission from. 2011. - 129 - *145PVDI4DSFFO Auto Start Auto Start on or off can be set here. Selecting the Check box will set it in the On position, when a piece of papers is detected the scanner will automatically feed the paper through making a copy. Auto Start off Auto Start on Automatic Deskew Turning on Automatic Deskew will allow for up to a 5 degree skew of the file to be automatically corrected on the final output. Deskew off Deskew On Label If used the Label feature will allow for the addition of a custom label on the lead edge of the final output. Selecting the white box will open the following window and allow for the entering of the label to be applied. Margins Margins may be applied to all four sides equally or with specific sizes. This information is solely for use of Personnel and Authorized Dealers. No part of this publication may be copied, reproduced or distributed in any form without express written permission from. 2011. - 130 - *145PVDI4DSFFO Paneling Tab Paneling will allow the user to create output that would be too big for the printer to print under normal conditions. For example if the desired output is to be 108”x72” wide this can be achieved by using paneling. In this example we have a 36”x24” original that will be paneled to 108”x72”. The paneling tab will look like this. The user can set the count given to specific values or let the software calculate the necessary panels. The height can also be controlled to make handling of the panels easier. Glueing marks and an overlap can also be applied to assist with lining up the panels for assembly. Print Queue Tab The print Queue will show the progress of the file being sent to the color printer. Once it has left the print queue it is at the printer to be printed. This information is solely for use of Personnel and Authorized Dealers. No part of this publication may be copied, reproduced or distributed in any form without express written permission from. 2011. - 131 - *145PVDI4DSFFO $PMPS4DBO5P'JMF"EWBODFE Color advanced software is available on all Printers with the exception of the 2420/9124/8124 printer. Please see the previous sections for instructions regarding Color Scan on the 2420/9124/8124. This information is solely for use of Personnel and Authorized Dealers. No part of this publication may be copied, reproduced or distributed in any form without express written permission from. 2011. - 132 - *145PVDI4DSFFO General Tab When Scanning to file users have various setting s that they can change to get the desired scan output and file format. This section will explain these settings. File Format Users have the ability to select from various file formats to save the files to. Using the arrows on the Right will allow for the scrolling up and down through the available formats Resolution Resolution can be changed from 72 DPI up to 600 DPI by using the left and right arrows. Clicking in the white box will bring up a new window and allow for the input of a specific resolution DPI. This information is solely for use of Personnel and Authorized Dealers. No part of this publication may be copied, reproduced or distributed in any form without express written permission from. 2011. - 133 - *145PVDI4DSFFO Destination When Scanning to file users can choose from different destinations to scan to. By default the system is set up to always scan to the local hard drive into the !DEFAULT mailbox. However this can be changed to a different location. The Drop down arrow will show all available mailboxes. Select the button to edit an existing mailbox. New mailboxes can be created by selecting the button to the right of the Drop down arrow. From this window two different types of mailboxes can be set up. They Are: x Local – Stored on the IPS Hard drive x SMB – Set up by an Administrator and stored on a network location or sent directly to a user’s workstation. If a local mailbox is to be set up enter the name to be displayed in the drop down list and Select OK to continue. The new Mailbox that was entered will be in the Destination window and ready to use. This information is solely for use of Personnel and Authorized Dealers. No part of this publication may be copied, reproduced or distributed in any form without express written permission from. 2011. - 134 - *145PVDI4DSFFO If a SMB Mailbox is to be set up an IT Administrator will need to provide the proper credentials and destination information for the following fields: Mailbox Name – The name to display. Workstation – The destination address. Domain - The domain name Shared Folder - the shared folder name. User Name – The user name used to log in. Password – the password used to log in. Once the information has been entered select the Test SMB button to confirm the connection. To remove a mailbox that is no longer needed select the mailbox to be deleted from the drop down list and then select the button This information is solely for use of Personnel and Authorized Dealers. No part of this publication may be copied, reproduced or distributed in any form without express written permission from. 2011. - 135 - *145PVDI4DSFFO File Name The file name can be set by the software or entered manually by clicking in the white box. Selecting the Increment button will turn on auto incrementation. Selecting the left or right arrows will allow the user to pick a specific starting point. Multipage Creating a multipage file can be accomplished by selecting the Check box for Start Multipage File. Once selected the text will change to Finish Multipage File, start feeding originals into the scanner and when finished select the Finish Multipage File to close the file. . This information is solely for use of Personnel and Authorized Dealers. No part of this publication may be copied, reproduced or distributed in any form without express written permission from. 2011. - 136 - *145PVDI4DSFFO Filters The Filter drop down will allow for the selection of different filters that are configured and can give different output depending on the file being copied. The drop down will open the following window. Selecting the button will open the following window. From here users have the ability to make changes to: x Black Enhancement – Darkens or lightens the black lines. x Background Removal – Removes background from the final output. x Color Adjustment – adjust colors green to red and blue to yellow to affect final output. Brightness The brightness adjustment will affect overall brightness of the final output. Positive numbers for brighter output and negative numbers for darker output. This information is solely for use of Personnel and Authorized Dealers. No part of this publication may be copied, reproduced or distributed in any form without express written permission from. 2011. - 137 - *145PVDI4DSFFO Misc Tab On the Misc. Tab users have the ability to change settings that can affect the final output of the file being copied? These settings are explained in this next section. This information is solely for use of Personnel and Authorized Dealers. No part of this publication may be copied, reproduced or distributed in any form without express written permission from. 2011. - 138 - *145PVDI4DSFFO Scanner The Scanner button displays the scanner that is currently connected to the Printer and the current status of the scanner. A green light shows the scanner is connected and working properly. If a scanner is not detected select the button to search for a scanner. Scan Preview Scan Preview allows the user to see the file prior to sending it to the printer. When Scan preview is selected the original will be scanned and then a preview will be displayed. Selecting OK will return to the main copy screen. Users also have the ability to copy a specific Area Of Interest (AOI). There are two methods for selecting the AOI. This information is solely for use of Personnel and Authorized Dealers. No part of this publication may be copied, reproduced or distributed in any form without express written permission from. 2011. - 139 - *145PVDI4DSFFO The first method for setting the Area of interest is to touch the screen and hold and then drag a box around the specific area. This will highlight only the selected area and if Ok is selected at this point, will only scan this area. Clicking Reset AOI will return to the full screen view of the file. The second method for setting the Area of interest is to touch the screen and hold for a second or two. A menu will appear, from this window a specific paper size can be selected as the Area of interest. This will highlight the specific size selected, and if Ok is clicked at this point, only this area will be scanned Note: In both methods once the size is selected the user has the ability to drag the box around on the screen to set the position. This information is solely for use of Personnel and Authorized Dealers. No part of this publication may be copied, reproduced or distributed in any form without express written permission from. 2011. - 140 - *145PVDI4DSFFO Auto Start Auto Start on or off can be set here. Selecting the Check box will set it in the On position, when a piece of papers is detected the scanner will automatically feed the paper through making a copy. Auto Start off Auto Start on Automatic Deskew Turning on Automatic Deskew will allow for up to a 5 degree skew of the file to be automatically corrected on the final output. Deskew off Deskew On Original Size The original size of the file to be scanned can be detected automatically or entered manually. Selecting the button will bring up the following window. Use the scroll arrows on the right to browse the available sizes or scroll all the way to the bottom to select Custom size. This information is solely for use of Personnel and Authorized Dealers. No part of this publication may be copied, reproduced or distributed in any form without express written permission from. 2011. - 141 - *145PVDI4DSFFO Output Size The output size of the file being scanned can be set to automatic or entered manually. Selecting the button will bring up the following window. Use the scroll arrows on the right to browse the available sizes or scroll all the way to the bottom to select Custom size. The percentage the original is being enlarged or reduced will be displayed to the right of the output size. Rotation Rotation of 90 degrees can be turned on for scanning. The original will view correctly in the real time preview and then be rotated after being scanned to file. This information is solely for use of Personnel and Authorized Dealers. No part of this publication may be copied, reproduced or distributed in any form without express written permission from. 2011. - 142 - *145PVDI4DSFFO Scan to E-Mail Another option when scanning is to scan directly to e-mail. This allows the user to send the scanned output direct to another person’s e-mail address. The ability to do this must be set up prior to using this functionality. This can be set up under the configuration button on the e-mail tab. The E-mail Tab has the following options that may be set up by the administrator: Maximum size – This is the maximum size allowed to be sent (color files can be very large). MAPI or SMTP – Setting for e-mail Test Settings – Test the entered settings E-mail Signatures – Standard, No signature or user defined signature. Note: Using the Area of Interest (AOI, see pages 139 and 140) to scan only the desired area can make the file size much smaller and easier to e-mail. This information is solely for use of Personnel and Authorized Dealers. No part of this publication may be copied, reproduced or distributed in any form without express written permission from. 2011. - 143 - *145PVDI4DSFFO $PMPS'JMFUP1SJOU x Click the “File-to-Print” button to print files stored locally on the printer. This includes Local Mailboxes and other folders on the hard drive. x Browse to the destination and select the file or files you want to print on the right side of the screen. Once selected click the OK button and the following window will open x File – Shows the name and location of the file being printed. Selecting the File Button will return to the mail File to Print selection screen. This information is solely for use of Personnel and Authorized Dealers. No part of this publication may be copied, reproduced or distributed in any form without express written permission from. 2011. - 144 - *145PVDI4DSFFO General Tab x Select the number of copies to be made along with setting any other options such as: o Original Size – Set by Actual Image (this is not changeable) o Output Size – Select from available sizes or enter manually o Printer – Select from drop down of available printers o Media – Select from drop down of calibrated medias o Brightness – Adjust brightness as necessary Note: All of these options are detailed in previous sections. Color Tab x Selecting the Color Tab will offer more color options such as: x Use Color management On (selected) – will use the selected ICC profile for either RGB or CMYK x Use Color Management Off (unselected)uses the colors embedded in the file. x Rendering intent –choose from four different rendering intents: absolute colorimetric, relative colorimetric, perceptual, and saturation This information is solely for use of Personnel and Authorized Dealers. No part of this publication may be copied, reproduced or distributed in any form without express written permission from. 2011. - 145 - *145PVDI4DSFFO Misc Tab Selecting the Misc Tab allows the user to preview the file to be printer prior to printing it. RIP Preview Scan Preview allows the user to see the file prior to sending it to the printer. When RIP preview is selected the original will be scanned and then a preview will be displayed. Selecting OK will return to the main copy screen. Users also have the ability to copy a specific Area Of Interest (AOI). There are two methods for selecting the AOI. This information is solely for use of Personnel and Authorized Dealers. No part of this publication may be copied, reproduced or distributed in any form without express written permission from. 2011. - 146 - *145PVDI4DSFFO The first method for setting the Area of interest is to touch the screen and hold and then drag a box around the specific area. This will highlight only the selected area and if Ok is selected at this point, will only scan this area. Clicking Reset AOI will return to the full screen view of the file. The second method for setting the Area of interest is to touch the screen and hold for a second or two. A menu will appear, from this window a specific paper size can be selected as the Area of interest. This will highlight the specific size selected, and if Ok is clicked at this point, only this area will be scanned Note: In both methods once the size is selected the user has the ability to drag the box around on the screen to set the position. This information is solely for use of Personnel and Authorized Dealers. No part of this publication may be copied, reproduced or distributed in any form without express written permission from. 2011. - 147 - *145PVDI4DSFFO Paneling Tab Paneling will allow the user to create output that would be too big for the printer to print under normal conditions. For example if the desired output is to be 108”x72” wide this can be achieved by using paneling. In this example we have a 36”x24” original that will be paneled to 108”x72”. The paneling tab will look like this. The user can set the count given to specific values or let the software calculate the necessary panels. The height can also be controlled to make handling of the panels easier. Print Queue Tab The print Queue will show the progress of the file being sent to the color printer. Once it has left the print queue it is at the printer to be printed. This information is solely for use of Personnel and Authorized Dealers. No part of this publication may be copied, reproduced or distributed in any form without express written permission from. 2011. - 148 - *145PVDI4DSFFO 1SJOU2VFVF Main Screen This information is solely for use of Personnel and Authorized Dealers. No part of this publication may be copied, reproduced or distributed in any form without express written permission from. 2011. - 149 - *145PVDI4DSFFO No. Name Function 1 Mode Selects the “Mode” of the system. (Current Jobs/Job History ) 2 User Name – Job # Display the User and any user info for the job ID. A job can be selected for other functions noted below. 3 Media Information Displays and allows change of the Width and Type. Shows the amount remaining per roll deck. (two or four rolls depended on system) 4 Status Shows the current status of a job and media selection. 5 Type Displays a copy or network print job 6 Total Displays the total number of prints and current number printed. 7 To Top After a job is selected (see #2) the position in the queue can be changed to the next job printed. 8 Delete After a job is selected (see #2) it can be removed from printing. 9 Pause Pauses printer to allow media change, etc. 10 Up/Down Scrolls through pages in the queue if so available. This information is solely for use of Personnel and Authorized Dealers. No part of this publication may be copied, reproduced or distributed in any form without express written permission from. 2011. - 150 - *145PVDI4DSFFO Operation Details The Job Info screen is used to view or manage the current copy or prints jobs on the 4820/9148/8148. Job List - Main Screen All jobs that are currently printing or are waiting to print are displayed in this area. You may view a jobs details, (or for other functions described further in this manual) by selecting the job from the list This information is solely for use of Personnel and Authorized Dealers. No part of this publication may be copied, reproduced or distributed in any form without express written permission from. 2011. - 151 - *145PVDI4DSFFO Requester Displays the “Name” or the “owner” of the job This information is obtained from fields within: a. Request b. Windows Driver c. AutoCAD Driver d. Or from the Accounting Fields on the copier when accounting is enabled Please see respective User Guides for detailed information An example screen from Request: Job Number Displays the “Job Number” or details regarding the job This information is obtained from fields within: a. Request b. Windows Driver c. AutoCAD Driver d. Or from the Accounting Fields on the copier / scanner when accounting is enabled An example from Copy / Scan Accounting: This information is solely for use of Personnel and Authorized Dealers. No part of this publication may be copied, reproduced or distributed in any form without express written permission from. 2011. - 152 - *145PVDI4DSFFO Status Displays the current “Status” of a job. Displays one of the following: a. Processing – job is currently printing b. On Hold – puts the job in the queue but will not print until a valid media type is applied c. Vellum – Media required - Vellum d. Film – Media required - Film e. Bond – Media required - bond Type Displays the source of the job, jobs can be sent from the network or come from the copier functions. For network jobs, the following symbol is displayed: For copy job the following symbol is displayed: Total Displays the number of prints, this includes: a. The quantity in each job b. The amount remaining, when a job is printing. This information is solely for use of Personnel and Authorized Dealers. No part of this publication may be copied, reproduced or distributed in any form without express written permission from. 2011. - 153 - *145PVDI4DSFFO Delete To remove a job from the Job list: a. Select the job to remove then select “Delete” Another Screen will appear. b. Press the Delete button c. The job will be removed from the list. This information is solely for use of Personnel and Authorized Dealers. No part of this publication may be copied, reproduced or distributed in any form without express written permission from. 2011. - 154 - *145PVDI4DSFFO Change Media Type in Print Job To change the media type in a job that may be in the job list: a. Select the job b. Job Information screen will appear. c. Press the Bond, Vellum or Film button to set the new media type for this job. This information is solely for use of Personnel and Authorized Dealers. No part of this publication may be copied, reproduced or distributed in any form without express written permission from. 2011. - 155 - *145PVDI4DSFFO To Top If a job in the list is required urgently and there are other jobs in the list prior to it, the job can be moved to the top of the queue. a. Select the job from the list b. c. d. e. f. g. h. i. j. k. l. b. Press the “To Top” button c. The list will be updated with urgent job to be printed next. This information is solely for use of Personnel and Authorized Dealers. No part of this publication may be copied, reproduced or distributed in any form without express written permission from. 2011. - 156 - *145PVDI4DSFFO Pause To pause all print jobs (to replace paper or perform another task that may require the printer to pause) press the pause button. Page Scroll Arrows may appear in the lower right corner of the screen to scroll through the pages of jobs. Please note that the total number of pages will be displayed as well as the current page. Media Information At the top of the Job List Screen is the region that displays the current media loaded in 4820/9148/8148. Please note that only rolls the printer has will be displayed. Amount Remaining Type Roll Deck Number Width a. Roll Deck Number d. Amount remaining: shows the quantity of media in ¼ steps. Example: Roll 1 is full Roll 2 is ¼ full Roll 3 is ¾ full Roll 4 is also full If no media installed then all bars would be empty e. Type: Shows the media type ( set by User ) Example: Roll 1 is Bond Roll 4 is Vellum This information is solely for use of Personnel and Authorized Dealers. No part of this publication may be copied, reproduced or distributed in any form without express written permission from. 2011. - 157 - f. *145PVDI4DSFFO Width: Shows the set width ( set by User ) Example: Roll 1 is 30” Roll 2 is 36” Roll 3 is 24” Roll 4 is 11” Change Media Information At the top of the Job List Screen is the region that displays the current media loaded in 4820/9148/8148. Please note that only rolls the printer has will be displayed. a. Press the “Roll Info Menu” to set media type and width in all roll decks g. Select the correct media width and type for each deck as required ( two roll model screen shown below ) h. Select OK to set i. The new settings will be noted on the top of the Job Info Screen This information is solely for use of Personnel and Authorized Dealers. No part of this publication may be copied, reproduced or distributed in any form without express written permission from. 2011. - 158 - *145PVDI4DSFFO Job History Job History can be used to call up and print jobs that were previously printed. By selecting a job from the Job History list, the job can be changed and resubmitted for printing. 1. To use the Job History select the Job Info Button and click on the Current Job button 2. The Job History Information will now be displayed on the screen and select the job to be edited. 3. Select the Edit Button to access the available options for the current selected job. This information is solely for use of Personnel and Authorized Dealers. No part of this publication may be copied, reproduced or distributed in any form without express written permission from. 2011. - 159 - *145PVDI4DSFFO 4. Users have the option to change Accounting information, Media type, Number of Originals and number of sets. Or to delete the job from History. 5. When all changes (if any) are complete select the Submit button to send the job to the printer. This information is solely for use of Personnel and Authorized Dealers. No part of this publication may be copied, reproduced or distributed in any form without express written permission from. 2011. - 160 - *145PVDI4DSFFO e f4DSFFO Configuration Screen Overview The software has the ability to display information about the system and allow detailed configuration or setting of the 4820/9148/8148 for Copy and Scan modes. It also has visual user guides which can assist the user in perform the functions of the 4820/9148/8148. To Enter the “Help – Configuration” screen press on the “?” on the bottom right of the 4820/9148/8148 user interface. Some of the configurable settings include: x Language x Sleep Timers x Energy Star - Mode x Reset Timer for Memory and Default Settings x Printer Density x Master Lead / Trail Edge x Default Mode x Units (Metric or Inch) x Default Original Size Mode x Quality / Scan Speed x Number of Rolls x Shading x Test patterns x Enable Options x Network IP settings Some of the above settings will require access by the system administrator, key operator or a certified service technician. This information is solely for use of Personnel and Authorized Dealers. No part of this publication may be copied, reproduced or distributed in any form without express written permission from. 2011. - 161 - *145PVDI4DSFFO “?” Screen – General No. Name Function 1 Home Returns to the Maine Home User Interface. 2 Information Region Displays meter counts and version number of the system. 3 Support / Supplies Displays the contact information for technical support and printer supplies. 4 User Guide Enters the Graphical Users Guides. 5 Configuration 1 Enters the settings and configurations modes. 6 Configuration 2 Enters the settings and configurations modes. 7 Print This Screen Prints the main “?” screen on the 4820/9148/8148 8 Service Password protected area for authorized technician use. 9 Hide/Show Version Hides or displays the software and hardware versions on the screen This information is solely for use of Personnel and Authorized Dealers. No part of this publication may be copied, reproduced or distributed in any form without express written permission from. 2011. - 162 - *145PVDI4DSFFO Main Screen - Details Information Region This area of the Screen includes meter counts and software versions Meter A Displays the total number of units run on the printer. This counter should match the hard counter on the right mid- front section on the printer. This unit is in square feet in North America and in Square Meters in all other countries (when printer set to metric mode). English mode: 1 count = one square foot Metric Mode: 1 count = one square meter NOTE If this counter differs from the hard counter on the printer contact your local service company! The units of this counter are taken from the internal processor of the printer and can be “reset” if care is not taken upon replacement of the DC Controller. Please see 4820/9148/8148 Service Manual for details on the setting procedures. In case of discrepancies: The hard counter shall be taken as the correct value! This information is solely for use of Personnel and Authorized Dealers. No part of this publication may be copied, reproduced or distributed in any form without express written permission from. 2011. - 163 - *145PVDI4DSFFO Total Run This meter counts the total number of linear meters run on the printer in all countries. One count = one linear meter NOTE The units of this counter are taken from the internal processor of the printer and can be “reset” if care is not taken upon replacement of the DC Controller. Please see 4820/9148/8148 Service Manual for details on the setting procedures. In case of discrepancies: The hard counter shall be taken as the correct value! Custom Meter This counter can be reset at any time to count the units in a particular job. The date of last “reset” is also displayed. This counter’s units are the same as Meter A. Press the reset button to start at “0” Scan Count The Scan Count displays the total count of the “imaged” area. If the original was larger than the saved imaged area only the saved imaged area is recorded. If the incorrect original size was selected the selected size will be recorded. Example: With a 24x36 original a. If the original was feed 36” wide with a 36” wide setting on the User Interface then 6 sq ft recorded. j. If the 36” wide original was scanned in at a 24” wide manual setting, the size will be recorded as 24x24 or 2 square feet. Scan Count- Temp This counter can be reset at any time to count the units in a particular job if so required. The date of last “reset” is also displayed. This counter’s units are the same as in Scan Count. Press the reset button to start at “0” This information is solely for use of Personnel and Authorized Dealers. No part of this publication may be copied, reproduced or distributed in any form without express written permission from. 2011. - 164 - *145PVDI4DSFFO Software version Displays the software IPS Touch screen version for technical support Firmware Version Displays the printer firmware version for technical support Printer EPROM Displays the current EPROM version installed in the Printer. IPS Number Displays the current IPS number, this is required for any optional upgrades to the 4820/9148/8148. Machine Serial Number Displays the 4820/9148/8148 hardware serial number, this is also located on the lower rear of the printer. NOTE If this serial number differs from the “hard coded” number on the lower rear of the printer contact your local service company! The hard code serial will be taken as correct in the case of any discrepancies. Supplier / Technical Support This region displays the contact information for 4820/9148/8148 supplies and service. This region should display your local Authorized dealers’ information, along with the ability to link directly to a preset up website. Pressing the button next to Website will display the Dealer’s configured website. This website can be custom tailored for the IPS by the Dealer and display information relevant to printing systems. This information is solely for use of Personnel and Authorized Dealers. No part of this publication may be copied, reproduced or distributed in any form without express written permission from. 2011. - 165 - *145PVDI4DSFFO Setting up the Dealer configured Website 1. From within the Service screen go to page 2. 2. Select the Website URL Button 3. Enter the Website to link to 4. Select Enter 5. The URL should now be displayed on the Website URL button 6. Select “OK” and click on the wrench in the top right corner to exit service mode. This information is solely for use of Personnel and Authorized Dealers. No part of this publication may be copied, reproduced or distributed in any form without express written permission from. 2011. - 166 - *145PVDI4DSFFO 7. Users may now click on the Website button and this will link them directly to the dealers configured website. 8. Select the Quit Button to exit the website. This information is solely for use of Personnel and Authorized Dealers. No part of this publication may be copied, reproduced or distributed in any form without express written permission from. 2011. - 167 - *145PVDI4DSFFO User Guides Press the User Guides button to gain access to the 4820/9148/8148 User Guides on the 4820/9148/8148. The User guides cover the most basic functions of the system operations including media / toner replacement on the 4820/9148/8148. For comprehensive details please consult this User Manual. a. Select this function when assistance is required b. Use the arrow buttons to move through the guide c. Press OK at any time to exit the guides This information is solely for use of Personnel and Authorized Dealers. No part of this publication may be copied, reproduced or distributed in any form without express written permission from. 2011. - 168 - *145PVDI4DSFFO $POGJHVSBUJPO This information is solely for use of Personnel and Authorized Dealers. No part of this publication may be copied, reproduced or distributed in any form without express written permission from. 2011. - 169 - *145PVDI4DSFFO 1BHF Copy Levels Sets the Copy levels for all copies made. Printer Density Sets the printer density for all Network Print jobs Image Enhancement Level Provides additional dots as needed to smooth curved lines and fill. Power Save Settings The 4820/9148/8148 incorporates timers to save power and place the printer in “cold sleep mode” to suit individual company production requirements. These timers can be used to automatically turn off the printer when the “office is closed”, for example overnight. Energy Star Settings – Energy Star compliant settings require that the printer goes to Warm Sleep after 15 minutes and into Cold Sleep after 90 minutes of inactivity. These are the factory setting and can be achieved by selecting “Reset”. There are two sleep mode settings to choose from, only one can be active at a time and these are locked by default in the Services settings. 1. Warm/Cold Sleep Timers – This timer can be set to put the printer into a warm/cold sleep mode after a predetermined period of inactivity. 2. Sleep Time – This time is used in conjunction with the computers clock and is used to put the Printer to sleep at a pre-set time and wake the printer back up at a pre-set time. This information is solely for use of Personnel and Authorized Dealers. No part of this publication may be copied, reproduced or distributed in any form without express written permission from. 2011. - 170 - *145PVDI4DSFFO Locked or Unlocked in “Service” If the Timers are locked they must first be unlocked in Service Menu (by a Certified Service Technician) Set the timers by pressing on the hour, minutes and AM/PM as needed. If the printer is required during the “sleep” period, it will “awake”, produce the prints and then “fall asleep“again, 15 minutes later. This information is solely for use of Personnel and Authorized Dealers. No part of this publication may be copied, reproduced or distributed in any form without express written permission from. 2011. - 171 - *145PVDI4DSFFO 1BHF This information is solely for use of Personnel and Authorized Dealers. No part of this publication may be copied, reproduced or distributed in any form without express written permission from. 2011. - 172 - *145PVDI4DSFFO Transfer Support There may be the case that the print image looks so light (not so clear) although the density setting is proper or higher than required. This kind of problem may occur when special media is used, because it is difficult to transfer the toner image fully onto it. Note: If available on your Printer Model. If unsure please contact technician. Low Room Temperature Low Temperature Mode can be validated to secure the fusing quality in the cold environment. The toner image may not be fixed firmly onto the paper if you make a copy or plot right after turning on the machine (in the morning especially) in very cold environment. But it is possible to avoid this kind of fusing problem by the Low Temperature Mode. Note: If available on your Printer Model. If unsure please contact technician. High Print Coverage High Coverage Setting Mode will be effective if the image density looks lighter when you print constant prints with high coverage. Note: If available on your Printer Model. If unsure please contact technician. Toner Supply Used with the 2420/9124/8124 and printer only. When turned on this will level the toner in the hopper. This can take up to 10 minutes. Note: If available on your Printer Model. If unsure please contact technician. This information is solely for use of Personnel and Authorized Dealers. No part of this publication may be copied, reproduced or distributed in any form without express written permission from. 2011. - 173 - *145PVDI4DSFFO Image Expansion Usually each print is compulsively provided with a trailing margin of 5-7mm long regardless of the image size. But the image can be printed even in the trailing margin area if you turn on the Full Image Mode. The interval between each sheet of print becomes longer than usual if you turn on the Full Image Mode, because it requires a cleaning operation between each sheet. Note: If available on your Printer Model. If unsure please contact technician. L/L Environment When the printer is used in a low temperature and low humidity condition (we call it “L/L Environment”), the printing media is likely to be creased or unfused in some areas. “L/L Environment Mode” may be able to fix this problem. If the L/L Environment Setting Mode is used the interval of prints becomes longer than usual to recover the temperature. The L/L Environment Mode works only in some specific cases, for example when the remaining volume of roll is very small or when a tracing paper is used. Note: If available on your Printer Model. If unsure please contact technician. H/H Environment When the printer is used in a high temperature and high humidity condition (we call it “H/H Environment”), the printing media from Roll 2 or Roll 4 is likely to be creased. “H/H Environment Mode” may be able to fix this problem. Note: If available on your Printer Model. If unsure please contact technician. This information is solely for use of Personnel and Authorized Dealers. No part of this publication may be copied, reproduced or distributed in any form without express written permission from. 2011. - 174 - *145PVDI4DSFFO Stacking For use with the only. This allows the user to decide how the prints will come out of the LIP Printer. There are three (3) methods for printing: Front Only – All prints will stack on the front (top) of the printer Back Only – All prints will stack out the back of the printer (optional stacker needed). Front & Back (default Front) – Prints can be printed to the front or back (optional stacker needed) Front will be default. Front & Back (default Back) - Prints can be printed to the front or back (optional stacker needed) Back will be default. Media QC Print Automatic Initial Cut known as “Dummy Print” is now added to the User Mode in Setting Mode 2 of the printer. This is not a feature set within the IPS. The service technician can set this mode after unlocking the key operation of the Sub UI (LCD Display/ OP Panel). Under a certain usage environment, the first print of a job sometimes would have a wrinkle or an image void if the prints are made with a roll media left in the deck for a long period. “Dummy Print” makes an automatic 24” initial cut before processing a job to obtain optimum image quality and feed balance in such conditions. Master Lead / Trail Adjustment The leading and trailing edges on scans and copies can be adjusted to best suit user requirements. This adjustment adds or removes image / media from all scans and copies and should be considered a default setting of such. This information is solely for use of Personnel and Authorized Dealers. No part of this publication may be copied, reproduced or distributed in any form without express written permission from. 2011. - 175 - *145PVDI4DSFFO 1BHF Media Zoom This is used to adjust the X, Y axis independently of each other when making a copy. Scanner Speed Scanner speed has two settings, Normal and Slow. When scanning old documents that may not in the best of shape, it may be necessary to slow down the 2300 scanner. Selecting Slow as the mode will scan the document at the selected DPI but scan it through at the 600 DPI speed. Scanner White Balance Performs a white balance on the scanner. Original white balance target is needed to perform this action. This information is solely for use of Personnel and Authorized Dealers. No part of this publication may be copied, reproduced or distributed in any form without express written permission from. 2011. - 176 - *145PVDI4DSFFO 1BHF Roll Adjustment 4820/9148/8148 Roll Adjustment allows the user to shift the image 5mm left or right. This function may be used if a roll of media is not cut precisely to the specified width and allows these types of rolls to have correct image placement. This information is solely for use of Personnel and Authorized Dealers. No part of this publication may be copied, reproduced or distributed in any form without express written permission from. 2011. - 177 - *145PVDI4DSFFO $POGJHVSBUJPO 1BHF Reset Timer 4820/9148/8148 systems can be configured to revert to the Log-In screen after a predetermined period of inactivity. From this screen, users must enter a username and password before use (if required by system administrator). English or Metric Units Set the system from “English Mode” to “Metric Mode” by pressing the English or Metric button. This will affect the entire 4820/9148/8148 System, including Scan, Print and Copy. Please note that the printer must be set to the correct size mode for proper print function. This information is solely for use of Personnel and Authorized Dealers. No part of this publication may be copied, reproduced or distributed in any form without express written permission from. 2011. - 178 - *145PVDI4DSFFO Default Mode Sets which screen will be the default, Scan, Copy or Job Info Mode dependent of the installation environment requirement. Fold Sets the system to accept fold parameter loaded by Request and enables the pull downs on the screens. Please contact your local certified service technician for configuration of this feature. Cut Sheet Enables / Disables the cut sheet function, which may not be required in certain installation. Interrupt Allows the Interrupt button to function in Copy Mode a. Enabled = allows the user to pause all network print jobs to allow copies to be printed first b. Disabled = all copy jobs will be placed in the queue as the order they are received within c. any network print jobs. Collate Allows for the collated printing of files in normal or reverse file order 1, 2, 3 or 3, 2, 1. This information is solely for use of Personnel and Authorized Dealers. No part of this publication may be copied, reproduced or distributed in any form without express written permission from. 2011. - 179 - *145PVDI4DSFFO Reset Job Info If the current job in the Job Info queue is printing unsuccessfully, the user can manually cancel the file within that job. This is done by going into the “Help/Info” screen and then to “Configuration”. Select the “Reset Job Info” button. An identification sheet will print out and the print queue can now continue printing. 1BHF Planwell Easyprint/Abacus Planwell EasyPrint and Abacus are ARC applications that have been integrated with the IPS software. These applications need to be present for use. Color File Compression (Direct Color Only) This feature is off by default but when turned on will apply to all scanned color files and reduce the output file size. Compression of 0 to 200 % is selectable, the larger the compression the larger the file size created. This information is solely for use of Personnel and Authorized Dealers. No part of this publication may be copied, reproduced or distributed in any form without express written permission from. 2011. - 180 - *145PVDI4DSFFO 1BHF Reboot IPS This button will restart the IPS, when the system is not responding / printing correctly. Current Time Set the current time using the arrow buttons. Please note that the Time Zone may need to be set. Please contact your Local Dealer to set the correct Time Zone. Monochrome Quality Settings If the Quality setting have been changed and the default settings are needed, clicking on “Restore to Default” will set the quality Settings back to Default. Test pattern A variety of test patterns may be printed from the 4820/9148/8148 operator panel on an on-demand basis. The following four predefined test patterns are available to assist in pen table selection and overall quality verification. 36” x 60” tif – Used to test long printing and calibrate scan/copy operations 17” x 11” plt – Used to calibrate lead/trail edge settings 36” x 24” plt – Used to calibrate lead/trail edge settings 36” x 24” hprtl – Used to test output of mixed raster and vector data This information is solely for use of Personnel and Authorized Dealers. No part of this publication may be copied, reproduced or distributed in any form without express written permission from. 2011. - 181 - *145PVDI4DSFFO Options Selecting the Options button will allow the enabling of options on the IPS. Contact your local dealer for more details and for the KeyCodes for your system. The Options that can be purchased are: x Scan to File x Network Printing x Network Printing , PDF & PS x Color Copy x Color Scan – To - File Select the “Enter the New Keycode” button and then enter in the keycode for the options purchased. Note: Color Copy is available separately as an option on the 4820/9148/8148 Model printer only. NOTE Incorrect codes will prevent your system from functioning. Please do not enter or modify the current code without permission. The codes may be locked and access may only be granted by a certified service technician. This information is solely for use of Personnel and Authorized Dealers. No part of this publication may be copied, reproduced or distributed in any form without express written permission from. 2011. - 182 - *145PVDI4DSFFO Network When setting up the Printer on the Network at the site the IPS comes already pre-configured for DHCP (Dynamic Host Configuration Protocol) and if plugged into the network will automatically receive an IP Address from the DHCP Server. If the Site is not using a DHCP server to dish out IP address it will be necessary to assign a Static IP Address to the Printer. The onsite network administrator will need to supply all of the valid information for the IP Address scheme that will be applied to the Printer. Default Example Static IP Example NOTE Incorrect settings will prevent your system from functioning. Do not enter or modify without your Network Administrators permission. Access to modify may be locked and may only be granted by a certified service technician. This information is solely for use of Personnel and Authorized Dealers. No part of this publication may be copied, reproduced or distributed in any form without express written permission from. 2011. - 183 - *145PVDI4DSFFO 1BHF Language Set the 4820/9148/8148 Operator Panel into a desired language. The system will then need to be rebooted and the system will come up with the selected language. 0UIFS#VUUPOT Service This button is used by a certified service technician to access the service functions of the IPS. It is password protected to prevent unwanted changes to the 4820/9148/8148. Print This Screen This button will print the main “?” screen. This includes the meter counts, versions, etc. This can be useful for troubleshooting or for record keeping. Hide/Show Versions Selecting the “Hide Versions” button will hide all of the technical information displayed on this screen that is not necessary for normal operation. Selecting the “Show Versions” button will display all of the technical information displayed on this screen that an Administrator or technician may need if servicing the printer. This information is solely for use of Personnel and Authorized Dealers. No part of this publication may be copied, reproduced or distributed in any form without express written permission from. 2011. - 184 -