1
User manual
The multi-functional software platform for
professional label printing
Version 4.0
Welcome to the platform!
With Labels Platform 4 you have reached the highest level of label design .
Overview:
Like standing on the highest platform of an observation tower, LP4 enables you to look
over the surrounding field of all other products of the Platform series, to solve any of your
tasks in the printing-, labeling-, automation- or visualization area. You have not bought an
isolated solution, but one component of a future-safe modular system.
Highlites of Labels Platform 4
Compatible with Windows XP / Vista / Windows 7 / Windows 8 (x86 and x64)
32 BIT Unicode MDI (Multiple Document Interface) application, network capable
Supports multi languages (german / english)
Fully compatible to LP3 layout files, import of LP2 layout files is possible
Configurable toolbars and keyboard shortcuts for often used tasks
Smooth zooming, Mouse wheel support
Label- and graphic preview in the File Open dialogs
User management with password security
Direct printer connections: serial, parallel, TCP/IP network, USB
Floating text fields
Support of printer- and true-type-fonts (Unicode)
Support of 1D/2D printer- and graphical barcodes
ODBC database interface with full Unicode support
Docking windows with lists for label fields, variables, properties and printers
Free line drawing, all angles supported
Graphic import (bmp, wmf, tif, pcx, gif, jpg and many more)
Graphics embedded in the layout file or linked with external graphic files
Curved or free rotated textfields
Free rotated graphic fields
Overview of all printer states and direct communication with printers using the integrated terminal
window
Powerful variables manager, GS1/EAN128 content manager and Risk/GHS text manager
Variables: constant, user input, time/date, formula, counter, printervars, fileimport (xml/ini/text),
database- and table queries, GHS texts
Selectable object properties (printable/not printable, movable/not movable, groups/levels)
Print conditions for each label object
Remote controlling of print jobs by OLE using for example Visual Basic or MSExcel
Integrated Spool Server: connect the label printers to one PC, and use them with all other PCs in your
network as well; Windows Service
Integrated OLE objects for displaying/printing data of other applications like MSWinWord or MSExcel
LP4 Commander for creating own user interfaces, including OPC Server support
Comfortable Printjob Manager for defining lists of future print jobs
Direct support of the following printer languages:
J-Script (CAB printers)
ZPL (Zebra printers)
Fingerprint 6.1 oder higher (Intermec / UBI printers)
Page 2
Datamax / Fargo Control Code Language
EasyPrint (Carl Valentin / EasyPrint printers)
Unicontrol (EasyPrint printers)
EPL (Eltron compatible printers)
Sato SBPL (Sato compatible printers)
SmartgraphCOM (Alltec Laser systems)
AZPrintEngine (Atlantic Zeiser)
bbScript (HAPA RedCube)
Other printer types can be used by installing vendor specific Windows printer drivers.
Page 3
Contents
1 Available versions....................................................................................................................... 7
1.1 Labels Platform 4 - PREMIUM.................................................................................................. 7
1.2 Labels Platform 4 - STAR......................................................................................................... 7
1.3 Labels Platform 4 - ECO........................................................................................................... 7
1.4 Labels Platform 4 – Print version............................................................................................ 7
1.5 Labels Platform 4 – Demo version.......................................................................................... 7
1.6 Additional modules.................................................................................................................. 7
2 Installation................................................................................................................................... 8
2.1 Versions using a local hardlock dongle :............................................................................... 8
2.2 Versions using a Dongle Server :........................................................................................... 8
2.3 Windows Vista/Windows 7/Windows 8 and/or restricted user priviliges............................. 9
3 Using Labels Platform 4............................................................................................................ 11
3.1 Introduction............................................................................................................................ 11
3.2 Starting the application.......................................................................................................... 12
3.3 Menu........................................................................................................................................ 13
3.3.1 Menu File............................................................................................................................... 13
3.3.2 Menu Edit.............................................................................................................................. 31
3.3.3 Menu View............................................................................................................................. 35
3.3.4 Menu Mode........................................................................................................................... 42
3.3.5 Menu Tools............................................................................................................................ 45
3.3.6 Menu Addons........................................................................................................................ 52
3.3.7 Menu Window........................................................................................................................ 58
3.3.8 Menu Help............................................................................................................................. 58
4 Label objects............................................................................................................................. 59
4.1 Generic.................................................................................................................................... 59
4.2 Lines........................................................................................................................................ 59
4.2.1 Description - Line................................................................................................................... 59
4.2.2 Properties - Line.................................................................................................................... 59
4.3 Rectangles.............................................................................................................................. 60
4.3.1 Description - Rectangle......................................................................................................... 60
4.3.2 Properties - Rectangle........................................................................................................... 60
4.4 Crosses................................................................................................................................... 61
4.4.1 Description - Cross................................................................................................................ 61
4.4.2 Properties - Cross.................................................................................................................. 61
4.5 Circles..................................................................................................................................... 62
4.5.1 Description - Circle................................................................................................................ 62
4.5.2 Properties - Circle.................................................................................................................. 62
4.6 Graphics.................................................................................................................................. 63
4.6.1 Description - Graphic............................................................................................................. 63
4.6.2 Properties - Graphic.............................................................................................................. 65
Page 4
4.7 OLE objects............................................................................................................................ 66
4.7.1 Description – OLE object....................................................................................................... 66
4.7.2 Properties – OLE object........................................................................................................ 67
4.8 Deadzones.............................................................................................................................. 67
4.8.1 Description – Deadzone........................................................................................................ 68
4.8.2 Properties – Deadzone.......................................................................................................... 68
4.9 Barcodes................................................................................................................................. 68
4.9.1 Description – Barcode........................................................................................................... 68
4.9.2 Properties – Barcode............................................................................................................. 69
4.10 Texts...................................................................................................................................... 72
4.10.1 Description – Text................................................................................................................ 72
4.10.2 Properties – Text................................................................................................................. 72
4.11 Special texts......................................................................................................................... 75
4.11.1 Description – Special text.................................................................................................... 75
4.11.2 Properties – Special text...................................................................................................... 75
5 Label variables.......................................................................................................................... 81
5.1 Generic.................................................................................................................................... 81
5.2 Constant Variable................................................................................................................... 83
5.2.1 Description – Constant variable............................................................................................. 83
5.2.2 Properties – Constant variable.............................................................................................. 83
5.3 Input Variable.......................................................................................................................... 83
5.3.1 Description – Input variable................................................................................................... 83
5.3.2 Properties – Input variable..................................................................................................... 84
5.4 Time/date Variable.................................................................................................................. 85
5.4.1 Description – Time/date variable........................................................................................... 85
5.4.2 Properties – Time/date variable............................................................................................. 85
5.5 Formula Variable.................................................................................................................... 86
5.5.1 Description – Formula variable.............................................................................................. 86
5.5.2 Properties – Formula variable................................................................................................ 86
5.5.3 Formula commands – Formula variable................................................................................ 87
5.6 Counter Variable..................................................................................................................... 93
5.6.1 Description – Counter variable.............................................................................................. 93
5.6.2 Properties – Counter variable................................................................................................ 93
5.7 Printer Variable....................................................................................................................... 95
5.7.1 Description – Printer variable................................................................................................. 95
5.7.2 Properties – Printer variable.................................................................................................. 95
5.8 File Variable............................................................................................................................ 96
5.8.1 Description – File variable..................................................................................................... 96
5.8.2 Properties – File variable....................................................................................................... 96
5.9 Table Variable......................................................................................................................... 98
5.9.1 Description – Table variable.................................................................................................. 98
5.9.2 Properties – Table variable.................................................................................................... 98
5.10 Database Variable............................................................................................................... 100
5.10.1 Description – Database variable........................................................................................ 100
5.10.2 Properties – Database variable......................................................................................... 100
5.11 External Variable................................................................................................................ 101
5.11.1 Description – External variable.......................................................................................... 101
5.11.2 Properties – External variable............................................................................................ 101
5.11.3 LP4 remote control............................................................................................................ 102
5.12 RS Variable......................................................................................................................... 104
5.12.1 Description – List/GHS variable......................................................................................... 104
5.12.2 Properties – RS variable.................................................................................................... 104
Page 5
6 The LP4 Print Tool................................................................................................................... 106
6.1 Generic.................................................................................................................................. 106
6.2 Usage.................................................................................................................................... 106
7 The LP4 Printjob Manager...................................................................................................... 107
7.1 Generic.................................................................................................................................. 107
7.2 Usage.................................................................................................................................... 107
8 LP4 Remote.............................................................................................................................. 109
8.1 Generic.................................................................................................................................. 109
8.2 Usage.................................................................................................................................... 109
9 LP4 Format manager............................................................................................................... 114
9.1 LP4 Formatmanager Intermec Standard............................................................................. 114
9.2 LP4 Formatmanager Zebra Standard.................................................................................. 116
9.3 LP4 Formatmanager Intermec Multi-Boot........................................................................... 117
10 LP4 Productmanager Standard DB...................................................................................... 119
10.1 Generic................................................................................................................................ 119
10.2 Configuration...................................................................................................................... 119
10.3 Usage.................................................................................................................................. 124
11 LP4 Spool Server................................................................................................................... 125
11.1 Generic................................................................................................................................ 125
11.2 Configuration...................................................................................................................... 125
11.3 Usage.................................................................................................................................. 126
12 Using VBScript Programs..................................................................................................... 127
12.1 Overview............................................................................................................................. 127
12.2 The additional LP4 VBScript commands.......................................................................... 127
13 Specific printer settings/informations................................................................................. 129
13.1 Intermec/UBI printers......................................................................................................... 129
13.2 Zebra printers..................................................................................................................... 132
13.3 CAB printers....................................................................................................................... 132
14 License Agreement............................................................................................................... 134
Page 6
1 Available versions
1.1 Labels Platform 4 - PREMIUM
all in this document listed features including the options Format Manager, Product Manager and LP4
Remote, GHS list manager/variables. The option “LP4 Commander Editor” needs an additional license.
1.2 Labels Platform 4 - STAR
all listed features without the special options Format Manager, Product Manager, LP4 Commander
Editor, LP4 Remote or GHS/list text manager/variables
1.3 Labels Platform 4 - ECO
all listed STAR features, but no circles, crosses, deadzones, special texts, OLE objects
limited variables, only available:
Constants, User inputs (scanner), Counters, but without variable values
no user management
no database functions
not usable as LP4 Spool Server
1.4 Labels Platform 4 – Print version
The print-only application for labels created with the ECO / STAR and PREMIUM versions
1.5 Labels Platform 4 – Demo version
1.6
Same features as the STAR version (inclusive GHS text support), but it is not possible to save label files,
and all print jobs will get distorted
Additional modules
LP4 Formatmanager: storing of labels, graphics and textdatabases directly into the printer, including
customized printing behaviours
LP4 Produktmanager : customized applications for production specific tasks
LP4 Remote : starting of print jobs directly on CAB and Intermec printer displays – the PC acts as label
server, starting the label download on the external printer demand
LP4 Spool Server: share your label printers by network
LP4 Commander: free configurable user interface for production tasks
Additional modules and connections to existing systems are possible.
Page 7
2 Installation
2.1
Versions using a local hardlock dongle :
The installation of Labels Platform 4 is done by the setup application on the Labels Platform 4 installation
CD. If you have a full (ECO, STAR, PREMIUM) version of Labels Platform 4, you have to put the delivered
hardlock dongle on the parallel port / USB port (depending on the dongle type) of your PC, or get a
Computer license from BBK, before you start the installed software. If you start the LP4 Editor, it will ask you
to enter your LP4 serial number to unlock your license’s functionality. You can also enter the serial number
by starting the Serial number tool from the LP4 menu, for example if you want to use different dongles – and
therefore serial numbers - on the same PC: for each dongle you have to enter the related serial number
once.
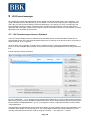
2.2
Versions using a Dongle Server :
The Dongle Server can be used on PCs connected to a local TCP/IP network.
Just one PC in that network will actually have a connected hardlock dongle, all other PCs will ask this PC for
a free LP4 license at startup time. The Dongle Server can hold up to 127 licenses, an unlimited Dongle
Server is also available.
Installation: Each PC needs a working connection to the local network, and an individual IP address or DNS
name.
The PC acting as Dongle Server needs the local parallel / USB port dongle (or Computer license), and an
installed „LP4 Dongle Server“ software. The Dongle Server software can work as an application (= the
network licenses are only available if the software has been started), or it can work as a Windows service (=
the network licenses are available as soon as Windows has been started, even if no user has logged in).
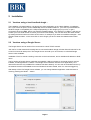
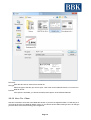
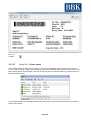
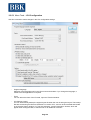
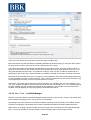
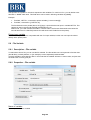
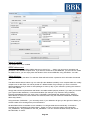
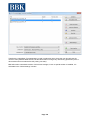
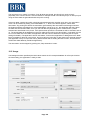
After startup of the LP4 Dongle Server software, you can change between application mode and service
mode by pressing the “Mode…” button:
Page 8
If you have just one license serial number (for example 5 PREMIUM licenses), you simple enter this number
on each PC (server and client PCs alike).
If you have multiple different license numbers for your Dongle Server (for example 3 STAR licenses, 1
PREMIUM and 5 ECO licenses), you have to input all license numbers by pressing the “Licenses…” button.
On each client PC you have to enter just the serial number you want to use with this client.
As long as the Server PC is running the Dongle Server application/service (and, of course, as long as it is
connected to the network), a client can connect to that PC and ask for an unused license. If there are enough
free licenses on the server, the LP4 software is allowed to start. If there are no free licenses, LP4 will start as
demo version only. Each time when a client closes the LP4 application, the license will get free again, and
another client can connect to the server.
Important: if you are using a network firewall, you have to enable TCP telegrams on port 40097. Otherwise
the LP4 Dongle Server will not work correctly.
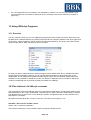
On the client PC you have to start the LP4 Dongle Client application before you can start any other LP4
application. You can setup the Dongle Client to automatically start other LP4 applications.
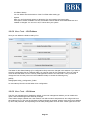
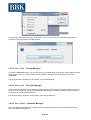
On first startup of the Dongle Client, you have to define the IP address of the Dongle Sever PC. Press the
“Change…” button, enter the IP address, and press “OK”. From now on the Dongle Client will start minimized
in the Windows System tray. A green tray symbol will show the user that a license is granted, a red tray
symbol means that no license is available.
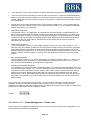
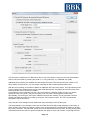
2.3 Windows Vista/Windows 7/Windows 8 and/or restricted user priviliges
For the LP4 installation you have to be logged on as a Windows administrator. After installation you can of
course work as a more restricted Windows user.
A normal Windows user cannot save application files (like the layout files) in the “C:\Program Files” folder. If
you install LP4 in this folder, it will save such user files in the “My Documents” folder instead. Also
configuration files will be saved into the Windows “Programdata” instead of the LP4 installation folder.
You can also configure different folders for your layout, graphics and data file, for example some global
networking folders.
Page 9
The folder settings can be changed in the LP4 Editor, menu “Tools -> LP4 folders”.
If you do not install LP4 in the “C:\Program Files” (for example into the default path “C:\LP4”), all layouts,
graphics and data files will be stored into sub folders of your installation path.
Page 10
3
3.1
Using Labels Platform 4
Introduction
LP4 is following the design guides for MSWindows applications, so many functions are easy to use even for
users who have not worked with LP4 before.
For example LP4 supports Drag & Drop, right mouse clicks are opening context menus, standard MDI
(Multiple Document Interface) is used for handling multiple label design windows, and an ‚undo‘ function
does help to correct user actions.
The software offers all kind of help functions: pressing F1 will show the online-help, each toolbar button will
show a small textinfo (tool tips), and the statusbar will also show a button/menu description.
Additional windows like the infobar or the measuring borders will show detailed informations at one glance,
other bars and symbols will help you to change the editor window (quick rotation in 90° steps and/or smooth
zooming).
The basic handling for creating labels is easy to learn (select an object type, and left mouse click to create
the object; in select mode you can move/resize objects; right mouse click will open the context menu for
showing the object properties).
Advanced users are able to use the powerful LP4 variables to fulfill even the most complex tasks concerning
the label objects.
Page 11
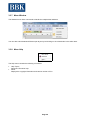
3.2
Starting the application
You can start the LP4 application by double-clicking its desktop icon. At startup time the available license
(Dongle or Computer-ID) is tested. If no license is found, the application will start in DEMO mode (no saving
possible, and print jobs will be slightly distorted).
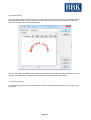
After the LP4 splash screen vanishes, you can see the editor window and a new empty label. All symbol bars
and docking windows will be repositioned at the same place as your last LP4 session.
Now you can edit/change/save the new label, or open an exiting one:
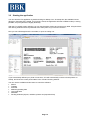
If you have already defined your printer connections, LP4 will automatically connect to those printers on
startup, and show the current printer states in the “Printers” docking window .
You can use the available window items to control the software:
Menus
Toolbars
Zoombar
Measuring/rotating bars
Layout edit area
Statusbar
Docking windows (objects, variables, printers and properties lists)
Page 12
3.3
Menu
The menu can be controlled by mouse or keyboard (pressing the ALT key and one of the underlined chars
will activate the proper menu item).
Menu File
Menu Edit
Menu View
Menu Mode
Menu Tools
Menu Addons
Menu Windows
Menu Help
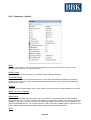
3.3.1 Menu File
You can find the following functions in the File menu:
New
Creates a new label
Open
Opens an existing label
Close
Closes the currently active label
Save
Saves a label using its current filename
Save as
Saves a label using a new filename
Import
Imports one LP2 or multiple LP3/LP4 labels
Page 13
Export
Exports multiple LP4 label files
Version history
Shows version infos of the current label (if activated)
Printer Management
Define new printers, change existing printer connections
Printer settings
Change the settings of the currently active printer of the current label
Print
Prints the active label
Change user
Changing the current user (if user management is active)
Exit
Exits Labels Platform 4
3.3.1.1 Menu File - New
Use this command to create a new label edit window in Labels Platform 4.
A new window showing an empty label will get created. You can change the label size (and other properties)
by left-clicking the label area to make the label properties active in the property list.
Short cut
Toolbar:
Keyboard:
STRG+N
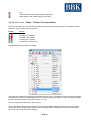
3.3.1.2 Menu File - Open
Use this command to open an existing label file in a new edit window. You can open multiple windows at
once. With the „Window“ menu you can switch between all available label edit windows.
Short cut
Toolbar:
Keyboard:
STRG+O
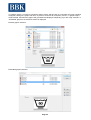
File Open window
This window appears when you activate File Open. You can select the label file with this window:
Page 14
File name:
Enter the file name or select it from the file list.
File type:
Select the type of the files you want to open: .LBF is the old LP3 label file format, .LP4 is the LP4
label file format.
Preview:
If this option is activated, you will see a small preview picture of the selected label file.
3.3.1.3 Menu File - Close
Use this command to close the active label edit window. If you have changed the label, LP4 will ask you if
you want to save the new label file before closing. If you close a window without doing a save, all changes
you have done since the last saving point will get lost.
Page 15
3.3.1.4 Menu File - Save
Use this command to save the active label using its current filename. If the label has no old filename, you will
get asked for a filename to save. If you want to save the label with a new filename, you can also select the
„Save as“ menu item.
Short cut
Toolbar:
Keyboard:
STRG+S
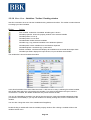
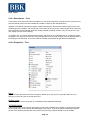
3.3.1.5 Menu File – Save as
Use this command to save the active label using a new filename. Labels Platform 4 will show the standard
MSWindows save dialog window, where you can enter the new filename.
To save a label using its current filename, you can also use the Save menu item.
The Save As dialog window
The Save As windows allows you to enter a new filename and a new directory:
Filename
Enter the new filename. If you don’t apply a LP4 file extension, the software will automatically add
this extension to the filename.
Drives
Select the drive you want to save to.
Directories
Select the directory you want to save to.
Network...
Use this button if you need to connect to a network drive.
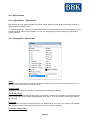
3.3.1.6 Menu File – Import
Use this command to import LP2 label files / exported LP3/LP4 label files.
3.3.1.7 Menu File – Export
Use this command to backup existing LP4 labels, or to easily transfer them to another LP4 system. The
Export file (LBY) can contain multiple LP4 label files, and all needed graphic files will get exported as well.
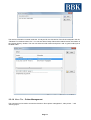
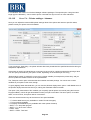
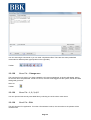
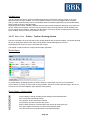
3.3.1.8 Menu File – Version History
If the LP4 Version Control is activated in the LP4 configuration (menu “Tools”), each time the user wants to
save the label file the following window apeears. Here the user can enter a version information comment.
Page 16
The version information is saved inside the .LP4 layout file, the old version of the file is backuped in the file
“Filename.LP4.Versionnumber.LPV”. You can see all the backup files and the related version information in
the “Version History” window. The user can select an older version and press “Load” to get this old layout in
the label editor.
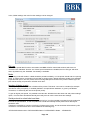
3.3.1.9 Menu File – Printer Management
This command can be used to access the functions “Show printer management”, “New printer…” and
“Printer groups”.
Page 17
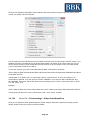
3.3.1.10
Menu File – Printer Management – Define new printer
Inside the “Printer Management” docking window all LP4 printers are defined and managed. You can only
use printers with LP4 which have been defined here. Depending on the printer type and the connection type
(RS232, USB, network, LPT, file) several settings need to be done.
The printer definition settings are global for all labels. The defined printers also have additional settings, like
the print orientation or print speed. Those settings are managed for each label separately, by the “Printer
settings” function. If you have several similar printers, you can also put them into the same “printer group”, all
printers in a group will have the same label settings.
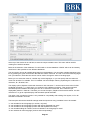
The “connection properties” are the global printer settings, used by all labels:
The following connection properties are available:
“Write timeout“: this is a timeout value which will be used by the internal LP4 spooler. Each time when a
printer will block the data receiving (while downloading new labels), LP4 will wait up to the specified time
until it reports an error to the user. On some special tasks (for example when downloading exotic
counters and a high batch count to a Zebra printer), it’s necessary to increase the default 5 seconds wait
time to a higher value (like 60 seconds), to avoid printer problems.
Page 18
“Sync Date/Time”: the current PC date & time will be transferred into the printer with each new print job.
“Job start“: Some printers will offer the choice to add a new print job to a queue (and start downloading
after the current job has been finished) or to cancel the currently running job and download the new one
instead. Please notice that the job queue may not work properly in unidirectional communication modes
on some printers.
Ask file name on print start / default file name: if the connection mode is “file”, you can define with this
properties if the user is asked on each print job where to save the file to, or you can define a default file
name to save without user interaction.
CAB specific properties:
„Check buffer full (%)“: on CAB printers, it is possible to improve the speed of variable label jobs (= a
print job which contains different variable content on each label, like address labels). If a “Check buffer
full” % value bigger 0 is given, LP4 will check during the data transfer, if it can download the next label
contents as well, until the buffer has reached the given level. Please note: all transferred labels will be
removed from the LP4 printing queue, therefore LP4 cannot show those print jobs in the printer
state/printer job list anymore.
Zebra specific properties:
“Ignore Format State” (yes/no): In some Zebra firmware versions you have to set this option to “yes”,
otherwise LP4 cannot detect (in bidirectional communication mode) if the print job has been completed.
Some Zebra firmware revisions have problems with aligned variable text fields (Fieldblock) or do not
support EAN128 barcodes directly. In such cases you can enable the related Firmware corrections. The
property “Transfer combined graphics” is telling LP4 to put all graphical elements of a label into a big
graphic.
Sato specific properties:
„Protocol: Status 3 / Status 4“: in case of Sato printers, you have to configure „Status 3“ or „Status 4“ as
communication protocol, otherwise LP4 cannot establish a bidirectional connection. In LP4, you also
have to select „Status3/Status4“ in the serial port configuration.
Windows printer specific properties:
You can define if you want to emulate a certain DPI setting, if you want to force a black/white print out or
if you want the printer internal “copy” function if printing more than one label. With some printer you have
to activate the “Use printer device context” option to print a label, please note that in this case the text
fields may look slightly differently (since the printer can replace the used Windows fonts with printer
internal fonts). You can also redirect the print data to the Windows default printer, which can be useful if
the printer is not available, or if you have some office environment, where every user should print on a
different printer.
If you want to use a LP4 Spool Server connection, you do not have to specify the specific connection
properties, instead you enter the IP address of the LP4 Spool Server PC. Please note that all other
connection port settings need to be indentical to the port settings of the Spool Server printer you want to use.
Please look in a later “Spool Server” chapter for details.
Toolbar:
3.3.1.11Menu File – Printer Management – Printer fonts
Some printers can use additional internal fonts. You can tell LP4 with the “printer fonts” configuration, if you
have activated such additional internal fonts:
Page 19
Toolbar:
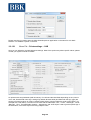
3.3.1.12
Menu File – Printer Management – Printer groups
If you want to use printer groups (= similar printers should use the same label settings), you can define such
groups in the following window:
Page 20
You can define a group by pressing the “New group” button and entering a group name. You can change the
name later on by doing a single click on the group name. You can assign printers to this group by selecting
the printer in the left list, and pressing the “>” button. The “<” button can be used to remove a printer from a
group. If you want to remove the complete group, you can use the “Remove group” button, all printers will
now have individual settings for each label.
Toolbar:
3.3.1.13
Menu File – Printer settings
Label printers have certain options to control the print results. You can change the settings according to your
label, all the settings will get saved inside the label file, and restored if you load the label again.
Some dialog windows (for example the LP4 Print dialog window) will also allow direct access to the settings.
Short cut
Toolbar:
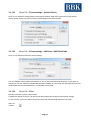
3.3.1.14
Menu File – Printer settings - Zebra
Here you can adjust the Zebra printer settings. Most of the options are Zebra-specific values, please consult
your printer manual for details. Special options like „Use additional printer files“ and „Create ZBI code“ will
only be needed with special custumized printing solutions (for example to connect a scanner to the printer, or
for permanent counters).
The option „Use printer add-on files“ enables you to specifiy special printer commands (using the Zebra ZPL
language), which will get downloaded on each print job for this label. The „ZBI code“ option only can be used
Page 21
in combination with certain LP4 Product Manager software packages. The special option ‘Use given label
length (ignore calibration)’ can be used to print a oversized LP4 layout on two or more real labels.
3.3.1.15
Menu File – Printer settings – Intermec
Here you can adjust the Intermec/UBI printer settings. Most of the options are Intermec-specific values,
please consult your printer manual for details.
If you are using a „Start delay“, the printer will wait after each printed label the specified time before doing its
startposition adjustments.
If the printer is used in an industrial area, most often it has to wait for a printing pulse before printing a label.
You can specify two different „print pulse“ modes, depending on the interface you are using.
“Refresh label content” is needed if you are using a printer variable (for example the printer time), and you
want to update the variable content on each printed label.
The „Fast print mode“ option minimizes the time between two label printings. You cannot use counter
variables or print pulse in this mode, though.
To get a (slightly) faster download time, you can use the „Minimal display texts“ option. It will disable some of
the printers display texts and function keys, making the download a little bit smaller.
The option „Use printer add-on files“ enables you to specifiy special printer commands (using the Intermec
Fingerprint Basic), which will get downloaded on each print job for this label. The same option, for smaller
tasks, can be found in „Use printer add-on commands“.
There are several function keys at the Intermec front panel available:
– * F1: Select label format (only available on certain Format managers)
– * F2: Input printer variables
– F5: Display SYSTEM INFO (only available with newer printer firmware)
– SHIFT + F5 : Stop label program
– SHIFT + F4 : Show error number
– FEED : Feed
– SHIFT + FEED : Test feed
Page 22
– SETUP : Setup
– * PRINT : Print one label
– * PAUSE : Pause the current printing
– * C : Cancel the print job, only available in Pause mode
The * marked keys are only available if a print job is active
3.3.1.16
Menu File – Printersettings - Easyprint
Here you can adjust the Easyprint printer settings. Most of the options are Easyprint -specific values, please
consult your printer manual for details.
3.3.1.17
Menu File – Printersettings - Unicontrol
Here you can adjust the Unicontrol-Easyprint printer settings. Most of the options are printer-specific values,
please consult your printer manual for details.
Page 23
3.3.1.18
Menu File – Printersettings - EPL
Here you can adjust the EPL printer settings. Most of the options are printer-specific values, please consult
your printer manual for details.
3.3.1.19
Menu File – Printersettings – Sato SBPL
Page 24
Here you can adjust the Sato SBPL printer settings. Most of the options are printer-specific values, please
consult your printer manual for details.
You can specify to store the label as a format inside the printer (on one of the printers memory cards). If you
enable this function, the label will not get printed after transfer, but saved on the card for later use. So you
have to specify a memory card number and a format number, to tell LP4 where to store your label format
(„2:03“ would mean: format 03 on card 2).
To use such formats, you have to send the following SBPL commands to the printer:
<STX><ESC>A<ESC>CCcardnumber<ESC>YR,formatnumber<ESC>/D,fieldnumber,fielddata<ESC>Qprint
count<ESC>Z<ETX>
„Cardnumber“ is to replace with 1 or 2 (the card number), „formatnumber“ is 01-99, the following „/D“
commands are optional, if you are using LP4 Printer Variables in your layout to define cariable text- and
barcode-fields. „Printcount“ will tell the printer how many labels to print, <STX> is the ASCII value 2, <ETX>
is 3, and <ESC> is 27.
Example:
<STX><ESC>A<ESC>CC1<ESC>YR,04<ESC>/D,01,Test 1<ESC>/D,02,Test 2<ESC>Q33<ESC>Z<ETX>
This will print format 04 from card 1 with the texts „Test 1“ and „Test 2“ 33 times.
3.3.1.20
Menu File – Printersettings – Alltec SmartGraphCom
Here you can adjust the Alltec SmartGraphCom system settings. Most of the options are system-specific
values, please consult your system manual for details.
Page 25
Please note that you need to start the Alltec SmartGraphCom application on the same PC as Labels
Platform 4 to establish a printer connection.
3.3.1.21
Menu File – Printersettings – CAB
Here you can adjust the Jscript/CAB printer settings. Most of the options are printer-specific values, please
consult your system manual for details.
On printers with two printheads (CAB XC series), LP4 will send the label fields depending on the „Head 2
color“ and „Head 2 field name sign“ settings. By default all black fields (and fields with the sign „@2“) are
send to print head 2 (which is using by default a black ribbon). All other fields are send to print head 1 (for
example with a red ribbon). The color can be used with the label fields “Line”, “Cross”, “Rectangle”, “Circle”,
“Barcode”, “Text”. The label fields “Graphic“, “Special text“ and “OLE Object“ need to get the special sign in
the field name, since those objects are using multiple colors.
Page 26
3.3.1.22
Menu File – Printersettings – Atlantic Zeiser
Here you can adjust the Omega Atlantic Zeiser printer settings. Most of the options are printer-specific
values, please consult your printer manual (AZ PrintEngine manual) for details.
3.3.1.23
Menu File – Printersettings – bbPrinter / HAPA RedCube
Here you can adjust the bbPrinter service settings.
The only available option (beside the Rotation) is “Do not use serial Red Cube Graphics”. If this option is
activated, a print job containing variable data will pause between two print outs. This way special just-in-time
variable data (like the current date/time, or scale data) can be used.
3.3.1.24
Menu File – Print
Use this command to print the active label.
A window will appear, there you can specify the label quantity and change margins/printer settings.
To use a printer, you have to define the printer connection with the Printer definition menu item.
Short cut
Toolbar:
Page 27
3.3.1.25
Menu File – Print – Print dialog window
After you have selected „Print“, the LP4 print window will appear:
Here you can select the printer (the currently active label printer will be initially selected), specify a quantity of
labels to print, and adjust the print margins.
The button „Extended“ will show you a few more options, to be used when you need to print multi-row labels.
By pressing the „Print“ button, the label will be send to the printer. The current printer state will be displayed
in the „State“ field.
If you need to adjust certain printer setting, you can easily do that by pressing the „Printer settings“ button
without leaving the print dialog window.
All entered settings (printer settings, quantity, margins, etc) will get saved with the label file, and LP4 will
store all settings per printer. Therefore, if you have to print the same label at two different printers, you can
specify different settings for each printer, as soon as you select one of them as printing device, LP4 will use
the settings stored exactly for that printer. No need to change margins/settings each time you swap between
the connected printers.
3.3.1.26
Menu File – Print preview
Use this command to display the current label inside a preview window. The preview will show you the first
label to get printed, all variables, counters, etc. will get displayed as the first real printed label. It is possible to
turn the preview in steps of 90°, and to save the displayed label as a bitmap or PDF file.
To do a real print, select the Print or Test print command.
Page 28
Short cut
Toolbar:
3.3.1.27
Menu File – Printer states
In the “Printer states” docking view you have on overview on all defined printers and their current state.
You can select a printer, change its label settings, open the print dialog, open the print preview, print a test
label, reset a printer communication, view the current print jobs, and communicate to a printer directly by a
build-in terminal window.
The Terminal window for accessing bi-directional printers can be used to send special printer commands
directly to the printer:
Page 29
You can enter single commands or you can send complete text files. There are also some predefined
commands for different printer types (button on the right side).
Toolbar:
3.3.1.28
Menu File – Change user
This command is only active if you have enabled the LP4 user management. A window will appear, asking
for the user name and password. If both are correct, the user will be logged into the system, and all his latest
settings will get active.
Short cut
Toolbar:
3.3.1.29
Menu File – 1, 2, 3, 4, 5
You can open the last recently used label files by selecting one of the shown menu items.
3.3.1.30
Menü File – Exit
This will close the LP4 application. If no other LP4 software is active, the connection to the printers will be
closed as well.
Page 30
If you close LP4, all user settings (position of toolbars, etc) will get stored, this settings will be used on the
next startup.
Short cut
Mouse: Double-click at the system menu
Keyboard:
ALT+F4
3.3.2 Menu Edit
The following functions are available in the Edit menu:
Undo
Restores the label to its previous state
Cut
Deletes the selected objects and places them into the Windows clipboard
Copy
Copies the selected objects into the Windows clipboard
Duplicate
Copies the selected objects, and pastes them at the current mouse position
Paste
Pastes the objects from the clipboard to the current label
Delete
Deletes all selected objects
Select all
Selects all items on the label
Select next/previous
Selects the next/previous label object
Align fields
Aligns objects fields
Transfer object properties
Transfers various display properties from one object to another.
Page 31
3.3.2.1 Menu Edit – Undo
Use this command to undo your last actions (if possible). If you cannot undo your last action, the menu item
will be grayed.
Short cut
Keyboard:
STRG+Z or
ALT-DELETE
3.3.2.2 Menu Edit – Cut
Use this command to delete all selected objects from the label, and place them into the Windows clipboard.
You cannot use this command if no label object is selected.
Short cut
Toolbar:
Keyboard:
STRG+X
3.3.2.3 Menu Edit – Copy
Use this command to copy all selected objects into the Windows clipboard.
You cannot use this command if no label object is selected.
Short cut
Toolbar:
Keybaord:
STRG+C
3.3.2.4 Menu Edit – Duplicate
Use this command to copy the selected objects and paste them at the current mouse position.
You cannot use this command if no label object is selected.
Short cut
Keyboard:
STRG+D
3.3.2.5 Menu Edit – Paste
Use this command to paste objects from the Windows clipboard to the current label.
You cannot use this command if no objects are available in the clipboard.
Short cut
Toolbar:
Keyboard:
STRG+V
3.3.2.6 Menu Edit – Delete
Page 32
Use this command to delete all selected objects from the label.
Short cut
Keyboard:
DEL / STRG+DEL
3.3.2.7 Menu Edit – Select all
Use this command to select all objects on a label.
3.3.2.8 Menu Edit – Select next/previous
Use this command to switch to the next/previous label object, and to select it.
Short cut
Keyboard:
PAGE UP/PAGE DOWN
3.3.2.9 Menu Edit – Align fields
You can align fields internally by using this commands:
Left
Center vertical
Right
Top
Center horizontal
Bottom
For example: selecting „Top“ will align all selected fields, moving all object tops in one line.
Short cut
Toolbar:
You can also align fields relatively to the label:
Label horizontal
Label vertical
Short cut
Toolbar:
You can rotate selected fields in 90° steps.
Rotate left
Rotate right
Short cut
Toolbar:
3.3.2.10
Menu Edit – Field printable
Page 33
Use this commands to make selected fields printable/not printable. All objects are printable by default, but if
you want certain objects not to get printed (but still visible in the label window), you have to set such objects
to „not printable“. If an object is not printable, a small icon will appear in the object list.
Short cut
Toolbar:
3.3.2.11Menu Edit – Field movable
Use this commands to make selected fields movable/not movable. A „not movable“ field cannot change
accidentially its object position. If an object is not movable, a small icon will appear in the object list.
Short cut
Toolbar:
3.3.2.12
Menu Edit – Field groups
Use the command „Make group“ to set all selected objects into one object group. Group objects cannot get
selected independent (always the complete group will be selected), so also moving/sizing/deleting/changing
will always happen to all members of a group.
Short cut
Toolbar:
3.3.2.13
Menu Edit – Transfer object properties
Use this command to transfer display properties of a label object to a different label object. Just select the
source objects, and activate the „transfer“ command by menu item/symbolbar button/hotkey. Now click on
the destination object, and the display properties of the source object will be transfered to the destination
object.
Display properties are: line width, color, fill type (rectangles/circles), corners (rectangles), font settings, text
alignment, barcode type and various graphic settings.
Short cut
Toolbar:
Keyboard:
CTRL + T
Page 34
3.3.3 Menu View
The following functions can be found in the View menu:
Symbolbars and docking windows
Shows/hides the toolbars/docking windows
Adjust…
Configuration of menus and toolbars
Statusbar
Shows/hides the status bar
Application view
Switches between different user interface skins
3.3.3.1 Menu View – Default toolbar
Use this command to show or hide the default toolbar. The toolbar contains buttons to do the most common
tasks, like File Open.
Button
Action
Creates a new empty label window
Opens an existing label file
Saves the current label
Cut selected objects
Copy selected objects to clipboard
Pastes objects from clipboard to label
Opens the print dialog
Shows/hides the docking window for the label fields
Shows/hides the docking window for the label variables
Shows/hides the docking window for the object properties
Shows/hides the docking window for the printer management
User logon
Copyright and version information
Page 35
3.3.3.2 Menu View – Object mode
Use this command to show or hide the object mode bar. This toolbar contains buttons to change the current
mode.
Button
Action
Selection mode to select/move/size label objects
Deadzone : create a deadzone object
Line : create a line object
Cross : create a cross object
Rectangle : create a rectangle object
Circle : create a circle object
Graphic : create a graphic object
Barcode : create a barcode object
Text : create a text object
Special text : create a special text object
OLE : create an OLE object
3.3.3.3 Menu View – Zoom bar
Use this command to show or hide the zoom bar. This toolbar contains buttons to change the label zoom and
a slider control for smooth zooming.
Button
Action
Zoom -: smallest Zoom level, displays a small label to get a complete overview
Zoom+: optimum Zoom level, displays the label to use all the available space
Selection Zoom: shows the selected fields as big as possible
3.3.3.4 Menu View – Object alignment bar
Use this command to show or hide the object align bar. This toolbar contains buttons to align objects
positions.
Button
Action
Transfer object properties
Rotation right
Rotation left
Left
Center vertical
Right
Bottom
Center horizontal
Page 36
Top
Label horizontal : align fields relatively to the label
Label vertical : align fields relatively to the label
3.3.3.5 Menu View – Fields – Toolbar / Docking window
Use this command to show or hide the Fields docking window and the Fields toolbar. This toolbar contains
buttons to change certain object properties.
Button
Action
Printable / not printable
Movable / not movable
Create group / ungroup
Create level / remove level
The field list is shown beneath the toolbar:
The fields will be displayed according their display and print order. Left clicking a list entry selects the related
fields inside the layout. A multiple selection can be done by pressing the SHIFT or CTRL key. Right clicking a
list entry shows the related contect menu (copy, cut, etc).
You can change the field order by „Drag & Drop“.
The list also displays the spezial properties of the fields (printable/movable/grouped/level). You can toggle
those properties by clicking on the symbol. The first symbol (empty rectangle) can be used to hide a field
(shown as a red cross inside the rectangle).
Page 37
3.3.3.6 Menu View – Variables - Toolbar / Docking window
Use this command to show or hide the Variables docking window and toolbar. This toolbar contains buttons
to manage your label variables.
Button
Action
New variable: a selection of available variable types is shown
Variable properties: shows the property window of the selected variable
Variable position: move up
Variable position: move down
Variable delete: delete selected variables
Variable copy: copy selected variables to the Windows clipboard
Variable paste: inserts variables from the Windows clipboard
Variable duplicate: combined copy / paste action
Refresh variables: calculates and displays all variables and connected label object fields.
Variable input fields: displays the input window, if input variables are available.
The variable list is shown beneath the toolbar:
In this list all variables of the active label are shown. A left-click at an entry is selecting the related variable,
and all label fields which are connected to this variable. If you select a label field in the layout, which is
connected to a variable, the related variable list entry will be selected as well.
You can do a Drag&Drop operation from this list into the layout to create new text/barcode/graphic fields
(connected to this variable). If you drop the variable on a already existing field, it will be connected to the
variable.
You can also change the order of the variables with Drag&Drop.
Double-clicking a variable will show the variable property window. Rich-clicking a variable will show the
variable context menu.
Page 38
Variable Input
You can use this function to open the Variable Input window. The window will only appear, if you have
defined at least one Input variable. If no Input variable is defined, an error message is shown instead.
After you have entered all Input values, all variables will be recalculated (depending on the variable order),
and the result is shown in the label fields.
Depending how the Input variable is defined, the Input edit controls will behave differently, some edits may
have a certain input condition. The user can only leave the edit control (by Mouse, TAB or ENTER) if his
input is matching the condition. A status line at the bottom of the input window is telling the user about the
input condition, it will turn red if the condition is not met.
3.3.3.7 Menu View – Printer – Toolbar / Docking window
Use this command to show or hide the Printer docking window and the Printer toolbars. The Printer docking
window is divided into three function parts: Printer States, Printer Management, Protocol.
Depending which function is active, the toolbar will change.
This toolbar contains buttons to change certain object properties.
Printer States
In “Printer States” all defined printers are listed, and their current state is shown (if a bi-directional
communication is active). This list is also showing printers, which are saved to the label layout, but do not
exist in the current LP4 installation (blue question mark symbol).
Printer States – Button Action
Printer settings: change the label printer settings of the selected printer
Print: shows the Print dialog window
Print preview: shows the Preview window
Test printing: one label is send to the printer
Reset: resets the printer communication and cancels all active print jobs
Print jobs: display of all active print jobs of the selected printer
Terminal: shows the Terminal window of the selected printer
Page 39
A double click on a printer opens the Printer settings window. Those settings are saved with the current label
layout.
The following symbols are giving information about the printer state:
Printer ready (uni-directional, no reported printer state!)
Printer reports: no error, printer is ready
Printer reports: printer is paused
Printer reports: error (no labels, no ribbon, etc)
Printer not ready, no communcation
Printer is not defined, but there are printer settings saved in the current label
Printer, which are not defined, cannot be used for printing, but it is possible to see and change the related
settings. Such settings are saved in the layout file. If you want to remove the complete settings before
saving, you can do this by doing a right-click -> remove properties.
Printer Management
The Printer Management is used for creating, changing and deleting of printer definitions. Only if you create
a printer definition, you can use the printer with Labels Platform.
Printer Management – Button Action
New printer: shows the „printer definition“ window
Change printer: change the selected printer definition
Remove printer: removes the selected printer definition
Change order: moves the selected printer definitions up/down in the list
Printer fonts: shows the window for defining additional printer fonts
Printer groups: shows the printer group definition window
Page 40
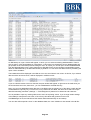
Printer protocol
The printer protocol can be activated to save information about print job start / stop and error states. Labels
Platform 4 creates a new log file for every new day, the log files can be opened using a text editor or MS
Excel. You can also open a log file in the protocol window, if no log file is selected, the protocol window is
showing the information for the current day.
Printer protocol – Button Action
Protocol settings: in the settings window you can activate/deactivate the protocol function
and define a folder for storing the log files.
Open protocol file: you can select an existing protocol file for opening in the protocol list. By
pressing “Cancel” you will see the entries of the current day again.
3.3.3.8 Menu View – Statusbar
Use this command to show or hide the statusbar. This bar contains text fields to show certain informations.
While you are moving through the LP4 menus or toolbar buttons, the left part of the statusbar will give you a
short description of the menu items.
In the right part of the statusbar the state of the locked keys will get displayed.
Page 41
3.3.4 Menu Mode
You can change the object creation mode by using the Mode menu:
Selection
Selection mode to select, move and size label objects
Line
Line mode
Cross
Cross mode
Rectangle
Rectangle mode
Circle
Circle mode
Graphic
Graphic mode
OLE
OLE-object mode
Deadzone
Deadzone mode
Barcode
Barcode mode
Text
Text mode
Special text
Special text mode
3.3.4.1 Menu Mode – Selection
By using the selection mode you can select one or more label objects by clicking on the object or by using a
multiselection rectangle.
Selected fields will get a red border, and selection drag points.
You can move selected objects by the mouse (if they are not marked as ‚not movable‘) and use the drag
points to resize them. Hint: some field types have restrictions in size, you cannot resize such objects freely.
Selected objects can be manipulated by the Edit menu commands.
Page 42
Hint: if there is an object in front of another, the selection mouse click will always select the visible,
uppermost, object. If you want to select the underlying object, simply press the SHIFT key will doing the
mouse click.
A special Zoom function is available in the Selection Mode: select a certain area by the mouse and hit the
HOME key. LP4 will zoom into this area. If you press the END button, LP4 will zoom to the currently selected
fields.
3.3.4.2 Menu Mode – Line
If the line mode is active, a new line will be created by a left mouse click. New lines will be positioned
horizontal, vertical or in 45° steps. If you need a free angle, you have to press the SHIFT key while creating
the line.
The line properties are descriped in the chapter „Line objects“.
3.3.4.3 Menu Mode – Rectangle
If the rectangle mode is active, a new rectangle will be created by a left mouse click. If you want to create a
quader, you have to press the SHIFT key while creating the rectangle.
The rectangle properties are descriped in the chapter „Rectangle objects“
3.3.4.4 Menu Mode – Cross
If the cross mode is active, a new cross will be created by a left mouse click. If you need a 90° cross, you
have to press the SHIFT key while creating the cross.
The cross properties are descriped in the chapter „Cross objects“
3.3.4.5 Menu Mode – Circle
If the circle mode is active, a new circle will be created by a left mouse click. If you need a perfect rounded
circle, you have to press the SHIFT key while creating the circle.
The circle properties are descriped in the chapter „Circle objects“
3.3.4.6 Menu Mode – Graphic
If the graphic mode is active, a new graphic will be placed by a left mouse click. A window will appear, asking
for the filename of the graphic object. If you leave that window by selecting „Cancel“, no new object will be
created.
There are two different graphic modes in LP4: an “embedded” graphic is saved within the .LP4 layout file. A
“linked” graphic is stored into an external graphic file, LP4 will just save the file name in the layout file.
Embedded graphics are helpful, if you want to preserve the current design (even if the original graphic file is
changed, the label stays the same).
The graphic properties are descriped in the chapter „Graphic objects“
Page 43
3.3.4.7 Menu Mode – OLE Object
If the OLE object mode is active, a new OLE object will be placed by a left mouse click. A window will
appear, asking for the OLE applicacion or filename. If you leave that window by selecting „Cancel“, no new
object will be created. Otherwise the object will get created, and the linked application will start up, to edit the
object content.
The OLE object properties are descriped in the chapter „OLE objects“
3.3.4.8 Menu Mode – Deadzone
If the deadzone mode is active, a new deadzone object will be placed by a left mouse click. Deadzones are
no printable objects, they influence the printing behaviour of other objects instead.
The deadzone properties are descriped in the chapter „Deadzone objects“
3.3.4.9 Menu Mode – Barcode
If the barcode mode is active, a new barcode object will be placed by a left mouse click. You can change the
barcode type and content by doing a right click on the new object, selecting its property window.
The barcode properties are descriped in the chapter „Barcode objects“
3.3.4.10
Menu Mode – Text
If the text mode is active, a text input cursor will be placed by a left mouse click. Now you can type your text
directly on the label, ESC or a left mouse click will stop the input mode. Empty textfields will be removed from
the label.
The text properties are descriped in the chapter „Text objects“
3.3.4.11Menu Mode – Special text
If the special text mode is active, a new special text object will be placed by a left mouse click. You can
change the special text content by doing a right click on the new object, selecting its property window.
The special text properties are descriped in the chapter „Special text objects“
Page 44
3.3.5 Menu Tools
The Tools menu contains the LP4 configuration, the user management, the embedded graphics
management, and additional tools for creating GS1/GHS variables:
LP4 Configuration
Configuration window containing several LP4 settings and the UI language selection
LP4 Folders
Definition of the LP4 folders (layouts, graphics, external data, configuration files)
Embedded Grafphics
Management of embedded graphics
GS1/EAN128 Manager (Star- or Premium license needed)
Easy creation of variables with GS1/EAN/UCC-128 content
List/GHS Manager (Premium license needed)
Easy creation of variables with list/GHS content
Page 45
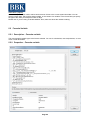
3.3.5.1 Menu Tools – LP4 Configuration
Use this command to make changes in the LP4 configuration settings.
-
Program language
Selection of the language used in the LP4 menus and windows. If you change the language, a
restart of all LP4 applications is required.
-
Fonts
You can select the fonts of the Formula, Input and Terminal window.
-
LP4 Version Control
LP4 can automatically backup the original layout file when the user is saving the layout. The backup
files are stored using the filename „filename.LP4.version.LPV“, and can be enumerated and loaded
in the Version History window. You can also activate a „version information“ window, which will
appear when saving the label, to ask the user for an additional comment.
Page 46
-
LP4 Editor Startup
You can define here the behaviour of the LP4 Editor after starting up.
-
Options
Here you can find several options to adjust the LP4 user interface and functionality.
If the option “refresh variables” is active, all variable contents will be recalculated whenever one
variable is changed. You can turn it off, if it slows dwn your system.
3.3.5.2 Menu Tools – LP4 Folders
Here you can define the folders used by LP4.
The folder for the Global Settings (LP4 configuration files) cannot be changed in this window. If you want to
store the configuration files in a different folder, you need to close all LP4 applications. Then you need to
move all files and folder from the currently used application folder to the new folder. Then you need to
change the local LP4.INI (=the one in the installation folder) to contain the following entry:
[SETS]
Settingspath=X:\My_Configuration_Folder
On next startup LP4 will use this folder for its configuration.
3.3.5.3 Menu Tools – LP4 Users
The LP4 user management is disabled by default. In the user management window you can enable this
option, and create/change users and their privileges.
There will be always a default user, that means a user without name and password, who will get active on
each startup of LP4. This user should have as little privileges as possible. All other users have to get defined
by name and password, and depending on their label printing tasks each will have certain rights to use LP4.
Page 47
Attention: at least one „administrator“ has to get defined as well. An administrator is a user with the privilege
to access the user management window. All other users should not have that privilige, otherwise they will be
able to change their (and other user’s) rights.
3.3.5.4 Menu Tools – Embedded Graphics
Labels Platform 4 can use graphics as „external“ linked files or as „embedded“ objects. Embedded graphics
are useful if you need to prevent changes from the label, even if the original graphic is changed. Such
graphics are also useful, since if you transfer the label file, the graphics are automatically included. External
linked files are useful, if you are using the same graphic in a couple of label files, for example a company
logo. If the logo is changed, the layouts automatically will print the new logo without any additional work
needed.
You can define in the „LP4 Configuration“ window which graphic mode you want to use by default. There is
also an option to ask the user each time when he creates the first graphic object on a label. Of course you
can change the graphic mode later on, each graphic field can be configured individually in the field
properties.
External graphic files are selected by a Windows file selection window. Embedded graphics are selected in a
special management window, you can reach this window by the Tools menu.
Page 48
The button „Add…“ can be used to import graphics into the label. Newly added graphics are displayed with a
red border around their symbol. “Remove” deletes the selectied graphic from the label, they cannot be used
in graphic fields anymore. With „Export” you can save a graphic as an external file again. “Convert“ can be
used to change all graphic fields on the label from „external“ graphics to „embedded“ ones.
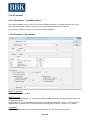
3.3.5.5 Menu Tools – GS1/EAN128 Manager
Use this command to start the GS1/EAN128 Manager window. Here you can easily define GS1/EAN/UCC
contents which are compliant with the GS1/EAN rules. The manager will create two formula variables, one
for barcodes, and one for the optional text field, which can be placed by drag&drop to the label area. Rightclicking an existing formula variable will show a popup menu containing also the GS1/EAN128 Manager
entry, so it is even possible to change existing formulas in the manager window.
Page 49
At the top of the window is an edit field, to enter the unique variable name.
Below this field is a list with all existing GS1/EAN possibilities. By double-clicking (or using the “Add” button)
the entry will be moved to the lower list, which is defining the user content.
In this lower list all parts of the defined user GS1/EAN content will be shown. Using the “Delete” button, an
entry can be removed from the content, and the arrow buttons will move an entry up/down in the list. If one
entry gets selected with the mouse, it is possible to change it: enter a fix text, or select a variable which is
delivering the text for this entry. With some DBs it is possible to activate an automatic checksum calculation.
Each time the text/variable of an entry is changed, it will be reflected in the preview area (between both lists).
It is also possible to activate a “space character” option, which will adjust the text with space characters (only
for the optional text formula, not for the barcode formula, of course).
Pushing the “OK” button will create the two formula variables, one “MyName_BC” and one “MyName_TXT”.
The “_BC” variable will hold the barcode informations (fe with FNC1 characters), the “_TXT” variable will hold
the user readable text (with brackets and optional space characters). The variables can now be placed on
the label, using Drag&Drop or the property settings of text/barcode objects.
3.3.5.6 Menu Tools – List/GHS Manager
Use this command to start the List/GHS Manager window (Premium version only). Here you can define GHS
texts in different languages, which can get used in LP4 text fields.
The Manager will create several LP4 List/GHS variables containing the texts (usually one List/Risk variable
will hold one language), the variables can be used in standard text fields or formatted spezial text fields.
Right-clicking an existing List/GHS variable will show a popup menu containing also the List/GHS Manager
entry, so it is even possible to change existing List/GHS variables again in the manager window.
Page 50
At the top of the window is an edit field, to enter the unique variable name. This name will be used for
creating the List/GHS variables.
Below is the selection of the database. LP4 will install an Access-database “LP4RS” which can be instantly
used. But it is also possible to use different databases.
The next section shows all available languages from the database. You can select multiple languages in the
list, by pressing the green arrow button the selection will be confirmed. The red cross will remove languages
from your selection, while the blue arrows can be used to change the order of the languages.
Below you can select the codes in a similar way as the languages, or you can specify that the codes will
come from another LP4 variable. The LP4 variable can hold multiple codes by separating the codes with a “;”
character: „R 1;R 52/53;S 25“.
The display option „Replace word break character X with character Y” can be used to remove the LP4RS
wordbreak character („}“ = ASCII 125), or to replace it with a different character. That can be used with
formatted special text fields: this field types can do an automatic word break, but it needs the (not
displayable) ASCII 31 character. Therefore you can set the option „Replace word break character 125 with
character 31” to get an optimal display with formatted special text fields.
The option „Use unicode hex format“ is only needed for compatibility with exisiting LP3 layouts; in LP4 all
texts will be handled in Unicode.
The last option will tell the List/GHS manager what kind (and how many) variables have to be created:
"1: one variable for each language (no number, only text)"
"2: one variable for each language (number with space separated from text)"
"3: one variable for each language (number with tab separated from text)"
"4: one variable holding all numbers, and one variable in each language for texts"
"5: two variables for each language (number and text separately)"
Page 51
"6: one variable for each language and code (number with linebreak separated from text)"
"7: two variables for each language and code (number and text separately)"
Some List/GHS examples can be found in the LP4 sample label files.
3.3.6 Menu Addons
The Addon menu offers commands to start special (sometimes optional) LP4 applications.
BBK Quick Support
Tool for the BBK support team for Remote Access
Serial number tool
Adding a LP4 license to your installation
Format Manager
Special solutions for storing label formats into the printers
Printjob Manger
An application for defining lists of multiple printjobs
Database Manager
The database manager offers an easy access to ODBC databases.
3.3.6.1 Menu Addons – BBK Quick Support
The BBK Quick Support tool enables your BBK support partner to access your PC by an internet connection.
Page 52
You are in full control: only if the tool has been started by you, and you are telling the random access
password to your support partner, he will be able to connect. As soon as you close the tool, he will not be
able to connect anymore.
3.3.6.2 Menu Tools – Serial number tool
For each LP4 Dongle or Computer-ID you will get a 20 digit serial number containing your license
information. If LP4 detects on start up that you do not have a valid license, it offers to proceed in DEMO
mode, or to start the serial number tool.
Please enter your serial number and press OK, this will save the number in your LP4 configuration files. If
the license number is not valid, an error message is displayed.
If you have a software-only license (without Hardlock Dongle), you need to tell your BBK Support partner
your Computer-ID. The serial number tool can calculate your Computer-ID by using the system menu item
“Computer-ID”:
Page 53
In the following window the Computer-ID is shown. You can copy the ID to the Windows clipboard, for
example to send it by email to the BBK support.:
3.3.6.3 Menu Tools – Format Manager
I you have a PREMIUM license, you can use the LP4 Format Manager to store layout files inside the printer
memory (flash memory). Those formats can be recalled in different ways, depending on the printer
capabilities.
You can find further information in the chapter “LP4 Format Manager”
3.3.6.4 Menu Tools – Print job Manager
The Print job Manager is a tool for defining complete job lists which needs to be printed. The job list can be
set to one or more printers, the LP4 Spooler will execute the jobs one after each other (printers need to be
connected with a bi-directional interface).
You can find further information in the chapter “LP4 Print job Manager”
3.3.6.5 Menu Addon – Database Manager
The LP4 Database Manager (short: DM) is a stand-alone application, and can be started from the menu
item, or by its Windows shortcut.
Page 54
On DM startup an „open“ window will appear, in which you can select an existing database/table. There is
also an option „open this database on next startup“, if this option is activated the current database/table will
get opened on the next startup without asking the user. Of course you can still open another database/table
from the DM application menu. Some data sources (like MS Excel) are not showing internal tables (system
tables or tables defined by the DB administrator) by default. You can see those table names by activating the
option “Show all tables”.
The loaded table will be displayed in the DM as a list. One set of data is one column in this list, if you select a
data set with a left mouse click, it will be displayed in a different color:
If you do a double mouse click on a data set, the print window will appear, a right mouse click will show you
the chosen data set in the „sheet view“, you can edit/delete/etc the data that way.
Note: you can only edit/delete/create data sets, if the DM knows the primary key of the table. Usually the DM
will autodetect the primary key, but if there is no key defined for this table, the user has to select an unique
data field manually (menuitem „Settings“ -> “Field assignment”) before he is allowed to edit a data set.
So it is possible to open any existing table, and to use it as a printing source. If you change certain settings
of the table (for example the row sizes, or the colors), this values will get stored in the local
LP4DBManager.ini file, the DM will use this stored values automatically on next startup.
You can also define specials “views” to the database data, the “view” definition is also stored in the INI file:
Page 55
A „table view“ is a collection of fields from one or more tables of the database. For example two tables
„Addresses“ and „Contacts“ can be used at the same time, if they are having two related fields (one field of
table „Contactes“ has the key information for table “Addresses”). It is also possible to define a view with jus
one table, for example if you want the user just to see certain fields of a table, or if you want to define your
own field order. You can use views like normal tables in LP4, but often it is not possible to edit/create data
records in such views.
If you have one table (or a view containing fields of one table including the key field), you can use the DM to
edit/create the data content. To edit an existing data set, the user can select the „Sheet view“ or by right
clicking a data set. The sheet view enables you to change the data by selecting a field by a mouse click, and
entering the new values. Even big memo fields can be easily changed that way. Advanced users can do all
commands by keyboard, „TAB/ SHIFT TAB“ will jump to the next/previous data field, „ESC“ will restore a
changed data field. The changes will be saved at the time when the user is selecting the „save“ toolbar
button, or if he is scrolling to the next data set, or if he is changing from sheet view to table view again.
Before storing the new data, the DM will always ask if the user wants really to save the data. Additional hint:
if you want you can configure the edit mode to jump into the next edit field by pressing the ENTER key: add
the entry [Settings] EditEnterJump=1 to your LP4DBManager.ini configuration file.
It is very easy to create a label with database connections: simple open the data source in the DM, use the
menuitem „variable definitions“, and a window with all table row names will appear. Simply drag&drop one
(or more) names from this window to a LP4 label window.
By doing this drag&drop operation, LP4 will create a) the correctly configured database variables, and b)
text/barcode/graphic fields connected to that variables. You only have to save the label, and it will be ready
to use with the DM.
Even more powerful is the creation of table variables, if you want to use your table as a source for address
labels, which will print on each label a different data set. Simply do the same drag&drop procedure as before,
select all data field names you want to print. Now you will not only get the proper table variables, but also
different helper variables (a formula variable for changing the label quantity and database variables for DMqueries).
A label with such automatically created variables will work in the following way:
Page 56
The user can select all or just a part of the current table data by using the “Filter records” option, and he can
sort the records by clicking at the column headers.
When the user now chooses „Print“, and selects the label he has created by drag&drop table variables, the
print job can be started. The printer will be the default printer of the selected label (it is also possible to put
the printer name into a table field or to set a “DM default printer” by putting [SETTINGS] Printer=... into the
LP4DBManager.ini).The print quantity will be calculated automatically: the print job will print exactly as much
labels as selected data sets, and each label will have the data from one data set. In our example all the
Berlin customers will get printed, in the order of the company names. If you want to have the Print window
closed after print start automatically, you can use the [SETTINGS] PrintAutoClose=1 entry.
The filter is also useful for deleting a range of data sets at once. The menuitem “Edit” > “Delete all” will delete
all currently filtered data sets.
Additionally you can use the filter to generate “n” single pintjobs at once, each job can have a different printer
or layout or count (if this informations are stored in the table). Simply click on „Print all“ in the menu, in the
following window you can define if the jobs should use the same layout/printer/batch count, or if this data is
stored individually for each data record. By clicking „Print“ n print jobs will get generated and spooled to the
printer(s), each job has the data of one of the table records. Therefore this printing is similar to the printing
with table variables, but it will generate multiple jobs (if needed on multiple printers with different layouts)
instead of just one job. And of course the layouts need to use database variables instead of a table variable.
3.3.6.6 Menu Addon – Format Manager
The PREMIUM version of LP4 offers additional special solutions, called Format Managers. This application
can be used to store label formats directly into the printers (different Zebra or Intermec solutions are
available), to integrate the printers closely in production lines, without the need for a PC.
If a Format Manager exists, it’s menu item is available, which you can use to start the application.
Further details can be found in the chapter “LP4 Format managers”.
Page 57
3.3.7 Menu Window
The Window menu offers commands to handle the multiple label windows:
You can also switch between different open layout by left-clicking on the colored tabs in the editor area.
3.3.8 Menu Help
The Help menu contains the following commands:
Help Topics
Starts the LP4 online help
About
Displays the copyright information and version number of LP4
Page 58
4 Label objects
4.1
Generic
A LP4 label layout contains printable or not printable label objects, objects which are showing a certain
content or having a special function.
A label object can be placed in the label area by selecting the wanted object mode from the Mode menu or
toolbar, and by left clicking the label area. Depending on the object type the user has to hold down the left
mouse button to move/size the object, or a special window does appear. Text objects will show a colored text
cursor for entering the desired text by keyboard.
Designing a label means to create and arrange the needed label objects on the available label area. LP4
offers a wide range of tools and properties for manipulating existing label objects. To manipulate/change an
object, you have to select it first. You can do that by activating the „Select“ mode, and clicking on one or
more objects. After you have done a selection, the properties are shown in the dockable Properties window.
The following label objects and properties are available:
4.2
Lines
4.2.1 Description - Line
Lines can have every possible angle in Labels Platform 4. If a native label printer only supports vertical and
horizontal lines directly, all other line types will be downloaded as grahic symbols to the printer (can cause a
slower label download time).
To create a line, you have to activate the line mode, and left-click on a free label area. Now you have to hold
the mouse button down and move the mouse to the second line point. By default LP4 only creates lines in
45° steps. To create another angle you need to press the SHIFT key while creating the line object.
4.2.2 Properties - Line
Page 59
Name
The name of the line. The name is empty by default, but if you want to access the object in a LP4 formula,
you have to enter an unique name for it.
Anchor mode
Depending on the anchor mode the x/y coordinates will be displayed differently.
X/Y/Width/Height
The line has a starting and an ending point. The exact point coords can be entered here.
Line width
The width of the line in [mm]
Color
The color of the line (note: colors are only supported on color printers)
Print condition
If you have enabled a print condition, the object gets only printed, if the condition is fulfilled at the time when
the print job starts.
4.3
Rectangles
4.3.1 Description - Rectangle
Rectangles can have rounded corners, and can be filled.
To create a rectangle, you have to activate the rectangle mode, and left-click on a free label area. Now you
have to hold the mouse button down and move the mouse to the second rectangle corner point. If you want
to have a quader with the same width and height, you can press the SHIFT key while creating the object.
4.3.2 Properties - Rectangle
Name
Page 60
The name of the rectangle. The name is empty by default, but if you want to access the object in a LP4
formula, you have to enter an unique name for it.
Anchor mode
Depending on the anchor mode the x/y coordinates will be displayed differently.
X/Y/Width/Height
A rectangle is defined by its top left and right bottom corner points. Sometimes it’s helpful to just enter the
coords of one corner point, and to specify the width/height of the object. That can be done be selecting a
different anchor mode.
Filling
A rectangle have different filling types:
not filled (rectangle will be displayed as four lines)
Completely filled (using the selected color)
Fine pattern (will be generated as graphic on most native label printers)
Medium pattern (will be generated as graphic on most native label printers)
Rough (will be generated as graphic on most native label printers)
Inverted (not available on all label printers)
Line width (if no filling is active)
The width of the four lines in [mm]
Corner width
You can create a rectangle with rounded corners by entering a corner width in [mm]. This rectangle type will
be generated as graphic on most native label printers.
Color
The color of the rectangle (note: only supported on color printers)
Print condition
If you have enabled a print condition, the object gets only printed, if the condition is fulfilled at the time when
the print job starts.
4.4
Crosses
4.4.1 Description - Cross
Crosses are two lines, connected in the center.
To create a cross, you have to activate the cross mode, and left-click on a free label area. Now you have to
hold the mouse button down and move the mouse to the second cross corner point. If you want to have a
cross with the same width and height, you can press the SHIFT key while creating the object.
4.4.2 Properties - Cross
Page 61
Name
The name of the cross. The name is empty by default, but if you want to access the object in a LP4 formula,
you have to enter an unique name for it.
Anchor mode
Depending on the anchor mode the x/y coordinates will be displayed differently.
X/Y/Width/Height
A cross is defined by its top left and right bottom corner points. Sometimes it’s helpful to just enter the coords
of one corner point, and to specify the width/height of the object. That can be done be selecting a different
anchor mode.
Line width
The width of the two lines in [mm]
Color
The color of the cross (note: only supported on color printers)
Print condition
If you have enabled a print condition, the object gets only printed, if the condition is fulfilled at the time when
the print job starts.
4.5
Circles
4.5.1 Description - Circle
Circles can be of any width and height, and they can be filled as well.
To create a circle, you have to activate the circle mode, and left-click on a free label area. Now you have to
hold the mouse button down and move the mouse to the second circle corner point. If you want to have a
quader with the same width and height, you can press the SHIFT key while creating the object.
4.5.2 Properties - Circle
Page 62
Name
The name of the circle. The name is empty by default, but if you want to access the object in a LP4 formula,
you have to enter an unique name for it.
Anchor mode
Depending on the anchor mode the x/y coordinates will be displayed differently.
X/Y/Width/Height
A circle is defined by its top left and right bottom corner points. Sometimes it’s helpful to just enter the coords
of one corner point, and to specify the width/height of the object. That can be done be selecting a different
anchor mode.
Filling
A circle have different filling types:
not filled (circle will be displayed as a round line)
Completely filled (using the selected color)
Fine pattern (will be generated as graphic on most native label printers)
Medium pattern (will be generated as graphic on most native label printers)
Rough (will be generated as graphic on most native label printers)
Line width (if no filling is active)
The width of the line in [mm]
Color
The color of the circle (note: only supported on color printers)
Print condition
If you have enabled a print condition, the object gets only printed, if the condition is fulfilled at the time when
the print job starts.
4.6
Graphics
4.6.1 Description - Graphic
Graphics can be used in many gfx formats. LP4 offers many graphic display properties to adjust the bitmaps
as good as possible.
Page 63
To create a graphic, you have to activate the graphic mode, and left-click on a free label area. Now a window
will appear, asking for a graphic file name. If you don’t choose a file, and press „Cancel“, no graphic object
will be created. Otherwise the graphic will get loaded and displayed. Depending if you are using “external” or
“embedded” graphics, the selection window is displayed:
External graphic selection:
Embedded graphic selection:
Page 64
4.6.2 Properties - Graphic
Name
The name of the graphic. The name is empty by default, but if you want to access the object in a LP4
formula, you have to enter an unique name for it.
Anchor mode
Depending on the anchor mode the x/y coordinates will be displayed differently.
X/Y/Width/Height
A graphic is defined by its top left and right bottom corner points. Sometimes it’s helpful to just enter the
coords of one corner point, and to specify the width/height of the object. That can be done be selecting a
different anchor mode.
Rotation
A graphic can get rotated in steps of 90°. There is also a „free rotate“ mode for angles between 0° and 359°
Angle (on „free“ rotations)
The angle value: 0° - 359°
Aspect ratio
If you use a „proportional“ ratio, the graphic can only be sized in a way that the ratio of width and height
remains the same. A „1:1“ ratio will show you the graphic in a way that one graphic dot is one printer dot (not
sizeable). In the „free“ mode you can select any object height/width you want, but of course the graphic can
get heavily distorted that way. The “prortional-anchor” mode is useful with variable graphics: here the current
graphic will be scaled to the defined graphic field, keeping the original width/height ratio.
Color
Page 65
If you have a color printer, you can of course print colored graphics without problems. On b/w label printer an
automatic color convertion will be done, but you can also try to get better results by using a manual color
convertion in the graphic properties.
Transparent mode
If the transparent mode is active, a color in the graphic (usually the white color) is transparent. Note:
depending on your graphic card this mode can cause slowdowns while editing the label.
Transparent color (if transparent mode is active)
The color of the graphic which should be used for transparency.
Brightness
It is possible to darken/brighten the graphics in 255 steps. The „0“ level displays the graphic without
brightness adjustments.
Invert mode
All colors will get inverted.
Anti Aliasing
Edges inside the graphics get smoothed out. This can improve the image quality on color printers.
Print condition
If you have enabled a print condition, the object gets only printed, if the condition is fulfilled at the time when
the print job starts.
Graphic storage
Here you can select between external linked files or embedded graphic symbols.
Content mode
The content of a graphic object can be a constant value (file name or name of embedded graphic), but also
variables like database values are possible.
Graphic file
Here you can select the graphic file you want to use (constant content). If you have a variable content, the
used variable has to give the graphic file name to the object. If the graphic is an external file, the filename
can be a full one (using a complete path), or just the name of the file, then LP4 will look for this file in the
default LP4 graphic subdirectory.
4.7
OLE objects
4.7.1 Description – OLE object
You can place documents of other applications like MSWord or MSExcel directly as OLE objects into a LP4
label. The linked application will do all the drawing and managing of the object, LP4 just serves as painting
area for the external application.
If you create an OLE object by left clicking at the label area, the standard MSWindows „OLE linking“ window
will open. You can select an application or document file in this window. If you use a document file, the object
will not get saved inside the LP4 label file, only a link to this file will be stored.
Hint: if the label display is rotated (90°/180°/270°), showing OLE objects in the label area may get very slow
(depending on the PC). LP4 will reduce the image quality inside the editor window to speed up the drawing,
but the best option is to turn the label design to match the OLE rotation.
Page 66
4.7.2 Properties – OLE object
Name
The name of the OLE object. The name is empty by default, but if you want to access the object in a LP4
formula, you have to enter an unique name for it.
Anchor mode
Depending on the anchor mode the x/y coordinates will be displayed differently.
X/Y/Width/Height
An OLE object is defined by its top left and right bottom corner points. Sometimes it’s helpful to just enter the
coords of one corner point, and to specify the width/height of the object. That can be done be selecting a
different anchor mode.
Aspect ratio
If you use a „proportional“ ratio, the object can only be sized in a way that the ratio of width and height
remains the same. A „1:1“ ratio will show you the object in a way that one graphic dot is one printer dot (not
sizeable). In the „free“ mode you can select any object height/width you want, but of course the graphic can
get heavily distorted that way.
Left/Top/Right/Bottom border
Sometimes it is needed to adjust the area of the displayed OLE object. Positive border values will decrease
the display area of an OLE object, negative border values will increase the area.
Print condition
If you have enabled a print condition, the object gets only printed, if the condition is fulfilled at the time when
the print job starts.
OLE link
If you want to edit the embedded object, selecting this property will start the linked application for this object.
4.8
Deadzones
Page 67
4.8.1 Description – Deadzone
Deadzones are no printable objects, they influence other objects which are touching the deadzone rectangle
instead.
Deadzones can a) switch objects which are touching the deadzone area to „no-printable“, b) limit floating text
fields, to define „no-printable“ areas inside of the text.
To create a deadzone, you have to activate the deadzone mode, and left-click on a free label area. Now you
have to hold the mouse button down and move the mouse to the second deadzone corner point.
4.8.2 Properties – Deadzone
Name
The name of the deadzone. The name is empty by default, but if you want to access the object in a LP4
formula, you have to enter an unique name for it.
Anchor mode
Depending on the anchor mode the x/y coordinates will be displayed differently.
X/Y/Width/Height
A deadzone is defined by its top left and right bottom corner points. Sometimes it’s helpful to just enter the
coords of one corner point, and to specify the width/height of the object. That can be done be selecting a
different anchor mode.
Mode
„All objects“ will affect all objects touching the deadzone areas, „float texts“ will only affect the content of
floating text fields.
Condition
If you have enabled a deadzone condition, the deadzone will onle be active, if the condition is fulfilled at the
time when the print job starts.
4.9
Barcodes
4.9.1 Description – Barcode
Page 68
There are many different types of barcodes availbale in Labels Platform 4. If a barcode type is fully
supported by the label printer, you should use the „Printer barcode“ option to get the best printing quality.
Barcodes which are not directly supported by a printer will be generated as graphics, so you should take
care to select a module width which is fine for your printer’s resolution. Also take note that’s not possible to
use counter variable with graphical barcodes on native label printers.
To create a barcode, you have to activate the barcode mode, and left-click on a free label area. A new
barcode will be placed on this position, you can now change the barcode type and content by the barcodes’s
property window.
4.9.2 Properties – Barcode
Name
The name of the barcode. The name is empty by default, but if you want to access the object in a LP4
formula, you have to enter an unique name for it.
Anchor mode
Depending on the anchor mode the x/y coordinates will be displayed differently.
X/Y/Width/Height
A barcode is defined by its top left and right bottom corner points. Sometimes it’s helpful to just enter the
coords of one corner point, and to specify the width/height of the object. That can be done be selecting a
different anchor mode. Please note, that not every barcode with is possible, it depends fully on the barcode
type and its content.
Rotation
You can rotate a barcode in steps of 90°
Page 69
Barcode type
The following types are available:
Aztec Code
Booklan
Codabar
Codablock F
Code11
Code128 Auto
Code128 A
Code128 B
Code128 C
Code39
Code39Full
Code93
Data Matrix
EAN/UCC128 Auto
EAN/UCC 128 A
EAN/UCC 128 B
EAN/UCC 128 C
EAN13 (optional Addon 2 or Addon 5)
EAN8 (optional Addon 2 or Addon 5)
GS1-128
Interleaved 2/5
Maxicode
MSI-Plessey
PDF417
Pharmacode (one line)
Postnet
QR
RSS14
UPCA (optional Addon 2 or Addon 5)
UPCE (optional Addon 2 or Addon 5)
Addon 2 or Addon 5 codes can be created by adding the Addon content to the real barcode content,
separated by a comma.
For example: the content ‘1234567,12345’ would not only create an EAN8 barcode, but also an Addon5
barcode with the content ‘12345’.
Printer barcode
This option is only available, if the currently selected label printer can print the barcode type directly. If you
select „yes“ the barcode will be printed in best quality, and counter variables are possible. If you select „no“
the barcode will be downloaded as graphic informations.
Module width
The width of the small barcode line. If you are using a printer barcode, you can only select module widths
supported by the label printer.
Ratio
That is the ratio between small barcode lines and thick barcode lines. A value „2.0“ means that the thick line
is twice as big as a small line. You can change the ratio in the range from 2.0 to 3.0.
Text line
Some barcode types offer an optional text line for the barcode, where the barcode content will be printed.
Please note, that the display of the text line could be different from the screen display if you are using an
internal printer barcode.
Page 70
Of course you can always place a real text object beneath a barcode field, to have more control over the text
line optics.
Font
The font used in the text line (if available).
Text size
The size of the text line (if available).
Text position
With some barcode types you can decide if you want to place the text line on barcode top or barcode bottom.
Show checksum
If the barcode is using a special checksum, this option tells the barcode to display it in the text line as well.
Additional checksum
On certain barcode types you can enable an additional checksum calculation:
* Code39 :
Modulo43 checksum
* Interleaved 2/5 :
Modulo10 checksum
* Codabar :
Modulo16 checksum
* GS1/EAN/UCC128: Modulo10 checksum
Bearer lines
Displays additional horizontal lines to limit the barcode height.
Modul height/Max. cols/Max. rows/Aspect ratio/Safety level/Security %
Special PDF417 properties
Error correction
Special corrction properties for Aztec Code/Datamatrix barcodes.
Format
You can select the data format with Datamatrix codes.
Color
The color of the barcode (note: only supported on color printers)
Print condition
If you have enabled a print condition, the object gets only printed, if the condition is fulfilled at the time when
the print job starts.
Content mode
The content of a barcode can be a constant value, but also variables like counters or database values are
possible.
Content
If the content mode is „constant“, you can enter the barcode content directly in this property. Otherwise the
Variable Manager window will open, you can select an existing variable there.
There are special function characters in GS1-128/Code128/EAN128/Datamatrix barcodes. You can reach
them by using the tokens <FNC1>, <FNC2> or <FNC3> in the barcode content. LP4 will map that tokens
correctly on available Windows printers, Zebra printers, Intermec/UBI printers and Esayprint printers. Since
the barcode text line can vary when such function characters are used, it is recommended to use an
additional text object as text line instead.
Page 71
4.10 Texts
4.10.1 Description – Text
Texts are the most often used objects of labels. LP4 can use the big family of Windows True Type fonts, but
also the internal printer fonts are available for variable counters or fast download times.
Windows TTFs will be generated as graphic objects (therefore the download time will be higher and not all
variable types are possible), and the printing of such texts will be very exact. Internal printer fonts will be very
fast to download, and all variable types are usually possible (including counters, etc), but the print out may
vary slightly from the screen display.
To create a text, you have to activate the text mode, and left-click on a free label area. A colored text cursor
will appear, you can now enter the text using the keyboard. You can stop the input mode by pressing ESC or
left clicking a free label area. If no text is inside a text field, the text field will get deleted automatically.
4.10.2 Properties – Text
Name
The name of the text field. The name is empty by default, but if you want to access the object in a LP4
formula, you have to enter an unique name for it.
Anchor mode
Depending on the anchor mode the x/y coordinates will be displayed differently.
X/Y/Width/Height
A text is defined by its top left and right bottom corner points. Sometimes it’s helpful to just enter the coords
of one corner point, and to specify the width/height of the object. That can be done be selecting a different
anchor mode. Please note that with some printer fonts not every height and width may be possible.
Page 72
Font family
The font familiies:
- Windows
- Alltec
- CAB
- Easyprint
- EPL
- Fargo
- Intermec/UBI
- MI
- Sato
- Unicontrol
- Zebra
All installed MSWindows True-Type-Fonts
Internal printer fonts of Alltec-SmartGraph laser systems
Internal printer fonts of CAB printers
Internal printer fonts of Easyprint printers
Internal printer fonts of EPL printers
Internal printer fonts of Fargo printers
Internal printer fonts of Intermec/UBI printers
Internal printer fonts of Markem-Imaje printers (optional)
Internal printer fonts of Sato printers
Internal printer fonts of Unicontrol Easyprint printers
Internal printer fonts of Zebra printers
Font type
Here you can select one of the available fonts of the chosen font family. With True-Type Windows fonts the
standard font dialog will appear, on printer fonts a list will be displayed, showing all available printer font
names. If a “-“ is displayed in front of the font name, this font is not available on your printer model. You can
still use such a font in your label, but the text will be generated as a graphic object, so no counter variables
are possible.
Character height/width
You can enter the average character height/width with this properties. Please note: with some printer fonts
not all values are allowed for the height/width. LP4 will adjust the values automatically, depending on the
currently selected label printer model.
Line space
If you are having a multi-line text, you can adjust the space between the lines using this option.
Variable font size (only in variable content mode)
If the text field is connected to the text field, and a Windows font selected, this option is available. You can
define here that the font size will be automatically adjusted depending on the variable content. LP4 will
enlarge/shrink the font size in a way that the complete content is always visible.
With variable font size, the text types „Float text“ and „Block text“ can contain special tags to control the
relative font size and the font attributes:
[$N100]
[$Bxxx]
[$Ixxx]
[$Uxxx]
[$Axxx]
[$Xxxx]
[$Yxxx]
[$Zxxx]
= Normal regular font style, font size 100%, default
= Bold font style, font size xxx%
= Italic font style, font size xxx%
= Underline font style, font size xxx%
= Bold + italic + underline
= Bold + underline
= Bold + italic
= Italic + underline
The tags need to be positioned at the start of a line (after a CRLF line break)!
Example:
[$X150]Header:
[$N050]
[$N100]That's a normal text, which will wrap at the right side of the text field.
[$I050]That's an italic text, with half font size.
[$N100]Switched back to normal size...
Will be displayed as:
Page 73
Size adjust (Unicontrol printer fonts only)
With Unicontrol printer fonts you can specify, if the printed text should always be within the text field borders
(Size adjust = yes), or if the field borders can be ignored (Size adjust = no, text may get printed somewhat
larger as on the PC display). Variable text fields (counters) are always ignoring field borders.
Alignment
A text can be aligned on the left, on the right, or centered.
Rotation
A text field can be rotated in steps of 90°
Color
The color of the text (note: only supported on color printers)
Text type: Float text/Block text
If you are enabling this option, the text will be automatically placed in the available lines. That means, if a
word is not having enough place to get displayed fully in the current line, the word will be placed in the next
free line instead. You can also use this option in combination with deadzone objects, to create texts which
will be arranged around a given graphic object, for example.
Block texts will additionally enlarge the spaces between words, so they appear left and right border aligned.
Text type: Unicode hex text (LP3 compatibility mode)
It was not possible to use Unicode texts in the old LP3 Editor with text fields. Nevertheless it was possible to
use Unicode fonts in text fields for displaying and printing the Unicode content by using special “hex codes”
as Unicode data. If you have old labels using such data, you can tell LP4 to show the content correctly by
activating this option.
FT-space char/FT-word break
If the float text option is activated, you can define two special characters. The first one will be displayed like a
space character, but LP4 will not try to part the words at this position. The second one can be used to tell
LP4 if a (long) word can be broken in smaller word parts.
Print condition
If you have enabled a print condition, the object gets only printed, if the condition is fulfilled at the time when
the print job starts.
Content mode
The content of a text can be a constant value, but also variables like counters or database values are
possible.
Content
If the content mode is „constant“, you can enter the text content directly in this property. Otherwise the
Variable Manager window will open, you can select an existing variable there.
Page 74
4.11 Special texts
4.11.1 Description – Special text
Special texts are True-Type font fields with special display abilities. Special texts will also be generated as
graphic objects on label printers.
To create a special text, you have to activate the special text mode, and left-click on a free label area. A new
special text will be placed on this position, you can now change the type and content by the special text’s
property window.
4.11.2 Properties – Special text
Name
The name of the special text. The name is empty by default, but if you want to access the object in a LP4
formula, you have to enter an unique name for it.
Anchor mode
Depending on the anchor mode the x/y coordinates will be displayed differently.
X/Y/Width/Height
A text is defined by its top left and right bottom corner points. Sometimes it’s helpful to just enter the coords
of one corner point, and to specify the width/height of the object. That can be done be selecting a different
anchor mode.
Font type
You can select a true type font name and some of it attributes (italic, bold, etc). This setting is not available
with formatted texts, the special text editor has to be used to change this setting.
Character height/width
Page 75
Here you can enter the average character with and height. This setting is not available with formatted texts,
the special text editor has to be used to change this setting.
Character spacing
It can be useful to adjust the spacing between characters, especially when using curved special texts. This
setting is not available with formatted texts, the special text editor has to be used to change this setting.
Page count
Only available in the display mode “formatted text”. By default just one page of formatted text will be
displayed, here you can specify if multiple pages should be placed into the field area.
Rotation
A special text field can get rotated in steps of 90°. Note: depending on your system, a rotated formatted text
may slow down the display.
Color
The color of the text (note: only supported on color printers). This setting is not available with formatted texts,
the special text editor has to be used to change this setting.
Print condition
If you have enabled a print condition, the object gets only printed, if the condition is fulfilled at the time when
the print job starts.
Display type
You can select rotated or curved or formatted special texts. Formatted texts are the default display type if a
new special text object is created.
Content
Depending on the display type, a special editor window will get displayed:
Rotated texts
On rotated texts you can enter the text content, and use an angle between 0° - 359°.
Page 76
Curved texts (static)
On curved texts (static) you can enter the text content, and use several buttons and a special editor field to
adjust the angle of each character of the text. In the editor field you can left or right click one of the drag
points, and move the point to the desired angle.
You can even assign a variable for the content. Since the size of the field will change whenever the content
changes, you should use a „centered“ anchor mode, to prevent movements of the field.
Curved texts (dynamic)
On curved texts (dynamic) you can enter the text content, and define the center point (circle origin) of your
curved text.
Page 77
If you now move your special text field with the Mouse, it will automatically rearrange around the given origin.
If you press CTRL while moving the object, you can also move the origin point itself.
Page 78
Formatted text
Formatted texts can be designed and edited in a way like with typical word processing software (for example
MS Word). It is possible to mix different fonts/sizes/attributes and arrange the text with tabs and tables.
Floating text is available, also in combination with anchored graphics. And of course Unicode texts can freely
be used, so for example cyrillic and chineese texts are possible.
The user can edit the formatted texts in a powerful editor, which appears when the user selects a text object
and presses the space key, or when the user is pushing the “content” button in the text item property
window.
The size of the edit area equals the size of the text object on the label, but it will be displayed always in a
100% zoom in the text editor. If more edit place is needed, the object needs to get resized in the label editor.
The features of the text editor are comparable with modern word processing applications, here is a list of
features:
-
Import of existing documents (WinWord, HTML, XML, RTF)
Insert graphics, with a fixed anchor or embedded in the text. If a anchor is used, the graphic can still be
moved or sized by using the mouse cursor while pressing the ALT key.
All typical clipboard functions, including undo/redo and search/replace functions
All kind of font/attributes/tab/numbering options, available in MS Word alike dialog windows.
Tables can be defined (either invisible, for easy text arrangement, or visible with custom line widths)
LP4 Variables can be inserted in the formatted text.
With the menuitem “variables” an existing variable can be chosen from a list, and it will be inserted at the
current text cursor position. The variable will be displayed by name in the editor window, it cannot be
directly changed in the editor, though. If a variable should get removed, the user has to select it (variable
will highlight) and remove it by using the variable menu.
In the label the current variable content will get displayed, and not the variable name.
Especially List/GHS variables are very powerful to use with formatted texts. You can see examples of
such a usage in the installed LP4 example labels.
Notes:
Page 79
-
For displaying and editing of the formatted texts a special ActiveX control is used. If this control is not
installed properly (for example if the user has only copied the LP4 folder) the “formatted text” display
type is not available. It is possible to install the ActiveX control manually by double-clicking the file
“TXRegister.bat” in the LP4 directory (administrative rights required).
-
If a document with multiple pages gets imported into the text editor, by default only the first page will be
visible in the label. The editor window will display all pages, though, so the user can edit the text to suit
its label appearance.
Also please note to make the text object big enough before importing a document, otherwise the
imported text may get rearragend to fit in the current size, and the original formatting will be lost.
It is also possible to display multiple pages in the same field area: simply increase the “page count”
option in the text field properties.
-
LP4 does not support OLE linking inside the formatted texts. The text editor will support it (it is possible
to paste an OLE link by using the clipboard functions), but as soon as the editor gets closed, LP4 will
remove all such links because of stability reasons.
-
If you need to use very small fonts (point size 7 or smaller), you may get an uneven text display
(character spacing seems to be wrong sometimes). That depends on the font and the default Windows
printer driver you are using (the TXControl is taking informations from the default driver to render fonts),
or the printer driver you have configured for the TX Control in the LP4 Configuration.
In LP4 it is also possible to improve the look of small fonts by increasing the internal rendering resolution
of the TXControl by using an INI switch. The only side effect: the higher the internal resolution, the
smaller the maximum width of the text field. The default resolution of „1“ is supporting a field width of
around 50 cm. If you are using the resolution „2“ (twice as high resolution“, you can only use fields up to
25 cm. The resolution „3“ will limit the field width to 17 cm, and so on (50cm divided by the resolution
factor).
If you need an factor bigger than 1, you can set it in your local LP4.INI configuration file:
[Settings]
...
TXSizeFactor=2
...
Page 80
5 Label variables
5.1
Generic
Label variables are used, if you need to fill texts or barcode fields dynamically. Also the printing of each label
field can depend on variables, using the field’s print condition. Variables can import data from various
sources, and even change the printing behaviour (for example by changing the print quantity, or by moving
around the label fields dynamically).
Label variables are generated and stored for each label, but they don’t have to be linked to printable label
fields. For example you can create a database variable, importing data from a database table, but you don’t
use that imported data directly in a text field, but in another variable (for example a formula variable).
You have to be aware that variables will get executed in a given order. So, if one variable depends on
another one, this variable should be further below in the variable order, to access the correct variable data,
and not some old data from a previous print job.
For example: a formula variable is used to calculate a checksum over the contents of a database variable
and a user input variable. Here you should use the following variable order:
1. Input variable
2. Database variable
3. Formula variable
Position 1 and 2 can be swapped in this example, since the first two variables don’t depend on each other,
but if the database variable would be used as a default value for the input variable, the order has to be:
1. Database variable
2. Input variable
3. Formula variable
If the formula variable would be on top in this list, wrong printing would happen: the formula would calculate
the checksum over two old values (probably the ones from the last printing), and not over the actual
entered/readed values.
The golden variable rule is: always look after variable dependencies, and adjust the variable order if needed!
Therefore it is also not possible to create ‚recursive‘ variable dependencies. If, for example, a data base
variable depends on an input variable, which also needs the data of the database variable as a default value,
it’s not possible to arrange the variables in a correct order, and one of the variables will use an old value. But
also no lock ups due to endless loops will be possible that way.
The creation and ordering of variables is done in the Variable docking window.
Page 81
Here you can create/change/delete variables, and change their order by Drag&Drop.
There is also a “Variable selection” window available, which is used when you need to select a label from a
field property:
You can use this window to create/change/delete variables as well.
It is also possible to use the LP4 Database Manager to create certain variable types (database and table
variables) by drag&drop from the database manager window to the label area.
Page 82
5.2
Constant Variable
5.2.1 Description – Constant variable
The Constant variable is the easiest type of variable available. You can only enter a constant text (beside the
unique variable name), which is used as the variable content.
Still such variables can be useful, for example if you are having many label fields containing the same text. If
you link that fields with a Constant variable, you only have to change the text once, if it needs to get
changed. All label fields will automatically have the new text this way, you don‘t have to change all fields
seperately.
5.2.2 Properties – Constant variable
Name of variable
The unique name of the variable
Constant text
Edit field for the variable content
5.3
Input Variable
5.3.1 Description – Input variable
The input variables can be used to enter new values by keyboard (or by a keyboard-scanner device) each
time when a print job is starting.
The input window will list all defined input variables, using the user defined variable order.
Page 83
5.3.2 Properties – Input variable
Name of variable
The unique name of the variable
Input remark
This text will be displayed in the input window in front of the edit field, for example „Article number:“
Default text (variable/constant)
This text will be used as default value in the input window. You can use a constant default text, or a text from
another variable (for example a default text from a database variable). Please note: if you are using variable
default texts, you have to take care about the variable order.
It is also possible to activate an option to replace the constant default value with the text the user will enter
the next time. That way the input field for this variable will show on each print job the last entered user value,
instead of the default text (until the label will be reloaded, of course then the input field will start with the
saved default value). To store the input remanently, you have to use the “Store input in file” option, then the
input data will be saved in a INI file on the LP4 data folder.
Input type
There are four different input types available:
- Text input: the the user can type in text in the input window. It is possible to limit the numbers of
characters, or give a special text format the user has to use for his input. For example: if the user should
enter ‚AB‘, then another char, and at the end four numbers, a format mask AB@#### can be provided.
It is also possible to activate the “Limit keyboard input to mask” option, now the user really only can enter
the mask positions, all fixed positions of the text are not available. There is also a small drawback,
though: the “*” wildcard is not usable with this option, and no clipboard functions are available.
Page 84
-
Integer input: that’s like the text input, but you can specify a lower and upper limit for the entered value.
Floatingpoint value: same as the integer value, but you can provide a floating point upper/lower limit.
Selection input: here you can enter the selection items, you user cannot input any text with this input
type, but only select one of the available items. You can also define a variable containing the selection
items, simply separate the items by semicolon (“Yes;No;Maybe”).
If the input type is not “Selection input”, the user can even select how the input cursor should behave in the
LP4 input window: if “Cursor left” is activated, the cursor will be placed at the left side of the input field. If
“Cursor right” is activated, the cursor will be placed at the right side. “Select all” will select all the current text
of the input field, so the next keystroke will clear the complete field.
5.4
Time/date Variable
5.4.1 Description – Time/date variable
Very flexible time/date functions can be defined using the Time/date variable. It is also possible to add an
expirement time to the time/date.
Please note: the current PC system time is used for Time/date variables. If you want/need to use the real
time clock of a printer, you cannot use Time/date vars, you have to use special printer variables instead.
5.4.2 Properties – Time/date variable
Name of variable
The unique name of the variable
Time/date format
Here you can define the needed display format and informations. Simply select the needed parts from a list,
and add them to your format field. You can also edit the format field directly, for adding special separators,
for example.
Page 85
Add value (expire)
Activate this option if you need to add a certain amount of time to the current system time/date. You can
specify a fixed value, which will be always added, or the content of a variable. In the format field you specify
the type of the value (for example months or days).
Please note: if you are using a variable addition value, take care about the variable ordering.
5.5
Formula Variable
5.5.1 Description – Formula variable
The most powerful variable type is the formula variable. You can do calculations, text manipulations, or even
move or hide label fields.
5.5.2 Properties – Formula variable
Page 86
Name of variable
The unique name of the variable
Formula edit field
Here you enter the formula, using constant texts, variable names and special formula commands. At the
bottom of the window you can see an help window, showing all available variables or all formula commands.
Simply do a double-click at one entry, and the text will get placed inside the formula edit field. You can also
start up an online help for the available formula commands.
5.5.3 Formula commands – Formula variable
How to create a formula
Formulas can use three different base types: texts, integer values and floating point values. You can do the
usual calculations with the values, and texts can get manipulated by the proper formula commands.
Different parts of one formula can get separated by a semicolon. The result of the formula will be the
combination of the results of every single part.
Existing base types:
Integer values
Range from -2147483647 to 2147483647.
For example: -100; 0; 0xFF (hexadecimal notation)
Floating point values
Range from +-2.2250738585072014 E-308 to +-1.7976931348623158 E+308.
The decimal sign is the dot (eg. 123.45). If you have very big/small values, you can use the exponential
notation, VALUE E EXPONENT (for example: 123.45 E 15)
Texts:
Texts will be set in double-quotation marks (“ ... “).
For example: “Hello“, “Q“, “1234567890“
Variables:
By using the variable name you can insert the content of a variable into the formula result. You can use any
variable type (database, input, even other formula variables), but you should ever have a look at the correct
variable order.
Hint: it is not possible to use variable names containing special characters (like “+”, “-“ or all kind of brackets)
in a formula, since this characters will have a special calculation meaning in the formula, making it
impossible for the formula parser to detect the variables correctly.
Easy example:
Formula: “Weight: “;WEIGHT; “ kg“
This will insert the content of the variable WEIGHT between the two constant texts.
Basic calculations:
You can use +,-,*,/ along with integer/floating point values, also (...) is possible. The „%“ operation will
calculate the division rest.
Easy example:
Formula: “Package weight: “;(WEIGHT/100)*5; “ kg“
This would calculate another weight value from the original WEIGHT variable. The variable type would need
to be integer or floating point, but most variables will create text contents. To use such variables as a value,
you have to use an _int or _real command on the variable name first, for example.
Formula: ‘‘Package weight: ‘‘;(_int(WEIGHT)/100)*5;’‘ kg’‘
Page 87
Special commands:
_case (Variable, # Test1 : Value1 # Test2 : Value 2 #... [, optional default text ])
Using a _case command you can test a given variable to contain certain contents. If a contain is found in the
# list, the value after the : will be the result of the _case command. If the content cannot be found in the list,
the _case will result in an empty text or in the optional default text (if given). You can write the _case
command in multiple lines to get a better overview on large lists.
Example: _case(INPUTVAR, # 0 : ‘’Off’‘ # 1: ‘’On’‘,‘’Not found’‘)
_cat (Text1,Text2)
This will combine two texts to one resulting text. It is needed, if another command just accepts one text
parameter (you cannot simply write Text1;Text2 as an parameter, since that are two texts, not only one).
Example: _mod10(_cat(TEXTVAR, “45678“))
_check5s(5 characters of text)
The result of this command is one checksum character (text) which will be used in special EAN13 barcodes.
Example for correct EAN13 encoding:
“270072“;_check5s(“10950“); “10950“;_mod10(12)
bzw.
“270072“;_check5s(VARIABLE);VARIABLE;_mod10
_check6itu(text)
This command will calculate a CRC 6 ITU checksum (two characters). You can specify the text you want to
use for calculation as a parameter, or you can give a number of chars. If you specify a number, the n chars in
front of the _check6itu command will be used for calculation.
Example:
or
''123456789012'';_check6itu(12)
VARIABLE;_check6itu (VARIABLE)
_chr(integer value)
This will turn an integer value in the range from 0 to 255 into one text character, the character will be the
proper ASCII character for the given value.
Example: “Char: “;_chr(65); “ is ASCII 65“
_convert(text, type number)
This will convert a given value text into a different format. The type number is controlling the convert action:
0 = Decimal -> Hex
1 = Hex -> Decimal
2 = Decimal -> Base33
3 = Base33 -> Decimal
4 = Decimal -> Alpha numeric
5 = Alpha numeric -> Decimal
Page 88
Example: “Hex: “;_convert(“123“,0); “ is Decimal 123“
_if(condition,true text,false text)
The condition will be checked, if it is true (not equal 0) or false (equal 0). The condition can use the following
compare options:
x1 > x2 Greater
x1 < x2 Less
x1 >= x2
Greater equal
x1 <= x2
Less equal
x1 == x2
Equal
x1 != x2Not equal
Using ( ) and AND / OR commands you can also check larger logical conditions.
If the condition is true (not equal 0), the result of this test will be the „true text“, else the „false text“ will be
taken.
Note: an _if command is only able to select between two given texts, but it’s not possible to use execution
commands like _objmove in the true/false branches. If you do that, random results will happen.
Example:
_if(Testvar==“Hello“, “Testvar contains Hello“, “No Hello“)
_if(
((Month==1) AND (Days>31)) OR
((Month==2) AND (Days >29)) OR
((Month==3) AND (Days >31)) OR
((Month==4) AND (Days >30)) OR
((Month==5) AND (Days >31)) OR
((Month==6) AND (Days >30)) OR
((Month==7) AND (Days >31)) OR
((Month==8) AND (Days >31)) OR
((Month==9) AND (Days >30)) OR
((Month==10) AND (Days >31)) OR
((Month==11) AND (Days >30)) OR
((Month==12) AND (Days >31)),
“DATE IS ILLEGAL!?!“, “Expirement time:“ )
_int(text)
The result will be the integer value of a given text
Example: “Value : “;_int(TEXTVAR)*100
_labcount
Will return the number of to printed labels on job start.
Example: “Label quantity: “;_labcount
_labname
Contains the current label file name.
Example: “Label name: “;_labname
Page 89
_labuser
Contains the current user name. If the usermanagement is disabled, or no user is logged in, the return value
will be empty.
Example: “Username: “;_labuser
_labprinter
Contains the active printer name of the current label file.
Example: “Printer name: “;_labprinter
_lppath
Contains the current LP4 installation path (default„C:\ LP4\“). The path contains a trailing back space
character.
Example: _lppath;“My settings.INI“
_left(text,count)
Result is the left part of a given text. The count is the numbers of chars to be taken.
Example: _left(“Hello world“,5)
_len(text)
Result is the length of the text (number of characters).
Example: “Length: “;_len(“Hello“)
_mid(text,start,count)
Result is the midth of a given text. The start is the number of the character to start (the first char is position
1), the count is the numbers of character to be taken.
Example: _mid(“Hello wonderful world“,6,9)
_mod10(text) or _mod10(value)
This command will calculate a modulo 10 checksum character. You can specify the text you want to use for
calculation as parametert, or you can give a number of chars. If you specify a number, the n chars in front of
the _mod10 command will be used for calculation.
Example:
or
“123456789012“;_mod10(12)
_mod10(“123456789012“)
_mod43(text) / _mod43(value) / _mod103(text) / _mod103(value) /
_mod1094(text) / _mod1094(value)
Same as _mod10, just a different calculation is used.
Page 90
_objmove(name,X-value,Y-value)
This command will move a label object field to a given label position (the position values are 1/100 mm
value, so 100=1mm).
Example:
_objmove(“Test“,100,200)
moves the field “Test“ to X=1mm, Y=2mm
_objprint(name,0/1)
Will make a given label object „printable“ (=1) or „not printable“ (=0).
Example:
_objprint(“Test“,0)
will mark the field „Test“ as „not printable“
_objsize(name,Width-value, Height-value)
This command will size a label object field to a given new width and height (the width/height values are 1/100
mm value, so 100=1mm).
Example:
_objsize(“Test“,1000,2000)
resizes the field “Test“ to a width of 10mm, and an height of 20mm
_part(text,divider,number)
This command will give the n-th part of a text list. You can specify the dividing character of the list, the
number will start with position 1. The result will be empty, if there does no n-th part exist in the list.
Example:
_part("Dog;Cat;Mouse",";",2)
Results in "Cat".
_replace(text,oldtext,newtext)
This command replaces a textpart within a bigger text. If the text can be found multiple times, each instance
will be replaced. The replacement is case-sensitive.
Example:
_replace("Wintertime in Indiana";"in";"out")
Results in "Wouttertime out Indiana".
_readini (positionstext,standardtext)
Reads a text entry from a given INI file. If the text entry doesn‘t exist, the standardtext will be returned
instead. The positiontext have to build like the following: “SECTION;ENTRY;INIFILE“. SECTION is the
section name in the INI file (the group name in [...]), ENTRY is the key name in the section, followed by a „=“.
The last part is the full path name of the ini file, if this one is missing, the function tries to read the entry from
the MSWindows WIN.INI.
Example:
or
_readini(“SETTINGS;TEST;C:\LPFORM\TEST.INI“, “not found“)
_readini(“SETTINGS;TEST“,“not found in WIN.INI“)
_real(text) / _reald(text,decimals)
Page 91
Result is the floating point value of a given text. With the _reald function you can specify the number of digits
after the decimal point.
Example: “Calculation: “;_real(TEXTVAR)/1.25
_remchar(text,characters)
Removes all given characters from the first text.
Example: _remchar(“100.12“, “. “)
_right(text,count)
Result is the right part of a given text. The count is the numbers of chars to be taken.
Example: _right(“Hello world“,5)
_setcount(value)
Sets the print quantity before the print job is generated. The old user print quantity will get overwritten.
Example: _setcount(10)
_text(value) or _text(unicode-var)
Changes a value to a text, for example to use it with another text command.
Example: _mod10(_text(INTVAR))
If the argument is a LP3 Hex Unicode variable (content: “FFFE…”), the text will be converted to the real
Unicode text.
_textpos(text,search text)
The first text will be searched for occurence of the search text. If the search text can be found in the first text,
the result will be the starting position. The first position is 1, if the text cannot be found a 0 will be returned.
Example: if(_textpos(WEIGHT, “. “)==0, “no decimals in weight“,WEIGHT);
_varupdate
This command will not change the content of a formula field. It will tell LP4 that all variables used inside of
the formula has to get re-calculated for each label again.
_writeini (positionstext,new text)
Writes a new text in an INI file. The position text has the same structure as in the _readini command, there’s
just one speciality: if the postion text contains no entry name, the _writeini will delete the complete section
from the ini file. This command will only be executed if a real printing gets started.
Example:
_writeini(“SETTINGS;TEST;C:\LPFORM\TEST.INI“, “Hello“)
Page 92
or
_writeini(“SETTINGS;;C:\LPFORM\TEST.INI “,““);“Section deleted“
_writefile (filename,new text)
Writes a new text line in a text file. If the file does not exist, it will get created. This command will only be
executed if a real printing gets started.
Example:
_writefile(“C:\LPFORM\TEST.TXT“, “Hello“)
Examples
Here is a more complex formula for calculating a special EAN128 barcode content.
The variable MHD contains the date text “12.03.99“, the variable EAN contains “0401234512345“ and EPA
contains “75“:
“(01)9“;_mid(EAN,2,12); _mod10(13); “(15) “; _mid(MHD,7,2); _mid(MHD,4,2); _mid(MHD,1,2); “ (30) “;EPA
result: (01)94012345123459(15)990312(30)75
5.6
Counter Variable
5.6.1 Description – Counter variable
A counter is needed, if you want to place a special number field (text or barcode) unto the label, the number
will change every printed label.
Please note: if you print at a real label printer, the counter text field has to use an internal printer font. Also
barcodes have to be real internal printer barcodes, otherwise the counter value will not change at all. This
restrictions don’t apply to Windows printers.
5.6.2 Properties – Counter variable
Page 93
Name of variable
The unique name of the variable
Start value
The start value of the counter
Step
Positive step values will count up, negative step values will count down.
Field width/leading zeros
How many characters are used for the counter, for example a counter using field width 3 and leading zeros
will get printed as „001“.
Same labels
If you need a counter which doesn’t change on every label, but on every n-th label, you can define this here.
Reset to value x at value y
It is possible to define counters which will jump back to a starting value when they have reached a givene
limit. For example you can define a counter which will count up to „999“, and jumps back to „001“ after he
has reached this value.
All values can be fixed, or be of variable origin. If you are using variables, take care about the variable order.
Counter type
It’s not only possible to define numeric counters, also hexdecimal, alphanumerical or counters with base 33
are available.
Start value format
Often the start value is not a fixed value, but given by other variables (for example input variables). And if the
counter type is not numeric, the given start value should often be in the same format as the printed counter
value. This can be controlled with “start value format” setting.
Page 94
Preview
The preview button will open a new window, displaying the first 20 counter values. That can be used to verify
the current counter settings.
5.7
Printer Variable
5.7.1 Description – Printer variable
You can use internal printer variables to access certain printer infos like the printer‘s real time clock. You will
need knowledge what kind of variables your printer is offering, LP4 will give you but a small collection of
available printer variables for some printer types.
Also, the LP4 Intermec input variables can be defined here.
5.7.2 Properties – Printer variable
Name of variable
The unique name of the variable
Printer variable
You have to enter the correct printer variable name or definition here, LP4 will add that text to a print
command for the printer. You can use predefined variables, or define your own variables, if the printer is
supporting them. Some printers (for example Unicontrol) will also allow to access the content of a LP4
variable inside the printer variable definition: simply add the placeholder [SVAR]LP4VariableName[EVAR] to
the printer variable definition, on print start LP4 will replace this placeholder with the current content of the
LP4 variable.
Page 95
CAB printers are capable to use whole sequences with variables. To use this in LP4, you can define a text
field with a “:NAME” field name. This field name can be used in following variables as [NAME].
Example:
1. Text field „:NETTO“, connected to printer variable „[?:Amount netto][I]“.
2. Text field, connected to „[*:NETTO,19]“
The first field will not be printed (due to the [I] sign), it just holds the user input in variable NETTO. This
variable is used in the second text field (multiplication by 19).
Please note: you need to define the fields in “reverse order”, the first text field needs to be below the
second field in the LP4 field list (because LP4 will send “lower” fields first to the printer).
Printer input variable
The Intermec input variable is comparable with the LP4 input variable, but the user can input the values
directly at the printer panel.
5.8
File Variable
5.8.1 Description – File variable
To read values from a file, you can use the file variable. The file variable can use keywords to find the data
(like INI files), or fixed positions, or (for example) comma separated positioned data.
It is also possible to write data into files. In this mode the file variable will have no return value, and just start
the write action on every print job.
5.8.2 Properties – File variable
Name of variable
The unique name of the variable
Page 96
Mode
There is a reading mode (to get data from a file) and a writing mode (to store data into a file)
File name
Can be fixed or variable. If the file name does not contain a directory, the LP4\DATA folder will be used as
directory instead.
File type
You can select files with keywords (like INI files) or fixed position files or character (comma) seperated data
files.
File type – Keywords or INI file
If you are using keywords, LP4 is looking for the following:
KeycharacterKeyword
So, the first character of a keyword (key character) is always used as special termination info, if LP4 is
reading this character, it assumes that the text field is finished.
Example:
@S1=Test1
@S2=Test2
If you now entering @S1= as keyword, LP4 will read the text „Test1“. The key character shouldn’t be used in
the real text, of course.
Example:
@[email protected]
@S2=....
Would just read the value „hugo“. Up to 4095 characters can be read at once.
If you have to read entries from Windows INI-files, you don’t need a key character. In this case you specify
the INI section and the INI entry by entering „[INI-SECTION]entry“.
File type – fixed positions
This type can be used, if the source file is always having the same structure. In that case you can simply
select the first and last position of the text to read, up to 4095 characters are possible.
File type – character seperated data
If the source file contains single lines with character sperated data, you can specify here the position of the
data, and the ASCII-value of the data seperator.
For example:
12345678;Business Inc;Red;999999
87654321;ISP Solutions;Green;3333333
If you want to have the third data from this file, you specify „3“ as position and „59“ (the ASCII value of a „;“
character). The variable will read the data „Red“. Position „7“ would be „Green“ (therefore, also multiple data
sets can be in one file).
File type – last line of file
In this mode the variable will read the last complete text line of the file. If the file contains just one line of text,
this one will be read.
Page 97
This type is also useful in writing mode: it will add a new line with the given data, so you can easily create
logging functionality.
File type – XML file
You can read an individual XML value from a given XML file. You just have to specify the tag name (either
fixed or by using a variable). There is a button „XML keyword“ with this file type, which will help you to find
the right tag name: a window with an example how to build the tag will appear, and it is even possible to
select a tag from an existing XML file in this window.
With XML files you can also specify to read the content as Unicode. You can use such variables in text fields
with the content type “Unicode” to display special language characters.
File writing
Every of the file types can not only be read, but also get written. If you select the „Write file“ mode, you will
get some addtional options:
„Create new file on writing“ will delete any existing file berfore writing into a new file.
The „Data to write“ can be a fixed text, or a text returned by a LP4 variable.
A file variable in writing mode will not return any printable text, instead the write action will be executed on
each started print job. It can be used to store the current counter value inside of a file, or to make an easy job
logging function.
5.9
Table Variable
5.9.1 Description – Table variable
The table variable is a special way to access database tables, to generate labels with different contents each
label (for example for address labels). By adding a new table variable, LP4 will automatically generate a sets
of „sub table variables“, each of them will hold the value of one field from the table.
5.9.2 Properties – Table variable
Page 98
Name of variable
The unique name of the variable
ODBC data source
Here you can select an existing ODBC data source name. Per „...“ button you can enter a username and
password, if the database requires such. If you want to access an Access database, you don’t have to create
an ODBC source, you can simply enter the filename of the Access MDB file, using ‘ACCESS=..xxx.mdb’.
Table definition
Here you can specify the table. The selection fields will build a SQL expression which will select the wanted
data.
The table variable doesn’t select only one value (like the database variable), but a complete table set, usually
multiple rows of data. Each row will be printed on a different label. Easy example: you have a customer
address database, and you want to send packages to some (or all) of your customers, printing the customer
name and address.
Simply select all the required tables and fields in the table variable property window, if you want you can also
give a special order statement, or some data limitation (for example: only customers living in Berlin).
Experienced database users can even enter a completely customizable SQL statement, like: ‘SELECT
table1.Name AS LPDATA1, table1.Street AS LPDATA2, table1.City AS LPDATA3 FROM table1 WHERE
table1.City=‘Berlin‘;’
Using the button „Build table...“ you can easily check, if your definition will give you the right set of datas, you
will see a table view containg all the print informations.
All table fields will be accessable as sub variables, LP4 will generate them automatically. In the above
example the sub variables for the fields ‘Name’, ‘Street’ und ‘City’ would get created, and named like
‘001_ADDRESS’, ‘002_ADDRESS’ und ‘003_ADDRESS’. You can use that variables directly with text or
barcode fields, of course.
Page 99
The ‚main table variable‘ also has a result: the number of selected data rows. That can be used in another
text field, for example, but usually this value will be used to automatically set the print quantity, to print as
much labels as selected data rows. This can be archived by using the variable’s value in a formula variable,
using the „_setcount“ formula command.
The easiest way to create table variables is to drag&drop them from the LP4 Database Manager. It will
create all necessary variables for an easy table print.
5.10 Database Variable
5.10.1 Description – Database variable
The database variable can be used in combination with the LP4 Database Manager, or for to read single
values from an existing ODBC database.
5.10.2 Properties – Database variable
Name of variable
The unique name of the variable
ODBC data source
Here you can select an existing ODBC data source name. Per „...“ button you can enter a username and
password, if the database requires such. If you want to access an Access database, you don’t have to create
an ODBC source, you can simply enter the filename of the Access MDB file, using ‘ACCESS=..xxx.mdb’.
Page 100
Selection using DB Manager / search criteria / SQL statement
The database variable has 3 different modes:
a) in combination with the LP4 database manager. The value which the user has selected in the database
manager will get printed that way.
b) without LP4 database manager. You have to give a „search field“ and „search value“, LP4 will access the
data set which is matching the search criterias. For example you can use an input variable „Please enter
product number“, and use this variable as search value for the database variable.
c) without LP4 database manager, using a complete SQL statement. That way very complex queries can be
done, and you can even access other variables contents by using the {...}: SELECT table1.Test as LPDATA
FROM table1,table2 WHERE table1.PNumber=table2.ID AND table1.ID={LPVARIABLE};
You can use the „Test read“ button to check, if your database variable is working correctly. if there is an error
condition, it will get displayed in full text form (if an error occurs while printing, no error message appears,
and the default text will be printed instead).
5.11 External Variable
5.11.1 Description – External variable
The external variable can only be used in combination with the LP4 COM interface. This interface can be
used to control LP4 label printing from an external application. In the LP4 COM interface exists a special
command to set the content of external variables, so this variable type can be used to transfer data from one
application to LP4.
Also some LP4 Product Manager applications are using external variables as data source.
5.11.2 Properties – External variable
Name of variable
The unique name of the variable
Default text
As long as no external application is changing the content of the variable, the default text will be used for
printing.
Page 101
5.11.3 LP4 remote control
Using the automation interface LP4COM
LP4 offers an automation control, which can be used in Visual Basic or other automation-capable
applications.
The automation interface will be registered automatically when LP4 gets installed, otherwise you can register
the interface by starting the LP4COM.EXE application with the /RegServer command line.
Here is some small Visual Basic code, explaining all the available LP4COM interface functions:
Sub PrintMe()
‘ The first two lines are creating a LP4 object for communicating with the LP4 spooler.
‘ IMPORTANT: the printer connection will only last as long as the object exists.
‘ So usually it is much better to create that object globally, to keep it alive as long as
‘ the application is up and running. If you are using only MSWindows printers, it’s
‘ not necessary to keep the object alive, and you can define the object locally.
Dim LP As Object
Set LP = CreateObject(‘’LP4COM.LP4’‘)
‘ Set the label file name... if no path is given, LP4 will search the label in the current
‘ label directory
LP.LabelName = “test.lbe“
‘ Set the batch count to print
LP.Count = 654
‘ Set the printer connection name. This printer will be used for printing the job
LP.PrinterName = “LASER“
‘ The above properties have always to be set before the printing can start...
‘ Additional you can transfer data into external label variables, here for example
‘ we set the external variable „Hugo“
Call LP.SetVar(“Hugo“, “This is an example text“)
‘ Now you can start the job. The “Print“ function doesn’t have any arguments, it
‘ will return if the print job was created successfully (value 0) or if an error
‘ occurred (value not equal 0)
Page 102
i% = LP.Print()
‘ If you are printing at a real label printer, you can ask the LP4 spooler for the
‘ current printer/job state:
‘
‘ i% = LP.State()
‘
‘ i% can have the following values:
‘ -5: Printer name unknown
‘ -4: No printer connection
‘ -3: Printer connection „File“
‘ -2: Cannot open port
‘ -1: Port doesn’t exist/error
‘ 0: Printer is online, no job pending
‘ 1: Job is spooling
‘ 2: Job is printing
‘ 3: Paper out
‘ 4: Bad temperature
‘ 5: Head open
‘ 6: Ribbon out
‘ 7: Unknown state
‘
‘ To reset a printer connection, you can use the following function:
‘
‘ i% = LP.Reset()
‘
‘ If the reset was successfully, the result will be 0, and the current print job gets
‘ canceled. Also the communication will start anew.
End Sub
There is an additional command to ‚remote control‘ the LP4 Database Manager. This command will set (like
the above shown „SetVar“ command) variables in the selected LP4 layout, but it will set the LP4
DatabaseManager variables instead of the external ones.
Code example (VB):
Call LP.SetDBMVars("LPODBCTEST", "LP4DB", "ProductID=21303")
The first parameter is giving the ODBC datasource name (here: LPODBCTEST). If the source also needs an
username and password, the proper values ahve to be added to the source name with help of the „@“
character (example: „LPODBCTEST@Name@Password“).
The second parameter is giving the table name of the ODBC source (example: LP4DB).
The last parameter is the search key and the search value (search condition). In the example the data with
the number 21303 in the „ProductID“ column will be selected. If a text has to be searched, simple quotation
marks have to be used for the value (example: "TextCol=‘ABCDEFG‘").
The „SetDBMVars“ function call will open the database, search into the table for the wanted value, and set
the found data record in the Database Manager variables in the layout. If no record can be found, the
variables will use their user given default values instead. Attention: like with the real Database Manager
application, a call to the function will initialize all database variables.
Page 103
5.12 RS Variable
5.12.1 Description – List/GHS variable
The List/GHS variable can be used for an automatic database selection of numbers and texts. LP4 comes
with a special database (LP4RS) containing over a dozen different languages of Risk texts.
You will need a Premium version of LP4 to use this type of variables.
5.12.2 Properties – RS variable
Name of variable
The unique name of the variable
ODBC source
As with the database variable, you can select an existing ODBC connection here. By default the connection
“LP4RS” will be used.
If you want to use your own database, please note that it needs the following structure: each language is a
separate table. The table name should be related to the language (like “ENG” = englisch, “IT”= italian).
Language
Fixed: all available table names (=languages) will be listed here, you can select one of them.
Page 104
Variable: a LP4 variable containing the table name can be selected here.
List selection
Fixed: you can select multiple numbers from the table
Variable: you can select a LP4 variable containing the numbers, separated by a “;”. For example : “R 1;S 4;S
23c”. You can also specify Alias texts, like “R1=ABC;S1=EFG;…”.
Display options
Here you specify the display details. For example if only the texts should be displayed, you simply deactivate
the number display. You can also define how the texts are separated, etc. The “Wordbreak” option should
always be used with the “LP4RS” database, since it will contain texts using the “}” character as word break. If
you want you can remove this character, or replace it with another one: the formatted special text field will
use the ASCII character 31 as wordbreak, for example.
Page 105
6
6.1
The LP4 Print Tool
Generic
The LP4 Print Tool is an external application which will get installed with the main LP4 application. It offers
an easy way to print existing labels. The user cannot edit labels that way, but he can adjust all parameters
needed for printing the labels.
It’s also possible to get print-only licenses which will only allow the usage of the LP4 Print Tool (for example
for production lines).
6.2
Usage
The print tool short cut can be found after installation in the Labels Platform 4 program group. The print tool
has the same features and controls as the LP4 print dialog, it just offers the possibility to select a label
(including a label file preview):
The user can select the label file, adjust the printer (if needed), and start the job by pushing the „Print“
button.
If there are input variables defined on the selected label, the LP4 input window will show up, otherwise the
label download will start.
Page 106
7
7.1
The LP4 Printjob Manager
Generic
The Printjob Manager is like the LP4 Print Tool an application for starting printing jobs. Instead of selecting
one label for printing, you can define whole label lists in the Manager. Such a list can be started by pressing
a button, all print jobs of the list will be generated. The LP4 Spooler will now work in the background, and
activate the jobs after each other on the given printers (please note: the printers have to be connected bidirectional).
It is possible to save a job list, and to load it later on demand.
7.2
Usage
After installation the Printjob Manager can be found as an icon in the LP4 program group. You can also start
the Manager from the LP4 label editor, by selecting the menu item „Addons“ -> „Printjob Manager“. Now the
application will start and display the following window:
By using the „Add“ button you can select one or more label files and put them into the list. Those entries can
be changed by the edit fields below the job list: the label, the printer and the batch count can be
selected/edited here.
Page 107
If you want to change other existing entries, you can select them by mouse or keyboard, and use the edit
fields to enter the new values. It is possible to select multiple entries (by using the SHIFT or CTRL keys), and
to change all entries at once.
To remove existing entries, or to change the job order, you can use the buttons on the right side of the
window.
For a fast change in the batch counts of existing entries, you can simply click on one of the counts in the list.
Now an edit field will appear there, simply enter the new value and click on the next entry you want to
change.
After you have defined your list, you can save it into a text file (button „save list“). With the button „Load list“
you can load the list at a later time. The current list will also be saved each time you close the application, in
a file called „LP4PJManager.INI“. Thios list will also get loaded automatically each time you start the
application again.
By pressing „Start print jobs“ all jobs in the list will be generated and put into the LP4 Printer Spooler. The
Spooler will now transfer the first job to a printer, then wait until it is finished, and start the next job, and so
on. Please note: the LP4 Spooler will only be active as long as at least one LP4 application (for example the
Printjob Manager, or the label editor) is still up and running. If you close all LP4 applications before the print
jobs are done, the LP4 Spooler will also close, and the remaining jobs will be lost.
The button „Printer states“ will show you the state of all connected printers. You can also control all started
print jobs in this window.
Command line parameters
There are two available command line parameters with the Printjob Manager. „/p“ means: start the Manager
invisible, and generate all jobs in the current job list. After this, the Manager will close automatically.
Therefore it is important, that still another LP4 application is active (usually this parameter is be used with a
LP4 Commander project, to start a job list).
The second parameter is simply a free selectable file name. The Manager will load this file as a job list on
start up. Please note: always use quotation marks around the filename!
The following example will show the usage of both command line parameters together. It starts the Printjob
Manager invisible with the list „C:\Jobs\Joblist1.ini“, all containing jobs will be generated, and the Manager
will close afterwards automatically:
LP4PJManager.exe /p “C:\Jobs\Joblist.ini“
Page 108
8
8.1
LP4 Remote
Generic
LP4 Remote is an external application which will get installed with the main LP4 application. LP4 Remote is
only usable if a PREMIUM license of LP4 is active.
LP4 works in combination with CAB & Intermec printers. The user can enter directly a job number at the
printer keyboard/panel (Intermec) or an external keyboard (CAB). LP4 Remote detects such user inputs and
starts a proper print job at this printer.
This way you have the advantage of a direct input on the printer with the PC advantages like a near unlimited
amount of space to store labels and data. And every PC with LP4 Remote can manage multiple printers at
once, so you don’t need one PC for one printer.
8.2
Usage
LP4 Remote can get startet parallel to any other LP4 application (like the label editor or the LP4 Database
Manager). LP4 Remote will use the printer definitions from the main LP4 system, all defined CAB & Intermec
printers with a bidirectional connection will get under control of LP4 Remote. Alternatively you can use a
native TCP connection for starting print jobs.
If you minize the LP4 Remote application, the icon will be moved from the MSWindows taskbar to the tray
area. A double-click on the tray icon will show the main window again.
After the startup from LP4 Remote the following window will appear:
Page 109
The right part of the window contains an information, if LP4 Remote is currently active, and two buttons:
„Settings“ and „Printer state“
The left part shows a protocol list. This list will inform you which printer has started a job at which time, or if
the job has failed.
The „Printer states“ button will bring up the LP4 printer states window, showing if all printers are connected
and ready.
The „Settings“ are controlling if and how LP4 Remote is working:
Page 110
The first option activates the LP4 Remote functions. Only if this option is turned on the user will be able to
enter a new job number by pressing the printer’s „F1“ key (Intermec) or „F1/ENTER“ key (CAB).
Additional printer settings are available: the first setting will control if the user should enter a batch count
when starting a new print job, or if LP4 should create the job with maximal possible label count.
With the second setting it is possible to define an additional user input at the printer. This input will be stored
into an external LP4 variable which can get used at the label layouts. The display text and the name of the
external variable can be chosen as needed.
It is possible to use LP4 Remote with just a TCP connection to a different system as well. You need to
specify the TCP port number, and you can specify if all connections should get the printer states
automatically. For running the TCP option, additional licenses are needed, you can purchase a license
number from BBK and enter the number by using the “TCP licenses” button. The TCP commands are
described in the section below.
The lower part of the settings window defines the internal handling of remote print jobs:
The first possibility is to interpret the user input as a label file name (without file extension). If this option is
active, and the user enters for example „12345“ at the printer keyboard, LP4 Remote will search for a lable
file named „12345.lbf“. If the label file can be found, it will get transfered to the printer, and the printing starts.
If the label file does not exist, the printer will ask the user again to enter a job number, no printing will occur.
Page 111
The second possibility is by using a database. You can select the ODBC datasource name, the table name,
the key field (contains the unique values the user can enter on the printer) and the label name field (contains
the label file name, like „format 1.lbf“ – the field can also contain the filename without the „.lp4“ extension). If
the database table has more than one label field (meaning: for the same article exist for example 5 different
label layouts), up to 9 label fields can be defined. There will be a special user input at the printer, asking for
the label field number (1-9) if more than one label field will be used,
Special INI settings: there exist a few INI entries in the file LP4.INI, section [LP4Remote] for some special
adjustments.
„CloseDB=1“ will tell LP4 Remote, to open and close the database connection on each new printer job
request (by default LP4Remote will open the database on startup and close it on exit). Please note: this
setting can cause slower reaction times, if the opening/closing of the database requires much time. On the
other hand it can be useful, since database maintance (backup, replacements) are easier when the database
is closed.
Another INI-Option is „DBPrefix“, with this key you can specify a prefix fort he table name. „DBPrefix=pub“
would tell LP4Remote to access the table „pub.Printjob“ internally, instead of „Printjob“. (this setting was
required by a special ODBC driver, and should not be needed in usual installations).
If your table does not contain a label field, and you want to use just one layout with LP4Remote, you can use
another INI entry: „LabelDefault=xyz.lbf“ specifies the layout file name, which will be used if no label field is
specified in LP4 Remote.
Additionally it is possible to define for each printer an individual layout directory in the INI file.Simply create
entries called „LayoutDirPRINTERNAME=c:\xyz\layouts“, PRINTERNAME has to be replaced with the LP4
printer name. If now a label request is coming from one of this printers, the layout folder from the INI file will
be used instead of the global directory. If you have not entered a special directory for one printer, the global
directory will be used for this printer. Please note: after you have set at least one printer to an indiviual
directory, you cannot change the global label directory in the „Settings“ dialog window: in this case you have
to change the global directoy in the INI file as well (entries „FileDir“ and „FileDir2“).
You can also specify in the INI file, if some of the database fields should be read as Unicode. You can define
this by adding “DBUnicode1=Column name A” entries to the [LPRemote] section.
Usage on the Intermec printer:
Now the user can select a new print job at the printer by pressing “F1”. On the printer display the text
“Number:” will appear, the user has to enter the proper article number (key field of database table). If more
than one label field is defined, the next printer question will be “Labelversion:”, here the user has to give the
proper label field index (1-9). If an additional external variable input is defined, it will appear next. The last
question (if not deactivated) will be the batch count.
After giving all prompted informations, LP4 Remote will search inside the database for this job number. If the
number is inside of one data set, the connected label file will get loaded internally, all database variables will
get updated with the found data, the optional external variable will be filled with the user input, and the label
download is starting.
If the user input cannot be found in the database, or if the label name in the found data set is wrong, no
printing will happen, the printer will only ask the user again to enter a valid number.
Hint: it is also possible to connect the printer serial com port (if not used for PC communication) with an input
device like a barcode scanner. After pressing F1, all user input (article number, batch count, etc) can come
from wither the printer keyboard or this external device. By default the device has to send the data frame in a
start- and stop-chracter. Start is “#”, stop is “*”, for example:
#123456*
Usage on the CAB printer:
The CAB printer needs an additional USB keyboard to work with LP4 Remote. The “abc” widget inside the
CAB display (if available) will show the text “LP4” as soon as LP4 Remote is activated. The user can now
Page 112
press “F1” or “Enter” to start the format selection. Up to three user inputs are to be done (format, print count,
additional data), the input is send to LP4Remote which will generate and transfer the label.
Additional user input can be defined in the label layout by using CAB printer variables. Those user prompts
are shown as soon as the new label is downloaded.
„F5“ will stop the LP4 Remote function inside the printer, if also the LP4 Remote application has been closed.
Usage with TCP connections:
The other system needs to act as a TCP client, and connect to the specified TCP port. A new connection is
only established, if the current connection count has not reached the number of purchased TCP licenses.
The TCP client can send the following sequence to activate a print job:
#P:printer name;key or label name;print count;additional data for external variable*
The print count and the external variable data are optional. If no print count is sent, a print job with 99999
labels is created. Example: #P:Cab1;ABC* creates a print job on printer Cab1 using label layout ABC.LP4,
99999 labels are printed.
The TCP client can also ask fort he current printer state by sending:
#I:printer name*
LP4 Remote will answer the request with the following sequence:
#S:printer name;currently active key/layout;LP4 printer state text *
The TCP client can also ask LP4 Remote to send this state information every time when the state is
changing:
#A:printer name*
If you activate the „Send state information of all printers to every TCP connection” option, LP4 Remote will
send the “#S…” information automatically to every established connection.
Page 113
9
LP4 Format manager
All available Formatmanager applications can be started from the label editor (menu item „Addons“), or by
using a desktop shortcut. With a shortcut you can define a command line containing the configuration file
(FM…INI) you want to load on startup of the Formatmanager. If you specify “/p” in the command line, the
format manager will start invisible, create all formats, and start the download to the printer. After this the
application will close again. Therefore this mode is useful in combination with the LP4 Commander, to create
applications with automatic format transfer.
9.1 LP4 Formatmanager Intermec Standard
The LP4 Format manager Intermec Standard is the standard solution to download label formats into an
Intermec/UBI printer once, and recall this labels without any PC directly on the printer panel (or by sending a
serial command, or by IO signals).
Up to 20 labels can be stored in a printer, and it is possible to use an optional text database inside the
printer, or to send variable data by RS232, so the printer can easily get integrated into an existing production
line.
Format manager Intermec Standard:
By using „Add labels…“ up to 20 labels can be selected. Each label has an unique number (used to recall the
label on the printer), and up to 8 additional parameters which can be used in the label layouts by defining the
printer variables VPA$(CURRLAB%-1)(1..8). To change the number or optional parameters, use the button
“Label parameters…”.
The application will automatically store the last list of labels you have defined, and all of the parameters, und
will load it automatically on the next start up. If you have multiple printers with individual label list, you can
manually save/load the list into/from a file by using the “Save list…” and “Open list…” buttons.
Page 114
In the „Global settings“ the main function settings can be changed:
FM type
Sometimes special label functions are needed, and BBK will offer customized solutions which are not
covered in the “Standard” function set. If those special solutions are installed, the list “FM type” will show
them. By default only the “Standard” functionality is available.
Mode
The printing mode will decide if a label should be printed immideatly, or if the printer should wait for a printing
pulse, or maybe even a combination of both (after a printing pulse n labels should be printed). Also available:
a special FIFO (first in, first out) mode, which is storing label jobs received on the printer’s RS232 (up to 40
jobs can be stored), an print them one after each other.
Number of labels to print
On each print job a certain number of labels will be printed. This batch count can be constant (for example
one label on each print pulse), or variable (defined in an optional text database, or given by the RS232
connection, or entered by the user at the printer panel).
To gain an higher print speed, it is possible to activate the “all labels have the same size and printer settings”
option, of course then all selected label layouts really have to use the same sizes and settings.
Serial protocol to select label and data
If a printer should get added to an existing production line, it is often needed to get data from the production
line unto the printed labels, or that the production should automatically tell the printer which label layout
should be used.
Therefore it is possible to connect a PC/PLC by RS232 to the printer, and to send label informations by this
connection. The information has to be formatted in the following way:
<STARCHAR>labelnumber <DATADIVIDER>Data1< DATADIVIDER >Data2….<ENDCHAR>.
Page 115
The start-, end- and divider-character can be easily defined in the Formatmanager settings. If an
acknowledge answer is needed (the printer should send back a sequence that the data have been received),
it is possible to activate that as well, even by defining what kind of data should be returned.
The received data can be used in the label layouts by defining the printer variables VSP$(1) to VSP$(50).
Additional text database
Beside the label layouts you can also transfer a special textfile inside the printer as well, containing additional
informations, a “text database”. Each line in the file will be a data set, with up to 50 data contents each set.
KEY1<DIVIDER>Data1-1<DIVIDER>Data1-2 etc
KEY 2<DIVIDER>Data2-1<DIVIDER>Data2-2 etc
KEY 3<DIVIDER>Data3-1<DIVIDER>Data3-2 etc
….
Again it is possible to select a special divider character, and to define if the text database holds the layout
number. If yes, the user only has to enter the dataset key on the printer panel to activate a print job, the
related label number will be read from the data set.
The data of the selected dataset can be used in the label layouts, by defining the printer variables VDB$(1)
to VDB$(50).
Select label by printer IO-card
If the printer has an IO-card installed, it is also possible to select a label number by setting the correct input
signals before the print pulse get set.
For example, if layout number 19 should be selected, the inputs 1, 2 and 5 (1+2+16=19) has to be set.
Transfer additional files as text
If you are transfering additional files with the Format Manager, you can speed up the transfer with this option,
if the files only contain text data. Please note: the double quotation marks (“) will be translated in single
quotation marks (’) during the transfer.
Commad line options
You can use two command line options with the Format Manager:
First, you can specify an INI file name. This file will be used as configuration file instead of the default
“LP4FMIStandard.INI”.
Also, you can use “/p” in the command line. This switch will tell the Format Manager to start invisible, load
the configuration file, and press internally the “Start transfer” button. After this action the application will close
again. Therefore you can start a format transfer from an external application.
This two command line switches can also be used in the other LP4 Format Managers (Zebra Standard and
Intermec Multi-Boot).
9.2 LP4 Formatmanager Zebra Standard
It is possible to store different label layouts on Zebra printers as well (in the RAM, in the internal FLASH
memory or on a PCMCIA card), and the number of labels is just limited by this storage. This labels can be
started by sending the printer a special sequence by RS232 or network. This sequence holds the layout
name, and (if needed) additional variable data which should be printed.
To transfer the label layouts to the printer, the Formatmanager Zebra Standard can be used:
Page 116
The basic functions are identical to the Formatmanager Intermec Standard, but there are no “Global settings“
available, the printer will only work in the following way:
To start a stored label, a sequence has to be send to it, here an example to start the label „EXAMPLE“ from
the printer flash memory, setting a variable text and printing it 5 times:
^XA
^XFE:EXAMPLE.ZPL
^FN1^FDTest^FS
^ILE: EXAMPLE.GRF
^PQ5
^XZ
The variables (here the number “1“ one) have to be defined in the label layout as printer variables, and
connected to text/barcode fields.
Such start sequences can easily be build, as an help the formatmanagert has an „Example“ button. But of
course the commands are also described in your printer’s ZPL manual.
9.3 LP4 Formatmanager Intermec Multi-Boot
This Formatmanager can be used with Intermec/UBI printers. It can store much more different label formats
inside the printer as the Standard formatmanager, but it is more limited in how to start a format: the user can
only select a new label format on the printer panel, after the selection the printer will reboot and activate the
chosen label.
Page 117
Therefore the „Multi-Boot“ Formatmanager is used in production lines, where the user should have the
choice of many different label formats, but the labels will not change very often during production (since a
reboot takes some seconds before the printing can start).
BBK offers also customized versions of this format manager, if such a special solution is installed, it is
selectable in the “Global settings” window.
Page 118
10 LP4 Productmanager Standard DB
10.1 Generic
LP4 Productmanager are stand-alone applications which are usually used in production areas with specific
tasks.
The LP4 Productmanager Standard DB is included in the main LP4 setup and can be used with a LP4
Premium version. It features an easy and flexible way to start print jobs from a connected database, and it is
highly configurable. It is also possible to give the user additional input fields to edit certain values before
printing or to define a text file import, to update the jobs in the database from an external source like SAP.
Also available: an “automation mode” in which the application will automatically print imported data.
The LP4 Productmanager Standard DB can be used with any printer type, a bidirectional connection can be
used to queue print jobs.
10.2 Configuration
The LP4 Productmanager Standard DB can be configured in many ways by changing settings in its
configuration file (LP4StandardDB.INI). The settings and their meaning are listed in this chapter:
[DATABASE]
Name=LP4DB
User=
PW=
Table=LP4StandardDB
MoveTable=LP4Protocol
KeepOpen=0
ShowKeyList=1
AutoIndex=0
The [DATABASE] section is used to define the ODBC datasource connection. “Name” is the ODBC
datasource name, “User” and “PW” are the optional username and password settings for this connection.
“Table” is giving the name of the table inside the database, in this table all the print job informations are
stored.
“MoveTable” is an optional setting. It is possible to enter the name of a second table from the database,
which needs to be indentical to the main print job table. Now on every print stop (Start/Stop mode) or on
every print start (normal printing mode) the currently selected data set will be moved from the main table to
this protocol table.
“KeepOpen” is a special option, telling the Productmanager application to open the database at startup, and
closing it on shutdown (KeepOpen=1) or to do just temporary open/close sessions each time when the
database gets accessed. Always opened databases are faster to handle, temporary opened databases are
more secure (if a PC crash problem occurr) and it is recommended if many users want to use the database
at the same time.
„ShowKeyList“ affctes the application window: if this setting is „1“ a small list showing all datasets from the
job table will be visible, making it easier for the user to see the valid job keys. Attention: this list will be
automatically refreshed if the user deletes/moves or imports data from/to the main table, but it will not be
refreshed if another application will change the table contents! Therefore it should be turned off, if
Page 119
applications beside the Productmanager will write data into the main table. Alternatively the “Import” options
can be used to refresh the list after a given time or button press.
If the table is using an automatical indexing field, its number has to be put into the “AutoIndex” entry. Only
then the Productmanager can do a proper data import into such a table.
[DBEXTVARS]
ArtikelID=LP4_VAR_ARTID
Etikett=LP4_VAR_LABEL
Stückzahl=LP4_VAR_NUM
Bezeichnung=LP4_VAR_BEZ
The section [DBEXTVARS] is used to tell the Productmanager which table column should be mapped to
which LP4 external variable. Each time when a print job gets started the content of the table columns will be
copied to the given variables. Hint: the usage of space characters or special characters in the table column
names can cause problems and should be avoided.
It is also possible to not map the data to external variables, but to LP4 Database Manager variables. This will
be activated by setting “UseDBManagerVars=1” in the [GENERIC] section. Then the [DBEXTVARS]
definitions will be ignored!
[MAINFIELDS]
KeyColumn=ArtikelID
LabelColumn=Etikett
BatchColumn=Stückzahl
PrinterColumn=
CounterColumn=
OrderColumn=
The section [MAINFIELDS] is storing informations about special table columns:
1) KeyColumn : Here the table key column name has to be entered. This entry is required! 2) LabelColumn :
This entry is optional. If the table contains a column which is storing the label layout name (like XYZ.LBF)
you can tell the productmanager to use it to initialize the label selction box.
3) BatchColumn : This entry is optional. If the batch count is stored in the table, you can enter this column
name here.
4) PrinterColumn : This entry is optional. If there are multiple printers connected to the PC, it may be needed
to print certain jobs at certain printers. If the database table has a column with the wanted printer name, you
can specify it here.
5) CounterColumn : This entry is optional. The column needs to be of a „number“ type, not a „text“ type! If
set, the Productmanager will read the data content on each print start, add the current batch count to it, and
write the sum back into the data record. That way a job related label counter can be defined. If the
“Start/Stop” mode gets used, another option (AdjustCounterStop, see below) can be used to adjust this sum
on each job end, so only the real printed labels will be counted in this column.
6) OrderColumn : This entry is optional. It will influence the display of the optional job list, and also the order
of the automation mode. If this entry is not set, the list and automation order will be defined by the
KeyColumn in ascending order, otherwise the entered column will be used for sorting. If the sort order should
be descending, a small addition “DESC” can be done to the column name (for example
„CounterColumn=JOBDATE DESC“)
Additional [MAINFIELDS] settings:
LabelDefault=LP4_ET1.lp4
BatchDefault=1000
PrinterDefault=UBI
Page 120
The „Default“ settings are used if no database table column is available or if the specified column entry of the
data record is empty. If you don’t specify default values as well, the values stored inside the label (batch
count, printer) are used.
Further [MAINFIELDS] settings:
LabelEdit=1
BatchEdit=1
PrinterEdit=1
MarginEdit=0
It may be useful to prevent the user from changing the initialized values of the label/batch/printer/margin
fields. In this case, just put the proper values to “0”. Special for “LabelEdit”: if set to “2”, the user can still
change the label, but not the label folder anymore.
With some ODBC drivers the productmanager may fail to detect if the key field is a text or a number.
Therefore, if you have a number as key, you may need to add the setting “KeyType=2” to your
[MAINFIELDS] section, to tell the application that your key is a numeric one.
[OPTIONALFIELDS]
1=Gewicht:;5.0 Kg;LP4_EXTVAR_WEIGHT;
2=Preis:;;LP4_EXTVAR_PREIS;Preis
3=Artikel:;;LP4_EXTVAR_ATEXT;Artikeltext
4=
5=
6=
7=
8=
9=
10=
It is possible to show up to 10 addional fields in the productmanager window. The user can edit/enter values
here, and since each field is connected to an external LP4 variable, this input can be used on the label.
The structure of an optional field entry is like:
N=display text;default value;external LP4 variable;optional table column name
Therefore you can also specify a connection between a database table field and the input field: if a print job
gets selected from the user, the optional edit field will be initialized with the table column’s value. He can still
change the data, on print start the edited text will be copied to the specified external variable.
You can disable the edit fields (so they are just showing the values, but the user cannot change them) by
setting “EditX=0”.
[IMPORT]
ImportActive=0
ImportFile=C:\SAP\*.TXT
ImportFileType=0
ImportChar=;
ImportTime=0
ImportButton=0
ImportDeleteFile=0
DeleteChar1=
…
DeleteChar9=
ReplaceChar1=
…
ReplaceChar9=
Page 121
ImportSerial=COM2,9600,n,8,1,2
ImportSerialStartChar=*
ImportSerialStopChar=#
ImportSerialAnswer=@ECHO
ImportSerialClearTable=
ImportSerialCancelPrint=
It is possible to configure the productmanager to import data from existing text files into the database. That is
useful if for example the table should always have the current SAP jobs. To activate the import function the
entry „ImportActive“ has to be set to „1“ or “2”. Both settings will activate the import functionality, but “1” will
also try an import on application start, while “2” will not do an import on startup.
The entry “ImportFile” is giving the information where the file is located (by using wildcards it is even possible
to specify a range of files as shown in the examples above). If this entry is empty, there will be no text file
import, of course, but the database key list will be refreshed. Therefore the import functionality can be used,
if the database is changed by an external application, to refresh the key list.
“ImportFileType” is specifying the file structure. There are two supported structures: a space filled text row
(type “0”), and a character divided text row (type “1”). A space filled file must have exact the same structure
as the table fields, for example if a field has 20 characters the text file field must also hold 20 characters for
its position. The database “number” type must have 10 characters in the text file.
Example: table with the three following fields: „ID“ [7 characters], „Count“ [number] and „Remark“ [8
characters] would need the following file structure:
AB12 500
Test1
AB23 100
Test2
…
Is „ImportFileType“ set to „1“, the file would need to look like this:
AB12;500;Test1
AB23;100;Test2
…
Please note that here the order and number of fields is also important, but there is no need to know how big
the table fields are. If another character instead „;“ should be used, it can be specified in the „ImportChar“
setting. It is also possible to specify ASCII-values by using the syntax “backslash-ascii value”. For example
the space character (ascii 32) would be “ImportChar=\32”. Tab characters can be written as “\t”. This syntax
can also be used with the DeleteCharX/ReplaceCharX settings (see below).
But when should the data get imported to the database? There are two possibilities: a) whenever the user
pushes an “import…“ button, and b) automatically after a given time span. Both ways (even together) can be
used in the productmanager. If “ImportButton” is set to “1”, a button in the productmanager window will
appear. If “ImportTime” is set to a number not equal to 0, it means: after n seconds to an automatic import
(for example “ImportTime=60” will look for new data every 60 seconds).
It is often necessary to delete imported files, to avoid to import them again. That can be specified by setting
“ImportDeleteFile” to “1”, but be aware that all files matching the “ImportFile” filter will get deleted!
Last but not least it is possible to tell the productmanager to ignore or replace up to nine special characters
while doing the text file import. You can specify this characters by adding a “DeleteCharX=…” /
“ReplaceCharX=…” line to the [IMPORT] section. For example, DeleteChar1=@ will ignore all @ characters
and ReplaceChar1=@,# would replace all @ characters by # characters.
Additionally it is possible to import data from the RS232. In this case the “ImportSerial” entry has to be set in
the following form:
COMx,Baud,Parity(n,e,o),Data,Stop,Protocol(0=none,1=xon/xoff,2=hardware)
For example: ImportSerial=COM2,9600,n,8,1,2
Page 122
The productmanager also has to know, which character is at the beginning of the data, and which character
is the ending of the data (“ImportSerialStartChar” and “ImportSerialStopChar”). It is also possible to specify a
reply, whenever new data is received (“ImportSerialAnswer”), either by setting a constant text, or by using
the special keyword “@ECHO” for sending back the received text.
The RS232 import is working like the file import (same divider characters, it is also possible to send multiple
datasets in one telegram), but the receive buffer is limited for 2048 bytes each telegram.
There are two special commands which can be used with RS232 communication: one is for resetting the
printer (to cancel the current printing job), the other can be used to delete all datasets in the database table.
To use the commands, the command sequences have to be entered into the “ImportSerialClearTable” and
“ImportSerialCancelPrint” entries. Please note: you have to send the entered sequence and the given
start-/stop-characters by RS232. If you want to clear the table and reset the printer with the same command,
you simply enter the same sequence into both entries.
[GENERIC]
ShowDeleteButton=0
ShowPreviewButton=1
ShowPrintSetButton=1
ShowSpecialTitle=
StartStopMode=0
AdjustCounterStop=0
AutomationMode=0
LabelPath=
UseDBManagerVars=0
ShowPrinterList=1
The last section can be used to change the application’s behaviour and to show or hide special buttons in the
productmanager window, by setting the values to “0” (hide) or “1” (show). The “Delete” button is useful if the
user should be able to deleted already printed jobs from the database. The “Preview” button allows the user
to see the complete label at the screen, and the “Print Sets” button can be used to change the printer
settings for the currently selected label.
With “ShowSpecialTitle” you can change the main Window title as needed.
“LabelPath” will have the latest selected label directory.
Setting “UseDBManagerVars=1” will cause the print data to be copied to LP4 database manager variables
instead of external variables.
“ShowPrinterList=1” replaces the combobox-printer list with a bigger list of printers, sjowing up to 6 entries at
the same time. A double click at one entry will bring up the port job list for this printer.
If the „Start/Stop“ mode is active (=1), the Productmanager will work different compared to the standard
mode: instead a „Print“ button a „Start“ button will appear, which also begins a print job, but also prevents
any futher actions on this printer until the “Stop” button gets pushed. This mode is important, if a label
counter column needs to be used (CounterColumn=….) and only the number of really printed labels should
be stored here. In that case the option „AdjustCounterStop=1“ has to be set, and now the application will
adjust the label number on “Stop”, by taking the reported number of printed labels from the printer.
ATTENTION: such a justage only works correctly if this job will not be started twice (or more) at the same
time on different printers/PCs.
Example for a start/stop mode with adjusted label counters (StartStopMode=1, AdjustCounterStop=1,
CounterColumn=COUNTCOL):
Job „12345“ containg „125“ in COUNTCOL gets started, the number of to-be printed labels is „100“. On start
the new label counter „225“ (=125 + 100) will be written into this job’s COUNTCOL. 90 labels get printed,
after this the user is pushing the “Stop” button. Now the COUNTCOL content will be adjusted: 10 labels have
not been printed, so the application will take the current content “225”, and subtract the label and writes the
final number “215” into the data set.
Page 123
This way there is no “waste” in numbers, if not all labels get printed, but this will only work correctly
(especially if the counter column is used to initalize for example a field in the label layout) if no other print job
using the same data set gets started while this job is running!
If the main table contains jobs which should be printed automatically one after each other, the „automation
mode“ can be enabled by setting „AutomationMode“ to „1“. Now a new button appears, called “Start
automation”. By pushing this button the automation gets started (if the automation should begin whenever
the Productmanager gets started, the “AutomationMode” can be set to “2”): the application will look if there
are data sets into the main table, and if yes, the first data set (depending on the “OrderColumn”) will be
activated and transferred to the printer. If this job has been printed, the next data set will be activated, and so
on. The printed data will be deleted from the main table (and moved to the “MoveTable”, if activated). If there
are no more data sets in the table, the application will wait until new data will be imported (see the import
settings for details). The application will not auto-detect, if some other application is adding data to the table!
But it is possible to define an import timer, and some dummy import file, to also detect such external changes
(the application will try to import the dummy data and after that re-reading the table content, and therefore it
will find also data added by a different application).
The automation can be stopped by pushing the „Stop automation“ button.
10.3 Usage
If all settings has been specified (the initial values match the LP4 example database for a first quick look at
the functionality), the application is ready to start:
Page 124
In the top edit field the user is entering the database key number he wants to print. The data will be loaded
as soon as he pushes the “Enter” key or by hitting the small button on the right side of the field. If the job list
is visible, he can also do a double-click on an available entry.
If the key cannot be found in the database, an error message will appear. If the key is fine, the proper data
set will be loaded, and all fields will be initialized.
Now the user can change the fields as needed, as soon as he pushes the “Print” / “Start” button the print job
will be downloaded to the printer.
If more than one printer is available, the user can start a job on each printer: in “Start/Stop” mode one job per
printer is possible (the job has to get stopped before a new job can be activated for this printer, of course), in
standard mode it is even possible to start multiple jobs at once, this jobs will be spooled one after each other.
11 LP4 Spool Server
11.1 Generic
The LP4 Spool Server is doing a similar job as the MSWindows printer network sharing: it allows using label
printers which are connected to one PC with every other PC in the network.
11.2 Configuration
It is easy to install such a label printer sharing: define your LP4 printer ports as usual on the PC which should
act as server. Now start the LP4 Spool Server (“LPSpoolServer.exe” in the main LP4 directory). Done, now
all active label printers (means: all printers with a “bidirectional” or “unidirectional” LP4 spool mode) can be
accessed from other PCs as well.
Important: if you are using a network firewall, you have to enable UDP telegrams on port 40094 and TCP
telegrams on port 40095. Otherwise the LP4 Spool Server will not work.
It is possible to activate the Spoolserver in “service” mode, this way the Spoolserver functionality is active
even without a logged in Windows user. Please note: only activate the service mode, if you have installed
LP4 to a local harddisk drive!
On the Client PCs simply define the same ports and printers, the port name and settings need to be identical
to the ones at the server PC. The only difference: instead of specifying the specific connection settings,
activate the “Spool Server” option, and enter the IP address of the Spool Server PC:
Page 125
By pushing the “Printers…” button you can do a test connection to the Spool Server, if the Server is up and
running all shared printers will be displayed in a new window (see picture above). If you select a printer and
press “OK”, all the printer settings will be used at your client PC.
11.3 Usage
The Spool Server connection is now up and running. You can now print on the Client PC just as fine as on
the Server PC: up to 512 printer shares can be handled by one LP4 Spool Server (the shares will be
displayed in the LP4 Spool Server main window).
If you are using the “bidirectional” spool mode, even the print job queue will be handled fine: Client PC “A”
can start a print job on the printer, and while it is printing another client “B” can start another one. As soon as
the running job gets finished, the next waiting job will be downloaded to the printer. The LP4 print job
windows will of course show correctly all waiting jobs, it is possible to see which PC has started each job (IP
address is visible). Also deleting single jobs or reseting the comple printer is possible from each client.
And of course it is still possible to work directly on the Spool Server PC with any LP4 application as well.
Please note:
The LP4 Spool Server application can only be started on PCs owning a Star or Premium license of LP4.
The Client PC can be of any license (including ECO, Print or even Demo versions).
Page 126
If the LP4 Spool Server is not started or not reachable by network, it is of course not possible to print
from the Client PCs! The Client PC will show an error message in the printer state if this condition is
happening.
12 Using VBScript Programs
12.1 Overview
You can configure LP4 to run your own VBScript program before each printing or preview. Each layout can
be attached to a different VBScript, by selecting the Script file in the property window of the layout (right-click
on the layout, select “Properties” and the layout property window appears). The Script .VBS files are best
stored into the default “Data” subdirectory of the LP4 folder.
On each print start or label preview the VBScript program will be started, after all LP4 variables and label
objects have been updated. Therefore you can use the VBScript program to adjust access the current
variable data, and to readjust and reposition all label objects. Since the LP4 variables already have been
validated, it is not possible to change the content of a variable in VBScript! But it is possible to change the
content of a label field (text or barcode) by setting new data from VBScript.
12.2 The additional LP4 VBScript commands
The main purpose of the LP4 VBScript option is to rearrange the label objects, to change the positions and
sizes depending on the current variable data. Therefore you can adjust your labels automatically, if needed.
The adjustment is only used in the current printing or preview, all objects will stay on their positions in the
label layout in LP4 editor.
All position and size values are in units of 1/100 mm. The value 100 is equal to 1 mm.
GetLPVar : Read current variable content
Syntax: value = GetLPVar(“Variable“)
This functions returns the current variable content of the given variable as text.
Page 127
SetLPObjData : Set new data into text and barcode fields
Syntax: Call SetLPObjData(“Object name“,”data”)
This function will change the content of a text or barcode field. The new content will be used by the following
print / preview action,.
GetLPObjPos : Get current positions of label object
Syntax: Call GetLPObjPos(“Object name“,X1,Y1,X2,Y2)
The VB variables X1/Y1 will be filled with the upper left coordinates of the field, the X2/Y2 will get the lower
right coordinates of the given label object (text, barcode, rectangle,…). The field width can be calculated by
X2-X1, the field height is Y2-Y1.
SetLPObjPos : Moving a label object
Syntax: Call SetLPObjPos(“Object name“,X1,Y1)
With this function you are setting a new upper left X1/Y1 coordinate for the given object. The width and the
height of the field are unchanged, so the object simply moves to the given point..
SetLPObjSize : Resizing a label object
Syntax: Call SetLPObjSize(“Object name“,DX,DY)
This function is changing the field width and height. DX is giving the new width, DY is the new height. The
upper left position (X1/Y1) of the field will not be affected by the resize.
LPObjAutoSize : Automatic resize of text fields by variable content
Syntax: Call LPObjAutoSize(“Object name“)
Typically a LP4 text object will not change its size if it gets a new variable content which does not fit into the
field area. This default behaviour is fine for static labels, when you don’t want to print over other fields in the
label. But if you want to readjust field positions depending on the current variable text, you usually want to
change the text object sizes to show all the new data. You can easily do that with this function, simply call it
with the name of the text object, and the object will adjust it size depending on its current data.
GetLPObjProp : Get detail information of a label object
Syntax: value = GetLPObjProp(“Object name“, Property-ID)
Depending on the property ID, this function will return the requested detail information.
ID=0
X1 position of the label object
ID=1
Y1 position of the label object
ID=2
X2 position of the label object
ID=3
Y2 position of the label object
ID=4
Field type:
ID=5
Line width. Only available with Rectangles, Lines, Crosses and Circles
ID=6
Rotation. Only available with Texts, Barcodes and Graphics. 0=0°, 1=90°, 2=180°, 3=270°
1=Rectangle, 2=Line, 3=Cross, 4=Circle, 5=Graphic, 6=Deadzone,
7=Barcode, 8=Text, 9=Special text, 10=OLE object
Page 128
13 Specific printer settings/informations
13.1 Intermec/UBI printers
Old LP3 versions (V3.19 or older) did send a „stop“ command to all connected Intermec/UBI printers when
the application has been closed. With LP4, the stop will not be sended anymore, only if you specify the
following entry in the LP4.INI file:
[UBI]
NoStopOnExit=0
To change the state poll time in bidirectional spooling mode you can add the following entry:
[UBI]
StatusPollTime=10
„10“ is the default value of 1 second, values ranging from 5 (=half a second) to 30 (=3 seconds) are possible.
Using SHIFT+F5 you also can stop a running Intermec/UBI-programm manually. Please note: if LP4 is still
running, and connected bi-direcional to the printer, it will detect a printer failure, and re-send a new status
program to the printer after a few seconds.
An user can see the latest printer error code on the printer display panel by pressing SHIFT+F4. List of
possible error codes:
Error code – Error text
Error code – Error text
0 No error
1 Syntax error.
2 Unbalanced parenthesis.
3 Feature not implemented.
4 Evaluation syntax error.
5 Unrecognized token.
6 Tokenized line too long.
7 Evaluation stack overflow.
8 Error in exectab.
9 Undefi ned token.
10 Non-executing token.
11 Evaluation stack underflow.
12 Type mismatch.
13 Line not found.
14 Division with zero.
15 Font not found.
16 Bar code device not found.
17 Bar code type not implemented.
18 Disk full.
19 Error in file name.
20 Input line too long.
21 Error stack overflow.
22 RESUME without error.
23 Image not found.
24 Overfl ow in temporary string buffer.
25 Wrong number of parameters.
26 Parameter too large.
27 Parameter too small.
28 RETURN without GOSUB
29 Error in startup file.
30 Assign to a read-only variable.
31 Illegal fi le number.
32 File is already open.
33 Too many files open.
53 Bad store checksum.
54 Bad store record end.
55 Remove in ROM.
56 Illegal communication channel.
57 Subscript out of range.
58 Field overflow.
59 Bad record number.
60 Too many strings.
61 Error in setup file.
62 File is list protected.
63 ENTER function.
64 FOR without NEXT
65 Evaluation overflow.
66 Bad optimizing type.
67 Error from communication channel.
68 Unknown execution entity.
69 Not allowed in immediate mode.
70 Line label not found.
71 Line label already defi ned.
72 IF without ENDIF.
73 ENDIF without IF.
74 ELSE without ENDIF.
75 ELSE without IF.
76 WHILE without WEND.
77 WEND without WHILE
78 Not allowed in execution mode.
79 Not allowed in a layout.
80 Download timeout
81 Exit to system
82 Invalid cont environment
83 ETX Timeout
1001 Not implemented.
1002 Memory too small.
1003 Field out of label.
Page 129
34 File is not open.
37 Cutter device not found.
38 User break.
39 Illegal line number.
40 Run statement in program.
41 Parameter out of range.
42 Illegal bar code ratio.
43 Memory overfl ow.
44 File is write protected.
45 Unknown store option.
46 Store already in progress.
47 Unknown store protocol.
48 No store defi ned.
49 NEXT without FOR
50 Bad store record header.
51 Bad store address.
52 Bad store record.
1004 Wrong font to chosen direction.
1005 Out of paper.
1006 No fi eld to print.
1007 Lss too high.
1008 Lss too low.
1009 Invalid parameter.
1010 Hardware error.
1011 I/O error.
1012 Too many fi les opened.
1013 Device not found.
1014 File not found.
1015 File is read-only.
1016 Illegal argument.
1017 Result too large.
1018 Bad fi le descriptor.
1019 Invalid font.
1020 Invalid image.
Error code – Error text
Error code – Error text
1021 Too large argument for MAG.
1022 Head lifted.
1023 Incomplete label.
1024 File too large.
1025 File does not exist.
1026 Label pending.
1027 Out of transfer ribbon.
1028 Paper type is not selected.
1029 Printhead voltage too high.
1030 Character is missing in chosen font.
1031 Next label not found.
1032 File name too long.
1033 Too many fi les are open.
1034 Not a directory.
1035 File pointer is not inside the fi le.
1036 Subscript out of range.
1037 No acknowledge received within specified timeout.
1038 Communication checksum error.
1039 Not mounted.
1040 Unknown fi le operating system.
1041 Error in fos structure.
1042 Internal error in mcs.
1043 Timer table full.
1044 Low battery in memory card.
1045 Media was removed.
1046 Memory checksum error.
1047 Interrupted system call.
1051 Dot resistance measure out of limits.
1052 Error in printhead.
1053 Unable to complete a dot measurement.
1054 Error when trying to write to device.
1055 Error when trying to read from device.
1056 O_BIT open error.
1057 File exists.
1058 Transfer ribbon fi tted.
1059 Cutter does not respond.
1060 DC motor to ribbon save did not start/stop.
1061 Wrong type of media.
1062 Not Allowed.
1081 Timer expired
1082 Unsupported protocol
1083 Ribbon Low
1101 Illegal character in bar code.
1102 Illegal bar code font.
1103 Too many characters in bar code.
1104 Bar code too large.
1105 Bar code parameter error.
1201 Insuffi cient font data loaded.
1202 Transformation matrix out of range.
1203 Font format error.
1204 Specifications not compatible with output module.
1205 Intelligent transform not supported.
1206 Unsupported output mode requested.
1207 Extended font not supported.
1208 Font specifi cations not set.
1209 Track kerning data not available.
1210 Pair kerning data not available.
1211 Other Speedo error.
1212 No bitmap or outline device.
1213 Speedo error six.
1214 Squeeze or clip not supported.
1215 Character data not available.
1216 Unknown font.
1217 Font format is not supported.
1218 Correct mapping table is not found.
1219 Font is in the wrong direction.
1220 Error in external map table.
1221 Map table was not found.
1222 Double byte map table is missing.
1223 Single byte map table is missing.
1224 Character map function is missing.
1225 Double byte font is not selected.
1301 Index outside collection bounds.
1302 Collection could not be expanded.
1303 Parameter is not a collection.
1304 Item not a member of the collection.
1305 No compare function, or compare returns faulty value.
1306 Tried to insert a duplicate item.
1601 Reference Font Not Found.
1602 Error in Wand-Device.
1603 Error in Slave Processor.
1604 Print Shift Error.
1605 No Hardware Lock.
1606 Testfeed not done.
1607 General Print Error.
1608 Access Denied.
1609 Specifi ed Feed Length Exceeded.
1610 Illegal Character Map File.
1701 Cutter Error1 (EasyCoder F-series only1)
1702 Cutter Error2 (EasyCoder F-series only1)
1703 Cutter Error3 (EasyCoder F-series only1)
1704 Cutter open (EasyCoder F-series only1)
Page 130
1106 Wrong number of characters.
1107 Illegal bar code size.
1108 Number or rows out of range.
1109 Number of columns out of range.
Page 131
13.2 Zebra printers
Some Zebra firmware versions will not print variable fields/counters correctly. LP4 has a workaround for that
issue, which can get activated in the connection settings of the Zebra printer:
Firmware correction: FieldBlock
yes/no
If “yes” is activated, the fields will not be printed distorted anymore, but please note: it’s not possible to print
centered/right aligned variable fields/counters while the workaround is activated.
Another workaround influences the automatic code-selection in Code128/EAN128 barcodes: LP4 uses a
Zebra feature, which will enable the printer to select the best code by itself. This feature is avaliable from
Zebra firmware x.11.x (or newer). If you are using an older printer, you can activate the following connection
setting:
Firmware correction: EAN128
yes/no
It is also possible to influence the time between state requests. By default LP4 is using 1 second between
each request. You can add the following entry to the local LP4.INI file:
[ZEBRA]
…
StatusPollTime=10
…
„10“ is the default value of 1 second, values ranging from 5 (=half a second) to 30 (=3 seconds) are possible.
13.3 CAB printers
CAB printers support powerful internal variables, which can be accessed by the LP4 „Printer variables“.
LP4 CAB Printer variables
[Varname]
Content of the LP4 variable "Varname".
[I{:condition}]
Field invisible (optional condition)
[?:Display,Default,z{,D}{,Lx}{,Mx}{,R}{,J}]
LCD user input
Page 132
[TIME{:+HH{,+MM{,+SS}}}]
Printer time (including optional offset), tags: [H024],[MIN],[SEC]
[DATE{:+DD{,+MM{,+YY}}}]
Printer date (including optional offset), tags: [DAY02],[DOFY],[WEEK02],[MONTH02],[YY]
[ISOWDAY{:+DD{,+MM{,+YY}}}]
Day of week 1-7 (including optional offset)
[+:op1,op2,...]
Addition, or other math functions (-,*,/,%,&,|)
[=:op1,op2]
Compare two values, other compare operations (>,<) possible
[==:text1,text2]
Compare text, result 0 or 1
[MOD10:x]
Modulo10 check sum, other check sums possible (MOD36,MOD43)
[C:0{,base}]
Leading zeroes
[D:m,n]
Number of digits before/after sparator
[DBF:Schlüssel,Wert,Datenfeld]
DBF-database field
[Varname,Start{,Anzahl}]
Part of a content from given variable
Page 133
14 License Agreement
BBK ETIKETTIER- UND SONDERMASCHINENBAU GMBH GEWÄHRT IHNEN EINE LIZENZ FÜR DIE IN
DIESEM PAKET ENTHALTENE SOFTWARE AUSSCHLIESSLICH UNTER DER VORAUSSETZUNG,
DASS SIE DIE BEDINGUNGEN DIESER LIZENZVEREINBARUNG IN VOLLEM UMFANG ANERKENNEN.
BITTE LESEN SIE DIE BESTIMMUNGEN SORGFÄLTIG, BEVOR SIE DIESE VERPACKUNG ÖFFNEN
ODER MIT DER INSTALLATION FORTFAHREN. MIT DEM ÖFFNEN DER VERPACKUNG ODER
FERTIGSTELLUNG DER INSTALLATION ERKLÄREN SIE SICH MIT DEN BESTIMMUNGEN DES
LIZENZVERTRAGES EINVERSTANDEN. SOLLTEN SIE NICHT EINVERSTANDEN SEIN, GEBEN SIE
BITTE DIE UNGEÖFFNETE DISKETTENPACKUNG ZUSAMMEN MIT ALLEN ZUM LIEFERUMFANG
GEHÖRENDEN GEGENSTÄNDEN UNVERZÜGLICH GEGEN ERSTATTUNG DES KAUFPREISES AN DIE
STELLE ZURÜCK, VON DER SIE DIESE BEZOGEN HABEN.
LIZENZ UND GARANTIE
Die mit dieser Lizenz erworbene Software (im folgenden als "Software" bezeichnet) ist Eigentum der Firma
BBK oder deren Lizenzgeber und ist durch nationale Gesetze und internationale Verträge urheberrechtlich
geschützt. Mit der Annahme der Lizenzbedingungen erhalten Sie das Recht zur Benutzung der Software.
Sofern nicht durch eine mit dieser Lizenz ausgelieferte Zusatzvereinbarung andere Regelungen getroffen
werden, unterliegt die Nutzung der Software folgenden Bestimmungen:
Sie sind berechtigt:
a) Verwenden Sie eine Kopie der Software nur für einen einzigen Computer; falls der Datenträger in diesem
Paket mehrere Software-Titel enthält, gilt Ihre Lizenz nur für einen Software-Titel auf dem Datenträger und
Sie sind nicht berechtigt, solche andere Versionen an andere Personen weiterzuleiten oder anderen
Personen die Benutzung solcher Versionen zu gestatten;.
b) eine Kopie der Software zu Archivierungszwecken anzufertigen oder die Software auf die Festplatte Ihres
Computers zu kopieren und die Originaldisketten zu archivieren.
c) die Software in einem Netzwerk einzusetzen, vorausgesetzt, daß Sie über eine lizenzierte Kopie der
Software für jeden Computer verfügen, der über das Netzwerk auf die Software zugreifen kann.
d) nach schriftlicher Benachrichtigung an BBK die Software dauerhaft einem Dritten zu überlassen,
vorausgesetzt, daß Sie alle Kopien der Software und der Begleitdokumentation übergeben und der
Empfänger der Software sich mit den Bestimmungen dieser Lizenzvereinbarung einverstanden erklärt.
Sie sind nicht berechtigt:
a) die Software ganz oder teilweise zu verleihen oder zu vermieten oder Unterlizenzen zu vergeben.
b) die Software zurückzuentwickeln (reverse engineering), zu dekompilieren, zu disassemblieren oder auf
andere Weise zu versuchen, den Quellcode der Software zugänglich zu machen, die Software zu ändern, zu
übersetzen oder davon abgeleitete Produkte zu erstellen.
c) nach Erhalt eines Austauschdiskettensatzes oder einer Upgrade-Version als Ersatz für eine frühere
Version die vorher erhaltene Kopie oder die frühere Version der Software zu benutzen.
Beschränkte Garantie
BBK gewährleistet für sechzig (60) Tage ab Empfangsdatum, daß das Medium, auf dem die Software
ausgeliefert wird, keine Material- und/oder Herstellungsmängel aufweist. Im Falle, daß das gelieferte Produkt
dieser Garantie nicht genügt, besteht Ihr alleiniger Anspruch nach Wahl von BBK entweder im Ersatz der
zusammen mit einem Kaufnachweis an BBK innerhalb der Garantiezeit zurückgegebenen fehlerhaften
Erzeugnisse oder in der Erstattung des bezahlten Kaufpreises.
DIESE BESCHRÄNKTE GARANTIE IST AUSSCHLIESSLICH UND ANSTELLE ALLER ANDEREN
GARANTIEN, SOWOHL AUSDRÜCKLICHER ALS AUCH IMPLIZIERTER ART, EINSCHLIESSLICH DER
IMPLIZIERTEN GARANTIE DER VERKÄUFLICHKEIT, DER EIGNUNG FÜR EINEN BESTIMMTEN ZWECK
UND DER NICHTÜBERTRETUNG. DIESE GARANTIE GIBT IHNEN BESTIMMTE GESETZLICHE
Page 134
RECHTE. SIE HABEN MÖGLICHERWEISE ANDERE RECHTE, DIE VON STAAT ZU STAAT
UNTERSCHIEDLICH SIND.
Haftungsausschluß
EINIGE STAATEN, EINSCHLIESSLICH MITGLIEDSSTAATEN DER EUROPÄISCHEN UNION, ERLAUBEN
DIE UNTEN AUFGEFÜHRTEN BESCHRÄNKUNG ODER DEN AUSSCHLUSS DER HAFTUNG FÜR
BEGLEIT- UND FOLGESCHÄDEN NICHT, SO DASS DIE UNTEN ANGEFÜHRTE BESCHRÄNKUNG
ODER DER AUSSCHLUSS FÜR SIE MÖGLICHERWEISE NICHT ZUTRIFFT.
UNTER MAXIMALER AUSDEHNUNG DES GELTENDEN RECHTS UND UNABHÄNGIG DAVON, OB
EINES DER HIERIN DARGELEGTEN RECHTSMITTEL SEINEN WESENTLICHEN ZWECK NICHT
ERFÜLLT, IST BBK IN KEINEM FALLE ERSATZPFLICHTIG FÜR IRGENDWELCHE INDIREKTEN,
FOLGE- ODER ÄHNLICHEN SCHÄDEN (EINGESCHLOSSEN SIND SCHÄDEN AUS ENTGANGENEM
GEWINN ODER VERLUST VON DATEN), DIE AUFGRUND DER BENUTZUNG DER SOFTWARE ODER
DER UNFÄHIGKEIT, DIE SOFTWARE ZU VERWENDEN, ENTSTEHEN, SELBST WENN BBK VON DER
MÖGLICHKEIT SOLCHER SCHÄDEN UNTERRICHTET WORDEN IST.
IN JEDEM FALLE IST DIE HAFTUNG VON BBK AUF DEN FÜR DIE SOFTWARE BEZAHLTEN
KAUFPREIS BESCHRÄNKT. Der oben dargelegte Ausschluß und die Beschränkung sind unabhängig von
Ihrer Annahme der Software.
Beschränkte Rechte der U.S.-Regierung
Erklärung beschränkter Rechte. Benutzung, Vervielfältigung oder Offenlegung durch die Regierung
unterliegen den Beschränkungen des Unterparagraphen (c) (1) (ii) der Klausel über die Rechte an
technischen Daten und Computer-Software unter DFARS 252.227-7013 oder den Unterparagraphen (c) (1)
und (2) der Klausel über die beschränkten Rechte in bezug auf kommerzielle Computer-Software unter CFR
52.227-19, wie anwendbar.
Allgemein
Diese Vereinbarung unterliegt den Gesetzen von Deutschland und kann nur durch eine mit dieser Lizenz
ausgelieferte Zusatzlizenzvereinbarung oder durch ein anderes, sowohl von Ihnen als auch von BBK
unterzeichnetes schriftliches Dokument geändert werden. Sollten Sie Fragen zu dieser Vereinbarung haben
oder sich aus anderen Gründen mit BBK in Verbindung setzen wollen, wenden Sie sich bitte an:
BBK Etikettier- und Sondermaschinenbau GmbH
Dieselstrasse 18
64743 Beerfelden, Deutschland
Fax.: +49 / 6068 / 9310-95 oder –99.
Page 135