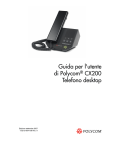
1
User Guide for the
Polycom® SoundStation® IP 7000 Phone
SIP 3.1.1
November, 2008 Edition
1725-40075-001 Rev. B
SIP 3.1.1
Trademark Information
Polycom®, the Polycom logo design, SoundPoint® IP, SoundStation®, SoundStation VTX 1000®, ViaVideo®,
ViewStation®, and Vortex® are registered trademarks of Polycom, Inc. Conference Composer™, Global Management
System™, HDX 4000™, HDX 7000™, HDX 8000™, HDX 9000™, HDX 9001™, HDX 9002™, HDX 9004™,
Instructor RP™, iPower™, MGC™, PathNavigator™, People+Content™, PowerCam™, Pro-Motion™, QSX™,
ReadiManager™, Siren™, SoundStructure™, StereoSurround™, V2IU™, Visual Concert™, VS4000™, VSX™, and
the industrial design of SoundStation are trademarks of Polycom, Inc. in the United States and various other countries.
All other trademarks are the property of their respective owners.
Patent Information
The accompanying product is protected by one or more U.S. and foreign patents and/or pending patent applications
held by Polycom, Inc.
Disclaimer
Some countries, states, or provinces do not allow the exclusion or limitation of implied warranties or the limitation of
incidental or consequential damages for certain products supplied to consumers, or the limitation of liability for personal
injury, so the above limitations and exclusions may be limited in their application to you. When the implied warranties
are not allowed to be excluded in their entirety, they will be limited to the duration of the applicable written warranty. This
warranty gives you specific legal rights which may vary depending on local law.
Copyright Notice
Portions of the software contained in this product are:
Copyright © 1998, 1999, 2000 Thai Open Source Software Center Ltd. and Clark Cooper
Copyright © 1998 by the Massachusetts Institute of Technology
Copyright © 1998-2003 The OpenSSL Project
Copyright © 1995-1998 Eric Young ([email protected]). All rights reserved
Copyright © 1995-2002 Jean-Loup Gailly and Mark Adler
Copyright © 1996-2004, Daniel Stenberg, <[email protected]>
Permission is hereby granted, free of charge, to any person obtaining a copy of this software and associated
documentation files (the “Software”), to deal in the Software without restriction, including without limitation the rights to
use, copy, modify, merge, publish, distribute, sublicense, and/or sell copies of the Software, and to permit persons to
whom the Software is furnished to do so, subject to the following conditions:
The above copyright notice and this permission notice shall be included in all copies or substantial portions of the
Software.
THE SOFTWARE IS PROVIDED “AS IS”, WITHOUT WARRANTY OF ANY KIND, EXPRESS OR IMPLIED,
INCLUDING BUT NOT LIMITED TO THE WARRANTIES OF MERCHANTABILITY, FITNESS FOR A PARTICULAR
PURPOSE AND NONINFRINGEMENT. IN NO EVENT SHALL THE AUTHORS OR COPYRIGHT HOLDERS BE
LIABLE FOR ANY CLAIM, DAMAGES OR OTHER LIABILITY, WHETHER IN AN ACTION OF CONTRACT, TORT OR
OTHERWISE, ARISING FROM, OUT OF OR IN CONNECTION WITH THE SOFTWARE OR THE USE OR OTHER
DEALINGS IN THE SOFTWARE.
© 2008 Polycom, Inc. All rights reserved.
Polycom Inc.
4750 Willow Road
Pleasanton, CA 94588-2708
USA
No part of this document may be reproduced or transmitted in any form or by any means, electronic or mechanical, for
any purpose, without the express written permission of Polycom, Inc. Under the law, reproducing includes translating
into another language or format.
As between the parties, Polycom, Inc. retains title to, and ownership of, all proprietary rights with respect to the software
contained within its products. The software is protected by United States copyright laws and international treaty
provision. Therefore, you must treat the software like any other copyrighted material (e.g. a book or sound recording).
Every effort has been made to ensure that the information in this manual is accurate. Polycom, Inc. is not responsible
for printing or clerical errors. Information in this document is subject to change without notice.
About This Guide
Thank you for choosing the Polycom® SoundStation® IP 7000 conference
phone. This conference phone provides multi-person audio and video
conferencing capabilities for medium to large conference rooms within a
Session Initiation Protocol (SIP) internet telephony system.
This guide provides everything you need to quickly use your new conference
phone. Verify with your system administrator that the network is prepared for
configuring the conference phone. Also, read the Parts List and the Safety and
Compliance section in this guide before you set up and use the conference
phone.
This guide includes regulatory compliance information that your system
administrator should review. You can also view this guide at
www.polycom.com/voicedocumentation.
Changes to this Guide
The following sections are new for this edition:
•
Connecting Optional Video Components on page 1-11
•
Registering the Phone on page 1-14
•
Using the Phone When it is Connected to a Polycom HDX System on page
4-7
Major changes have occurred to the following sections since the previous
edition:
•
Optional Accessories on page 1-2
•
Connecting Optional External Microphones on page 1-8
•
Adding Contacts to Your Local Contact Directory on page 2-19
•
Placing Calls on page 3-2
•
Restarting the Phone on page 4-26
iii
User Guide for the Polycom SoundStation IP 7000 Phone
iv
Contents
About This Guide . . . . . . . . . . . . . . . . . . . . . . . . . . . . . . . . . iii
Changes to this Guide . . . . . . . . . . . . . . . . . . . . . . . . . . . . . . . . . . . . . . . . . . . . iii
1 Getting Started with Your Phone . . . . . . . . . . . . . . . . . . . . 1-1
Parts List . . . . . . . . . . . . . . . . . . . . . . . . . . . . . . . . . . . . . . . . . . . . . . . . . . . . . . 1-2
Optional Accessories . . . . . . . . . . . . . . . . . . . . . . . . . . . . . . . . . . . . . . . . 1-2
Installing the Phone . . . . . . . . . . . . . . . . . . . . . . . . . . . . . . . . . . . . . . . . . . . . . 1-3
Connecting Network and Power Sources . . . . . . . . . . . . . . . . . . . . . . .
Connecting the Phone Using a Power over Ethernet Source . . .
Connecting the Phone Using AC Power (One Phone) . . . . . . . . .
Connecting the Phone Using AC Power
(One Phone, with Multi-Interface Module) . . . . . . . . . . . . . . . . . .
Connecting the Phone Using AC Power
(Two Phones, with Multi-Interface Module) . . . . . . . . . . . . . . . . .
1-3
1-3
1-4
1-5
1-6
Connecting Optional External Microphones . . . . . . . . . . . . . . . . . . . . 1-8
Connecting Optional Auxiliary Audio Components . . . . . . . . . . . . . 1-9
2.5mm Audio Connector on Phone . . . . . . . . . . . . . . . . . . . . . . . . 1-10
Audio Connectors on Multi-Interface Module . . . . . . . . . . . . . . 1-11
Connecting Optional Video Components . . . . . . . . . . . . . . . . . . . . . . 1-11
Registering the Phone . . . . . . . . . . . . . . . . . . . . . . . . . . . . . . . . . . . . . . . . . . 1-14
Before You Use Your Phone . . . . . . . . . . . . . . . . . . . . . . . . . . . . . . . . . . . . . 1-14
Features of the Phone . . . . . . . . . . . . . . . . . . . . . . . . . . . . . . . . . . . . . . . 1-15
Understanding Icons . . . . . . . . . . . . . . . . . . . . . . . . . . . . . . . . . . . . . . . 1-18
Navigating Menus and Entering Data . . . . . . . . . . . . . . . . . . . . . . . . . 1-20
2 Customizing Your Phone . . . . . . . . . . . . . . . . . . . . . . . . . . 2-1
Configuring Basic Settings . . . . . . . . . . . . . . . . . . . . . . . . . . . . . . . . . . . . . . . 2-1
Updating Preferences . . . . . . . . . . . . . . . . . . . . . . . . . . . . . . . . . . . . . . . . 2-2
Updating the Language . . . . . . . . . . . . . . . . . . . . . . . . . . . . . . . . . . 2-2
Updating the Time and Date Display . . . . . . . . . . . . . . . . . . . . . . . 2-3
Updating the Display Contrast . . . . . . . . . . . . . . . . . . . . . . . . . . . . . . . . 2-6
Updating the Backlight Intensity . . . . . . . . . . . . . . . . . . . . . . . . . . . . . . 2-6
v
User Guide for the Polycom SoundStation IP 7000 Phone
Updating the Ring Tone . . . . . . . . . . . . . . . . . . . . . . . . . . . . . . . . . . . . . . 2-8
Selecting a Different Ring Tone for Your Phone . . . . . . . . . . . . . . 2-9
Setting Distinctive Ring Tones for Contacts . . . . . . . . . . . . . . . . . 2-9
Updating Audio Quality and Capabilities . . . . . . . . . . . . . . . . . . . . . 2-11
Updating the Sound Quality of Your Phone . . . . . . . . . . . . . . . . 2-11
Enabling Auxiliary Audio Components . . . . . . . . . . . . . . . . . . . 2-12
Adjusting the Speaker and Ringer Volume . . . . . . . . . . . . . . . . . . . . . . . . 2-14
Using Call Lists . . . . . . . . . . . . . . . . . . . . . . . . . . . . . . . . . . . . . . . . . . . . . . . . 2-14
Viewing Call Lists . . . . . . . . . . . . . . . . . . . . . . . . . . . . . . . . . . . . . . . . . . 2-15
Managing Call Lists . . . . . . . . . . . . . . . . . . . . . . . . . . . . . . . . . . . . . . . . 2-15
Managing Contacts . . . . . . . . . . . . . . . . . . . . . . . . . . . . . . . . . . . . . . . . . . . . 2-17
Adding Contacts to Your Local Contact Directory . . . . . . . . . . . . . .
Adding Contacts Manually . . . . . . . . . . . . . . . . . . . . . . . . . . . . . .
Adding Contacts From Call Lists . . . . . . . . . . . . . . . . . . . . . . . . .
Adding Contacts to Your Local Contact Directory From a
Corporate Directory . . . . . . . . . . . . . . . . . . . . . . . . . . . . . . . . . . . .
2-19
2-19
2-21
2-22
Searching for Contacts . . . . . . . . . . . . . . . . . . . . . . . . . . . . . . . . . . . . . . 2-23
Searching for Contacts in Your Local Contact Directory . . . . . . 2-23
Searching for Contacts in a Corporate Directory . . . . . . . . . . . . 2-24
Updating Contacts in Your Local Contact Directory . . . . . . . . . . . . . 2-26
Deleting Contacts From Your Local Contact Directory . . . . . . . . . . 2-27
Placing Calls to Contacts . . . . . . . . . . . . . . . . . . . . . . . . . . . . . . . . . . . . 2-27
Managing Incoming Calls . . . . . . . . . . . . . . . . . . . . . . . . . . . . . . . . . . . . . . . 2-28
Distinguishing Calls . . . . . . . . . . . . . . . . . . . . . . . . . . . . . . . . . . . . . . . . 2-28
Rejecting Calls . . . . . . . . . . . . . . . . . . . . . . . . . . . . . . . . . . . . . . . . . . . . . 2-28
Diverting Calls . . . . . . . . . . . . . . . . . . . . . . . . . . . . . . . . . . . . . . . . . . . . . 2-29
Understanding Shared Lines . . . . . . . . . . . . . . . . . . . . . . . . . . . . . . . . . . . . 2-30
3 Using the Basic Features of Your Phone . . . . . . . . . . . . . . . 3-1
Placing Calls . . . . . . . . . . . . . . . . . . . . . . . . . . . . . . . . . . . . . . . . . . . . . . . . . . . 3-2
Answering Calls . . . . . . . . . . . . . . . . . . . . . . . . . . . . . . . . . . . . . . . . . . . . . . . . 3-6
Ending Calls . . . . . . . . . . . . . . . . . . . . . . . . . . . . . . . . . . . . . . . . . . . . . . . . . . . 3-6
Muting the Microphone . . . . . . . . . . . . . . . . . . . . . . . . . . . . . . . . . . . . . . . . . 3-7
Redialing Numbers . . . . . . . . . . . . . . . . . . . . . . . . . . . . . . . . . . . . . . . . . . . . . 3-7
Holding and Resuming Calls . . . . . . . . . . . . . . . . . . . . . . . . . . . . . . . . . . . . . 3-8
Hosting Conference Calls . . . . . . . . . . . . . . . . . . . . . . . . . . . . . . . . . . . . . . . . 3-9
Setting Up Conferences . . . . . . . . . . . . . . . . . . . . . . . . . . . . . . . . . . . . . . 3-9
Managing Conferences . . . . . . . . . . . . . . . . . . . . . . . . . . . . . . . . . . . . . .
Muting Conference Call Participants . . . . . . . . . . . . . . . . . . . . . .
Placing Conference Call Participants on Hold . . . . . . . . . . . . . .
Removing Conference Call Participants . . . . . . . . . . . . . . . . . . . .
Obtaining Information About Conference Call Participants . .
vi
3-11
3-12
3-13
3-14
3-14
Contents
Holding and Resuming Conferences . . . . . . . . . . . . . . . . . . . . . . . . . . 3-15
Splitting Conferences . . . . . . . . . . . . . . . . . . . . . . . . . . . . . . . . . . . . . . . 3-16
Ending Conferences . . . . . . . . . . . . . . . . . . . . . . . . . . . . . . . . . . . . . . . . 3-16
Transferring Calls . . . . . . . . . . . . . . . . . . . . . . . . . . . . . . . . . . . . . . . . . . . . . . 3-16
Performing a Consultative Transfer . . . . . . . . . . . . . . . . . . . . . . . . . . . 3-17
Performing a Blind Transfer . . . . . . . . . . . . . . . . . . . . . . . . . . . . . . . . . 3-18
Forwarding Calls . . . . . . . . . . . . . . . . . . . . . . . . . . . . . . . . . . . . . . . . . . . . . . 3-19
Forwarding Calls Statically . . . . . . . . . . . . . . . . . . . . . . . . . . . . . . . . . . 3-19
Forwarding Calls Dynamically . . . . . . . . . . . . . . . . . . . . . . . . . . . . . . . 3-21
Enabling Do Not Disturb . . . . . . . . . . . . . . . . . . . . . . . . . . . . . . . . . . . . . . . 3-21
Managing Speed Dial Entries . . . . . . . . . . . . . . . . . . . . . . . . . . . . . . . . . . . . 3-23
Using Voice Mail . . . . . . . . . . . . . . . . . . . . . . . . . . . . . . . . . . . . . . . . . . . . . . 3-24
4 Using the Advanced Features of Your Phone . . . . . . . . . . . 4-1
Using Computer or Mobile Audio with the Conference Phone . . . . . . . . 4-1
Listening to Computer or Mobile Audio . . . . . . . . . . . . . . . . . . . . . . . . 4-2
Ending Computer or Mobile Audio . . . . . . . . . . . . . . . . . . . . . . . . . . . . 4-5
Placing Computer or Mobile Audio on Hold . . . . . . . . . . . . . . . . . . . . 4-5
Creating Conference Calls with Computer or Mobile Audio . . . . . . 4-5
Adjusting the Volume of Computer or Mobile Audio . . . . . . . . . . . . 4-6
Using the Phone When it is Connected to a Polycom HDX System . . . . . 4-7
Placing Calls When Your Phone is Connected to a
Polycom HDX System . . . . . . . . . . . . . . . . . . . . . . . . . . . . . . . . . . . . . . . 4-9
Placing Calls When You Don’t Have Any Active Calls . . . . . . . . 4-9
Placing Calls When You Have an Audio-Only Call
on Hold . . . . . . . . . . . . . . . . . . . . . . . . . . . . . . . . . . . . . . . . . . . . . . . 4-10
Placing Calls When You Have an Active Audio-only Call or
a Video Call . . . . . . . . . . . . . . . . . . . . . . . . . . . . . . . . . . . . . . . . . . . 4-11
Placing Calls Using Call Lists, Directories, Speed Dial
Index Numbers, and the Redial Key When Your Phone is
Connected to a Polycom HDX System . . . . . . . . . . . . . . . . . . . . . . . . . 4-11
Answering Calls When Your Phone is Connected to a
Polycom HDX System . . . . . . . . . . . . . . . . . . . . . . . . . . . . . . . . . . . . . .
Answering Calls When You Don’t Have Any Active Calls . . .
Answering Calls When You Have an
Audio-Only Call on Hold . . . . . . . . . . . . . . . . . . . . . . . . . . . . . . . .
Answering Calls When You Have an Active Call . . . . . . . . . . .
4-11
4-11
4-12
4-12
Ending Calls When Your Phone is Connected to a
Polycom HDX System . . . . . . . . . . . . . . . . . . . . . . . . . . . . . . . . . . . . . . 4-13
Holding Calls When Your Phone is Connected to a
Polycom HDX System . . . . . . . . . . . . . . . . . . . . . . . . . . . . . . . . . . . . . . 4-13
Transferring Calls When Your Phone is Connected to a
Polycom HDX System . . . . . . . . . . . . . . . . . . . . . . . . . . . . . . . . . . . . . . 4-13
vii
User Guide for the Polycom SoundStation IP 7000 Phone
Forwarding Calls When Your Phone is Connected to a
Polycom HDX System . . . . . . . . . . . . . . . . . . . . . . . . . . . . . . . . . . . . . . 4-14
Enabling Do Not Disturb When Your Phone is Connected to a
Polycom HDX System . . . . . . . . . . . . . . . . . . . . . . . . . . . . . . . . . . . . . . 4-14
Rejecting Calls When Your Phone is Connected to a
Polycom HDX System . . . . . . . . . . . . . . . . . . . . . . . . . . . . . . . . . . . . . . 4-14
Hosting Conference Calls When Your Phone is Connected to a
Polycom HDX System . . . . . . . . . . . . . . . . . . . . . . . . . . . . . . . . . . . . . .
Setting Up Conferences . . . . . . . . . . . . . . . . . . . . . . . . . . . . . . . . . .
Handling Active Conferences . . . . . . . . . . . . . . . . . . . . . . . . . . . .
Managing Conferences . . . . . . . . . . . . . . . . . . . . . . . . . . . . . . . . . .
4-14
4-15
4-16
4-17
Controlling Volume and Muting Calls When Your Phone is
Connected to a Polycom HDX System . . . . . . . . . . . . . . . . . . . . . . . . . 4-17
Showing Content When Your Phone is Connected to a
Polycom HDX System . . . . . . . . . . . . . . . . . . . . . . . . . . . . . . . . . . . . . . 4-18
Handling Multiple Call Appearances When Your Phone is
Connected to a Polycom HDX System . . . . . . . . . . . . . . . . . . . . . . . . . 4-18
Handling Computer or Mobile Audio When Your Phone is
Connected to a Polycom HDX System . . . . . . . . . . . . . . . . . . . . . . . . . 4-19
Handling Multiple Call Appearances . . . . . . . . . . . . . . . . . . . . . . . . . . . . . 4-19
Using Buddy Lists . . . . . . . . . . . . . . . . . . . . . . . . . . . . . . . . . . . . . . . . . . . . . 4-20
Updating Presence Settings . . . . . . . . . . . . . . . . . . . . . . . . . . . . . . . . . . 4-20
Selecting Contacts to Monitor . . . . . . . . . . . . . . . . . . . . . . . . . . . . . . . . 4-21
Blocking Contacts From Viewing Your Status . . . . . . . . . . . . . . . . . . 4-22
Monitoring the Status of Contacts in Your Buddy List . . . . . . . . . . . 4-24
Integrating With Microsoft Office Live Communications
Server 2005 . . . . . . . . . . . . . . . . . . . . . . . . . . . . . . . . . . . . . . . . . . . . . . . . 4-25
Restarting the Phone . . . . . . . . . . . . . . . . . . . . . . . . . . . . . . . . . . . . . . . . . . . 4-26
5 Troubleshooting Your Phone . . . . . . . . . . . . . . . . . . . . . . . 5-1
Installation Configuration . . . . . . . . . . . . . . . . . . . . . . . . . . . . . . . . . . . . . . . . 5-2
Power and Startup . . . . . . . . . . . . . . . . . . . . . . . . . . . . . . . . . . . . . . . . . . . . . . 5-3
Controls . . . . . . . . . . . . . . . . . . . . . . . . . . . . . . . . . . . . . . . . . . . . . . . . . . . . . . . 5-4
Access to Screens and Systems . . . . . . . . . . . . . . . . . . . . . . . . . . . . . . . . . . . . 5-5
Calling . . . . . . . . . . . . . . . . . . . . . . . . . . . . . . . . . . . . . . . . . . . . . . . . . . . . . . . . 5-6
Displays . . . . . . . . . . . . . . . . . . . . . . . . . . . . . . . . . . . . . . . . . . . . . . . . . . . . . . . 5-7
Audio . . . . . . . . . . . . . . . . . . . . . . . . . . . . . . . . . . . . . . . . . . . . . . . . . . . . . . . . . 5-7
Testing Phone Hardware . . . . . . . . . . . . . . . . . . . . . . . . . . . . . . . . . . . . . . . . 5-7
Safety Notices . . . . . . . . . . . . . . . . . . . . . . . . Safety Notices-1
Index . . . . . . . . . . . . . . . . . . . . . . . . . . . . . . . . . . . . . Index-1
viii
1
Getting Started with Your Phone
This chapter provides basic installation instructions and information for
obtaining the best performance from your SoundStation IP 7000 conference
phone.
The SoundStation IP 7000 conference phone is a next-generation phone with a
modern industrial design, and the latest advancements in Polycom voice
technology.
Some of the key features of the phone include:
•
Extraordinary audio performance
•
Strong IP telephony feature set
•
Built-in voice bridge for multi-participant conferences
•
Ability to connect two phones together for convenience, performance, and
flexibility
•
Ability to connect to Polycom HDX systems to conduct video calls and
conferences
•
A port built into the console to allow calls from a computer calling
application or a mobile phone
This chapter includes the following topics:
•
Parts List on page 1-2
•
Installing the Phone on page 1-3
•
Registering the Phone on page 1-14
•
Features of the Phone on page 1-15
•
Understanding Icons on page 1-18
•
Navigating Menus and Entering Data on page 1-20
1-1
User Guide for the Polycom SoundStation IP 7000 Phone
To read about how to change the settings on your phone, see
Chapter 2, Customizing Your Phone. To read about the phone’s basic features,
see Chapter 3, Using the Basic Features of Your Phone. To read about more
advanced features, see Chapter 4, Using the Advanced Features of Your
Phone.
If you require additional information or assistance with your new phone, see
your system administrator.
Parts List
The following items are included in your basic phone package:
•
SoundStation IP 7000 Conference Phone
•
25-foot Network Cable
•
Quick Start Guide
Make sure your conference phone package contains each item. If any item is
missing, see your system administrator.
SoundStation IP 7000 Conference Phone
25-foot Network Cable
Quick Start Guide
Optional Accessories
The following items are optional accessories for the phone:
•
AC Power Kit with:
— Power Adapter
— Regional Power Cord
— Power Insertion Cable
1-2
Getting Started with Your Phone
•
Multi-Interface Module Package with:
— Multi-Interface Module
— 12-foot Network Cable (10-pin)
— Power Adapter
— Regional Power Cord
•
Console Interconnect Cable
•
External Microphone Kit with two SoundStation IP 7000 extended
microphones
•
External Microphone Kit with two Polycom HDX Microphone Arrays
•
Mobile Phone Cable
•
Computer Calling Kit with Computer Calling Cable
•
Video Kit with a Polycom HDX Microphone Cable
Installing the Phone
This section describes how to install your phone. It includes the following
topics:
•
Connecting Network and Power Sources on page 1-3
•
Connecting Optional External Microphones on page 1-8
•
Connecting Optional Auxiliary Audio Components on page 1-9
•
Connecting Optional Video Components on page 1-11
Connecting Network and Power Sources
There are four ways to connect your phone to the network and a power source.
Your system administrator can tell you which of the following methods best
suits your teleconferencing needs:
•
Power over Ethernet (PoE)
•
AC Power (One Phone)
•
AC Power (One Phone, with Multi-Interface Module)
•
AC Power (Two Phones, with Multi-Interface Module)
Connecting the Phone Using a Power over Ethernet Source
Power over Ethernet is the default connection for the phone.
1-3
User Guide for the Polycom SoundStation IP 7000 Phone
Note
AC power adapters are not included in the PoE package. If you require one, see
your system administrator.
The following figure shows how to connect the phone to the network using a
PoE source.
1
2
25-foot Network Cable
To connect the phone using a PoE source:
1. Connect the 25-foot Network Cable to the LAN jack on the phone.
2. Connect the other end of the 25-foot Network Cable to an available
LAN port on the wall or hub/switch device port.
Connecting the Phone Using AC Power (One Phone)
If a PoE source is not available, connect the phone to an AC power source. To
connect the phone to an AC power source, make sure you have the optional
AC Power Kit (containing a Power Adapter, Regional Power Cord, and a
Power Insertion Cable).
1-4
Getting Started with Your Phone
The following figure shows how to connect the phone to an AC power source.
Power Insertion Cable
2
3
4
1
25-foot Network Cable
Power Adapter
5
To connect the phone to an AC power source:
1. Connect the 25-foot Network Cable to the LAN jack on the phone.
2. Connect the other end of the 25-foot Network Cable to the
Power Insertion Cable.
3. Connect the Power Insertion Cable to an available LAN port on the wall
or hub/switch device port.
4. Connect the Power Adapter to the Power Insertion Cable.
5. Connect the other end of the Power Adapter (with the attached
Regional Power Cord) to the wall outlet.
Connecting the Phone Using AC Power (One Phone, with Multi-Interface
Module)
You can connect one phone to an AC power source and the Multi-Interface
Module. In this way, you have access to the auxiliary audio connectors on the
module so you can connect speakers, wireless (lapel) microphones, and
recording devices and computers (to record phone calls).
Before you set up a phone using the Multi-Interface Module, make sure you
have the optional Multi-Interface Module Package (containing a
Multi-Interface Module, 12-foot Network Cable (10-pin), Power Adapter, and
Regional Power Cord).
1-5
User Guide for the Polycom SoundStation IP 7000 Phone
The following figure shows how to connect the phone to an AC power source
and the Multi-Interface Module.
Power Adapter
Multi-Interface
Module
6
5
12-foot
Network Cable (10-pin)
3
1
2
25-foot
Network Cable
4
To connect the phone to an AC power source and the Multi-Interface Module:
1. Connect the 12-foot Network Cable (10-pin) to the LAN jack on the
phone.
2. Connect the other end of the 12-foot Network Cable (10-pin) to the
Multi-Interface Module.
3. Connect the 25-foot Network Cable to the Multi-Interface Module.
4. Connect the other end of the 25-foot Network Cable to an available
LAN port on the wall or hub/switch device port.
5. Connect the Power Adapter to the Multi-Interface Module.
6. Connect the other end of the Power Adapter (with the attached
Regional Power Cord) to the wall outlet.
Connecting the Phone Using AC Power (Two Phones, with Multi-Interface
Module)
If you have a larger room configuration, you can connect up to two phones
together. In this case, the phones act as one phone and display the same
information. For more information on how to use your phone when two
phones are connected, see your system administrator.
1-6
Getting Started with Your Phone
Before you connect two phones together, make sure you have the optional
Multi-Interface Module Package (containing a Multi-Interface Module, 12-foot
Network Cable (10-pin), Power Adapter, and Regional Power Cord) and the
optional Console Interconnect Cable.
The following figure shows how to connect two phones to the network using
AC power.
Power Adapter
6
Multi-Interface
Module
7
5
12-foot
Network Cable (10-pin)
3
Console
Interconnect Cable
1
2
25-foot
Network Cable
4
To connect two phones to an AC power source:
Warning
Make sure you connect the two phones and the Multi-Interface Module before you
connect the Power Adapter (with the attached Regional Power Cord) to the wall
outlet.
1. Connect the 12-foot Network Cable (10-pin) to the LAN jack on the first
phone.
2. Connect the other end of the 12-foot Network Cable (10-pin) to the
Multi-Interface Module.
3. Connect the 25-foot Network Cable to the Multi-Interface Module.
4. Connect the other end of the 25-foot Network Cable to an available
LAN port on the wall or hub/switch device port.
5. Connect the Power Adapter to the Multi-Interface Module.
1-7
User Guide for the Polycom SoundStation IP 7000 Phone
6. To connect phones, plug one end of the Console Interconnect Cable into
one of the microphone connectors on the first phone and the other end of
the cable into one of the microphone connectors on the second phone.
7. Connect the other end of the Power Adapter (with the attached
Regional Power Cord) to the wall outlet.
Connecting Optional External Microphones
You can connect microphones to the phone using an optional
External Microphone Kit. Depending on the External Microphone Kit you
have, your kit will contain either two SoundStation IP 7000 extended
microphones (analog), or two Polycom HDX Microphone Arrays (digital).
Connect the free end of a microphone cable to one of the microphone
connectors on the phone. You can connect two microphones to one phone.
The following figure shows two SoundStation IP 7000 extended microphones
connected to a single phone. You would connect two Polycom HDX
Microphone Arrays in the same way.
If your conference room setup has two connected phones, you can only
connect one microphone to one phone (you cannot connect a microphone to
each phone). Connect the free end of a microphone cable to the available
microphone connector on one of the phones. It does not matter which phone
you attach the microphone to.
1-8
Getting Started with Your Phone
The following figure shows a two phone setup with a SoundStation IP 7000
extended microphone. You would attach a Polycom HDX Microphone Array
in the same way.
Power Adapter
Multi-Interface
Module
12-foot
Network Cable (10-pin)
Console Interconnect Cable
25-foot
Network Cable
Connecting Optional Auxiliary Audio Components
You can connect various auxiliary audio components, such as wireless (lapel)
microphones, speakers, and recording devices and computers (to record
phone calls) to your phone. You can also connect your conference phone to
audio from a mobile phone or a computer calling application. You connect
audio components to one of the following connectors:
•
2.5mm audio connector on your conference phone—to hear audio from
mobile phones and computer calling applications.
To connect a mobile phone to your conference phone, you require the
optional Mobile Phone Cable. To connect a computer calling application
to your conference phone, you require the optional Computer Calling Kit
(containing a Computer Calling Cable).
1-9
User Guide for the Polycom SoundStation IP 7000 Phone
•
Audio connectors and ports on the Multi-Interface Module—to connect
wireless (lapel) microphones, speakers, and recording devices and
computers (to record phone calls).
To connect audio components to the Multi-Interface Module, see your
system administrator.
After you connect an auxiliary audio component to the Multi-Interface
Module, you must enable the component. To enable the component, see
Enabling Auxiliary Audio Components on page 2-12.
Note
You do not have to enable audio from a mobile phone or from a computer calling
application. This audio is automatically enabled when you connect the
Mobile Phone Cable or the Computer Calling Cable to the 2.5mm audio connector
on your conference phone.
2.5mm Audio Connector on Phone
Your conference phone has a 2.5mm audio connector to connect to a mobile
phone or to a computer calling application. You connect a mobile phone or
computer calling application so you can use the conference phone speaker to
stream two-way audio from the mobile phone or computer calling application
for hands-free conversations. When you connect mobile or computer audio to
your conference phone, all participants in a call or conference call (including
those connected through a mobile phone or computer calling application) can
hear and speak to each other.
The 2.5mm audio connector is located on the right side of your conference
phone, behind a door you flip open.
The following figure shows the 2.5mm audio connector on the side of the
conference phone. The 2.5mm audio connector has a mobile phone icon above
it.
1 - 10
Getting Started with Your Phone
To connect to audio from a mobile phone:
>> Connect one end of the optional Mobile Phone Cable to the headset jack on
your mobile phone, and connect the other end to the 2.5mm audio
connector on your conference phone.
Note
If your conference phone setup has two connected phones, you can attach the
Mobile Phone Cable to either conference phone.
For information on using your conference phone with a mobile phone
connection, see Using Computer or Mobile Audio with the Conference Phone
on page 4-1.
To connect to audio from a computer calling application:
>> Connect one end (the end with two connectors) of the Computer Calling
Cable (contained in the optional Computer Calling Kit) to the sound card
on your computer, and connect the other end to the 2.5mm audio
connector on your phone.
For information on using your phone with a computer calling application, see
Using Computer or Mobile Audio with the Conference Phone on page 4-1.
Audio Connectors on Multi-Interface Module
The Multi-Interface Module has various connectors and ports to connect
wireless (lapel) microphones, speakers, and recording devices and computers
(to record phone calls). To attach and use audio components, see your system
administrator.
Connecting Optional Video Components
You can connect your phone to a Polycom HDX system so that your phone can
conduct video calls and conferences. You can connect your phone to the
following Polycom HDX systems running 2.5 or later:
•
Polycom HDX 4000™ series
•
Polycom HDX 7000™ series
•
Polycom HDX 8000™ HD
•
Polycom HDX 9000™ series
For information on how to use your phone when it is connected to a
Polycom HDX system, see Using the Phone When it is Connected to a Polycom
HDX System on page 4-7. For detailed information on how to use a Polycom
HDX system, see the Polycom HDX documentation at www.polycom.com/
videodocumentation.
1 - 11
User Guide for the Polycom SoundStation IP 7000 Phone
Before you set up your phone to connect to a Polycom HDX system, make sure
you have the optional Video Kit (containing a Polycom HDX Microphone
Cable). You use the Polycom HDX Microphone Cable to connect your phone
to the Polycom HDX system.
When you connect your phone to a Polycom HDX system, you do not need to
connect the phone to a power source. The Polycom HDX system provides the
power source.
To connect your phone to a Polycom HDX system:
Note
You can only connect a single-phone setup to the Polycom HDX system. That is,
you cannot connect two phones together (using the Console Interconnect Cable),
and then connect the phones to a Polycom HDX system.
1. Connect your phone to the network:
Note
If you are using a Multi-Interface Module, follow the steps for Connecting the Phone
Using AC Power (One Phone, with Multi-Interface Module) on page 1-5, and then
go to step 2.
a
Connect the 25-foot Network Cable to the LAN jack on the phone.
b
Connect the other end of the 25-foot Network Cable to an available
LAN port on the wall or hub/switch device port.
The following figure shows how to connect the phone to the network.
2. (Optional.) Connect an external microphone or auxiliary audio
components to your phone. See Connecting Optional External
Microphones on page 1-8 and Connecting Optional Auxiliary Audio
Components on page 1-9.
1 - 12
Getting Started with Your Phone
Note
You can only connect one external microphone to your phone. The other
microphone connector on your phone must be available to connect to the
Polycom HDX system.
You may be able to connect additional Polycom HDX Microphone Arrays to the
Polycom HDX system (the exact number depends on the Polycom HDX system you
have). To find out how many Polycom HDX Microphone Arrays you can connect to
your system, see the “optional setup” instructions in the setup guide for your system
at www.polycom.com/videodocumentation.
3. Connect one end of the Polycom HDX Microphone Cable into an
available microphone connector on your phone, and connect the other
end to the Polycom HDX system.
The following figure shows how to connect the Polycom HDX
Microphone Cable to an available microphone connector on your phone.
The other end of the cable connects to the Polycom HDX system.
Polycom
HDX System
To Network
Network Cable
1 - 13
User Guide for the Polycom SoundStation IP 7000 Phone
Registering the Phone
Generally, your phone will be deployed with multiple other phones. In this
case, your system administrator will configure the phone parameters
beforehand, so that after you set up your phone, the phone will be registered
and ready to use.
If your phone is not part of a large phone deployment, your phone may not be
registered after you set it up. Before you use your phone, you or your system
administrator will have to register it.
For detailed information on how to register your phone after you install it, see
Quick Tip 44011: Registering Standalone SoundPoint IP and SoundStation IP
Phones, available at http://www.polycom.com/usa/en/support/voice/
soundpoint_ip/VoIP_Technical_Bulletins_pub.html
Before You Use Your Phone
Note
Since you can customize your phone in many different ways, and your
system administrator can enable and disable certain features, the user
interface that displays on your phone may differ from the figures that
appear in this guide.
Before you use your phone, familiarize yourself with the phone’s features, the
icons that display on the screen, and how to navigate menus and enter data.
1 - 14
Getting Started with Your Phone
Features of the Phone
The following figure shows the primary hardware features of your phone
console.
2
1
3
3
2
Feature
Description
1
Speaker
Allows for ringer and hands-free audio output.
2
Microphones
Provide 360o coverage by three internal
microphones.
3
LED Indicators
Indicate phone and call status through three bi-color
LEDs. The LEDs illuminate to indicate the following
normal operational states:
•
Solid red—A muted call
•
Flashing red—A call is on hold
•
Solid green—A dial-tone is available, dialing is
in-progress, or call is in-progress
•
Flashing green—An incoming call
1 - 15
User Guide for the Polycom SoundStation IP 7000 Phone
The following figure shows the primary components on your phone console:
1
2
3
4
12
5
11
6
10
7
9
8
.
1 - 16
Item
Description
1
LCD graphic display
Shows call and status information, messages,
soft keys, menus, time, and date.
2
Soft keys
Select specific context-sensitive functions that
display on the screen above each soft key.
3
Scroll keys
Allow you to:
•
Scroll through displayed information
•
Enable or disable fields
•
View the Speed Dial Info list (Up scroll key)
•
View the Received Calls list (Left scroll key)
•
View the Placed Calls list (Right scroll key)
•
View the Missed Calls list (Down scroll key)
Getting Started with Your Phone
Item
Description
4
End Call key
Ends a call.
5
Select key
Allows you to:
•
Select a field of displayed data
•
Enable or disable fields
6
Volume keys
Adjust the volume of the speaker and the ringer.
7
Mute key
Stops local audio from being heard at the far end
of the call.
8
Dial pad keys
Contain 10 digits, 26 alphabetic characters, and
other special characters available in
context-sensitive applications.
9
Redial key
Places a call to the most recently dialed person.
10
Conference key
Allows you to set up local audio conferences.
11
Menu key
Allows you to access additional features and
configuration settings.
12
Make Call key
Initiates a call.
1 - 17
User Guide for the Polycom SoundStation IP 7000 Phone
Understanding Icons
Icon
1 - 18
Line, Call State, or
Indicator
Description
Active call using
Polycom® HD
Voice™ technology
A call is in progress using Polycom HD Voice.
The active call icons merge into one icon on the
phone screen. The following figure shows what
displays on the screen during an active call:
Active call not using
Polycom HD Voice
A call in is progress that does not use
Polycom HD Voice.
Audio-only call
An audio-only call is either active or on hold, or
the phone is placing a call. In lists, the icon
represents an audio-only call.
Call forward
You have enabled the call forward feature on your
phone. See Forwarding Calls on page 3-19.
Conference
A conference is in progress. See Hosting
Conference Calls on page 3-9.
Dialing
The phone is placing a call.
Hold
A call or conference is on hold. See Holding and
Resuming Calls on page 3-8 and Holding and
Resuming Conferences on page 3-15.
Do Not Disturb
You have enabled the Do Not Disturb feature on
your phone. Your phone will not ring. See
Enabling Do Not Disturb on page 3-21.
Far mute
You have applied the far mute feature to a
conference call participant. The muted participant
can hear all participants, but no participant can
hear the muted participant. See Muting
Conference Call Participants on page 3-12.
Getting Started with Your Phone
Icon
Line, Call State, or
Indicator
Presence
Description
Identifies the status of a buddy in your Buddy
Status list. See Using Buddy Lists on page 4-20.
—Online
—Busy or On the phone
—Be right back, Away, or Out to lunch
—Offline
Registered line
The phone can place and receive calls.
Registered shared
line
The phone, which shares a directory number with
another phone, can place and receive calls. See
Understanding Shared Lines on page 2-30.
Ringing
The phone is ringing.
Unregistered line
The phone is unable to place and receive calls.
Video call
A video call is taking place, or the phone is
placing a video call. In lists, the icon represents a
video call.
Voice mail message
You have a new voice mail message. See Using
Voice Mail on page 3-24.
1 - 19
User Guide for the Polycom SoundStation IP 7000 Phone
Navigating Menus and Entering Data
To navigate menus and enter data, use the following tips.
Note
After 20 seconds of inactivity, the menu system automatically exits to the idle
screen unless an edit session is in progress.
If you want to ...
Then do this ...
Enter the Main Menu
Exit the Main Menu and return to the
idle screen
Press
.
Press
.
Exit the Main Menu or Directories
menu
Press the Exit soft key.
Return to the previous menu
Press the Back soft key.
Cancels the current task or edit
session
Press the Cancel soft key.
Scroll through a list or menu items
Press the Up and Down scroll keys:
and
.
When lists appear on more than one page,
press the * key to Page Up, or press the #
key to Page Down.
Select a menu item
Do one of the following:
•
Scroll to the menu item, and then press
.
•
Scroll to the menu item, and then press
the Select soft key.
•
Press the dial pad key that corresponds
to the item in the numbered menu list.
For example, to select the second item
in a menu, press 2.
Enter text
In text-entry mode, press the number keys
one or more times.
For example, to enter “A,” press
once. To enter “C,” press
three
times quickly.
(To enter and dial an IP address or URL,
see Placing Calls on page 3-2.)
1 - 20
Getting Started with Your Phone
If you want to ...
Then do this ...
Enter numbers, uppercase
characters, or lowercase characters
Press the 1/A/a soft key one or more times.
Enter text in a specific language
The format the text will display in appears at
the top of the screen.
Press the Encoding soft key.
The language the text will display in
appears at the top of the screen.
Enter special characters
Do the following:
•
In text-entry mode, press the 1/A/a soft
key to select A/Ascii or a/Asciii mode,
and then press
or
one or more times.
•
Enter a space
Press
one or more times.
In text-entry mode, press the 1/A/a soft key
to select A/Ascii or a/Asciii mode, and then
press
three times quickly.
Delete text you entered
Press the << soft key.
View additional soft keys
Press the More soft key.
Enable or disable fields
Press the Right or Left scroll key:
and
.
1 - 21
User Guide for the Polycom SoundStation IP 7000 Phone
1 - 22
2
Customizing Your Phone
You can customize your SoundStation IP 7000 conference phone by adjusting
certain settings, including time and date, language, display contrast and
intensity, and ring tone. You can also add contacts to your phone’s local
Contact Directory.
This chapter shows you how to customize your phone. It includes the
following topics:
•
Configuring Basic Settings on page 2-1
•
Adjusting the Speaker and Ringer Volume on page 2-14
•
Using Call Lists on page 2-14
•
Managing Contacts on page 2-17
•
Managing Incoming Calls on page 2-28
Some customizations, including setting up shared lines and viewing a
Corporate Directory, must be configured by your system administrator.
To learn about the phone’s basic features, see Chapter 3, Using the Basic
Features of Your Phone. To read about the phone’s advanced features, see
Chapter 4, Using the Advanced Features of Your Phone.
For more information or assistance with your new phone, see your system
administrator.
Configuring Basic Settings
To configure basic phone settings, press
, and then select
Settings > Basic to view the basic phone settings you can customize.
This section includes the following topics:
•
Updating Preferences
•
Updating the Display Contrast
•
Updating the Backlight Intensity
•
Updating the Ring Tone
•
Updating Audio Quality and Capabilities
2-1
User Guide for the Polycom SoundStation IP 7000 Phone
Updating Preferences
The Preferences menu allows you to customize the language that displays on
the phone and how the time and date display on the idle screen.
You can also enable your phone to save Corporate Directory search results
(if Corporate Directory is set up on your phone). See Searching for Contacts in
a Corporate Directory on page 2-24.
Updating the Language
The phone supports the following languages. English (Internal) is the default
language that displays.
Language (Localization)
1. English (Internal)
2. Chinese (China)
3. Danish (Denmark)
4. Dutch (Netherlands)
5. English (Canada)
6. English (United Kingdom)
7. English (United States)
8. French (France)
9. German (Germany)
10. Italian (Italy)
11. Japanese (Japan)
12. Korean (Korea)
13. Norwegian (Norway)
14. Polish (Poland)
15. Portuguese (Portugal)
16. Russian (Russia)
17. Slovenian (Slovenia)
18. Spanish (Spain)
19. Swedish (Sweden)
2-2
Customizing Your Phone
To change the language:
1. Press
, and then select Settings > Basic > Preferences > Language.
The Language screen displays.
2. Scroll to the language you want, and then press Select.
The text that appears on the screen will change to the language that you
selected.
3. Press
to return to the idle screen.
Updating the Time and Date Display
The time and date display on the idle screen of your phone. If the phone cannot
obtain a time and date, the display will flash. If this happens, or if the time or
date is incorrect, see your system administrator.
You can select from various formats for the time and date display. Select and
set options that are right for you. You can also disable the time and date
display, so the time and date do not display on the phone screen.
The following figure shows the default format for the date and time display.
2-3
User Guide for the Polycom SoundStation IP 7000 Phone
To display a new time format:
1. Press
, and then select Settings > Basic > Preferences >
Time & Date > Clock Time.
The Clock Time screen displays.
2. Scroll to the time format you want, and then press Select.
3. Press
to return to the idle screen.
To display a new date format:
1. Press
, and then select Settings > Basic > Preferences >
Time & Date > Clock Date.
The Clock Date screen displays.
2. Scroll to the date format you want, and then press Select.
3. Press
2-4
to return to the idle screen.
Customizing Your Phone
To disable the time and date display:
1. Press
, and then select Settings > Basic > Preferences >
Time & Date.
The Time & Date screen displays.
2. Scroll to Disable, and then press Select.
3. Press
to return to the idle screen.
The idle screen no longer displays the time and date. To display the time and
date again, enable the time and date (see below).
To enable the time and date display:
1. Press
, and then select Settings > Basic > Preferences >
Time & Date.
The Time & Date screen displays.
2. Press Select.
3. Press
to return to the idle screen.
The idle screen now displays the time and date.
2-5
User Guide for the Polycom SoundStation IP 7000 Phone
Updating the Display Contrast
To adjust the contrast on the phone display:
1. Press
, and then select Settings > Basic > Contrast.
The Contrast screen displays.
2. Press the Up or Down soft keys to increase or decrease the display
contrast.
3. Press the Ok soft key.
4. Press
to return to the idle screen.
Updating the Backlight Intensity
Backlight intensity on the phone has three components:
•
Backlight On
•
Backlight Idle
•
Maximum Intensity
You can modify the Backlight On intensity and the Backlight Idle intensity
separately. You can select high, medium, low, and off levels for both.
When you modify the Maximum Intensity, you modify the entire backlight
intensity scale. For example, if you decrease the Maximum Intensity, the low,
medium, and high levels for both Backlight On and Backlight Idle intensities
decrease.
The Backlight On intensity applies to following events:
2-6
•
Any key press
•
Incoming calls
•
Ending a call, holding a call, or resuming a call by the other person
•
A voice message received
Customizing Your Phone
If you do not press any keys on the phone, after 20 seconds of the backlight
turning on, the backlight dims (or changes) to medium in the following cases:
•
A call is in progress
•
A call is on hold
•
There is an incoming call (ringing)
•
There is an outgoing call (ringing back)
•
Any menu shows on the display
In all other cases, the Backlight Idle intensity applies.
To update the backlight intensity:
1. Press
, and then select Settings > Basic > Backlight Intensity.
The Backlight Intensity screen displays.
2. Select Backlight On Intensity.
The Backlight On Intensity screen displays.
3. Scroll to the intensity you want, and then press Select. The default
Backlight On Intensity is High.
4. Press the Save soft key.
2-7
User Guide for the Polycom SoundStation IP 7000 Phone
5. Select Backlight Idle Intensity.
The Backlight Idle Intensity screen displays.
6. Scroll to the intensity you want, and then press Select. The default
Backlight Idle Intensity is Low.
7. Press the Save soft key.
8. Select Maximum Intensity.
The Maximum Intensity screen displays.
9. Press the Up or Down soft keys to increase or decrease the maximum
intensity the screen can display, and then press the Ok soft key.
10. Press
to return to the idle screen.
Updating the Ring Tone
You can select from many different ring tones to distinguish your phone from
your neighbor’s. You can also set distinctive ring tones for contacts in your
local directory so you can identify callers when your phone rings.
2-8
Customizing Your Phone
Selecting a Different Ring Tone for Your Phone
You can choose a unique ring tone for your phone to identify it when it rings.
To select a ring tone for your phone:
1. Press
, and then select Settings > Basic > Ring Type.
The Ring Type screen displays.
2. Scroll to the ring type you want. To hear the ring type, press the Play
soft key. The default ring type is Low Trill.
3. Press Select.
4. Press
to return to the idle screen.
Setting Distinctive Ring Tones for Contacts
Note
Your company’s settings may override this feature. For more information, contact
your system administrator.
You can set a distinctive ring tone for each contact in your contact directory so
you can distinguish callers.
2-9
User Guide for the Polycom SoundStation IP 7000 Phone
To set a distinctive ring tone for a contact:
1. Press
, and then select Features > Contact Directory.
The Directory screen displays.
2. Scroll to the contact for whom you want to assign a distinctive ring tone.
3. Press the Edit soft key.
The Edit Contact screen displays.
4. Scroll to Ring Type, and then enter a number corresponding to one of the
ring types available.
If a ring type is already assigned to the contact, but you want to change it,
press the << soft key to delete the existing ring type. Then, enter a number
corresponding to one of the ring types available.
Note
To exit this screen and determine the number associated with a ring type, press the
Menu key, and then select Settings > Basic > Ring Type. Each ring type has a
number associated with it.
5. Press the Save soft key.
6. Press
2 - 10
to return to the idle screen.
Customizing Your Phone
Updating Audio Quality and Capabilities
You can adjust the audio quality of your phone, and enable auxiliary audio
components, such as wireless (lapel) microphones, speakers, recording
devices, and computers that you connect to the Multi-Interface Module.
Updating the Sound Quality of Your Phone
You can adjust the sound quality of your phone by changing the treble or bass
control.
To adjust the sound quality of your phone:
1. Press
, and then select Settings > Basic > Audio >
Bass and Treble.
The Bass and Treble screen displays.
2. Do one of the following:
— To adjust the treble control, scroll to Treble EQ, and then press Select.
The Treble EQ screen displays.
2 - 11
User Guide for the Polycom SoundStation IP 7000 Phone
or
— To adjust the bass control, scroll to Bass EQ, and then press Select.
The Bass EQ screen displays.
3. Press the Up or Down soft keys to adjust the treble or bass EQ, and then
press Select.
4. Press
to return to the idle screen.
Enabling Auxiliary Audio Components
Before you can use the auxiliary audio components that you connect to the
Multi-Interface Module (wireless microphones, speakers, as well as recording
devices and computers to record phone calls), you must enable them. You
enable the components from the Auxiliary Audio menu.
Note
You do not have to enable audio from a mobile phone or from a computer calling
application. This audio is automatically enabled when you connect the
Mobile Phone Cable or the Computer Calling Cable to the 2.5mm audio connector
on your conference phone.
For information on connecting auxiliary audio components to the conference
phone or Multi-Interface Module, see Connecting Optional Auxiliary Audio
Components on page 1-9.
2 - 12
Customizing Your Phone
To enable or disable wireless (lapel) microphones:
1. Press
, and then select Settings > Basic > Audio >
Auxiliary Audio > Aux Audio In.
The Aux Audio In screen displays.
2. Do one of the following:
— To enable a wireless (lapel) microphone, scroll to Wireless Mic, and
then press Select.
— To disable wireless microphones, scroll to Off, and then press Select.
3. Press
to return to the idle screen.
To enable or disable speakers, as well as recording devices and computers:
1. Press
, and then select Settings > Basic > Audio >
Auxiliary Audio > Aux Audio Out.
The Aux Audio Out screen displays.
2 - 13
User Guide for the Polycom SoundStation IP 7000 Phone
2. Do one of the following:
— To enable recording devices or computers to record phone calls, scroll
to Record Out, and then press Select.
— To enable external speakers, scroll to External Speaker, and then press
Select.
— To disable speakers, and to prevent recording devices and computers
from recording phone calls, scroll to Off, and then press Select.
3. Press
to return to the idle screen.
Adjusting the Speaker and Ringer Volume
To adjust the speaker volume:
>> During a call, press either
or
to adjust the speaker volume.
To adjust the ringer volume:
>> When the phone is in the idle state, press either
or
to adjust
the ringer volume.
Using Call Lists
Your phone maintains lists of missed, received, and placed calls. Each list can
hold up to 100 entries.
If you miss a call (for example, if you do not answer a call, or you have
call forwarding or Do Not Disturb enabled), the idle screen will display a
message indicating the number of missed calls you have. To view information
about the missed call, view your Missed Calls list (see Viewing Call Lists,
below). After you view the Missed Calls list, the message on the idle screen is
removed.
2 - 14
Customizing Your Phone
The following figure shows what the idle screen looks like when you miss a
call.
Viewing Call Lists
You can access missed, received, and placed calls from the idle screen, or you
can quickly access call lists using the scroll keys.
To view a call list:
>> From the idle screen, do one of the following:
— Press
, and then select Features > Call Lists > Missed Calls,
Received Calls, or Placed Calls.
or
— Press the Dir soft key, and then select Call Lists > Missed Calls,
Received Calls, or Placed Calls.
or
— Use the scroll keys to access a call list:
— To view the Received Calls List, press the Left scroll key.
— To view the Placed Calls List, press the Right scroll key.
— To view the Missed Calls List, press the Down scroll key.
Managing Call Lists
You can clear all the records in a call list, or just one record. You can also
choose a record in a list and return the call, store the call details in your local
Contact Directory, or view detailed information about the particular call.
2 - 15
User Guide for the Polycom SoundStation IP 7000 Phone
To manage a call list:
1. Press the Dir soft key, and then select Call Lists.
The Call Lists screen displays.
2. Do one of the following:
— To clear the records in a call list, select Clear > Missed Calls, Received
Calls, or Placed Calls.
The following figure shows the message that displays when you clear
a Missed Calls list.
Note
2 - 16
To manually clear all calls in all call lists, restart the phone. See Restarting the
Phone on page 4-26.
Customizing Your Phone
— To view and manage a call list, scroll to either Missed Calls, Received
Calls or Placed Calls, and then press Select. Your call list information
displays.
The following figure shows a Placed Calls list.
To manage your call list:
— To return the call, press the Dial soft key.
— To edit the phone number (if necessary) before you place the call or
store the call details in your Contact Directory, press the Edit soft key.
— To return to the Call Lists menu, press the Back soft key.
— To remove the call from the list, press the Clear soft key.
— To store the contact in your Contact Directory, press the Save soft key.
— To view information about the call, such as the phone number, the
time and duration of the call, and the name of the caller, press the Info
soft key.
3. Press
twice to return to the idle screen.
Managing Contacts
You can store a large number of contacts in your phone’s local
Contact Directory. Contact your system administrator for the exact number.
You can dial and search for contacts in this directory. You may be able to add,
edit, and delete contacts. Contact your system administrator to see if you have
read-only access to your local Contact Directory, or if you can update it.
If your system administrator sets up a Corporate Directory on your phone, you
may also have read access to portions of your Corporate Directory. Your
system administrator determines which contacts you can see. You can search
for contacts in the Corporate Directory, and add contacts from the Corporate
Directory to your local Contact Directory. For more information, see Searching
for Contacts in a Corporate Directory on page 2-24 and Adding Contacts to
Your Local Contact Directory From a Corporate Directory on page 2-22.
2 - 17
User Guide for the Polycom SoundStation IP 7000 Phone
To view your local Contact Directory:
>> Do one of the following:
— Press
, and then select Features > Contact Directory.
or
— Press the Dir soft key, and then select Contact Directory.
The Directory screen displays, listing all the contacts in your directory.
To view your Corporate Directory:
>> Do one of the following:
— Press
, and then select Features > Corporate Directory.
or
— Press the Dir soft key, and then select Corporate Directory.
The Corporate Directory screen displays, listing all the contacts in your
directory. You can search for and dial contacts, or save contacts to the local
Contact Directory.
2 - 18
Customizing Your Phone
Adding Contacts to Your Local Contact Directory
You can add contacts to your local Contact Directory in the following ways:
Note
•
Manually (if you have permission to update your local Contact Directory)
•
From a call list
•
From a Corporate Directory (if this is set up on your phone)
You cannot update Corporate Directory from your phone.
Adding Contacts Manually
You can update your local Contact Directory manually, instead of importing
contact information from a call list or a Corporate Directory.
To add a contact manually:
1. Press the Dir soft key, and then select Contact Directory.
The Directory screen displays.
2. To add a contact to your phone’s database, press the Add soft key.
The Add To Directory screen displays.
2 - 19
User Guide for the Polycom SoundStation IP 7000 Phone
3. Enter the contact information. To move between fields, use the Up and
Down scroll keys. Enter the following information:
Note
Your phone may not display all the following fields. For more information, see your
system administrator.
— (Optional.) Enter the First Name and Last Name of the contact.
You can enter a maximum of 32 characters. To alternate between
numeric, uppercase, and lowercase alphanumeric modes, press the
1/A/a soft key. To enter text in another language, press the Encoding
soft key.
— (Required.) Enter the Contact phone number.
You can enter a maximum of 32 characters. The contact number must
be unique, and must not already exist in the directory. If you try to
save an entry with a non-unique phone number, or you do not enter a
phone number, an error message displays.
— (Optional.) Change the Speed Dial Index number.
The speed dial index is automatically assigned to the next available
index value, up to a maximum value of 99.
You can assign any unused speed dial index number from 1 to 99. If
you assign a speed dial index number that is already taken, or you
enter an invalid speed dial index number (for example, 0 or 00), an
error message displays.
For more information on speed dial index numbers, see Managing
Speed Dial Entries on page 3-23.
— (Optional.) Enter a Label for the contact. You can enter a maximum of
32 symbols, letters, or numbers.
If you specify a label, the label will be the first item that displays for
the contact in the Contact Directory and on the Speed Dial Info screen
(before the contact’s first and last names, if specified). For example, in
the following figure, the labels Sales and Marketing have been
assigned to contacts in the local Contact Directory.
2 - 20
Customizing Your Phone
— (Optional.) Set the Ring Type.
For information on setting the ring type, see Updating the Ring Tone
on page 2-8.
— (Optional.) Assign a Divert Contact.
The Divert Contact identifies the third person to which you want this
contact’s calls sent. You can enter a maximum of 32 characters.
— (Optional.) Change the Auto Reject and Auto Divert settings.
If you set the Auto Reject field to enabled, each time the contact calls,
the call will be directed to your voice mail system (if a voice mail
system is set up). If you set the Auto Divert field to enabled, each time
the contact calls, the call will be directed to a third person you specify
in the Divert Contact field.
Press the Right or Left scroll key to switch between the Enabled and
Disabled settings for the Auto Reject and Auto Divert fields.
Note
If you do not have a voice mail system set up, enabling the Auto Reject field will
have no effect. Each time the contact calls, your phone will ring (unless you choose
to divert the contact’s calls, or enable call forwarding or Do Not Disturb).
— (Optional.) Change the Watch Buddy and Block Buddy settings.
If you set the Watch Buddy field to enabled, you can monitor the
contact’s status. If you set the Block Buddy field to enabled, the contact
cannot monitor your status. For more information on monitoring
status, see Using Buddy Lists on page 4-20.
Press the Right or Left scroll key to switch between the Enabled and
Disabled settings for the Watch Buddy and Block Buddy fields.
4. Press the Save soft key.
5. Press
twice to return to the idle screen.
Adding Contacts From Call Lists
You can save call information from a call list to your local Contact Directory.
To add a contact to the local Contact Directory from a call list:
1. Press the Dir soft key, and then select Call Lists > Missed Calls,
Received Calls, or Placed Calls.
2. Scroll to the contact.
You can use the * key to Page Up and the # key to Page Down.
3. To save the contact to your Contact Directory, press the Save soft key.
4. Press
twice to return to the idle screen.
2 - 21
User Guide for the Polycom SoundStation IP 7000 Phone
Note
You may want to go to the Contact Directory and check if the contact was saved
correctly and to add any missing fields. To view your Contact Directory, see
Managing Contacts on page 2-17. To update missing contact information, see
Adding Contacts Manually on page 2-19 (step 3).
Adding Contacts to Your Local Contact Directory From a Corporate Directory
You can save any contact listed in your Corporate Directory (if it is set up on
your phone) to your local Contact Directory.
To add a contact to your local Contact Directory from a Corporate Directory:
1. Press the Dir soft key, and then select Corporate Directory.
The Corporate Directory screen displays.
2. Search for the contact, and then scroll to the contact’s entry.
For information on how to search for a contact, see Searching for Contacts
in a Corporate Directory on page 2-24.
3. Press the View soft key.
The Contact screen displays.
2 - 22
Customizing Your Phone
4. To save the contact to the local Contact Directory, press the Save soft key.
“Saved” displays on the screen. Only the first name, last name, and phone
number are saved.
If the contact already exists in your local Contact Directory,
“Contact already exists” displays.
5. Press
Note
twice to return to the idle screen.
You may want to go to the Contact Directory and check if the contact was saved
correctly and to add any missing fields. To view your Contact Directory, see
Managing Contacts on page 2-17. To update missing contact information, see
Adding Contacts Manually on page 2-19 (step 3).
Searching for Contacts
You can search for contacts in your local Contact Directory, or in a
Corporate Directory (if this is set up on your phone).
Searching for Contacts in Your Local Contact Directory
Search for a contact by scrolling through the directory, or entering specific
search criteria.
To search for a contact in the local Contact Directory:
1. Press the Dir soft key, and then select Contact Directory.
The Directory screen displays.
2 - 23
User Guide for the Polycom SoundStation IP 7000 Phone
2. Press the Search soft key. Then, enter the first few characters of the
contact’s first or last name, and then press the Search soft key again.
The Directory Search screen displays a list of successful matches.
3. Scroll to the contact you are searching for.
From this screen, you can dial, edit, or delete the contact.
4. Press
twice to return to the idle screen.
Searching for Contacts in a Corporate Directory
Search for a contact by scrolling through the directory, or entering specific
search criteria.
Note
2 - 24
You can enable your phone to save Corporate Directory search results, and to
remember the last person you viewed in the directory. Whenever you re-display
Corporate Directory, the last person you viewed will display. If you searched for a
person, the results of the last search you submitted will display. To enable this
feature, press the Menu key, and then select Settings > Basic > Preferences >
Corporate Directory > Retain Search. Scroll to Enabled, and then press Select.
Customizing Your Phone
To search for a contact in the Corporate Directory:
1. Press the Dir soft key, and then select Corporate Directory.
The Corporate Directory screen displays.
2. Press the Search soft key. Then, enter the first few characters or numbers
of a search criteria, and then press the Submit soft key.
The screen displays a list of successful matches.
3. Scroll to the contact you are searching for.
From this screen, you can press the Dial soft key to dial the contact, or
press the View soft key and save the contact to your local
Contact Directory.
4. Press
twice to return to the idle screen.
2 - 25
User Guide for the Polycom SoundStation IP 7000 Phone
Updating Contacts in Your Local Contact Directory
You can update information for contacts in your local Contact Directory. You
cannot update information for contacts in your Corporate Directory.
To update a contact in your local Contact Directory:
1. Press the Dir soft key, and then select Contact Directory.
The Directory screen displays.
2. Scroll to the contact whose information you want to update, or search for
the contact (see Searching for Contacts in Your Local Contact Directory
on page 2-23).
3. Press the Edit soft key.
The Edit Contact screen displays.
4. Update the contact information. For information on the fields you can
update, see Adding Contacts Manually on page 2-19 (step 3).
5. Press the Save soft key.
6. Press
2 - 26
twice to return to the idle screen.
Customizing Your Phone
Deleting Contacts From Your Local Contact Directory
You can delete contacts from your local Contact Directory. You cannot delete
contacts from your Corporate Directory.
To delete a contact from the local Contact Directory:
1. Press the Dir soft key, and then select Contact Directory.
The Directory screen displays.
2. Scroll to the contact you want to delete. Or, search for the contact (see
Searching for Contacts in Your Local Contact Directory on page 2-23).
3. Press the Delete soft key.
The contact is deleted from the directory.
4. Press
twice to return to the idle screen.
Placing Calls to Contacts
You can place calls to contacts from your local Contact Directory or from your
Corporate Directory (if this is set up on your phone).
To place a call to a contact from your Local or Corporate Directory:
1. Press the Dir soft key, and then select Contact Directory or
Corporate Directory.
2. From the Directory or Corporate Directory screen, scroll to the contact
you want to call, or search for the contact (see Searching for Contacts on
page 2-23).
3. Press the Dial soft key.
2 - 27
User Guide for the Polycom SoundStation IP 7000 Phone
Managing Incoming Calls
You can manage incoming calls from the contacts in your local Contact
Directory by doing the following:
•
Setting up a distinctive ring tone for a contact
•
Rejecting calls from a particular contact by sending the call to your
voice mail system
•
Diverting calls from a particular contact to another person
Distinguishing Calls
You can customize your phone so that you can distinguish callers by certain
ring types. For information on setting a distinctive ring type for a particular
contact, see Setting Distinctive Ring Tones for Contacts on page 2-9.
Rejecting Calls
You can customize your phone so that incoming calls from a particular person
are immediately sent to your voice mail system. (If you do not have a voice
mail system set up, the call will still ring on your phone.)
Note
Rejecting calls is not available on shared lines.
To send incoming calls from a particular contact directly to voice mail:
1. Press the Dir soft key, and then select Contact Directory.
The Directory screen displays.
2. Scroll to the contact whose calls you want to go to your voice mail system.
You can use the * key to Page Up and the # key to Page Down.
2 - 28
Customizing Your Phone
3. Press the Edit soft key.
The Edit Contact screen displays.
4. Scroll to the Auto Reject field and change the Auto Reject setting to
Enabled. (To select Enabled, press the Right or Left scroll key.)
5. Press the Save soft key.
6. Press
twice to return to the idle screen.
Diverting Calls
You can customize your phone so that incoming calls from a particular person
are transferred directly to a third person.
To divert incoming calls from a contact to a third person:
1. Press the Dir soft key, and then select Contact Directory.
The Directory screen displays.
2. Scroll to the contact for whom you want to transfer calls.
You can use the * key to Page Up and the # key to Page Down.
2 - 29
User Guide for the Polycom SoundStation IP 7000 Phone
3. Press the Edit soft key.
The Edit Contact screen displays.
4. Scroll to the Divert Contact field and enter the number of the person to
whom you want to divert the call. You can enter a maximum of 32
characters.
5. Scroll to the Auto Divert field.
6. Change the Auto Divert setting to Enabled. (To select Enabled, press the
Right or Left scroll key.)
7. Press the Save soft key.
8. Press
twice to return to the idle screen.
Understanding Shared Lines
Note
Shared lines is an optional feature that your system administrator sets up. Your
system may not support it. For more information, contact your system administrator.
If two phones share a line, an incoming call to one number will cause both
phones to ring. The call can be answered by either phone, but not both. If your
phone shares a line, a shared line icon that is half black and half grey displays
on the screen.
2 - 30
Customizing Your Phone
The following figure shows the shared line icon at the top left of the screen.
The shared line icon changes to a moving icon, and the LEDs glow a steady red
when the line is in use remotely.
Calls on shared lines can be transferred, put on hold, or added to a conference.
Note
You cannot forward or reject calls on shared lines.
For information on answering calls with shared lines, see Answering Calls on
page 3-6.
2 - 31
User Guide for the Polycom SoundStation IP 7000 Phone
2 - 32
3
Using the Basic Features of Your
Phone
Your SoundStation IP 7000 conference phone is designed to be used like a
regular conference phone on a public switched telephone network (PSTN).
You can place calls, transfer a call to someone else, conduct a multi-participant
conference call, or perform other basic and more advanced functions.
At any time, at most one active call may be in progress on your phone. The
active call is the one that has audio associated with it. There may be multiple
other calls, including a conference call, on hold.
This chapter provides introductory information and basic operating
instructions for the phone. It includes the following topics:
•
Placing Calls on page 3-2
•
Answering Calls on page 3-6
•
Ending Calls on page 3-6
•
Muting the Microphone on page 3-7
•
Redialing Numbers on page 3-7
•
Holding and Resuming Calls on page 3-8
•
Hosting Conference Calls on page 3-9
•
Transferring Calls on page 3-16
•
Forwarding Calls on page 3-19
•
Enabling Do Not Disturb on page 3-21
•
Managing Speed Dial Entries on page 3-23
•
Using Voice Mail on page 3-24
If you require additional information or assistance with your new phone,
contact your system administrator.
For information on the advanced features of your phone, refer to Chapter 4,
Using the Advanced Features of Your Phone.
3-1
User Guide for the Polycom SoundStation IP 7000 Phone
Placing Calls
Note
If your phone is connected to a Polycom HDX system, see Using the Phone When
it is Connected to a Polycom HDX System on page 4-7. When you place a call,
different soft keys display and options apply.
You can place a call off-hook (with a dial tone) or on-hook (without a dial
tone). If you place a call off-hook, you can dial a contact using an IP address or
URL, if this feature is enabled for your phone.
The phone screen displays the duration of active calls. The following figure
shows an active call to Jacklyn Smith at directory number 1955 that has lasted
57 seconds.
To place a call on-hook (to dial a phone number):
>> Enter the phone number of the person you want to call, and then press
or the Dial soft key.
3-2
Using the Basic Features of Your Phone
To place a call off-hook (to dial a phone number, IP address, or URL):
Note
Placing a call using an IP address or URL may not be enabled for your phone. For
more information, see your system administrator.
1. Press
or the New Call soft key.
The Enter number screen displays.
2. Do one of the following:
— To dial a phone number, enter the phone number of the person you
want to call.
— To dial an IP address:
a
Press the URL soft key.
The (123) Enter number screen displays.
b
Enter the IP address of the person you want to call.
To enter “.”, press
.
3-3
User Guide for the Polycom SoundStation IP 7000 Phone
— To dial a URL:
a
Press the URL soft key.
The (123) Enter number screen displays.
b
Press the ABC soft key.
The (ABC) Enter number screen displays
c
Enter the URL of the person you want to call.
To enter the letters that display on a number key, press the
number key one or more times.
For example, to enter “a,” press
once. To enter “c,” press
three times quickly.
To enter “.” and “@”, press
Note
When you dial a URL, the maximum number of characters you can enter is 32.
3. Press
3-4
one or more times quickly.
or the Dial soft key.
Using the Basic Features of Your Phone
Note
Instead of entering a phone number from memory, you can access call lists,
directories, and speed dial lists to display and dial the number for you.
•
•
•
To access a call list, press the Left, Right, or Down scroll key to access the
received, placed, or missed calls list. Scroll to the call you want to dial, and then
press the Dial soft key. For more information, see Using Call Lists on page 2-14.
To access your Contact Directory or Corporate Directory (if enabled for your
phone), press the Dir soft key, and then select Contact Directory or
Corporate Directory. Scroll to or search for the contact you want to dial, and
then press the Dial soft key. For more information, see Managing Contacts on
page 2-17.
To place a call using a speed dial index number, press the Up scroll key, scroll
to the person you want to call, and then press the Dial soft key. For information
on other ways to use speed dial, see Placing Calls Using Speed Dial, below.
Placing Calls Using Speed Dial
Use a speed dial index number for quick dialing. Speed dial index numbers are
associated with entries in your Contact Directory. For information on
managing speed dial entries from your Contact Directory, see Managing
Speed Dial Entries on page 3-23.
Note
From the idle screen, press the Up scroll key to quickly access your list of speed
dial entries.
To place a call using a speed dial index number:
1. Do one of the following:
— If you know the contact’s speed dial index number, enter the number,
and then press #.
— Press the Up scroll key.
— Press
, and then select Features > Speed Dial.
The Speed Dial Info screen displays.
3-5
User Guide for the Polycom SoundStation IP 7000 Phone
2. Do one of the following:
— Enter the speed dial index number.
or
— If the contact you want to call is not already highlighted, scroll to the
contact, and then press the Dial soft key.
The call is placed.
Answering Calls
To answer a call:
>> Press
or the Answer soft key.
The LEDs blink green when the phone rings.
Note
•
To ignore incoming calls, press the Reject soft key (for private lines) or the
Silence soft key (for shared lines). To prevent your phone from ringing, enable
the Do Not Disturb feature (see Enabling Do Not Disturb on page 3-21).
•
You can forward incoming calls by pressing the Forward soft key. See
Forwarding Calls Dynamically on page 3-21.
•
If you set up your phone with a silent ring, press the Answer soft key to answer
the call.
•
To answer a call from a mobile phone or computer calling application, see Using
Computer or Mobile Audio with the Conference Phone on page 4-1.
To answer a call on a shared line:
1. Answer the incoming call.
2. Press the Hold soft key.
Anyone on another phone configured to use the same shared line may take the
call by selecting the call on their phone screen.
Ending Calls
To end a call:
>> Press
Note
3-6
or the End Call soft key.
You cannot end a call that is on hold until you resume the call. To end a call on hold,
scroll to the call on hold, press the Resume soft key, and then press the End Call
soft key.
Using the Basic Features of Your Phone
Muting the Microphone
To mute the microphone:
>> During a call, press
.
The LEDs glow red, and the mute icon,
, displays on the phone screen.
The other person (or people) cannot hear you. You can still hear all other
people while Mute is enabled.
To turn off the Mute feature, press
again.
To mute the microphone if you use extension microphones:
>> Press
on the phone or the
button on the top of the extension
microphones.
To turn off the Mute feature, press
Note
or
again.
When you press the Mute button on the phone, or on any extended microphone
connected to the phone, you mute the microphone on the phone and all extended
microphones connected to the phone.
Redialing Numbers
You can redial the last number you dialed, or search a list of placed calls to find
a previously-dialed number.
To redial the last number dialed:
>> Press
.
3-7
User Guide for the Polycom SoundStation IP 7000 Phone
To redial a previously dialed number:
1. Press the Dir soft key, and then select Call Lists > Placed Calls.
The Placed Calls screen displays.
2. Scroll to the number you want to redial, and then press
or the
Dial soft key.
Holding and Resuming Calls
To hold a call:
>> During a call, press the Hold soft key. The LEDs blink red to indicate that
a call is on hold.
Note
You cannot end a call that is on hold. You must resume the call first.
The following figure shows James Smith on hold. The Resume soft key now
displays on the screen.
To resume a call on hold:
>> While a call is on hold, press the Resume soft key.
3-8
Using the Basic Features of Your Phone
Hosting Conference Calls
You can create a conference with up to two other people using the phone’s
local conference feature. To quickly set up a conference, you can use the Join
soft key to create a conference between an active call and a call on hold.
The conference management feature allows you to view and manage each
participant in the conference call. From the Manage Conference screen, you
can mute, hold, and remove individual participants.
Note
You can host and manage conferences with audio from computer calling
applications and mobile phones, as well as video if your phone is connected to a
Polycom HDX system. For more information, see Using Computer or Mobile Audio
with the Conference Phone on page 4-1 and Using the Phone When it is Connected
to a Polycom HDX System on page 4-7.
This section includes the following topics:
•
Setting Up Conferences on page 3-9
•
Managing Conferences on page 3-11
•
Holding and Resuming Conferences on page 3-15
•
Splitting Conferences on page 3-16
•
Ending Conferences on page 3-16
Setting Up Conferences
You can set up a conference in one of two ways:
•
Using
or the Confrnc soft key.
•
Using the Join soft key, if you have an active call and a call on hold.
3-9
User Guide for the Polycom SoundStation IP 7000 Phone
Setting Up a Conference Using the Conference Key or Soft Key
To set up a conference using the Conference key or soft key:
1. Call the first person. See Placing Calls on page 3-2.
2. Press
or the Confrnc soft key to create a new call. The active call is
placed on hold.
The Enter number screen displays.
Note
If configured for single key-press conferences, the conference participant hears the
dial tone and ringback when the conference host places the call to the new person.
3. Place a call to the second person. See Placing Calls on page 3-2.
4. When the second person answers, press
or the Confrnc soft key
again to join all people in the conference.
Note
If configured for single key-press conferences, you do not have to press the
Conference key or the Confrnc soft key again.
The Active:Conference screen displays.
3 - 10
Using the Basic Features of Your Phone
Setting Up a Conference With an Active Call and a Call on Hold
If you are currently in an active call, and you have another call on hold, you
can create a conference call between the active call, the call on hold, and
yourself, by pressing the Join soft key.
To set up a conference call with an active call and a call on hold:
>> If you have an active call and a call on hold, press the Join soft key.
The Active:Conference screen displays.
A conference is created with the active call, the call on hold, and yourself.
Managing Conferences
To manage a conference, you must currently be in an active conference call.
From the Active:Conference screen, you can press the Manage soft key to
manage the individual participants in the conference, or end the conference
call.
The following figure shows the Manage soft key that displays when you are in
an active conference.
3 - 11
User Guide for the Polycom SoundStation IP 7000 Phone
To manage a conference:
>> From the Active:Conference screen, press the Manage soft key.
The Manage Conference screen displays.
From the Manage Conference screen, you can scroll to a conference participant
and manage the participant’s conference participation, or end the conference
call.
You can access the following soft keys from the Manage Conference screen:
•
Hold—Puts a selected participant on hold. The held participant cannot
hear any other participants and no participant can hear the held
participant.
•
Back—Returns you to the Active:Conference screen.
•
End Call—Ends the conference call. The other two participants remain
connected. (To remove a conference call participant, see Removing
Conference Call Participants on page 3-14.)
•
Info—Provides additional information about the selected participant.
•
Far Mute—Mutes the selected participant. The muted participant can hear
all participants, but no participant can hear the muted participant.
Muting Conference Call Participants
To mute a conference call participant:
>> From the Manage Conference screen, scroll to the participant you want to
mute, and then press the Far Mute soft key.
3 - 12
Using the Basic Features of Your Phone
The following figure shows the far mute feature applied to James Smith. The
“far mute” icon displays next to his name, and the UnMute soft key appears.
The muted participant can hear all participants, but no participant can hear the
muted participant.
If you press
instead of the Far Mute soft key, all other participants can
hear each other, but they cannot hear you. When you press
glow red.
, the LEDs
To un-mute the participant, press the UnMute soft key.
Placing Conference Call Participants on Hold
You can select a conference call participant and place the participant on hold.
You can return the participant to the conference at any time by pressing the
Resume soft key.
If you want to place a conference call on hold, see Holding and Resuming
Conferences on page 3-15.
To place a conference call participant on hold:
>> From the Manage Conference screen, scroll to the participant you want to
place on hold, and then press the Hold soft key.
3 - 13
User Guide for the Polycom SoundStation IP 7000 Phone
The following figure shows James Smith on hold. The “on hold” icon displays
next to his name, and the Resume soft key appears.
The held participant cannot hear any participants and no participant can hear
the held participant.
To return the participant to the conference, scroll to the participant, and then
press the Resume soft key.
If the held participant presses the Hold soft key on their phone, the participant
will still be on hold even if you press the Resume soft key.
Removing Conference Call Participants
To remove a conference call participant:
>> From the Manage Conference screen, scroll to the participant you want to
remove, and then press
.
The participant is removed from the conference, the conference call ends, and
the other participant becomes the active call.
Note
If you press the End Call soft key instead, you end the conference call. The other
participants remain connected.
Obtaining Information About Conference Call Participants
You can display information about a conference call participant, such as their
name and number, or if they are on hold.
3 - 14
Using the Basic Features of Your Phone
To display information about a conference call participant:
1. From the Manage Conference screen, scroll to the participant whose
information you want to obtain.
2. Press the Info soft key.
The Participant Info screen displays.
3. Press the Back soft key to return to the Manage Conference screen.
Holding and Resuming Conferences
When you place a conference call on hold, you place all other conference
participants on hold. Conference call participants cannot hear each other.
To place an individual participant on hold, see Placing Conference Call
Participants on Hold on page 3-13.
To place a conference call on hold:
>> From the Active:Conference screen, press the Hold soft key.
The Hold:Conference screen displays. The other participants in the conference
call are placed on hold.
3 - 15
User Guide for the Polycom SoundStation IP 7000 Phone
From the Hold:Conference screen, you can do the following:
•
To resume the conference call, press the Resume soft key. The
Active:Conference screen will display again.
•
To place a call to a new person, press the New Call soft key. The
conference remains on hold, and the new call becomes the active call.
•
To end the conference call and place each conference participant on hold,
press the Split soft key.
Splitting Conferences
When a conference is established, a Split soft key is available. When you split
a conference, you end the conference and place all participants on hold.
To split a conference:
>> From the Active:Conference or Hold:Conference screen, press the Split
soft key.
The conference ends, and all calls are split into individual calls and placed on
hold.
Ending Conferences
You can end a conference, and your connection to the other participants, by
pressing the End Call soft key. When you use the End Call soft key, the other
participants remain connected.
To end a conference:
>> From the Active:Conference or Manage Conference screen, press the
End Call soft key.
The two other participants remain connected.
Transferring Calls
A call can be transferred in one of three ways:
•
Consultative transfer—You have the option of either talking to the person
to whom you are transferring the call, or you can choose not to talk to the
person, and complete the transfer when you hear the person’s ring-back
sound.
— Performing a Consultative Transfer on page 3-17.
3 - 16
Using the Basic Features of Your Phone
•
Blind transfer—The call is automatically transferred after you dial the
number of the person to whom you want to transfer the call. You do not
have the option of talking to the person.
— Performing a Blind Transfer on page 3-18.
•
Attended transfer—Conference call participants are automatically
connected to each other after you exit a conference.
— Set up a conference call and then end your participation. For more
information, refer to Ending Conferences on page 3-16.
Performing a Consultative Transfer
Perform a consultative transfer if you want to talk to the person to whom you
are transferring the call. Or, you can chose not to talk to the person. In this case,
you wait for the person’s ring-back sound, and then transfer the call.
To transfer a call:
1. During a call, press the Transfer soft key. The call is placed on hold.
The Enter number screen displays.
2. Place a call to the person to whom you want to transfer the call. See
Placing Calls on page 3-2.
3. When you hear the ring-back sound, press the Transfer soft key. The
transfer is complete. If you want to talk privately to the person to whom
you are transferring the call before the transfer is complete, wait until the
person answers the call, talk to the person, and then press the Transfer
soft key.
You can cancel the transfer before the call connects by pressing the Cancel
soft key.
3 - 17
User Guide for the Polycom SoundStation IP 7000 Phone
Performing a Blind Transfer
When you use a blind transfer, you transfer a call without speaking to the
person to whom you are transferring the call. The call is automatically
transferred as soon as you dial the person’s number.
To perform a blind transfer:
1. During a call, press the Transfer soft key.
The Enter number screen displays, with the Blind soft key.
2. Press the Blind soft key.
The Blind transfer to screen displays.
3. Place a call to the person to whom you want to transfer the call. See
Placing Calls on page 3-2.
The call automatically transfers to the person you specified.
3 - 18
Using the Basic Features of Your Phone
Forwarding Calls
Note
Your company’s settings may override this feature. For more information, contact
your system administrator.
Call forwarding is not available on shared lines.
You can set up your phone to forward incoming calls to another person (static
forwarding) or you can forward a call as your phone rings (dynamic
forwarding). Your phone will forward calls even if you enable the Do Not
Disturb feature.
You can also reject calls from a particular contact (by sending the call to your
voice mail system), or divert calls from a particular contact to another person.
For more information, see Managing Incoming Calls on page 2-28.
Forwarding Calls Statically
You can set up your phone to forward calls to another number.
To forward calls to another number:
1. Press
, and then choose Features > Forward.
The Forwarding Type Select screen displays.
2. Scroll to the forwarding type you want, and then press Select. The
options are:
— Always—To forward all incoming calls.
— No Answer—To forward all unanswered incoming calls.
— Busy—To forward calls that arrive when you are already in a call.
3 - 19
User Guide for the Polycom SoundStation IP 7000 Phone
3. Do one of the following:
— If you selected Always, enter a number to forward all incoming calls
to.
— If you selected No Answer, do the following:
a
In the Contact field, enter a number to forward all unanswered
incoming calls to.
b
In the Forward After Rings field, enter how many rings to wait
before forwarding the call (one ring is approximately six seconds).
The recommended value is two rings.
— If you selected Busy, enter the number to forward all future incoming
calls to when you are already in another call.
4. Press the Enable soft key.
If you selected the forwarding type Always, the text “Call Forward Enabled”
and a moving arrow display on the idle screen next to the directory number.
To disable call forwarding:
1. Press
, and then select Features > Forward.
The Forwarding Type Select screen displays.
2. Scroll to the forwarding type you want to disable, and then press Select.
3. Press the Disable soft key.
3 - 20
Using the Basic Features of Your Phone
Forwarding Calls Dynamically
You can manually forward a call to another number while your phone rings.
To forward an incoming call to another extension:
1. While your phone rings, press the Forward soft key.
The Call Forwarding screen displays.
2. Enter the phone number to forward the incoming call to.
Your phone displays the last number you forwarded calls to (either
statically or dynamically). If you previously set a forwarding number and
want to enter a new one, use the << soft key to delete the number.
3. Press the Forward soft key.
The incoming call is forwarded to the other person. If call forwarding is
disabled, all future calls will not be forwarded and forwarding will remain
disabled.
Enabling Do Not Disturb
To prevent your phone from ringing, activate the Do Not Disturb feature.
Calls you receive while Do Not Disturb is enabled will display in your Missed
Calls list (see Using Call Lists on page 2-14). If you have chosen to forward
your calls to another number, calls will be sent to that number if you enable the
Do Not Disturb feature.
3 - 21
User Guide for the Polycom SoundStation IP 7000 Phone
To enable and disable Do Not Disturb:
1. Press
, and then select Features.
The Features screen displays. If Do Not Disturb is not highlighted, scroll
to it.
2. To toggle Do Not Disturb on and off, press Select.
When you enable Do Not Disturb, a flashing icon,
top left of the screen.
, displays at the
When you disable Do Not Disturb, the registered line icon,
, displays
instead.
3. Press
to return to the idle screen.
If you enabled Do Not Disturb, the idle screen displays Do Not Disturb and
flashing icons next to the directory number.
The following figure shows what the idle screen looks like with
Do Not Disturb enabled.
3 - 22
Using the Basic Features of Your Phone
Managing Speed Dial Entries
Use the speed dial feature for fast, automated dialing. To use speed dial, you
enter a speed dial index number instead of entering a complete phone number.
When you create a Contact Directory entry, the phone automatically assigns a
Speed Dial index to the entry. You can change the index number, or delete it.
Note
Only entries in your Contact Directory can be set up as speed dial entries. To create
a new Contact Directory entry with a speed dial index number, see Adding Contacts
to Your Local Contact Directory on page 2-19.
The following steps describe how to update a speed dial entry for a contact. To
place a call using a speed dial number, see Placing Calls Using Speed Dial on
page 3-5.
To update a speed dial entry in your local Contact Directory:
1. Press the Dir soft key, and then select Contact Directory.
The Directory screen displays.
2. Scroll to the user’s entry, and then press the Edit soft key.
The Edit Contact screen displays.
3 - 23
User Guide for the Polycom SoundStation IP 7000 Phone
3. Scroll to Speed Dial Index, and then update the speed dial index
number. Use the << soft key to update an existing entry.
You can assign any unused speed dial index number from 1 to 99. If you
assign a speed dial index number that already exists, or you enter an
invalid speed dial index number (for example, 0 or 00), an error message
displays.
4. Press the Save soft key.
5. Press
twice to return to the idle screen.
Using Voice Mail
Note
Voice mail is an optional feature that your system administrator sets up. Your
system may not support it. For more information, contact your system administrator.
Screen options may vary with your application. Voice mail may be accessible with a
single key press. Contact your system administrator about this option.
Your voice mail is saved in a centralized location and may be accessed from
your phone. Your phone may indicate voice mail by the following:
•
An icon,
, on the phone screen
•
A stutter dial tone instead of a normal dial tone
To listen to voice mail messages:
1. Press
, and then select Features > Messages > Message Center.
The Messages screen displays.
2. To listen to your voice mail, press the Connect soft key, and then follow
the voice or visual prompts on the screen.
3. Press
3 - 24
to return to the idle screen.
4
Using the Advanced Features of Your
Phone
This chapter provides operating instructions for the advanced features of your
SoundStation IP 7000 conference phone. If you require additional information
or assistance with these features, contact your system administrator.
For information on the basic features of your phone, refer to Chapter 3, Using
the Basic Features of Your Phone.
This chapter includes the following topics:
•
Using Computer or Mobile Audio with the Conference Phone on page 4-1
•
Using the Phone When it is Connected to a Polycom HDX System on page
4-7
•
Handling Multiple Call Appearances on page 4-19
•
Using Buddy Lists on page 4-20
•
Restarting the Phone on page 4-26
Using Computer or Mobile Audio with the Conference Phone
You can connect audio from a computer calling application, or from a mobile
phone, to your conference phone for hands-free conversations. You initiate
and end conversations from your computer calling application or your mobile
phone interface.
From your conference phone, you can do the following:
•
Accept a computer or mobile audio source while you have an active call
(including a conference call), or calls on hold.
•
Place a computer or mobile audio source on hold.
•
Join, split, and host conference calls between the calls on your
conference phone and the computer or mobile audio source.
•
Accept calls from other phones while you listen to computer or mobile
audio.
4-1
User Guide for the Polycom SoundStation IP 7000 Phone
If you connect your computer calling application or mobile phone to your
conference phone when your conference phone is idle, the computer or mobile
audio automatically becomes the active call, and you immediately hear any
audio associated with the mobile phone or computer calling application.
The following figure shows the conference phone screen if the conference
phone is idle and you connect your computer calling application or mobile
phone to it. You can place the computer or mobile audio on hold (and then
initiate a new call or conference call), or accept a call from another phone while
you listen to computer or mobile audio.
l
Note
Audio from computer calling applications or mobile phones does not display in your
conference phone Call Lists.
For information on how to connect your conference phone (in a single or
two-phone setup) to computer calling applications and mobile phones, see
Connecting Optional Auxiliary Audio Components on page 1-9.
Note
You can use your conference phone that is connected to a computer calling
application or a mobile phone to handle video calls and conferences. See Handling
Computer or Mobile Audio When Your Phone is Connected to a Polycom HDX
System on page 4-19.
Listening to Computer or Mobile Audio
You can connect the computer or mobile audio source while your conference
phone is in an idle state, or when you have an active call.
To listen to computer or mobile audio when your conference phone is idle:
>> When your conference phone is idle, connect the mobile phone or
computer calling application to your conference phone. (See Connecting
Optional Auxiliary Audio Components on page 1-9.)
4-2
Using the Advanced Features of Your Phone
The computer or mobile audio automatically becomes the active call, and you
can hear any audio associated with the computer calling application or mobile
phone. If there isn’t any audio, you can wait for a call, answer it from your
computer calling application or mobile phone interface, and then listen to the
audio on your conference phone.
The following figure shows what the screen looks like when you connect a
computer calling application or mobile phone (with or without a current call)
to the conference phone when the conference phone is idle.
To listen to computer or mobile audio when the conference phone has another
call:
1. Do one of the following:
— While the conference phone has an active call, connect the computer
calling application or mobile phone to the conference phone. (See
Connecting Optional Auxiliary Audio Components on page 1-9.)
The conference phone screen shows a computer or mobile audio
source. The LEDs blink green to indicate the audio source.
or
— If the conference phone has a call on hold, connect the computer
calling application or mobile phone to the conference phone. (See
Connecting Optional Auxiliary Audio Components on page 1-9.)
4-3
User Guide for the Polycom SoundStation IP 7000 Phone
The conference phone screen shows a computer or mobile audio
source. The LEDs blink green to indicate the audio source.
2. Do one of the following:
— If the conference phone has an active call, press the Hold soft key.
The active call is placed on hold, and the computer or mobile audio
becomes the active call.
or
— If the conference phone has a call on hold, press the Accept soft key.
The computer or mobile audio becomes the active call.
You can place the computer or mobile audio on hold, or use the Join soft
key to create a conference call with the call on hold and the computer or
mobile audio.
4-4
Using the Advanced Features of Your Phone
Ending Computer or Mobile Audio
To remove the computer or mobile audio source, disconnect the
Computer Calling Cable or Mobile Phone Cable from the conference phone.
If you want to keep the connection for future computer or mobile audio calls,
end the call from your computer or mobile phone, but do not remove the
Computer Calling Cable or Mobile Phone Cable. The conference phone screen
will still display “From:PC-Mobile audio,” and the computer or mobile audio
will continue to be the active call.
Placing Computer or Mobile Audio on Hold
To place computer or mobile audio on hold:
>> From your conference phone, scroll to PC-Mobile audio, and then press
the Hold soft key. If you want, you can place a new call, or create a
conference between the computer or mobile audio and another person.
Press the Resume soft key to make the computer or mobile audio active
again.
Creating Conference Calls with Computer or Mobile Audio
You can set up conference calls with computer or mobile audio using the
Cnfrnc or Join soft key.
To create a conference call with a computer or mobile audio source, do one of
the following:
•
If you have an active computer or mobile audio source, place the call on
hold, and then use the Cnfrnc soft key to set up a conference. See Hosting
Conference Calls on page 3-9.
•
If you have an active computer or mobile audio source and another call on
hold, scroll to the call on hold, and then press the Join soft key.
•
If you have an active conference call, and you connect computer or mobile
audio, scroll to the incoming computer or mobile audio, and then press the
Join soft key.
4-5
User Guide for the Polycom SoundStation IP 7000 Phone
The following figure shows the Join soft key that displays when there is an
active conference call and an incoming computer or mobile audio source.
You manage conference calls with computer or mobile audio just as you do
with other phone calls. For detailed information on setting up conferences
using the Confrnc and Join soft keys, as well as managing conference calls, see
Hosting Conference Calls on page 3-9.
Adjusting the Volume of Computer or Mobile Audio
To adjust the speaker volume:
>> While you listen to computer or mobile audio, press either
or
to adjust the speaker volume.
To mute the microphone:
>> While you listen to computer or mobile audio, press
.
The LEDs glow red to indicate that the other person (or people) cannot hear
you. You can still hear all other people while Mute is enabled.
To turn off the Mute feature, press
4-6
again.
Using the Advanced Features of Your Phone
Using the Phone When it is Connected to a Polycom HDX
System
Note
This section describes how to use your phone when it is connected to a
Polycom HDX system. For detailed information on how to use a Polycom HDX
system, see the Polycom HDX documentation at www.polycom.com/
videodocumentation.
You can connect your phone to Polycom HDX systems that run software version 2.5
or later. Your phone must run SIP application 3.1.1 or later.
You can perform many of the following phone functions using your Polycom HDX
system’s remote control or keypad. For detailed information on how to use the
remote control or keypad, see the user guide for your Polycom HDX system at
www.polycom.com/videodocumentation.
You can set up your phone with a Polycom HDX system so that your phone
can conduct video calls and conferences.
When you connect your phone to a Polycom HDX system, your phone
displays different soft keys:
Note
•
Video—Allows you to place a video call
•
Phone—Allows you to place an audio-only call
•
Content—Allows you to show content to near-site participants, as well as
to far-site participants with whom you are exchanging video.
•
Add Video—Allows you to establish a conference between yourself, an
active call or call on hold, and the new person you dial. Or, automatically
joins the new person you dial to an active conference.
•
Add Phone—When an audio-only call is active or on hold, allows you to
add an additional call to your phone. If you have a video call, pressing the
Add Phone soft key automatically creates a conference between yourself,
the video call, and the new person you dial.
When your phone is connected to a Polycom HDX system, there is no New Call
soft key. To initiate a call, press the Video or Phone soft keys. For more information,
see Placing Calls When Your Phone is Connected to a Polycom HDX System on
page 4-9 and Ending Calls When Your Phone is Connected to a Polycom HDX
System on page 4-13.
A video call or a video conference (a conference that has at least one video call),
displays the video icon,
.
4-7
User Guide for the Polycom SoundStation IP 7000 Phone
The following figure shows a video call to Jacklyn Smith.
The following figure shows an active conference call in which one participant
is connecting with video.
The video icon,
, also displays next to video calls in call lists.
The following figure shows a Placed Calls list. The call to John Smith used
video.
4-8
Using the Advanced Features of Your Phone
Placing Calls When Your Phone is Connected to a Polycom HDX System
You can place a call when your phone is idle, when you have an active call, or
when you have a call on hold.
Placing Calls When You Don’t Have Any Active Calls
When you place a call, you must specify if the call will be an audio-only call or
a video call.
To place a call when you don’t have any active calls:
1. Do one of the following:
— Press
.
The message “Video or Phone Call?” displays. To place a video call,
press the Video soft key. To place an audio-only call, press the Phone
soft key.
or
— To place a video call, press the Video soft key. To place an audio-only
call, press the Phone soft key.
2. Do one of the following:
— To enter a phone number, enter the number of the person you want to
call.
or
— To enter an IP address or URL:
Note
Placing a call using an IP address or URL may not be enabled for your phone. For
more information, see your system administrator.
If you are making an audio-only call, press the URL soft key. Then,
toggle the ABC and 123 soft keys to enter the URL or IP address of the
person you want to call.
If you are making a video call, toggle the ABC and 123 soft keys to
enter the URL or IP address of the person you want to call.
You can switch between entering a number or IP address, or a URL,
by pressing the 123 and ABC soft keys.
4-9
User Guide for the Polycom SoundStation IP 7000 Phone
To enter the letters that display on a number key, press the number
key one or more times.
For example, to enter “a,” press
once. To enter “c,” press
three times quickly.
To enter “.” and “@”, press
3. Press
one or more times quickly.
or the Dial soft key.
The following figure shows a video call to Jacklyn Smith.
Placing Calls When You Have an Audio-Only Call on Hold
Note
Only audio-only calls can be on hold. Video calls cannot be on hold.
When an audio-only call is on hold, you can place a separate audio-only call or
video call without setting up a conference. When the call is placed, the phone
will display the call on hold and the active call.
To place a call when you have a call on hold:
>> With an audio-only call on hold, place a call (see Placing Calls When You
Don’t Have Any Active Calls on page 4-9.)
When the other person answers the call, the phone displays a call on hold and
an active call.
4 - 10
Using the Advanced Features of Your Phone
The following figure shows a video call and an audio-only call on hold.
Placing Calls When You Have an Active Audio-only Call or a Video Call
If you place a call when you have an active audio-only call or video call, you
automatically create a conference between yourself, the active call or video
call, and the new person you call. For more information, see To set up a
conference using the Add Phone or Add Video soft keys: on page 4-15.
If you have an active audio-only call, you can choose not to create a conference.
You can place the active call on hold, and then place a separate call to another
person (see Placing Calls When You Have an Audio-Only Call on Hold on
page 4-10).
Placing Calls Using Call Lists, Directories, Speed Dial Index Numbers, and the
Redial Key When Your Phone is Connected to a Polycom HDX System
Instead of entering phone numbers, URLs, and IP addresses from memory,
you can access call lists, directories, and speed dial lists to place calls to
audio-only and video endpoints. You can also redial numbers. For more
information, see Placing Calls on page 3-2 and Redialing Numbers on page 3-7.
Note
The directories on your phone and on the Polycom HDX system are not integrated.
Directory entries on the phone do not display on the Polycom HDX system, and
directory entries on the Polycom HDX system do not display on the phone.
Answering Calls When Your Phone is Connected to a Polycom HDX System
Answering Calls When You Don’t Have Any Active Calls
You answer an incoming call in the same way you answer calls if your system
is not connected to a Polycom HDX system.
4 - 11
User Guide for the Polycom SoundStation IP 7000 Phone
To answer an incoming call:
>> Press
or the Answer soft key. For more information, see Answering
Calls on page 3-6.
Answering Calls When You Have an Audio-Only Call on Hold
Note
Only audio-only calls can be on hold. Video calls cannot be on hold.
When you answer a call when you have an audio-only call on hold, your
phone displays two call appearances: one for the call on hold, and one for the
active call.
To answer an incoming call when you have a call on hold:
>> Press
or the Answer soft key.
The following figure shows a video call and an audio-only call on hold.
If you want to create a conference between the call on hold (audio-only) and
an active audio-only or video call, scroll to either call, and then press the Join
soft key.
Answering Calls When You Have an Active Call
If you answer a call when you have a video call, a conference is automatically
created between yourself, the video call, and the call you answer.
If you answer a call when you have an active audio-only call, the phone places
the active call on hold, and the call you answer becomes the active call.
4 - 12
Using the Advanced Features of Your Phone
To answer a call when you have an active call:
>> Do one of the following:
— If you have a video call, and an incoming call arrives, press
or
the Join soft key.
A conference is automatically created between yourself, the video call,
and the call you answer.
or
— If you have an active audio-only call, and an incoming call arrives,
press
or the Answer soft key.
The active call is placed on hold, and the new call becomes the active
call. The phone displays two call appearances: one for the call on hold,
and one for the active call.
Ending Calls When Your Phone is Connected to a Polycom HDX System
To end a call:
>> Scroll to the call, and then press
or the End Call soft key.
To end a call on hold, scroll to the call on hold, press the Resume soft key, and
then press
or the End Call soft key.
To end a call to a conference call participant, see Managing Conferences on
page 4-17.
Holding Calls When Your Phone is Connected to a Polycom HDX System
You cannot place video calls on hold. To place audio-only calls on hold, see
Holding and Resuming Calls on page 3-8.
Transferring Calls When Your Phone is Connected to a Polycom HDX System
You cannot transfer video calls. You can transfer audio-only calls only if there
are no other video calls or conferences. To transfer audio-only calls, see
Transferring Calls on page 3-16.
4 - 13
User Guide for the Polycom SoundStation IP 7000 Phone
Forwarding Calls When Your Phone is Connected to a Polycom HDX System
You cannot forward video calls. To forward audio-only calls , see Forwarding
Calls on page 3-19.
Enabling Do Not Disturb When Your Phone is Connected to a Polycom HDX
System
To prevent audio-only calls from ringing on your phone, activate the Do Not
Disturb feature.
Audio-only calls you receive while Do Not Disturb is enabled will display in
your Missed Calls list. If you have chosen to forward audio-only calls to
another number, those calls will be sent to that number if you enable the
Do Not Disturb feature.
To enable Do Not Disturb, see Enabling Do Not Disturb on page 3-21.
Rejecting Calls When Your Phone is Connected to a Polycom HDX System
You can ignore incoming audio-only and video calls.
To ignore incoming calls:
>> Press the Reject soft key.
Hosting Conference Calls When Your Phone is Connected to a Polycom HDX
System
You can create a conference with up to two other people that connect by audio
only and a multiple number of sites that connect by video (the exact number
of video calls you can add is determined by your system setup). At most, a
conference call can have two audio-only calls and multiple video calls.
The following figure shows a video conference. The video icon,
displays when at least one conference participant connects by video.
4 - 14
,
Using the Advanced Features of Your Phone
The following figure shows an audio-only conference. The handset icon,
, displays when all conference call participants connect using audio-only
endpoints.
Setting Up Conferences
You can set up a conference in two ways:
•
If you have no active calls, or you have an active call or conference, use the
Add Phone or Add Video soft keys.
•
If you have an audio-only call on hold and an active call, use the Join soft
key.
To set up a conference using the Add Phone or Add Video soft keys:
1. Call the first person. See Placing Calls When Your Phone is Connected to
a Polycom HDX System on page 4-9.
The following figure shows a video call to Jacklyn Smith.
4 - 15
User Guide for the Polycom SoundStation IP 7000 Phone
2. Place a call to the second person:
a
To place a video call, press the Add Video soft key. To place an
audio-only call, press the Add Phone soft key.
b
Enter the number of the phone, and then press the Dial soft key. (For
more information on placing calls, including how to enter
IP addresses or URLs, see Placing Calls When Your Phone is
Connected to a Polycom HDX System on page 4-9.)
The call is placed, and an active conference is automatically created.
To continue to add people to an established conference, do the following:
— To continue to add audio-only calls, press the Add Phone soft key
from the Active:Conference screen, and then place the call to the
person you want to add to the conference. When the person answers,
the person automatically joins the conference.
The Add Phone soft key does not display when the maximum number
of audio-only calls (two) has been added to the conference.
— To continue to add video calls, press the Add Video soft key from the
Active:Conference screen, and then place a call to the site you want to
add to the conference. When the site answers, the people
automatically join the conference.
Note
If you have an active audio-only call, you can choose not to create a conference.
You can place the active call on hold, and then place the call to the new person (see
Placing Calls When You Have an Audio-Only Call on Hold on page 4-10).
A conference is automatically created when you have a video call and you answer
an incoming call. See Answering Calls When You Have an Active Call on page
4-12.
To create a conference using the Join soft key:
>> If you have an active audio-only or video call or conference, and an
audio-only call or conference on hold, scroll to either call, and then press
the Join soft key.
An active conference is created.
Handling Active Conferences
You handle active audio-only and video conferences differently.
You handle active audio-only conferences in the same way as you handle
conferences for phones that are not connected to a Polycom HDX system (see
Hosting Conference Calls on page 3-9). Except, an Add Video soft key displays
so you can add additional video endpoints to the conference.
4 - 16
Using the Advanced Features of Your Phone
During a video conference:
•
The Hold and Split soft keys are not available. You cannot place the
conference on hold, or end the conference by pressing the Split soft key
and placing all conference call participants on hold.
•
The Add Phone and Add Video soft key display so you can add additional
people to the conference. (The Add Phone soft key does not display if you
have already added two audio-only calls to the conference.)
•
The Content soft key displays. (See Showing Content When Your Phone is
Connected to a Polycom HDX System on page 4-18.)
Managing Conferences
The Manage soft key is available for both active audio-only and video
conferences.
You manage audio-only and video conferences in the same way as you
manage conferences for phones that are not connected to a Polycom HDX
system. Except, for video conferences, the Hold and Far Mute soft keys are not
available. For video conferences, you only have access to the Info, End Call,
Content, and Back soft keys. For information on how to use these soft keys and
manage conferences, see Managing Conferences on page 3-11.
Controlling Volume and Muting Calls When Your Phone is Connected to a
Polycom HDX System
When your phone is connected to a Polycom HDX system, all audio-only calls
and conferences use your phone’s speaker. Any video calls (or conference calls
that connect to at least one video endpoint) use the Polycom HDX system’s
speaker. As well, your phone (and attached external microphone, if
applicable) act as the microphone for all calls.
To adjust the volume of calls and to mute the near site, see Adjusting the
Speaker and Ringer Volume on page 2-14 and Muting the Microphone on page
3-7.
Note
When you press the Mute button on the phone, or on any extended microphone or
Polycom HDX Microphone Array, you mute the microphone on the phone and all
extended microphones and Polycom HDX Microphone Arrays connected to your
phone and to the Polycom HDX system. A Mute icon displays on both the phone
and Polycom HDX system screens. (You will not mute audio from other sources,
such as a computer, VCR, or DVD player.)
You can also control the volume and mute microphones (including your phone’s
microphones) using the Polycom HDX system’s remote control or keypad. For more
information, see the user’s guide for your Polycom HDX system at
www.polycom.com/videodocumentation.
4 - 17
User Guide for the Polycom SoundStation IP 7000 Phone
Showing Content When Your Phone is Connected to a Polycom HDX System
A Content soft key displays on your phone so that you can show content to
near-site participants, as well as to near-site and far-site video participants
during a video call or conference. The Content soft key displays when your
phone is idle, or when you have a call.
Depending on the Polycom HDX system you have, you may be able to show
the following:
•
Information stored on a computer.
•
A paper document or object placed on a document camera.
•
A videotape or DVD.
For information on how to connect a computer, document camera, VCR, or
DVD player to a Polycom HDX system so you can show content, see your
system administrator.
For detailed information on how to show content, see the user guide for your
system at www.polycom.com/videodocumentation.
To start and stop showing content:
Press the Content soft key.
Handling Multiple Call Appearances When Your Phone is Connected to a
Polycom HDX System
When your phone is connected to a Polycom HDX system, the following
applies:
•
You cannot place video calls (or conferences) on hold. Therefore, you
cannot have multiple video call (or conference) appearances.
•
Your phone can handle up to eight audio-only call appearances, or seven
audio-only appearances (on hold) and one video call appearance.
For more information on multiple call appearances, see Handling Multiple
Call Appearances on page 4-19.
4 - 18
Using the Advanced Features of Your Phone
Handling Computer or Mobile Audio When Your Phone is Connected to a
Polycom HDX System
When your phone is connected to a Polycom HDX system, your phone handles
computer or mobile audio just like an audio-only call.
You handle computer or mobile audio when your phone is connected to a
Polycom HDX system in the same way you handle computer or mobile audio
when your phone operates as a standalone system (see Using Computer or
Mobile Audio with the Conference Phone on page 4-1). Except, the video soft
keys display instead.
Handling Multiple Call Appearances
Your system administrator can set up your phone to have one or more call
appearances. If your phone is set up to have multiple call appearances, your
phone screen can display information for multiple calls, and you can handle
active and held calls at the same time. Your phone can handle a maximum of
eight different calls, or eight “appearances,” at one time.
The following figure shows what the phone screen looks like with multiple
appearances set up. The figure shows an active call with extension 1955, and a
call on hold with extension 1951.
If three or more calls are taking place, the phone displays a counter at the top
left of the screen. For example, in the following figure, “1/3” indicates that the
call to John is the first one out of a total of three. To select the other two calls,
press the Up or Down scroll keys.
4 - 19
User Guide for the Polycom SoundStation IP 7000 Phone
Using Buddy Lists
Note
Monitoring the status (presence) of contacts in a buddy list is an optional feature
that your system administrator enables. Your system may not support it. For more
information, contact your system administrator.
A buddy list is a list of users/devices whose status, or “presence,” you can
monitor. Users update their presence setting (for example, Be right back, Out
to lunch, or Busy), and you can view their status in real time from your phone’s
Buddy Status screen. If you like, you can block others from monitoring your
status.
Your phone can “watch” the status of up to eight other phones. These phones
form your “Buddy List.” Your phone can be monitored by up to eight other
phones.
If your phone is configured to work with Microsoft Office Live
Communications Server 2005, the behavior of presence settings and buddy
lists is different. For more information, see Integrating With Microsoft Office
Live Communications Server 2005 on page 4-25, or contact your system
administrator.
Updating Presence Settings
Your presence setting indicates your status (either online, busy, be right back,
away, on the phone, out to lunch, or offline). Update your presence setting so
that other users can monitor your status from their phones.
To change your presence setting:
1. Do one of the following:
— Press
, and then choose Features > Presence > My Status.
or
— Press the MyStat soft key.
The My Status screen displays.
4 - 20
Using the Advanced Features of Your Phone
2. Scroll to the status you want, and then press Select.
3. Press
to return to the idle screen.
The following figure shows what the phone screen looks like when you assign
a presence status (in this case, “Busy”). If you assign the status “Online” (the
default status) or “On the phone,” the presence status does not display on your
screen.
Selecting Contacts to Monitor
Select the contacts whose presence you want to monitor by updating the
contacts in your buddy list. You add contacts to your buddy list from your
local Contact Directory.
Note
If your call server is Microsoft Office Live Communications Server 2005, see
Integrating With Microsoft Office Live Communications Server 2005 on page 4-25.
To update your buddy list:
1. Press the Dir soft key, and then select Contact Directory.
The Directory screen displays.
4 - 21
User Guide for the Polycom SoundStation IP 7000 Phone
2. Scroll to find the contact. Or, search for the contact (see Searching for
Contacts in Your Local Contact Directory on page 2-23).
You can use the * key to Page Up and the # key to Page Down.
3. Press the Edit soft key.
The Edit Contact screen displays.
4. Scroll to Watch Buddy, and then press the Right or Left scroll key to
choose Enabled or Disabled.
When Watch Buddy is enabled, the contact is added to your buddy list and
you can monitor the contact’s status. When Watch Buddy is disabled, the
contact is removed from your buddy list and you cannot monitor the
contact’s status.
The default for Watch Buddy is Disabled.
5. Press the Save soft key.
6. Press
twice to return to the idle screen.
If you enable the Watch Buddy setting for a contact, the contact will display on
your Buddy Status screen. To view your Buddy Status screen, press the
Buddies soft key from the idle screen.
Blocking Contacts From Viewing Your Status
Block a contact in your Contact Directory if you don’t want the contact to view
your status. If you unblock a contact, the contact can add you to their buddy
list and view your status.
Note
4 - 22
To view a list of contacts that can and cannot monitor your status, do the following:
•
To view contacts that cannot view your status, press the Menu key, and then
select Features > Presence > Blocked List.
•
To view contacts that can view your status, press the Menu key, and then select
Features > Presence > Watcher List.
Using the Advanced Features of Your Phone
To block or unblock a contact from viewing your status:
1. Press the Dir soft key, and then select Contact Directory.
The Directory screen displays.
2. Scroll to find the contact. Or, search for the contact (see Searching for
Contacts in Your Local Contact Directory on page 2-23).
You can use the * key to Page Up and the # key to Page Down.
3. Press the Edit soft key.
The Edit Contact screen displays.
4. Scroll to Block Buddy, and then press the Right or Left scroll key to
choose Enabled or Disabled.
When Block Buddy is enabled, the contact cannot watch your status. The
contact will display in your Blocked List.
When Block Buddy is disabled, the contact can watch your status. The
contact will display in your Watcher List.
The default for Block Buddy is Disabled.
5. Press the Save soft key.
6. Press
twice to return to the idle screen.
4 - 23
User Guide for the Polycom SoundStation IP 7000 Phone
Using your Blocked List to Unblock Contacts
You can use your Blocked List to unblock a contact, so the contact can view
your status. Use the Blocked List to quickly unblock a contact, rather than
updating the Contact Directory.
To use your Blocked List to unblock a contact:
1. Press
, and then select Features > Presence > Blocked List.
The Blocked List screen displays.
2. Scroll to the contact, and then press the Unblock soft key.
3. Press
to return to the idle screen.
The contact can now watch your phone. The contact will display in your
Watcher List. (To view your Watcher List, see Blocking Contacts From
Viewing Your Status on page 4-22.)
Monitoring the Status of Contacts in Your Buddy List
You can monitor the status of all the contacts in your buddy list, except those
contacts that have blocked you from viewing their status. To add contacts to
your buddy list, see Selecting Contacts to Monitor on page 4-21.
4 - 24
Using the Advanced Features of Your Phone
To monitor a contact in your buddy list:
>> Do one of the following:
— From the idle screen, press the Buddies soft key.
or
— Press
, and then select Features > Presence > Buddy Status.
The Buddy Status screen displays, listing the status of all your buddies.
Integrating With Microsoft Office Live Communications Server 2005
Your system administrator can configure your phone to work with Microsoft
Office Live Communications Server 2005 and communicate with others using
Microsoft Office Communicator and Windows Messenger. From your phone,
you can invite, join, control, and monitor integrated multipoint conferences.
Any contacts added through your buddy list will appear as a contact in
Microsoft Office Communicator and Windows Messenger. Any contacts
added as a contact in Microsoft Office Communicator and Windows
Messenger will appear in your buddy list. You can access your Privacy List on
the phone to allow or disallow your contacts from monitoring your presence.
To view and change your presence, see Updating Presence Settings on
page 4-20. For more information on integrating with Microsoft Office Live
Communications Server 2005, contact your system administrator.
4 - 25
User Guide for the Polycom SoundStation IP 7000 Phone
To add a contact to your buddy list:
1. Press
, and then choose Features > Presence > Buddy Status.
2. Press the Add soft key.
3. Enter the phone number of the contact.
4. Press the Submit soft key.
5. Press
to return to the idle screen.
To view and change your privacy list:
1. Press
, and then choose Features > Presence > Buddy Status >
Privacy List.
2. Scroll to the contact.
3. Press the Edit soft key.
4. Scroll to Access, and then press the Up or Down scroll key to select
Enabled.
When Access is enabled, you allow the contact to see your presence. When
Access is disabled, you prevent the contact from seeing your presence.
The default for Access is Disabled.
5. Press
to return to the idle screen.
For more information, see the Microsoft Office Communicator and
Windows Messenger documentation.
Restarting the Phone
.
Note
If your phone malfunctions, you may be able to restore normal operation without
restarting it. Before you restart your phone, contact your system administrator.
Periodically, you may need to restart your phone so your phone can accept a
new configuration.
Note
4 - 26
Call lists are automatically cleared when you restart your phone.
Using the Advanced Features of Your Phone
To restart the phone:
1. Press
, and then select Settings > Basic > Restart Phone.
The Restart Phone screen displays. The message “Are you sure?” displays.
2. If you still want to restart the phone, press the Yes soft key.
The restart process begins. The process ends when the idle screen displays.
4 - 27
User Guide for the Polycom SoundStation IP 7000 Phone
4 - 28
5
Troubleshooting Your Phone
This chapter contains general troubleshooting information to help you solve
any problems you might encounter when you use the SoundStation IP 7000
conference phone. The tables in this chapter list possible trouble symptoms,
the likely causes of these problems, and recommended corrective actions to
take. Problems are grouped as follows:
•
Installation Configuration on page 5-2
•
Power and Startup on page 5-3
•
Controls on page 5-4
•
Access to Screens and Systems on page 5-5
•
Calling on page 5-6
•
Displays on page 5-7
•
Audio on page 5-7
To obtain more detailed troubleshooting information, you can access certain
menus on your phone that test your phone hardware. For more information,
see Testing Phone Hardware on page 5-7.
If you require more information or assistance, contact your system
administrator.
5-1
User Guide for the Polycom SoundStation IP 7000 Phone
Installation Configuration
Symptom
Problem
Corrective Action
The display shows:
The phone installation
configuration is not supported.
Verify that you have installed the phone(s)
and any components correctly:
“General configuration error
Unsupported configuration
Undo last configuration change”
The display shows:
“Daisy-Chaining Error:
Multiple Ethernet cables
Connect only one Ethernet
cable”
5-2
More than one 12-foot Network
Cable (10-pin) has been
connected to a phone
installation.
•
Check that no more than two phones
are connected together.
•
Check that no more than two
extension microphones are installed.
If your conference room setup has two
connected phones, check that only
one extension microphone is installed.
•
Refer to Installing the Phone on page
1-3.
•
Contact your system administrator.
Connect only one 12-foot Network Cable
(10-pin) to the multiple phone installation.
See Installing the Phone on page 1-3.
Troubleshooting Your Phone
Power and Startup
Symptom
Problem
Corrective Action
The display shows:
The network cable is not properly
connected.
Verify that the network cable is properly
connected:
“Network Link is Down”
•
Check the cable termination at the
switch or hub (furthest end of the
cable from the phone).
•
Check that the switch or hub is
operational (flashing link/status
lights).
•
Press the Menu key, and then select
Status > Network > Ethernet. From
the Ethernet screen, scroll to
LAN port and verify that it is Active.
•
To attempt re-registration with the call
server, reboot the phone. For more
information, see your system
administrator.
•
Contact your system administrator.
5-3
User Guide for the Polycom SoundStation IP 7000 Phone
Controls
Symptom
Problem
Corrective Action
The dial pad does not work.
The dial pad on the phone does
not respond.
Do one of the following:
5-4
•
Check for a response from other
feature keys.
•
Place a call to the phone from a known
working telephone. Check for display
updates.
•
Check if the LAN port is active or
inactive. Press the Menu key, and
then select Status > Network >
Ethernet. From the Ethernet screen,
scroll to LAN port and verify that it is
Active.
•
Check the termination at the switch or
hub end of the network LAN cable.
Ensure that the switch/hub port is
operational (if not accessible, contact
your system administrator).
•
Before restarting your phone, contact
your system administrator. Your
system administrator may want to
troubleshoot the phone in more detail
before restarting the phone and losing
current status information.
Troubleshooting Your Phone
Access to Screens and Systems
Symptom
Problem
Corrective Action
There is no response when you
press a feature key.
The phone is not in an active
state.
Do one of the following:
The display shows:
The network cable is not properly
connected.
•
Press the keys more slowly.
•
Call the phone to confirm that inbound
call display and ringing is normal. If
successful, try to press feature keys
within the call to access the Directory
or Buddy Status screens, for example.
•
To confirm the line is actively
registered to the call server, press the
Menu key, and then select Status >
Lines > Line Information. From the
Line Information screen, verify that
your phone line is registered.
•
To attempt re-registration with the call
server, reboot the phone. For more
information, see your system
administrator.
See Power and Startup on page 5-3.
“Network Link is Down”
5-5
User Guide for the Polycom SoundStation IP 7000 Phone
Calling
Symptom
Problem
Corrective Action
There is no dial tone.
Power is not correctly applied to
the phone.
Verify that power is correctly applied to the
phone:
There is no audible ringing.
Ring setting or volume is low.
•
Check that the display is illuminated.
•
Ensure the network cable is inserted
properly on the underside of the
phone. (Try unplugging and
re-inserting the cable.)
Verify incoming ring setting and volume
level:
•
To adjust the ringer volume, press
either
or
when the
phone is in the idle state.
•
A “hollow” phone icon displays at
the top left of the screen.
5-6
Check that the ring type selected is
not set to Silent Ring. (For more
information, see Updating the Ring
Tone on page 2-8.)
Outbound or inbound calling is
unsuccessful.
Place a call to the phone under
investigation. Check that the display
indicates incoming call information.
The phone is not registered to a
server.
Ask your system administrator to register
the phone to a server.
Troubleshooting Your Phone
Displays
Symptom
Problem
Corrective Action
There is no display.
Power is not correctly applied to
the phone.
Verify that power is correctly applied to the
phone:
The display is incorrect.
The display has bad contrast.
The display is flickering.
•
Check that the display is illuminated.
•
Ensure the network cable is inserted
properly on the underside of the
phone. (Try unplugging and
re-inserting the cable.)
•
If your phone uses in-line power, have
your system administrator check that
the switch is supplying power to the
phone.
The contrast needs adjustment.
Adjust the screen contrast. (See Updating
the Display Contrast on page 2-6.)
Certain types of older fluorescent
lighting cause the display to
appear to flicker.
Do one of the following:
•
Move the phone away from the lights.
•
Replace the lights.
Audio
Symptom
Problem
Corrective Action
The speaker has no audible
sound.
Speaker volume is low.
Adjust the speaker volume. During a call,
press either
or
.
Testing Phone Hardware
Your system administrator may ask you to access a diagnostics menu on your
phone to test your phone hardware. From the diagnostics menu, you can test
your phone’s microphones, keypad mappings, and display. See your system
administrator for instructions on how to perform these tests.
To test your phone hardware:
>> Press
, and then select Status > Diagnostics > Test Hardware >
Audio Diagnostics, Keypad Diagnostics, or Display Diagnostics.
5-7
User Guide for the Polycom SoundStation IP 7000 Phone
5-8
Safety Notices
Service Agreements
Please contact your Polycom Authorized Reseller for information about service agreements applicable to your
product.
Governing Law
This Limited Warranty and Limitation of Liability shall be governed by the laws of the State of California, U.S.A., and
by the laws of the United States, excluding their conflicts of laws principles. The United Nations Convention on
Contracts for the International Sale of Goods is hereby excluded in its entirety from application to this Limited
Warranty and Limitation of Liability.
All rights reserved under International and Pan-American Copyright Conventions. No part of the contents of this
manual may be copied, reproduced, or transmitted in any form or by any means, or translated into another language
or format, in whole or part, without written consent from Polycom, Inc. Do not remove (or allow anybody else to
remove) any product identification, copyright or other notices.
Limitations of Liability
LIMITATION OF LIABILITY. TO THE FULL EXTENT ALLOWED BY LAW, POLYCOM EXCLUDES FOR ITSELF
AND ITS SUPPLIERS ANY LIABILITY, WHETHER BASED IN CONTRACT OR TORT (INCLUDING
NEGLIGENCE), FOR INCIDENTAL, CONSEQUENTIAL, INDIRECT, SPECIAL, OR PUNITIVE DAMAGES OF
ANY KIND, OR FOR LOSS OF REVENUE OR PROFITS, LOSS OF BUSINESS, LOSS OF INFORMATION OR
DATA, OR OTHER FINANCIAL LOSS ARISING OUT OF OR IN CONNECTION WITH THE SALE,
INSTALLATION, MAINTENANCE, USE, PERFORMANCE, FAILURE, OR INTERRUPTION OF ITS PRODUCTS,
EVEN IF POLYCOM OR ITS AUTHORIZED RESELLER HAS BEEN ADVISED OF THE POSSIBILITY OF SUCH
DAMAGES, AND LIMITS ITS LIABILITY TO REPAIR, REPLACEMENT, OR REFUND OF THE PURCHASE
PRICE PAID, AT POLYCOM’S OPTION. THIS DISCLAIMER OF LIABILITY FOR DAMAGES WILL NOT BE
AFFECTED IF ANY REMEDY PROVIDED HEREIN SHALL FAIL OF ITS ESSENTIAL PURPOSE.
Safety Notices – 1
User Guide for the Polycom SoundStation IP 7000 Phone
Polycom Limited Warranty and Limitation Liability
LIMITED WARRANTY. Polycom warrants to the end user (“Customer”) that this product is expected to be free from
defects in workmanship and materials, under normal use and service, for one year from the date of purchase from
Polycom or its authorized reseller.
Polycom’s sole obligation under this express warranty is at Polycom’s option and expense, to repair the defective
product or part, deliver to Customer an equivalent product or part to replace the defective item, or if neither of the
two foregoing options are reasonably available, Polycom may, on its sole discretion, refund to Customer the
purchase price paid for the defective product. All products that are replaced will become the property of Polycom.
Replacement products or parts may be new or reconditioned.
Polycom is expected to warrant any replaced or repaired product or part for ninety (90) days from shipment, or the
remainder of the initial warranty period, whichever is longer. Products returned to Polycom must be sent prepaid
and packaged appropriately for safe shipment, and it is recommended that they be insured or sent by a method that
provides for tracking of the package. Responsibility for loss or damage does not transfer to Polycom until the
returned item is received by Polycom. The repaired or replaced item will be shipped to Customer, at Polycom’s
expense, not later than thirty (30) days after Polycom receives the defective product, and Polycom will retain risk of
loss or damage until the item is delivered to Customer.
Exclusions
Polycom will not be liable under this limited warranty if its testing and examination disclose that the alleged defect or
malfunction in the product does not exist or results from:
• Failure to follow Polycom’s installation, operation, or maintenance instructions.
• Unauthorized product modification or alteration.
• Unauthorized use of common carrier communication services accessed through the product.
• Abuse, misuse, negligent acts or omissions of Customer and persons under Customer’s control; or
• Acts of third parties, acts of God, accident, fire, lightening, power surges or outages, or other hazards.
Warranty Exclusive
IF A POLYCOM PRODUCT DOES NOT OPERATE AS WARRANTED ABOVE, CUSTOMER’S SOLE REMEDY
FOR BREACH OF THAT WARRANTY SHALL BE REPAIR, REPLACEMENT, OR REFUND OF THE PURCHASE
PRICE PAID, AT POLYCOM’S OPTION. TO THE FULL EXTENT ALLOWED BY LAW, THE FOREGOING
WARRANTIES AND REMEDIES ARE EXCLUSIVE AND ARE IN LIEU OF ALL OTHER WARRANTIES, TERMS,
OR CONDITIONS, EXPRESS OR IMPLIED, EITHER IN FACT OR BY OPERATION OF LAW, STATUTORY OR
OTHERWISE, INCLUDING WARRANTIES, TERMS, OR CONDITIONS OF MERCHANTABILITY, FITNESS FOR
A PARTICULAR PURPOSE, SATISFACTORY QUALITY, CORRESPONDENCE WITH DESCRIPTION, AND
NON-INFRINGEMENT, ALL OF WHICH ARE EXPRESSLY DISCLAIMED. POLYCOM NEITHER ASSUMES NOR
AUTHORIZES ANY OTHER PERSON TO ASSUME FOR IT ANY OTHER LIABILITY IN CONNECTION WITH THE
SALE, INSTALLATION, MAINTENANCE OR USE OF ITS PRODUCTS.
Safety Notices – 2
Safety Notices
Safety and Compliance
Part 15 FCC Rules
This device is compliant with Part 15 of the FCC Rules. Operation is subject to the following two conditions:
1. This device may not cause harmful interference, and
2. This device must accept any interferences received, including interference that may cause undesired operation.
Class A Digital Device or Peripheral
Note: This equipment has been tested and found to comply with the limits for a Class A digital device, pursuant to
part 15 of the FCC Rules. These limits are designed to provide reasonable protection against harmful interference
when the equipment is operated in a commercial environment. This equipment generates, uses, and can radiate
radio frequency energy and, if not installed and used in accordance with the instruction manual, may cause harmful
interference to radio communications. Operation of this equipment in a residential area is likely to cause harmful
interference in which case the user will be required to correct the interference at his own expense.
Modifications
In accordance with Part 15 of the FCC Rules, the user is cautioned that any changes or modifications not expressly
approved by Polycom, Inc. could void the user’s authority to operate the equipment. This equipment may not be
used on a coin service or party line.
Installation Instructions
Installation must be performed in accordance with all relevant national wiring rules.
L’Installation doit être exécutée conformément à tous les règlements nationaux applicable au filage électrique.
When using Power over Ethernet (PoE), the equipment is to be connected only to PoE networks without
connections to the outside plant.
Plugs Acts as Disconnect Device
The socket outlet to which this apparatus is connected must be installed near the equipment and must always be
readily accessible.
La prise électrique à laquelle l’appareil est branché doit être installée près de l’équipement et doit toujours être
facilement accessible.
Industry Canada (IC)
This Class [A] digital apparatus complies with Canadian ICES-003.
Cet appareil numérique de la classe [A] est conforme à la norme NMB-003 du Canada.
CE and VCCI Mark
This SoundStation IP 7000 phone is marked with the CE mark. This mark indicates compliance with EC Directives
2006/95/ED and 2004/108/EC. A full copy of the Declaration of Conformity can be obtained from Polycom Ltd.,
270 Bath Road, Slough, Berkshire, SL1 4DX, UK.
Safety Notices – 3
User Guide for the Polycom SoundStation IP 7000 Phone
Safety and Compliance (continued)
WARNING Electrical Safety
To avoid electric shock, do not connect safety extra low voltage (SELV) circuits to teleconference station network
(TNV) circuits. LAN ports contain SELV circuit, and WAN ports contain TNV circuits. Some LAN and WAN ports
both use RJ-45 connectors. Use caution when connecting cables.
This product is rated 48Vdc, 0.375A. When used with the optional external power supply, the power supply shall be
a Listed power supply with a LPS output, rated 48V, min. 0.375A.
Russian Compliance
Ministry of Information Technologies & Communication of the Russian Federation - Declaration of Conformity
DoC # !"#-1918. Expiry 03/28/2011.
Safety Notices – 4
Index
Symbols
# key, page down shortcut 1–20
* key, page up shortcut 1–20
Numerics
2.5mm audio connector 1–9, 1–10, 2–12
A
AC power 1–4, 1–5, 1–6
AC Power Kit 1–2
accessories, optional
AC Power Kit 1–2
Computer Calling Kit 1–3
console interconnect cable 1–3
External Microphone Kit 1–3
mobile phone cable 1–3
Multi-Interface Module Package 1–3
Video Kit 1–3
analog microphones 1–3
answering calls 3–6, 4–11
appearances, handling 4–19
attended transfer 3–17
audio components 1–9, 2–12
audio connectors 1–9, 1–11, 2–12
Auto Divert setting 2–21
Auto Reject setting 2–21
auxiliary audio components 1–9, 2–12, 4–1
B
backlight intensity 2–6
bass and treble control 2–11
blind transfer 3–17
Block Buddy setting 2–21, 4–23
blocking and unblocking contacts 4–22
buddies, managing 4–20
buddy lists, using 4–20
C
call appearances, handling 4–19
call forwarding 3–19, 4–14
call lists, using 2–14
calls
answering 3–6, 4–11
with auxiliary audio 4–1
and call lists 2–14, 4–11
and conference calls 4–14, 3–9
distinguishing by ring type 2–10, 2–28
diverting 2–29
ending 3–6
forwarding 3–19, 4–14
handling with Polycom HDX system 4–7
holding and resuming 3–8, 3–13, 3–15
holding, and video calls 4–13
ignoring 3–6
obtaining information about 2–17
on-hook and off-hook 3–2
placing 3–2
rejecting 2–28
transferring 2–29, 3–16, 4–13
cell phone, using with video endpoint 4–19
cell phones, using with conference phone 1–9,
1–11, 4–1
characters, entering 1–21
computer
calling applications 1–9, 1–11, 4–1
calling applications, and Polycom HDX system
4–19
calling cable 1–3, 1–9
content, showing 4–18
Computer Calling Kit 1–3, 1–9
conference
calls, hosting 3–9, 4–5, 4–14
key, about 1–17
phone. See SoundStation IP 7000
console interconnect cable 1–3, 1–7
consultative transfer 3–16
contact directory, and Polycom HDX system
4–11
Index – 1
User Guide for the Polycom SoundStation IP 7000 Phone
contact directory, managing 2–17
contact directory, searching for contacts in 2–23
contacts
adding to contact directory 2–19
blocking and unblocking 4–22
calling 2–27
deleting 2–27
managing 2–17
monitoring 4–21
searching for 2–23
setting ring tones for 2–9
updating 2–26
viewing in contact directory 2–18
viewing in corporate directory 2–18
Content soft key 4–18
content, showing 4–18
contrast, adjusting for screen 2–6
corporate directory, and Polycom HDX system
4–11
corporate directory, managing 2–17
corporate directory, searching for contacts in
2–23
customizing your phone 2–1
D
data, entering 1–20
date and time display, updating 2–3
Diagnostics menu 5–7
dial pad keys, about 1–17
digital microphones 1–3
directory contacts, managing 2–17
display contrast, updating 2–6
distinguishing calls 2–28
diverting calls 2–21, 2–29
Do Not Disturb feature 3–21, 4–14
E
Encoding soft key 1–21
end call key, about 1–17
ending calls 3–6
EQ settings 2–11
Extension Microphone Kit 1–3
extension microphones 1–3
External Microphone Kit 1–3, 1–8
F
Far Mute soft key 3–12
fields, enabling or disabling 1–21
forwarding calls 3–19, 4–14
Index – 2
H
hardware, testing 5–7
HD Voice technology, about 1–18
HDX
microphone cable 1–3, 1–13
microphones 1–3
system, connecting phone to 1–11
system, using with phone 4–7
systems, compatible versions 1–11
holding
calls 3–8, 4–13
conference call participants 3–13, 4–16
conference call participants, from video
endpoints 4–17
conferences 3–15
conferences, from video endpoints 4–17
I
icons, description of 1–18
ignoring calls 3–6
inactivity timer 1–20
Info soft key 3–12, 3–15
installation instructions 1–3
installation issues, troubleshooting 5–2
J
Join soft key, using 3–11, 4–5
K
key buttons, description of 1–16
L
language, updating for phone 2–2
lapel microphones 1–9, 2–12
LED indicators 1–15
lowercase characters, entering 1–21
M
make call key, about 1–17
maximum intensity 2–6
menu key, about 1–17
menus, navigating 1–20
microphone cable 1–3, 1–12
microphones
connecting 1–8
extension 1–3
HDX 1–3
internal, about 1–15
muting 3–7, 4–17
Index
Microsoft Office Live Communications
Server 2005 4–20, 4–21, 4–25
missed calls list 2–14
mobile audio, using with video endpoint 4–19
mobile phone cable 1–3, 1–9
mobile phones, using with conference phone
1–9, 1–11, 4–1
Multi-Interface Module 1–3, 1–5, 1–7, 1–10
Multi-Interface Module Package 1–3, 1–5, 1–7
multiple call appearances, handling 4–18, 4–19
Mute key 4–17
mute key, about 1–17
muting the microphone 3–7, 4–6
MyStat soft key 4–20
N
Name soft key 3–4
network cable 1–3, 1–5, 1–7
network, connecting to phone 1–3
numbers, entering 1–21
O
off-hook calls 3–2
on-hook calls 3–2
optional accessories
AC Power Kit 1–2, 1–4
Computer Calling Kit 1–3, 1–9
console interconnect cable 1–3, 1–7
External Microphone Kit 1–3, 1–8
mobile phone cable 1–3, 1–9
Multi-Interface Module Package 1–3, 1–5, 1–7
Video Kit 1–3
P
parts list 1–2
phone, using with Polycom HDX system 4–7
placed calls lists 2–14
placing calls 3–2, 4–9
PoE 1–3
Polycom HD Voice technology, about 1–18
Polycom HDX microphone cable 1–3, 1–12
Polycom HDX system, connecting to phone 1–11
Polycom HDX system, using with phone 4–7
Polycom HDX systems, compatible versions to
run with phone 1–11
power adapter 1–2, 1–3, 1–5
Power Insertion Cable 1–2, 1–4
power issues, troubleshooting 5–3
Power over Ethernet 1–3
power source, connecting to phone 1–3
presence settings 4–20
R
received calls list 2–14
recording devices 1–9, 2–12
redial key, about 1–17
redialing numbers 3–7
regional power cord 1–2, 1–3
registering the phone 1–14
Reject soft key 2–28, 3–6
rejecting calls 2–28, 3–6, 4–14
restarting the phone 4–26
Retain Search feature 2–24
ring tone, updating for contacts 2–8
ringer volume, adjusting 2–14
S
scroll keys, about 1–16, 1–20
searching for contacts 2–23
select key, about 1–17
shared lines 2–30
showing content 4–18
Silence feature 3–6
soft keys, about 1–16
soft keys, viewing 1–21
SoundStation IP 7000
accessories (optional) for 1–2
advanced features of 4–1
auxiliary audio components, connecting to 1–9
extended microphones 1–3
hardware, testing 5–7
installing 1–3
language support for 2–2
registering 1–14
restarting 4–26
troubleshooting 5–1
video, integrating with 1–11
spaces, entering 1–21
speaker, internal 1–15
speaker, volume, adjusting 2–14, 4–6
speakers, external 1–9, 2–11, 2–12
special characters, entering 1–21
speed dialing 3–5, 3–23, 4–11
startup issues, troubleshooting 5–3
status, updating 4–20
symbols, entering 1–21
Index – 3
User Guide for the Polycom SoundStation IP 7000 Phone
T
testing phone hardware 5–7
text, entering and deleting 1–20, 1–21
time and date display, updating 2–3
transferring calls 2–29, 3–16, 4–13
treble and bass control, updating 2–11
troubleshooting
audio problems 5–7
calling problems 5–6
control problems 5–4
and the Diagnostics menu 5–7
display problems 5–7
hardware 5–7
installation problems 5–2
power and startup problems 5–3
screen and system problems 5–5
U
uppercase characters, entering 1–21
URLs, dialing 3–4
V
video components, connecting to phone 1–11
Video Kit 1–3
video, integrating with phone 1–11
voice mail 2–28, 3–24
volume keys, about 1–17
volume, adjusting 2–14, 4–6, 4–17
W
Watch Buddy setting 2–21, 4–22
watcher list 4–22
wireless microphones 1–9, 2–12
Index – 4