1
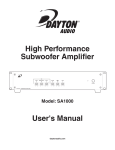
HIGH PERFORMANCE
SUBWOOFER AMPLIFIER
Model: SA1000 User Manual
Thank you for purchasing the Dayton Audio® SA1000 subwoofer amplifier, one of the most versatile and powerful subwoofer amplifiers
available. The tabletop or rack-mountable design is perfect for high-end home theater installations or DIY subwoofer projects. The SA1000
has the power to drive even the most power-hungry subwoofer systems.
FEATURES:
• Patented tracking downconverter power supply
•
•
•
•
•
for high efficiency
Class AB output stage for clean, controlled output
Low frequency parametric EQ allows you to boost or
cut to custom-tailor the sound
Advanced soft clip circuitry improves headroom and
protects woofers
Manual, auto, or triggered on/off for integration into
any automated system
Switchable subsonic and bass boost filters
• High pass output for looping signal back into
distributed audio systems
• Can be easily converted between rack-mount and
tabletop configurations
• Heavy-duty steel chassis with brushed
aluminum faceplate
• Adjustable phase, gain, crossover, and parametric EQ
• Pop-out adjustment knobs keep settings from being
easily disturbed
• Switchable 110/220V input voltage
INSTALLATION:
The SA1000 is designed to provide high fidelity subwoofer amplification and is tailored for home audio, home theater, and studio
environments.
It is not recommended for use in DJ, pro-sound, or other high-duty-cycle applications. For home audio tabletop applications, use
the unit as it comes out of the box with the rubber feet and without the rack ears. In a custom home theater or studio where rack
mounting is available, simply remove the rubber feet and attach the included rack ears. The amplifier runs cool thanks to its high
efficiency, but care should be taken to leave some room for air circulation above the amplifier. Stacked components that utilize
rubber or plastic feet should provide adequate clearance in most situations.
FRONT PANEL:
1. Power Switch / Indicator LED
Front panel pushbutton power switch turns the amplifier on
and off. When the indicator LED is lit dimly, the amplifier is in
standby mode. When the LED is lit brightly, the amplifier is
fully active.
2. Gain
Sets the overall level of the amplifier, used to match the
output of the subwoofer to the rest of the speakers
in the system.
3. Frequency
Adjusts the low-pass crossover frequency from 30 Hz to
200 Hz. When using the Left/Right inputs, this adjustment
will allow you to properly integrate the subwoofer with the
satellite or main speakers. It is recommended to experiment
with different settings until the smoothest transition between
subwoofer and speakers is achieved.
4. Phase
Adjustable phase compensation from 0 to 180 degrees.
Helps the user correct improper phasing of the main speakers or differing listening distances between the subwoofer
and mains, which can cause a poor acoustic summation
around the crossover point. In most situations the knob
should be left at 0 degrees, but for the advanced user it can
be set either by ear or with the aid of measurement instruments.
5. EQ
The EQ adjustment knobs enable the user to custom-tailor
one band of parametric equalization for their subwoofer,
which can be used to add boost to the low-end of the response, or can be used to cut out an excessively loud room
resonance. The freq. knob selects the frequency for the filter,
the bandwidth knob selects how wide or narrow the filter is
(the higher the bandwidth, the broader the effect), and the
level knob can be used to add up to 6dB of boost or 14 dB
of cut.
(2)
REAR PANEL:
6. AC Power
The SA1000 comes shipped standard for 110V U.S. operation; simply connect the included IEC power cord to your
wall outlet. For 220V input, remove the fuse holder, rotate
180 degrees, and re-install. In most 220V applications a
separate power cord will be required and is not included.
10. Bass Boost
Selects a bass boost filter with +3dB @ 25Hz, Q=1.4. Allows
the user to add boost to the low end response without using
the built-in parametric EQ. This leaves the parametric EQ
function to address room modes to cut out an excessively
loud room resonance.
7. 12V Trigger Input
The 12V trigger input is a handy feature when connecting
the amplifier to an automated audio system. The 3.5mm
mini-plug jack will accept up to a 12V DC output from
another device, or from a separate power supply. When the
trigger input is energized, the amp turns from standby to ON
mode. When using the SA1000 with a home theater receiver
without a trigger output, the voltage can come from a 12V
wall wart (3.5mm tip-positive connector) plugged into the
receiver’s switched outlet and the trigger input.
11. Subsonic Filter
Selects a subsonic filter with -3dB @ 18Hz, Q=.8. Allows the
user to remove the subsonic information from the signal and
tighten the low end response of some subwoofer systems.
8. Speaker Outputs
Speaker level output connections carry the amplified signal
to the subwoofer drivers. Binding posts will accept bare wire,
banana plugs, or spade plugs. Two sets of outputs are provided so multiple systems can be connected. When using
both outputs the combined load must have a minimum of 4
ohms impedance!
9. Remote Turn On
Selects the turn-on stimuli that will put the amplifier in ready
mode. “12V trigger” setting relies on voltage going into the
12V trigger input to activate the amplifier. “Auto” setting
senses a signal on the RCA line-level inputs and automatically puts the amp in ready mode. “On” setting puts the amp
constantly in ready mode so that it can be controlled by the
master power switch on the front panel. In “Auto” mode, the
amplifier will take approximately 15 minutes to turn off from
ready to standby mode.
12. Line Inputs
RCA-style jacks receive the audio signal from standard
line-level audio sources. When used in a two-channel stereo
system, both the left and right audio inputs should be connected and are internally summed to a mono output. The
adjustable crossover is in effect when using the left or right
inputs. When using an amplifier with an audio source that
is mono and pre-filtered, the LFE input should be used; this
bypasses the onboard low-pass crossover for more accurate
reproduction of the incoming signal.
NOTE: Bass Boost and Subsonic Filters are active on both
LFE and L/R inputs.
13. High Pass Output
RCA-style jacks allow the line level input signal to be looped
back into other audio equipment. The high pass signal
utilizes a 12 dB per octave filter with an output slope of -3dB
@ 80Hz. This feature is useful for connecting the signal to
distributed audio systems.
BASS BOOST / SUBSONIC FILTER SETTINGS
Frequency Response
Switch Settings
(3)
NOTES ABOUT HUM:
While the SA1000 has been designed to minimize the possibility of hum in the subwoofer system, it is still possible that a hum
will occur in rare circumstances. Its safety grounding can create a path for small amounts of 60 Hz energy to travel through the
line-level audio system. Although not dangerous, this energy can cause difficulty with the subwoofer auto signal sensing circuit,
and at the very least will interfere with the quiet enjoyment of your system. The first course of action should be trying to make sure
that all of the audio components are connected to either the same electrical outlet, or at least into the same circuit branch. Next,
cable TV systems are notoriously the culprit, so be sure to try disconnecting all coaxial feeds that are connected to the system. If
this solves the problem, install a coaxial line isolator and reconnect the system. In the very worst case, a line-level audio isolator/
transformer connected to the line-in of the subwoofer amplifier will usually solve the problem.
SPECIFICATIONS:
Rated Power Output:
Signal to Noise Ratio:
Efficiency:
Input Impedance:
Subsonic Filter:
Bass Boost:
High Pass Output:
Low Pass Adjustment:
Phase Adjustment:
Parametric EQ:
Frequency:
Bandwidth:
Level:
Dimensions:
Power Requirements:
Stand-By Power Rating:
Weight:
(0.92 % THD) 497 watts* into 8 ohms, 950 watts* into 4 ohms
*Based on one-third power duty cycle
98 dB A-weighted
86%
12K ohms
-3 dB @ 18 Hz, Q=.8
+3 dB @ 25 Hz, Q=1.4
-3 dB @ 80 Hz, 12 dB per octave
30 Hz – 200 Hz
0° – 180°
18 Hz – 80 Hz
0.1 – 1 Q
-14.5 dB – +6 dB
17-1/2" W x 4" H x 13" D (tabletop configuration)
120/230 VAC, 60 Hz/50 Hz
120V 24W; 230V 18.4W
28 lbs.
IMPORTANT SAFETY INSTRUCTIONS
To reduce the risk of electric shock, do not remove cover. No user serviceable parts inside. Refer servicing to qualified personnel. To
reduce the risk of fire and shock do not expose unit to rain or moisture. The unit should be connected to an earth grounded AC electrical
socket. The unit should be operated in a well ventilated area. Minimum clearance is 2 inches from the ventilation openings.
Note: Unit is set at the factory for 115V operation. Be sure to change the fuse to a 5A rating before switching to 230V operation.
Warranty Information
Dayton Audio products are warranted free from defects in material and workmanship for 5 years from date of purchase. 1 year warranty applies to the
following products: powered subwoofers and electronic devices (e.g. subwoofer amplifiers, and plate amplifiers, as well as the Omnimic V2 and DATS
loudspeaker testing devices). In the rare case of a product failure, please contact your place of purchase or call our Customer Support Department at
(937) 743-8248.
Warranty Limitations
There are no other warranties, either expressed or implied, that extend the foregoing, and there are no warranties of merchantability or fitness for any
particular purpose. Dayton Audio is not responsible for any consequential or inconsequential damage to any other unit or component or the cost for
installation or extraction of any component of the audio system, or for the improper use of products. This includes but is not limited to burnt voice coils,
overheating, bent frames, holes in the cone, or broken lead wires.
This warranty gives you specific legal rights and you may also have other rights that vary from state to state.
Non-Warranty Service: If non-warranty service is required, the product may be sent to the Company for repair/replacement, transportation prepaid, by
calling (937) 743-8248 for details, complete instructions, and service fee charges.
daytonaudio.com
tel + 937.743.8248
[email protected]
Dayton Audio®
(4)
705 Pleasant Valley Dr.
Springboro, OH 45066
USA
Last Revised: 3/20/2015