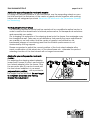
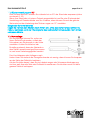
1
User manual of Siro II
page 2 of 43
We are a company-member of rehaKIND e.V.
International Support Group for the
Rehabilitation of Children and Young People
Editor: Bernhard Wendel
Technical collaborator: Bernd Rothardt
As at March 13
Technical alterations and misprints excepted.
SORG Rollstuhltechnik GmbH + Co.KG
Benzstraße 3
D-68794 Oberhausen-Rheinhausen
Fon
+49 7254 - 9279.0
Fax
+49 7254 - 9279.10
[email protected]
www.sorgrollstuhltechnik.de
© All texts and pictures are subject to copyright and may not be published - not even
as an excerpt! - without the explicit authorization of SORG Rollstuhltechnik GmbH +
Co.KG
© translated by: www.my-translator.biz
User manual of Siro II
page 3 of 43
1. Contents
1.
2.
3.
Contents
Preface
General advice
3.1 Functional purpose
3.2 Mark of SiroII
3
7
8
8
8
4.
Safety precautions
9
5.
Handling
5.1. Completion of use condition
5.2. Unfolding the chair
5.3. Folding up the chair
5.4. Loading and transport
5.5. Getting in and out the chair
5.6. Transporting the wheelchair
5.7. Rolling off
5.8. Carrying
13
13
13
14
15
15
16
16
16
6.
Brakes
6.1. Standard knee lever brakes
6.2. Knee lever brakes - braked lockable
6.3. Knee lever brakes - braked and unbraked lockable
6.4. Brake lever lengthening
Safety precautions and advice for your orthopaedic mechanic master
6.5. Drum brakes
Advice for your orthopaedic mechanic master
17
17
17
17
17
18
19
19
7.
21
21
22
22
22
22
22
23
23
24
24
Adjustment of wheel postions
7.1. Punch plate and camber
7.2. Alteration of the centre of gravity’s position
7.3. Adjustment of seat-tilting
7.4. Critical height of obstacle
7.5. Static stability
Safety precautions and advice for your orthopaedic mechanic master
7.6. Adjustment of front wheel
Advice for your orthopaedic mechanic master
7.7. Supporting wheel (overturning protection)
Advice for your orthopaedic mechanic master
User manual of Siro II
page 4 of 43
8.
Wheels
8.1. Driving wheels
8.2. Grip rings
8.3. Spoke cover
8.4. Wheel cover
25
25
25
26
26
9.
Seatback
9.1. Backrest
9.2. Seatback cover cloth standard
9.3. Seatback cover cloth restretchable
9.4. Fixed seatback
9.5. Lateral truss pads
9.6. Seatback inclination with notch system
9.7. Headrests
9.8. Stabilizing rod
27
27
27
27
27
28
28
28
28
10. Sliding handles
10.1. Extendable sliding handles / One-handed sliding handle
10.2. Sliding handles with sliding pole
Safety precautions
29
29
29
29
11. Seat
11.1.
11.2.
11.3.
11.4.
31
31
31
31
32
Fixed seatFix
Seat extension
Bolting device
Seat cover cloth
12. Side parts
12.1. Side parts
12.2. Arm pads
33
33
33
User manual of Siro II
page 5 of 43
13. Leg supports
Advice for your orthopaedic mechanic master
36
36
14. Further options
14.1. Therapy table
14.2. Safety belt
14.3. Tilt clip
14.4. Extension parts of other concerns
37
37
37
37
39
15. Cleaning and maintenance
16. Warranty statement
16.1. Quality assurance system
16.2. Design life
16.3. Working life
16.4. Complaints
16.5. Data plate
41
43
43
43
43
44
44
17. Warranty clauses
18. Compliance statement
19. Warranty of delivery
19.1. Assemblage and inspection
19.2. User-chronology
19.3. Handing over
Please make sure that the concerning items are filled out
20. List of maintenance
21. List of repair works
45
47
48
48
48
48
49
51
User manual of Siro II
page 6 of 43
User manual of Siro II
page 7 of 43
2. Preface
Dear Customer,
today, your child has met its new “daily companion” for the first time. A companion
that would never let your child down and that will accompany him/her through thick
and thin. Day after day, month after month, year after year. The most important
precondition for such a cheerful and safe companionship is a sensitive reaction
against all individual needs.
We want to be such a reliable companion to your child. Therefore, we use our years of
experience and we take a lot of care over development and assemblage. This is the
only way for us to guarantee the permanent best quality, individuality and safety. After
having been certified according to DIN EN ISO 9001:2000, we are under the obligation
to continue this standard of quality perpetually. With a measurable result!
Special people need special solutions. This is why we are developing mobilization
solutions, all being as unique as their user. Therefore it may happen that some
descriptions slightly differ from your child’s wheelchair because we’re on the road of
permanent development and this individual variant may be not yet included in this
user manual. Our specialist staff or your intermediary medical service centre will be
pleased to answer all your questions about the handling.
Please keep this service paper in a safe place and have filled out the required data on
page 44. It will be proof of regular inspections, which might be decisive in case of a
warranty claim. Moreover, it will be an important source of information for the costbearer in the event of the wheelchair’s further use.
For a reliable use of the new wheelchair, please read the following sections carefully
and pay attention to our advice and instructions for your child’s safety! More questions?
Please consult our proficient staff, they’ll be pleased to help you!
Service phone +49 07254 / 9279-0
Hugo Sorg, Managing director
User manual of Siro II
page 8 of 43
3. General advice
This user manual has been drawn up not only for you but also for your orthopaedic
mechanic master of the medical service centre – specialists who are able to adjust
the wheelchair exactly to your individual needs and who will complete the wheelchair’s
use-state.
Therefore, this user manual includes instructions which you may in no circumstances
carry out yourself – improper action will always be a risk to you, the user and your
environment. Please take some time to read this user manual carefully and keep it in a
safe place.
3.1 Verwendungszweck
Unsere Rollstühle und Sitzschalen-Fahrgestelle dienen ausschließlich gehunfähigen
und geh- oder geistig behinderten Menschen zum individuellen Gebrauch bei
Selbst- und/oder Fremdbeförderung. Jede andere Verwendung gilt als nicht
bestimmungsgemäß.
3.2 Merkmale des Siro II:
Das Besondere an Siro II ist die Möglichkeit, die komplette Sitz-Rücken-Einheit um 30°
zu kanteln, das heißt, dass man den Sitz im Neigungswinkel verändern kann. Ebenso
und gleichzeitig kann man bei Siro II auch den Rückenwinkel um 40° verändern bzw.
den Rücken zum Transport nach vorne umklappen.
Für die Veränderung des Sitzwinkels (die Kantelung) ist Siro II so konzipiert, dass sich
der Schwerpunkt des Rollstuhls nur unwesentlich verändert, weil die komplette SitzRücken-Einheit beim Kanteln gleichzeitig etwas nach vorne rutscht.
Diese therapeutischen Vorteile des Siro II s bergen leider auch Risiken für die
Sicherheit des Benutzers, die man kennen muss, um sie beherrschen zu können. In
dieser Gebrauchsanweisung wollen wir Sie über diese Risiken aufklären und Ihnen
eine Handreichung zum sicheren Umgang im therapeutischen Alltag geben.
Die wichtigsten drei seien gleich hier erwähnt:
• Betätigen Sie bitte NIEMALS den Kantel-Mechanismus während der Fahrt des
Rollstuhls!
• Fahren Sie bitte NIEMALS den Siro II im gekantelten Zustand oder mit gestrecktem
Rücken ohne Kippschutz (Sicherheitsrad)!
• Fahren Sie bitte NIEMALS den Siro II mit maximaler Rückenneigung und gleichzeitiger
maximaler Kantelung!
Viele Sicherheitsaspekte in dieser Gebrauchsanweisung wiederholen wir nahezu
"gebetsmühlenartig". Wenn Sie aber die Gebrauchsanweisung sorgfältig gelesen
haben, werden Sie die Gründe gut nachvollziehen können, denn wir wollen, dass Sie
und/oder Ihr Kind sich wirklich absolut sicher fühlen können im neuen Siro II.
User manual of Siro II
page 9 of 43
3.1 Optionale Veränderungen
Weil kein Mensch dem anderen gleicht, sind wir in unseren Standards so vielfältig wie
nur irgend möglich, um somit Ihren völlig individuellen Bedürfnissen gerecht werden
zu können. Deshalb empfehlen wir Ihnen aus unserer langjährigen Erfahrung heraus
die folgenden baulichen Veränderungen an Ihrem Rollstuhl:
•
bei einem Benutzergewicht über 90 kg eine verstärkte Lochplatte aus Stahl;
•
bei einem Benutzergewicht über 90 kg oder bei einer SB/ST über 44cm eine
zweite Gasdruckfeder zur leichteren Sitzkantelung des Stuhls;
•
bei nicht aktiven Benutzern die weniger wartungsintensiven 12"-Räder;
•
bei sehr aktiven Kindern oder Benutzern eine Kindersicherung am
Auslösehebel für die Sitzkantelung
User manual of Siro II
page 10 of 43
4. Safety precautions
When developing and manufacturing our wheelchairs, we set great store by safety. In
order to maintain this high quality of safety in everyday life, it is in your own and your
child’s interest to carefully pay attention to the following rules. Improper use could
cause a hazardous situation to you and your child and our assurance of warranty
would no longer be valid.
Viele Sicherheitsaspekte wiederholen wir in dieser Gebrauchsanweisung nahezu
"gebetsmühlenartig". Wenn Sie aber die Gebrauchsanweisung sorgfältig gelesen
haben, werden Sie die Gründe gut nachvollziehen können, denn wir wollen, dass Sie
und/oder Ihr Kind sich wirklich absolut sicher fühlen können im neuen Siro.
Die folgende Vorgehensweise, um ggf. Ihr Kind mit dem neuen Rollstuhl vertraut zu
machen, gilt natürlich in modifizierter Form auch für erwachsene Benutzer. Aber aus
Gründen der Einfachheit beschreiben wir die Situationen im Folgenden immer aus der
Perspektive eines (sehr) jungen Benutzers.
Familiarizing with Siro II
•
Take your time to familiarize yourself and your child with the new situation. Be
very patient and use caution to make sure that your child will feel safe in its new
wheelchair. Because Muby is an activity-wheelchair whose limits you’ll have to
get to know. You should really let your child undergo these limits quite literally.
Make sure that during the following steps both of you are safeguarded by an
experienced and strong assistant!
•
Lock the parking brakes and the drum brake and put your child into Siro II.
•
Carefully practise the wheelchair’s behaviour on shifting the centre of gravity in
all 4 directions! Make your child reach for objects, holding them further and
further.
•
Sensitize your child for these changed situations and ask if something changes,
and what exactly. And do not forget to express clearly that you will now intensify
the situation.
•
In any case, this must all be practised without fear. Do not force the learning
process!
•
Only after your child has been familiarized with the wheelchair’s static stability in
its standstill position, you should risk trying out the wheeling behaviour.
•
Children soon understand how to drive a wheelchair, it nearly is an automaticity.
The process of braking down however, needs thorough practice because it is
dangerous! Tell your child in clear terms that the knee lever brake is NOT
designed for braking down the wheelchair’s speed and that it may fall out of the
chair.
User manual of Siro II
•
page 11 of 43
Your child must learn that it should only use the grip rings for braking down the
wheelchair. Set Siro II in a slow motion and make the child brake down the
wheelchair to the standstill position with its palm on the grip rings. In doing so,
the child should keep in mind what will happen as it reaches between tyre and
grip ring (as far as the wheelchair is not equipped with our Rehavolution-wheels).
If your child has got delicate hands, please give it some gloves, eg. for cycling,
meaning with a leather inside – in no case mitts nor woolen gloves!
(Never forget that strong friction will heat up the grip rings. Therefore, either wear
some gloves or use the grip ring coating. Your medical assistant will be pleased
to give you some advice.)
•
•
•
As your child has thoroughly been familiarized with the items „centre of gravity“
and „brakes“, you may carefully begin with the next items.
At first, repeat the above exercises in the open country on even territory and only
after that on gradients and slopes and always with another assistant.
It is most important to create a situation your child is not afraid of. But: do never
“play” dangerous situations, eg. by tilting the chair and then catching it
meaning it to be a joke… Only real-life dangers may be mastered by your child.
Further safety precautions
•
Die Gefahr des Umkippens wird bei Siro II durch die Möglichkeit der Verstellung
des Sitzwinkels und/oder des Rückenwinkels erheblich verstärkt!
•
Aktivieren Sie deshalb niemals die Sitzkantelung während des Fahrens, sondern
bringen Sie zu diesem Zweck den Siro II immer zuerst in einen absolut
gesicherten Stillstand mit der Feststellbremse plus, falls vorhanden, der
Trommelbremse.
•
Aktivieren Sie vor jeder Sitzkantelung oder Rückenlehnenverstellung immer und
unbedingt zuerst den Kippschutz (Sicherheitsrad) und lassen Sie unbedingt das
Sicherheitsrad während der Fahrt aktiviert!
•
Examine the braking efficiency of the parking brake (knee lever brake) each
time your child wheels off. Only when the driving wheels show adequate air
pressure, the brake will work perfectly. Versuchen Sie zu diesem Zweck, den Siro II
•
bei geschlossenen Feststellbremsen zu schieben. Die Räder dürfen maximal im
blockierten Zustand über den Boden rutschen.
•
Please also keep in mind that wet or dirty tyres may considerably reduce the
braking efficiency. Never change the parking brakes’ adjustment on your own
authority because a wrong distance between brake unit and tyre may eliminate
the braking efficiency completely. In this case, please consult your intermediary
medical service centre immediately and have a qualified orthopaedic
mechanic taken care of the problem.
•
The parking brake (knee lever brake) is designed for blocking the wheels and not
for braking down the wheeling chair. Such improper use could cause a serious
hazardous situation your child and its environment!
•
Each time your child wheels off, you will have to check if the driving wheels’
User manual of Siro II
•
•
•
•
•
•
•
•
•
•
•
•
•
page 12 of 43
plug-in axles have been thoroughly tightened.
Your child may never use the foot rest(s) or leg supports for getting in or out the
wheelchair. The chair may turn over forewards.
Lock the parking brake each time your child gets in or out the wheelchair.
If possible, always use the supporting wheel. Especially when wheeling on
gradients or slopes, on uneven territory or thresholds, the danger of turning over
is really high.
When wheeling in public traffic, keep in mind that you must act according to
Road Traffic Act. In order to avoid accidents, you should always control if the
reflectors are tidy and both of you should wear bright colours to be well seen.
The wheelchair may not be carried together with its occupant but may only be
wheeled.
When transporting the wheelchair in a vehicle, your child may only sit in the chair
as the chair is fixed onto the required devices. (see handling – transporting the
wheelchair p.16).
Have the wheelchair serviced regularly by a qualified medical service centre. It
is necessary to examine if all screws are properly tightened, if welded joints show
any damage and if signs of wear can be detected.
Your child should get over steps and stairs only with an assistant. Take care that
the supporting wheel is swung in and that the assistant(s) always uses the fixedly
screwed metal parts of the wheelchair for carrying, because the sliding handles’
rubber caps may unexpectedly come off and cause serious accidents!
In order to avoid injuries, your child should not take its hand between the driving
wheels and knee lever brake or wheel cover.
Do not wheel on gradients over 4°; meaning ca. 7%. The danger of overturning
increases on gradients over 4°.
An occupied wheelchair should never be left unsupervised on a slope, not even
with locked knee lever brake.
With an active (swung out) supporting wheel, the max. critical obstacle height is
ca. 3 cm.
The max. useful vehicle load capacity is 100 kg. The standard frame is not
equipped for more weight.
User manual of Siro II
page 13 of 43
5. Handling
5.1 Completion of use condition
The wheelchair will be in working order for everyday life after having examined the
following basic items:
•
do the parking brakes show functional performance?
•
do the drum brake show functional performance?
•
are the plug-in axles thoroughly snapped in the adapters?
•
are the steering wheels in working order and may they be easily rotated?
•
do the driving wheels show adequate air pressure?
•
is the supporting wheel in working order?
•
is the fixed seat shell thoroughly locked into the securing devices at the back?
•
is the seat shell in perfect condition?
•
is the seat shell fest im Sitzschalen-Tragerahmen arretiert?
•
is the seat-tilting unobjectionable working?
•
is the gas pressure spring in working order?
•
Sitzt der Bowdenzug am Auslösehebel der Kantelung fest in seiner Aufhängung?
5.2 Kantelung der Sitz-Rücken-Einheit
•
Um den Siro II zu kanteln, das heißt, die komplette SitzRücken-Einheit um bis zu 30° im Winkel nach hinten zu
kippen, schließen Sie zunächst die Feststellbremse and
the drum brake.
•
Dann betätigen Sie den Auslösehebel am Schiebegriff
bzw. am Schiebebügelgriff, halten ihn im gezogenen
Zustand und schieben mit leichtem Druck den Sitz
gleichzeitig nach vorne und nach unten.
•
Beachten Sie bitte, dass die Gasdruckfeder Ihrem Druck
entgegenwirkt und Sie deshalb die Sitzkantelung bei leerem Siro II selbst kaum
oder nur sehr schwer bewerkstelligen können. Dies ist kein Defekt, sondern ein
Zeichen dafür, dass die Gasdruckfeder voll funktionstüchtig ist.
•
Im Gegenteil wäre eine leicht zu betätigende Gasdruckfeder bei einem leeren
Stuhl ein Indiz dafür, dass sie den Anforderungen bei Belastung nicht mehr
gewachsen ist und deshalb unverzüglich ausgetauscht werden muss. Denn eine
defekte Gasdruckfeder stellt bei der Kantelung ein erhebliches Sicherheitsrisiko
dar, weil Ihnen der Sitz mit Insasse unvermittelt und ungefedert nach unten
plumpsen kann.
•
Um den Sitz wieder in seine wagerechte Position zu versetzen, Schließen Sie
wieder die Feststellbremse.
•
Ziehen Sie dann wieder den Auslösehebel und ziehen die Sitz-Rücken-Einheit mit
leichtem Zug nach oben bis sie die gewünschte Position erreicht hat.
•
Beachten Sie bitte, dass Sie den Sitzwinkel bei Siro II bis auf - 5° absenken
können.
User manual of Siro II
page 14 of 43
5.3 Einstellung des Rückenwinkels auf die Sitzschale
•
Um den Rücken im Winkel exakt auf die Sitzschale
einzustellen, befolgen Sie bitte die Schritte auf S. 23
•
Um den Rücken für den Transport nach vorne
umzulegen, bringen Sie zunächst die ausziehbaren
Schiebegriffe bzw. den Schiebebügelgriff auf die
niedrigste Position.
•
Drücken Sie dann, wie auf S. 23 beschrieben, die
Querstange, entriegeln die Arretierungsbolzen und
legen den Rücken nach vorne um.
•
Um den Rücken wieder zurück zu stellen,
verfahren Sie bitte analog.
5.4 Getting in and out the chair
Achten Sie beim Ein- und Aussteigen darauf, dass die Feststell- und die
Trommelbremsen fest angezogen und die Fußplatte/n hochgeklappt ist/sind. Lassen
Sie sich von einer Begleitperson die Lenkräder nach vorne drehen oder fahren Sie
selbst mit Ihrem Stuhl soweit rückwärts, dass die Lenkräder nach vorne gedreht sind
und schließen dann die Kniehebelbremse. Das verleiht dem Stuhl beim Ein- und
Aussteigen noch etwas zusätzliche Stabilität. Vermeiden Sie bitte, sich auf die
Fußplatte zu stützen, da sonst der Rollstuhl nach vorne kippen kann. Zum Kippen
kann es ebenfalls kommen, wenn Sie sich mit ihrem Körper zu weit aus dem Rollstuhl
lehnen und somit den Schwerpunkt ändern.
Lesen Sie dazu ggf. noch einmal die S. 9 ff.
Seien Sie sich bewusst, dass Sie nach jeder Veränderung der Radposition andere
Balance-Verhältnisse haben und machen Sie sich durch entsprechende Versuche ebenfalls nur in Anwesenheit einer Hilfsperson! - damit vertraut. Nur Gefahren, die
Ihnen bewusst sind, können Sie auf Dauer wirklich vermeiden!
User manual of Siro II
page 15 of 43
5.5 Verladung und Transport
5.5.1 Sitzschale
Bevor Sie die Sitzschale abnehmen wollen, stellen Sie die Räder
mit den Kniehebel- und den Trommelbremsen fest und bringen
den Sitzschalen-Tragerahmen immer in die waagerechte
Position. Nehmen Sie die Sitzschale aus der Keilaufnahme,
indem Sie den Auslösehebel der Keilaufnahme an der Rückseite
des Stuhls nach unten und die Sitzschale nach vorn schieben.
Zum Wiedereinsetzen setzen Sie die Sitzschale auf den Bolzen
der Keilaufnahme und richten den Keil horizontal nach der
Keilaufnahme aus.
Dann können Sie die Sitzschale nach hinten schieben, bis sie in der Keilaufnahme
fest sitzt; der Sicherungsbolzen schnappt dabei hörbar ein. Vergewissern Sie sich auf
jeden Fall, dass der Sicherungsbolzen eingerastet ist! Klappen Sie die Beinstütze hoch
und bringen Sie ggf. die Beinstützenhalter in eine senkrechte Stellung.
5.5.2 Schiebebügel / Rücken
Lösen Sie mit Hilfe der Klemmhebel oder Sterngriffschrauben die
ausziehbaren Schiebegriffe, schieben diese dann so weit wie
möglich ein und klemmen sie wieder fest. Die Bügelgriffe lassen
sich durch Lösen der Sterngriffschrauben an den beiden BügelEnden in die gewünschte Raststellung drehen (siehe auch S. 33).
Klappen Sie die Rückenlehne mit den Schiebebügelgriffen nach
vorn, indem Sie die Querstange am unteren Ende der
Rückenrohre nach unten drücken. Auch hier achten Sie beim
Wiederaufbau bitte darauf, dass die Sicherungsriegel auf beiden
Seiten sicher eingerastet sind. Bei Rückenlehnen mit Verstellung durch Gasdruckfeder
hängen Sie diese durch ziehen des Kugelsperrbolzens aus und klappen Lehne und
Gasdruckfeder nach vorn um.
5.5.3 Antriebsräder
Um die Antriebsräder per Steckachse abzunehmen,
lösen Sie die Bremsen und drücken auf den kleinen
Knopf, der aus der Mitte der Steckachse herausragt
und ziehen das Rad mit gedrücktem Knopf heraus.
Beachten Sie bitte grundsätzlich, dass die
Steckachsen sehr empfindlich sind. Vor dem
Wiedereinsetzen der Räder überzeugen Sie sich,
dass die Feststellbremsen geöffnet sind.
5.5.4 Trommelbremse
Wenn Sie bei Ihrem Siro die Räder abnehmen, liegen anschließend die Bremsbacken
der Tommelbremse ungeschützt frei. Achten Sie bitte darauf, dass die empfindlichen
Bremsbacken nirgendwo anstoßen und/oder beschädigt werden.
User manual of Siro II
page 16 of 43
5.6 Transporting the wheelchair
First of all we have to point out that transporting a person sitting in a wheelchair
signifies a considerable security risk!
In principle, a wheelchair may only be transported unoccupied!
Therefore, transporting and securing a wheelchair in a vehicle, with or without
occupant, is always at your own risk. SORG Rollstuhltechnik GmbH + Co.KG will not
be liable for injured people or damaged materials, resulting from such a transport.
At its immovable points the unoccupied wheelchair must be secured in the vehicle
with suitable securing devices, so it will not put passengers in danger in case of a
sudden brake manoeuvre!
In order to transport a wheelchair as instructed, it must absolutely be equipped with
an AMF-system or a similar retention system with MOT-certificate (Technical Authority
Inspection). In addition to this, the vehicle must be equipped with a headrest, firmly
connected with the vehicle, as well as with an integrated person retention system on
the basis of three point seatbelt if the wheelchair is to be transported together with its
occupant.
More questions? Do not hesitate to contact us, just give us a call:
service phone +49 7254-92790. We will be pleased to give you advice and to refit
your Siro II if necessary.
5.7 Rolling off
Zuerst bringen Sie den Siro II in eine senkrechte Sitzposition. Dann kippt die
Begleitperson den Rollstuhl am Ankippbügel an und zieht ihn rückwärts mit den
Schiebgriffrohren am Hindernis hoch.
Sicherheitshinweise:
Auf keinen Fall an der Schiebestange oder dem Schiebebügelgriff hochziehen. Der
Schiebebügelgriff könnten aus Versehen nicht richtig festgezogen sein, wodurch sich
der Rollstuhl vom Griff lösen und es zu schweren Verletzungen kommen kann.
Zur Sicherheit sollte eine zweite Person unterhalb des Rollstuhls am Rahmen
(nicht an den Beinstützen!) den Vorgang unterstützen und absichern.
5.8 Carrying
Your child should, together with its wheelchair, be carried by an assistant only in
extremely seldom exceptions. To the most part it will be easier rolling off the
wheelchair over the obstacle with its driving wheels! And if it really should be
unavoidable, only frame and back tubes are suited for carrying.
Safety precautions:
The extendable sliding handles, as well, may in no circumstances be used for carrying
the wheelchair. When wheeling with your chair, never use escalators! Not even with an
assistant and especially not being carried! Department stores and public institutions
with escalators always have suitable elevators.
User manual of Siro II
page 17 of 43
6. Brakes
6.1 The knee lever brake is a parking brake for blocking the wheels and may in no
circumstances be used for braking down the wheelchair’s speed!
Each wheelchair is equipped with two knee lever brakes. These
only have the purpose of blocking the wheels in their standstill
position. They are not designed for braking down the wheeling
chair. For this, your child should always use the grip rings and it is
also possible for you to deal with this, using the drum brake.
Please, keep in mind that strong friction will considerably heat
up the aluminium grip rings. For your child’s and your own
safety, always take care that the brakes are working perfectly.
Low air pressure, rainy and wet days, bad treads and a distance
too large between brakes and tyres, all may have an effect on
the functional performance of the brakes.
6.2 Knee lever brake - braked lockable (as option)
The same function as above, yet, in addition lockable by a
safety bolt. For securing the knee lever brake in brakedstate, lock the brake. The bolt will be interlocked as far as it
is not pulled out and turned by 90°. For releasing the brake
again, pull out the safety bolt and at the same time open
the brake.
6.3 Knee lever brake – braked and unbraked lockable (as option)
The same function as above, yet, in addition lockable by a red safety bolt in every
position. This bolt locks automatically in braked- or unbraked-state.
To actuate the brake, you only have to unburden the brake lever and pull the bolt
outwards to get the brake in the needed position. After that the bolt again locks
automatically and so it prevents a change of the brake position.
6.4 Brake lever lengthening (as option)
In case the brake is correctly adjusted but the operation lever
may no longer be reliably operated by manual power, in no
circumstances you may change the distance between brake
dowel and tyre! In this case, your child will need our brake lever
lengthening and your medical centre will be pleased to equip the
wheelchair with it. Please take care that your child is not sitting on
the lengthening – danger of breakage
User manual of Siro II
page 18 of 43
Safety precautions:
• Take care that the tyres always show correct air pressure. Low tyre pressure is not
only a needless obstruction for easy wheeling, it above all reduces the parking
brakes’ functional performance considerably and their operation function may
even be eliminated completely.
• Always take care that the brakes have to operate reliably. Especially when
wheeling on slopes, it must be ensured at any time that the wheelchair will stand
still when the brakes are locked.
• Keep in mind that on rainy and wet days and as the chair is dirty, the braking
operation is considerably changed and reduced.
• After each adjustment of the wheel positions as well as after each tyre-change,
the brakes must be adjusted anew. Have the knee lever brakes adjusted by a
qualified medical service centre.
Advice for your orthopaedic mechanic master:
For adjusting the brake as the tyres are properly
inflated, both filister head screws
(A+B), fixing the brake on the brake support, must
be loosened (max. air pressure on the outer tyre).
The brake must be adjusted in such a way that with
a released brake on 1“-tyres a distance (s) of ca.
15-18mm between brake dowel and tyre surface
exists and a distance of ca. 12-15mm on 1 3/8“tyres. Re-fix the brake in this position with the filister
head screws.
Now do a test on it: the brakes should block the
wheel thus far that the occupied chair can no
longer be wheeled. The wheelchair will instead skid
across the floor with blocked wheels.
User manual of Siro II
page 19 of 43
6.5 Drum brakes
In contrast to the parking brake, the drum brake may be used for braking down your
speed. In addition, our drum brakes have a locking-mechanism with whom they can
be braked in their maximum braking-state. (as an option, a childproof safety catch is
available as well)
•
•
•
•
•
Please keep in mind that the drum brake on its own is not suited for a reliabale
securing of the wheelchair, eg. on slopes. The brake pull rod may unexpectedly
be torn, resulting in bad accidents.
Hence, for your child’s safety, take special care that when locking the drum
brake, the parking brake (knee lever brake) must always be activated as well!
Drum brakes have delicate adjustment alternatives and they require some
service and maintenance, however, they are not dependent on air pressure.
In the second lock-in position of the brake lever, the brake should be so firmly
fixed that the occupied wheelchair may no longer be wheeled (the wheelchair
will instead skid across the floor with blocked wheels).
Please have the drum brakes regularly serviced by your intermediary medical
service centre.
Advice for your orthopaedic mechanic master:
The adjustment of the drum brake is effected by a set screw on the lower end of the
brake pull rod. The brake is adjusted by turning the set screw counter-clockwise.
6.6 Rückrollsperre (optional)
Diese dient dazu, den Rollstuhl z.B. beim Befahren einer Steigung
gegen ungewolltes Zurückrollen zu sichern. Um die Rückrollsperre
zuzuschalten, klappen Sie den Mechanismus an der Kniehebelbremse einfach nach hinten, Richtung Antriebsrad, sodass die
Rolle der Rückrollsperre auf dem Mantel des Rads liegt.
Wenn Sie jetzt, z.B. an einer Steigung, dem Rolli keinen Schub
mehr geben, blockiert die Rückrollsperre automatisch die Räder.
Die Blockierkraft beträgt bei 7° Steigung maximal 90 kg und
verringert sich mit zunehmender Steigung. Um die Rückrollsperre
wieder zu deaktivieren, klappen Sie den Blockiermechanismus
einfach wieder nach vorne oben.
Dringender Sicherheitshinweis:
Reinigen Sie bitte nach jedem Gebrauch die Rolle gründlich
von Sand, Schmutz, etc., damit sie beim nächsten Einsatz nicht
etwa durch Rückstände außer Funktion gesetzt wird. Das
könnte Sie in ganz erhebliche Gefahr bringen und unter
Umständen schwer verletzen.
User manual of Siro II
page 20 of 43
7. Sitzschale – Rücken
Die folgenden Veränderungen sollten Sie bitte unbedingt von einem qualifizierten
Sanitätsfachhändler vornehmen lassen, um die Funktionstüchtigkeit des Stuhls, seinen
therapeutischen Nutzen und vor allem Ihre Sicherheit gewährleisten zu können.
7.1 Anpassen der Standard Rückenlehne
Die Standard-Rückenlehne beim Siro II kann
durch Lösen der Schrauben (A) stufenlos
von 90°-120° dem festen Sitzschalenwinkel
angepasst werden. Die Schrauben müssen
nach der Einstellung wieder fest angezogen werden. Beachten Sie dabei, dass
sich beim Verstellen der Rückenlehne der
Schwerpunkt des Rollstuhles verlagert.
(Siehe dazu auch 9.1 S.25)
Wir raten daher dringend, den Schwerpunkt
bei der hinteren (der am wenigsten steilen)
120° Stellung der Rückenlehne plus der
max. Kantelung zu bestimmen. Dann sind
Sie bezüglich des Schwerpunkts immer auf
der sicheren Seite.
7.2 Anpassen der Rückenlehne mit Gasdruckfeder
Das Rückenteil der Sitzschale wird auf
beiden Seiten mit Verriegelungswinkeln
ausgerüstet, in welchen arretierbare
Rastbolzen eingeschraubt sind.
Die Rastbolzen werden bei der mit
Gasdruckfeder verstellbaren Rückenlehne
an beiden Rückenrohren in die Führungen
auf der Innenseite eingerastet. Dadurch
R as t bo lz en
wird beim Verstellen des Rückenwinkels das
Sitzschalenrückenteil automatisch
mitgeführt. Zum Entnehmen der Sitzschale
sind die Rastbolzen zu entriegeln und zu
arretieren. Beim Einsetzen der Sitzschale
müssen Sie dann in umgekehrter
Reihenfolge verfahren.
U K S it z s c ha le
User manual of Siro II
page 21 of 43
8. Sitzschalenadapter
8.1 Befestigen der Sitzschale auf dem Tragerahmen
Bevor Sie die Sitzschale auf dem Tragerahmen befestigen, schließen Sie bitte
unbedingt die Kniehebel- und Trommelbremse und bringen den Sitzschalenadapter
anschließend über den Kantel-Mechanismus in eine waagerechte Position.
Setzen Sie dann die Sitzschale auf den Bolzen des Adapters (waagerecht), wodurch
der Bolzen der Keilaufnahme entriegelt wird.
Schieben Sie nun die Sitzschale nach hinten, bis der
Verriegelungs-Bolzen der Keilaufnahme hörbar einrastet.
Testen Sie dann, ob die Sitzschale auch fest im Adapter
arretiert ist, indem Sie versuchen, die Sitzschale von
hinten (möglichst weit unten) aus dem Adapter zu
schieben.
8.2 Lösen der Sitzschale
Sie können die Sitzschale natürlich nur dann vom
Adapter lösen (z.B. wenn Sie den Siro für den Transport
klein machen wollen), wenn sie nicht fest mit den
Sitzschalen-Tragerahmen verschraubt ist.
Bevor Sie die Sitzschale abnehmen wollen, stellen Sie die Räder mit den Kniehebelund den Trommelbremsen fest und bringen den Sitzschalen-Tragerahmen immer in
die waagerechte Position. Nehmen Sie die Sitzschale aus der Keilaufnahme, indem
Sie den Sicherungsbolzen mit dem Auslösehebel an der Rückseite des Rollstuhls nach
unten drücken und die Sitzschale nach vorn schieben.
User manual of Siro II
page 22 of 43
9. Einstellung der Radpositionen
9.1 Lochplatte und Radsturz
Die folgenden Veränderungen sollten Sie bitte unbedingt nur von einem qualifizierten
Sanitätsfachhändler vornehmen lassen, um die Funktionstüchtigkeit des Stuhls, seinen
therapeutischen Nutzen und vor allem Ihre Sicherheit gewährleisten zu können.
Die Position der Antriebsräder bestimmen im Zusammenspiel mit den Lenkrädern
die Sitzhöhe, das Sitzgefälle sowie die Lage des Schwerpunktes und damit die
Handhabung des Rollstuhls insgesamt.
Vor dem Hintergrund der äußerst sensiblen Schwerpunktsituation beim Siro II durch die
mögliche Kantelung, empfehlen wir Ihnen dringend, auf eine Veränderung des
Sitzgefälles über diesen Weg zu verzichten.
Die Position der Antriebsräder im Zusammenspiel mit den Lenkrädern
bestimmen die Sitzhöhe, das Sitzgefälle sowie die Lage des
Schwerpunktes und damit die Handhabung des Rollstuhls insgesamt.
Sie können die Adapter für die Steckachsen der Antriebsräder vertikal
in mehreren Positionen der Lochplatte befestigen, um den
Radgrößen anzupassen oder die Sitzhöhe zu beeinflussen. Auch
horizontal können Sie diese in unterschiedliche Positionen bringen,
womit Sie die Lage des Schwerpunkts und damit die Kippsicherheit
des Rollstuhles verändern können.
Werkseitig justieren wir das Sitzgefälle auf 0°. Ein anderes
Sitzgefälle ist sehr leicht über die Kantelung der kompletten
Sitz-Rücken-Einheit zu erreichen. Um dennoch die Sitzhöhe
oder den Grundsitzwinkel zu beeinflussen, empfehlen wir
Ihnen, den Siro nachträglich mit einer Radstandsverlängerung
ausstatten, damit sich der Schwerpunkt nicht ungünstig nach
hinten verlagert.
Unsere Lochplatte ist so konzipiert,
dass Sie jederzeit zwischen Standardund 12"-Rädern wechseln können,
ohne dabei die Lochplatte wechseln
zu müssen. Bringen Sie dafür einfach
den Steckachsen-Adapter in die
gewünschte Position. Beachten Sie,
dass die Schnorr-Sicherungsscheibe
nur einmal verwendet werden soll.
User manual of Siro II
page 23 of 43
Weiterhin besteht die Möglichkeit, den Radsturz zu verändern. Dieser dient der
Seitwärtsstabilität, zum Schutz der Finger vor Quetschungen bei engen Durchgängen
und zur besseren Erreichbarkeit der Greifringe. Hierzu entfernen oder ergänzen Sie
einfach die Abstandhalter zwischen Rahmen und Lochplatte.
Achten Sie bei allen Veränderungen der Antriebsrad-Position darauf, dass der
Schwerpunkt nicht zu weit nach hinten wandert, dass die Bremsen einwandfrei
funktionieren. Testen Sie die neue Radposition immer vorsichtig mit Stützrad und einer
Hilfsperson, damit Sie sich an das neue Fahrverhalten des Rollstuhls gewöhnen können
und ein Umkippen verhindert wird.
9.2 Alteration of the centre of gravity’s position
Fundamentally, Siro’s centre of gravity is situated in front of the wheelchair’s rear
axles. The distance between centre of gravity and rear axles is decisive on the
handling and the safety of the chair. If the axles are right behind the centre of
gravity, the child will wheel and manoeuvre much easier, yet the danger of
overturning increases, above all if the chair is tilted!
Deshalb orientieren Sie sich bei jeder Veränderung der Radposition am größtmöglichen Neigungswinkel des Rückens, also daran, wenn der Rücken maximal nach
unten geklappt und zusätzlich die Sitzeinheit gekantelt ist.
Benutzen Sie dann beim Testen der Kippstabilität unbedingt die Sicherheitsräder und
lassen sich von einer erfahrenen und kräftigen Begleitperson dabei assistieren.
Der Schwerpunkt muss so eingestellt werden, dass bei maximalem Neigungswinkel und
der Originalbelastung die Sicherheitsräder nicht den Boden berühren.
Mit der Radstandverlängerung können Sie den Schwerpunkt des Siro II um 125 mm
nach hinten verlagern und die Kippsicherheit erhöhen. Allerdings vergrößert sich
dadurch auch der Wendekreis.
9.3 Critical height of obstacle
Siro’s critical height of obstacle, with an activated supporting wheel is at the best ca.
2.5 cm.
9.4 Static stability
Siro’s static stability is 4°, i.e. ca. 7%. On steep slopes, the wheelchair together with its
occupant may tilt over and your child may be injured badly!
Safety precautions:
Fundamentally, your child may turn over backwards in its wheelchair as it is getting
over an obstacle. This depends on the wheelchair’s centre of gravity and on the
height of obstacle. Please always make sure that an assistant is helping and
safeguarding the child as it wants to get over high obstacles, e.g. stairs and thresholds.
User manual of Siro II
page 24 of 43
Advice for your orthopaedic mechanic master:
On trying out different positions of the rear wheels, use the supporting wheels on your
first trials and test the behaviour of the centre of gravity at best together with a strong
helper who will safeguard your tests. Beachten Sie bitte auch die veränderte Situation
bei Kantelung.
9.5 Adjustment of front wheel
The following alterations should only be carried out by a qualified medical centre, in
order to ensure the wheelchair’s functional performance, its therapeutical usefulness
and especially your safety.
On changing the extension of the steering wheel onto the frame, the seatangle may
be changed as well. Take care on all alterations that exactly the same adjustments
are carried out on both sides, that the centre of gravity is not shifted too far
backwards (danger of overturning) and that the rotation performance is not
obstructed by the leg support.
Please remember to adjust the correct position of the front wheel adapter after
each modification of the wheel size, of the wheel base etc., otherwise the perfect
wheeling function of the front wheels will no longer be ensured.
Advice for your orthopaedic mechanic
master:
For adjusting the steering wheel adapter,
loosen both screws (A) which are fixing the
front wheel adapter onto the frame. Now
the eccentric disc (B) can be turned until
the front wheel adapter is in an exact
perpendicular position - with a protractor
the angle may be rectified. Do not forget
to re-tighten all screws after having
finished the adjustment!
User manual of Siro II
page 25 of 43
9.6 Supporting wheel (overturning protection)
The purpose of the supporting wheel is to avoid turning over backwards. As depicted in
the illustration, the wheel should be adjusted with a distance of 2-5cm towards the
floor.
For getting over a threshold, the supporting wheel must be swung in by the assistant
and afterwards be swung out again; otherwise the wheelchair may not be wheeled
properly.
The swing jib of the supporting wheel is pivoted in the fixed fitment. In order to swing out
the supporting wheel, push it down with your foot or hand and turn it by 180°. Then
release it, so it may be engaged into the position slot.
If you push down the jib in the fitment, it will come out of its position and may be swung
back. Make sure that the jib is snapped in its end position because a loose wheel may
result in an ankle injury of the assistant.
Wir empfehlen Ihnen bei einem sehr lebhaften Benutzer bzw. bei einer TonusDysstabilität ein zweites Sicherheitsrad, damit Ihnen der Rollstuhl nicht ungewollt nach
einer Seite umkippen kann. Ihr Orthopädiemechaniker baut es Ihnen gerne an Ihren
Siro II. Auch nachträglich!
Advice for your orthopaedic mechanic master:
For adjusting the supporting wheel higher, loosen
screw A and pull out the jib from the spring and
A
the fitment. Re-set screw B in the jib by the
needed punch hole distance. Then assemble
spring and jib into the fitment and re-tighten all
screws properly.
2 - 5 cm
B
User manual of Siro II
page 26 of 43
10. Wheels
10.1 Driving wheels
Fundamentally, the driving wheels are nearly the most delicate parts of the
wheelchair because many factors concerning your safety and the wheeling
performance depend on them!
In this connection, once again we have to point out politely, yet insistent, that the
safety precautions are most important!
•
In case the wheelchair is equipped with pneumatic tyres, please regularly
examine the air pressure (at least every 2 weeks) because the functional
performance of the brakes depends on them! You’ll find details concerning
the required air pressure on the outer tyre.
•
Examine the tyres’ tread regularly because a bad tread will not only affect the
functional performance of the knee lever brake, it may even be completely
eliminated in unfavourable circumstances.
•
This is also valid on puncture resistent tyres!
•
Examine regularly (at least every 3 months) if the spokes are tightened
properly. If necessary, have the spokes re-tightened by your medical service
centre, otherwise the wheel will be a danger.
•
The grip ring’s screws may loosen themselves as they are strained too much.
Then the grip rings as well will be a considerable danger because they may
come off and the wheelchair may not be braked down. Hence, also
examine if the grip rings are tightened properly at least every 3 months and if
necessary, have them re-adjusted by your orthopaedic mechanic master.
•
Please also examine if the spoke covers, if equipped with, are firmly fixed!
Loose ends may result in injuries of your child’s hand. If you need the required
clips or cable fixers, ask your medical service centre or just give us a call, we’ll
send them right away; service phone +49 7254-92790.
10.2 Grip rings
Strong friction will easily heat up aluminium grip rings. Some gloves are surely a good
aid yet your child’s wheelchair may also be equipped with a grip ring coating, even
if the chair is equipped with rehavolution wheels with integrated grip rings.
On standard wheels, the grip ring extension and its distance towards the wheel rim is
a variable feature. For this, the tyre must be removed from the wheel and the grip
ring screws on the rim must be loosened. Then re-assemble the screws in the
needed position and put the tyre back onto the rim. Please take special care that
the rubber band covers the screw heads otherwise the air tube may be damaged.
User manual of Siro II
page 27 of 43
10.3 Spoke cover (as option)
Depending on the design, the spoke cover is attached to the spokes by clips or
cable fixers. For the most part, these parts may not be used twice if the spoke cover
has been removed.
10.4 Wheel cover (as option)
The most important purpose of the wheel cover is to
protect your child’s hands from getting injured, but it will
also keep off the dirt caused by the rotating driving
wheels. At our works, we have adjusted the wheel cover
in the optimum position.
So, if you want to modify the wheel position, you will
also have to re-adjust the wheel cover. For this, the
screws on the wheel cover holder must be loosened,
then get the wheel cover into the needed position by
means of the slotted holes. Re-tighten the screws - and
off it goes!
In case the wheel cover holder is bent out of shape,
please ask your medical service centre, so that the aluminium parts will not be
broken off or the paint layer will not peel off as the part is bent improperly.
User manual of Siro II
page 28 of 43
11. Seatback
11.1 Rückenlehne
Bei Siro II ist die komplette Rücken-Sitz-Einheit um 30° im Winkel
verstellbar. Diese "Kantelung" erfolgt über eine Gasdruckfeder
(optional zwei), deren Auslösehebel sich an den Schiebegriffen
befindet. Standardmäßig wird Siro II mit einer
Rückenbespannung ausgeliefert. Der Rücken ist serienmäßig
mit einer Stabilisierungsstange ausgestattet, um die vertikale
Stabilität des Rollstuhls zu optimieren. Ebenso serienmäßig
kann man bei Siro II den kompletten Rücken um 40° im Winkel
nach hinten verstellen und nach vorne zum Transport
umklappen (siehe hierzu nochmals S.9, 15-16). Wir halten
jedoch zahlreiche Optionen bereit, mit denen Sie Ihren Siro II
exakt nach Ihren Wünschen ausstatten können. Diese sind hier
im Folgenden alle beschrieben.
11.2 Kantelung der Sitzeinheit um 30°
Die Kantelung der Sitz-Rücken-Einheit erfolgt über den
Auslösehebel der Gasdruckfeder an den Schiebegriffen bzw.
Schiebebügelgriff. Ziehen Sie dazu den Hebel und bringen Sie
die Sitzeinheit mit gezogenem Hebel in die gewünschte
Position und lassen den Hebel anschließend wieder los.
Zum Aufrichten des Stuhls ziehen Sie bitte wieder den Hebel
und gleichzeitig den Sitz mit den Schiebegriffen nach oben.
Die Gasdruckfeder unterstützt diesen Prozess auf ideale Weise,
so dass Sie dabei kaum Kraft aufwenden müssen.
Dringender Sicherheitshinweis
Betätigen Sie die Sitzkantelung nur bei aktiviertem Kippschutz (Sicherheitsrad), da Ihnen
sonst der Rollstuhl nach hinten umkippen könnte.
Betätigen Sie die Kantelung niemals während der Fahrt, da die plötzlich veränderte
Schwerpunktlage zu ungewolltem Kontrollverlust führen könnte und sowohl die
Begleitperson wie den Benutzer in äußerst gefährliche Situationen bringen kann.
User manual of Siro II
page 29 of 43
11.3 Rückenverstellung um 30°
Den Rücken des Siro II können Sie stufenlos bis zu 30° der Sitzschale anpassen (siehe
nochmals S. 23)
Wenn Ihre Sitzschale mit einem Gelenk ausgestattet ist und Sie eine RückenwinkelVerstellung mit Gasdruckfeder am Siro II haben, dann können Sie auf die gleiche
Weise wie bei der Kantelung den Rücken sogar um 37° verstellen.
Dringender Sicherheitshinweis
Legen Sie niemals den Rücken nach hinten um, ohne das Sicherheitsrad aktiviert zu
haben, weil Ihnen sonst der Tilty aufgrund des veränderten Schwerpunkts nach hinten
umkippen könnte.
11.4 Armauflage
Die Armauflage können Sie, sofern an
Ihrem Rollstuhl vorhanden, mittels der
Schrauben am Rückenrohr in der Höhe
verstellen. Achten Sie bitte bei der
Einstellung darauf, dass der Abstand zu
den Reifen ausreichend groß bemessen
ist, weil sonst Verletzungsgefahr besteht.
Zum Hochklappen der Auflagen nach
hinten lösen Sie einfach die Sterngriffschraube ein wenig, dann können Sie bequem
an der Seite des Rollstuhls hantieren.
Achten Sie bitte darauf, dass Sie sich dabei wegen der Schwerpunktverlagerung
nicht zu weit über die Seite des Rollstuhls hinauslehnen. Sie könnten sonst mit dem
ganzen Rollstuhl umkippen.
User manual of Siro II
page 30 of 43
12. Sliding handles
The sliding handles of all our wheelchairs have black handle caps at their end made
out of PVC. Those are connected firmly with the sliding rod. In unfavourable
circumstances however, the caps may loosen themselves from the tube – eg. in
cases of heat, humidity or extreme strain.
With insistence we have to warn you:
Never use the sliding handle caps to roll off an occupied wheelchair over an obstacle,
or even worse - on stairs! For this, always use parts which are firmly fixed onto the frame
and make sure that another person is safeguarding the action.
12.1 Ausziehbarer Schiebebügelgriff
B
B
A
F ü hr un gs sch li tz
1 0 0 mm V e rs te ll w eg
A
Bis einschließlich Rückenhöhe 50 cm ist
der Schiebebügelgriff im Rückenlehnenrohr geführt und 100 mm ausziehbar.
Dafür lösen Sie auf beiden Seiten die
Sterngriffschrauben A und verschieben
die Einsteckrohre gleichmäßig in der
Höhe. Achten Sie bitte darauf, dass Sie
dabei den Schiebebügelgriff nicht
"verkanten".
Um zusätzlich die Höhe oder den
zweckmäßigen Winkel des Bügelgriffs
einzustellen, kann er nach dem Lösen
der Sterngriffschrauben B um 317°
verstellt werden.
Sicherheitshinweis:
Achten Sie unbedingt nach jedem Verstellen der Schiebegriffe darauf, dass die
Sterngriffschrauben wieder fest angezogen werden. Nur mit wirklich fest fixierten
Schiebegriffen können Sie den Rollstuhl zuverlässig handhaben. Hängen Sie auch bitte
keine Taschen etc. an die Schiebegriffe, weil ein zusätzliches Beladen die Kippgefahr
enorm erhöht.
User manual of Siro II
page 31 of 43
13. Leg supports
15.1
To your child’s seating convenience, it is most important that its feet are resting on
the leg supports in a relaxed manner. On leg supports that are not properly adjusted,
your child’s knees may fall outwards (due to unsufficient support underneath the
thighs). And unpleasant congestions may occur in the thighs as the leg supports are
too far below.
Do not take an unnecessary risk and have the following adjustments carried out only
by your experienced orthopaedist.
Advice for your orthopaedic mechanic master:
Siro’s leg supports may be adjusted in height in several steps. Hence, the wheelchair
may be adjusted exactly to the needed length not only of the thigh but also of the
lower leg.
Für die Tiefenregulation öffnen Sie die Schraube auf der
Unterseite des Sitzes, bringen die Beinstütze/n in die
gewünschte Position und schrauben sie wieder an.
Für die Höhenregulation lösen Sie die Schraube auf der
Hinterseite der Beinstütze am jeweiligen Gelenkhalter und
bringen die Fußplatte in die gewünschte Position.
Please also keep in mind that the foot rest/s may not bump
into the front wheels! When changing of direction, the front
wheels must always rotate and swing free underneath, i.e.
behind the foot rest, i.e. behind the leg support fitment,
otherwise you may hurt somebody or even have an
accident!
Finally, do not forget to re-tighten all screws and keep in
mind that self-locking nuts with a nylon-inset may be used
only a few times and must then be replaced or else they
will no longer serve their purpose in a reliable way!
15.2 Beinstütze/n hochschwenkbar (optional)
Um die Beinstütze/n hoch zu schwenken, öffnen Sie mit dem Haken zunächst die
Arretierungsbolzen am Rastergelenk, bringen die Beinstütze/n in die gewünschte
Position und verriegeln die Bolzen wieder. Achten Sie bitte darauf, dass die Bolzen
auch wirklich eingerastet sind.
Den Längenausgleich erreichen Sie, indem Sie die Klemmhebel am Beinstützenrohr
einfach lockern, die Fußplatte in die neue Position bringen und den Klemmhebel
wieder fest schließen. Bei geteilten Beinstützen verfahren Sie bitte analog.
User manual of Siro II
page 32 of 43
16 Further options
16.1 Headrests
Our headrests may be adjusted in height, in depth and in angle. For this, loosen the
clamping levers of the connection you want to adjust by turning them slightly. Then
re-tighten them after you have reached the needed position. The headrest’s angle
may be adjusted by slightly loosening the screwed connection and tightening them
as you have reached the needed position.
16.2 Therapy tables
Our therapy tables are adjustable according to your child’s individual needs. For this,
loosen the locking screws of the table fitment at the back tube by slightly turning
them and then adjust the table to the needed height or depth. Furthermore, you
may modify the table-angle by adjusting the locking screw at the table’s underside
(depending on design).
16.3 Safety belt
The safety belt protects your child from falling out of the chair. It is fixed onto the
frame, i.e. onto the seat pan. Always take care that the safety belt is fastened in a
firm and secure manner.
16.4 Tilt clip
The tilt clip is an aid for tilting the wheelchair much easier as the child wants to get
over small obstacles. Your assistant shall carefully operate the tilt clip using his/her
foot and at the same time keep hold of the wheelchair at its sliding clamp.
16.5 Stick holder
The stick holder must only be used for transporting walking aids. Excessive use may
turn over the wheelchair backwards.
16.6 Extension parts of other concerns
For using extension parts of other concerns, such as:
AMF-system, Scalamobil, s-max,
viamobil, E-Fix E20 or e motion M12,
it is necessary to carry out some modifications on the wheelchair frame. If you are
interested, please consult your intermediary medical service centre or us, we’ll be
pleased to give you advice! Service-phone +49 7254-92790.
User manual of Siro II
page 33 of 43
17. Cleaning and maintenance
Please pay attention to the following advice for cleaning and maintenance so that the
new wheelchair will remain the reliable everyday therapeutical partner for a long time.
•
•
•
•
•
•
•
Examine the tyres’ air pressure at least every 2 weeks or according to demand
at regular intervals, as well as the connected function of the brakes. It is
absolutely necessary for your safety. The spokes of the driving wheels should
be tightened once a year. For this, please consult your specialist of the
medical service centre.
Every quarter year you will have to control if all relevant screwed connections
are still tight and if necessary, you will have to tighten them. In doing so, keep
in mind that a safety nut can be used only once without reduction of its safety
efficiency. Your specialist of the medical service centre will answer further
questions.
For cleaning the wheelchair’s frame, only use a gentle cleaner and a soft
cloth.
If the wheelchair has become wet, please dry it as soon as possible with a
clean, soft cloth. Sand, sea water and salt for icy roads will lead to damage
and corrosion. In order to avoid this, clean the wheelchair carefully and
thoroughly after contact with one of these or similar substances.
All ball bearings are maintenance-free. For preserving the running properties
of the plug-in axle permanently, clean the plug-in axles and the fitment
bushes of the plug-in axles every quarter year with a clean and soft cloth and
than use some lubricating oil as grease.
Gradually dirt particles will gather between the steering wheel and the fork of
the steering wheel, which will render the wheel heavy to move. For cleaning,
remove the steering wheel out of the fork and free it from dirt.
In case of a puncture, the tyre may be changed in the same way as on the
usual bicyle. If you’re on your way, it is recommendable to take a puncture
spray or an emergency repair set, or else to have the wheelchair equipped
with puncture resistent tyres
User manual of Siro II
page 34 of 43
18. Warranty statement
18.1 Quality assurance system
When manufacturing our wheelchairs, we pay attention to the greatest possible
quality and comply with the relevant German Industrial Standards (DIN) and ECdirectives. Therefore we have been certified according to DIN EN ISO 9001:2000 in
2003 and we take the stipulated subsequent audits regularly. All our wheelchairs,
mobile standing chairs and seat pan undercarriages meet the requirements of law
concerning medical devices and are correspondingly CE-labelled (special designs
excepted).
18.2 Design life
According to the criteria of
, the International Support Group for the
Rehabilitation of Children and Young People, concerning quality and safety on the
further use of rehabilitation devices, we can as manufacturer of Muby reliably
guarantee a design life of 7 years, provided the wheelchair is used in a normal way
and is regularly serviced by a qualified specialist. Until over this period of time we
can guarantee supplying you with the according spare parts for another 2 years
(special designs excepted).
18.3 Working life
Especially devices in further use demand high standards. Therefore we freely
recommend you, in case of further use of Muby, not to exceed a further working life
of 3 years within the period of design life.
„Working life“ shall be understood by the period of time during which a device has
been permanently in use. Hence, storage periods with the customer and/or the
specialist store can not be called working life. “Design life“ however, means the
period of time which we have defined on the basis of our experience and technical
facts and which should not be exceeded in further use. Yet, we emphasize that this
life span may directly be influenced as it is clearly dependent on service and
maintenance. Under the most favourable conditions the wheelchair’s functionality
may be extended over the defined design life in a reliable way.
User manual of Siro II
page 35 of 43
18.4 Complaints
If you really should have cause for complaint, it goes without saying that we will solve
your problems as soon as possible and replace or repair the defective parts free of
charge. We give you this guarantee for a period of 5 years, however wear and tear
parts as well as all sewed parts are unfortunately excluded (cover cloth for seat and
back, cushions, truss pads, headrest pads).
In order to be served promptly, please enclose with the return the invoice-no., the
order-no. and/or the consignment-no., as well as a short description what has
happened. So we may be able to avoid the failure in the future. We are grateful for
your help. You’ll find the required details on the data plate (example below).
Damage in transit must immediately after receipt and examination of the goods be
communicated to the freight company, otherwise it shall not be liable for the
defective consignment, which is in accordance with the transportation’s general
conditions.
The five-year guarantee period starts with the date of delivery. Please read the
warranty clauses for an exact definition of our guarantee conditions.
18.5 Data plate
The data plate can be found on the lower frame tube.
It contains the following information:
manufacturer, order-no. (Auftr.-Nr.)
design name, (Modell)
type-no. (Typ)
aid index no. / licensing no. (Zul.-Nr.)
max. nominal weight in kg (max. G.)
seat width (SB), seat depth (ST) and back height (RH) in cm.
In order to be served promptly, please indicate the order-no.
in case of a spare part order or complaint. Both last figures
refer to the year of construction.
User manual of Siro II
page 36 of 43
19. Warranty clauses
I. Subject of Warranty
These warranty conditions are valid for wheelchairs from the limited company Sorg
Rollstuhltechnik GmbH & Co. KG. Legal claims out of deficiencies warranty of the
end-user with regard to the medical service centre or other service companies,
responsible for the patient's medical care, will not be affected.
II. Extent of Warranty
Sorg Rollstuhltechnik GmbH & Co. KG grants a warranty period of three years after
first use on frame parts and cross braces in accordance with the conditions from
section III and to the exclusion of section IV. With the warranty conditions, the enduser is granted the right to claim substitute delivery and improvement(s) according
to paragraph 2.
In case production and/or material faults occur two years after first use, Sorg
Rollstuhltechnik GmbH & Co. KG will either replace the wheelchair partly or as a
whole or will repair the defective frame parts and the cross braces. After this
period, Sorg Rollstuhltechnik GmbH & Co. KG shall only be committed to replacing
the defective parts. Further claims for reduction, contract cancellation or
compensation will not be granted.
III. Claim Conditions
In order to put in a claim, the following conditions have to be met:
the wheelchair must be in first use
the wheelchair must be adapted by a specialist centre from the National
Health Service (NHS)
the transmission of the full care must be carried out by the experts from the
NHS with enclosed list of faults
wheelchair adaptations may not exceed the designed completion of Sorg
Rollstuhltechnik GmbH & Co. KG, yet, in exceptional cases they may, as far as
an agreement with Sorg Rollstuhltechnik GmbH & Co. KG has been made
Sorg Rollstuhltechnik GmbH & Co. KG's products may only be repaired and
extended by specifically qualified employees with the exclusive use of original
spare parts.
User manual of Siro II
page 37 of 43
IV. Exclusion Clause
Sorg Rollstuhltechnik GmbH & Co. KG has the right to reject a claim on the
following conditions:
as the claim conditions according to section III are not met
as the reduction of the wheelchair's use feature is based upon unprofessional
use, especially after improper alterations and modifications
as the reduction of the wheelchair's use feature is based upon the usual
process of consumption
as the reduction of the wheelchair's use feature is based upon faulty or
improper storage, transportation or use
as the reduction of the wheelchair's use feature is based upon a change of
the patient's physical constitution, eg. in case of a considerable increase in
weight
as the reduction of the wheelchair's use feature is based upon Force Majeure
or as the wheelchair was wilfully damaged
as Sorg Rollstuhltechnik GmbH & Co. KG determines that the maintenance
regulations and instructions have not been complied with.
V. Liability
Sorg Rollstuhltechnik GmbH & Co. KG shall not be liable in case of negligence
and accepts no responsibility for intentional action of accomplices. Furthermore,
entitlements to compensation are restricted to damages, foreseeable at the
beginning of the obligations' performance.
VI. Additional Provisions
Warranty cases must be communicated within appropriate period.
Replaced parts must be returned to Sorg Rollstuhltechnik GmbH & Co. KG.
Warranty obligations shall be fulfilled in Oberhausen-Rheinhausen, Germany.
These warranty conditions are subject to the civil and commercial laws of
Federal Government of Germany.
VII. Warranty Period for Repairs
The warranty period for repairs will end together with the wheelchair's warranty,
however, will be at least one year.
User manual of Siro II
page 38 of 43
20. Compliance Statement
EC – Compliance Statement
in accordance with Appendix VII of directive
93/42/EEC concerning medical devices
We, Company Sorg Rollstuhltechnik
GmbH & Co.KG, Benzstraße 3,
D 68794 Oberhausen-Rheinhausen,
in sole responsibility as a manufacturer,
declare that our product
Siro II
meets the basic requirements
of the directive 93/42/EEC, Appendix I.
Oberhausen-Rheinhausen, March 13
(signature)
User manual of Siro II
page 39 of 43
21. Warranty of delivery
This wheelchair has been assembled
and inspected with great care!
Our staff stands surety for that with its signature.
Mechanic:
Date
signature
Inspector:
Date
signature
User-chronology
name of user or its legal
representative
1.
date of birth
street
code
2.
3.
Wheelchair handed over by
on
stamp medical service centre
date and signature
Place
User manual of Siro II
22. List of maintenance
maintenance
due:
date,
stamp medical
service centre,
signature
parking brakes and drum brakes
rota of 3 months
date,
stamp medical
service centre,
signature
date,
stamp medical
service centre,
signature
date,
stamp medical
service centre,
signature
maintenance
due:
date,
stamp medical
service centre,
signature
date,
stamp medical
service centre,
signature
all frame parts and welded joints
rota of 6 months
page 40 of 43
User manual of Siro II
22. List of maintenance
maintenance
due:
date,
stamp medical
service centre,
signature
date,
stamp medical
service centre,
signature
date,
stamp medical
service centre,
signature
date,
stamp medical
service centre,
signature
parking brakes and drum brakes
rota of 3 months
maintenance
due:
date,
stamp medical
service centre,
signature
date,
stamp medical
service centre,
signature
all frame parts and welded joints
rota of 6 months
page 41 of 43
User manual of Siro II
page 42 of 43
23. Implemented repair works
description
date
signature
stamp medical centre
User manual of Siro II
page 43 of 43
23. Implemented repair works
Description
date
signature
stamp medical centre