1
T H E
U S E R
G U I D E
Introducing
Hi, welcome to the MantaRay User Guide
Please take the time to read through the Important Safety Information on the following pages
prior to experiencing the (nff)∞ of MantaRay.
What is (nff )∞?
(nff)∞ = Net Fun Factor to the Power of Infinity
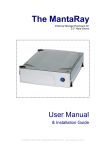
MantaRay is a unique and stylish portable entertainment unit, which allows you to
immerse yourself in a large image on your wall or screen*. It is a video projector with a
series of enhanced features designed specifically for your enjoyment at home, MantaRay
rocks the home entertainment experience!
MantaRay has a stack of applications. It is fully compatible with all games consoles,
DVD players, VCR’s, and cable TV set top boxes. MantaRay also has television reception
capabilities, which enables it to be used as an independent TV.
You don’t need a science degree to operate MantaRay – just plug and play. Clever design
has resulted in user-friendly functionality, with an emphasis on safety.
If you require further information, visit:
www.mantaray.net.au
Enjoy! – It won’t be hard.
*(For best viewing a 1.5m diagonal image is recommended).
Disclaimer
Every effort has been made to ensure that the details in the User Guide are accurate at time of printing.
Page 2
CONTENTS
Introducing MantaRay
Page 2
Important Safety Information
Page 4
Package contents
Page 8
Parts & connections
Page 9
Set Up & Use Instructions
Page 11
Using MantaRay
- for Television reception
Page 12
- with an external video source:
Page 16
DVD player, games console,VCR,
VCD player, satellite or cable TV, digital still camera or video camera
Air filter replacement instructions
Page 18
Lamp replacement instructions
Page 19
Troubleshooting checklist
Page 20
Technical specifications
Page 23
Warranty registration
Page 24
Page 3
IMPORTANT SAFETY INFORMATION
WARNING:
TO REDUCE THE RISK OF FIRE OR
SHOCK HAZARD, DO NOT EXPOSE
THIS UNIT TO RAIN OR MOISTURE.
Page 4
CAUTION:
TO ENSURE PERSONAL SAFETY, OBSERVE THE FOLLOWING
IMPORTANT SAFEGUARDS REGARDING THE USE OF THIS UNIT.
1. Read Instructions
All the safety and operating instructions should be read before MantaRay is operated.
2. Retain Instructions
The safety and operating instructions should be retained for future reference.
3. Observe Warnings
All warnings on the unit and in the Set Up & Use Instructions should be observed and
adhered to.
4. Follow Instructions
The Set Up & Use Instructions should be followed at all times.
5. Operating Surface
Always set up MantaRay on a stable and secure surface. If the surface is unstable, the
unit may fall and be damaged.
6. Power Sources
MantaRay should be operated only from the type of power source indicated on the
marking label and as defined in the User Guide (240V, 50/60 Hz). If you are not sure of
the type of power supply to the place of use , consult your local power company.
When the unit is not in use for a long period of time, disconnect the power cord from
the AC outlet.
7. Power Cord & Connector Lead Protection
Avoid damaging the AC plug, power cord and any connector leads to other electrical
devices. Power-supply cords and connector leads should be positioned so that they are
not likely to be walked on or pinched by items placed on or against them. Take specific
care with the power cord and connector leads at attachment points.
8. Object & Liquid Entry
Never push objects or allow liquids of any kind to enter vents as they may touch
dangerous voltage points or cause a short circuit that may result in fire or electric
shock. Keep all liquids clear of MantaRay.
Page 5
9. Water & Moisture
Do not use MantaRay near water or other liquids. Do not operate this unit in a moist
environment.
10. Heat
It is recommended that MantaRay not be operated at temperatures over 35˚C or
humidity over 85%. The unit should be situated away from any source of heat. Always
position the unit in a well ventilated environment.
11. Ventilation
Keep MantaRay vents clear and uncovered to prevent overheating. For minimal
servicing and to maintain high image quality, we recommend that this unit be used in an
area free from high humidity, dust, and cigarette smoke. When the unit is subjected to
these environments, the filter will require more regular replacement.
12. Lamp Replacement
If the lamp blows, it will remain hot for a short period before it cools down. We
recommend that the user waits at least 10 minutes prior to touching the lamp for
replacement.
13. Lens Cap
Always remove the lens cap prior to use. When MantaRay is not in use, re-fit the
lens cap.
14. Replacement Parts
Only use original manufacturer’s replacement parts, as the use of non-original parts
may damage MantaRay and will void the warranty.
15. High Brightness Light source
Do not shine projector light directly into the eyes – be especially careful that children
do not stare directly into the beam of light.
16. Accidental Damage Requiring Service
Please refer to the Troubleshooting checklist accompanying this User Guide for all
information regarding damage to the unit.
Page 6
17. Servicing
The only MantaRay components that you should attempt to change are the lamp
and air filter. All other servicing requirements must be carried out by an authorised
MantaRay service agent. In the event of a fault, do not attempt to service the
MantaRay or disassemble this unit, as opening or removing covers may expose you
to dangerous voltage or other hazards. It will also void the warranty. Simply unplug the
unit and refer all servicing enquiries to:
Freecall 1800 422 877 (Australia only)
www.mantaray.net.au
18. Cleaning
Unplug MantaRay from the wall outlet before cleaning. Use a damp cloth only for
cleaning external surfaces. Do not use liquid cleaners or aerosol cleaners.
19. General Use
MantaRay is designed to be tilt-adjusted to an angle of 30 degrees. Under no
circumstances should you place anything underneath the front of the base to angle the
unit’s image up higher on the screen/wall.
Page 7
PACKAGE CONTENTS
A
B
C
D
A
1
MantaRay unit in a sealed plastic bag
B
1
Mains power lead
C
1
Connector lead (RCA lead), having 1 yellow, and 1 white plug at
each end
D
2
Adaptors
E
1
Telescopic antenna
1
User Guide
1
Warranty Form, including Warranty Registration Form
Page 8
E
PARTS & CONNECTIONS
3
4
2
1
6
5
8
7
1
Objective lens
2
Focus ring
3
Top vent
4
Filter cover
5
Bottom air vent
6
Tilt adjustment thumbscrew
7
Speaker
8
Lamp access screw
9
Lamp access door
9
Page 9
18
10
11
12
13
14
10
Control buttons
11
Rear vent
12
Mains power socket
13
On/off switch
14
Antenna socket
15
Video input
16
Audio input
17
Headphones / audio out
18
Top vent release slot
Page 10
15
16
17
SET UP & USE INSTRUCTIONS
RECOMMENDED VIEWING & SET UP GUIDELINES
•
MantaRay performs at its best when the image is projected onto a clean
white wall or a non-reflective screen
•
The maximum recommended projected image size from MantaRay is 1.5
metres (measured diagonally)
•
The size of the projected image is dependent upon the distance MantaRay is
placed away from the projection surface (ie. wall or screen)
•
We recommend that for every 1 metre of image projected (measured
diagonally) the viewer should be 3 metres back from the image. These
measurements are to be used as a guide only, and will not be practicable in all
conditions and environments
•
To adjust the image position on the projection surface, support the rear of
MantaRay, and turn the tilt adjustment thumbscrew on the neck of the unit
1⁄4 turn anti-clockwise. Whilst holding MantaRay at the required image height,
re-tighten thumbscrew to lock unit in position. NOTE: Do not over-tighten the
tilt adjustment thumbscrew
•
If headphones are required, plug headphones into the headphones / audio out
socket, designated by a headphones symbol on the base of MantaRay
Page 11
USING MantaRay FOR TELEVISION RECEPTION
The best television reception will always be via an external
antenna socket. If you do not have access to an external
antenna socket, a telescopic antenna has been supplied.
Initial Set Up
1.
2.
3.
4.
5.
Place MantaRay on a flat level surface, facing a wall
or a screen
Insert power lead into MantaRay base
Plug other end of power lead into mains power
outlet and turn switch on at the wall
Remove the lens cap
Insert the supplied telescopic antenna into the
antenna socket and extend for TV reception
NOTE: If a connection to an external antenna is
available, this will provide the best reception. Simply
attach an RF lead (not supplied) to the antenna socket
of MantaRay. Attach the other end to the external
antenna socket
6. Turn on the power switch located on the base
of MantaRay (indicated by having the hyphen symbol
depressed)
Page 12
Tuning, programming and watching television
You may need to tune your MantaRay for television reception in your own region.
MantaRay is controlled by the use of 3 buttons on the back of the fin:
A
Down
left button
B
Mode
centre button
C
Up
right button
A
1.
B
C
Press and hold MODE button and simultaneously press the UP button. The On
Screen Display will show the word ‘SCAN’
You have 2 options:
a. Press the UP button to SCAN for television channels
OR
b. Press the MODE button again to exit from this option. No television
channels will be programmed.
2.
When SCAN, begins the On Screen Display will display ‘SCANNING 1…2…’
3.
When MantaRay detects a television signal, the corresponding audio will be
heard.You have 3 options:
a.
b.
c.
4.
Press UP button to accept the channel
OR
Press DOWN button to reject the channel and continue the SCAN
OR
Press MODE button to terminate the SCAN procedure
Once desired channels have been programmed into the memory, scroll up
or down using the UP and DOWN buttons to select a television channel for
viewing
Page 13
5.
AV will appear on the On Screen Display after scrolling to the highest
or lowest programmed television channel. (AV = Audio Visual. AV is the
appropriate channel when using your MantaRay with other devices, eg. DVD,
VCR, games consoles, etc.)
Image Adjustments
Focus
To adjust focus turn the front lens clockwise or anti-clockwise until a sharp picture
is viewed
Height
To adjust image height:
a. Support the rear of MantaRay
b. Turn the tilt adjustment thumbscrew located between the top and
base 1⁄4 turn anti-clockwise
c. Hold the unit at the required image height
d. Tighten thumbscrew to lock it into position. NOTE: Do not overtighten the tilt adjustment thumbscrew
Additional Adjustments
When there is no On Screen Display, press the MODE button to initiate the following
cycle: VOLUME, CONTRAST, BRIGHTNESS and COLOUR.
a.
b.
a.
b.
VOLUME ADJUSTMENT
Press the MODE button (in the centre) once. The word VOLUME, a green bar,
and a VOLUME SETTING (range of 0-30) will appear on the bottom of the On
Screen Display
Press and release left button to lower VOLUME. The On Screen Display will
display the volume setting. Press and release right button to increase VOLUME.
The number increases or decreases as the VOLUME is adjusted. The green bar
becomes shorter or longer depending on VOLUME selected
CONTRAST ADJUSTMENT
Press the MODE button (in the centre) once. The word CONTRAST, a green
bar, and a CONTRAST SETTING (range of 0-30) will appear on the bottom of
the On Screen Display
Press and release left button to decrease CONTRAST. The On Screen Display
will display the CONTRAST setting. Press and release right button to increase
CONTRAST. The number increases or decreases as the CONTRAST is
adjusted. The green bar becomes shorter or longer depending on CONTRAST
selected
Page 14
a.
b.
a.
b.
BRIGHTNESS ADJUSTMENT
Press the MODE button (in the centre) once. The word BRIGHTNESS, a green
bar, and a BRIGHTNESS SETTING (range of 0-30) will appear on the bottom
of the On Screen Display
Press and release left button to decrease BRIGHTNESS. The On Screen
Display will display the BRIGHTNESS setting. Press and release right button
to increase BRIGHTNESS. The number increases or decreases as the
BRIGHTNESS is adjusted. The green bar becomes shorter or longer depending
on BRIGHTNESS selected
COLOUR ADJUSTMENT
Press the MODE button (in the centre) once. The word COLOUR, a green bar,
and a COLOUR SETTING (range of 0-30) will appear on the bottom of the
On Screen Display
Press and release left button to decrease COLOUR. The On Screen Display
will display the volume setting. Press and release right button to increase
COLOUR. The number increases or decreases as the COLOUR is adjusted.
The green bar becomes shorter or longer depending on COLOUR selected
NOTE:
Each adjustment option will ‘time out’ after approximately 3 seconds. This means,
for example, to adjust CONTRAST, you will need to press the MODE button whilst
the VOLUME option is still visible on the On Screen Display to gain access to the
CONTRAST adjustment
Memory
MantaRay will store the programmed television channels in its memory. If TV is the
last source that you were using prior to turning off MantaRay, it will remember the
particular channel you were viewing. MantaRay will project that channel the next
time it is turned on. A channel will appear in the bottom centre of the On Screen
Display, eg. 2. The icon will disappear after 3 seconds if no control buttons have been
pressed.
Page 15
USING MantaRay WITH AN EXTERNAL VIDEO SOURCE
External video sources may include:
- DVD players
- Games consoles
- VCRs
- Cable & satellite TV
- Digital cameras
- Video cameras
- VCD players
and any other video source with ‘composite video’ or RF out.
Initial Set Up
1.
2.
3.
4.
5.
6.
7.
8.
Page 16
Place MantaRay on a flat level surface, facing a
wall or a screen
Insert power lead into MantaRay base
Plug other end of power lead into mains power
outlet and turn switch on at the wall
Remove the lens cap
Insert the connector leads into the source device
by inserting one of the yellow-ended plugs into the
‘video out’ socket of your source
Insert the white ended plug into the ‘audio out’
socket of your source
Plug the 2 supplied adaptors onto the 2 free ends
of the connector leads
Insert the yellow plug with adaptor attached, into
the video input (marked with a square screen) on
the MantaRay base
9.
Insert the white plug with adaptor attached, into the audio input (marked with
a musical note) on the MantaRay base
* To watch cable/satellite television attach an RF lead into the antenna socket of
MantaRay. Operate MantaRay as per the To Use MantaRay as a television
instructions above
To Use MantaRay
1. Turn on the power switch located on the base of MantaRay, (indicated by
having the hyphen symbol depressed)
2. Press the UP button (right button) on the back of the MantaRay fin until you
select the AV channel option
3. Operate the source device as stipulated in its user manual
4. Refer to Additional Adjustments above to adjust VOLUME, CONTRAST,
BRIGHTNESS and COLOUR
5. Refer to Image Adjustments above to adjust height of the image
*Mains power outlet must be 240V, 50 Hz
Page 17
AIR FILTER REPLACEMENT INSTRUCTIONS
1
3
2
1
Top vent release slot
2
Top vent
3
Air filter
Replace air filter each time you replace the lamp
To replace the air filter follow these simple steps:
1. Unplug the power lead
2. Using the tool from the MantaRay Service Kit (not supplied with unit), insert
flat end of tool into top vent release slot (1) and lever away from the lens until
top vent (2) is released and remove the air filter (3)
3. Place the new air filter (3) into position
4. Replace the top vent (2)
Page 18
LAMP REPLACEMENT INSTRUCTIONS
4
5
6
7
4
Lamp access screw
5
Lamp access door
6
Lamp connector
7
Lamp
CAUTION: If the lamp fails, wait 10 minutes to allow the lamp to cool down prior to
replacing with a new lamp.
1.
2.
3.
4.
5.
6.
7.
8.
Unplug the power lead and all connector leads connected to the MantaRay
Place MantaRay upside down on a clean stable surface. Loosen tilt adjustment
thumbscrew and swivel base for ease of access to lamp access door
Unscrew the lamp access door using the Phillips head end of the tool in the
MantaRay Service kit (not supplied), slide out lamp gently with fingers
Holding the lamp connector in one hand, use the other hand to remove the
lamp from its socket
Avoid touching the filament of the new lamp* (by holding the outer surface of
the lamp), push the new lamp into the 2 centre holes of the lamp connector
Push the newly connected lamp gently back inside the MantaRay body
Close the lamp access door and tighten the screw** using the tool in the
MantaRay Service kit (not supplied)
Remember to replace the air filter at this time (see instructions on previous
page)
NOTE:
* Touching the filament will dramatically reduce the lifetime of the lamp
** Do not over-tighten the tilt adjustment thumbscrew
Page 19
TROUBLESHOOTING CHECKLIST
Please Note: Carefully read through the checklist below before
returning MantaRay to the point of purchase. In an attempt to avoid
unnecessary returns, a service fee may apply in such circumstances.
Issue
No image
Page 20
Solution
•
Make sure that the power lead is properly
connected to a fully functional AC electric
outlet
•
Make sure that the power lead is properly
connected to MantaRay
•
If MantaRay is plugged into a power board,
make sure that the power board is turned on
•
Make sure that you have removed the lens cap
on the lens at the front of MantaRay
•
Make sure that MantaRay is switched ON at
the switch on the base of the unit
•
Check the lamp to ensure that it is securely
connected in the lamp connector. See “Lamp
Replacement Instructions” on page 19 of the
User Guide
•
Make sure that the cable connectors do not
have any bent pins
•
Make sure that the cables are correctly
connected to both MantaRay and the source
device (ie. DVD,VCR etc)
•
Check the lamp to ensure that it has not
blown. If it has, see “Lamp Replacement
Instructions” on page 19 of the User Guide
•
If you are watching TV, check that the
antenna is inserted into the antenna socket
and extended
Issue
No sound
Solution
Adjust volume:
•
Press the middle control button on the back
of the MantaRay fin once to bring up Volume
control on the on-screen display
•
Press left control button on back of fin to
lower the volume
•
Press the right control button on back of fin to
increase the volume
Verify audio / input connections
Adjust audio source
Colour or text not being
projected
You might need to adjust the brightness up or down
until the text is visible
•
Press left control button to darken the image
•
Press right control button to lighten the image
Image isn’t centred on the
wall/screen
Reposition MantaRay
Adjust the tilt of the MantaRay by turning the tilt
adjustment thumbscrew 1/4 turn anti-clockwise and
tilting up or down. Tighten the thumbscrew again
Image is out of focus
Suggested solutions:
•
Adjust the focus by turning the projection lens
to focus the image
•
Check the projection lens to see if it needs
cleaning. If required, do so with a lens cleaning
tissue/cloth
Page 21
Solution
Issue
Projector displays
“bleeding,” or spots.
Adjust the brightness:
•
Press left control button on back of fin to
darken the image
•
Press the right button on back of wing to
lighten the image
•
Check the projection lens to see if it needs
cleaning
Poor colours
Adjust the colour and brightness from the onscreen
menu display. See Display Menus in your User Guide
Lamp blows
Replace the lamp as described in “Lamp Replacement
Instructions” on page 19 of the User Guide
Lines in the picture source Reposition the antenna
(using the TV tuner feature)
Lamp shuts off
A minor power surge may cause the lamp to shut off.
Turn MantaRay off, wait at least one minute, then turn
it back on
Visit www.mantaray.net.au for a full list of FAQs and regularly updated
troubleshooting information
Page 22
TECHNICAL SPECIFICATIONS - MantaRay
Optical
Projection system
Anamorphic LCD technology
LCD panel
181470 pixels, 4:3 aspect ratio
Projection lens
Fixed-focal manual focus
All lenses
Multi coated glass lenses
Lamp
100W TH lamp
Brightness
575 ANSI lumens
Number of colours
16.7 million
Image size
1.5m diagonal (optimum)
Projection distance
3m optimum
Video
Colour System
PAL
Video Input
3.5mm connector
Audio
Audio input
Mono mini jack
Audio output
Mono mini jack
Television
Built-in TV tuner
PAL
Antenna input
RF coaxial, 75 ohm
General
Operation
On screen menu display
Unit colour
Blue & black / dark grey
Internal speaker
2.5W mono
Power input
240V AC, 50Hz
Dimensions
A4 footprint
Weight
3kg
Fan noise
28 dB
Operating temperature
5-35degC
Page 23
WARRANTY REGISTRATION
Fill out the warranty registration card enclosed within the packaging of MantaRay and
send to the following address:
Digislide
PO Box 20
NORTH ADELAIDE SA 5006
ACCESSORIES AVAILABLE
Service Kit
includes:
- Spare lamp
- MantaRay tool for replacing air filter and lamp
- Replacement filter
Distributed by: