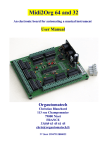
Download Midi2Org_16 - Orgautomatech
Transcript
Midi2Org_16
An electronic board for automating a musical instrument
User Manual
Orgautomatech
Christian Blanchard
113 rue Champommier
79000 Niort
FRANCE
33(0)9 63 45 61 45
[email protected]
N° Siret 39947913800022
Preamble
The Midi2Org_16 board isn't a musical instrument by itself. It is intended to be the
interface between an automated musical instrument and a MIDI data stream.
The MIDI data stream can originate from a computer, an iPhone (or similar), or a
dedicated reader (card SD like MIDILECTOR , or diskette).
It is also possible to drive lights, within the limits of the 35 volts DC, or even 220 AC
but with adapted relays.
The purpose of this user manual is not to explain the MIDI protocol. It is assumed the
user already has a basic knowledge of this.
Main features:
• 16 outputs, 35 volt , 500 ma max. On request this last value can be doubled by
coupling outputs.
• size: 85 * 70 mm
• The MIDI channel can be changed on the card by a push button and LED or by
Midi. This simple procedure is explained later in this document.
Responds to note-on, note-off, all sound off (CC120), all note off (CC123)
Considers note-on with velocity 0 as note-off
Supports MIDI running status
On demand, an output can be configured to respond to sustain (cc64) or
another control change of your choice
• Easy mapping of outputs by «self-learning» or by the freeware “Parametor”.
This simple procedure is explained later in this document.
• Chips are not soldered on the board. In case of an accident (for example a short
circuit in a solenoid) they are very easily replaced.
•
•
•
•
• Protection against bad polarity
• Compatible with every midi files player in respect to MIDI standard
• The MIDI OUT socket acts as a MIDI THRU. That means that every message
that arrived via MIDI IN goes out via MIDI OUT except active sensing
messages.
• For safety, there is a limit on the number of notes that may be played at once
on each Uln. The default setting is 4, and can be changed very easily by the
user with Orgautomatech freeware “Parametor”.
• Pushing any button will stop all notes
• Extra output with different functions to choose and program very easily by the
user himself.
• Solenoids test with just one button. This is explained later.
Electrical features
Each of the 16 outputs can deliver up to 500 ma at a maximum of 35 volts DC. I still
advise to limit the voltage to 24 volts, anyway, you will have difficulties to find a 35
volt supply.
Each ULN (group of 8 outputs) can only carry 2 amps at all. For safety, it is therefore
necessary to limit the number of simultaneous outputs by ULN.
There is only 2 Uln's on board, that's give no more than 4 amps at all, which means 8
simultaneous notes of 500 mA each. There is no need of total limitation on this
board . Default setting is 4 for max ULN outputs. You can change these parameters
with the Orgautomatech freeware: “Parametor”. Look at the user manual for details.
Measure the resistance of your coils and check on the table below, their current
versus voltage that you apply. For example, a 60-ohm coil consumes 0.2 amps at 12
volts and 0.4 volts at 24. In the latter case, you have to limit the maximum number of
simultaneous outputs by ULN to 5 (0.4 * 5 = 2 amps max allowed by ULN).
Look at your MIDI files. They contain only very rarely more than 7 or 8 notes really
simultaneously played . In opposit imagine your sequencer that would begin to send
only "Notes On", the security will apply and your card will not be burned!
Table: The intersection of ohms and volts gives amps. Red: prohibited!
Volts
6
7
8
9
10
11
12
13
14
15
16
17
18
19
20
21
22
23
24
20
0,3
0,35
0,4
0,45
0,5
0,55
0,6
0,65
0,7
0,75
0,8
0,85
0,9
0,95
1
1,05
1,1
1,15
1,2
30
0,2
0,23
0,27
0,3
0,33
0,37
0,4
0,43
0,47
0,5
0,53
0,57
0,6
0,63
0,67
0,7
0,73
0,77
0,8
40
0,15
0,18
0,2
0,23
0,25
0,28
0,3
0,33
0,35
0,38
0,4
0,43
0,45
0,48
0,5
0,53
0,55
0,58
0,6
50
0,12
0,14
0,16
0,18
0,2
0,22
0,24
0,26
0,28
0,3
0,32
0,34
0,36
0,38
0,4
0,42
0,44
0,46
0,48
60
0,1
0,12
0,13
0,15
0,17
0,18
0,2
0,22
0,23
0,25
0,27
0,28
0,3
0,32
0,33
0,35
0,37
0,38
0,4
OHMS
70
0,09
0,1
0,11
0,13
0,14
0,16
0,17
0,19
0,2
0,21
0,23
0,24
0,26
0,27
0,29
0,3
0,31
0,33
0,34
80
0,08
0,09
0,1
0,11
0,13
0,14
0,15
0,16
0,18
0,19
0,2
0,21
0,23
0,24
0,25
0,26
0,28
0,29
0,3
90
0,07
0,08
0,09
0,1
0,11
0,12
0,13
0,14
0,16
0,17
0,18
0,19
0,2
0,21
0,22
0,23
0,24
0,26
0,27
100
0,06
0,07
0,08
0,09
0,1
0,11
0,12
0,13
0,14
0,15
0,16
0,17
0,18
0,19
0,2
0,21
0,22
0,23
0,24
150
0,04
0,05
0,05
0,06
0,07
0,07
0,08
0,09
0,09
0,1
0,11
0,11
0,12
0,13
0,13
0,14
0,15
0,15
0,16
200
0,03
0,04
0,04
0,05
0,05
0,06
0,06
0,07
0,07
0,08
0,08
0,09
0,09
0,1
0,1
0,11
0,11
0,12
0,12
Electrical wiring
There are 2 different voltage requirements on the board: The logic part, and the
solenoid power. The logic part needs a power supply that gives between 8 and 18
volts DC. A small ‘phone charger (8-12 volt, 100 ma) will work fine. Connect the +
(usually the red one) to the + connector on the board and the – to Gnd. There is
protection against polarity reversal, don't worry!
The board can deliver up to 35 volts to the solenoids (with 500mA each). You'll need
to calculate the power requirement of each solenoid, and the number of notes you
want to play simultaneously. Music is not necessarily made more beautiful just
because there are many notes all at once. Even 10 notes playing at once is a very
large number! A laptop power supply giving perhaps 6 amps or so is usually perfect.
If you plan to power your instrument with less than 18 volts, (perhaps with a battery),
then there is no need to have a second power supply for the logic part - simply
connect the terminal marked “+” with “com+” by means of a small wire. There is no
need to connect together the two “–“ terminals as these are already connected on the
board.
Please note than a continuously filtered current must drive the solenoids.
One wire from each solenoid is connected to common bus and to the power + (plus).
The other wire from each solenoid is connected to the corresponding output on the
board. Yes, for the solenoids, the + (plus) is the common wire, not the gnd!
I advice you to put a switch and a fuse on the solenoids “+” line. This switch is
important if you don't have a special supply for board logic part. It allows to start the
logic first and then the coils, which I highly recommend.
You will need a 2.5 mm screwdriver for the terminal blocks.
If something is not clear, please let me know: orgautomatix@orange,fr
MIDI wiring
Connect a DIN 5 pin cable from your computer’s (or SD reader) MIDI out socket and
the Midi2Org MIDI IN socket. If you have another board or another Midi instrument
that you want to play also, you can link the Midi2Org MIDI OUT to the MIDI IN of
this other instrument.
Please note that you should not connect the Midi2Org MIDI OUT to your computer
or midi player’s MIDI IN. This would cause problems, especially if your sequencer
midi thru is on: an undesirable feedback loop would result!
Midi channel setting
The board responds to only one channel at a time. I did this because there is no good
reason to have many channels on the same board. It’s better to have as many boards
as needed: one for each instrument or one for each register on large organs.
The MIDI channel can be set easily, without changing anything else, and without a
computer, directly on the board. This is very useful on stage when you want to play
with others instruments.
To verify or check the board’s currently set MIDI channel: push the «channel» button
once and count the number of red LED flashes. That number is the MIDI channel.
To set the MIDI channel:
• 1. Push the set button – the green led switches off. While holding it down,
press the channel button as many times as the channel you want, for example
once for channel 1, twice for channel 2, etc. Don't be to quick. Each press must
last at least ½ second.
• 2. When it's done, release the setting button. The green led switches on again.
The new channel is recorded.
• 3. You can verify your setting by pushing the channel button and count the
number of red LED flashes
This procedure is needed only once. The board stores the midi channel in memory
even when it is switched off.
Channel can be also simply changed by Orgautomatech freeware “Parametor”.
Notes mapping
Midi2Org_16 can play 16 of the 128 notes of standard Midi. Unless you have asked
for a special programming, the default factory mapping is midi numbers 48 to 111.
If this doesn't suit your needs, you will need to remap the outputs. You'll need to do
this only once. The board will store the notes in memory even when switched off.
Classic procedure:
• 1. Link your computer or SD player Midilector out to the Midi2Org Midi in.
Do not plug anything in the board Midi Out socket.
• 2. Prepare the logic power on the connector, but don't plug it in yet
• 3. Push the setting button and while holding it down, switch on the board.
• 4. Then release the button. The green led should be off.
• 5. Now send the 16 notes you want, starting with the one you want on the
output #1. You can do this with a Midi keyboard, but it’s easier with a midi file
that you have prepared in advance. The notes will be stored in the order you
send them. They can be chromatic or not.
Please ensure the sending midi channel is the one to which the board is set to receive.
Each new note must start at least 10 milliseconds after end of the preceding note.
You could use the sample files I’ve put on my web page and modify each note as
needed. As you send each note, the red led flashes.
Even if you don't need 16 outputs you must send 16 notes. Please do not repeat any.
After the 16th note has been sent, the red led switches off and the green one switches
on. The board is ready to work!
Simplified procedure with “Parametor” (Orgautomatech freeware)
• 1. Link your computer out to the Midi2Org Midi in. Do not plug anything in
the board Midi Out socket.
• 2. Switch on the board (logic part)
•
3.In the software Parametor, fill the boxes with the notes you want regarding of
exit numbers.
4. select "16 outputs" and "setting"
5. Press "Send "
The green LED on the card will shut down, the red LED will light up briefly, then the
green LED is on again, it's done. All in less than a second
You can then check that everything works well, either in sequence (remember to
select "test"), or by individual note by pressing the button corresponding to the output
you want to test. One click plays the note, a second click stop it . You can thus check
each note on your instrument and even tune it.
For detail see also the Parametor user manual.
Programming the maximum number of outputs
Use the Orgautomatech freeware “Parametor”. It has been specialy designed for this
use and it is free ! Have a look at it's user manual for detail.
Programming the extra port:
This port (marked JP01on board) have several functions:
1. Modulate (PWM) the coils voltage with the velocity of the last note .
2. Make a real 17th output with modulated voltage (PWM).Of course you can
choose the note. Can be used for percussion, for example, which requires
power. You will need an extra Mosfet board.
3. Make a real 17th output ON or OFF. Again you can the note.
4. Unused port
All these possibilities require extra board, which I can deliver the schemematic on
request.
To change these settings, use the software Parametor designed specifically for that
and provided to you free of charge. See the “Parametor”user manual for details.
Functioning
If you have a separate supply for board logic part, switch it on first, and then switch
on the solenoids.
A few tenths of second after switching on the board, the green LED lights signifying
that the board is ready to work.
Midi2Org works on only one channel at a time, but sends via MIDI OUT everything
that comes in via MIDI IN except sensing messages. So you can connect another
board (daisy chain) or MIDI device.
When it receives a note on the right channel but out of range (too low or too high) the
red LED flashes.
If you push one or other of the buttons during midi messages reception, this closes
any open outputs and thus fixes a lost ‘note-off’.
Solenoid test procedure
Switch off the board. Push the “channel” button and hold it while switching on the
board. Then release the button. The board switches on each output for ¼ second one
by one in sequence. By listening to the organ you can verify if all the notes are
working. After all the notes have been played, the green led lights and the board is
ready to receive midi commands.
Please note than, if your computer is on, you can make this test with “Parametor”.
Guarantee
The Midi2Org_16 as all the Orgautomatech boards has a one-year guaranty against
manufacturing fault. Each board is tested before shipping. I advice you to try it with
its factory settings before changing the note mapping. You can test it with an
electronic piano or a synthesizer with Midi out socket.
Trouble shooting:
If there seems to be a problem, please check a few things before sending back the
board:
The green LED doesn't light after switching on the board:
• Check the power polarity
• If you are using 2 power supplies (logic and solenoids) try switching on the
logic power supply first.
The green LED lights, but no output seems to work when sending a midi note:
•
Is the midi cable connected to the board’s MIDI IN and in the computer’s
MIDI out? Don't laugh, this happens also to me...
•
The MIDI OUT is used to connect another board or other midi instrument. It
must not be connected to the MIDI IN of the computer!
• Is the board midi receive channel the same as the channel being sent?
• If the red led lights continuously your note mapping is not correct.
An output seems to not work:
• Check your note mapping. In the file you send for auto-learning, each note
must be at least 20 milliseconds after the preceding one.
• If an output stops working suddenly, suspect a problem with a ULN2803.
ULNs are not fragile, but they cannot survive a short circuit. They are on dip
sockets and so are very easily changed. If you have not got a special extractor,
you can use a small screwdriver like a lever, alternately either side, very gently
please. Be careful. Do not bend a pin when inserting the replacement.
•
Before changing a ULN, check the solenoid!
If there was a big problem with solenoid and the output still doesn't work even after
changing the ULN, something else is damaged. Please contact me. Note that
solenoids must be driven by filtered CC. Unfiltered power supplies can affect the
functioning of the board.
Tips & tricks for midi files
On the Internet many midi files can be found, but they do not correspond necessarily
to the range of your instrument, and furthermore, they have passed through the hands
of many people, more or less expert, before you get them. Often they are very
crowded with many midi messages as a result of numerous edits. I don’t advise you
to use them "as is ". It is better to take some time to edit them. It’s pointless for
example to have multiple tracks on 16 channels if you have only a single Midi2Org
board. It would only slow down transmission. The MIDI standard is a "serial"
connection, which means that every message is sent one after another on the same
thread. There is no point in including messages for pitch bend etc. These and many
other messages just add congestion and slow down the system.
The first thing to be done with a new midi file is to clean it of all you do not need.
Keep only the notes and possibly sustain if the card was programmed for a piano (on
request for Midi2Og). If you are using Cubase, the function "erase everything except
note" is very useful for this. I think that Cakewalk should have such a function too.
After working for more than 20 years with MIDI, particularly on stage, I can tell you
that this is very important and will save you many problems, lost notes, and other
issues.
Have fun !
Christian Blanchard
Orgautomatech
Christian Blanchard
113 rue Champommier
79000 Niort
FRANCE
33(0)9 63 45 61 45
[email protected]
N° Siret 39947913800022
Update on 02/22/12


