Download Instructions
Transcript
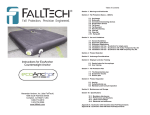
User Instruction Manual WrapTech® 9' Mini Single/Twin Self Retracting Device This manual is intended to meet the Manufacturer's Instructions as required by the American National Standards Institute (ANSI) Z359 and should be used as part of an employee training program as required by the Occupational Safety and Health Act (OSHA). WARNING This product is part of a personal fall arrest, restraint, work positioning, suspension, or rescue system. A Personal Fall Arrest System (PFAS) is typically composed of an anchorage and a Full Body Harness (FBH), with a connecting device, i.e., a Shock Absorbing Lanyard (SAL), or a Self‐Retracting Device (SRD), attached to the dorsal D‐ring of the FBH. These instructions must be provided to the worker of this equipment. The worker must read and understand the manufacturer's instructions for each component or part of the complete system. Manufacturer's instructions must be followed for proper use, care, and maintenance of this product. These instructions must be retained and be kept available for the worker’s reference at all times. Alterations or misuse of this product, or failure to follow instructions, may result in serious injury or death. A Fall Protection Plan must be on file and available for review by all workers. It is the responsibility of the worker and the purchaser of this equipment to assure that workers of this equipment are properly trained in its use, maintenance, and storage. Training must be repeated at regular intervals. Training must not subject the trainee to fall hazards. Consult a doctor if there is reason to doubt your fitness to safely absorb the shock of a fall event. Age and fitness seriously affect a worker’s ability to withstand falls. Pregnant women or minors must not use this equipment. NOTE: For more information consult ANSI Z359 FallTech 1306 South Alameda Street Compton, CA 90221, USA 1‐800‐719‐4619 1‐323‐752‐0066 www.FallTech .com ©2015 MSRD13.1 081315 TABLE OF CONTENTS 1. DESCRIPTION 4.2 Installation And Use Of The SRD 1.1 ANSI and OSHA 4.2.1 Single SRD 2. APPLICATION 4.2.2 Twin SRDs 2.1 Purpose 4.3 Twin SRD Work Zone Transition 2.2 Personal Fall Arrest System 4.4 Locking Speed 2.3 SRD Orientation In Fall Arrest 4.5 Impact Indicator 2.4 Rescue 2.5 Application Limits 5. SPECIFICATIONS 6. MAINTENANCE, SERVICE AND STORAGE 3. SYSTEM REQUIREMENTS 6.1 Maintenance 3.1 Capacity 3.2 Compatibility Of Connectors 6.2 Service 3.3 Compatibility Of Components 6.3 Storage 3.4 Making Connections 7. INSPECTION 3.5 Personal Fall Arrest System 7.1 Pre‐Use Inspection 7.2 Inspection Frequency 3.5.1 Average Arrest Force and Arrest Distance; Zero Free Fall 7.3 Inspection Checklist 3.5.2 Average Arrest Force and Arrest Distance; With Free Fall 7.4 Inspection Results 3.6 Personal Fall Arrest System Anchorage Strength 3.7 Definitions 7.5 Inspection Document 4. INSTALLATION AND OPERATION 4.1 Plan the Personal Fall Arrest System APPENDIX A – Table 1, Table 2, Table 3, Table 4, Chart 1, Figures 1 – 7 4.1.1 Anchorage Structure APPENDIX B – Figures 1 – 13, Acronyms and Abbreviations, Inspection Record 4.1.2 Acceptable Anchorage Range, Diameter of Anchorage Structure, and Free Fall 4.1.3 Calculate the MRFC 4.1.4 Swing Fall 1. DESCRIPTION The FallTech® WrapTech® 9' Mini Single/Twin SRD is a self‐retracting lifeline for those working at height and subject to fall hazards. The WrapTech Single/Twin is specifically designed for instances where traditional anchoring options are limited, for users with a combined (clothing, tools, etc.) total weight of between 130 lbs and 310 lbs only. This manual contains two Appendices, Appendix A and Appendix B. Appendix A contains figures and tables specific to the SRD discussed in this manual. Appendix B contains figures and tables applicable to fall protection equipment in general. All figure, table, and chart references in this manual are to Appendix A unless otherwise noted. All section and paragraph references are to this manual unless otherwise noted. The user of the equipment discussed in this manual must read and understand the entire manual before beginning work. For purposes of this manual, the SRD may be referred to as the SRD, the equipment, the device, the product, or the unit. The terms wrap‐back, wrapped, tied back, and tie‐back are used interchangeably. At the top of the unit, a swiveling steel eye provides an attachment point for a self‐closing and self‐locking connector. The SRD body consists of a nylon housing containing 6' of high performance polyethylene and polyester fiber webbing wound onto a spring‐tensioned drum. The drum is equipped with a pawl system that locks the drum shaft and halts lifeline payout in a fall event. Below the housing is an Energy Absorber (EA) to absorb the energy of a fall event, slowing and arresting the fall. The EA also functions as a fall event indicator. Below the EA is an additional 3' of jacketed webbing, which is equipped with a specially designed connector. The jacket on the lifeline supplies abrasion protection for the lifeline when it's wrapped around an anchorage structure, and provides a 9' operational lifeline. The special carabiner is designed to attach back onto the jacketed portion of the lifeline. The jacketed length of lifeline is not held inside the housing. WARNING The jacket on the lifeline is designed to provide abrasion protection on an anchorage structure. Do not use the jacketed portion of the lifeline on any type of leading edge application. See Tables 1‐A, 1‐B and 1‐D, and Figure 1. 1.1 OSHA Regulations: The device discussed in this manual complies with OSHA 1926.502 Safety and Health Regulations for Construction Fall Protection. The SRD was also tested for Static Strength per ANSI standards and OSHA regulations. See paragraph 3.5.1. 2. APPLICATION 2.1 Purpose: An SRD is designed for use as a component in a PFAS, to provide a combination of worker mobility and fall protection as required for inspection work, general construction, maintenance work, oil production work, or any application where fall protection and worker mobility is required. The SRD is not designed nor suited for use in restraint, personnel riding, suspension, work positioning, or rescue applications. Do NOT use the SRD for these applications except as part of a back‐up PFAS. 2.2 Personal Fall Arrest System: A PFAS is typically composed of an anchorage and a FBH, with an energy absorbing connecting device, i.e., a SAL, an SRD, or a Fall Arrester Connecting Subsystem (FACSS), attached to the dorsal D‐ring of properly fitted and adjusted FBH. All uses and applications of a FBH with this equipment requires the FBH to be properly fitted and adjusted to the user. Failure to properly fit the FBH to the user could result in serious injury or death. The SRD must be installed on an approved FBH. See Section 4 for additional details. 2.3 SRD Orientation In Fall Arrest: The 9' WrapTech SRD is a versatile design, with multiple attachment options with approved connectors, as shown in Table 1B and Figure 2A, Panels A, B, C, and D. 2 081315 Figure 2A, panels E and F depict common INCORRECT connections, such as the SRD attached to an anchorage structure, and the leg end carabiner attached to the portion of the lifeline that is not jacketed. Incorrect attachment may result in severe injury or death. The SRD is always used with the housing end attached to the FBH. The single is attached to the dorsal D‐ring with an approved carabiner. The twin SRD attachment to the FBH is via the provided triple‐locking carabiner with an alignment clip, as shown in Figure 6A. The SRD leg end connector supplied with the unit at shipping is a 5,000 lb. gate carabiner. The lifeline may be wrapped around a suitable anchorage structure, with the connector tied back onto the jacketed portion of the lifeline as shown in Panel C, or connected directly to the anchorage structure as shown in Panel D. 2.4 Rescue: Rescue operations require specialized equipment that is beyond the scope of this manual. Users are required to have a written rescue plan in place, and a method to implement it in a timely manner. 2.5 Application Limits: Take action to avoid moving machinery and thermal, electrical and chemical hazards as contact may cause serious injury or death. Avoid swing falls. Follow the weight restrictions and recommendations in this manual. Be advised, the SRD discussed in this manual is NOT rated for Leading Edge applications. The lifeline is vulnerable to damage by sharp edges and abrasive surfaces and it is very important to avoid these hazards as a damaged lifeline may cause serious injury or death. DO NOT use the SRD to lift tools, materials, or personnel. Remove from service any equipment subjected to fall arrest forces. 3. SYSTEM REQUIREMENTS 3.1 Capacity: The SRD discussed in this manual is rated for a user weight range of 130‐310 lbs. (58.9‐140.6 kg), including clothing, tools, etc. 3.2 Compatibility Of Connectors: Connectors are considered to be compatible with connecting elements when they have been designed to work together in such a way that their sizes and shapes do not cause their gate mechanisms to inadvertently open regardless of how they become oriented. Contact FallTech if you have any questions about compatibility. Connectors must be compatible with the anchorage or other system components. Do not use equipment that is not compatible. Non‐compatible connectors may unintentionally disengage. Connectors must be compatible in size, shape, and strength. Self‐closing, self‐locking snap hooks and carabiners are specified by OSHA and ANSI Z359.12. FallTech offers a wide variety of connectors for use with the 9' SRD. See Table 1‐B and Table 1‐C. 3.3 Compatibility Of Components: Equipment is designed for use with approved components and subsystems only. Substitutions or replacements made with non‐ANSI Z359 compliant components or subsystems may jeopardize compatibility of equipment and may affect the safety and reliability of the complete system. Ensure compatibility between the connectors if non‐FallTech components are used for fall protection. 3.4 Making Connections: Only use self‐locking snap hooks, rebar hooks, and carabiners with this equipment. Only use connectors that are suitable to each application. Ensure all connections are compatible in size, shape and strength. Do not use equipment that is not compatible. Visually ensure all connectors close and lock completely. Connectors (snap hooks, rebar hooks, and carabiners) are designed for use only as specified in this manual. See Figure 13 in Appendix B. 3.5 Personal Fall Arrest System: A PFAS is an assembly of components and subsystems used to arrest a person during a fall event. A PFAS is typically composed of an anchorage and a FBH, with an energy absorbing connecting device, i.e., a SAL, an SRD, or a Fall Arrester Connecting Subsystem (FACSS) attached to the dorsal D‐ring of the FBH. PFAS components used with this equipment must meet applicable ANSI Z359 requirements and OSHA regulations. OSHA requires a personal fall arrest system be able to arrest the worker’s fall with a maximum arresting force of 1,800 lbs., and limit the free fall to 6.5 feet or less. If the maximum free fall distance must be exceeded, the employer must document, based on test data, that the maximum arresting force will not be exceeded, and the personal fall arrest system will function properly. 3.5.1 Average Arrest Force and Arrest Distance; Zero Free Fall: The SRD discussed in this manual has been dynamically tested to ascertain typical, average, and worst case performance attributes when a 310 lb. worker is attached in a zero free fall condition, i.e., an anchorage at the top of the allowable range: Maximum Allowable Free Fall = 0' Longest Arrest Distance = 24.6" Largest Average Arrest Force = 909 lbs Largest Maximum Arrest Force = 1371 lbs 3.5.2 Average Arrest Force and Arrest Distance; With Free Fall: The SRD discussed in this manual has also been dynamically tested to ascertain allowable free fall, typical, average, and worst case performance attributes when a 310 lb. worker is attached in a free fall condition, i.e., an anchorage at the bottom of the allowable range. Maximum free fall allowed = 6.5' Longest Arrest Distance = 51" Largest Average Arrest Force = 903 lbs Largest Maximum Arrest Force = 1320 lbs 3.6 Personal Fall Arrest System Anchorage Strength: An anchorage selected for PFAS application must have the strength to sustain a static load applied in the direction permitted by the PFAS of at least two times the maximum arrest force permitted when certification exists, or 5,000 lbs. (22.2 kN) in the absence of certification. 3.7 Definitions: The following are definitions of terms as defined in ANSI Z359.0‐2012. Authorized Person: A person assigned by the employer to perform duties at a location where the person will be exposed to a fall hazard (otherwise referred to as “user” for the purpose of these instructions). Certified Anchorage: An anchorage for fall arrest, positioning, restraint, or rescue systems that a Qualified Person certifies to be capable of supporting the potential fall forces that may be encountered during a fall or that meet the criteria for a certified anchorage prescribed in this standard. Competent Person: One who is capable of identifying existing and predictable hazards in the surroundings or working conditions which are unsanitary, hazardous, or dangerous to employees, and who has authorization to take prompt corrective measures to eliminate hazards. Harness Stretch: Amount of vertical travel of the Full Body Harness D‐ring during a fall arrest. Qualified Person: A person with a recognized degree or professional certificate and with extensive knowledge, training, and experience in the fall protection and rescue field who is capable of designing, analyzing, evaluating and specifying fall protection and rescue systems to the extent required by this standard. Rescuer: Person or persons other than the rescue subject acting to perform an assisted rescue by operation of a rescue system. 3 081315 4. INSTALLATION AND USE 4.1 Plan the Personal Fall Arrest System: WARNING Do not alter or intentionally misuse this equipment. Consult FallTech when using this equipment in combination with components or subsystems other than those described in this manual. Do not connect rebar hooks, large carabiners, or large snap hooks to the FBH dorsal D‐rings as this may cause a roll‐out condition and/or unintentional disengagement. Use caution. Take action to avoid sharp and/or abrasive surfaces and edges. Avoid electric hazards. Use caution when performing arc welding. Arc flash from arc welding operations, including accidental arcs from electrical equipment, can damage equipment and are potentially fatal. Examine the work area. Be aware of the surroundings and workplace hazards that may impact safety, security, and the functioning of fall arrest systems and components. Hazards may include but not be limited to cable or debris tripping hazards, equipment failures, personnel mistakes, moving equipment such as carts, barrows, fork lifts, cranes, or dollies. Do not allow materials, tools or equipment in transit to contact any part of the fall arrest system. Pay special attention to the lifeline. Do not work under suspended loads. Examine the work area and take action to address hazards. See paragraph 2.5. Falls are a serious hazard when working at height. All anchoring situations present different clearance issues, performance characteristics, and requirements. Table 4 provides typical performance attributes of a FallTech WrapTech 9' Mini Single/Twin SRD, for workers up to a maximum total weight of 310 lbs. The qualified person may find this data useful in determining anchor location. There are several closely related facets of fall hazard management with a PFAS; Anchorage Structure Acceptable Anchorage Range and Free Fall Minimum Required Fall Clearance Swing Fall Installation and Use of the SRD 4.1.1 Anchorage Structure: An anchorage structure is any part of a building or structure on the building that will meet strength requirements. NOTE: OSHA 1926.502 and 1910.66 require that anchors for a PFAS be able to hold at least 5,000 pounds of weight per person or maintain a safety factor of at least two (twice the impact load) under the supervision of a qualified person. Method of attachment to an anchorage structure may be either wrapped back or with the carabiner directly attached. 4.1.2 Acceptable Anchorage Range, Diameter of Anchorage Structure, and Free Fall: Figure 2B, 2C, 2D, and 2E depict a tie‐back anchorage, with a maximum diameter of 11.5" and a minimum diameter of 3". The acceptable anchorage range is the total vertical range of allowable anchor placement, relative to the height of the users FBH D‐ring, ranging from 5' above the D‐ring, to a maximum of 5' below the D‐ring, dependent on the tie‐back anchorage structure diameter. Free fall is the vertical distance the user will travel before the system begins to engage if a fall event occurs. Free fall distance will vary depending on the diameter of the anchorage, and the vertical distance from the anchorage to the FBH dorsal D‐ring. Figure 2B illustrates free fall requirements for an anchorage diameter of 11.5", at various heights. At the highest anchorage, 5' above the FBH D‐ring, there is 0' free fall requirement. As the anchorage level drops to level with the D‐ring, shown as 0', the free fall required increases to 1.5', and at 5' below the D‐ring, the free fall requirement has increased to 6.5'. Figure 2C shows the same information for a 9" diameter anchorage structure, Figure 2D is for a 6" diameter, and Figure 2E is for a 3" diameter anchorage structure. Figure 2F depicts a direct connection of the leg end connector to an anchorage structure. As shown, the acceptable anchorage range is from 5' above the D‐ring, to a maximum of 2' below the D‐ring, and results in a free fall requirement of 6.5'. The maximum allowable free fall for the SRD discussed in this manual is 6.5'. This free fall must be carefully considered when calculating the MRFC. 4.1.3 Calculate the MRFC: To calculate the MRFC use Figure 3 as a worksheet. As shown, there are six metrics; A, B, C, D, E, and F. G is the sum of these values, and G is the MRFC. Metric A is the amount of additional fall clearance due to potential free fall. Metrics B, C, and D are known equipment parameters, with their values filled in. Metric E is the sub‐total of B+C+D. Metric F is additional fall clearance calculation due to Swing Fall. If a swing fall hazard exists, see Chart 1 to derive how much additional fall clearance due to swing fall is required. Place that value in the box for metric F. If there is no swing fall hazard, disregard metric F, and use only A – E. Metric G is the MRFC. WARNING Anchor points located low in the acceptable anchorage range will require additional clear fall distance. Always consider where the anchor point is located and ensure there is adequate clear fall distance to avoid striking an obstruction or a lower level. 4.1.4 Swing Fall: Swing falls occur when the user is not directly under the anchor point as shown in Figure 4A.The force of striking an obstruction or a lower level in a swing fall may result in serious injury or death. This force will increase as the user moves horizontally away from directly under the anchor. Swing falls may also occur when the user is tied off below the FBH D‐ring as shown in Figure 4B. Minimize swing fall by working as close to the anchor point as possible. If you must work away from the anchor, ensure there is adequate fall clearance. Use Chart 1 to find the additional fall clearance required due to swing fall. 4.2 Installation And Use Of The SRD: The SRD is always used with the housing end attached to the FBH. The SRD may be installed and used as a single unit, or as a twin. Installation and use of the SRD discussed in this manual must be on a properly adjusted and fitted FBH. Improper adjustment and fit of an FBH is dangerous and may result in serious injury or death. 4.2.1 Single SRD: A single SRD is attached to the dorsal D‐ring of the user's FBH with an standard approved carabiner and attached to the anchorage is one of two manners. See Figure 5. Follow these steps: 1. Don the harness in accordance with the harness manufacturer’s instructions. 2. Insert the nose end of an ANSI compatible double‐locking carabiner through the SRD housing swivel eye. 4 081315 3. Attach the carabiner to the dorsal D‐ring of the FBH. Ensure the carabiner is oriented with the lock opening up and will take the load along its major axis. Visually ensure the carabiner closes and locks securely. 4. Connect the leg end connector to an approved, suitable anchorage structure by connecting the carabiner to an installed anchor point, or by wrapping the jacketed portion of the lifeline around a pipe, beam, or other suitable structural member, and attaching the special carabiner back onto the jacketed portion of the lifeline. Ensure the carabiner does not contact the bare lifeline outside of the sheathing. Do not connect the carabiner between the energy absorber and the SRD housing. The SRD will pay out and retract smoothly to maintain a taut line during normal movement. Work as directly under the anchor as possible. Be aware that a lower anchorage increases the risk of injury due to swing fall. Additional fall clearance is required. DO NOT use a rebar hook or any large‐throat snap hook or large carabiner to install the housing on the FBH, as this could cause a side load and create an unintentional disengagement. 4.2.2 Twin SRDs: A twin SRD installation is attached to the user's FBH harness with a specially configured oval triple‐locking carabiner, as shown in Figure 6A. Do not attach a twin SRD to the FBH with a standard carabiner. The user must be aware that an incorrect attachment may cause an equipment failure, which may result in serious injury or death. Figure 6B shows common INCORRECT attachments. Ensure your twin SRD is attached correctly. If you have questions regarding the installation of this unit, contact FallTech Customer Service at [email protected] WARNING Ensure the carabiner is correctly installed on the FBH as shown in Figure 6A. Incorrect installation may result in serious injury or death. Figure 6B shows common incorrect connections. Twin Attachment Directly to Anchorage: Attach the leg end connectors, one at a time, directly to an anchorage, overhead or non‐overhead, up to a maximum of 2' below the dorsal D‐ring, by a user with a working weight of up to 310 lbs maximum. Twin Attachment in WrapTech: The twin WrapTech may be wrapped around an anchorage structure, and the special carabiner attached back onto the jacketed portion of the lifeline. Ensure the abrasive protection wrapped portion of the lifeline contacts the anchorage structure. Do not connect the carabiner between the EA and the SRD housing. 4.3 Twin SRD Work Zone Transition: This SRD is designed for attachment of one leg end at a time during work performance. Dual connection is only for transitioning from one work zone to another for 100% tie‐off, as shown in Figure 7. Attach one leg end connector to a suitable anchor. The user may then move to another work location and attach the unused leg to another suitable anchorage. Detach the original attached leg. Repeat the procedure, until the desired work location is reached. 4.4 Locking Speed: The SRD utilizes a centrifugal locking mechanism. The locking function requires a certain payout rate during a fall event to function correctly. If a fall occurs, a pawl mechanism is engaged, which locks the drum, halting payout. The energy absorber deploys to slow and arrest the fall. Certain situations, cramped spaces, shifting footing such as sand, gravel, grain, or a sloped surface may not allow the lifeline to reach sufficient speed to activate the lock mechanism. A clear path is required to assure positive locking of the SRD. 4.5 Impact Indicator: The fall arrest impact indicator for this unit is the EA. Inspect the unit before each use, and in accordance with the instructions in this manual. A deployed shock absorber, or any broken or torn stitching, indicates the SRD has been subjected to fall arrest forces. Remove the SRD from service immediately. DO NOT allow any lifelines to become tangled or twisted together as this may prevent them from functioning normally. DO NOT allow any lifeline to pass under arms or between legs during use. DO NOT clamp, knot, or prevent the lifeline from retracting or being taut. DO NOT lengthen the SRD by connecting a lifeline or similar component. DO NOT allow the lifeline to freewheel back into the housing. Use a tag line if necessary. After a Fall: Remove from service immediately any equipment subjected to fall arrest forces, or exhibiting damage consistent with the effects of fall arrest forces. 5. SPECIFICATIONS See Table 1A, 1B, and 1C. 6. MAINTENANCE, SERVICE AND STORAGE 6.1 Maintenance: Keep the SRD free of contaminants such as paint, grease, grit and chemicals as this may hinder lifeline functions. Keep debris from entering the housing through the lifeline port. Clean the exterior of the unit as required with a soap/water solution. Do not allow any water inside the housing. After cleaning, pull the lifeline all the way out, allow the unit to air dry, then retract the lifeline into the unit. Do not allow the lifeline to freewheel into the housing. Maintain tension. Use a tag line if necessary. DO NOT use heat to dry. DO NOT attempt to disassemble the SRD. Inspect the SRD according to the procedures in Section 7 before returning it to service. If the SRD fails any portion of the inspection checklist, remove it from service, tag the unit as “UNUSABLE”, and consult with the manufacturer. 6.2 Service: Remove the unit from service if it has been subjected to fall arrest force. Tag the unit as “UNUSABLE” to prevent future use. The SRD is not repairable. 6.3 Storage: Hang to store, out of direct sunlight. Ensure the lifeline is completely retracted into the housing. Avoid exposure to chemical agents and vapors, airborne debris, and water ingress. Store units tagged as “UNUSABLE” in a clearly marked area to prevent inadvertent use. Inspect any unit that has been stored for an extended period of time in accordance with the procedures detailed in Section 7. 7. INSPECTION 7.1 Pre‐Use Inspection: Perform an inspection before each use in accordance with the Inspection Checklist procedures in Table 3. See paragraph 7.4. 7.2 Inspection Frequency: OSHA 1910.66 and OSHA 1926.502 require an inspection by an authorized person before each use. In addition, an inspection by a competent person at regular intervals is required. The competent person will use the information in the Inspection Interval Table to determine the inspection frequency. See Table 2. 7.3 Inspection Checklist: Use the Inspection Checklist provided to inspect the SRD. See Table 3. 7.4 Inspection Results: If an inspection reveals defects in or damage to the equipment, inadequate maintenance or activated fall force indicators, mark as “UNUSABLE” and remove the equipment from service. 5 081315 7.5 Inspection Document: Record inspection results on the Inspection Record provided in Appendix B, or on a similar document. 8. LABELS The labels must be present and legible. Style #: 74709TB8 OSHA 1926.502 Max Arrest Distance: 25" (without freefall) Max Free Fall: See User Manual Avg Arrest Force: 909lbs Date of Mfg: AUG 2015 READ AND FOLLOW INSTRUCTIONS SUPPLIED WITH PRODUCT AT TIME OF SHIPMENT. REFER TO INSTRUCTIONS FOR PROPER INSPECTION OF ENERGY ABSORBER. DO REMOVE LABEL MADE IN USA SERIAL NUMBER: 123456789 6 081315 APPENDIX A Table 1A: Specifications for 9ft Mini Tie-back Web SRDs Single-leg SRDs: 74709SA8 74709SB8 74709SG8 Twin-leg SRDs: 74709TB8 Minimum Tensile Strength and Material Maximum User Capacity Standards and Regulations 9’ Mini Tie-back SRD Webbing: 6,100 lbs 100% Dyneema 19mm width Swivel Eye: Alloy Steel 5/8” hole 310 lbs Spring: Rolled Carbon Steel to comply with SRD Housing: Nylon 6/6 and OSHA ANSI Z359.14 OSHA 1926.502 Main Shaft: Alloy Steel Pawls: Stainless Steel Material Specifications for all Swivel-Eye and Leg-End Connector options are shown in Table 1B. The last two digits of each Part # define the Swivel-eye and Leg-end connectors of each configuration. 7 TS9TB1A.1 SRD Configuration and Part Numbers APPENDIX A 081315 Table 1B: Specifications for Single and Twin-leg Swivel Eye and Leg-end Connectors All Anchorage Connectors shown below have 5,000 lb Minimum Tensile Strength and 3,600 lb minimum Gate Strength to comply with ANSI Z359.12 Part # Reference Housing Swivel Eye Connector A Material Gate Opening Integral Housing Swivel Eye only Steel Eye: 5/8” B Carabiner with Captive Pin Steel .95” G Carabiner with Captive Pin (B)* Triple-lock Carabiner with Alignment Clip Connector Aluminum Steel .95” .55” *Carabiner with Alignment Clip joins two (2) Single-leg SRDs into one (1)Twin-leg Part # Reference Leg-End Connector 8 Captive Eye Carabiner Connector 8 Material Gate Opening Steel .85” TS9TB1B.1 Leg-end Tie-back Connector shown below has 5,000lb Minimum Tensile Strength and 5,000lb minimum Gate Strength to comply with ANSI Z359.12 APPENDIX A 081315 Table 1D: Part Numbers with Connector Reference Carabiner with Alignment Clip Alum. Carabiner w/captive pin 5k Tie-back Carabiner” A B (B) G 8 Retracted Length Extended Length Weight Each Lbs 74709SA8 4’ 6” 9’ 0” 2.3 lbs 74709SB8 4’ 10” 9’ 4” 2.9 lbs 74709SG8 4’ 10” 9’ 4” 2.5 lbs 74709TB8 4’ 6” 9’ 0” 5.1 lbs Part #s 9 TS9TB1D.1 Steel Carabiner w/Captive Pin Leg-End Connectors None; Swivel-eye only Housing Swivel Eye Connectors APPENDIX A 081315 Type of Use Application Examples Conditions of Use Inspection Frequency Competent Person Infrequent to Light Rescue and Confined Space, Factory Maintenance Good Storage Conditions, Indoor or Infrequent Outdoor Use, Room Temperature, Clean Environments Annually Moderate to Heavy Transportation, Residential Construction, Utilities, Warehouse Fair Storage Conditions, Indoor And Extended Outdoor Use, All Temperatures, Clean or Dusty Environments Semi-annually to Annually Harsh Storage Conditions, Prolonged or Continuous Outdoor Use, All Temperatures, Dirty Environment Quarterly to Semi-annually Severe to Continuous Commercial Construction, Oil And Gas, Mining 10 T6SRD22.1 Table 2: ANSI Z359.14 SRD Inspection Requirements APPENDIX A 081315 Table 3: Guidelines for SRD Inspection (use Figure 1 where needed) Inspection Pass Fail The web lifeline should extract and retract completely and without faltering and should remain taut under tension without sagging. Extract the web lifeline several inches and apply a firm pull to confirm the SRD locks. The locking should be certain and without skidding. Repeat this lockup at additional places along the lifeline length to confirm the SRD is operating correctly. Examine the load indicator stitch on the lifeline to be certain that it has not been activated. Review the web lifeline closely for wear created by abrasion, tattered yarns, unraveled strands, burns and cuts. Also examine for knots, rust, dirt, paint and grease or oil. Check for damage caused by chemical corruption or excessive heat as evident with discoloration. Examine for extreme exposure to sunlight and ultraviolet as demonstrated by desiccation. Check for any missing or loose screws or nuts and any deformed or damaged components. Examine the external housing for cracks, breaks or warping. Examine the overall SRD unit for any indications of deterioration or damage. All labels must be intact and totally readable (see Section 8) 11 T6SRD33.1 Review the integral Swivel Eye and Connector for damage and deformation. The Swivel Eye should rotate smoothly and be joined firmly to the housing. The Connector should also rotate smoothly within the Swivel Eye. APPENDIX A 081315 Table 4: 9ft Tie-back Web SRD Typical FallTech Performance Attributes Maximum Values of Testing User Condition Arrest Distance Average Arrest Force Maximum Arrest Force 310 lbs with *zero Free Fall 19” 833 lbs. 1,153 lbs 310 lbs with *zero Free Fall 25” 909 lbs. 1,371 lbs 310 lbs *6½’ Free Fall 48” 877 lbs. 1,304 lbs 310 lbs *6½’ Free Fall 51” 909 lbs. 1,320 lbs User Condition Arrest Maximum Average Distance Arrest Force Arrest Force * See Figures 2B thru 2F for Free Fall distance concerns 12 APPENDIX A 081315 TS9TB44.1 Average Values of Testing G A B J H FS9TB1.1 A B C C D K D E E F F A Integral Swivel Eye F Leg-end Connector B Unit Housing G Triple-lock Carabiner C Web Lifeline H Carabiner Body D Energy Absorber J Alignment Clip E Jacketed Tie-back Leg K Triple-lock Gate 13 TS9TB1.1 Figure 1: About 9’ Tie-back Web SRDs APPENDIX A 081315 A Figure 2A: 9’ Tie-back SRD Orientation and Use A Single-leg Tie-back SRD Attachment to Dorsal D-ring B Twin-leg Tie-back SRD Attachment to Dorsal D-ring C Correct- Tie-back Connection to Jacketed Leg Only D Correct- Direct Connection to Anchorage B E Incorrect- Attach Single-leg Tie-back SRD to Anchorage F Incorrect- Tie-back Carabiner connected to Lifeline D C F INCORRECT INCORRECT FS9TB2A.1 E TS9TB2A.1 Incorrect Orientation and Use 14 APPENDIX A 081315 FF AC AC 6” Diameter of Structure FF AC 0’ 5’ 0’ 5’ 0’ 5’ 0’ 0’ 0’ 4’ 0’ 4’ 0’ 4’ 3’ 0’ 3’ 0’ 3’ 2’ ½’ 2’ 1’ 2’ ½’ 1’ 1½’ 1’ 2’ 1’ 1½’ 0’ 2½’ 0’ 3’ 0’ 2½’ -1’ 3½’ -1’ 4’ -1’ 3½’ -2’ 4½’ -2’ 5’ -2’ 6’ -3’ -3’ 5½’ -3’ 5½’ -4’ 6½’ -4’ 6½’ -5’ FF 3” Diameter of Structure AC 0’ 5’ 0’ Non-Tieback Anchorage FF AC 0’ 5’ 4’ ½’ 4’ 1’ 3’ 1½’ 3’ 2’ 2’ 2½’ 2’ 3’ 1’ 3½’ 1’ 4’ 0’ 4½’ 0’ 5’ -1’ 5½’ -1’ -2’ 6½’ -2’ 6’ Figures 2B thru 2F: Anchorage Connection and Free Fall AC Anchorage Connection: Distance above or below Dorsal D-ring FF Free Fall: Distance to be added to Minimum Required Fall Clearance calculation in Figure 3A and3B; resulting from diameter of Tie-back anchorage structure and distance above or below dorsal Dring WARNING The maximum User Capacity for these Tie-back SRDs is 310lbs and therefore strictly applies to the above figures. The maximum anchorage distance above or below the User’s dorsal D-ring is limited to the diameter of the Tie-back anchorage structure. Similarly, with a maximum Free Fall distance of 6½’, the anchorage distance (above or below the dorsal D-ring) and the diameter of the anchorage structure must be strictly understood and observed. 15 TS9TB2BF.1 Figure 2F: Direct Anchorage FS9TB2E.1 Figure 2E: Tie-back Anchorage FS9TB2F.1 4½’ APPENDIX A 081315 FS9TB2D.1 9” Diameter of Structure Figure 2D: Tie-back Anchorage FS9TB2C.1 11½” Diameter of Structure FF Figure 2C: Tie-back Anchorage FS9TB2B.1 Figure 2B: Tie-back Anchorage 1 2 A G B C E DS9TB3.1 D 3 310 lbs Maximum User Capacity User Must Calculate for A and F Figure 3: 9’ WrapTech Tie-back SRD Minimum Required Fall Clearance * Additional Fall Clearance Calculation due to potential Free Fall (use Figures 2B thru 2F to find Free Fall distance) B 4 ft C 1 ft D 1½ ft E 6½ ft SRD Arrest Distance D-ring Shift and Harness Stretch Safety Factor Sub Total- Minimum Required Fall Clearance without Free Fall or Swing Fall (sum of B, C and D only) F ** Additional Fall Clearance Calculation due to Swing Fall (use Chart 1 to find Swing Fall distance) G Total Minimum Required Fall Clearance Including sub-total E + User Calculations A + F (Using Figures 2B thru 2F and Chart 1) 1. Overhead Anchorage 2. Walking/Working Surface 3. Nearest Lower Level or Obstruction TS9TB3.1 A * Use Figures 2B thru 2F to calculate increased Free Fall distance * Use Chart 1 to calculate Additional Fall Clearance due to Swing Fall 16 APPENDIX A 081315 Overhead Anchorage B C 9’ Tie-back SRD- Direct Connect to Anchorage Walking/Working Surface D Swing Fall Impact after fall event E Next Lower Level or Obstruction See Chart 1 for additional Swing Fall hazard due to increased Fall Distance A B TS9TB4A.1 A DS9TB4A.1 Figure 4A: Swing Fall Hazards Overhead Direct Connect Anchorage D C E Below Dorsal D-ring Anchorage/Walking Working Surface B 9’ Tie-Back SRD- Tie-back Connect to Anchorage C Swing Fall Impact after fall event See Chart 1 for additional Swing Fall hazard due to increased Fall Distance B TS9TB4B.1 A DS9TB4B.1 Figure 4B: Swing Fall Hazards - Below D-ring Tie-back Anchorage A C 17 APPENDIX A 081315 Chart 1: Additional Required Fall Clearance Due to Swing Fall (ft) 0’ 0’ 0’ 0’ 6’ 6’ 6’ 6’ 6’ 6’ 6’ 1’ 0’ 0’ 0’ 0’ 0’ 1’ 1’ 6’ 6’ 6’ 6’ 6’ 1’ 1’ 0’ 0’ 0’ 0’ 0’ 1’ 1’ 2’ 6’ 6’ 6’ 6’ 2’ 1’ 1’ 0’ 0’ 0’ 0’ 0’ 1’ 1’ 2’ 2’ 6’ 6’ 6’ 3’ 2’ 1’ 1’ 0’ 0’ 0’ 0’ 0’ 1’ 1’ 2’ 3’ 4’ 6’ 6’ 4’ 3’ 2’ 2’ 1’ 0’ 0’ 0’ 0’ 0’ 1’ 2’ 2’ 3’ 4’ 5’ 6’ 6’ 6’ 6’ 6’ 6’ 8’ 6’ 6’ 6’ 6’ 6’ 1’ 7’ 6’ 6’ 6’ 6’ 2’ 6’ 6’ 6’ 6’ 2’ 5’ 6’ 6’ 4’ 5’ 4’ 3’ 6’ 6’ 5’ 4’ 3’ 2’ 1’ 1’ 0’ 0’ 0’ 1’ 1’ 2’ 3’ 4’ 5’ 6’ 6’ 2’ 7’ 6’ 5’ 4’ 3’ 2’ 2’ 1’ 0’ 0’ 0’ 1’ 2’ 2’ 3’ 4’ 5’ 6’ 7’ 1’ 2’ 3’ 4’ 5’ 6’ 7’ 8’ 1’ 8’ 7’ 6’ 5’ 4’ 3’ 2’ 1’ 0’ 0’ 0’ 0’ 9’ 8’ 7’ 6’ 5’ 4’ 3’ 2’ 1’ 0’ 1’ 2’ 3’ 4’ 5’ 6’ 7’ 8’ 9’ -1’ 9’ 8’ 7’ 6’ 5’ 4’ 3’ 2’ 1’ 0’ 1’ 2’ 3’ 4’ 5’ 6’ 7’ 8’ 9’ -2’ 9’ 8’ 7’ 6’ 5’ 4’ 3’ 2’ 1’ 0’ 1’ 2’ 3’ 4’ 5’ 6’ 7’ 8’ 9’ -3’ 6’ 8’ 7’ 6’ 5’ 4’ 3’ 2’ 1’ 0’ 1’ 2’ 3’ 4’ 5’ 6’ 7’ 8’ -4’ 6’ 8’ 7’ 6’ 5’ 4’ 3’ 2’ 1’ 0’ 1’ 2’ 3’ 3’ 4’ 5’ 6’ 7’ 8’ 6’ 6’ -5’ 6’ 5’ 7’ 6’ 5’ 4’ 3’ 2’ 1’ 0’ 1’ 2’ 3’ 4’ 5’ 6’ 7’ 6’ 6’ CS9TB1.1 0’ 9’ Any Connection More than 5’ Below User’s Dorsal D-Ring is Not Allowed -6’ 6’ 5’ 5’ 6’ 5’ 4’ 3’ 2’ 1’ 0’ 1’ 2’ 3’ 4’ 5’ 6’ 6’ 5’ 5’ -7’ 6’ 5’ 5’ 5’ 5’ 4’ 3’ 2’ 1’ 0’ 1’ 2’ 3’ 4’ 5’ 6’ 6’ 5’ 5’ -8’ 6’ 5’ 5’ 5’ 5’ 4’ 3’ 2’ 1’ 0’ 1’ 2’ 3’ 4’ 5’ 5’ 6’ 5’ 5’ -9’ 6’ 5’ 5’ 5’ 5’ 5’ 5’ 2’ 1’ 0’ 1’ 2’ 6’ 6’ 5’ 5’ 6’ 5’ 5’ 9’ 8’ 7’ 6’ 5’ 4’ 3’ 2’ 1’ 0’ 1’ 2’ 3’ 4’ 5’ 6’ 7’ 8’ 9’ X- Axis: Lateral Work Zone Radius (ft) Using Chart 1 for Additional Fall Clearance Key to Work Zone Areas: = Allowable Use Area = Cautionary Use Area = Not Allowed Use Area Getting Started: Locate the center 0’ cell shown in Chart 1 at the intersection of the X and Y axes; this represents the location of the Dorsal D-Ring on the User’s FBH. Overhead (above the Dorsal D-Ring) Starting at the center 0’ cell, follow the arrows: EXAMPLE: With a 9’ Tie-back SRD connected to the Dorsal D-ring on an FBH, User connects to an anchorge 3’ overhead (up the Y axis) and 3’ laterally (along the X axis). This intersection shows 1’ of additional Fall Clearance needed which is caused by Swing Fall. This additional 1’ must be added to the Minimum Required Fall Clearance calculation shown in Figure 3 Non-Overhead (below the Dorsal D-Ring) Starting at the 0’ cell, follow the arrows: EXAMPLE: With 9’ Tie-back SRD connected to the Dorsal D-ring on a FBH, User connects to an anchorage 2’ below the dorsal d-ring (down the Y axis) and 4’ laterally (along the X axis). This intersection shows 4’ of additional Fall Clearance needed which is caused by Swing Fall. This additional 4’ must be added to the Minimum Required Fall Clearance calculation shown in Figure 3 18 TS9TB1.1 Y-Axis: Location of Anchorage Attachment Point Relative to Dorsal D-Ring on FBH (ft) Limited to 310 lb Max User Weight APPENDIX A 081315 Anchorage B 5k Tie-back Leg End Connector C Jacketed Tie-back Leg D External Shock Absorber E Web Lifeline F SRD Body/Housing G SRD Integral Swivel Eye H Carabiner w/captive pin I Dorsal D-ring on FBH B C D E TS9TB5.1 A FS9TB5.1 A Figure 5: Attaching Single-leg Tie-back SRD to FBH F G H I 19 APPENDIX A 081315 (A) (B) (C) (D) 2. Prepare FBH and Preliminary Attachment (E) (F) (G) DS6M7A.1 1. Prepare Twin-leg SRD for Attachment TS9TB6A.1 Figure 6A: Installing 9’ Tie-back Twin-leg SRD to Dorsal D-ring 2. Prepare FBH and Preliminary Attachment: (E) Lift the Dorsal D-ring to the up-pointing position then loosen the intersection of the two web straps that pass through the D-ring slot to create slacked loops of about 2” or 3”. (F) With only one SRD unit still connected to the Carabiner, reopen the gate and insert the nose of the Carabiner into the two intersecting slacked loops; (G) allow the gate to close while the Alignment Clip remains positioned on the gate only. 1. Prepare Single-leg SRD for attachment: (A) Open the Alignment Clip from the reverse side by pushing on the top ears to release and (B) allow clip to rotate downward; next, (C) rotate to one side one SRD unit and the clip then open the triple-lock gate on the Carabiner and remove the other SRD unit. (D) Allow gate to close. 3. Reinstating 2nd SRD Unit (H) (I) 4. Closing and Securing (J) (K) 3. Reinstating 2nd SRD Unit: (H) Now rotate the Carabiner and Alignment Clip 1/4 turn to the horizontal position; while keeping slack in the web loops, the gate and clip will end up positioned below the loops. (I) Keeping the Carabiner horizontal, rotate the SRD unit away from the gate and slide the Alignment Clip off and away from the gate as well. (J) Open the Carabiner gate and insert the nose through the swivel eye of the second SRD unit then allow the gate to close to capture the second SRD. (K) Next, reposition the Alignment Clip back onto the gate. 20 (L) (M) 4. Closing and Securing: (L) With the Alignment Clip on the gate, rotate the clip upward; then tightly pinch the two web straps together and insert between the ears of the clip and snap the ears to the body of the Carabiner. (M) Lastly, remove the slacked loops from the intersecting web straps by pulling up through the D-ring slot and the D-ring holder. Check the gate for full closure and the Alignment Clip to be securely snapped to the Carabiner body. Don your FBH and adjust as needed for proper fit. APPENDIX A 081315 INCORRECT INCORRECT INCORRECT CORRECT DS6M7B.1 INCORRECT A DO NOT Attach directly to the Dorsal D-ring B DO NOT Attach to only one of the intersecting web straps C DO NOT Attach to intersecting web straps over/above the Dorsal D-ring D DO NOT Attach anywhere outside the intersecting web straps E CORRECT attachment to both intersecting web straps with Dorsal D-ring in the up position 21 TS9TB6B.1 Figure6B: Incorrect install 9’ Tie -back Twin Leg APPENDIX A 081315 B Starting Lateral Movement C Momentary Transition D Ending Lateral Movement E After Lateral Movement DS6M8.1 Before Lateral Movement Figure 7: Use of SRD for 100% Tie-off Lateral movement A Orginal Work Location before lateral movement B Starting lateral movement; one leg connected to Anchor C During lateral move; both legs connected in momentary transition between Anchors D Ending lateral movement; one leg connected to Anchor E New Work Location after lateral movement 22 TS6M8.1 A APPENDIX A 081315 APPENDIX B Fig. 1 - Minimum Clear Fall Requirement: 6 ft Shock Absorbing Lanyard Measured from Overhead Anchorage Connector A 6 ft B 4 ft C 1 ft D 5 ft E 1½ ft F Length of Shock Absorbing Lanyard Original working length before a fall event occurs/before activation of energy absorber Elongation/Deceleration Distance Maximum allowable amount of elongation that may payout from the energy absorber upon activation during a fall event Harness Stretch and Dorsal D-Ring Shift Combined amount of harness webbing elongation and dorsal back D-ring up-shift during entire fall event Height of Dorsal D-ring Typical average height of the dorsal D-Ring on a user’s full body harness measured from the walking/working surface up Safety Factor Added length to account for other factors such as an improperly adjusted harness, actual worker height or worker weight 17½ ft Total Minimum Clear Fall Distance Required 1. Overhead Anchorage 2. Walking/Working Surface 3. Nearest Lower Level or Obstruction Fig. 1 - Requerimiento mínimo de claridad: línea de vida con amortiguación de impactos de 6 pies B 4 pies Distancia de elongación/desaceleración Cantidad máxima permitida de elongación que se puede emplear del (1,2 m) amortiguador de energía al activarse durante un evento de caída C 1 pie Cambio del anillo en “D” dorsal y tramo del arnés combinada de la elongación de la red del arnés y el cambio del (0,3 m) Cantidad anillo en “D” dorsal durante un evento de caída completa D E F 5 pies Altura del anillo en “D” dorsal Altura típica promedio del anillo en “D” dorsal en el arnés de cuerpo completo (1,5 m) de un usuario, medida desde la superficie para caminar/trabajar hacia arriba 1½ pies Factor de seguridad Longitud agregada para contar otros factores tales como un ajuste (0,5 m) inapropiado del arnés, la altura real del trabajador o el peso del trabajador 17½ pies Distancia mínima total de caída despejada requerida (5,3 m) TUCF1.2 6 pies Longitud de la línea de vida con amortiguación de impactosLongitud de trabajo original antes de ocurrir un evento de (1,8 m) caída/antes de la activación del amortiguador de impactos DUCF1.1 Medida desde el conector de anclaje superior A 1. Anclaje superior 2. Superficie para caminar/trabajar 3. Nivel inferior más cercano u obstrucción Fig. 2 - Minimum Clear Fall Requirement: 12 ft Free Fall Lanyard Measured from Foot Level Anchorage Connector Length of Shock Absorbing Lanyard A 6 ft B 5 ft C 1 ft D 5 ft E 1½ ft F 18½ ft Original working length before a fall event occurs/before activation of energy absorber Elongation/Deceleration Distance Maximum allowable amount of elongation that may payout from the energy absorber upon activation during a fall event Harness Stretch and Dorsal D-Ring Shift Combined amount of harness webbing elongation and dorsal back D-ring up-shift during entire fall event Height of Dorsal D-ring Typical average height of the dorsal D-Ring on a user’s full body harness measured from the walking/working surface up Safety Factor Added length to account for other factors such as an improperly adjusted harness, actual worker height or worker weight Total Minimum Clear Fall Distance Required 1. Walking/Working Surface 2. Nearest Lower Level or Obstruction Fig. 2 - Requisito mínimo de caída despejada: línea de vida con amortiguación de impactos para caídas de hasta 12 pies Medida desde el conector de anclaje superior C D E F 1 pie Cambio del anillo en “D” dorsal y tramo del arnés combinada de la elongación de la red del arnés y el cambio del (0,3 m) Cantidad anillo en “D” dorsal durante un evento de caída completa 5 pies Altura del anillo en “D” dorsal Altura típica promedio del anillo en “D” dorsal en el arnés de cuerpo completo (1,5 m) de un usuario, medida desde la superficie para caminar/trabajar hacia arriba 1½ pies Factor de seguridad Longitud agregada para contar otros factores tales como un ajuste (0,5 m) inapropiado del arnés, la altura real del trabajador o el peso del trabajador 18½ pies Distancia mínima total de caída despejada requerida (5,6 m) 1. Superficie para caminar/trabajar 2. Nivel inferior más cercano u obstrucción 23 DUCF2.1 B TUCF2.2 A 6 pies Longitud de la línea de vida con amortiguación Longitud de trabajo original antes de ocurrir un evento de caída/antes (1,8 m) de la activación del amortiguador de energía 5 pies Distancia de elongación/desaceleración Cantidad máxima permitida de elongación que se puede emplear del (1,5 m) amortiguador de energía al activarse durante un evento de caída APPENDIX B 03122014 Fig. 3 - Minimum Clear Fall Requirement: ANSI Class A Self-Retracting Device A 2 ft B 1 ft C 1½ ft D 4½ ft Activation/Deceleration Distance Maximum allowable length of cable or web that may payout from the SRD once deceleration of the user has begun and after a fall event occurs Harness Stretch and Dorsal D-Ring Shift Combined amount of harness webbing elongation and dorsal D-ring upshift during entire fall event Safety Factor Added length to account for other factors such as an improperly adjusted harness, actual worker height or worker weight Total Minimum Clear Fall Distance Required 1. Overhead Anchorage 2. Walking/Working Surface 3. Nearest Lower Level or Obstruction Fig. 3 - Requisito mínimo de caída despejada: Dispositivo auto-retráctil Tipo A de ANSI A Distancia de activación/desaceleración 2 pies Distancia máxima permitida del cable o red que puede emplearse (0,6 m) desde el SRD una vez que la desaceleración del usuario ha comenzado y B 1 pie Cambio del anillo en “D” dorsal y tramo del arnés Cantidad combinada de la elongación de la red del arnés y el cambio del (0,3 m) anillo en “D” dorsal durante un evento de caída completa C 1½ pies Factor de seguridad Longitud agregada para contar otros factores tales como un ajuste (0,5 m) inapropiado del arnés, la altura real del trabajador o el peso del trabajador D 4½ pies (1,4 m) Distancia mínima total de caída despejada requerida TUCF2A.2 DUCF2A.2 después de que ocurra un evento de caída 1. Anclaje superior 2. Superficie para caminar/trabajar 3. Nivel inferior más cercano u obstrucción Fig. 4 - Minimum Clear Fall Requirement: ANSI Class B Self-Retracting Device A 4½ ft B 1 ft C 1½ ft D 7 ft Activation/Deceleration Distance Maximum allowable length of cable or web that may payout from the SRD once deceleration of the user has begun and after a fall event occurs Harness Stretch and Dorsal D-Ring Shift Combined amount of harness webbing elongation and dorsal D-ring upshift during entire fall event Safety Factor Added length to account for other factors such as an improperly adjusted harness, actual worker height or worker weight Total Minimum Clear Fall Distance Required 1. Overhead Anchorage 2. Walking/Working Surface 3. Nearest Lower Level or Obstruction Fig. 4 - Requisito mínimo de caída despejada: Dispositivo auto-retráctil Tipo B de ANSI A Distancia de activación/desaceleración 4½ pies Distancia máxima permitida del cable o red que puede emplearse (1,4 m) desde el SRD una vez que la desaceleración del usuario ha comenzado y 1 pie Cambio del anillo en “D” dorsal y tramo del arnés Cantidad combinada de la elongación de la red del arnés y el cambio del (0,3 m) anillo en “D” dorsal durante un evento de caída completa C 1½ pies Factor de seguridad Longitud agregada para contar otros factores tales como un ajuste (0,5 m) inapropiado del arnés, la altura real del trabajador o el peso del trabajador D 7 pies (2,1 m) Distancia mínima total de caída despejada requerida DUCF2B.1 B TUCF2B.1 después de que ocurra un evento de caída 1. Anclaje superior 2. Superficie para caminar/trabajar 3. Nivel inferior más cercano u obstrucción 24 APPENDIX B 03122014 Fig. 5 - Managing Stretch Minimum Clear Fall Requirement: Vertical Lifeline System *A Stretch B 3 ft C 4 ft D 1 ft E 5 ft F 1½ ft *G Stretch of Vertical Lifeline Stretch = length of VLL from Anchorage Connector to Rope Grab position on VLL multiplied by 10% Length of Shock Absorbing Lanyard Original working length before a fall event occurs/before activation of energy absorber Elongation/Deceleration Distance Maximum allowable amount of elongation that may payout from the energy absorber upon activation during a fall event Harness Stretch and dorsal D-ring Shift Combined amount of harness webbing elongation and dorsal D-ring upshift during entire fall event Height of Dorsal D-ring Average height of the dorsal D-Ring on a user’s full body harness measured from the walking/working surface up Safety Factor Added length to account for other factors such as an improperly adjusted harness, actual worker height or worker weight Add Total Minimum Clear Fall Distance Required A though F *(must calculate for distance A) 1. Overhead Anchorage 2. Walking/Working Surface 3. Nearest Lower Level or Obstruction Fig. 5 - Distancia total de caídas Requerimiento mínimo de claridad: Sistema de cuerda de salvamento vertical Estiramiento de la cuerda de salvamento vertical Estiramiento Estiramiento = longitud de la VLL desde el conector de anclaje hasta la posición de agarre de la cuerda en VLL multiplicado por 10% B 3 pies (0,9 m) Longitud de la cuerda con amortiguación C 4 pies (1,2 m) Distancia de elongación/desaceleración D 1 pie (0,3 m) Cambio del anillo en “D” dorsal y tramo del arnés E 5 pies (1,5 m) Altura del anillo en “D” dorsal F 1½ pies Factor de seguridad Longitud agregada para contar otros factores tales como un ajuste (0,5 m) inapropiado del arnés, la altura real del trabajador o el peso del trabajador *G Longitud de trabajo original antes de ocurrir un evento de caída/antes de la activación del amortiguador de energía Cantidad máxima permitida de elongación que se puede emplear del amortiguador de energía al activarse durante un evento de caída DUCF4C.2 Cantidad combinada de la elongación de la red del arnés y el cambio del anillo en “D” dorsal durante un evento de caída completa Altura típica promedio del anillo en “D” dorsal en el arnés de cuerpo completo de un usuario, medida desde la superficie para caminar/trabajar hacia arriba Sumar Distancia mínima total de caída despejada requerida A hasta F *(debe calcular para la distancia A) TUCF4C.1 *A 1. Anclaje superior 2. Superficie para caminar/trabajar 3. Nivel inferior más cercano u obstrucción Fig. 6 - Swing Fall Hazard A Anchorage B Self-Retracting Device (SRD) C Walking/Working Surface D Swing Fall Impact after fall event E Next Lower Level or Obstruction Anclaje B Dispositivo autorretráctil (SRD) C Superficie para caminar/trabajar D Impacto de caída con balanceo después del evento de caída E Siguiente nivel inferior u obstrucción TUSF1.1 A DUSF1.2 Fig. 6 - Peligro de caída con balanceo 25 APPENDIX B 03122014 Common Fall Protection Applications Fig. 7 - Fall Arrest (PFAS) Fig. 8 - Work Positioning Positioning Anchor Anchorage Connector A B C Shock Absorbing Lanyard (SAL) C Full Body Harness (FBH) with Side D-Rings D Full Body Harness (FBH) E Walking/Working Surface D Back-up Fall Arrest (PFAS) Fig. 8 - Posicionamiento del trabajo Arnés de cuerpo completo (FHB) E Superficie para caminar/trabajar DUFPA1.1 TUFPA1.1 Arnés de cuerpo completo (FBH) con anillos en “D” laterales D Detención de caídas de respaldo (PFAS) Fig. 9 - Restraint Cordón de posicionamiento Fig. 10 - Climbing A B Restraint Anchor A B Fixed Ladder Restraint Lanyard C Full Body Harness (FBH) C Safety Sleeve/Grab/Trolley D Walking/Working Surface D E Fall Hazard Area Full Body Harness (FBH) with Front D-Ring Anclaje de restricción Superficie para caminar/trabajar E Área de peligro de caídas Fig. 11 - Suspension/Personnel Riding A Suspension Line B Suspension Yoke C Boatswain’s Chair/Work Seat D Full Body Harness (FBH) E Back-up Fall Arrest (PFAS) DUFPA3.1 D DUFPA1 Arnés de cuerpo completo (FHB) TUFPA3.1 Cordón de restricción C E Detención de caídas de respaldo (PFAS) DUFPA5.1 Arnés de cuerpo completo (FHB) Funda de seguridad/agarre/ carrito D Arnés de cuerpo completo (FBH) con anillo en “D” delantero Sistema seguridad de escalera A B Retrieval Line C FBH Shoulder D-Rings D Full Body Harness (FBH) Retrieval Yoke A B Línea de retirada C Anillos en “D” para los hombros del FBH D Arnés de cuerpo completo (FHB) Balancín de retirada TUFPA5.1 D C Fig. 12 - Rescate/Retirada Balancín de suspensión C Escalera fija Fig. 12 - Rescue/Retrieval Línea de suspensión Asiento/silla de trabajo de especialista de maniobra A B Fig. 11 - Montaje de personal/ suspensión A B Ladder Safety System Fig. 10 - Escalar Fig. 9 - Restricción A B DUFPA2.2 D C DUFPA4.1 Cuerda de salvamento con amortiguación (SAL) Anclaje de posicionamiento DUFPA6.1 C Conector de anclaje A B DUFPA1 Anclaje TUFPA2.1 Fig. 7 - Detención de caídas (PFAS) A B Positioning Lanyard TUFPA4.1 Anchorage TUFPA6.1 A B 26 APPENDIX B 03122014 DUCON.2 Incorrect Connections / Acronyms for Fall Protection and Fall Arrest / Inspection Record C D E F G A B C D E Never attach in a manner where an element of the connector (gate or release lever) may become caught on the anchor thereby producing additional risk of false engagement. Never attach a spreader snap hook to two side/positioning D-rings in a manner whereby the D-rings will engage the gates; the gates on a spreader must always be facing away from the D-rings during work positioning. F G Acronyms for Fall Protection and Fall Arrest; ANSI Z359.0-2012 ACTD Activation Distance HLL Horizontal Lifeline AD Arrest Distance MAF Maximum Arrest Force CSS Connecting Subsystem mm Millimeter DD Deceleration Distance PFAS Personal Fall Arrest System DDV Deceleration Device PPE Personal Protective Equipment FACSS Fall Arrestor Connecting Subsystem SRD Self-retracting Device FAS Fall Arrest System TFD Total Fall Distance FBH Full Body Harness VLL Vertical Lifeline FF Free Fall VLLSS Vertical Lifeline Subsystem FFD Free Fall Distance WPS Work Positioning System Other Acronyms for Fall Protection and Fall Arrest DDV Dispositivo de desaceleración FACSS Subsistema de conexión de FAS FBH FF FFD Shock Absorbing Lanyard cm Centimeters kN RPA kilo-Newton Rebar Positioning Assembly Society for Testing ASTM American and Materials lbs TPA pounds (weight) Tower Positioning Assembly INSPECTION RECORD Modelo N° :____________________ Date of Manufacture Inspection Date Fecha de inspección Inspector Inspector Comments Observaciones detenedor de caídas Sistema de detención de caídas Arnés de cuerpo completo de caídas PPE Personal Protective Equipment SRD Self-retracting Device TFD Total Fall Distance VLL Vertical Lifeline Caída libre VLLSS Vertical Lifeline Subsystem Distancia de caída libre WPS Work Positioning System Other Acronyms for Fall Protection and Fall Arrest Nacional de Normas RGLS Equipo de agarre de cordón/cuerda ANSI Instituto de los Estados Unidos de salvamento de Seguridad y SAL Cuerda OSHA Administración con amortiguación Salud Ocupacional Safety and Health OSHA Occupational Administration SAL Model # Siglas para la protección y detención de caídas; ANSI Z359.0-2012 ACTD Distancia de activación HLL Cuerda de salvamento horizontal AD Distancia de detención MAF Fuerza de detención máxima CSS Subsistema de conexión mm Milímetro DD Distancia de desaceleración PFAS Sistema personal de detención National Standards ANSI American Institute RGLS Rope Grab Lanyard Set Nunca conecte dos componentes activos (ganchos de cierre instantáneo o mosquetones) entre sí. Nunca conecte dos componentes activos (ganchos de cierre instantáneo o mosquetones) a un solo anillo en “D” al mismo tiempo. Nunca se debe conectar de una manera que se produzca una condición de carga en la hebilla. Nunca conecte a un objeto de tal manera que la hebilla (del gancho de cierre instantáneo o del mosquetón) se vea impedida de cerrarse y bloquearse por completo. Siempre protéjase de falsas conexiones mediante la inspección visual del cierre y bloqueo. Nunca conecte explícitamente a un subcomponente constituyente (correa, cable o cuerda), a menos que se hayan proporcionado específicamente por las instrucciones del fabricante para los subcomponentes (gancho de cierre instantáneo o mosquetón y correa, cable o cuerda). Nunca conecte de modo que un elemento del conector (hebilla o palanca de liberación) pueda quedar atrapada en el anclaje y por lo tanto producir un riesgo adicional de conexión falsa. Nunca conecte un gancho de cierre instantáneo del esparcidor a dos anillos en “D” laterales/de posicionamiento en una forma que los anillos en “D” se acoplen a la hebillas; las hebillas en un esparcidor deben estar siempre orientadas hacia el lado opuesto de los anillos en “D” durante el posicionamiento del trabajo. cm Centímetros kN RPA Kilo Newton Ensamblaje de posicionamiento con refuerzo Americana de Pruebas ASTM Sociedad y Materiales lbs TPA Libras (peso) Ensamblaje de posicionamiento con torre TUAA.2 B Fig. 13 - Conexiones incorrectas Never connect two active components (snap hooks or carabiners) to each other. Never connect two active components (snap hooks or carabiners) to a single D-ring at the same time. Never connect in a way that would produce a condition of loading on the gate. Never attach to a object in a manner whereby the gate (of the snap hook or carabiner) would be prevented from fully closing and locking. Always guard against false connections by visually inspecting for closure and lock. Never attach explicitly to a constituent subcomponent (webbing, cable or rope) unless specifically provided for by the manufacturer’s instructions for both subcomponents (snap hook or carabiner and webbing, cable or rope). TUCON.2 Fig. 13 - Incorrect Connections A PLANILLA de INSPECCIÓN Serial # N° de serie :____________________ Fecha de fabricación :____________________ Pass/Fail Pasó/No pasó 27 Corrective Action Needed Accion correctiva a realizer Approved By Aprobado por APPENDIX B 03122014


