1
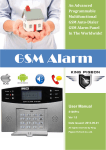
Contents 目录 Preface] Thank you for choosing the wireless alarm system product of our company. Wireless alarm system adopts the most advanced digital sensing and controlling technologies, it is the intelligent alarm control system containing burglar alarm, fire alarm, fire fighting, gas leakage and SOS. Wireless alarm system uses the most advanced multiple random selection technology, it avoids the problems of interference and alarm missing which usually [Function Introduction] 1. 2. 3. 4. 5. 6. 7. 8. 9. 10. exist in the similar systems. This system can be used widely in residence, shops, villa, and small enterprise and so on. For your safety, before installing and using, we suggest you read this manual carefully. Caution:To ensure that you can enjoy the impeccable warranty service, do not open the host-housing to repair and renovation by yourself or we will not provide 11. 12. 13. 14. 15. 16. 17. free warranty service. All the losses and the adverse consequences it makes will be assumed by users. Please make safekeeping to the user manual for reference when it is necessary. 18. 19. 20. 21. 22. 23. 24. 25. Touch screen keypad GSM alarm system 8 Wired defense zones and 100 wireless defense zones. At most 5 wireless remote control codes. Touch keypad, Built-in clock.,LCD display. Operate easily. Voice prompt for each operation. SMS prompt automatically about low power of battery. SMS prompt when AC power lost or recovered. Built-in intercom horn, two way communication can be realized. Built-in wireless transmitting module, could be coding with wireless siren. Build-in wireless transmitter,can control 4 relay outputs with home appliances,such as lights,garage door,television,curtain,etc. 1 group timed Arm and timed Disarm function. Can store 6 groups of phone numbers: when alarming, system will make alarm call to these numbers automatically. Can store 2 groups of SMS numbers: when alarming, system will send alarming SMS to these numbers automatically. Can store 2 alarm center telephones. Inquire the status of alarm panel by SMS. Delay alarming for each defense zone(0-99 seconds) 10-second voice message recording can be played automatically when alarming. The host can be used as a hand-free phone. Users can make call by the keypad for telephone fee inquiry and charging. One-key-control function: Out Arm, Home Arm, Remote Arm. Real-time, delay, 24 hours, bypass defense zones programming function. Wireless coding: easy to add additional wireless accessories. Remote control Arm, Disarm, Monitor, and Intercom by phone. Event Log Query: host automatically records 40 pieces of all information concerning arm, disarm and alarm events. Multi-type of arm: Remote control arm, out arm, home arm, timed arm, arm by phone. Built-in AAA NI-MH rechargeable battery: make alarm when power off. [Alarm Host Diagram] wire connecting terminal: The host shall be installed in the Centre of the prevent site which could realize best receiving effect from all wireless detectors. Please note that keep the host away from large-sized metallic objects and home appliances producing high-frequency interference; meanwhile avoid steel-reinforced concrete and fire-proof doors. Panel schemes: LCD display: Installation drawing on the back: [Function Setting] 4. Coding of Remote Controller Setting The remote controller has to be coded to the alarm host in order to perform 1. Initialization normally. Please insert SIM card and insert the adapter output terminal into the power hole of Press the host, and then power on the system. Alarm panel will take about 1 min to search input instruction code [21], Press the GSM network.in the period of searching GSM network,the alarm panel will be in control coding” .the [ ] indicator is on without flashing; Press any button on the wireless remote controller, the host makes a long beep and you will hear Freeze status for a while ,until work properly. appear on LCD display,the alarm panel will 2. System setting Press firstly, then input 4- digit password by the keypad on the host. You will hear a voice prompt: please enter instruction. You can perform different settings repeatedly as long as the system keeps in setting status and after input different firstly, then input 4- digit password by the keypad on the host,and to confirm,then you will hear “remote “coding completed” [ ] indicators goes out, indicating the remote controller succeeds in coding. The code of next remote controller will be displayed on the LCD screen automatically , when coding completed. Operating method : Password [21] Notes: The same remote controller could be coded just one time. You can add maximum 5 remote controllers. LCD display: settings,press to confirm. The system will exit setting mode and return to main interface if you don't press any keypad button for 40 seconds. Note: The system default password is [6666]. Operating method: Passwordsetting code X indicates: 4-digits program password. LCD display: 5. Remote Controller Deleting Setting The remote controller can’t control the host after it is deleted. Press firstly, then input 4- digit password by the keypad,and input instruction code [22], Press to confirm.The main hear a voice prompt “delete completed”. Operating: Password [22] LCD display: 3. Exit Setting Press buttons, the host emits a long beep and exits settings to main-interface. a long beep, You will LCD display: 6. Coding of Wireless Detector Setting Wireless detectors have to be coded to the host in order to trigger its alarm. Press firstly, then input 4- digit password by the keypad,and input instruction code [23], input the defense zone number you want to code [02~99],Press to confirm,The host emits a long beep and the corresponding defense zone is displayed on the screen. You will hear a voice prompt “detector coding”. Then trigger a wireless detector to emit a wireless signal; after receiving the signal, 8. All Wireless Detector Deleting Setting the host makes a long beep, and you will hear “ coding completed”, the [ ] indicator goes out at the same time. Operating method: The wireless detector can’t trigger the host to alarm after the whole deletion. Press Password[23][XX] XX Indicates:02~99 defense zones number firstly, then input 4- digit password by the keypad,input instruction code[25],and then press to confirm.The host emits a long beep,and You will hear a voice prompt “delete completed”. Example: Password[23][02] LCD display: Operating method: LCD display: 7. Single Wireless Detector Deleting Setting Password[25] The wireless detector can’t control the host after it is deleted. 9. Alarm Zone Type Setting Press firstly, then input 4- digit password by the keypad,input instruction code [24] and then press the [02~99] defense zone number needs to be deleted, Alarm Zone type is convenient to decide which detector will be alarmed. finally press to confirm. The host emits a long beep ,You will hear a voice prompt “delete completed”. 1). Detector alarm type is set to “0”: This detector will not trigger the host to alarm Operating method: Password[24][XX] XX indicates:02~99 defense zones number。 Example:Delete 02 defense zones Operating method: Password[24][02] There are 4 defense types: in any status. 2). Detector alarm type is set to “1”: This detector will trigger the host to alarm whether in out arm or home arm. 3). Detector alarm type is set to “2”: This detector will trigger the host to alarm only in Out Arm state; host is in Home Arm state, the detector cannot trigger the host to alarm. 4). Detector alarm type is set to “3”: This detector will trigger the host to alarm in Password[47][82][1] Operating method: LCD display: any status. Wireless detector alarm type setting Press firstly, then input 4- digit password by the keypad,input instruction code [26], and press the defense zone [02~99] and then input [0~3] about detector alarm type, finally press to confirm. The host emits a long beep,You will hear a voice prompt “setting completed” Operating method: Password[26][XX][Y] XX indicates: two defense zones number. Y indicates: one defense zone alarm type Example: setting 02 defense zone alarm type to be Out Arm or Home Arm. Operating method: LCD display: Password[26][02][1] 10.Wireless Equipment Coding Setting Press firstly, then input 4- digit password by the keypad,input instruction code [27] + 8 wireless equipment coding, then enter to confirm. The host makes a long beep,you will hear a voice prompt “setting completed”. Note: Wireless equipment coding includes sc2262 coding four data bits & 8 address bits. Operating method: Password[27][XXXXXXXX] XXXXXXXX indicates:8 wireless equipment coding Example: detailed operating of wireless equipment coding is“01020102” Operating method: LCD display Wired detector alarm type setting Press firstly, then input 4- digit password by the keypad,input instruction code [47], and then press the defense zone [81~88] and then input [0~3] about detector alarm type, finally press to confirm. The host emits a long beep ,You will hear a voice prompt “setting completed” Operating method: Password[47][XX][Y] XX indicates: two defense zones number. Y indicates: one defense zone alarm type Notes: wired defense zone of Z1 is equal to zone of 81, wired defense zone of Password[27][01020102] 11.Remote Controller Sound Prompt setting In arm or disarm, external siren prompt arm or disarm. Press firstly, then input 4- digit password by the keypad,input instruction code [31] on the keypad, then enter[0~1], finally press ;The host makes a long beep. You will hear a voice prompt “setting completed”. Operating method: Password[31][X] X =“0” indicates:Remote controller Sound Prompt closed; X =“1” indicates: Remote controller Sound Prompt open; Z2 is equal to zone of 82, and wired defense zone of Z8 is equal to zone of 88 Example: Detailed operating of external siren prompt open in turn. Operating method: LCD display: Example: alarm type about defense zone of 82 is set to out arm or home arm. Password[31][1] Example: detailed operating of 2 seconds delayed time arm. Operating method: LCD display: Password[33][02] 12.Siren Ring Time setting(Default:3 minutes) Press firstly, then input 4- digit password by the keypad,input instruction code [32] on the keypad, then enter time [00~15] minutes, finally press ; The host make a long beep, You will hear a voice prompt “setting completed”. Operating method: Password[32][XX] XX indicates: siren ring time, unit “minute”. Example: Set 5 minutes of siren ring time. Operating method: LCD display Password[32][05] 14.Alarm Delayed Setting Alarm time delayed setting is that the host will not alarm until delayed time arrives. Press firstly, then input 4- digit password by the keypad,input instruction [34], enter zone number [00~99], and then input delayed time [00~99] seconds, finally press to confirm. The host makes a long beep. You will hear a voice prompt “setting completed”. Operating method: Password[34][XX][XX] XX indicates:Alarm delayed time, unit: second Example: Detailed operating of 5 seconds alarm delayed time to 04 zone. Operating method: LCD display: Password[34][04][05] 13.Arm Time Delayed Setting(Default:30 seconds) When press down the key of Out Arm, the host will arm according to the delayed time after setting. Press firstly, then input 4- digit password by the keypad,input instruction [33], then input [00~99], press to confirm. The host makes a long beep. You will hear a voice prompt “setting completed”. Operating method: Password[33][XX] XX indicates:Arm delayed time, unit: second. 15. Telephone Dial-up Cycle Times Setting(Default:9 Times) Alarm dial-up cycle times are the times of dial-up from the beginning again, if all the phone numbers are dial-up, but no answer. Press firstly, then input 4- digit password by the keypad,input instruction [35], then input dial-up cycle time [00~09] times, finally press to confirm. The host makes a long beep. You will hear a voice prompt “setting completed”. Password[35][XX] XX indicates: Telephone dial-up cycle times. Operating method: 17. Voice Recording message Setting Pres s firstly, then input 4- digit password by the keypad,input instruction [37],and then press to confirm. Example: Detailed operating about 2 cycle times. The host will emits a beep and the [ ] indicator is on, and after 10 second s countdown, recording starts: record at 30cm away from the host with mod Password[35][02] erate tone;10 seconds later, the host will make a beep indicating the recording Operating method: LCD display: finish and the recorded voice will replay. Operating method: LCD display: Password[37] 16 Remote Call Ringing Times Setting(Default:6 Times) Users dial-up the telephone connected to the host, then the signal of ringing times Note: when you need to change the content of recording, just store your new one. would transfer to the host. Users through voice prompt, input correct password to get remote control setting to the host. Press firstly, then input 4- digit password by the keypad,input instruction [36], then input delayed time [0~9] times, finally press to confirm. Main unit make a long beep. You will hear a voice prompt “setting completed”. Operating method: Password[36][X] X indicates:ring times; Example: After receiving 2 ringing signals, start the host to work remote control Password[36][2] Operating method: Notes: The host remote control closed, when ringing times is set to 0 LCD display: 18.Password Change Setting 1. Change User Password(Default:1234) User password is the key to enter the host operating system when start Disarm or Remote Control. Press firstly, then input 4- digit password by the keypad,input instruction[38], and then input the 4- digit new password, finally press to confirm. The main unit will make a long beep and you will hear a voice prompt “setting completed”. Operating: Password[38][XXXX] XXXX indicates:the new 4-digit password Example: change the system password to 1012; Operating: LCD display: Password[38][1012] 2. Change Administrator Password(Default:6666) Administrator password is the key to enter the host system when need function setting. Press should be entered. Example: Open the keypad lock. Operating: Password[40][1] LCD display: firstly, then input 4- digit password by the keypad,input instruction [39], and then input the 4- digit new password, and then press to confirm. The host emits will make a long beep and you will hear a voice prompt “setting completed”. Operating: Password[39][XXXX] XXXX indicates: the new 4-digit password Example: change the system password to 2846 Operating: Password [39][2846] LCD display: 20.Turning Host Timed Arm/Disarm on/off Setting(Default: Closed) Press firstly, then input 4- digit password by the keypad,input instruction [41], then choose on/off timed Arm or Disarm function key[1/0], finally press to confirm, The host makes a long beep. You will hear a voice prompt “setting completed”. Note: The user password and the Administrator password cannot be the same. Operating: Password [41][X] X=“0” indicates: close all timed Arm/Disarm function. X=“1” indicates: Open all timed Arm/Disarm function.. Example: Indicates: Open all timed Arm/Disarm function 19.Keypad lock setting(Default: Closed) Keypad lock could ensure the host password can’t be changed maliciously. Press firstly, then input 4- digit password by the keypad,input instruction [40], then input [0~1], finally press to confirmed. The host makes a long beep. You will hear a voice prompt “setting completed”. Operating: Password[40][X] X=“0” indicates: Keypad lock is closed. Arm/Disarm, password don’t need to be entered X=“1” indicates: Keypad lock is open. Arm/Disarm, password Operating: LCD display: Password[41][1] 21. Host Timed Arm /Disarm Setting Timed arm or disarm is convenient to arm or disarm at the necessary time. Press firstly, then input 4- digit password by the keypad,input instruction [42], and then input disarming time [AABB], and then input arming time [XXYY], finally press to confirm. The host makes a long beep. prompt “setting completed”. Operating: You will hear a voice Password [42][AABB][XXYY] “AABB” indicates: disarming time—hour and minute “XXYY” indicates: arming time—hour and minute Example: set disarming is 8:20 and arming time is 20:30. Operating: Password [42][0820][2030] LCD display: 23. Host Historical Records Inquires Setting Press firstly, then input 4- digit password by the keypad,input instruction [44], then press to confirm. The host makes a long beep. You will hear a voice prompt “setting completed”. Press “2” to page up and press “8” to page down Operating: LCD display: Password [44] 24.Host Historical Records Inquires Deleting Setting Press 22.Host Reset Setting All telephone number will be deleted automatically when main host reset. Press firstly, then input 4- digit password by the keypad,input instruction [43], then press to confirm. The host makes a long beep. You will hear a voice prompt “setting completed”. (Will not delete the remote control and accessories) Password [43] Operating: LCD display: firstly, then input 4- digit password by the keypad,input instruction [45], then press to confirm. The host makes a long beep. voice prompt “setting completed”. Operating: LCD display: Password [45] You will hear a 25.Arm/ Disarm SMS alert Setting(Default: Will not send) To ensure safety, alarm panel will (or not) send a SMS to user when arm/ Example: set the time as 17:30, June, 12th, 2012 Operating: Password [48][12][06][12][17][30] LCD display: disarm Press firstly, then input 4- digit password by the keypad,input instruction [46]. Then choose whether alarm panel need to send a SMS to user [0/1], finally press to confirm. The host makes a long beep. You will hear a voice prompt “setting completed”. Factory value is [0]: alarm panel will not send SMS to user. Operating: 27.SMS Phone Number Setting Password [46][0/1] “1” indicates: alarm panel will send SMS to user. “0” indicates: alarm panel will not send SMS to user. Press firstly, then input 4- digit password by the keypad,input instruction [49~50], then input phone number; finally press to confirm. The host makes a long beep, You will hear a voice prompt: setting completed. LCD display: Note: 49 for the first group of SMS phone number, 50 for the second group of SMS phone number. Operating: Password [49][YY…YY] YY…YY Indicates: phone number Example: set 13911112245 to be first group alarm phone number Password[49][13911112245] Operating: LCD display: 26. System Clock Setting Press firstly, then input 4- digit password by the keypad,input instruction [48], then input the last 2 digits [AA] of the present year, the two digits [BB] of the month, the two digits [CC] of the date. The two digits [DD] of the hour (24-hour system), the two digits [EE] of the minute, and finally enter will hear a long beep and a voice prompt “setting completed”. Operating: to confirm. You Password[48][AA][BB][CC][DD][EE] “AA” indicates: the last 2 digits of the present year “BB” indicates: the 2 digits of the present month 28.SMS Phone Number Delete Setting “CC” indicates: the 2 digits of the present date Press “DD” indicates: the 2 digits of the present hour [49~50], then press to confirm. The host makes a long beep, You will hear a voice prompt: setting completed. “EE” indicates: the 2 digits of the present second firstly, then input 4- digit password by the keypad,input instruction Operating: Password[XX] XX indicates: address code [49] ~ [50] of 1-2 group SMS phone number 30.Alarm call Number Delete Setting Example: Delete the first group of SMS phone number. Press Operating: [49] LCD display: [51] ~ [56], then press to confirm. The host makes a long beep, You will hear a voice prompt: setting completed. firstly, then input 4- digit password by the keypad,input instruction Operating: Password[XX] XX indicates: address code [51] ~ [56] of 1-6 group alarm phone number Example: Delete the 1 group of alarm phone number. Operating: Password [51] LCD display: 29.Alarm call Number Setting Press firstly, then input 4- digit password by the keypad,input instruction [51] ~ [56], then input phone number, finally press to confirm. The host makes a long beep, You will hear a voice prompt: setting completed. 31.Defense Zone name Setting Operating: Password[XX][YY…YY] XX indicates: address code [51] ~ [56] of 1-6 group alarm phone number Press YY…YY indicates: phone numbers Example: set 13811110751 to be first group alarm phone number Operating: Password[51][13811110751] LCD display: firstly, then input 4- digit password by the keypad,input instruction [60], choose the corresponding defense zone code [02] ~ [99] , and then input [1 ~ 8] defense zone alarm type, finally add Operating: key to confirm. Voice prompt: setting completed. Password 【60】【XX】【 A 】 XX indicates defense zone code: [02] ~ [99], matching 02 to 99 defense zones correspondingly A Form alarm type: [1] SOS Alarm, [2] fire alarm, [3] gas leak alarm, [4] Door lock alarm, [5] hall alarm, [6] window alarm, [7] Balcony alarm, [8] perimeter alarm. Example: 10-defense zone fire alarm operation Operating: Password【60】【 10 】【 2 】 32. Host GSM Signal Checking Press firstly, then input 4- digit password by the keypad,input instruction [62] and then press to confirm. The host makes a long beep, you will hear a voice prompt: “setting completed”. GSM signal value displays. Operating: LCD display: Password [62] 3) Home Arm: Press [ 4) SOS: Press [ ] ] 3. Away Arm It means to guard all around your house while everyone is going out; all the det ectors of the host are always working; when the detector is triggered by detecting source(anti-theft, fire prevention,gas leak, etc), the alarm system will sound the alarm. [Operation Instructions] Press [Out Arm 1. Main Host Status and totally 100 beeps. The [Out Arm System status: There are 4 status types as follows: 1) Arm: Defense zone 02-99 will alarm when detectors are triggered ] button on keypad, system will make a beep per second ] indicator will be on without flashing. It means Out Arm is set successfully. Operating: press [Out Arm ] of remote controller 2) Home Arm: In arm status, the defense zone which is set as [Home arm], The Host Operating: [Out Arm [user password] + LCD display: ] (keypad lock is closed or [Out Arm ]+ (keypad lock is open) when detectors are triggered. 3) Disarm: Defense zone 02-99 will not alarm when detector triggered (except 24 hours defense zone). 4) System setup status: In this status, all defense zones will not alarm when 4. Home Arm detectors are triggered. 2. Remote Controller Operation It means, for the safety, while somebody is at home, you need to enable the peripheral: door, window, balcony and boundary detectors of the alarm User can use remote controller to set system as Out Arm, Home Arm, system while prevent from triggering the indoor detectors, which may cause Emergency Alarm, Real-time Disarm and etc. improper warning; then, you shall select Home Arm, let just part of the detectors 1) Out Arm: Press [ ] work and disable the other parts. 2) Disarm: Press [ ] Alarm host operation: Press Remote Control Operation: Just press [ number automatically. The system will call each preset numbers for 3 times in ]. LCD display: order. If you answer the all, you will hear the pre-record voice message . You can set system via your telephone or mobile phone keypad. If you hang-up directly without answering the call, system will call each preset number for 3 times circularly. Press [*]: listen voice recording message Press [1]: The host stops alarming and to Arm; it stops calling users. 5. Disarm Press [2]: The host stops alarming and to Disarm; it stops calling users. It means to stop the alarm when the host sounds the alarm or makes the alarm Press [3]: The host closes Siren and monitors the scene for 30 seconds, for system in the state of non-warning. After disarming, even if you trigger the continuous monitoring, press [3] again to monitor the abnormal detector, the host would not sound alarm (excluding 24- hour defense areas). sounds or a burglar intrusion for another 30 seconds. Press [4]: start talkback 30s. If keypad lock is closed, press on keypad directly to disarm. If keypad lock is Press [6]: Turn on the relay NO.1. (Press 6 again, turn it off). Press [7]: Turn on the relay NO.2. (Press 7 again, turn it off). open, press , and follow voice prompt enter [user password, finally press to confirm. Disarming operation is completed. Press [9]: Turn on the relay NO.4. (Press 9 again, turn it off). Remote Control Operation: Press [ ]. The Host Operating: ]. Press [ Press [8]: Turn on the relay NO.3. (Press 8 again, turn it off). LCD display: Press [#]: Stop calling users. 7. Remote control by making call to host The telephone (mobile) is connected to alarm host number, and after ringing times setting, the telephone receiver prompts computer-generated voice: “Please enter password”. The password is entered via telephone (mobile). For wrong password, the host gives prompt: “wrong password, please enter password again”. For correct password, the telephone receiver prompts “press ① to arm, press ② to disarm, press ③ to monitor, press 4 to talk ”. And after it is accessed, phone button could be used for remote control. 6. Answer Alarm Call When the host sounds alarm, Siren releases voice prompt at once: first, would send out SMS, telling user which defense zone has alarm, and then it will dial the preset numbers. If no one answers the call, the system will call the next user Press [1]: the host enters Arm state and voice prompts “Armed”. Press [2]: the host enters Disarm state and voice prompts “Disarmed”. Press [3]: the host enters monitoring state for 30 seconds and press [3] for 30 seconds delay repeatedly in case of continuous monitoring. Press [6]: Turn on the relay NO.1. (Press 6 again, turn it off). Press [7]: Turn on the relay NO.2. (Press 7 again, turn it off). Press [8]: Turn on the relay NO.3. (Press 8 again, turn it off). Press [9]: Turn on the relay NO.4. (Press 9 again, turn it off). Press [*] : Play voice recording message. 9. SOS Some special cases occur in the family: sudden illness for the elderly or children results in first aid; in case of sudden fire, help is needed; in case of housebreaking, the alarm is required; So please just press the host keypad “Emergency Alarm ” ,remote controller key [ alarming ]. Alarm system will immediately sound loudly and Remote operation: press remote control [a ]. Keypad operation: press alarm host keypad . 10. Alarm host used as hand-free phone This alarm system has dial-up function and could be used as hand-free phone. In disarming status,input phone number [13800138000], then press , main host makes a long beep, then phone call will go out ,after Call completed, press again to hang up phone. 11. Maintenance 1. System detection Although the alarm system is used every day, it still needs regular care and maintenance and detection to ensure that the alarm system will be stable, reliable and safe. Normally the host needs a thorough inspection every 3 months and the detectors need to be checked once a month, at least once every 3 months in case of no good conditions. Console detection: Sensor detection: Technical Parameter Adaptor power: DC12V Static consumption: ≤55mA Alarm current: ≤450mA Output current: DC12V Wireless frequency: 1). manually trigger the detector to check whether it sounds normal alarm. 1000mA 2). Check batteries of all detectors to make sure whether it is under-voltage. 3). Check whether wireless detector is communicated with the host during emission testing 2. Notices 150mA Alarm equipment, for explosion-proof design, shall not directly be used in 315MHz/433MHz hazardous location with Grade I, II and III (flammable and explosive places), 900/1800/1900/850Mhz otherwise it is very dangerous. 110dB Do not dismantle, repair and modify products privately, or accidents and Backup battery: NI-MH AAA*6 7.2V DC failures may be caused. Temperature: -20℃ ~ +55℃ GSM Siren volume: Do not drop the product on the ground or hard objects to avoid strong Humidity: 40% ~ 80%RH Encoded mode: 2262 IC / 4.7MΩ impact for failure and damage. Without permit and consent from relevant department, do not directly set "110", "119" or alarm phone number of police station as alarm phone number of the host. 1). whether the host normally performs Arm or Disarm. Defense zone Arm Home Type Siren 1 defense zone effective effective 24H Yes 02-99 defense zone effective effective Real-time Yes effective effective 24H Yes effective effective Real-time Yes SOS Wired defense zone Administrator 6666 Remote control On password User password 1234 Siren Off Siren sound time According setting Home appliance Optional [Technical Parameters] 1. Table one time 2). whether the host normally dials up the telephone numbers. 3). whether the detector signal is received or backup battery works. 2. Table two 3. Administrator password system setup command table Data 19 Keypad Lock Setting 40 X 20 Host Timing Setting 41 X X=1 open, X=0 closed 0 No 0 21 YYYY time X X=# 42 Setting 22 XXXX= arm time YYYY= disarm Host Reset 43 1 44 X X=# 45 X X=# X X=# 23 X X=02~99 24 X X=02~99 25 X X=# 26 XY X=02~99,Y=0~3 47 XY X=81~88,Y=0~3 XXXX XXXXXXXX=8 digit XXXX wireless equipment coding XXXX= 4 digit user number All Wireless Detectors 5 Deleting 46 X X=0 don’t 7 XXX XXX=year, month,day, 8 YY YY= hour, minute X X= SMS number 49~ Setting 50 Host Alarm Phone 51~ 28 56 Host Center Call Number 57~ 29 X=alarm number 58 GSM Signal Checking 62 Wireless Equipment 27 Coding Setting 9 User ID Setting 28 XXXX 10 Siren Prompt Setting 31 X X=1 siren prompt open, 11 Siren Ring Time Setting 32 X X=00~15 minutes 3 minutes X= Call number of Receiving 12 Arm Time Delayed 33 X X=00~99 seconds 0 second Center 13 Alarm Time delayed 34 X X=00~99 seconds 0 seconds 35 X X=00~09 times 9 times X=0~9 times 9 times X Setting Wired Alarm Type Setting X=0 siren prompt closed X Number Setting Setting Center 48 27 Wireless Alarm Type 6 inform Receiving Center 30 22 Deleting X=1 inform Receiving Center Host SMS Number X=# Single Wireless Detector Arm/ Disarm Upload to Clock Setting Coding of Detector 4 Deleting 26 X Remote Controller 2 3 Host Historical Records 25 21 Controller Inquires 24 Default Deleting Historical Records 23 Factory Remark (XY) X=0 close time setting function XXXX Add Coding of Remote X=1 open time setting function Host Arm or Disarm Setting item X X=# Telephone Dial-up Cycle 14 Times 15 Remote Call Ring Times 36 X 16 Artificial Recording 37 X X=#, play automatically after recording 17 Change User Password 38 XXXX XXXX= 4 digit 1234 39 XXXX XXXX= 4 digit 6666 Change Administrator 18 Password