1
user manual
electrophoresis system
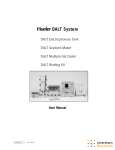
Ettan DALT II System
second-dimension gel electrophoresis
um 80-6476-53/Rev. AO/09-00
Page finder
Ettan DALT II System . . . . . . . . . . . . . . . . . . . . . . . . . . . . . . . . . . . . . . . . . . . . . . . . . . . . . . . . . . . . . . . . . . . . . . . . . . . . . . . . . . . .1
Ettan DALT II System components . . . . . . . . . . . . . . . . . . . . . . . . . . . . . . . . . . . . . . . . . . . . . . . . . . . . . . . . . .1
Important information . . . . . . . . . . . . . . . . . . . . . . . . . . . . . . . . . . . . . . . . . . . . . . . . . . . . . . . . . . . . . . . . . . . . . . . . . . .3
Specifications . . . . . . . . . . . . . . . . . . . . . . . . . . . . . . . . . . . . . . . . . . . . . . . . . . . . . . . . . . . . . . . . . . . . . . . . . . . . . . . . . . . . . .4
Preparing the gel caster . . . . . . . . . . . . . . . . . . . . . . . . . . . . . . . . . . . . . . . . . . . . . . . . . . . . . . . . . . . . . . . . . . . . . . . . . . . . . . .6
Casting homogeneous gels . . . . . . . . . . . . . . . . . . . . . . . . . . . . . . . . . . . . . . . . . . . . . . . . . . . . . . . . . . . . . . . . . . . . . . . . . . . .7
Casting gradient gels . . . . . . . . . . . . . . . . . . . . . . . . . . . . . . . . . . . . . . . . . . . . . . . . . . . . . . . . . . . . . . . . . . . . . . . . . . . . . . . . . . .8
Preparing for gradient gel casting . . . . . . . . . . . . . . . . . . . . . . . . . . . . . . . . . . . . . . . . . . . . . . . . . . . . . . . . . . . .8
Configuring the gradient divider . . . . . . . . . . . . . . . . . . . . . . . . . . . . . . . . . . . . . . . . . . . . . . . . . . . . . . . . . . . . . .8
Calibrating the peristaltic pump . . . . . . . . . . . . . . . . . . . . . . . . . . . . . . . . . . . . . . . . . . . . . . . . . . . . . . . . . . . . . .9
Casting gradient gels . . . . . . . . . . . . . . . . . . . . . . . . . . . . . . . . . . . . . . . . . . . . . . . . . . . . . . . . . . . . . . . . . . . . . . . . . . .10
Gradient casting setup . . . . . . . . . . . . . . . . . . . . . . . . . . . . . . . . . . . . . . . . . . . . . . . . . . . . . . . . . . . . . . . . . . . . . . . . .10
Pouring gel solutions for gradient gels . . . . . . . . . . . . . . . . . . . . . . . . . . . . . . . . . . . . . . . . . . . . . . . . . . . .11
Polymerization
.........................................................................................
12
Unloading the gel caster . . . . . . . . . . . . . . . . . . . . . . . . . . . . . . . . . . . . . . . . . . . . . . . . . . . . . . . . . . . . . . . . . . . . . . . . . . . . .13
Electrophoresis . . . . . . . . . . . . . . . . . . . . . . . . . . . . . . . . . . . . . . . . . . . . . . . . . . . . . . . . . . . . . . . . . . . . . . . . . . . . . . . . . . . . . . . . .14
Programming the power supply/control unit . . . . . . . . . . . . . . . . . . . . . . . . . . . . . . . . . . . . . . . . . . . .14
Preparing the separation unit . . . . . . . . . . . . . . . . . . . . . . . . . . . . . . . . . . . . . . . . . . . . . . . . . . . . . . . . . . . . . . . .15
Preparing second-dimension gels: equilibration and loading . . . . . . . . . . . . . . . . . . . . . .16
Loading the separation unit . . . . . . . . . . . . . . . . . . . . . . . . . . . . . . . . . . . . . . . . . . . . . . . . . . . . . . . . . . . . . . . . . .17
Unloading and cleaning the separation unit . . . . . . . . . . . . . . . . . . . . . . . . . . . . . . . . . . . . . . . . . . . .18
Electrophoresis on pre-cast gels . . . . . . . . . . . . . . . . . . . . . . . . . . . . . . . . . . . . . . . . . . . . . . . . . . . . . . . . . . . . . . . . . . .19
Ettan DALT II Gel, 12.5 and Ettan DALT II Buffer Kit . . . . . . . . . . . . . . . . . . . . . . . . . . . . . .19
Description of the system . . . . . . . . . . . . . . . . . . . . . . . . . . . . . . . . . . . . . . . . . . . . . . . . . . . . . . . . . . . . . . . . . . . . .20
Preparing the Ettan DALT II Separation Unit . . . . . . . . . . . . . . . . . . . . . . . . . . . . . . . . . . . . . . . . . .21
Applying the IPG strip . . . . . . . . . . . . . . . . . . . . . . . . . . . . . . . . . . . . . . . . . . . . . . . . . . . . . . . . . . . . . . . . . . . . . . . . .23
Inserting gels into the separation unit . . . . . . . . . . . . . . . . . . . . . . . . . . . . . . . . . . . . . . . . . . . . . . . . . . . .24
Detection . . . . . . . . . . . . . . . . . . . . . . . . . . . . . . . . . . . . . . . . . . . . . . . . . . . . . . . . . . . . . . . . . . . . . . . . . . . . . . . . . . . . . . . . . .24
Recommended running conditions . . . . . . . . . . . . . . . . . . . . . . . . . . . . . . . . . . . . . . . . . . . . . . . . . . . . . . . . . . . . . . . . .25
Recipes . . . . . . . . . . . . . . . . . . . . . . . . . . . . . . . . . . . . . . . . . . . . . . . . . . . . . . . . . . . . . . . . . . . . . . . . . . . . . . . . . . . . . . . . . . . . . . . . . .26
Homogeneous gel solutions . . . . . . . . . . . . . . . . . . . . . . . . . . . . . . . . . . . . . . . . . . . . . . . . . . . . . . . . . . . . . . . . . .28
Gradient gel solutions . . . . . . . . . . . . . . . . . . . . . . . . . . . . . . . . . . . . . . . . . . . . . . . . . . . . . . . . . . . . . . . . . . . . . . . . . .28
Troubleshooting
........................................................................................
29
Care and maintenance . . . . . . . . . . . . . . . . . . . . . . . . . . . . . . . . . . . . . . . . . . . . . . . . . . . . . . . . . . . . . . . . . . . . . . . . . . . . . . .33
Cleaning . . . . . . . . . . . . . . . . . . . . . . . . . . . . . . . . . . . . . . . . . . . . . . . . . . . . . . . . . . . . . . . . . . . . . . . . . . . . . . . . . . . . . . . . . . . .33
Replacing internal components . . . . . . . . . . . . . . . . . . . . . . . . . . . . . . . . . . . . . . . . . . . . . . . . . . . . . . . . . . . . .33
Customer service information . . . . . . . . . . . . . . . . . . . . . . . . . . . . . . . . . . . . . . . . . . . . . . . . . . . . . . . . . . . . . . . . . . . . . . .34
Technical service and repair . . . . . . . . . . . . . . . . . . . . . . . . . . . . . . . . . . . . . . . . . . . . . . . . . . . . . . . . . . . . . . . . .34
Ordering information . . . . . . . . . . . . . . . . . . . . . . . . . . . . . . . . . . . . . . . . . . . . . . . . . . . . . . . . . . . . . . . . . . . . . . . . . . .34
• pi
um 80-6476-53
• pii
• ettan dalt II system function and description
Ettan DALT II System
In 2-D electrophoresis, proteins are separated according to isoelectric
point by isoelectric focusing, most reliably on immobilized pH gradient
(IPG) strips using the IPGphor™ IEF System. The second-dimension
electrophoresis separates the proteins on the basis of their molecular mass
using sodium dodecyl sulphate-polyacrylamide gel electrophoresis (SDSPAGE). The Ettan™ DALT II System is designed to handle multiple large
second-dimension gels in a simple, efficient, and reproducible manner.
Ettan DALT II System components:
•
•
•
•
•
12-slot vertical slab separation unit
200 W, 600 V, 1 A Power Supply/Control Unit
gel caster
gel casting cassettes
gradient maker with peristaltic pump.
Separation Unit
The Ettan DALT II Separation Unit accommodates up to twelve 25.5 ×
20.5 cm slab gels for separation under identical conditions. A sample,
focused in an IPG strip, is placed on the cathodic surface of a slab gel
and sealed with agarose. Up to 12 gels are inserted into the separation
unit through the buffer seal slots flanked by rubber gaskets. Any unused
slots are filled with the blank cassette inserts. The buffer seal is an effective current and liquid barrier.
The platinum wire cathode is attached to the underside of the lid, and
the platinum wire anode is in the lower tank. Safety interlocks prevent
the application of power to the separation unit unless the lid is closed
properly and the pump valve is in the circulate position. The lid is easily
removed for cleaning by sliding it off its hinges.
Fig 1. Ettan Dalt II Separation Unit.
A pump located in the lower chassis of the unit circulates the buffer,
pumping it up into the main chamber on the left side, between the
cassettes, down the right side and over the internal heat exchanger before
returning to the pump. The default setting for the pump is auto; the
pump will come on only when a run is started. Turning the lever at the
back of the unit from circulate to drain drains the tank. The temperature
is controlled by Peltier modules attached to the heat exchanger beneath
the tank.
• p1
ettan dalt II system • ettan dalt II system function and description
Power Supply/Control Unit
The Ettan DALT II System is controlled from the Power Supply/Control
Unit (see Fig 2). The unit supplies a maximum power output of 200 W
with a maximum of 600 V or 1 A. The temperature control range is
10 °C to 50 °C.
Gel Caster
The Ettan DALT II Gel Caster holds up to fourteen 1 mm gel cassettes,
with separator sheets, for casting homogenous or gradient gels (see Fig 3).
Fewer gels can be cast at one time by using blank cassette inserts to occupy
unneeded volume. The removable faceplate and separator sheets simplify
loading and unloading of cassettes from the unit. The unit also has
removable tilt support legs that allow the caster to be tipped back for
more convenient loading of gel casting cassettes.
Fig 2. Power Supply/Control Unit.
Gel Casting Cassettes
The Ettan DALT II Gel Casting Cassettes are preassembled (see Fig 4).
Two glass plates are joined along one edge by a hinge strip of silicone rubber,
and the sticky vinyl spacers (1 mm thick) are glued in position. To complete
assembly, close the two plates like a book and press them together over the
length of the spacer. Gels are removed by opening the book after the run
and carefully lifting out the gel slab. Care must be taken to ensure that the
gel does not adhere to the spacers and tear during removal. The cassette is
cleaned as a unit and can be stood upright to dry. The cassettes can be
cleaned in a dishwasher. Cassettes are 27 × 21 cm and produce a gel about
25.5 × 20.5 cm. A 1 mm-thick gel has a volume of approximately 52 ml.
Fig 3. Gel Caster.
Fig 4. Gel Casting Cassette.
um 80-6476-53
• p2
• ettan dalt II system function and description
Important information
• Connect the instrument to a properly grounded electrical outlet.
• The safety lid must be firmly in place and the pump valve set to circulate
before power can be applied.
• Stop the run before opening the safety lid.
• Rinse and flush the tank and pumping system with distilled or deionized water
before and after use.
• Always disconnect the power cord before servicing.
• Do not run the circulation pump if the separation unit is empty.
• Do not operate with buffer temperature above 50 ºC. All plastic parts are rated
for 50 ºC continuous duty.
• Turn the pump on during electrophoresis to minimize heating. Overheating will
cause irreparable damage to the unit.
• For runs near the lower temperature limits (~10–15 ºC), it may be necessary to
operate the unit in a cold room, especially in laboratories where the ambient
temperature is above 25 ºC.
• Do not autoclave or boil this unit or any of its parts.
• Use care when lifting and moving the separation unit. It is best to move the
unit when empty.
• When filled with glass plates and gel solutions, the casting unit is very heavy.
Use caution when moving or lifting the caster.
• If this equipment is used in a manner not specified by the manufacturer, the
protection provided by the equipment may be impaired.
• Only accessories and parts approved or supplied by Amersham Pharmacia
Biotech may be used for operating, maintaining and servicing this product.
• p3
ettan dalt II system • ettan dalt II system function and description
Specifications
Ettan DALT II Separation Unit
Gel capacity
Electrophoresis buffer volume
Dimensions (h × w × d)
Weight
Maximum temperature
Environmental operating conditions
Buffer circulation pump rate
12 gels
10 l
54 × 46 × 51 cm, lid closed
74 × 46 × 51 cm, lid open
24.5 kg
50 ºC
Indoor use, 4–40 ºC
Humidity up to 90%
Altitude to 2 000 m
~10 l/min
Ettan DALT II Power Supply/Control Unit
Maximum wattage
Maximum voltage
Maximum current
Temperature control range
Weight
Dimensions (h × w × d)
Environmental operating conditions
Installation category
Pollution degree
115 V~
230 V~
Product and safety certifications*
200 W
600 V DC
1.00 A
10–50 ºC
6.35 kg
33 × 26 × 19 cm
Indoor use, 4–40 ºC
Humidity up to 90%
Altitude to 2 000 m
II
2
90–130 VAC, 60 Hz, 650 W
180–230 VAC, 50–60 Hz, 650 W
EN61010-1, UL3101-1, CSA22.2
1010.1, EMC EN61326, CE Marked
Ettan DALT II Gel Caster
Gel capacity
Acrylamide solution volume (total)
Dimensions (h × w × d)
Weight
um 80-6476-53
• p4
14, 1 mm thick
950 ml
26 × 21 × 36 cm
(empty) 5 kg
(loaded) 19 kg
• ettan dalt II system function and description
Gel Casting Cassettes
Cassette dimensions (w × h × d)
Slab gel dimensions (w × h × d)
27.6 × 21.7 × 0.7 cm
25.5 × 20.5 × 0.1 cm
Gradient Maker
Dimensions (h × w × d)
Maximum gradient volume
Weight
54 × 19 × 18 cm
2l
5.4 kg
Peristaltic Pump for Gradient Maker
115 V~
230 V~
Weight
Dimensions (h × d × w)
Environmental operating conditions
Installation category
Pollution degree
Product certifications*
37 W, 1.5 A
37 W, 0.9 A
4.1 kg
13.5 × 18 × 22 cm
Indoor use: 0–40 ºC
Humidity: 10–90%
II
2
EN61010-1, UL508, cUL (115 V),
IEC 1010 (230V), CE
*This declaration of conformity is valid for the instrument only when it is:
• used in laboratory locations,
• used as delivered from Amersham Pharmacia Biotech, except for alterations
described in the User Manual, and
• connected to other CE-labeled instruments or products recommended
or approved by Amersham Pharmacia Biotech.
• p5
ettan dalt II system • preparing the gel caster
Preparing the gel caster
faceplate
feed tube
hydrostatic
balance
chamber
grommet
Set up the gel caster near a sink, in a tray, or on a drainboard so that any
liquid that may overflow from the unit or drain out of it during pouring
or disassembly can be easily contained.
The Ettan DALT II Gel Caster (see Fig 5) can accommodate up to fourteen 1 mm gel cassettes with separator sheets between them. If you are
not planning to cast a full set of gels, use the blank cassette inserts, with
separator sheets in between (provided with the separation unit) to
occupy the extra space.
support leg
knobbed
screw
gasket
Fig 5. Exploded view of caster.
Gel labels, for easy indexing of gels and samples, can be placed in the
cassettes at any time during the assembly of the caster.
1
Check that the caster is level. Remove the faceplate and tip the caster back
so that it rests on the removable tilt support legs. If casting gradient gels, place
the triangular sponge in the base of the V-shaped feed channel; otherwise, it may
be omitted (see Fig 6a).
2
Start filling the gel caster by placing a separator sheet against the back wall to
make it easier to remove the last cassette from the unit after polymerization. Fill
the caster by alternating cassettes with separator sheets. The rubber hinge should
be on the left side of the caster, with the offset end of the cassette up. End with
a separator sheet then use the thicker spacer sheets to bring the level of the
stack even with the edge of the caster.
Fig 6a. Gel caster with gel cassettes, tipped back.
3
Lubricate the foam gasket with a light coating of GelSeal compound to help
ensure a liquid-tight seal. Place the gasket in the groove on the faceplate.
Avoid stretching the gasket by seating it from the ends toward the middle.
4
Fig 6b. Gel caster filled and level.
Turn four black-knobbed screws into the four threaded holes across the bottom
until they are well engaged (two to three full turns). Carefully place the faceplate
onto the caster with the bottom slots resting on their respective screws. Screw the
four remaining black-knobbed screws into the holes at the sides of the faceplate
and tighten all eight evenly. Be sure the sealing gasket is compressed evenly by
the faceplate and forms a tight seal with the caster. Do not overtighten the screws
(see Fig 6b).
5
Insert the end of the rigid plastic feed tube, supplied with the gel caster, into the
rubber grommet in the floor of the hydrostatic balance chamber on the side of the
caster. The feed tube must be snug so that there is no leakage from the balance
chamber into the caster. The feed tube should be connected with flexible tubing
directly to either a peristaltic pump or a funnel (see Fig 7).
um 80-6476-53
• p6
• casting homogeneous gels
Casting homogeneous gels
Warning! Acrylamide is a neurotoxin. Never
pipette by mouth and always wear protective
gloves when working with acrylamide solutions, IPG strips, or surfaces that come into
contact with acrylamide solutions.
1
Be sure the entire gel casting system is clean, dry, and free of any
polymerized acrylamide.
2
Prepare a sufficient volume of gel overlay solution (water-saturated n- butanol). You
need 1 ml of overlay for each cassette, about 14 ml for casting a full 14-gel set.
3
Make up 100 ml of displacing solution (0.375 M TrisCl pH 8.8, 50% (v/v)
glycerol, bromophenol blue).
4
For a full 14-gel set, make up 0.9 l of acrylamide gel stock solution without
adding the 10% (w/v) ammonium persulphate (APS) or 10% (v/v) N,N,N',N'tetramethylethylenediamine (TEMED). This amount of gel solution will provide
you with sufficient volume to cast gels using either a funnel or a peristaltic pump.
5
Assemble the gel caster as described in the preceding section; the caster should
be placed on a level bench or on a leveling table so that gel tops are level. The
white triangular sponge may be omitted.
6
Connect the feed tube to either a funnel held in a ring-stand above the top of the
gel caster (about 30 cm) or a peristaltic pump. Insert the other end of the feed
tube into the grommet in the bottom of the balance chamber (see Fig 7).
7
Fill the balance chamber with 100 ml of the displacing solution.
8
Add the appropriate volumes of APS and TEMED only when ready to pour the
gels, not before. Once these two components are added, polymerization begins
and the gel solution should be completely poured within 10 min.
Fig 7. Gel caster, in use.
9
Pour the gel solution into the funnel, taking care to avoid introducing any air
bubbles into the feed tube. If a peristaltic pump is being used, the flow rate
should be increased slowly to the desired speed to avoid introducing any air
bubbles into the feed tube.
0
Pump gel solution into the caster until it is about 1 to 2 cm below the final desired
gel height. Stop the flow of acrylamide and remove the feed tube from the balance
chamber grommet. Once the feed tube is removed, the dense displacing solution
flows down the connecting tube, filling the V-well and sloped trough at the bottom of
the caster. The remaining acrylamide solution is forced into the cassettes to the final
gel height. The amount of gel solution required will be 800 to 850 ml for 14 gels.
!
Immediately pipette 1 ml of water-saturated butanol onto each gel. If you are
using a peristaltic pump to pour the gels, rinse the gel solution from the pump
before it begins to polymerize.
@
Allow the homogeneous gels to polymerize for at least 1 h before disassembling
the caster.
• p7
ettan dalt II system • casting gradient gels
Casting gradient gels
Preparing for gradient gel casting
Successful gradient gel casting requires planning, timing, and practice.
A full cast with the Ettan DALT II Gel Caster requires approximately
0.9 l of acrylamide stock. Polymerization begins as soon as TEMED and
APS are added to the acrylamide stock. At this point there is no time to
adjust the gradient maker divider, or the cassettes and separators in the
gel caster. To familiarize yourself with the gel caster and gradient maker
before casting gels, we recommend setting up the unit and configuring
the gradient divider as described below. Follow the gradient pouring
procedure on pages 11–12, substituting water for the appropriate volume
of light solution, and a mixture of glycerol and water for the appropriate
volume of heavy solution. When the angle of the gradient divider is
adjusted correctly and you are comfortable with the gel casting procedure,
clean all parts of the caster and gradient maker, including sponges, separator sheets and filler blocks, with a solution of mild detergent, followed
by a deionized water rinse.
Configuring the gradient divider
divider
You can adjust the shape of the gradient divider to suit the number of gels
to be cast and the shape of the gradient you want. When casting a full
tank of gels, the angle of the adjustable divider to the floor of the gradient
maker should be about 40° (see Fig 8). For fewer gels, decrease the divider
angle. Whatever angle you use, a straight divider gives a linear gradient.
1
Determine the amount of gel solution needed to cast the desired number of gels.
pinch clamps
Fig 8. Configuration of the gradient maker.
2
Loosen the faceplate screws on the empty gradient maker to adjust the gasket
angle. Refer to the divider configuration in Figure 8 as a guideline for the angle
you should use. Pull the divider slightly to help move it into position. Use the red
adjuster rod provided with the gradient maker to push the gradient divider down.
3
For a linear gradient, straighten the divider, with its upper end almost touching
the left wall at the height determined by the volume of water.
4
To make a funnel for introducing heavy solution into the left side, bend the
remaining top of the divider to the right.
continues
um 80-6476-53
• p8
• casting gradient gels
5
Tighten the faceplate screws and close the pinch clamps on the outflow tubing at
the bottom of the gradient maker before adding water or gel solutions.
6
Using water in place of gel solution, put half of the required volume in the right
chamber and the other half in the left chamber.
7
Adjust the angle of the gradient divider so that the level of liquid in the “heavy”,
or left, chamber is about 2 cm below the level of liquid in the “light” chamber.
You can use tape or wax pencil on the outside of the gradient maker to mark the
angle of the gradient divider.
8
Open the pinch clamps to remove the water, or pour the water out of the top of the
gradient maker. Repeat this procedure whenever the required volume of acrylamide
solution changes as a result of changing the number of gels you are casting.
Calibrating the peristaltic pump
Install the pump head and tubing on the pump controller as directed in
the User Manual supplied with the pump. Calibrate the pump flow rate
before the first use and after every 10 to 20 uses, to ensure proper flow
rates. This calibration procedure assumes a desired flow rate of
335 ml/min for 14 gels.
Example. You want to cast a full tank of gels
and determine that the flow rate is 500 ml/min
when you set the flow rate at 3. For a flow
rate of 335 ml/min:
(335 ÷ 500) × 3 = 2 = the appropriate flow
rate setting to deliver 335 ml/min
1
Place the inlet side of the tubing in a beaker that contains 1 l of water.
2
Place the outlet side of the tubing in a 1 l graduated cylinder.
3
Set the flow speed at 3 on the dial and start the pump.
4
Stop the flow of liquid after exactly 2 min.
5
Measure the water in the outlet cylinder and divide by 2 to determine
the flow in ml/min.
6
To determine the appropriate flow setting, divide the desired flow rate by the flow
rate in step 5; multiply this result by the flow speed used in step 3.
• p9
ettan dalt II system • casting gradient gels
Casting gradient gels
light
chamber
heavy
chamber
feed tube
pump
a
b
c
Fig 9. Pump connected to gradient maker.
The gradient maker is a simple unit with two chambers that are defined
by an adjustable silicone rubber gasket clamped between two acrylic
plates. You can modify the shape of the gel gradient by adjusting the
movable divider. Solutions flow out of the two chambers in proportion to
the relative widths at the surface of the liquid, join at the Y-connector,
and then are thoroughly mixed in an in-line “bow-tie” mixer that has no
moving parts. Three pinch clamps control the flow at the exits from the
light (a) and heavy (b) chambers, and after the mixer (c) to control flow
into the peristaltic pump (see Fig 9).
A gradient gel results from using two gel solutions of different acrylamide
concentrations and densities—a light solution and a heavy solution. The
heavy gel solution contains glycerol. During the gradient pouring procedure, the mixing ratio of heavy solution to light solution gradually
increases, with the heavier solution underlaying the light solution. This
generates a downward gradient of increasing gel percentage. To ensure
balanced flow, when the gradient maker is filled with equal volumes on
each side of the divider, the height of the heavy gel solution in the gradient maker should be 1 to 2 cm less than the height of the light solution.
Under these conditions, the two solutions are in hydrostatic equilibrium.
See “Configuring the gradient divider” on page 8. Hydrostatic equilibrium can also be achieved by using equal masses, instead of volumes, of
the heavy and light solutions.
Gradient casting setup
1
Warning! Acrylamide is a neurotoxin. Never
pipette by mouth and always wear protective
gloves when working with acrylamide solutions, IPG strips, or surfaces that come into
contact with acrylamide solutions.
Be sure the entire gel casting system is clean, dry, and free of any polymerized
acrylamide. Place the white sponge in the base of the V-shaped feed channel of
the caster. The caster should be placed on a level bench to ensure that the gels
and gradients are even and level.
2
Configure the gradient divider for the number of gels you are casting. If necessary, calibrate the gradient pump flow rate. See “Calibrating the peristaltic pump” on page 9.
3
Be sure that the faceplate screws on the gradient maker are fingertight and all
the gradient maker lines are clamped off. There are three clamps: one coming
from each chamber and one after the bow-tie mixer. Close all three.
4
Prepare a sufficient volume of gel overlay solution (water-saturated n- butanol). You
need 1 ml of overlay for each cassette, or about 14 ml for a set of 14 cassettes.
5
Make up 100 ml of displacing solution.
6
Make up the gel acrylamide solutions from the stock mixes, but do not add the
10% ammonium persulphate (APS) and 10% N,N,N',N',-tetramethylethylenediamine (TEMED). See “Gradient gel solutions” on page 28.
um 80-6476-53
• p10
• casting gradient gels
Pouring gel solutions for gradient gels
1
Prepare the gel caster, as described on page 6, placing gel labels in each cassette.
2
When you are ready to cast the gels, add the APS and TEMED and mix each gel
solution thoroughly. Vary the amount of TEMED added to control the rate of
polymerization. Once these reagents are added, polymerization begins. You have
about 10 min to cast the gradient before the gels begin to solidify at the top.
Work rapidly and carefully.
3
light
solution
Pour the light solution into the right side of the gradient maker (the chamber that
is narrower at the bottom—“Light in right”).
4
Fill the tubing between the light and heavy chambers with light solution. Carefully
open the clamp on the light chamber exit tube (a) and then very slowly open the
heavy chamber exit tube clamp (b). Allow light solution to fill the tube coming
from the light chamber all the way to the Y-connector and back up to the point
at which the heavy tube enters the heavy chamber. Fill the entire tube with light
solution (no bubbles), but do not allow light solution into the heavy chamber
itself (see Fig 10).
a
b
c
Fig 10. Priming the gradient maker
with light solution.
5
Close both clamps again. All three clamps should now be closed.
6
light
solution
displacing
solution
Add the heavy solution to the heavy (left) chamber (the chamber that is wider at
the bottom) until the liquid level reaches a point about 2 cm below the level of
light solution in the adjacent chamber.
7
heavy
solution
Load the balance chamber on the side of the caster with 75 ml of displacing
solution (see Fig 11). The feed tube should be seated securely in the grommet
seal to prevent leakage of displacing solution into the caster.
8
Open the clamp below the mixer (c) to start flow to the gel caster via the
peristaltic pump.
a
b
Fig 11. Properly filled caster and
gradient maker.
c
9
Carefully open the clamp on the light chamber exit tube (a) and turn on the
pump to bring a small amount of solution into the caster. Light solution should
begin to flow through the feed tube and mixer toward the caster. At this point
a small amount of light solution can enter the caster.
continues
• p11
ettan dalt II system • casting gradient gels
0
When the light solution level in the gradient maker falls to about 1 cm above the
level of the heavy solution, open the heavy chamber exit tube clamp (b).
!
Watch the gradient enter the caster.
@
When the caster is filled to about 1–2 cm below the final desired gel height or
the gradient maker is empty, turn off the pump and close the feed tube clamp
(c). Stop the pump before air enters the feed tube.
#
Pull the feed tube out of the balance chamber grommet. Place the end in a
waste container to collect the excess polymerizing acrylamide. As soon as the
feed tube is removed, the dense blue displacing solution flows down the connecting
tube to the unit. It should completely fill the V-well and the sloped trough at the
bottom of the caster. If the V-well is not completely filled and the level of gel in
the cassettes is more than 1 cm below the top of the cassettes, you can add up
to 25 ml more displacing solution to the balance chamber. The gradient is now
in hydrostatic equilibrium in the unit, ready to polymerize (see Fig 12).
water
$
a
b
displacing solution
c
Immediately pipette 1 ml of water-saturated n- butanol onto each gel. Allow gels
to polymerize at least 2 h.
%
Fig 12. Finished cast.
Quickly reopen clamp (c) and restart the pump to empty the gradient maker of
any excess polymerizing acrylamide. Collect the excess in a waste container.
Dispose of unpolymerized acrylamide according to applicable safety guidelines.
^
Rinse the gradient maker well to prevent polymerization within the tubing lines.
Place the feed tube in a larger waste vessel or a sink drain. Pour a litre of water
into each chamber of the gradient maker and open all clamps.
&
Start the pump to flush the system. Flush another 2 l of water through the
gradient maker and tubing.
Polymerization
Allow nongradient gels to polymerize for at least 1 h; allow gradient gels
2 h to polymerize. Gradient gel polymerization should proceed from the
top down. You can observe this through the front and sides of the caster.
The level of the dense displacing solution falls farther as the gels contract
upon polymerization.
um 80-6476-53
• p12
• unloading the gel caster
Unloading the gel caster
1
Make sure the caster is either near a sink or on a tray so that any liquid leaking
out can be contained.
2
Remove the front of the gel caster by loosening and removing the
black-knobbed screws.
3
Carefully unload the cassettes from the unit by pulling forward on the
separator sheets.
4
Rinse the top surface of each gel with distilled water to remove the butanol
and any unpolymerized acrylamide. Remove the separator sheet if still attached
and rinse the glass cassettes with water to remove any acrylamide adhering to
the glass plates.
5
Examine the gels for polymerization defects and discard any unsatisfactory gels.
6
Store the good gels in an airtight container at 4 ºC with a small amount of gel
storage solution to keep the gels from drying out.
7
Rinse the gel caster and all tubing with mild detergent, then rinse thoroughly
with deionized water. Clean the separator and spacer sheets with a mild detergent
and rinse with deionized water.
• p13
ettan dalt II system • electrophoresis
Electrophoresis
The unit should be placed close to a sink for easy rinsing and draining.
A length of rubber or vinyl tubing sufficiently long to reach a sink should
be attached to the drain port on the back of the unit before use. The unit
should not be placed on bench paper or any other material that might be
pulled in by the air intake fans, as any hindrance to air circulation will
reduce the cooling capacity.
Programming the power supply/control unit
The control unit has four programmable parameters: Run Type, Timer,
Pump, and Temperature. When the unit is turned on, the default settings
of constant power, continuous run, auto pump, and 25 ºC are shown on
the display. The set/read button toggles the controller between the set and
read modes. The start/stop button starts and stops the execution of the
programmed electrophoresis run. The § and © buttons move the cursor
between run parameters, and the ¶ and Ä buttons change the settings of
the parameters (see Fig 13).
Fig 13. Controller interface in programming mode.
Sample program
Twelve gels electrophoresed at 160 W, constant
power, and 25 ºC with a 5 W/gel entry phase.
The second phase is extended longer than required
to ensure that the dye front runs off the gel.
Step #1
Const Watt
Time 1
Pump
Temperature
60 W
00:45 hrs
Auto
2 5ºC
Step #2
Const Watt
Time 2
Pump
Temperature
160 W
10:00 hrs
Auto
2 5ºC
Run Type determines the method of power regulation. The options for run type
are constant power, constant current, constant voltage, and crossover mode.
In crossover mode the voltage and current limits for the run are set manually,
instead of using the instrument defaults of 600 V and 1 000 mA. As the run
progresses, the power supply operates in the mode that is limiting.
Timer controls the duration of the electrophoresis run. The options are continuous
run, timed step, timed and hold, and volt-hours. Up to three timed steps of up
to 100 h each can be programmed using the timed step mode. With timed step
mode, all the steps must have the same run type.
Pump controls buffer circulation through the separation unit. The options for
the pump are on, off, and auto. Auto mode activates the pump only when power
is applied.
Temperature controls the cooling or heating of the buffer in the separation unit.
The temperature range is from 10–50 ºC. On the display, cooling is indicated by
↓ and heating is indicated by ↑. The pump must be on to properly cool or heat
buffer in the tank. The lower temperature limit is a function of the ambient
temperature and the power reading. To reach the lower temperature limit (10 ºC)
or in laboratory environments where the ambient temperature is elevated, it may
be necessary to place the unit in a cold box or cold room.
um 80-6476-53
• p14
• electrophoresis
Preparing the separation unit
The Ettan DALT II Separation Unit requires a total volume of about
9.5 l of electrophoresis buffer to fill both the upper and lower chambers.
The upper chamber holds approximately 2.0 l; the lower chamber holds
about 7.5 l. Because most standard electrophoresis systems use the same
buffer in both the lower and upper chambers, the tank can be filled with
the full volume of buffer and the gels added afterward. With the full
volume of buffer in the unit, the liquid buffer serves as a lubricant for
inserting the glass cassettes through the buffer seal. Lubrication of the
cassettes and the rubber surfaces of the buffer seal is vital when loading
the unit. Forcing dry cassettes through the slots can severely damage the
seal. The electrophoresis buffer can be made within the tank using the
internal circulating pump to mix the solution.
1
Before filling the tank, turn the pump valve to circulate (see Fig 14).
2
Fill the separation unit with 8–9 l of SDS electrophoresis buffer, turn on the
pump/control unit, and turn the pump on. If the pump fails to begin circulating
buffer immediately, the pump must be primed; turn the pump valve to drain then
back to circulate while the pump is on.
3
On the control unit, adjust the temperature to the desired setting.
Fig 14. Circulation valve.
• p15
ettan dalt II system • electrophoresis
Preparing second-dimension gels:
equilibration and loading
For a detailed description of the components of the SDS equilibration
solution and the equilibration process, please consult 2-D Electrophoresis:
Using Immobilized pH Gradients (80-6429-60).
1
Prepare SDS equilibration buffer. Just prior to use, add DTT to the buffer to a
concentration of 1% (w/v).
2
Place the IPG strips in individual tubes with the support film toward the wall.
3
Add 5–10 ml of the DTT-containing solution to each tube. Typically, two 18-cm
strips can be equilibrated with 10 ml of buffer.
4
Incubate the strips for 10–15 min with gentle agitation. Do not overequilibrate,
as proteins can diffuse out of the strip during this step.
5
Second equilibration (optional): Prepare SDS equilibration buffer with iodoacetamide
added to 2.5% (w/v) and equilibrate the strips with this solution, as in steps 3–4.
6
Before equilibration is completed, prepare the gel cassettes for loading by rinsing
the top of the gel with deionized water and draining. Before loading the IPG
strips, make sure that the gel surface and plates are dry.
7
Lay the prepared gel flat on a clean surface.
Fig 15a. IPG strip being positioned on cassette.
8
Using forceps, remove the equilibrated IPG strip from the equilibration solution
and rinse with fresh SDS electrophoresis buffer.
9
Fig 15b. IPG strip being seated against slab gel.
Holding one end of the IPG strip with forceps, carefully draw it across the long gel
plate until the strip is completely on the glass plate and centred (see Fig 15a).
Using a thin plastic spatula, ruler, or spacer, push against the plastic backing of
the IPG strip—not the gel itself—and slide the strip between the two glass plates
and down into contact with the surface of the slab gel (see Fig 15b). The strip
should just rest on the surface of the gel. Avoid trapping air bubbles between strip
and the slab gel and avoid piercing the second-dimension gel with the strip. By
convention, the acidic, or pointed, end of the IPG strip is on the left. The gel face
of the strip should not touch the opposite glass plate.
continues
um 80-6476-53
• p16
• electrophoresis
0
Apply molecular weight marker proteins (optional): Apply the markers to a sample
application piece in a volume of 15–20 µl, then cover the piece with 50 µl of
agarose sealing solution. Pick up the application piece with forceps and place
next to one end of the IPG strip. The markers should contain 0.2–1.0 mg of each
component for Coomassie blue staining or about 10–50 ng of each component for
silver staining.
!
Seal the IPG strip in place. For each IPG strip, melt an aliquot of agarose sealing
solution in a heating block or boiling water bath. (Tip: An ideal time to carry out
this step is during IPG strip equilibration.) Allow the agarose to cool slightly and
slowly pipette the solution across the length of the IPG strip, taking care not to
introduce bubbles. It will flow down between the glass plate and the support film
and seal the IPG strip in place (see Fig 16). Agarose should also be used to seal
any gap between the side of the gel and a side spacer. Allow a minimum of 1 min
for the agarose to cool and solidify.
Loading the separation unit
1
Once the electrophoresis tank has reached the desired temperature and the gels
are ready, carefully slide the gels, one-by-one, into the tank. Until the buffer
reaches the bottom of the rubber sealing tubes, the cassettes should be lubricated with buffer or water to prevent the rubber tubing from sticking to the
cassettes. Once the buffer level reaches the sealing tubes, the gels should slide
in easily.
Note: Forcing cassettes through the rubber tubes of the buffer seal without
sufficient lubrication can damage the buffer seal.
2
Fig 16. Adding agarose sealing solution.
Fill any unused slots with the blank cassette inserts. When the last cassette is put
into place, buffer will be pushed out of the lower tank into the upper tank via the
two air vents at the corners of the sealing assembly. The final level of electrophoresis
buffer in the upper tank should not be above the openings for the air vents.
Recommendation: For electrophoresis runs of six or fewer gels, it is helpful to
alternate gel cassettes with blank cassette inserts. Alternating cassettes will make
it considerably easier to remove the cassettes from the unit following the run. The
blank cassette inserts are easily removed first, leaving a larger gap that makes it
easier to grasp and remove the gel cassettes.
• p17
ettan dalt II system • electrophoresis
Unloading and cleaning the separation unit
1
After the run has been completed, remove one or more of the blank cassette
inserts or gels and drain enough of the electrophoresis buffer from the tank to
expose 2–3 cm of the gel cassettes. This will ease removing the remaining
cassettes. When the first cassette, either blank or gel, is removed, a sucking sound
will be heard as air is drawn into the lower chamber. For runs of six or fewer gels,
alternating gel cassettes with blank cassettes also eases the removal of the gel
cassettes at the end of a run. Leave enough of the electrophoresis buffer in the
tank to act as a lubricant between the glass cassettes and the buffer seal.
There are two methods for removing the first cassettes from the unit:
using (a) the cassette removal tool or (b) the hands.
A Carefully insert the cassette removal tool between the cassette and the buffer
Fig 17. Using the cassette
removal tools.
seal, with the folded tip facing the cassette, until the tip is beneath the bottom
edge of the cassette. Verify that the tool is caught on the bottom edge of the
cassette, then lift it out slowly with the tool (see Fig 17).
B By hand, apply upward pressure alternately to each side of the cassette,
gradually shifting it up until you can grasp it and remove it (see Fig 18).
2
Open the cassettes using a Wonder Wedge (80-6127-88) and carefully transfer
the gels to a staining tray (80-6468-17), for example. Take care to ensure that
the gel does not adhere to the spacers.
Note: Vinyl gloves are less sticky than latex gloves and make it easier to handle
large gels.
3
Fig 18. Removing cassettes
by hand.
When all of the gels and blank cassette inserts have been removed, drain the
buffer by turning the pump valve to drain with the pump on. Emptying will take
about 1 min.
4
After the buffer has been removed, pour 3–4 l of distilled or deionized water into
the unit and allow it to drain. Rinse the unit with 5–7 l of distilled or deionized
water in circulate mode, empty again, and repeat if necessary.
5
Remove the lid from the unit by sliding it to the left and rinse it with distilled or
deionized water. Slide the lid back on its hinges before using the unit again.
6
In most cases thorough rinsing is all the cleaning that is necessary. If a more
thorough cleaning is required, see “Care and maintenance” for a detailed
description of the removal of all the internal components.
um 80-6476-53
• p18
• electrophoresis on pre-cast gels
Electrophoresis on pre-cast gels
Ettan DALT II Gel, 12.5 is a pre-cast polyacrylamide gel for the seconddimension of two-dimensional electrophoresis. The gel is cast onto a
plastic support film. The gel size is 255 × 196 × 1 mm.
The gel is a homogeneous 12.5% polyacrylamide gel cross-linked with
bisacrylamide. It is intended to be used in the Ettan DALT II System
together with the Ettan DALT II Buffer Kit. The gel is formulated for
long shelflife and, when used with the buffer kit, generates a discontinuous
buffer system yielding rapid runs with sharp, reproducible results. Performance and capacity of this gel and buffer system are similar to the widely
used Laemmli (Tris-glycine) buffer system.
These instructions describe how to use Ettan DALT II Gel, 12.5 together with
the Ettan DALT II Buffer Kit for the second-dimension of 2-D electrophoresis.
Ettan DALT II Gel, 12.5 and Ettan DALT II Buffer Kit
Package contents
Each gel package contains six gels and instructions. The buffer kit contains
four bottles of buffer and 12 tubes of sealing solution. The solutions are
sufficient for a single run of up to 12 gels.
product
quantity
product number
Ettan DALT Gel 12.5%
Instructions
Ettan DALT II Buffer Kit
Anode buffer
Cathode buffer
Gel buffer
Sealing solution
6
1
enough to run 12 gels
1 bottle (75 ml)
2 bottles (2 × 125 ml)
1 bottle (60 ml)
12 tubes (12 × 1 ml)
17-6002-36
71-5019-56
17-6002-50
Technical data
Gel composition
Separation range
Gel dimensions
Buffer in gel
Gel backing
Shelf life
Storage
100× anode buffer
10× cathode buffer
Gel buffer
Sealing solution
T = 12.5%, C = 3%
(12.125% acrylamide, 0.375% bisacrylamide)
Mr 12 000 –120 000
255 × 196 × 1 mm
Piperidinopropionamide (PPA)*
Polyester film, 265 × 211 mm
6 months
+4 °C to +8 °C
5 M diethanolamine (DEA), 5 M acetic acid
0.25 M Tris, 1.92 M glycine, 1% (w/v) SDS
Piperidinopropionamide (PPA)*
Gel buffer with 0.5% agarose and 0.002%
bromophenol blue
*The buffer system in this gel and buffer kit is covered by United States Patent 6,090,252
and others.
• p19
ettan dalt II system • electrophoresis on pre-cast gels
Description of the system
The Ettan DALT II Gel, 12.5 gel is a pre-cast polyacrylamide gel for the
second-dimension of large-format 2-D electrophoresis. It is bound to a
plastic support film, which provides ease of handling and dimensional
stability. The gel is intended for use in the Ettan DALT II System. The gel
is inserted into a cassette that allows it to be run in a vertical mode with
liquid buffers. The gel is used with the Ettan DALT II Buffer Kit that
includes concentrated buffers for running the gels, gel buffer for seating
the gel in the pre-cast gel cassette, and sealing solution for attaching the
IPG strip to the top of the slab gel.
Fig 19. Ettan DALT II Gel, 12.5 and
buffer kit components.
The pre-cast gel cassette holds the Ettan DALT II gel vertically in the
Ettan DALT II Separation Unit. It consists of a glass plate with spacers
glued to the vertical edges and connected to a rigid plastic frame along
one edge by a flexible hinge. The gel is placed against the glass plate
between the spacers. When the cassette is closed and snapped together,
the frame presses the gel evenly against the glass plate. The glass plate
extends 5 mm higher than the plastic frame at the cathodic (–) edge
providing a surface for sliding the IPG strip into position.
The buffer in the gel is part of a unique buffer system that gives longer shelf
life and shorter run times than the conventional Laemmli (Tris-glycine)
system, while retaining the protein capacity and robustness of that system.
Separations performed using Ettan DALT II Gel, 12.5 are similar to those
seen with a 12.5% Laemmli gel.
Fig 20. Pre-cast gel cassette.
um 80-6476-53
• p20
The associated buffer kit contains all the reagents necessary for a single
run of up to 12 Ettan DALT II Gel, 12.5 gels in the Ettan DALT II
Separation Unit.
• electrophoresis on pre-cast gels
Preparing the Ettan DALT II Separation Unit
Tip: The subsequent steps of electrophoresis
unit preparation, insertion of the gel into
the pre-cast gel cassette, and melting of the
Sealing Solution can be performed as the
IPG strips are equilibrating.
Ensure that the valve on the Ettan DALT II Separation Unit is set to
circulate. Fill the tank to the 7.5 l fill line with distilled or deionized
water. Add the entire contents (75 ml) of the bottle of 100× anode solution from the buffer kit. Avoid pouring the 100× anode solution on the
buffer seal tubing by spreading it slightly with one hand while pouring
the solution (see Fig 21). Turn on the pump to mix. Set the unit to the
desired temperature (25 ºC is recommended).
Inserting the Ettan DALT II Gel, 12.5 into the pre-cast gel cassette
1
Open the gel package. Cut around the gel on two sides at about 1 cm from the
edge to avoid cutting the gel or the support film. Remove the gel from the package.
Fig 21. Addition of 100× anode to the separation
unit solution.
The gel is cast onto a plastic support film and does not cover the film entirely.
The gel is covered with a protective plastic sheet. Markings on the protective
sheet indicate the orientation of the gel and the direction of electrophoresis. The
bottom (+ or anodic) edge of the gel is flush with the edge of the support film.
The support film protrudes approximately 15 mm beyond the top (– or cathodic)
edge of the gel and approximately 5 mm at either side.
2
Open an Ettan DALT II Pre-cast Gel Cassette and place it on the bench top with
the hinge down (see Fig 22).
3
Pipette 2–4 ml of gel buffer onto the centre of the glass plate (see Fig 23).
Fig 22. Pre-cast gel cassette open.
continues
Fig 23. Gel buffer.
• p21
ettan dalt II system • electrophoresis on pre-cast gels
4
Remove the protective plastic sheet from the gel. Handling the gel only by the
side support film margins, hold it, gel-side down, over the glass plate. Ensure that
it is oriented with the cathodic (–) edge of the gel toward the cathodic (–) edge of
the cassette. Flex the centre of the gel downward slightly and lower it toward the
glass plate so that the middle of the gel contacts the puddle of gel buffer. The
gel buffer will lubricate the gel and allow it to be moved and placed in the proper
position (see Fig 24).
5
Fig 24. Initial placement of the gel.
Move the gel and allow it to fall against the glass so that the edges of the gel are
against (not overlapping) the side spacers and so that the bottom (anodic) edge of
the gel is flush (within 1 mm) of the bottom (anodic) edge of the glass plate. The
protruding side support film margins (but not the gel) should rest on top of the
side spacers (see Fig 25).
6
Use the roller to press out any bubbles and excess buffer from between the gel
and the glass. Press firmly against the plastic support film with the roller and roll
over the entire gel (see Fig 26). After rolling, the gel should adhere firmly to the
glass and resist further movement.
Fig 25. Final placement of the gel.
7
Close the cassette and snap the plastic frame to the glass plate (see Fig 27 and 28).
8
Repeat the procedure for each second-dimension gel to be run.
Fig 26. Removing air bubbles.
Fig 27. Closing the cassette.
Fig 28. Snapping the cassette.
um 80-6476-53
• p22
• electrophoresis on pre-cast gels
Applying the IPG strip
1
Leave the loaded gel cassette lying flat on the bench top with the glass plate
down and the plastic frame up.
2
Fig 29. Placing of the IPG strip.
Rinse the IPG strip. Pour some of the diluted (1×) cathodic buffer into a 100 ml
graduated cylinder or similar vessel. Using forceps, remove the equilibrated IPG
strip from the equilibration solution and dip it into the cathodic buffer in the
cylinder. (This step lubricates the IPG strip and washes off any particulate material
that may be precipitated on the surface of the IPG strip.)
3
Place the IPG strip on the top (cathodic) surface of the gel. Holding one end of
the IPG strip, carefully draw it across the shelf formed by the extension of the
glass plate beyond the plastic frame, until the strip is completely on the glass
plate and centred, gel face upward (see Fig 29).
4
Fig 30. Seating the IPG strip against the gel.
Push the IPG strip into place. Using a thin spatula or ruler, push against the plastic backing of the IPG strip to slide it a short distance into the gap between the
glass plate and the support film and plastic frame. Be sure to push against the
backing of the IPG strip, not the gel itself (see Fig 30). Place the cassette upright
in the cassette rack with the glass plate forward. Continue to slide the IPG strip
down until it contacts the surface of the second-dimension gel. The strip should
just rest on the surface of the gel. Avoid trapping bubbles between the strip and
the slab gel and avoid piercing the second-dimension gel with the strip. Note the
orientation of the IPG strip relative to the gel (conventionally, the acidic [pointed]
end of the IPG strip points to the left). The gel face of the strip should not touch
the plastic support film.
5
Fig 31. Sealing the IPG strip with agarose.
Seal the IPG strip in place. For each IPG strip, melt an aliquot of sealing solution
from the buffer kit in a 100 °C heating block or boiling water bath. (Tip: An ideal
time to carry out this step is during IPG strip equilibration.) Allow the solution to
cool slightly, then slowly pipette the solution across the length of the IPG strip,
taking care not to introduce bubbles. It will flow down between the glass plate
and the support film and seal the IPG strip in place (see Fig 31). There may be a
gap of up to 2 mm between the edge of the gel and the side spacer. Any gap
should be plugged by allowing some of the sealing solution to flow down the gap.
Allow a minimum of 1 min for the agarose to cool and solidify).
6
Repeat the procedure for each second-dimension gel to be run.
• p23
ettan dalt II system • electrophoresis on pre-cast gels
Inserting gels into the separation unit
1
When the lower tank buffer has reached the desired temperature, insert the loaded
gel cassettes with the IPG strips in place (see Fig 32). Push blank cassette
inserts into any unoccupied slots. Load the unit from back to front. Gel cassettes
and blank cassette inserts slide much more easily into the unit if they are wet.
Distilled or deionized water from a squirt bottle can be used to wet the cassettes
and inserts as they are being loaded into the unit. When all 12 slots are filled,
the buffer level should be slightly below the level of the buffer seal gaskets.
2
Dilute the cathode buffer to working strength by adding both bottles of 10×
cathode buffer (total volume 250 ml) to 2.25 l of distilled or deionized water.
Fig 32. Loading gels into the separation unit.
3
Pour the diluted (1×) cathode buffer into the top of the tank to the fill line.
(Some of this buffer may drip through the gasket and mix with the lower anode
buffer during the run, but this will not affect performance or results.)
4
Program the desired run parameters into the control unit, close the lid of the
electrophoresis tank, and press start/stop to begin electrophoresis.
Detection
The Ettan DALT II Gel, 12.5 gel can be stained or visualized with a
variety of commonly used techniques, including Coomassie Blue and
silver staining. When using the PlusOne™ Silver Staining Kit, Protein,
a modified staining protocol should be used. Prepare the staining
reagents (250 ml per gel) as indicated in the kit instructions with the
following exceptions:
• Prepare twice the fixing solution called for (500 ml per gel rather than 250 ml).
• Prepare the developing solution with twice the formaldehyde called for
(100 µl per 250 ml of developing solution rather than 50 µl). Stain the gels
according to the following protocol:
Fixing
Sensitization
Water wash
Silver
Wash
Developing
Stop
Wash
Preserve
2 × 60 min*
60 min
5 × 8 min
60 min
4 × 1 min
10 min†
60 min
2 × 30 min
40 min
*The first fixing step may be
prolonged up to 3 days if desired
for the sake of convenience.
†
um 80-6476-53
• p24
Approximate time: this step may
be visually monitored. The gels
should be transferred to stop
solution when the spots have
reached the desired intensity and
before the background staining
becomes too dark.
• recommended running conditions
Recommended running conditions
Note: The run times provided should only be
used as guidelines or estimates. Decreasing
the number of gels per run allows increased
watts per gel, which reduces run times.
The maximum power specified for each
temperature is the limit of the cooling system
capacity at that temperature.
Constant power, 28 °C
phase
power
1
5 W per gel
2
200 W maximum*
Constant power, 25 °C
phase
power
1
5 W per gel
2
180 W maximum*
Constant power, 20 °C
phase
power
1
5 W per gel
2
120 W maximum*
Constant power, 15 °C
phase
power
1
5 W per gel
2
80 W maximum*
Constant power, 10 °C †
phase
power
1
1–2 W per gel
duration
15–60 min
Until the bromophenol blue dye front reaches
the bottom of the gel. Approximately 5 h for a
full set of 12 gels.
duration
15–60 min
Until the bromophenol blue dye front reaches
the bottom of the gel. Approximately 6 h for a
full set of 12 gels.
duration
15–60 min
Until the bromophenol blue dye front reaches
the bottom of the gel. Approximately 8 h for a
full set of 12 gels.
duration
45 min
Until the bromophenol blue dye front reaches
the bottom of the gel. Approximately 10–12 h
for a full set of 12 gels.
duration
Until the bromophenol blue dye front reaches
the bottom of the gel. Overnight.
*The ambient temperature must be ≤ 25 °C
† The ambient temperature must be ≤ 15 °C
• p25
ettan dalt II system • recipes
Recipes
Acrylamide stock (30.8 %T)
Warning! Acrylamide is a neurotoxin. Always
use mechanical pipettes and wear gloves
when working with acrylamide solutions.
Acrylamide (MW 71.08)
Bis (N,N’ methylenebisacrylamide,
MW 154.17)
Distilled or deionized water
final conc.
30%
amount
900 g
0.8%
24 g
to 3 000 ml
May need filtration. Weigh acrylamide and bis in a hood; avoid contact with dust.
Filter and store at 4 ºC.
1.5 M TrisCl, pH 8.8
Tris (MW 121.14)
6 M HCl to pH 8.8
Distilled or deionized water
final conc.
1.5 M
amount
545 g
about 150 ml
to 3 000 ml
final conc.
amount
10%
10 g
to 100 ml
final conc.
amount
10%
2g
to 20 ml
final conc.
10%
amount
0.5 ml
4.5 ml
Adjust to pH 8.8 and store at 4 ºC.
10% (w/v) SDS
Sodium dodecylsulphate
(MW 288.38)
Distilled or deionized water
Store at room temperature.
10% (w/v) Ammonium persulphate
Ammonium persulphate
(MW 71.08)
Distilled or deionized water
Prepare fresh.
10% (v/v) TEMED
TEMED (MW 116.2)
Distilled or deionized water
Prepare fresh.
Displacing solution
(0.375 M TrisCl, pH 8.8, 50% (v/v) glycerol, bromophenol blue, 100 ml)
amount
TrisCl (1.5 M, pH 8.8)
25 ml
Glycerol
50 ml
Bromophenol blue
2 mg
Distilled or deionized water
25 ml
Should be made fresh; stored solution may support microbial growth.
um 80-6476-53
• p26
• recipes
Recipes (continued)
Water-saturated butanol
n or t-butanol
Distilled or deionized water
amount
50 ml
5 ml
Combine in a bottle and shake. Use the top phase to overlay gels.
Store at room temperature indefinitely.
Gel storage solution
(0.375 M TrisCl, pH 8.8, 0.1% (w/v) SDS, 2 l)
final conc.
TrisCl (1.5 M, pH 8.8)
0.375 M
10% (w/v) SDS
0.1% (w/v)
Distilled or deionized water
amount
500 ml
20 ml
to 2 000 ml
Store at 4 ºC.
1 × SDS electrophoresis buffer
(25 mM Tris, 192 mM glycine, 0.1% (w/v) SDS, approximate pH 8.3, 20 l)
final conc.
amount
Tris (MW 121.14)
25 mM
60.5 g
Glycine (MW 75.07)
192 mM
288.0 g
SDS (MW 288.38)
0.1% (w/v)
20.0 g
Distilled or deionized water
to 20 l
Do not adjust the pH of this solution.
SDS equilibration buffer
(50 mM TrisCl, pH 8.8, 6 M urea, 30% (v/v) glycerol, 2% (w/v) SDS,
bromophenol blue, 200 ml)
final conc.
amount
TrisCl (1.5 M, pH 8.8)
50 mM
6.7 ml
Urea (MW 60.06)
6M
72.07 g
Glycerol (87% [v/v], MW 92.09)
30% (v/v)
69 ml
SDS (MW 288.38)
2% (w/v)
4.0 g
Bromophenol blue
trace
a few grains
Distilled or deionized water
to 200 ml
Store at -20 ºC. This is a stock solution. Add DTT or iodoacetamide before using.
Sealing solution
(0.25 mM Tris, 192 mM glycine, 0.1% (w/v) SDS, bromophenol blue,
0.5% (w/v) agarose, 25 ml)
final conc.
amount
SDS electrophoresis buffer
(see above)
25 ml
Agarose (IEF, NA, or M)
125 mg
Bromophenol blue
trace
a few grains
Combine all ingredients in a 250 ml Erlenmeyer flask. Swirl to disperse. On a low setting,
heat in a microwave oven until the agarose is completely melted, about 1 min. Do not allow
the solution to boil over.
Allow the agarose to cool slightly before using. Do not adjust pH.
• p27
ettan dalt II system • recipes
Homogeneous gel solutions
900 ml
volume required for (ml)
final %T
Acrylamide stock
1.5 M TrisCl, pH 8.8
Water
10% SDS
10% APS
10% TEMED
10%
300
225
356
9
9
1.54
12.5%
375
225
281
9
9
1.24
15%
450
225
206
9
9
1.03
Note: The amounts of TEMED (0.025–0.09% (v/v)) and APS (0.1% (w/v)) suggested here
are based on our experience. You may want to change volumes for your laboratory because of
differences in temperature and reagent quality. Perform a small-scale test before using a new
composition to check that your solution polymerizes in about 10 min.
The gel recipes are based on Laemmli, U.K. Nature 227, 680–685 (1970).
Gradient gel solutions
Light solution, 450 ml
volume required for (ml)
final %T
Acrylamide stock
1.5 M TrisCl, pH 8.8
Water
10% SDS
10% APS
10% TEMED
8%
120
113
207
4.5
4.5
0.96
10%
150
113
178
4.5
4.5
0.77
12%
180
113
148
4.5
4.5
0.64
14%
210
113
118
4.5
4.5
0.55
16%
240
113
88
4.5
4.5
0.48
Heavy solution, 450 ml
volume required for (ml)
final %T
Acrylamide stock
1.5 M TrisCl, pH 8.8
Water
10% SDS
Glycerol
10% APS
10% TEMED
um 80-6476-53
• p28
12%
180
113
120
4.5
31
2.3
0.21
14%
210
113
90
4.5
31
2.3
0.18
16%
240
113
60
4.5
31
2.3
0.16
18%
270
113
30
4.5
31
2.3
0.14
20%
300
113
0
4.5
31
2.3
0.13
• troubleshooting
Troubleshooting
symptom
possible causes
possible solutions
Insufficient volume of buffer
in upper reservoir.
Pump is not primed.
Ensure that the unit contains enough buffer to contact the
upper electrode.
Turn circulation valve to drain to fill with buffer then back
to circulate.
On control unit, set pump to on.
Service call.
Turn unit on at power switch in back.
Plug in unit.
Service call.
Turn the AC power switch off for a few seconds, then on again.
If the problem persists, Service call.
Make sure that the lid is completely closed.
Make sure that the pump valve is turned completely
to circulate.
Service call.
Electrical and mechanical
No current at start of run
Buffer not circulating
Display on the control unit blank
Pump is off or set to auto.
Pump is broken.
Unit is not turned on.
Unit is not plugged in.
Display is broken.
Control unit display malfunctions
Open-circuit warning
Safety interlocks not engaged.
Gel casting
Gel caster leaks
Incomplete gel polymerization
Gel is too soft, too brittle, or white
Gel exhibits swirls
Dye front curves up “smiles”
Apply a light film of GelSeal compound to the foam gasket
before casting.
Check the foam gasket for cracks or nicks and replace if necessary.
If the stack is too thick, the front plate may not seat firmly
against the gasket. Remove one or more of the filler sheets until
the gasket seals.
Use only recent stocks of the highest-quality reagents.
If the dry ammonium persulphate does not crackle when water is
added to it, replace with fresh reagent.
Use fresh ammonium persulphate.
Solutions of extreme pH may not polymerize.
Degas the monomer solution. Oxygen inhibits polymerization.
Increase both ammonium persulphate and TEMED by 30 to 50%.
Adjust the gel solution temperature to a minimum of 20 ºC.
Check and adjust crosslinker concentration. Standard SDS gels
should have a crosslinker concentration of 2.6% (%C = (g bis ×
100)/(g monomer + g bis)).
Make up fresh acrylamide stock solution.
If gel polymerized too fast (<10 min), reduce the concentration
of catalyst (APS and TEMED) by 25%.
If gel polymerized too slowly (>50 min), increase the
concentration of catalyst (APS and TEMED) by 50%.
Make up fresh acrylamide stock solution.
Check circulation of the buffer.
Pre-chill the buffer.
Decrease power, voltage, or current.
• p29
ettan dalt II system • troubleshooting
Troubleshooting (continued)
symptom
possible causes
possible solutions
Gel casting (continued)
Gels cast simultaneously are different sizes
Gradient gels—uneven layering
Unusually slow or fast run
Check for leaks.
Allow the solution to settle, or reach equilibrium, before adding
the overlay.
Add equal amounts of overlay solution to each gel.
Add overlay as quickly as possible.
Add sucrose (15% (w/v)) or glycerol (25% (v/v)) to the highpercentage monomer solution.
Add a very small amount of bromophenol blue to the highpercentage monomer solution to track gradient formation.
Note: Excessive bromophenol blue will inhibit polymerization.
All plates, spacers, and gaskets must be clean, dry, and free
of grease.
Make sure buffer is at the fill level and not covering the vent holes.
Check the pH of the buffer. If the pH is exceeded, make fresh
buffer; do not back-titrate.
Check recipes, gel concentrations, and buffer dilutions.
(For example, do not use TrisCl in place of Tris base for the
electrophoresis buffer.)
Discard older acrylamide solutions and use only reagents of the
highest quality.
Only use freshly deionized urea of the highest quality.
Adjust power, current, or voltage.
Pre-cast gels
Second-dimension separation
proceeds slowly with high current
Dye front is irregular
All of the slots in the buffer
seal are not occupied
by either gel cassettes or
blank cassettes.
Anodic buffer has mixed
with cathodic buffer
from overfilling of
either the cathodic or
the anodic reservoir.
The top surface of the gel
has been damaged during
application of the IPG strip.
Bubbles or liquid between
the gel and the glass plate.
Interfering substances in
the first dimension.
Pronounced downward curving of
the dye front on one side of the gel
um 80-6476-53
• p30
There is an unfilled gap
between the gel and one
of the spacers.
Ensure that all 12 slots in the buffer seal are occupied.
Do not pour more than the suggested volume (7.5 l) into the
lower reservoir.
Ensure that the level of the anode (lower) buffer does not
come above buffer seal when the separation unit is
fully loaded. Remove any excess anode buffer from the
upper reservoir.
Ensure that the level of cathode buffer is not above the air vents
in the upper reservoir.
Take care during application of the IPG strip that neither
gel is damaged.
Use the roller to remove any bubbles or excess liquid between
the gel and the glass plate. Ensure that no visible bubbles remain
and that the gel adheres firmly to the glass and resists movement.
Contaminants in the sample can cause distortions or swollen
regions in the IPG strip following IEF. Modify sample preparation
to limit these contaminants. See 2-D Electrophoresis Using
Immobilized pH Gradients—Principles and Methods (80-6429-60).
When sealing the IPG strip into place, ensure that some of the
agarose sealing solution flows down any gap that may exist
between the gel and the spacer.
• troubleshooting
Troubleshooting (continued)
symptom
possible causes
possible solutions
Stained gels
Protein spots are diffuse
or broader than usual
Protein spots are poorly resolved
Protein spots are near the buffer front
Protein spots have not entered the
gel when buffer front has reached
the bottom of the gel
Protein spots are at both extremes
but not in center
Vertical protein streaks
Spots skewed or distorted
IPG strip not properly placed
on gel surface.
Gels run too fast—
uneven migration.
Uneven gel surface.
Heavy background after silver staining
Use only the highest-quality reagents.
Make sure that polymerization is complete.
Check equilibration time of IPG strips. Too long can lead to
diffusion, and too short can lead to incomplete equilibration.
Make sure the IPG strip rests on the slab gel surface
without damaging.
Problems with first dimension—see troubleshooting guides for
IPGphor or Multiphor™ units,
or 2-D Electrophoresis: Principles and Methods.
Allow gel to polymerize completely.
Begin electrophoresis as soon as the IPG strips are loaded, to
prevent diffusion of low-molecular-weight proteins.
Running too fast. Reduce the power, current, or voltage.
Reduce the temperature setting.
Problems with the first dimension.
Pore size of the gel is too large. Increase the %T.
Proteins degraded during sample preparation. Add protease
inhibitors during sample preparation.
Check the pH of the 4× gel buffer. It should be pH 8.8. Proteins
will migrate faster below pH 8.8.
The gel pore size is too small. Decrease the %T.
Check the pH of the 4× gel buffer. It should be pH 8.8. Proteins
will migrate more slowly above pH 8.8.
The molecular weight range of the sample requires an acrylamide
concentration gradient to resolve the full range of proteins.
Make sure IPG strip uniformly contacts the gel surface along its
entire length. Avoid gouging the surface of the separating gel.
Run at a lower power setting. Use a two-step program: Start at a
low power setting until the proteins enter the gel, then increase
the power for the remainder of the run.
Overlay the running gel with water-saturated butanol before
polymerization begins to avoid forming an uneven gel surface.
Uneven gel polymerization or gradient formation.
Use reagents of the highest purity, preferably electrophoresis grade.
Use deionized, double-distilled water.
• p31
ettan dalt II system • troubleshooting
Troubleshooting (continued)
symptom
possible causes
possible solutions
Distortion in the 2-D pattern
Bubbles between the gel
and the glass plate.
Liquid between the gel and
the glass plate.
Interfering substances in
the first dimension.
Vertical gap in the 2-D pattern
Bubble between IPG strip
and top surface of second
dimension gel.
Incorrectly prepared
equilibration solution.
Poor transfer of protein from
IPG strip to second
dimension gel.
Insufficient equilibration
IPG strip is not placed properly.
Use the roller to remove any bubbles or excess liquid between
the gel and the glass plate.
Ensure that no visible bubbles remain and that the gel adheres
firmly to the glass and resists movement.
Contaminants in the sample can cause distortions or swollen
regions in the IPG strip following IEF. These distortions can result
in disturbances in the second-dimension.
Ensure that no bubbles are trapped between the IPG strip and
the top surface of the second-dimension gel.
Vertical streaking
Spots are vertically doubled,
or “twinned”
Poor representation of highermolecular-weight proteins
um 80-6476-53
• p32
Incorrectly prepared
equilibration solution.
Poor transfer of protein from
IPG strip to second
dimension gel.
Prepare equilibration solution according to instructions.
Use low power for sample entry phase. Extend entry phase
if necessary.
Prolong equilibration time.
Ensure that the plastic backing of the IPG strip is against the
glass plate of the second-dimension cassette.
Prepare equilibration solution according to instructions.
Use low power for sample entry phase. Extend entry phase
if necessary.
• care and maintenance
Care and maintenance
Cleaning
For day-to-day operation of the unit, the cleaning procedure outlined in
unit operation—thoroughly rinsing the separation tank with distilled or
deionized water—is sufficient. If desired, the internal components of the
separation unit can be removed for a more thorough cleaning (see below).
The unit can also be periodically cleaned with a dilute solution of a
mild detergent.
Clean the gel casting cassettes and pre-cast gel cassettes with a dilute
solution of a laboratory cleanser such as RBS-35, from Pierce Chemical
Company. Rinse the cassettes thoroughly with distilled or deionized water.
• DO NOT autoclave or heat any part above 50 ºC.
• DO NOT expose the unit or its parts to organic solvents, including
>20% ethanol
• If using radioactive reagents, decontaminate the unit with a cleaning
agent such as CONTRAD 70 or Decon 90 from Decon Laboratories, Inc.
Replacing internal components
To remove the anode plate or any of the other internal components, follow the
directions below.
1
Insert the buffer seal removal tools through the fifth or sixth slot, with the wider
end underneath the tubes. Turn the tools 90º and place as close to the end
blocks as possible. Carefully pull upward on the buffer seal until it is removed
from the unit (see Fig 33).
2
Fig 33. Using the buffer seal
removal tools.
Slide the two baffle plates upward and out of the unit.
3
The two flow guides are removed by pulling out the retaining pins and lifting the
blocks out.
buffer seal
baffle plate
4
The anode plate then can be removed by unscrewing the flathead nylon screw
and lifting the plate out.
flow guide
5
To reassemble the unit, replace the anode plate and screw, making sure that
the sealing sleeve is in place. Spread a small amount of GelSeal compound on
the plug with a swab applicator to prevent corrosion.
6
anode plate
Fig 34. Internal components.
Replace the flow guides and baffle plates.
7
Put a light film of GelSeal compound on the gasket of the buffer seal and
reinsert it into the unit using even pressure. Make sure that it is fully seated
before using the unit.
• p33
ettan dalt II system • customer service information
Customer service information
Technical service and repair
Amersham Pharmacia Biotech offers complete technical support for all
our products. If you have any questions about how to use this product,
or would like to arrange to repair it, please call Amersham Pharmacia
Biotech Technical Support.
Important! Request a copy of the Amersham Pharmacia Biotech “Health
and Safety Declaration” Form before returning the item. No items can be
accepted for servicing or return unless this form is properly completed.
Ordering information
product
code number
Ettan DALT II Separation Unit and Power Supply/Control Unit
115 V~
230 V~
Replacement Lid
Replacement Buffer Seal
Buffer Seal Removal Tool (2/pkg)
Replacement Baffle Plate
Replacement Flow Guide
Replacement Anode Plate
80-6466-46
80-6466-27
80-6473-11
80-6473-30
80-6474-63
80-6473-49
80-6473-68
80-6473-87
Ettan DALT II Cassettes
Pre-cast Gel Cassette
Gel Casting Cassette
Blank Cassette Insert
Cassette Removal Tool (2/pkg)
80-6466-65
80-6466-84
80-6466-03
80-6474-82
Ettan DALT II Pre-cast Gels
Pre-cast Gel, 12.5% (6/pkg)
Buffer Kit (one run of 12 gels)
17-6002-36
17-6002-50
Ettan DALT II Gel Caster
Complete with Separator Sheets (16 pcs) and Filler Sheets (6 pcs)
Separator Sheets (16/pkg)
Filler Sheets (6/pkg)
Black-Knobbed Screws (4/pkg)
Triangular Sponge
Acrylic Feed Tube
Foam Sealing Gasket
Silicon Tubing Set, two pieces/pkg: 9 mm o.d., 178 mm long;
and 12.5 mm o.d., 16 mm long
Replacement Tilt Leg with Nylon Screw
Replacement Faceplate
um 80-6476-53
• p34
80-6467-22
80-6467-41
80-6467-60
80-6437-58
80-6474-06
80-6437-20
80-6023-76
80-6437-39
80-6474-25
80-6474-44
• customer service information
product
code number
DALT Gradient Maker with Peristaltic Pump
115 V~
230 V~
Gradient Maker Gasket/Divider
Gasket Adjuster Rod
Knobs (4/pkg)
Plastic Feed Tubing (1.8 m)
Bow-Tie Mixer Kit
Acrylic Feed Tube
80-6067-65
80-6067-84
80-6068-41
80-6068-60
80-6437-58
80-6068-03
80-6068-22
80-6437-20
Accessories
2-D Electrophoresis: Using Immobilized pH Gradients
Cassette Rack (2/pkg)
Equilibration Tubes (12/pkg)
Stainless Steel Staining Tray Set
GelSeal, 1/4 oz. tube
Roller
Fluorescent Rulers (2/pkg)
Wonder Wedge Plate Separation Tool
80-6429-60
80-6467-98
80-6467-79
80-6468-17
80-6421-43
80-1106-79
80-6223-83
80-6127-88
PlusOne Electrophoresis Chemicals and Reagents
Urea, 500 g
Dithiothreitol (DTT), 1 g
Bromophenol Blue, 10 g
Glycerol (87%), 1 l
Acrylamide IEF (acrylic acid <0.002%), 1 kg
Acrylamide IEF 40% solution, 1 l
N,N’,-Methylene bisacrylamide, 25 g
N,N’,-Methylene bisacrylamide 2% solution, 1 l
Agarose IEF, 10 g
N,N,N’,N’,-tetramethylethylenediamine (TEMED), 25 ml
Ammonium Persulphate (APS), 25 g
Tris, 500 g
Glycine, 500 g
Sodium Dodecylsulphate (SDS), 100 g
Silver Staining Kit, Protein
17-1319-01
17-1318-01
17-1329-01
17-1325-01
17-1300-02
17-1301-01
17-1304-01
17-1306-01
17-0468-01
17-1312-01
17-1311-01
17-1321-01
17-1323-01
17-1313-01
17-1150-01
Molecular Weight Markers
MW Range 2 512–16 949, 2 mg/vial, 1 vial
MW Range 14 400–94 000, 575 mg/vial, 10 vials
MW Range 53 000–212 000, 175 mg/vial, 10 vials
80-1129-83
17-0446-01
17-0615-01
• p35
ettan dalt II system • notes
Notes:
um 80-6476-53
• p36
• notes
Notes:
• p37
ettan dalt II system • notes
Notes:
um 80-6476-53
• p38
Ettan, IPGphor, Multiphor, and PlusOne are trademarks of Amersham Pharmacia Biotech Limited or
its subsidiaries.
Amersham is a trademark of Nycomed Amersham plc.
Pharmacia and Drop Design are trademarks of
Pharmacia Corporation.
Coomassie is a trademark of ICI Americas Inc.
© 2000 Amersham Pharmacia Biotech Inc.
All rights reserved.
All goods and services are sold subject to the terms
and conditions of sale of the company within the
Amersham Pharmacia Biotech group that supplies
them. A copy of these terms and conditions is
available on request.
Printed in the USA.
Amersham Pharmacia Biotech UK Limited
Amersham Place Little Chalfont
Buckinghamshire England HP7 9NA
Amersham Pharmacia Biotech AB
SE-751 84 Uppsala Sweden
Amersham Pharmacia Biotech Inc.
800 Centennial Avenue PO Box 1327
Piscataway NJ 08855 USA
Amersham Pharmacia Biotech Europe GmbH
Munzinger Strasse 9 D-79111 Freiburg Germany
www.apbiotech.com