1
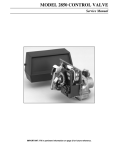
Isobar Twin Softener
User Manual
System Overview
Slave Valve 1
Master Shuttle Valve
Slave Valve 2
Electrical Connections
Unit 1
Unit 2
Brine Line Connection
Back View
System Overview Cont.
• Unit 1(left) & Unit 2 (right) will be labeled on the back of each control valve and
should be installed in this order for soft water regeneration & refill.
• Connect Master Shuttle Valve by pushing the manifold onto the back of each unit and
fasten with clips provided. Check that Meter Cable is firmly inserted into the center of
the electronic meter located between Master Shuttle Valve manifold and bypass
valve.
• Insert Unit 1 and Unit 2 electrical cords into Master Shuttle Valve receptacles labeled
1 & 2. These are located under the front cover plate on the lower left side of the
Master Shuttle Valve (See Electrical Connections for details.)
• Connect brine line by pushing the black tubing into the 3/8” Tube Lok tee as shown.
Note: To prevent air leaks, make certain that two distinct resistance points are felt
when pushing the tubing into the Tube Lok tee. This will be approximately 3/8”.
• For drain line and plumbing connections refer to your installation manual provided.
Master Shuttle Valve
24VAC Power Supply
Connection (P)
•
•
•
•
Unit 1 & Unit 2
Connections
(1 & 2)
The Hardness Pointer should be set for the compensated hardness, calculated in grains per gallon
(gpg). This setting determines how often the system will need to regenerate. NOTE: To calculate
compensated hardness multiply the ppm (mg/l) of iron (Fe) & manganese (Mn) by “4” & add to the
hardness number in gpg. If your hardness number is calculated in mg/l or ppm, simply divide this
number by 17.1 to convert it to grains per gallon.
The Green status light indicates which unit is in service (currently being used to soften the water) and
the Blue status light indicates which unit is in Standby (waiting its turn to be in service). They will
alternate between each other and regenerate automatically based on water usage. This provides
uninterrupted soft water to the home.
Once the unit in service has depleted its capacity, the Master Shuttle Valve will switch to the unit that
is in standby. After it switches tanks, the status light for the unit that was in standby will turn from
Blue to Green indicating it is the unit now in service. The status light for the unit that was in service
will turn from Green to Yellow, indicating that unit is in a regeneration cycle. Once the Yellow unit is
finished regenerating, it will then turn Blue indicating it is in standby.
When a unit is regenerating and the end user turns the Slave Valve dial manually through the steps,
the Master Shuttle Valve circuit board will not count that unit as being regenerated properly. It
WILL force the unit to regenerate again to make sure that the unit has completed all of the required
steps for the proper amount of time. In this case the status light will continue to be Yellow until the
full regeneration completes. A full regeneration (1 full revolution of the indicator dial) takes 2 hours
and 45 minutes.
Battery Backup (Uses a Standard 9-Volt Alkaline Battery)
•
Installing the Battery
o To install the battery, the slide cover of the Master Shuttle Valve must be removed.
o Next connect the battery to the 9 volt battery connector located just beneath the Master
Shuttle Valve circuit board control panel. Place the battery in the plastic tray.
o Replace the Master Shuttle Valve cover.
•
Features of Battery Backup
o The battery backup allows the Master Shuttle Valve motor to complete running to the next
position if a power fail occurs during a unit transition.
o The battery backup will keep the electronic meter active to count down gallons if water is
used during a power failure.
•
If power fails during regeneration of Unit 1 or Unit 2, the respective slave valve will act like a
standard electromechanical control valve—when a power failure occurs, the unit stops at its current
point in the regeneration and then restarts at that point when the power is restored. If water flow is
detected through the drain line, it is recommended that the unit be bypassed.
Battery Location
Starting an Immediate Regeneration Cycle
•
•
To Start an Immediate Extra Cycle Turn the Slave Valve dial clockwise to “Regen” for the tank
that is in service (Green status light)
This units status light
ight will turn Yellow and start to regenerate. When finished, the status light will
turn Blue.
Regeneration Cycle Indications
•
The Softener Regeneration Cycle steps can be viewed by looking at the position indicator slot on the
respective softener Slave
ve Valve dial.
o
o
o
o
o
o
o
Step 1: Rinse
Step 2: Backwash
Step 3: Brine + Rinse
Step 4: Rapid Rinse
Step 5: Settle Rinse
Step 6: Brine Refill
Step 7: In Serv (Service)
Basic Operation
The Reverse flow body is
marked with an “R” and
also with a “Star” located
on the inlet of Unit 2.
Electrical Connections
Master Shuttle Valve
P = Power Supply Connection
=
P
1
2
1 = Unit 1 Connection
2 = Unit 2 Connection
Final Set-Up
When Plumbing Installation is Complete and Power is OFF:
.
1) Make certain that bypass valve is in bypass position & open a soft water faucet to evacuate
air from plumbing lines.
2) Add water a few inches above the salt grid in the brine tank. Manually step Unit 1 & Unit 2
to Backwash position. Crack open the bypass valve just enough to allow a very low flow
into the units and allow BOTH to evacuate air. Once air is depleted, slowly open bypass
valve and let run at full flow to drain for 2-3 minutes.
3) Manually select Service (In Serv) position for both units
4) For Unit 1 only, select Brine/Rinse position and draw water from the brine tank until it stops.
This will be approximately 3” from the bottom. Note: If water is not being drawn from
the brine tank, check all brine line connections for air leaks.
5) For Unit 1 only, select Rapid Rinse position & let run to drain for 2-3 minutes.
6) For Unit 1 only, select Brine Refill position & fill brine tank until water level is just above
the grid plate.
7) For Unit 1 only select Service (In Serv) position.
8) Repeat steps 4 – 7 for Unit 2.
9) Plug Power Supply in “P” port.
10) Add Softener Sanitizer disinfectant packet (included) to brine tank. In lieu of Softener
Sanitizer, 2-3 oz. of standard unscented chlorine bleach can be used. Caution: More bleach
than 2-3 oz. can damage the softener resin!!!
11) Manually step unit in service (Green status light) to the regeneration position (Regen).
12) Verify the Master Shuttle Valve switches to the stand-by tank (Blue status light changes to
Green for unit that was in stand-by & Green to Yellow for unit that was in service).
Final Set-Up (Cont.)
13) For the unit that is now in Service (Green status light), fully rotate Slave Valve dial
clockwise 360° back to Service (InServ) position. Note: After unit in regeneration
completes the cycle, the unit in service will immediately begin a full regeneration (This will
take approximately 5 ½ hours for both units to complete)
14) Open faucet & verify Green status light is flashing signifying the electronic meter is
detecting flow through the unit. Note: If the Green Light is NOT flashing, check bypass
valve and ensure it is in the service position & the meter cable is firmly inserted into the
electronic meter.
15) Fill the brine tank with high quality water softener salt. Note: If softener is treating iron
and/or manganese the regular use of resin cleaners or using iron inhibiting salt is
recommended .
16) Replace Master Shuttle Valve cover & check bypass is fully in the service position.
Trouble Shooting
SYMPTOM
1. Softener fails to regenerate
automatically
2. Loss of capacity
PROBABLE CAUSE
Power supply plugged into
intermittent or dead power source.
Reconnect cable
Improper Hardness input
Reset Hardness input
Defective power supply
Replace power supply
Defective circuit board or meter
Call dealer, Replace or repair
Defective drive motor
Replace motor.
Increase raw water hardness
Brine concentration and/or quantity
Reset unit to the new capacity.
Keep brine tank full of salt at all times.
Clean it yearly. Salt may be bridged.
If using a salt grid pate, ensure refill
water is over it.
Resin fouling
Call dealer, find out how to confirm it.
Clean the resin and prevent future
fouling.
Poor distribution, Channeling
(uneven bed surface)
Internal valve leak
Call dealer. Check distributors and
backwash flow.
Call dealer. Replace spacers, seals
and/or piston.
Call dealer. Check for resin oxidation
caused by chlorine. Mushy resin.
Resin loss
Call dealer. Check for correct bed
depth. Broken distributors.
Air or gas in bed: Well gas eliminator.
Loose brine line.
Check items listed in #1 & #2
Bypass valve open
Channeling
4. High salt usage
Connect to constant power source
Disconnected meter cable
Resin age
3. Poor water quality
CORRECTION
High salt setting
Excessive water in brine tank
Constant flow through the unit
Improperly set hardness
Close by-pass valve
Check for too slow or high service
flow. Check for media fouling.
Adjust salt setting on back of valve.
Check brine line connections for air
leak and injection assembly.
Indicates plumbing leak (i.e. toilet
tank)
Reset Compensated Hardness
Trouble Shooting
SYMPTOM
5. Loss of water pressure
PROBABLE CAUSE
Clean or replace pipeline.
Pre-treat to prevent
Fouled resin
Clean resin. Pretreat to prevent
Improper backwash
6. Excessive water in brine
tank and/or salty water
to service
7. Softener fails to use salt
CORRECTION
Scaling/fouling of inlet pipe
Plugged drain line
Too many resin fines and/or
sediment. Call dealer, reset backwash
flow rate, and/or adjust
Dirty or damaged brine valve
Check flow to drain. Clean flow
control
Clean or replace brine valve
Plugged injector
Clean injector and replace screen
Low inlet pressure
Increase pressure to allow injector to
perform properly. (20 psig minimum)
Excessive brine refill cycle time
Reset brine refill cycle time
Check items listed in #1
Improper control valve programming
Check and reset programming
Plugged/restricted drain line
Clean drain line and/or flow control
Injector is plugged
Clean or replace injector and screen
No water in brine tank
Check for restriction in BLFC.
Ensure safety float is not stuck.
Check brine tank for leaks.
Water pressure is too low
Line pressure must be at least 20 psi.
Brine line injects air during brine draw
Check brine line for air leaks
Internal control leak
8. Control cycles
continuously
Faulty circuit board
Call dealer, check piston, seals and
spacers for scratches and dents
Replace circuit board
9. Continuous flow to drain
Foreign material in control
Call dealer. Clean valve, rebuild unit
Internal control leak
Same as above
Valve jammed in backwash, brine, or
Rapid rinse position
Same as above
Motor stopped or jammed
Replace motor
Status Light Error Indications
•
If there is an error on the Master Shuttle Valve, the two unit status lights will alternately
flash orange and normal operation will not be able to continue until the error is corrected. To
try to recover from this condition, carefully observe what is happening (does the shuttle
motor sound like it is running? Is it actually turning the output shaft? How long does it run
before it goes into error? If the motor is NOT running, unplug power from the unit,
disconnect the 9 volt battery (if installed) and then repower it. See if the error returns. If the
error does return call your WaterSoft Dealer. NOTE: If the unit is alternately flashing orange
lights and the Master Shuttle Valve IS running, the shuttle valve is most likely trying to find
the home position. If this is the case, the orange lights should stop flashing within two
minutes time and it will NOT be necessary to unplug the power.
•
There are two things that can cause a unit to have an RED error. First, if the micro-switch
located on the slave valve does not latch in after the circuit board has run the unit for 10
minutes, the softener unit will go into a RED status light error meaning the motor failed to
run or the micro switch failed to open. Second, if the micro-switch does not drop out after
approximately 3 hours and 15 minutes, then the electronics assumes that the micro-switch
failed closed and sets that unit in RED error.
•
Purple indicates that both units are in regeneration at the same time. Hard water will pass
through to service during this time. To correct this, turn both dials clockwise on the units to
“In Serv” position. Both units will regenerate one at a time.
Orange Alternately
Flashing
Red
Purple
Replacing a Master Shuttle Valve Circuit Board
•
After installing a new electronics circuit board in the Master Shuttle Valve, it must be forced
to find the home position. To do this, plug everything into the electronics board except for
the shuttle valve optical encoder. Do not install the 9 volt battery. Before powering up the
system make sure both units are in the service (“In Serv”) position. Then power up the
system. The unit status light that is Green, rotate its knob clockwise to the regeneration
(“regen”) position. The Master Shuttle Valve will run but will go into error after a few
seconds because the optical encoder is unplugged. Remove power from the unit, plug the
encoder in, and repower the board. The shuttle valve will search for the home position.