Download User manual of PT301
Transcript
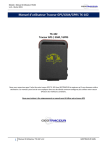
GPS Personal and Pet Tracker
www.autoleaders.gr
PT03
Please Read these simple guidelines. Not following them may be dangerous or illegal. Read the full user
manual for more information.
Thank you for purchasing our product PT03. This deliberately edited manual is to introduce the tracker
with the complete technical data and the instructions showing how to operate the device smoothly and
correctly. Make sure to read this manual carefully before using this product. Most problems could be
solved through the explanations and the troubleshooting tips. Once you finish reading it, keep it handy for
necessary reference. Please note that specification and information are subject to changes without prior
notice in this manual. Any change will be integrated in the latest release. The manufacturer assumes no
responsibility for any errors or omissions in this document. For safety reason, do not tell other people the
mobile phone number of your PT03 without taking precautions of security settings.
1. Product Overview
Can be used for the protection for kids, old persons and pets, the management of persons, track secretly.
Based on GSM/GPRS network and GPS satellite positioning system to track the far-way object
conveniently by short message, internet or PDA. Easy to find the position: No need to build special
platform, checking directly by short message, internet, PDA. So it can take down the cost for the server
and the customers. It also supports LiveGTS to real-time track. With the antenna and battery inside, easy
to carry on.
Main Features:
Tracking via SMS or GPRS (TCP)
Current location report
Tracking by time interval
Voice Surveillance
Movement alert
SOS panic button
Geo-fencing control
Low battery alert
Speeding alert
Work with GPS tracking software LiveGTS
2. Parameters
Content
Specs.
Dim.
68mm x 47mm x 17mm
Weight
50g
Network
GSM/GPRS
Band
900/1800/1900Mhz or 850/900/1800/1900Mhz
GPS chip
SIRF3 chip
GSM/GPRS module
Simcom300 or Simcom340
GPS sensitivity
-159dBm
GPS accuracy
5m
Time To First Fix
Cold status
Car charger
12—24V
Wall charger
110-220V
Battery
Chargeable changeable 3.7V 800mAh Li-ion battery
Standby
48hours
Storage Temp.
-40°C to +85°C
Operation Temp.
-20°C to +55°C
Humidity
5%--95% non-condensing
45s
input
Warm status
5V
input
35s
Hot status
1s
output
5V
output
3. Getting Started
This section will describe how to set up your PT03.
-2-
3.1
Hardware Features
PT03 includes:
• Main Unit
• Charger
3.2
Connecting and Installation
Read this manual before using your PT03 and check if all parts are included in the packaging box.
3.2.1 SIM card installation
Make sure that there is no call transfer and call display is on, and PIN code off. The SMS message must
in Text format, can’t be identified for PDU format.
Steps:
1 Open the rear cover, and pick out the battery.
2 Push the foil along and turn it left.
3 Put the SIM card into the holder, and turn the foil right and fasten it in place.
3.2.2 Battery and Charger
Do charge the battery to capacity in 8 -12 hours for first use. Please use the battery and charger provided
by the manufacturer. This unit adopts built-in Li-ion battery, and full battery will support around 48 hours
use on end. After first use, the battery can be charged fully in 3-5hours.
Cautions:
a: For it’s Li-ion battery, which contains harmful chemicals and may burst, please don’t bump, puncture it
violently and keep it off fire.
b: Please charge the battery in time to keep it working normally.
3.2.3 Startup
¾
Put the SIM card and battery in place.
¾
Turn on the unit outdoors by pressing the “on/off” button until the indicator is on.
¾
For first use, please initialize the unit and restore it to default setting.( please refer to 5.4 for
¾
In 10 or 40seconds, the unit will begin to work and acquire the GSM signals as well as the GPS
instruction.)
signals. The indicator will keep flashing every 4 seconds when the unit has received the signals,
otherwise it will keep on.
¾
When this unit receives GPS signals normally, you can use it and do all the following settings.
4. SMS Command
PT03 will only accept commands from a user with the correct password. Commands with wrong
password are ignored. The default password is 123456.
4.1
Basic SMS Commands
4.1.1 Initialization
Command: begin<password>
Example: begin123456
Reply SMS: begin ok
Send this SMS to initialize all the settings. (default password: 123456)
-3-
4.1.2 Change the password
Command: password<old password> <new password>
Example: password123456 000000
Notice:
1. Be sure keep the new password in mind, you have to upload the software to restore the original
setting in case of losing the new password.
2. Make sure the new password is in 6 digits, or else the tracker can not recognize the password.
4.1.3 Authorization
There are only 5 numbers able to be authorized.
¾
Call the tracker for 10 times, it will make the cell phone number as the authorized number
automatically.
¾
Set up a authorized number
Command: admin<password> <cell phone number>
Example: admin123456 008613682400000
Reply SMS: admin ok!
Note:
1. The other authorized numbers should be set by the first authorized number.
2. For roaming purpose, you have to add your country code ahead of the cell phone number, for
example, please send admin123456 008613682400000 to tracker to set 13682400000 as an
authorized number.
¾
Cancel
Command: noadmin<password> <authorized number>
Example: noadmin123456 8613682400000
Send this SMS to delete the authorized number.
4.1.4 Real-time polling
¾
If there is no authorized number, when any number dials up the unit, it will report a Geo-info; If there
is already an authorized number, then it will not respond when an unauthorized number calls it up.
¾
When an authorized number dials up the unit, it will hang up and report a real-time Geo-info as
below:
Receive SMS: lat: <latitude> long:<longitude> speed: <speed> <date> <time> bat:<F/L> signal:<F/L>
imei: <imei number>
Example: lat: 23.578608 long: 113.053513 speed: 000.0 07/05/08 03:50
bat:F signal:L
imei:359586012458076
4.1.5 Auto Track
¾
Set up for several times.
Command: t<xxx:intervals number><s:second, m:minute, h:hour><xxx:times number>n<password>
Example: t030s005n123456
It means report a Geo-info at 30s intervals to the authorized numbers for 5 times, the setting must be in
3 digits and at maximum 255 in value.
¾
Set up for unlimited times.
Command: t<xxx:intervals number><s:second, m:minute, h:hour>***n<password>
Example: t030s***n123456
Note: the interval must not be less than 30s.
¾
Cancel.
-4-
Command: notn<password>
Example: notn123456
4.1.6 Voice Surveillance
In this mode, the user can dial up the unit to monitor the voice (please refer to Modes switch between
“track” and “monitor” for instruction).
4.1.7 Modes switch between “track” and “monitor”
The default mode is “track”.
¾
Switch to “monitor” mode
Command: monitor<password>
Example: monitor123456
Reply: monitor ok!
¾
Restore to “track” mode
Command: tracker<password>
Example: tracker123456
Reply: tracker ok!
4.1.8 Geo-fence
Set up a geo-fence for the unit to restrict its movements within a district. The unit will send the message
to the authorized numbers when it breaches the district.
¾
Set up:
Command: stockade<password> <latitude,logitude; latitude,longitude>
Example: stockade123456 22.55057, 114.04216; 22.53602, 114.068
Receive SMS: stocade!<geo-info>
When the unit stays immobile in a place for 3-10 minutes, the user can Send this SMS to unit to set the
restricted district. In case of breach, it will send SMS “stockade!<geo-info>” to the authorized numbers.
Note : The first latitude&longitude is coordinate of the top left corner of the Geo-fence, while the second
latitude&longitude is the coordinate of the bottom right corner. It will alarm one time in each setting.
¾
Cancel:
Command: nostockade<password>
Example: nostockade123456
This function will be out of effect after the unit moves outside the district.
4.1.9 Movement alert
¾
Set up:
Command: move<password>
Example: move123456
Reply: move ok!
When the unit stays immobile in a place for 3-10 minutes, send this SMS to the unit, then the unit will
reply “move ok!”. In case of such a movement, it will send SMS “Move” along with a Geo-info to the
authorized numbers. It will alarm one time in each setting.
¾
Cancel:
Command: nomove<password>
Example: nomove123456
Send this SMS to deactivate the movement alert.
Remark: This function will be out of effect after the unit moves outside the district.
-5-
4.1.10 Overspeed alert:
¾
Set up:
Command: speed<password> <speed>
Example: speed123456 080
Tracker will reply “speed ok!”. When the target moves exceeding 80 km/h, the unit will send SMS
speed+080!+Geo-info to the authorized numbers. It will alarm one time in each setting.
¾
Cancel:
Command: nospeed<password>
Example: nospeed123456
Send this SMS to deactivate the overspeed alert
Note: It is recommended that the speed alarm is set at not less than 50km/h. For below that rate, it may
cause the excursion of the GPS signal influenced by clounds etc.
4.1.11 IMEI checking:
Command: imei<password>
Example: imei123456
Send this SMS to check the IMEI number.
4.1.12 SOS button
Press the SOS for 3 second, it will send “help me!+ Geo-info” to all the authorized numbers every 3
minutes.
Receive SMS format: help me!<Geo-info>
It will stop sending such a SMS when any authorized number reply SMS ”help me!” to the tracker.
4.1.13 Low battery alert
It begins to alert when it is 3.7V and sends you SMS in 30m interval.
Receive SMS format: low battery<Geo-info>.
4.1.14 SMS center
¾
Send SMS adminsms+password+space+cell phone number to set the SMS center.
Command:adminsms<password> <cell phone number>
Example: adminsms123456 13682413000
If the SMS center is set up, when an authorized number sends SMS to the tracker, the tracker will
reply a SMS with Geo-info & authorized number to SMS center.
¾
Send SMS noadminsms+password to cancel the SMS center.
Command:noadminsms<password>
Example:noadminsms123456
Response SMS format: authorized number+Geo-info
4.2
GPRS Settings by SMS
Tracking via GPRS, you should set IP, Port and APN for PT03.
Ensure that your SIM card in PT03 supports GPRS connection prior to setting.
4.2.1 Set an IP address and port:
¾
Set:
Command: adminip<password> <IP> <port>
Example: adminip123456 64.191.21.237 8001
Reply SMS: adminip ok
¾
Cancel:
-6-
Command: noadminip<password>
Example: noadminip123456
4.2.2 Set APN
Command: apn<password> <apn>
Example: apn123456 CMNET
Reply SMS: APN ok
Note:
1.
The old APN will be invalid when you set a new APN.
2.
Please ask your local SIM card provider for your APN.
4.2.3 Call to tracker
As soon as the IP & Port & APN are set up, the user can make a call or send SMS to tracker. The
tracker will hand up the telephone and report the coordinates to IP address.
The message sent by tracker to IP address is as following:
Serial number + authorized number + GPRMC + GPS signal indicator + command + IMEI number +
CRC16 checksum.
5. Tracking on Map
Download Google Earth from http://earth.google.com/
Start the Google Earth (For more information about Google Earth please refer to http://earth.google.com/)
as the following picture shows:
Input the latitude and longitude that you receive from the tracker by SMS and click the search button.
Google Earth will display the location for you.
Example:
When you receive:
Latitude = 22.577800
Longitude = 114.063255
Type as the following picture shows:
(Note: you should input the latitude and longitude as: 22.577800,114.063255)
-7-
Now you can find the location of your tracker:
Or you can start the Internet Explorer and connect to http://maps.google.com for displaying the location.
Or you can use our tracking software for displaying the location http://demo.livegts.com.
6. Real-time Tracking on LiveGTS
If you want to use real-time tracking function, you need to buy extra LiveGTS software from us, provide a
domain name to us then install it in your server. Or you can test your tracker on our demo.
For example, LiveGTS is installed in http://demo.livegts.com, IP is 64.191.21.237, port is 8001, below
is configuration steps:
6.1
Add tracker to LiveGTS
6.1.1.1 Login LiveGTS
You can open your tracking server domain name by IE and Login with your account name and
password.
6.1.1.2 Add tracker to server
Go to “Manage” -> “Tracker Config” -> “Add New Tracker”, please input your name and tracker ID,
select correct tracker’s model.
-8-
Note:
1.
Tracker ID must be your tracker’s IMEI number, you can send SMS “imei123456” to get the
tracker’s imei number.
2.
Please select correct model according to your tracker, otherwise you can’t use real-time
tracking correctly.
6.2
Set tracker to report to LiveGTS
Default password is 123456, if you have changed it, please replace “123456” with your password in
below SMS.
6.2.1.1 Reset tracker (optional)
Send SMS: begin123456
This step can reset all parameter of tracker.
6.2.1.2 Set authorized number
Send SMS: admin123456 <your cell phone number>
Cell phone number is the SIM card number which you use to send SMS to tracker.
6.2.1.3 Set APN
Send SMS: apn123456 <your apn>
Please ask your local SIM card provider for your APN
6.2.1.4 Set IP Address and Port
Send SMS: adminip123456 64.191.21.237 8003
6.2.1.5 Set Time Interval for Sending GPRS Packet
Send SMS: t030s***n123456
6.2.1.6 Enable GPRS Tracking Function
Call PT03 by the admin
6.3
Real-time Tracking
Visit your LiveGTS by domain name and login with your account and password, go to “Realtime” page,
select your tracker, then you can see your tracker on the map.
-9-
7. Troubleshooting
Faults
Startup Fail
Hangup Fail
Solution
Check the battery and see if it is fully charged or correctly installed.
In existence of an authorized number, an unauthorized number dials up the unit.
Please initialize the unit and re-set up the authorized numbers.
Monitor Fail
Check if the authorized number is setup or in the coverage of signals.
Location report in
Don’t use it in the place beyond reach of signals. Place the unit outdoors,
digits of zeros.
especially when starting it up.
Caution:
Please comply with the instructions to extend the unit life:
1. Keep the unit dry. Any liquid, i.e. rain, moisture, may destroy or damage the inside circuitry.
2. Don’t use & store the unit in dusty places.
3. Don’t put the unit in overheated or overcooled places.
4. Handle carefully. Don’t vibrate or shake it violently.
5. Clear the unit with a piece of dry cloth. Don’t clean in chemicals, detergent.
6. Don’t paint the unit, this may cause some foreign materials left in between the parts.
7. Don’t disassemble or refit the unit.
8. Please use the battery and charger provided by manufacturer. Using other batteries and chargers
will cause unwanted situation.
9. Don’t dismount the antenna randomly, or use other antennas. This may interfere the transmission,
and increase the radiation as well.
- 10 -


