1
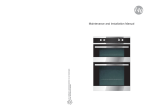
Installation and Instructions for Use
BSDO69
Dear Customer,
Congratulations on purchasing your new product from Think Appliances.
To register your parts and labour warranty (some conditions apply please refer to your
warranty card for more details) please contact out Customer Care team on:
1800 444 357
Our Customer Care centre is there to ensure you get the most out of your appliance. For
example, should you want to learn more about recommended cooking temperatures, the
various cooking functions available, how to set and program your LED clock, and importantly
taking care of your appliance when cleaning, please call us because we are here to help you.
It is important that you read through the following use and care manual thoroughly to
familiarize yourself with the installation and operation requirements of your appliance to
ensure optimum performance.
We also carry a complete range of spare parts for all Think products. For all your spare parts
enquiries please contact our team at Pronto Parts on:
1300 306 973
Again, thank you for choosing an appliance brought to you by Think Appliances and we look
forward to being of service to you.
Kind regards
Management
Think Appliances
2
SAFETY INSTRUCTIONS
Read this Instruction Manual carefully to obtain the
best performance from your oven. Keep this manual
so that it can be read by a new owner.
Electrical Safety
• To connect the oven to the power supply, the technician
should use an T150 power cable. The connection diagram
is shown in Figure 19.
• The oven should always have a good earth connection in
line with current regulations.
• Connection must be made by means of an omnipolar
switch that is suitable for the current drawn and with a
minimum aperture between contacts of 3 mm for
disconnection in case of emergency, cleaning or bulb
changing. Under no circumstances must the earth wire
pass through this switch.
• This switch may be replaced by a plug, provided it is
accessible for normal use.
• If the supply cord is damaged, it must be replaced by the
manufacturer, its service agent or similarly qualified
persons in order to avoid a hazard.
• Any handling or repair to the appliance, including
replacement of the power cable, should be carried out by
authorised Technical Service Personnel using original
spare parts. Repairs or handling by others may damage
the appliance or cause malfunctioning that could be
hazardous to your safety.
• Unplug your oven if it malfunctions.
3
• In ovens combined with hobs, only those recommended
by the manufacturer may be fitted.
Child Safety
During use, the appliance becomes hot. Care should be
taken to avoid touching heating elements inside the oven.
WARNING: Accessible parts may become hot during use. To
avoid burns, young children should be kept away.
Accessible parts may become hot when the grill is in use.
Children should be kept away.
WARNING: This appliance is not intended for use by
persons (including children) with reduced physical, sensory
or mental capabilities, or lack of experience and
knowledge, unless they have been given supervision or
instruction concerning use of the appliance by a person
responsible for their safety. Children should be supervised
to ensure that they do not play with the appliance.
Safety in the use of the oven
• The oven must always be operated with the door closed.
• Only use the oven after it has been installed inside the
kitchen unit (See Installing the Oven).
• The tray and grill have a system for easy part removal and
handling of food.
• The oven heats up when in use, so please use oven gloves
when performing operations inside the oven and avoid
touching the heating elements.
4
• Only use the temperature probe supplied to measure the
temperature inside the oven (in models that come with
this feature).
Cleaning and Maintenance
• Disconnect the appliance from the mains power supply
before any operation.
• Do not use abrasive cleaning products, or steam or
pressurised water cleaning equipment.
• Cleaning and maintenance tasks to be carried out by the
user should not be done by children without supervision.
• Before replacing a bulb, first make sure that the oven has
been disconnected from the mains to avoid the possibility
of receiving an electric shock.
CAUTION
For the specific features and performance of your oven,
please consult the Quick Start Guide that comes with this
Manual.
5
Before First Use
Other important
instructions
There may be traces of grease and other substances in the oven as a result of its manufacturing process. These should be removed by
means of the following procedure:
• The oven must always be operated with the
door closed.
• Remove all of the packaging from your oven,
including the protective plastic, if any.
• Turn the oven to setting
, or else place it
on the defect settingt
, at 200ºC, for 1
hour. Consult the Quick Start Guide accompanying this manual on how to do this.
• Cool the oven with the door open so that it
ventilates and no odours remain inside it.
• Once cold, clean the oven and accessories.
During this first operation, smoke and smells
will be produced. The kitchen should therefore
be well ventilated.
Environmentally Friendly
Packaging
The packaging is made from totally recyclable
materials which can be put to other uses.
Consult your local council regarding the necessary procedures for disposing of these materials.
CAUTION
The
symbol on the product or packaging
indicates that this appliance cannot be disposed of as normal household waste. It should
be taken to an electrical and electronic equipment collection point for recycling. In this way,
any negative consequences for the environment
and public health from incorrect handling can
be avoided. Contact your local council, household waste disposal service or the establishment you bought the product from for more
information on recycling the appliance.
6
• The manufacturer takes no responsibility for
any use of the oven other than for the home
preparation of food.
• Do not store oil, fats or inflammable materials
inside the oven. This may be dangerous if the
oven is turned on.
• Do not lean or sit on the open oven door. You
could damage it, as well as endanger your
own safety.
• Do not cover the bottom of the oven with aluminium foil as this may affect cooking performance and damage the enamel inside the
oven and the interior of your kitchen unit.
• To cook any food, insert the tray or grill in the
side rails in the oven.
• Do not place containers or food on the bottom
surface of the oven. Always use the trays and
grill.
• Do not pour water on the bottom surface of
the oven when in use; this may damage the
enamel.
• Open the oven door as little as possible during
cooking. This will reduce power consumption.
• It is normal for condensation to occur on the
oven door when cooking dishes with a high
liquid content.
• Clean the oven interior to remove traces of
grease or food, which could later give off
smoke and odours and cause stains to
appear.
Cleaning and Maintenance
Caution:
Disconnect the appliance from mains power
supply before any operation.
Cleaning the Oven Interior
1 Easy-to-clean enamel ovens
Use nylon brushes or sponges with warm
soapy water to clean enamelled surfaces
such as the bottom of the oven. Clean when
the oven is cold. Use oven-cleaning products
only on enamelled surfaces and always follow
the manufacturer’s instructions.
2 Ovens coated in special enamel adapted to
other cleaning systems
Please consult the Specifications Sheet for
your oven.
Caution
Cleaning the Oven Exterior and
Accessories
Clean the outside of the oven and accessories
with warm soapy water or with a mild detergent.
Take great care when cleaning stainless steel
surfaces. Use only sponges or cloths that do not
scratch.
Cleaning the Oven Door
Do not use metal scouring pads, wire brushes or
commercially available or abrasive powder
cleansers to clean the oven door as they could
scratch the surface and cause the glass to
break.
In some oven models the door may be removed
to make them easier to clean, by proceeding as
follows:
Do not clean the oven interior with steam or
pressurised water cleaning equipment. Do not
use metal scouring pads, wire brushes or any
utensil that can scratch the enamel.
1 Open the door.
• Other oven models have a catalytic (self-cleaning) cleaning system. This system removes
small traces of grease while cook-ing at high
temperatures.
4 Holding the door at the sides with both
hands, raise and remove the door from the
oven until the hinges (G) have been completely removed. Figure 8
Use of Fold-down Grill (depending on Model)
To mount the door, proceed in reverse order.
2 Turn the two clamps (F) right round. Figure 6
3 Close the door until it fits in the two clamps.
Figure 7
To clean the top part of the oven:
• Wait until the oven is cold.
For other oven models, follow these instructions:
• Turn the screw (A) and lower the grill element
as far as possible. Figure 1
1 Open the oven door completely.
• In other oven models, push the rod of the grill
element (B) with both hands until it is released from the upper fastening point. Figure 2
• Turn the element round and clean the upper
part of the oven.
• Finally, return the grill element to its original
position.
2 Insert the safety pins in the visible slots in the
door hinges. Figure 9
3 Hold the door at the sides with both hands
and close it almost completely.
4 Now lift the door and remove the hinges from
the slots in the front of the oven by pulling
them out. Figure 8
Caution
Do not remove the safety pins at any time since
the hinge is taut and may cause injury. It would
also be impossible to mount the door without
the pins being in place.
7
To mount the door, hold it with both hands and
insert the hinges in the appropriate openings in
the front of the oven. Slowly open the door until
it is fully open.
Cleaning the Large Inner
Glass Door
Instructions for Removing / Replacing Inner
Glass
1 Open the oven door.
2 Pull the glass outwards by the bottom (H).
Figure 10
3 The inside glass will become loose. Remove
it.
Caution
Be very careful when removing the inner glass,
as the oven door will close.
Changing the Oven Light bulb
Caution
First make sure the oven is unplugged before
proceeding to change the bulb.
Warning
Ensure that the appliance is switched off before
replacing the lamp to avoid the possibility of
electric shock.
• Unscrew the bulb-holder glass cover.
• Replace the bulb and reassemble the glass
cover.
The replacement bulb must be resistant to temperatures up to 300ºC. You can order one from
the Technical Assistance Service. Figure 16
For other oven models, follow these instructions:
4 Clean the inner glass and the inner surface of
the oven door.
• Loosen the lens from the lampholder with the
help of the appropriate tool. Fig 17
5 Return the glass supports to the upper door
slots (I). Figure 11
• Exchange the bulb.
6 Turn the glass towards the door (K).
7 Attach the glass to the door again by push-ing
the two lower supports (L) with both hands
while pushing the glass towards the door (M).
Figure 12
Warning
If the door has not been blocked with the clamp
(N), please take care when removing the inside
glass panels as the oven door will close.
6 Once clean, return the glass panels in the
same order so that the word TERMOGLASS
can be read.
7 Replace the upper clasp of the door, making
sure that the side tabs fit in point 1.
8
• Replace the lens, making sure it fits in the
correct position without forcing it. Fig 18
If Something Goes Wrong
The oven stops working
Check the power connection.
Check the fuses and the circuit breaker
for your installation.
Make sure the timer is either in the manual
or programmed setting.
Check the position of the function
and temperature setting.
Technical Specifications
If the appliance does not work, inform Technical
Service of the kind of problem you are experiencing and give the:
1 Serial Number (S-No)
2 Model of Appliance (Mod.)
You will find this information engraved on the
identification plate. This plate is on the bottom
of the oven and can be seen when open-ing the
door.
The light inside the oven does not go on
Change the bulb.
Check that it has been properly inserted
according to the Instruction Manual.
The heating pilot light does not turn on
Select a temperature.
Select a function.
It should only come on while the oven
is heating up to the temperature selected.
Oven smoking during use
Normal during first use.
Clean the oven regularly.
Reduce the amount of grease or oil in the tray.
Do not use temperatures higher than
those indicated in the cooking chart.
Installation
This information is exclusively for the installer,
who is responsible for the oven’s assembly and
electrical connection. If you install the oven
yourself, the manufacturer will not accept liability for possible damage.
Prior to Installation
Please refer to electrical safety instructions on
page 3 of this manual before installation.
• The opening in the kitchen unit must be that
indicated on the diagram. The minimum size
of the unit base must be 580 mm. (See
Figures 16, 17, 18 and 20).
• The adhesive used in the plastic lining the kitchen units must be able to withstand temperatures over 85ºC.
The expected cooking results
are not achieved
Check the cooking chart for guidance
on how your oven operates.
Caution
If these problems persist despite these tips,
contact Technical Service.
9
Electrical Connection
The installer must ensure that:
• The mains power voltage and frequency correspond to what is marked on the identification plate.
• The wiring system can withstand the maximum power marked on the identification
plate.
• After connecting the power, check that all
electrical parts of the oven are working correctly.
• Disconnection from the electrical supply
must be allowed after the oven is in the installed position.
Oven Installation
For all ovens. after the power has been connected:
1 Position the oven inside the unit and en-sure
that the power cable is not trapped or in contact with parts of the oven that heat up.
2 Anchor the oven to the unit with the screws
supplied, screwing them into the unit through
the holes that can be seen when the door is
open.
3 Make sure that the body of the oven is not in
contact with the walls of the unit and that
there is a separation of at least 2 mm with
the adjacent units.
10
Control Panel
1
2
3
4
5
Top cavity
Main cavity
1 Temperature selector.
4 Electronic clock.
2 Heating indicator light. Indicates that the heat
is going to the food and it goes out when the
set temperature is reached.
5 Function selector.
6
7
6 Heating indicator light.
7 Temperature selector.
3 Function selector.
Oven Functions
Top cavity: /
Main cavity: /
/
/
/
/
/
Grill
/
Switch off oven
For preparing dishes with superficial roasting. It
allows the outer layer to be browned without
affecting the inside of the food. Ideal for flat
food, such as steaks, ribs, fish, toast.
MaxiGrill with fan
Conventional
It is used for sponges and cakes where the heat
received must be uniform to achieve a spongy
texture.
Lower Element
Heats only from beneath. Suitable for heating
dishes and raising pastry and similar.
MaxiGrill
Allows greater surfaces to be prepared, than
with the grill, together with higher power
reducing the time required for browning of the
food.
Allows uniform roasting at the same time as
surface browning. Ideal for grills. Special for
large volume pieces, such as poultry game etc.
It is recommended to put the item on a rack
with a tray beneath to collect the stock and
juices.
Caution
While using the Grill, MaxiGrill or MaxiGrill with
fan, the door must be kept closed.
Turbo
The fan distributes the heat produced by an
element located at the rear of the oven. Due to
the uniform heat distribution, it allows roasting
and baking to take place on two levels at the
same time.
11
Note
Defrosting
This cooking mode is suitable for gentle
defrosting of delicate food to be consumed
unheated, e.g.: cream, custard, pastry, tarts,
cakes, fruit,...
The pilot light remains on in any cooking
function.
Use of the Oven
Caution
Functions of the Electronic Clock
The electronic clock features Touch-Control
technology. To operate, simply touch the glass
control symbols with your fingertip.
Alarm: Creates an alarm signal when the period
of time finishes; the oven does not need to be in
use in order to use this function.
The touch control sensitivity continuously adapts
to ambient conditions. Make sure the glass surface of the control panel is clean and free of obstacles when plugging in the oven.
Cooking Time: To cook for a selected length of
time; the oven turns itself off automatically
when the time finishes.
If the clock does not respond correctly when you
touch the glass, unplug the oven for a few
seconds and then plug it in again. Doing this
causes the sensors to adjust automatically so
that they will react once more to fingertip control.
Setting the time on the Electronic Clock
When the oven is connected to the power supply,
the indication 00:00 flash on the display. Press
or
to set the time on the clock. The clock beeps
twice to confirm the selected time.
If you wish to modify the time, press
or
until the current time flash on the screen. Press
OK. Then press
or
to modify the time. The
clock beeps twice to confirm the modification.
Manual Operation
The oven is ready to be used when the clock has
been set. Select a cooking function and a temperature.
When you begin cooking, symbol
lights up to
indicate that the oven is heating the contents;
the symbol goes out when the selected temperature is reached.
Set the controls to
12
to turn the oven off.
End Cooking Time: To cook until a set time; the
oven turns itself off automatically when the time
finishes.
Cooking time and End Cooking Time: To cook
for a selected length of time and end at a set
time. When this function is set, the oven comes
on automatically at the time required in order to
cook for the set length of time (Cooking time)
and end automatically at the indicated time
(End Cooking Time)
Programming the Alarm
1 Press
until symbol
lights up. Press OK.
2 Set the period of time after which you wish
the alarm to sound by pressing
or
.
3 The clock beeps twice, the current time is displayed and symbol
lights up permanently
to indicate that the alarm has been set.
4 When the set period of time comes to an end,
the alarm sounds and symbol
starts to
flash.
5 Press any button to stop the alarm; symbol
goes out.
You can consult the remaining time at any
moment by pressing
or
until symbol
flashes and then pressing OK. You can also
modify the set time at this point by pressing
or
. The clock beeps twice to confirm the
change.
Setting the End Cooking Time
If you wish the remaining time to be displayed
until the end of the set period of time, press
or
until symbol flashes and then press
OK and keep it pressed in. Symbol
flashes.
Keep OK pressed in again to return to the real
time.
3 The clock beeps twice, the current time is displayed and symbol
lights up permanently
to indicate that the oven will turn itself off
automatically.
Setting the Cooking Time
1 Press
or
Press OK.
until symbol
lights up.
2 Select the period of time you wish to cook for
by pressing
or
.
3 The clock beeps twice, the current time is displayed and symbol
lights up permanently
to indicate that the oven will turn itself off
automatically.
4 Select a cooking function and temperature.
5 When the cooking time comes to an end, the
oven turns itself off, the alarm sounds and
symbol
flashes.
6 Press any button to stop the alarm and turn
the oven back on again.
7 Set the controls to
to turn the oven off.
You can consult the remaining cooking time at
any moment by pressing
or
until symbol
flashes and then pressing OK. You can also
modify the set time at this point by pressing
or
. The clock beeps twice to confirm the
change.
If you wish the remaining time to be displayed
until the end of the set period of time, press
or
until symbol
flashes and then press
OK and keep it pressed in. Symbol
flashes.
Keep OK pressed in again to return to the real
time.
1 Press
or
Press OK.
until symbol
lights up.
2 Select the time you wish the cooking process
to finish at by pressing
or
.
4 Select a cooking function and temperature.
5 When the set time is reached, the oven turns
itself off, the alarm sounds and symbol
flashes.
6 Press any button to stop the alarm and turn
the oven back on again.
7 Set the controls to
to turn the oven off.
You can consult the end cooking time at any
moment by pressing
or
until symbol
flashes and then pressing OK. You can also
modify the end cooking time at this point by
pressing
or . The clock beeps twice to confirm the change.
This function can be used even when you are
already using the oven. To do this, follow the
instructions indicated above except point number 4.
Setting the Cooking Time and the End Cooking
Time
1 Press
or
Press OK.
until symbol
lights up.
2 Select the period of time you wish to cook for
by pressing
or
.
3 The clock beeps twice, the current time is
displayed and symbol
lights up permanently.
4 Press
or
Press OK.
until symbol
lights up.
5 Select the time you wish the cooking process
to finish at by pressing
or
.
6 The clock beeps twice, the current time is
displayed and symbol
lights up permanently.
13
7 Select a cooking function and temperature.
Child Safety Function
8 The oven remains off with symbols
lit up. Your oven is set.
and
This function can be selected at any time while
using the oven.
9 When the time to start cooking is reached,
the oven starts up and cooks for the set period of time.
To activate the function, press the + and – sensors at the same time for several seconds. You
will hear a beep and the display will show the
word SAFE. The clock is locked.
10 When the set end cooking time is reached,
the oven turns itself off, the alarm sounds
and symbols
and
flash.
11 Press any button to stop the alarm and turn
the oven back on again.
12 Set the controls to
to turn the oven off.
You can modify the end cooking time by pressing
or
until symbol
lights up and then
pressing OK. You can now modify the end cooking time by pressing
or
. The clock beeps
twice to confirm the change.
Important
In the event of a power cut, all the electronic
clock settings are deleted and the indication
00:00 flashes on the display. It is necessary to
set the time and programme the clock again.
14
If the oven is off and you activate the child safety
function, it will not work even if a cooking function is selected.
If this function is activated while you are cooking, it will only lock the electronic clock settings.
If a clock sensor is touched while the child safety
function is on, the word SAFE will appear on the
display. The clock is locked.
To disable the function, press the + and – sensors at the same time for several seconds until
you hear a beep.
Shelf positions
You should use the shelf position(s) that you
find are best suited to your personal cooking
preferences.
Insert the oven shelf and deep tray between the
2 side rails at any position (1 to 5) on both
sides. The oven shelf has safety stops to
prevent accidental withdraw. After engaging the
oven shelf into the side rails, as you push the
oven shelf into the oven, lift the front of the
shelf slightly to bypass the stops and allow the
oven shelf to slide fully into the rails.
Your oven will come supplied with the following
oven furniture:
(A) Oven shelf
(B) Enamelled deep tray
The numbers 1 – 5, indicate the different shelf
positions that you can utilise within the oven.
(Image for reference only – actual product may
differ slightly)
To remove the oven shelf, gently pull the oven
shelf outwards. When the shelf stops, lift the
front slightly to bypass the safety stops and then
completely withdraw the oven shelf from the
oven.
When installed correctly, the shelf and tray
should be horizontal and not on an angle.
Figures
Fig 1
Fig 2
A
B
Fig 3
Fig 4
C
D
D
Fig 5
Fig 6
E
F
Fig 7
Fig 8
G
G
16
Fig 9
Fig 10
H
Fig 11
Fig 12
M
K
L
I
Fig 13
Fig 14
Fig 15
17
Fig 1 6
Fig 18
4mm
-56
40.5mm
m
4m
-56
558
5mm
595mm
540mm
600mm
580mm
1018mm
1020mm
718mm
720mm
558
22mm
Fig 17
5mm
595mm
540mm
4mm
580mm
-56
888mm
880mm
558
5mm
595mm
540mm
580mm
Fig 19
18
600mm
22mm
600mm
22mm
720mm models
Installation under a worktop
without housing unit.
580mm
min
Fig 20
600mm
720mm
95mm
720mm
runners
20mm
55mm
720mm models
Installation under a worktop
unit with internal height of
less than 710mm.
580mm
min
558-564mm
720mm
runners
720mm
35mm
20mm
19
(AUS)
Think Appliances Pty Ltd.
416-424 Barry Rd
Coolaroo VIC 3048
Sales Telephone
1300 132 824
Service Telephone
1800 444 357
Website
www.thinkappliances.com
(NZ)
Applico Ltd.
Private Bag 92900
Onehunga, Auckland,
New Zealand 1061
(UK)
United Kingdom
Baumatic Ltd.,
Baumatic Buildings,
6 Bennet Road,
Reading, Berkshire
RG2 0QX
United Kingdom
Sales Telephone
(0118) 933 6900
Website
www.baumatic.co.uk
Our contribution to enviromental protection: we use recycled paper.
Cod.: 83172609/3172609-001
Website
www.baumatic.co.nz