1
INSTALLATION, OPERATION AND MAINTENANCE INSTRUCTIONS
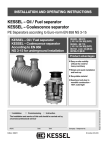
KESSEL-rainwater pumping system Aqadive®
with Aqatronic switch unit and
Aqaset installation kit
Aqadive쏐 with switch unit Aqatronic쏐 S
Aqadive쏐 with switch unit Aqatronic쏐 K
Aqaset installation kit
Art. # 85 601
Art. # 85 801
Art. # 85 602
Product advantages
Plug-in compact unit
No pump noises in the
house thanks to the pump
being set up in the cistern
Tested to DIN 1998
High operational safety
The installation and service of this unit should be carried
out by a licensed professional servicer
company - telephone number
Edition 2010/10
Date
town
stamp
Subject to technical amendment
Nationwide service network
ID-Number 010-201 EN
Dear customer,
we are pleased that you have decided to buy a KESSEL product.
The entire system was subjected to a stringent quality control before it left our factory. Nevertheless, please check immediately whether the system has been delivered to you complete and undamaged. In case of any transport damage,
please refer to the instructions in the chapter "Warranty" in this manual.
These installation, operating and maintenance instructions contain important information that has to be observed during
assembly, operation, maintenance and repair. Prior to carrying out any work on the system, the operator and the responsible technical personnel must carefully read and heed these instructions.
KESSEL AG
2
Table of contents
1. Safety instructions
2. General
3. Technical Data
4. Installation and assembly
5. Electrical connection
6. Initial operation
7. Maintenance
8. Faults and remedial measure
9. Spare parts and accessories
10. Warranty
11. Important contacts and infos
.................................................................................................Page
2.1
2.2
2.3
2.4
Application ..................................................................Page
Plant description Aqadive® ..........................................Page
Plant description Aqaset..............................................Page
Functional description .................................................Page
4
5
6
6
7
3.1
3.2
3.3
3.4
3.5
3.6
Dimensions and weight ...............................................Page
Control unit..................................................................Page
Floating switch ............................................................Page
3-way-switch-over-valve .............................................Page
Automatic pressure switch ..........................................Page
Pump...........................................................................Page
5.1
5.2
Wiring the components ...............................................Page 13
Installation of floating switch with saddle connector....Page 13
4.1
4.2
4.3
4.4
4.5
4.6
6.1
6.2
6.3
Wall mounting Aqadive® ..............................................Page
Wall mounting Aqaset .................................................Page
Anschluß Notüberlauf..................................................Page
Drinking water connection...........................................Page
Connection cistern - basic unit ....................................Page
Connection to service water network ..........................Page
8
8
8
8
8
9
10
10
11
11
12
12
Initial operation of the control unit ..............................Page 14
Feeding mode .............................................................Page 14
Pumping mode ............................................................Page 14
.................................................................................................Page 15
................ .................................................................................Page 16
9.1
9.2
Spare parts..................................................................Page 17
Accessories.................................................................Page 18
.................................................................................................Page 20
.................................................................................................Page 22
3
1. Safety Instructions
!
The personnel for assembly, operation, maintenance and repair must possess the appropriate qualification for this type of work. The area of responsibility, the authority and the supervision of personnel
must be exactly regulated by the operator.
The operational safety of the plant supplied is only guaranteed when it is used in accordance with the
regulations. The limits of the technical specifications may not be exceeded on any account.
This plant contains electric charges and controls rotating mechanical plant components.
Non-compliance with the operating instructions may result in considerable damage to property, personal injuries or fatal accidents.
During assembly, operation, maintenance and repair of the plant, the regulations for the prevention of
accidents, the pertinent DIN and VDE standards and directives, and the regulations of the local power
supply industry must be heeded.
Warning !
The system represents one component in a whole plant. Please therefore also heed the operating instructions for plant as a whole and the individual components. During assembly, maintenance, service
and repair work on one of the components, the plant as a whole must always be put out of operation
and secured against unintentional restart.
The plant must not be operated in potentially explosive areas.
The switch unit is live and must not be opened. Only qualified electricians may carry out work on electrical facilities. The term qualified electrician is defined in VDE 0105.
The pump housing must not be opened. Work on the pump exceeding the scope of the activities described in the chapter "Service and maintenance" is not permissible.
It must be ensured that the electric cables as well as all other electrical plant components are in a faultless condition. In case of damage, the plant may on no account be put into operation.
Caution !
Conversions or changes to the plant may only be carried out in agreement with the manufacturer. For
safety reasons, use original spare parts and accessories approved by the manufacturer. The use of other
parts may void the liability for any consequences arising thereof.
The system does not influence the quality of the service water.
In the case of backwater, wastewater from the sewer can be pushed back into the service water network.
In the event of damage, water can leak from the basic unit. Danger of slipping!
The water must be discharged by installing a floor drain, for example.
The service water is not suitable for consumption and personal hygiene.
Signs saying “Caution: Not drinking water” must be attached to all tapping points.
The basic tank can fall off the wall if not secured properly or if installation is faulty.
Risk of injury! Care must be taken that the wall and/or the brackets have a sufficient load bearing capacity.
Ladders or similar must not be leant against the basic tank. Suitable access steps must be provided for
work on the system.
4
2. General
2.1 Area of application:
The KESSEL rainwater pumping system Aqadive® and Aqaset
booster stations. They are used for supplying service water to
single family and multi-family homes. The reliable service water
supply is guaranteed by the automatic feeding of rainwater from
a cistern. Replenishment is through the basic tank or funnel with
free outlet (according to DIN 1989, Part 1) direct into the cistern.
The service water can be used for watering gardens, flushing toilets, washing clothes and cleaning.
Drainpipe
Rainwater filter System 400
Rainwater storage tank Aqabase®-Comfort
Coarse suction filter, floating
5
The Aqadive® and Aqaset systems have been designed for freestanding set-up and may only be used above the backwater
level. The room where they are set up must be frost-protected
and flood-proof.
You will find more details about the system design in the chapter “Technical data”.
Submersible pump
Empty conduit seal DN 150
Rainwater pumping system Aqadive®
with switch unit Aqatronic® S
Service water network
2. General
2.2 System description Aqadive®
The KESSEL rainwater pumping system Aqadive® with switch unit Aqatronic® S or Aqatronic® K is made up of the following
assemblies:
3.3
1.4
1.
1.1
1.2
1.3
1.4
1.5
2.
3.
(Basic unit)
Drinking water feeding tank
Cover
Installation door
Emergency overflow
Solenoid drinking water feeding
Control unit
(Pump unit)
3.1
3.2
3.3
3.4
3.5
3.6
3.7
Submersible pump
Suction connection submersible pump
Pressure connection submersible pump
Automatic pressure switch
Inlet automatic pressure switch
Outlet automatic pressure switch
“RESET” button
2.3 System description Aqaset
The KESSEL rainwater pumping system Aqaset comprises the following assemblies:
1.
1.1
1.2
2.
2.1
2.2
3
(Feeding unit)
Drinking water feeding funnel
Solenoid valve
(Switch unit)
Saddle connector
Floating switch
(Pump unit)
3.1
3.2
3.3
3.4
3.5
3.6
3.7
Submersible pump
Suction connection submersible pump
Pressure connection submersible pump
Automatic pressure switch
Inlet automatic pressure switch
Outlet automatic pressure switch
“RESET” button
6
2. General
2.4 Functional description:
The pump unit comprises a submersible pump and the automatic pressure switch. The maintenance-free automatic
pressure switch has an automatic switch on/off function geared towards demand which absorbs any pressure blows, integrated dry-run protection and a backwater flap.
Rainwater mode:
If there is a drop in pressure in the service water network
caused by a consumer being switched on, the submersible
pump is switched on by the automatic pressure switch.
Rainwater is suctioned out of the cistern and fed into the
service water network through the outlet of the automatic
pressure switch. If the consumer is turned off, the automatic pressure switch switches the pump off after a brief runon time. This flow-dependent switch-off guarantees constant pressure.
Feeding mode:
If the water level in the cistern falls to below a defined minimum level, a solenoid opens. Drinking water is fed into the
cistern via the free inlet until the level has reached a defined
switching point.
Then the submersible pump pumps the drinking water from
the cistern into the service water network just like in rainwater mode. This means the water supply is guaranteed.
With Aqaset, drinking water feeding takes place directly
through the floating switch.
With Aqadive®, there are two different switch units available
for controlling the fully automatic drinking water feeding.
➣ The KESSEL switch unit Aqatronic® S controls the drinking water feeding through a floating switch installed in the
cistern.
➣ With the KESSEL switch unit Aqatronic® K the water level
in the cistern is determined by an ultrasonic sensor and
indicated on a digital display on the switch unit. An optical and acoustic warning is given in the event of backwater from the sewer (when an alarm point is set). Further switching points can be programmed as required.
Drinking water feeding can also be activated manually with
both switch units.
Flow route
feeding mode
Flow route
rain water mode
Rainwater drainage
Rainwater filter
Rainwater feeding with fixtures
drinking water feeding
Pump with automated pressure switch
Emergency overflow with odour trap
Switch unit Aqatronic S
Water tap (non drinking)
7
3. Technical Data
3.1 Dimensions and weight
Aqadive®
Aqaset
70
268
108
Druck
Ausgang
54 Druck Eingang
485
Trinkwasser
Abb. zeigt Art. Nr. 85 801
Fließrichtung
Breite x Höhe 629 x 614 mm
Tiefe: 235 mm
3.2 Control unit
The technical data can be found in the enclosed original operating manual.
3.3 Solenoid valve
Voltage / Frequency
Power consumption
Protective rating
Permanent operation
Pressure range
Cv-value
Inlet/outlet muffs
Approval
230 V AC / 50 Hz
21 VA (valve opening)
12 VA / 8 W (operation)
closed when currentless
IP 65 possible
0,2 - 16 bar
4,0 m3/h
1/2“ inner thread
fsuitable for drinking water
3.4 Automatic pressure switch
Voltage / Frequency
230 V AC / 50 Hz
Switching capacity
max. 10 A bzw
max. 1,8 kW
Protective rating
IP 55
Mains connection cable 1,4 m
Network connection
0,3 m
Switch-on point
2,4 bar (uppermost tapping point
is max. 20 metres above the automatic pressure switch)
Switch-off point
Water consumption <= 0.5 l/min.
or during dry run
Pressure difference
min. 0.7 bar (between switch-on
and switch-off point)
Art.Nr. 85 602
DN 50
zum Speicher
110
Fließrichtung
132
Fließrichtung
The pump is put back into operation after dry running by
pressing the “RESET” button
Drop in pressure
Manometer
Pumping medium
Dimensions l x w x h
Inlet muff
Outlet muff
approx. 0.3 bar with a flow rate
of 3 m3/h
Display range 0 - 10 bar
Clear water
214 x 128 x 154 mm
1" Outer thread
1" inner thread
3.5 Floating switch with saddle connector
Switching capacity DC
min: 40 mA at 8 V;
max: 60 mA at 20 V
Switching capacity 230 V AC
min: 15 mA, max: 100 mA
Protective class
I (with earth conductor connection according to VDE 630)
Operating temperature
max. 50 C
Type
Fill (contact = break contact)
top => contact broken
bottom => contact made
Cable length
20 metres
8
3. Technical Data
3.6 Multi-stage underwater vertical rotary pump
Voltage / Frequency
Power consumption
Insulation class
Speed
Thermal protection
Mains connection cable
Pumping medium
230 V AC / 50 Hz
1000 W
F
2800 min-1
integrated
10 metres
Clear water
Permanent operation
Suction connection
Pressure connection
Materials
Operating temperature
Dimensions lxwxh in mm:
Weight:
max. submersion depth
Pumping data
possible
1 1/4" inner thread
1 1/4" inner thread
rust-free
max. 40 °C
15 kg
20 metres
Max. pumping capacity Q (m3/h)
1,4
1,8
2,4
3,6
4,8
Max. pumping height in m
43,3
40,2
36,3
26,1
13,4
Max. pumping capacity Q (l/min)
20
30
40
60
Pumping height as a function of pumping capacity
pumping height H (mWS)
60
50
40
30
20
10
0
0 0,5 1 1,5 2 2,5 3 3,5 4 4,5 5 5,5 6
pumping capacity Q (m 3 / h)
0
10
20
30
9
40
50 60
Q [m3/h]
70
80
90 100
80
4. Installation and assembly
The chapter “Safety instructions” must be heeded!
Take the KESSEL rainwater pumping station out of the packaging and remove the transportation safety devices. The accessories are in the same box.
The KESSEL rainwater pumping station must be installed in
dry, frost-free and ventilated rooms.
It can only be set up above the backwater level..
4.1 Mounting Aqadive® on the wall
➣ When choosing where to install the Aqadive®, care must
be taken that there is about 50 cm space available above the
system for setting and servicing work and that the pipe for
drinking water feeding can be laid to the cistern at a gradient.
➣ Mark the three bore holes for the attachment as required
on the wall and drill them using a drill (Ø = 10 mm). Insert the
enclosed dowels and screw in the stay bolts so that they protrude by at least 40 mm.
Set the basic tank with emergency overflow inserted onto the
stay bolts, align using a spirit level and tighten the collar nuts.
4.2 Aqaset wall mounting
When choosing where to install the Aqadive, care must be
taken that there is about 20 cm space available above the
system for setting and servicing work and that the pipe for
drinking water feeding can be laid to the cistern at a gradient.
Hole patterns
Bracket for automatic pressure switch:
253
407
60
Bracket for drinking water feeding:
465
Attach both brackets to the wall using suitable hardware and
align using the spirit level.
10
4. Installation and assembly
4.3 Connecting the emergency overflow (only for Aqadive®)
In rooms with a floor drain, it suffices to discharge the overflowing water out of the basic unit through the emergency
overflow without connection to the sewage system, since no
water escapes during normal mode.
If there is no floor drain available, the emergency overflow
DN 70 is connected directly to the sewage network.
If any changes are made to the emergency overflow, the
DVGW approval is no longer valid. Safety and hygiene are
no longer guaranteed.
4.5 Connection cistern - basic unit Aqadive® (Aqaset accordingly)
➣ We recommend the KESSEL suction fine/coarse filter,
floating, art. no. 85050/85051 for suctioning water from
the rainwater storage tank. With this suction pipe, the
rainwater is suctioned out of the cistern from the cleanest
zone, approx. 15 cm underneath the surface of the water.
The formation of a sediment layer on the floor of the tank
as well as suspended particles such as pollen or soot particles on the surface of the water cannot be completely
avoided even if filters are used.
Leitungsführung links:
Trinkwasserleitung
Betriebswassernetz
4.4 Drinking water connection
We recommend a 1/2" flexible reinforced hose for connection to the drinking water network. An additional shut-off
valve makes all servicing work easier.
➣ If water pressure is greater than 4.5 bar or if there are
large fluctuations in pressure, a pressure reducer must be
installed in the drinking water network.
➣ To be able to safely guarantee the function of the solenoid, a fine filter must be installed in the drinking water network on site. No liability will be accepted for functional problems or damage caused by a lack of fine filter.
➣ Before initial operation, the drinking water pipe feeding the
system must be flushed and cleaned.
11
Druckleitung
Nachspeisung in die Zisterne
➣ If the system is operated with a rigid suction pipe, the suction strainer must be positioned in such a way that no solids can be suctioned in. A distance of 15 - 20 cm to the
floor of the tank must be observed. In addition, a backflow preventer must be installed.
➣ The submersible pump should be placed on the floor of
the rainwater storage tank. The enclosed messenger
cable with snap hook is useful during installation and servicing work.
➣ The pressure pipe or any service water pipe for filter rinsing must be laid at a frost-free depth to prevent it freezing. The pressure pipe should be at least DN 25.
➣ The pipe for drinking water feeding must have at least the
diameter DN 50 and is laid at a gradient to the cistern.
➣ The mains supply cable for the submersible pump and the
cable for the ultrasonic sensor or floating switch must not
be damaged by the way they are routed.
➣ We recommend always using a KG empty conduit DN 150
when routing all lines (water and cables) in order to make
access easier for any servicing and repair work later.
4. Installation and assembly
Leitungsführung rechts:
Trinkwasserleitung
Druckleitung
Betriebswassernetz
Nachspeisung in die Zisterne
➣ The backwater-proof KESSEL empty conduit seal (art.no. 85412) should be used wherever pipes pass from the
cistern into a cellar room.
➣ The feeding pipe should not discharge upstream from the
rainwater filter. This could result in soiled filters and scaling on the filter fabric.
➣ The drinking water should flow into the cistern via the inlet
slowdown.
4.6 Connection to service water network
➣ Connect the submersible pump to the service water network. The user can choose how the pipes are to be
connected. (left, right, both sides, see illustrations)
➣ We recommend the use of a flexible reinforced hose for
connection to the service water network. In addition, the
pressure connection should be fitted with a shut-off valve
with low flow resistance. This makes later servicing work
much easier.
➣ The service water pipes must be clearly marked in accordance with DIN 1989 Part 1.
Leitungsführung links/rechts:
Trinkwasserleitung
Betriebswassernetz
Druckleitung
12
Betriebswassernetz
Nachspeisung in die Zisterne
5. Electric connection
Caution!
Connection may only be carried out by a qualified electrician. The relevant currently valid directives, laws and
standards must be observed. Please heed the chapter
“Safety instructions” and the operating manual for the
switch unit used as well.
A double socket with earthed contacts is required for installation of the KESSEL rainwater pumping system Aqabull®.
Fuse 16 A slow-blow with residual current breaker 30 mA.
Splashwater can escape during servicing work on the system. Depending on the routing of the service water pipes,
the double socket must be installed in a protected position at
the side and underneath the system.
5.1 5.1 Wiring the components
Aqadive ®:
Aqaset:
Please see the enclosed original operating manual for instructions on the installation of the ultrasonic sensor (switch unit
Aqatronic® K) or the floating switch (switch unit Aqatronic® S)..
5.2 Installation of floating switch with saddle connector
The floating switch can be mounted in
the cistern at the desired height according to individual requirements. The minimum distance from the floating switch
to the floor of the tank must be about 15
- 20 cm in order to prevent sediment
being suctioned in from the bottom of
the cistern.
Note:
If the installation conditions are not
clear, we recommend mounting the
floating switch on a pole that can be
fixed in place and is movable from
above. This allows the position of the
floating switch to be changed slightly
even if the cistern is full.
13
6. Initial operation
The chapter "Safety instructions" must be heeded!
Caution!
➣ Before the system is put into operation, all the parts belonging to the rainwater management system such as
trough, drainpipes, gutter drains, rainwater filter, rainwater storage tank and outlet to the sewer/seepage must be
cleaned. The original operating manuals must be heeded.
➣ All the inlet and outlet pipes must be flushed and pressure tested.
➣ The pump must never be put into operation dry!
6.1 Initial operation of the control unit
for drinking water feeding
➣ The shut-off valve for drinking water must be closed.
➣ The switch unit (Aqadive®) or the feed unit (Aqaset) respectively must be put into operation. The original operating manual must be heeded.
6.2 Feeding mode
➣ The drinking water shut-off valve must be opened carefully.
➣ Manual drinking water feeding must be activated if this
has not already happened automatically.
➣ The water-tightness of the feeding pipe and safe outlet
into the cistern must be checked.
➣ If the drinking water feed into the cistern is not splash-free
during feeding mode, the brass union nut on the feeding
unit must be loosened and the screen insert with seal and
the filter sponge must be removed and cleaned.
➣ Drinking water feed must be deactivated again after test
operation. Otherwise the cistern can overflow and the
drinking water will be discharged through the overflow directly into the sewage channel.
➣ In the case of automatic drinking water feeding the filling
level in the cistern must be checked.
Fill the whole system by opening the feed valve until water
is discharged without bubbles from the opened consumer on
the pressure side. Remove the hose, screw the strainer back
in place if appropriate.
This way, the system is reliably ventilated and is ready for immediate operation.
➣ Insert the mains plug for the automatic pressure switch.
The submersible pump starts up immediately.
➣ During initial operation, a consumer e.g. water tap must
be opened the whole time so that the compete system can
be ventilated. If the pump does not start up or stops again
after a short time, the red “Reset” button must be pressed.
This process must be repeated until no air bubbles escape at the consumer.
As soon as the system has been completely ventilated,
close all consumers. The submersible pump achieves its
maximum pressure, the unit switches off automatically.
➣ Check whether the floating switch or ultrasonic sensor has
been installed and set in the rainwater storage tank according to the instructions in the operating manual for the
KESSEL Aqatronic switch unit. The switching point must
be chosen in such a way that the system changes to drinking water feeding mode when the water level drops to
less than 15 - 20 cm. This prevents the sediment layer
being suctioned in.
➣ Check all the connections for leaks.
➣ The KESSEL rainwater management system is now
ready for operation.
6.3 Pumping mode
➣ The inlet pipe and the submersible pump must be filled
with water. To do this, connect the end of the inlet pipe on
the cistern side to a water connection, e.g. a garden hose,
and open at least one consumer so that air can escape.
When an inlet pipe with strainer is used, this must be screwed off first.
14
7. Service and maintenance
The chapter "Safety instructions" must be heeded!
The KESSEL rainwater pumping system Aqadive® requires
almost no servicing.
➣ Avoid the submersible pump running dry since the slip
ring seal is cooled by liquid.
➣ If aggressive media are to be pumped, the pump must be
rinsed after use.
➣ Empty the pump if there is a danger of frost.
➣ If the KESSEL rainwater pump system is to be at a standstill for longer periods, the pump body and automatic pressure switch must be emptied. If the system is not used at
all for a longer period, the pump and the automatic pressure switch must be cleaned and stored in a cleaned and
well-ventilated place.
➣ The free inlet on the KESSEL drinking water feeding unit
has to be checked by the operator at regular intervals.
This includes checking that the safe distance is maintained between the inlet valve and the overflow when the
inlet is completely opened. DIN 1989 Part 1 must be heeded here.
➣ Floating switch or ultrasonic sensor must be cleaned at regular intervals.
➣ Filter sponge and screen insert in the feeding unit must
also be cleaned at regular intervals, at the latest when
drinking water feed is no longer splash-free.
15
➣ The inlet and pressure pipes as well as all the connections
must be checked for leaks occasionally and sealed if necessary.
➣ Fine or coarse filters in the floating suction pipe must be
cleaned at regular intervals.
➣ Only when the emergency overflow is connected to the
sewer. The odour trap of the emergency overflow dries
up over time. This must be filled at regular intervals to
avoid odour pollution.
➣ To reduce the foreign matter entering the feeding tank,
the area around the system must be cleaned at regular
intervals.
We recommend that you conclude a servicing contract with
your installation company.
A draft contract is enclosed with this operating manual.
8. Faults and remedial measure
The chapter "Safety instructions" must be heeded!
Repairs and maintenance work on the electrical system and the pump unit may only be carried out by a
qualified electrician or by the KESSEL Customer Services department.
Possible faults
Motor does not start up
Pump does not suction water in
Cause
Remedial measure
No mains voltage
Pump wheel is blocked; the motor
has been switched off by the thermal switch
Suction valve not in the water
Air in the suction pipe
Clean the suction valve
Strainer blocked
max. suction height or length of
suction pipe has been exceeded
Insufficient pumping capacity
Suction height too high
Clean the strainer
Check the suction height, change
the location of the pump if necessary (or the length of the suction
pipe)
Close the tapping point
Tapping point leaking
Seal the tapping point
Check the suction height and
change the location if necessary
Suction strainer clogged
Clean the strainer
Water level decreasing
Set the suction valve deeper
Pump requires cleaning/
maintenance
Thermal switch switches the pump off
Attach suction valve underneath
the surface of the water
Check the suction pipe for leaks
Suction valve leaking
Possible open tapping point
Have the pump serviced or cleaned by a specialist company
Fill the pump with water or
fill up the suction hose
Pump wheel without water
Pump does not switch off
Check whether the mains plug is
in the socket or if the socket is
live
Motor is overstrained on account
of excessive friction caused by
soiling in the pump housing
16
Remove the plug from the mains!
Have the pump serviced or cleaned by a specialist company, replace wearing parts if necessary
Have the pump serviced or cleaned by a specialist company
Prevent foreign matter being
suctioned in
9. Spare parts and accessories
9.1 Spare parts
1a
1b
32
29 30
29 30
28 24
27
26
25
24
22
21
1a 210-075
210-069
1b 210-315
134-025
234-003
234-002
234-005
234-006
010-087
010-010
9a 010-104
9b 010-135
234-010
234-024
234-007
017-199
017-012
Assembly switch unit t Aqatronic S
+ Floating switch
Assembly switch unit Aqatronic K
PT screw
Basic tank
Cover
Installation door
Emergency overflow
Installation instructions for Aqabull®
Servicing contract
Installation instructions for Aqatronic S
Installation instructions for Aqatronic K
Zipped pocket
Floating switch
Pump plate
Cylinder head screw
Washer
17
21
22
23
24
25
26
27
28
29
30
31
32
210-264
017-041
017-184
017-046
182-565
210-049
234-012
210-056
210-094
234-011
234-008
210-351
210-349
210-357
210-072
210-103
210-036
234-023
Bearing buffer
Washer
Countersunk screw
Nut
Pipe duct seal
Non-return valve
Bent pipe section
Pump
Bend
Pipe nipple
Screw attachment
3-way valve body
Drive for 3-way valve body +
Connection cable
T-piece
Threaded cap with seal
Automatic pressure switch
Anti-twist protection
9. Spare parts and accessories
9.2 Accessories
ø
Art. #
Piece/
Pack
KESSEL-suction fine filter,
floating
-
85 050
1
KESSEL suction coarse filter,
floating
-
Description
Art.# 85 050
Product advantages:
for suctioning unfiltered rainwater from
rainwater storage tanks, floating version
Guarantees suctioning of the cleawith floating ball made of PE, with sucnest water about 15 cm undertion hose (3m long; standard suction
neath the water surface.
hose and connection) and hose fitting,
filter body with filter made of stainless
Protects the pump from suctioning
steel,
in damaging particle sizes.
mesh width 0.23 mm, all connections 1
inch, with backflow protection device.
Large flow possible thanks to highquality non-return valve.
for suctioning rainwater from rainwater
storage tanks, floating version with floating ball made of PE, with suction hose
(3 m long; standard suction hose and
connection and hose fitting, filter body
with filter made of stainless steel, mesh
width 1.2 mm, all connections 1 inch,
with backflow protection device.
Art.# 85 051
KESSEL empty conduit seal
DN 150 made of plastic
85 051
1
Guarantees suctioning of the cleanest water about 15 cm underneath the water surface.
Product advantages:
Large flow possible thanks to highquality non-return valve.
-
85 412
1/-
-
-
85 020
1
-
With two seals each DN 32/DN 40, one seal
DN 50 and one blind plug each DN 40 and
DN 50.
Suitable for KESSEL rainwater pumping systems Aqabull®/Aqadive® and rainwater filters with/without back-flushing unit
KESSEL-level measuring device
for analog indication of the voulme of water
in the cistern or tank, with 20 m control lead,
pneumatic universal tank content meter for
all tank sizes and heights
Art.# 85 020
18
9. Spare parts and accessories
ø
Art. #
Piece/
Pack
KESSEL leak probe
Optical probe with 5 m cable for monitoring the level of the water in the feeding
tank of the KESSEL rainwater pumping
system Aqabull ® / Aqadive ® with switch
unit Aqatronic K.
-
80 085
1
KESSEL sticker
“Not drinking water”
for marking the pipes as non-drinking
water pipes. L x W: 26 x 80 mm.
5 pc/box
-
85 073
1 pack
DN 100
DN 125
DN 150
DN 200
72 100
72 125
72 150
72 200
-
Description
-
KESSEL sign
“Not drinking water”
for marking the tapping point,
L x W: 60 x 120 mm.
2 pc/box
KESSEL sign “No cross-connection
to the drinking water network
(heed DIN 1988)”
for attachment near the water meter,
L x W: 105 x 148 mm.
1 pc/box
Art.Nr.
85073
073
Art.# 85
KESSEL- Staufix® backwater valve
automatic valve closure with emergency
lever
DN
L
H
Art.Nr. 72 100
19
100
125
150
200
355
460
390
530 L = Length in mm
40+60 148+60 165+60 178+60 H = Height in mm
-
10. Warranty
1. In the case that a KESSEL product is defective, KESSEL has
the option of repairing or replacing the product. If the product
remains defective after the second attempt to repair or replace the product or it is economically unfeasible to repair or replace the product, the customer has the right to cancel the
order / contract or reduce payment accordingly. KESSEL
must be notified immediately in writing of defects in a product.
In the case that the defect is not visible or difficult to detect,
KESSEL must be notified immediately in writing of the defect
as soon as it is discovered. If the product is repaired or replaced, the newly repaired or replaced product shall receive
a new warranty identical to that which the original (defective)
product was granted. The term defective product refers only
to the product or part needing repair or replacement and not
necessarily to the entire product or unit. KESSEL products are
warranted for a period of 24 month. This warranty period begins on the day the product is shipped form KESSEL to its customer. The warranty only applies to newly manufactured
products. Additional information can be found in section 377
of the HGB.
In addition to the standard warranty, KESSEL offers an additional 20 year warranty on the polymer bodies of class I / II
fuel separators, grease separators, inspection chambers, wastewater treatment systems and rainwater storage tanks. This
additional warranty applies to the watertightness, usability
and structural soundness of the product.
A requirement of this additional warranty is that the product is
properly installed and operated in accordance with the valid
installation and user's manual as well as the corresponding
norms / regulations.
2. Wear and tear on a product will not be considered a defect.
Problems with products resulting from improper installation,
handling or maintenance will also be considered a defect.
Note: Only the manufacturer may open sealed components or
screw connections. Otherwise, the warranty may become null
and void
01.06.2010
20
EU - KONFORMITÄTSERKLÄRUNG
nach der Maschinenrichtlinie 89/392/EWG, der Niederspannungsrichtlinie 73/23/EWG
und der Richtlinie zur elektromagnetischen Verträglichkeit 89/336/EWG.
Der Hersteller
KESSEL GmbH, D-85101 Lenting
erklärt, daß die Produkte
KESSEL-Regenwasserpumpanlage Aqaset und
KESSEL-Regenwasserpumpanlage Aqadive®
mit Schaltgerät Aqatronic® S / K
entwickelt und gefertigt worden sind
in Übereinstimmung mit folgenden Normen:
EN 292
EN 60335-1
EN 60730-1
EN 50081-1
EN 50082-1
Lenting, den 01.02.2001
B. Kessel
G. Vanetta
21
Notice
22
11. Important contacts / Info
Separator Type:
__________________________________________________________
Day / Hour
__________________________________________________________
Project description /Building services supervisor __________________________________________________________
Address
__________________________________________________________
Builder
__________________________________________________________
Telephone / Fax
__________________________________________________________
Telephone / Fax
__________________________________________________________
Address
__________________________________________________________
Planner
__________________________________________________________
Telephone / Fax
__________________________________________________________
Address
__________________________________________________________
Contracted plumbing company
__________________________________________________________
Telephone / Fax
__________________________________________________________
Address
__________________________________________________________
KESSEL-Commissions no.:
System operator /owner
__________________________________________________________
Telephone / Fax
__________________________________________________________
Address
__________________________________________________________
User
__________________________________________________________
Telephone / Fax
__________________________________________________________
Address
__________________________________________________________
Person of delivery
__________________________________________________________
Other remarks
__________________________________________________________
The system operator, and those responsible, were present during the commissioning of this system.
____________________________
Place and date
____________________________
Signature owner
23
____________________________
Signature user
Everything for drainage
Backwater valves and cleanouts
Polymer and Ecocast drains
Volatile liquid traps
Lifting stations, pumps, warning
and control units
Rainwater management systems