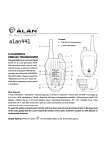
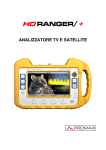
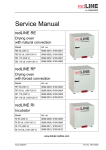
1
User Manual RT-800 Wideband Precision Direction Finder RHOTHETA Elektronik GmbH RHOTHETA User Manual RT-800 Edited by: RHOTHETA Elektronik GmbH Kemmelpark Dr.-Ingeborg-Haeckel-Str. 2 82418 Murnau Germany Tel.: Fax: +49 8841 4879 - 0 +49 8841 4879 - 15 Internet: E-Mail: www.rhotheta.de [email protected] Copyright © RHOTHETA Elektronik GmbH All rights reserved - Issue: 2013/05/19 [Rev 1.08] - Display Control Unit: Software [Rev 2.00] - Document-ID: 12-9-1-0003-3-1-61 Note The manufacturer reserve the right to make modifications at any time and without previous information of the here described product. Page 2 of 74 RHOTHETA User Manual RT-800 Page 3 of 74 RHOTHETA User Manual RT-800 Content 1 Use and Characteristics .................................................................................................. 8 2 Short Description............................................................................................................. 9 3 4 2.1 Front View (DCU) ...................................................................................................................................9 2.2 Front View (Buttons and Display) .........................................................................................................10 2.3 Bearing Display (Main Page) ................................................................................................................12 2.4 Rear View .............................................................................................................................................15 Operation ........................................................................................................................ 16 3.1 Bearing Operation.................................................................................................................................16 3.1.1 Instruction Fields (flags, errors and warnings).........................................................................18 3.1.2 Alarm Function .........................................................................................................................19 3.1.3 Function Repeat ......................................................................................................................19 3.1.4 Function Clear..........................................................................................................................19 3.1.5 Function Channel 16 ................................................................................................................20 3.1.6 Function SAR ...........................................................................................................................20 3.1.7 Function Scan ..........................................................................................................................20 3.2 Monitoring Operation ............................................................................................................................21 3.2.1 Timing of normal Monitoring Operation ...................................................................................22 3.2.2 Timing Monitoring with selected Cospas-Sarsat Main Frequency ..........................................22 3.2.3 Monitoring operation with filtering of Emergency Transmitters: ID-Only .................................22 3.3 Standby-Operation................................................................................................................................23 3.3.1 Standby Mode SAR .................................................................................................................23 3.3.2 Standby Mode PLB ..................................................................................................................23 3.4 Scan-Dialogue ......................................................................................................................................24 3.4.1 Fast Channel Scan ..................................................................................................................24 3.4.2 Fast Marine Scan .....................................................................................................................25 3.5 SAR-Dialogue .......................................................................................................................................27 3.6 Cospas-Sarsat Decoding Data Content ...............................................................................................28 Operating and Adjusting ............................................................................................... 30 4.1 Reset of the DCU..................................................................................................................................31 4.2 Setting Main Bearing Frequency/Channel ............................................................................................32 4.2.1 Adjusting Main Bearing Frequency ..........................................................................................32 4.2.2 Setting a Main Operating Channel ..........................................................................................33 4.3 Adjusting the Squelch ...........................................................................................................................34 4.3.1 Hints for Squelch Level Adjustment .........................................................................................34 4.3.2 Manual Adjusting of Squelch Levels ........................................................................................35 4.3.3 Automatic Adjustment of Squelch Levels ................................................................................36 4.3.4 Automatic Squelch ...................................................................................................................37 4.4 Adjusting Monitoring Operation and ID-only Filtering ...........................................................................38 4.5 Activating Standby Operation ...............................................................................................................39 4.6 Setting Brightness (Dimming) ...............................................................................................................40 4.6.1 Automatic Adjustment of Brightness of Display and LEDs ......................................................41 4.6.2 Manual Adjustment of Display and LED Brightness ................................................................41 4.6.3 Adjustment of Key Illumination (legends) ................................................................................41 Page 4 of 74 RHOTHETA User Manual RT-800 5 6 4.7 Setting the Volume (Volume)................................................................................................................42 4.7.1 Muting the Speaker (Mute) ......................................................................................................42 4.7.2 Setting Speaker Volume ..........................................................................................................43 4.7.3 Functional Test of Speaker ......................................................................................................43 4.8 Activating Memory / Band function .......................................................................................................44 4.8.1 Recall Frequency/Channel from Storage List ..........................................................................44 4.8.2 Edit Text (of Frequency/Channel) in Storage List....................................................................45 4.8.3 Move a Frequency/Channel within a Storage List ...................................................................46 4.8.4 Delete a Frequency/Channel in the Storage List .....................................................................46 4.8.5 Store a new Frequency/Channel in a Storage List ..................................................................47 Menu (Setup) .................................................................................................................. 48 5.1 Menu General .......................................................................................................................................49 5.1.1 Audio ........................................................................................................................................49 5.2 Menu Interface ......................................................................................................................................50 5.2.1 NMEA Std Sentence ................................................................................................................50 5.2.2 NMEA Mode.............................................................................................................................50 5.2.3 NMEA baud rate ......................................................................................................................51 5.2.4 Compass Source .....................................................................................................................51 5.3 Menu System ........................................................................................................................................52 5.3.1 Address-ID ...............................................................................................................................52 5.3.2 Antenna Unit ............................................................................................................................52 5.3.3 Audio Line Output ....................................................................................................................52 5.3.4 Antenna Offset .........................................................................................................................52 5.3.5 PS Ram....................................................................................................................................53 5.3.6 Monitoring ................................................................................................................................53 5.3.7 S/N-Ratio AutoSQL ..................................................................................................................53 5.3.8 AU-Calibration..........................................................................................................................53 5.3.9 BeepTone Decoding ................................................................................................................53 5.3.10 CPSS Dialog Time ..................................................................................................................53 5.4 Menu Service ........................................................................................................................................54 5.4.1 Monitor .....................................................................................................................................54 5.4.2 Password .................................................................................................................................54 5.5 Unlocking Setup Settings .....................................................................................................................55 Interfaces ........................................................................................................................ 56 6.1 Overview ...............................................................................................................................................56 6.2 Device Ports .........................................................................................................................................57 6.2.1 Antenna Unit Port (Connecting Cable DCU AU).................................................................57 6.2.2 GPS / RS422 Port ....................................................................................................................58 6.2.3 Fuse F3 ....................................................................................................................................58 6.3 Remote Control and IP-Audio Encoder Ports.......................................................................................59 6.4 Power Supply........................................................................................................................................60 6.5 Service & Maintenance Ports ...............................................................................................................61 6.5.1 Power Supply and Optional Connections ................................................................................61 6.5.2 NMEA Bus (RS 232) ................................................................................................................62 6.5.3 Test / Program .........................................................................................................................63 7 Guideline for optimal DF antenna position.................................................................. 64 8 Technical Data Sheet ..................................................................................................... 65 8.1 Electrical Characteristics ......................................................................................................................65 Page 5 of 74 RHOTHETA User Manual RT-800 8.2 9 Mechanical Characteristics...................................................................................................................67 8.2.1 DCU Dimensions (built-in version)...........................................................................................67 8.2.2 DCU Dimensions (tabletop version) ........................................................................................68 8.2.3 DCU Data.................................................................................................................................68 8.2.4 Antenna Unit Dimensions ........................................................................................................69 8.2.5 Antenna Unit Mast Flange .......................................................................................................70 8.2.6 Technical Data Antenna Unit ...................................................................................................70 Appendix ........................................................................................................................ 71 9.1 Error Messages ....................................................................................................................................71 9.2 Warnings...............................................................................................................................................71 9.3 Frequencies of channels on maritime band .........................................................................................72 9.4 List of abbreviation................................................................................................................................73 9.5 CE Declaration of Conformity ...............................................................................................................74 Page 6 of 74 RHOTHETA User Manual RT-800 List of figures Fig. 1 Front View – DCU ........................................................................................................... 9 Fig. 2 Front View – Buttons and Display ................................................................................. 10 Fig. 3 Bearing Display ............................................................................................................ 12 Fig. 4 Rear view...................................................................................................................... 15 Fig. 5 Bearing operation ......................................................................................................... 16 Fig. 6 Digital display of bearing value ..................................................................................... 17 Fig. 7 Last bearing (time, frequency) ...................................................................................... 17 Fig. 8 Instruction fields ............................................................................................................ 18 Fig. 9 Monitoring operation ..................................................................................................... 19 Fig. 10 Example active monitoring frequency ......................................................................... 21 Fig. 11 Monitoring operation ................................................................................................... 21 Fig. 12 Example: Timing normal monitoring ........................................................................... 22 Fig. 13 Example: Timing Cospas-Sarsat ................................................................................ 22 Fig. 14 Example: Timing Standby Mode: SAR........................................................................ 23 Fig. 15 Example: Timing Standby Mode: PLB ........................................................................ 23 Fig. 16 Scan-Dialogue ............................................................................................................ 24 Fig. 17 SAR-Dialogue ............................................................................................................. 27 Fig. 18 Display of Cospas-Sarsat Scanning-Mode ................................................................. 27 Fig. 19 Cospas-Sarsat data decoding .................................................................................... 29 Fig. 20 Operating and adjusting.............................................................................................. 30 Fig. 21 Switch-on system information ..................................................................................... 31 Fig. 22 Input of main bearing frequency ................................................................................. 32 Fig. 23 Input of a main bearing channel ................................................................................. 33 Fig. 24 Adjustment squelch level ............................................................................................ 34 Fig. 25 Dialogue window: Squelch level adjustment ............................................................... 35 Fig. 26 Auto-Squelch Marker .................................................................................................. 37 Fig. 27 Dialogue window Monitoring settings.......................................................................... 38 Fig. 28 Activation of Standby operation .................................................................................. 39 Fig. 29 Dialogue window Dimming ......................................................................................... 40 Fig. 30 Automatic dimming ..................................................................................................... 41 Fig. 31 Manual dimming ......................................................................................................... 41 Fig. 32 Dialogue window Volume ........................................................................................... 42 Fig. 33 Muting the speaker ..................................................................................................... 42 Fig. 34 Speaker volume .......................................................................................................... 43 Fig. 35 Speaker functional test ............................................................................................... 43 Fig. 36 Dialogue window Memory / Band ............................................................................... 44 Fig. 37 Text input window ....................................................................................................... 45 Fig. 38 Operating Menu Setup (example: Interface / NMEA Standard Sentence) .................. 48 Fig. 39 Menu General, table default settings .......................................................................... 49 Fig. 40 Menu Interface, table default settings ......................................................................... 50 Fig. 41 Menu System, table default settings ........................................................................... 52 Fig. 42 Menu Service table ..................................................................................................... 54 Fig. 43 Overview of Interfaces ................................................................................................ 56 Fig. 44 Connecting cable DCUAU ...................................................................................... 57 Fig. 45 Example for optimal DF antenna position ................................................................... 64 Fig. 46 RT-800, mechanical dimensions (built-in version) ...................................................... 67 Fig. 47 RT-800, mechanical dimensions (tabletop version) .................................................... 68 Fig. 48 Antenna Unit, mechanical dimensions ........................................................................ 69 Fig. 49 Antenna Unit, mast flange (mechanical dimensions) .................................................. 70 Page 7 of 74 RHOTHETA User Manual RT-800 1 Use and Characteristics The DF-system RT-800 combines a communication direction finder and a SAR (Search and Rescue) direction finder, thus allowing to bear all coastal and maritime radio stations. EPIRB (Emergency Position Indicating Radio Beacon) equipped persons or vessels may be found quickly and safely. The DF-system RT-800 allows the bearing of radio signals on 5 different frequency bands as well as traditional emergency frequencies in the VHF and UHF range, the common calling up channel 16 in the maritime radio band and the widely used Cospas-Sarsat emergency signals. Optionally the whole frequency range 118,000 MHz – 470,000MHz could be unlocked! Frequency Ranges: Standard-Version Optional extended Frequency Range VHF air band 118,000 MHz - 123,975 MHz 118,000 MHz - 136,992 MHz VHF marine band 154,000 MHz - 162,995 MHz 137,000 MHz - 224,995 MHz Maritime channels Channel 00 (Ship / Coast) - Channel 88 (Ship / Coast) UHF air band 240,000 MHz - 245,975 MHz 225,000 MHz - 399,975 MHz Cospas-Sarsat 400,000 MHz - 406,092 MHz UHF FM band 406,100 MHz - 410,000 MHz 406,100 MHz - 470,000 MHz Full automatic bearing of emergency signals in the monitoring and standby mode guarantees additionally a permanent emergency surveillance and the auto alert function. The DF-system consists of two units, the bearing AU (Antenna Unit) and the operating device DCU (Display Control Unit). The bearing antenna is a dipole antenna, its housing contains all bearing electronics. Thus short bearing signal paths with low loss, but also high insensitiveness to external disturbing fields are achieved. The DF-system is working with the Doppler principle, and by the high rotation frequency of 3 kHz and clockwise / counterclockwise rotation of the antenna to compensate running time errors, highest precision of the system is achieved. The indicating and operating system (DCU) represents bearing signals and allows operating and controlling of the bearing antenna. Additionally external devices can be connected (speaker, audio / line out, PTT push to talk). Also data in- and export is possible by various interfaces including remote control over IP and IP-based audio transmission. The DF-system is suitable for stationary surveillance of coastal ship traffic as well as for mobile use on big vessels. AU is watertight (protection IP 67) and may be used under extreme and rough conditions. Optionally a lightning protection rod is available for costal VTS installations. Caution: The DF-system RT-800 is not licensed for primary navigation. It may support navigation if necessary, but navigation of a vessel may not be based under any circumstances on data obtained by the DF-system. Page 8 of 74 RHOTHETA User Manual RT-800 2 Short Description 2.1 Front View (DCU) 1 2 3 Fig. 1 Front View – DCU Pos. Designation 1. Control Panel 2. Speaker 3. Power Switch Function See page Display of bearing data; local control of the direction finder Audio Speaker for received signal (volume is adjustable with button ) Switches system power On and Off Page 9 of 74 10 42 --- RHOTHETA User Manual RT-800 2.2 Front View (Buttons and Display) 18 17 16 15 1 2 14 3 13 4 5 6 12 7 8 9 10 11 Fig. 2 Front View – Buttons and Display Pos. Designation Function See page 1. Reset of the control panel 31 2. Opens dialogue window for adjustment of brightness of the TFT-display, of the LEDs and illumination of keys. 40 3. Opens dialogue window for adjustment of volume and mutefunction 42 4. Opens dialogue window for adjustment of the squelch level 34 5. Opens dialogue window for recalling and storing of own frequencies and channels 44 6. Opens dialogue window for setting main bearing frequency / channel. 32 Shows present bearing values during bearing, data content of Cospas-Sarsat or corresponding settings dialogues 16 28 30 7. TFT-Display (Thin-Film-Transistor) Page 10 of 74 RHOTHETA User Manual RT-800 Pos. Designation Function See page 8. Software controlled function keys 30 9. Closing dialogue or adjusting field without storing changed parameters 30 Arrow keys enable selection of selection fields 10. Increasing or decreasing of a value for one step Confirms and stores input or selection 11. Closes dialogue window 30 30 12. (n/a) 13. Opens setup menu 48 14. Numeric keys for direct numeric input of frequency/ channels… 30 Measures environmental brightness for best automatic adjustment of brightness of the TFT-display and key illumination. 40 15. 16. 17. 18. Sensor of brightness Opens settings dialogue monitoring / scanning-mode with selective filtering of emergency transmitters and standby operation 21, 38 Indicates correct reception of GPS-sentences xxRMC/xxGGA if option “UTC Time Base” is installed (additionally indicates input of compass data) 16, 51 Page 11 of 74 RHOTHETA User Manual RT-800 2.3 Bearing Display (Main Page) 21 20 19 18 17 16 1 15 2 14 3 13 4 12 11 10 5 6 8 7 9 Fig. 3 Bearing Display Pos. Designation Meaning See page 1 Frequency or channel display Display of present main bearing frequency or display of present main bearing channel 16 2 Display of frequency band Display of frequency band related to present main bearing frequency/channel 16 3 Monitoring field Display of selected frequencies/channels in monitoring mode 21 4 Instruction fields (Flags) Display, additional to present adjustments (PTT, mute, alarm display) Warnings Error messages 18 5 Clr (Clear) Clears the bearing value storage 19 6 SAR Shows SAR-Dialogue It is used for direct selection of SAR-Freqencies, to start Cospas-Sarsat-Scanning and to start the Cospas-Sarsat – Decoding 27 Activation of Marine Scan Mode or Fast Channel Scan Mode 24 Switch to common maritime emergency channel 16 20 7 8 CH 16 Page 12 of 74 RHOTHETA User Manual RT-800 Pos. Designation 9 Rep (Repeat) Meaning See page Recall last bearing value 19 10 Monitoring/scanning operation will be continued on next frequency/channel, if currently no signal is received on current frequency. 21 11 Taking over active scanning frequency as main bearing frequency (at signal reception only) 21 The squelch level of the main bearing frequency/channel may be adjusted directly by keys (only possible if main frequency active; deactivated during Cospas-Sarsat-Scan) 12 34 No signal received (signal level < squelch level) Sqelch threshold of current frequency / 13 channel Signal is received and beared (signal level > squelch level) 34 No signal received (Auto-Squelch active) Display of signal level of current frequency/channel 14 Bar indicator of signal level color: cyan color: red no reception signal reception 16 15 Digital signal level indicator Digital indication of signal level of active bearing frequency/channel 16 16 Bearing indicator Graphic display of bearing value relative to longitudinal axis of antenna 16 17 Spread of bearing Maximum deviation of unaveraged single bearing values 16 360°-display Without compass data: Display of relative bearing value in 360°-display. (If antenna mounted correctly, the 0°value corresponds to North direction) 18 Or Compass card If compass information available: graphic display of relative bearing value within compass card with display of the four cardinal points. 16 19 Heading Pointer Is always in 12 o´clock position and displays present course if compass information available (only used for mobile applications) 16 20 Digital bearing indicator Display of bearing value as a three-digit number 17 Page 13 of 74 RHOTHETA User Manual RT-800 Pos. Designation Meaning See page Indication of selected reference direction Relative Brg 21 Direction of reference Magnetic Brg True Bearing bearing relative to longitudinal axis of antenna Magnetic North (bearing relative to magnetic North) Geographic North (bearing relative to geographic North) Page 14 of 74 17 RHOTHETA User Manual RT-800 2.4 Rear View 1 2 3 4 5 6 7 8 Fig. 4 Rear view Pos. Designation Meaning See page 1 Power Supply Power supply connector with replacable fuse 60 2 IP-Audio Encoder (Channel-1) Audio Output for DF and ecoder cofiguration 59 3 Remote Control Channel-1 Ethernet ports for remote control (NMEA / Ethernet) and IP-Audio (AUDIO / Ethernet) 59 4 Devices Connector ports for AU (antenna unit) and optional GPS-connector for the option “UTC Time Base”; fuse for AU / GPS power supply 57 5 Slave DCU Ethernet connector for factory use only --- 6 Service & Maintenance Ports for optional connections, SW-Update and local NMEA-Output 61 7 Remote Control Channel-2 Option: “2nd Channel Remote Control” Ethernet ports for remote control (NMEA / Ethernet) and IP-Audio (AUDIO / Ethernet) --- 8 IP-Audio Encoder (Channel 2) Option: “2nd Channel Remote Control” Audio Output for DF and ecoder cofiguration --- Page 15 of 74 RHOTHETA User Manual RT-800 3 Operation 3.1 Bearing Operation The display unit of the DF-system RT-800 during the bearing operation is the concentrically arranged TFT-display. All current bearing data, settings and status reports are displayed here. Top left in the display the current main bearing frequency or, if operating in the sea band, the current main bearing channel will be displayed. If a duplex channel is selected, the reference position "Ship" for a maritime radio station is indicated additionally, or "Coast" for a coastal radio station. The frequency band related to the current main bearing frequency/channel is indicated too. Fig. 5 Bearing operation The level of a received signal on the selected operating frequency/channel is indicated digitally in the range of 0% to 99% and additionally as bar graph. The scale is not calibrated and serves as a measure of signal strength in quality. The bearing electronics will process data only, if their signal level is above the selected squelch level (= noise suppression). Even without a received signal the DF-system may display a certain signal level (= noise). In order not to bear these environmental noise signals, the squelch level shall be set above the noise level. For correct setting of the squelch level, please pay attention to chapter 4.3. The DF-system captures about 280 bearing values per second. These bearing values may vary significantly, depending on signal quality (signal strength and modulation). This range of spread is the narrower, the better the signals quality is, respectivly wider if the signals quality is decreasing. The processing electronics will average the bearing values over a certain time, thus achieving a rather smoothed display of the bearing value, additionally, this averaging procedure still produces good bearing results if there´s a wide spread of, e.g. 45%. The relative as well as the digital bearing values will be put out by the DF-system as averaged values. The relative bearing value is depicted as an arrow and refers to the longitudinal axis of the antenna. This corresponds, if mounted correctly, to north. Page 16 of 74 RHOTHETA User Manual RT-800 Digital display of bearing value: 74° Direction of reference Fig. 6 Digital display of bearing value The digital bearing display is a 3-digit number with a resolution of 1 degree. Depending on compass data (only used in mobile applications), the bearing data displayed digitally with following directions of reference: Display Direction of reference Meaning Relative Brg. Relative Bearing relative to longitudinal axis of antenna Magnetic Brg. Magnetic North Bearing relative to magnetic North True Bearing True North Bearing relative to geographic North After end of reception the last bearing value will be displayed flashing for ca. 5 sec. Then the bearing display will vanish and the field of the digital bearing display will show the passed time and the frequency of the last received bearing signal "Last Bearing": time since last bearing frequency of last bearing Fig. 7 Last bearing (time, frequency) After pressing key "Repeat" (see 3.1.3) the last bearing value will be displayed again for three seconds. Page 17 of 74 RHOTHETA User Manual RT-800 3.1.1 Instruction Fields (flags, errors and warnings) When bearing an emergency signal and additional functions are activated or operating parameters are out of their specified limits, the system will inform you by the means of instruction fields (flags): Display Meaning See page Speaker audio output is currently muted 42 Self bearing suppression (SBS) active 61 An emergency signal has been detected. Source, signal frequency and time since detection will be displayed. The key Clr will deactivate the warning signal and the alarm relay output. 19 After that, if receiving no more emergency signal for more than a minute, the alarm flag will be turned off automatically. The system will indicate a warning, if the operating parameters are close to the tolerable limits or if external signals are not available anymore. The system´s basic functions are not affected yet, but preventive measures are recommended. An error message will be displayed, if one or more operating parameters are out of admitted limits or if a malfunction was recognized. In this case the system is not working. Key Clr deactivates the acoustic warning signal. Fig. 8 Instruction fields Page 18 of 74 71 71 RHOTHETA User Manual RT-800 3.1.2 Alarm Function During signal reception (signal level above squelch level), the signal is analysed in the background if it´s a modulated emergency signal. These emergency signals (ELT = Emergency Locator Transmitter, PLB, EPIRB) are modulated with a typical, repeating and distinct sweeping tone. Once recognized as an emergency signal, alert will be activated. A flashing alarm flag indicates the signals frequency, it´s type and duration since first reception. active frequency bearing of the signal alarm flag if emergency signal was recognized deactivates acoustic warning Fig. 9 Monitoring operation At the same time a special internal warning tone informs you about the reception of the emergency signal. The alert will last (even after end of signal) until confirmation/deactivation by the flashing function key Clr (warning signal mute). After that, if no emergency signal is received for more than one minute on the recognized scanning frequency, the alarm flag will be turned off automatically. Note: The alarm relay output will be activated simultaneously when recognizing an emergency signal. Like the internal warning tone the relay output can be deactivated by pressing key Clr. The alarm relay output may be used for an warning bell or similar. 3.1.3 Function Repeat The function Repeat will show once again the last valid bearing value. Pressing the function key F5 Rep will show the last bearing value with its corresponding digital signal level, flashing for 3 seconds. (For mobile applications: With an external compass activated (true / magnetic bearing), a vessels change of heading will be considered automatically for the relative bearing.) 3.1.4 Function Clear The function Clr clears the internal bearing value averaging buffer. The averaging buffer enhances bearing accuracy and delivers a useful bearing display even with bad received signals (e.g. distant transmitter, receiving gaps). The averaging procedure causes a contouring error, which might influence the bearing value, if changing heading too quickly (in Page 19 of 74 RHOTHETA User Manual RT-800 case of a vessel installation). In this case the indicated bearing value will be lagging a bit to the actual bearing value. Pressing function key F1 Clr after a distinct change of heading, the corrected bearing value will be displayed immediately. In connection with an alarm flag or an error message the key Clr deactivates warning tone and alarm relay output. 3.1.5 Function Channel 16 Pressing function key F4 Ch 16 enables direct switching to maritime emergency channel 16. Note: Please verify correct squelch adjustment of channel 16. For squelch adjustment see 4.3. Pressing key F4 Back recalls the previous bearing frequency. 3.1.6 Function SAR Pressing function key F2 SAR will show the SAR-Dialogue. This dialogue grants access to following frequencies and functions: All Cospas-Sarsat frequencies (separated in channels) Start of Cospas-Sarsat-Scanning-Mode monitored) Cospas-Sarsat-Frequency found by last scan Decoding of Cospas-Sarsat messages 121.500 MHz (Emergency-Frequency) 121.650 MHz (typical Training-Frequency of PLB’s) 243.000 MHz (Emergency Fequency) (all In the dialogue you could navigate with the arrow-keys selected frequency is selected as new main frequency. Cospas-Sarsat-Frequencies are . By pressing Ok the In chapter 3.1.6 the SAR-Dialogue is decribed in detail. 3.1.7 Function Scan By pressing the function key F3 the scan dialogue is shown where the scan modes can be activated. The dialogue provides one scan mode to scan eight channels freely selectable of all bands and a second scan mode to scan all ship frequencies of the lower marine band in 5 kHz steps. A detailed description of the scan dialogue can be found in chapter 3.4 on page 24. Page 20 of 74 RHOTHETA User Manual RT-800 3.2 Monitoring Operation Activation and adjusting monitoring operation see 4.4. The DF-system RT-800 is equipped with only one receiver, that means, only one frequency can be received at a time. Signals on other specified frequencies/channels cannot be beared at the same time. For simultaneous surveillance of the traditional emergency frequencies and any other frequencies/channels there is the function monitoring. Thus, the surveillance of up to four different frequencies (monitoring frequencies) within the specified frequency bands is possible. When the monitoring function is activated the DF-system switches alternating from the main bearing frequency to the selected surveilling scanning frequencies. The actual frequency is displayed highlighted in white color. Monitoring Off Monitoring On Monitoring On active frequency: Main frequency = Channel 02 Ship active frequency: Monitoring frequency = 121.500 MHz Fig. 10 Example active monitoring frequency If a signal is received during monitoring, the reading of the corresponding frequency is red colored and the bearing value is indicated. Even after the end of the signal this frequency/channel will be held for 10 sec (Hold-Time). Currently active frequency Monitoring frequencies Bearing of the signal Fig. 11 Monitoring operation Page 21 of 74 RHOTHETA User Manual RT-800 In order to interrupt the actual reception press key Esc (the system is continuing with next monitoring frequency). Active reception will be interrupted after 30 sec for a short moment in order to examine the other monitoring frequencies (safety function). If this feature is not desired, press key Ok . The active receiving frequency will be overtaken as the main frequency. Thus, interruptions are shortened considerably, for the main frequency is monitored now with highest priority (see also 3.2.1). 3.2.1 Timing of normal Monitoring Operation The main frequency (here channel 16) is monitored with highest priority. The Fig. 12 Example: Timing normal monitoring duration of the monitoring cycles may be extended, if receiving signals on the monitoring frequencies (also by misadjustment of the squelch level). 3.2.2 Timing Monitoring with selected Cospas-Sarsat Main Frequency The main frequency adjusted to a Cospas-Sarsat-Fequency, the timing cycle will be changed automatically in order Fig. 13 Example: Timing Cospas-Sarsat to catch the short pulse (duration of pulse ca. 400 msec, every 50 sec). Additionally the Cospas-Sarsat-Scanning is activated. 3.2.3 Monitoring operation with filtering of Emergency Transmitters: ID-Only In order to activate the emergency transmitter filtering function see 4.4. Signals transmitted by emergency transmitters (PLB/ELT/EPIRB) are modulated with a typical sweeping tone. When surveilling, in order to exclude false alarms caused by disturbing signals or by nonauthorized radio communication, the function "emergency transmitter filtering ID-Only" may be called up. Once activated, all radio signals without the prescribed sweeping tone for emergency transmitters will be suppressed. Alert will be triggered, if a modulated emergency signal is recognized. Caution: For very weak signals recognition of modulation may take a certain time. Releasing an alarm can be delayed in this case. Page 22 of 74 RHOTHETA User Manual RT-800 3.3 Standby-Operation Activating standby operation see 4.5. During standby operation the DF-system monitors the corresponding emergency frequency, the display is dimmed and the audio output is switched off. Once an emergency signal is detected on these frequencies, the system will release alarm and the display is illuminated. In order to avoid false alarms caused by other signals, the surveillance is coupled automatically with the emergency transmitter filtering function ID-Only. In order to end standby operation, press any key. If an internal system error is recognized, the standby operation will be finished as well. Note: The standby operation is not available, if there´s an error flag or an active alert (emergency transmitter). 3.3.1 Standby Mode SAR During this standby operation the DF-system is surveilling the traditional emergency frequency 121.500 MHz and all Cospas-Sarsat frequencies. Fig. 14 Example: Timing Standby Mode: SAR These frequencies are preset in the system. 3.3.2 Standby Mode PLB During this standby operation the DFsystem is surveilling exclusively the emergency frequency 121.500 MHz. This frequency is preset in the system. Because there is no scanning necessary, this mode reacts very fast if a distress signal (from ELT/PLB/EPIRB) on 121.500 MHz is activated. Fig. 15 Example: Timing Standby Mode: PLB Page 23 of 74 RHOTHETA User Manual RT-800 3.4 Scan-Dialogue The Scan-Dialogue provides the activation of two different scan modes. In the first mode it is possible to scan eight freely selectable channels of all bands which are scanned in less than two seconds (Fast Channel Scan) In this mode a “BeepTone” filter could be activated which issues an alarm if a distinct tone frequency is recognized and ignores all other signals. The second mode provides a quick scanning of the lower marine band in approximately three seconds. (Fast Marine Scan) Channellist for Fast Channel Scan Channel selected for editing Frequency range of Fast Marine Scan SNR-Adjustment for each channel F1-Function key for acitvation of Fast Channel Scan F5-Function key for activation of Fast Marine Scan F2-Function key for activation and deactivation of channels F3-Function key for channel selection and SNR adjustment F4-Function key for activation of alarm only decoding during Fast Fig. 16 Scan-Dialogue 3.4.1 Fast Channel Scan The Fast Channel Scan enables the scanning of eight freely selectable frequencies accross all supported bands in a very fast manner. The scan process lasts less than two seconds. All channels are scanned continuously. If not all channels are enabled, the duration of one scanning cycle is reduced accordingly. (e.g. if only four channels are enabled, the duration of one scanning cyle is approximately one second) Navigation in the dialogue is possible using the arrow keys . The currently selected item (channel or SNR-value) is surrounded by a red rectangle. To choose a channel, select the respective channel and press the key „F3“ Edit. The frequency dialogue is shown to enter the new frequency or channel. In Fast Channel Scan mode the Autosquelch is enabled automatically. The value of the Autosquelch can be adjusted slightly by the user. The SNR value indicates the count of level points above the noise level to which the Autosquelch is set to. For example, if the noise level is at 27% on a specific channel and the SNR-Value is adjusted to 7, then the Autosquelch level is set to 34%. Page 24 of 74 RHOTHETA User Manual RT-800 Because the channels may be set to frequencies of different bands with different noise levels, the SNR-Value can be adjusted for every channel seperately. To activate the Fast Channel Scan press the key „F1“ Off. The label of the soft key changes to ON and shows that the Fast Channel Scan was activated. If the Fast Marine Scan was already activated, it is deactivated because only one scan mode could be active at a time. By pressing Ok all changes in the channel list are stored and the respective scan mode is activated or stopped. „Alarm Only Decoding“ / „BeepTone“ If the scan mode Fast Channel Scan was invoked, an additional filter for the decoding of audio signals could be activiated by pressing the key „F4“ Decode. The Fast Channel Scan then reacts only to signals with a distinct (preconfigured) audio frequency and issues an alarm immediately if such a signal was recognized. This can be used to search NOVATECH Radio Beacons which transmit a two second signal with 800Hz audio tone every six seconds. The parameters of the audio signal (upper and lower audio frequency as well as minimum required duration of the signal) can be configured in the System Menu (see chapter 5.3.9). If a signal was found during Fast Channel Scan with activated BeepTone-Decoding, the scan process is stopped and the signal analysed. Only if a valid audio signal (BeepTone) is decoded, an alarm signal is started. If the signal stops or no valid audio signal was decoded the scanning procedure starts over again after five seconds. Remark: Alarm is always started if a signal with an ELT-Modulation was recognised! 3.4.2 Fast Marine Scan By pressing the function key „F5“ Off a fast scan mode for the lower marine band is activated. The label of the key changes to ON and indicates that the Fast Marine Scan is to be started. If the Fast Channel Scan was already activated, it is deactivated because only one scan mode could be active at a time. The frequency range of Fast Marine Scan is fixed from 156.050 MHz (Channel 01) to 157.425 MHz (Channel 88) and is scanned with 5 kHz frequency step without gap. The duration of one scanning cycle is approx. 3 seconds. The small frequency spacing of 5 kHz is used to detect stations which use frequencies between two maritime channels! Page 25 of 74 RHOTHETA User Manual RT-800 General Information on Fast-Channel-Scan and Fast-Marine-Scan: If a signal is found during the scan (signal-level above squelch-level) the scan is interrupted and the bearing of the signal is started as long as the signal is present. At Fast Channel Scan one second after the signal was lost, the scanning process starts again at the next frequency / channel. At Fast Marine Scan the scanning process starts after ten seconds. If the key Ok is pressed during this time, the scanning mode is deactivated and the current frequency is the new main frequency. In case that an unwanted signal is found, the scanning process can be proceeded immediately by pressing the Esc button! If an interesting signal is found and the direction finder should bear this frequency permanently, the scanning process can be cancelled in the Scan-Dialogue by deactivating the scan mode. CAUTION: In case that Monitoring is active before starting the scan, Monitoring is interrupted while the scan is active! If a scan mode is not supported by the connected AU, the respective scan mode can not be selected in the dialog. If a signal was found during scanning process which lasts longer than 30 seconds, the scan process is continued after 30 seconds with the next channel/frequency. This is done to ensure that other signals are found as well. Remark: If there are interferences on the frequency band which are above the squelch level, scanning stops as well at these interferences (They are interpreted as signals). This may be and buttons in Fast Marine avoided by adjusting the squelch level manually using the Scan mode or adjusting the SNR value in Fast Channel Scan mode. Because of this, it may be possible that weak signals are not received any more! (For correct squelch adjustment read also chapter 4.3 on page 34!) Page 26 of 74 RHOTHETA User Manual RT-800 3.5 SAR-Dialogue The SAR-Dialogue allows direct access to several emergency frequencies as well as the possibility to scan all Cospas-Sarsat frequencies. Furthermore you can start the decoding of Cospas-Sarsat signals. Current selection Fast Scan of all Cospas-Sarsat Frequencies Frequency found at last Cospas-SarsatScan Cospas-Sarsat Channel-Groups Emergency frequencies for direct access Function-Keys for direct access Function-Key to display the Cospas-SarsatDecoding dialogue Fig. 17 SAR-Dialogue If one of the dialogue’s frequencies is already selected as main frequency, it is marked at dialogue startup. While the dialogue is active, the selection can be made with the arrow keys . If the Ok key is pressed, the selected frequency becomes the new main frequency and the dialogue is closed. Function Scan CP/SS: By selecting this function a fast Scan-Mode is started. It scans all Cospas-Sarsat channels for signals. The Scan-Mode is displayed in the main window: Fig. 18 Display of Cospas-Sarsat Scanning-Mode Function DECODE CP/SS: By pressing the function key F5 DECODE CP/SS the decoding dialogue for Cospas-Sarsat signals is shown. The selected Cospas-Sarsat frequency is transferred to the DecodingDialogue. A detailled description of the Decoding-Dialogue is in chapter 3.6. Page 27 of 74 RHOTHETA User Manual RT-800 3.6 Cospas-Sarsat Decoding Data Content In order to receive a Cospas-Sarsat data pulse and to decode its content, the main frequency has to be adjusted to a Cospas-Sarsat frequency first. This can be achieved manually or, faster, by selecting the frequency directly in the SAR-Dialogue. For decoding, you have to press function key F2 SAR in the main screen, choose the frequency and then press F5 DECODE CP/SS to start the decoding of Cospas-Sarsat signals. In this mode the bearing operation and also the monitoring function will be interrupted. In order not to suppress other emergency signals, the selected decoding mode is limited to 75 sec (visible on progress bar). After that, the system is returning to the previous operating mode. (For special purposes this time could be changed by the menu item Menu/System/CPSSDlgTim) A Cospas-Sarsat pulse will be broadcasted every 50 sec ( 5 sec). While the waiting period a pulse will be received if the transmitter is not out of range. Once received a valid pulse, the function key F1 Confirm starts flashing and an acoustic warning tone is put out. By pressing key F1 the acousitc signal is muted. The last received Cospas-Sarsat message can be displayed again by pressing function key F4 Recall . The data content of a received Cospas-Sarsat message can be stored to an internal memory with the function key Save, and displayed again with functon key Restore. During the decoding of Cospas-Sarsat signal the squelch level could not be adjusted because the Auto-Squelch is activated automatically! Page 28 of 74 RHOTHETA User Manual RT-800 Bar of progress of remaining waiting period Time span since last received pulse Signal level and squelch level (Auto-Squelch activated) Data content Fig. 19 Cospas-Sarsat data decoding Data Content: Frame Sync. Ok (normal Cospas-Sarsat Signal) or SelfTest (Cospas-Sarsat Signal in self test mode). The 24 synchronizing bits have been received correctly. Protocol Used protocol: User (Test), Standard (Test) or National (Test) Complete Hex Message Complete data signal, coded in hexadecimal notation (Bit 25 to 112) and, if available (Bit 113 to 144) Country country identification (numeric code) Beacon Identification 15 Hex / MMSI Identification Transmitter identification of a registered transmitter (Fifteen Hexadecimal Character Beacon Identification), if signal contains a MMSI-ID, it is displayed here. GPS Position GPS-Position (latitude and longitude) if contained in data signal of transmitter. Precision depending on protocol, between 15 min of arc and 4 sec of arc. Page 29 of 74 RHOTHETA User Manual RT-800 4 Operating and Adjusting Common operating functions of the RT-800 are done with help of the keys placed around the display. In normal bearing mode the functions will be called up directly by the keys, opening the corresponding dialogue window. Fig. 20 Operating and adjusting Rarely used adjustments or adjustments which are only done once during installation, will be done in the menu-setup (see chapter 5). Parameter setting is done generally by using the arrow keys, the number keys or the software controlled function keys F1 to F5. New, changed parameters will be accepted with key Ok and be stored permanently in the system for further operation (even after switching off and on of the device). Key Esc will close the dialogue window without storing the changed parameters. If no adjustments are made in an opened dialogue window for more than 10 minutes, the system will close the window automatically and return into the bearing display mode. While adjusting the bearing operation is still running in the background. If receiving an alarm signal, a warning tone will sound and the last bearing value can be called up with function Repeat. Page 30 of 74 RHOTHETA User Manual RT-800 4.1 Reset of the DCU Press key in order to restart the DCU. (The system stores the last settings.) Key illumination and the green operating light are activated. The display is still dark and the system is booting the operating software. The starting page shows up, serial numbers and software version of the DF-system are displayed. Display Control Unit: Software version Serial number Antenna Unit: Software version Serial number Fig. 21 Switch-on system information After a period of 10 sec the bearing display will appear. The system is working with the previously selected adjustments. Page 31 of 74 RHOTHETA User Manual RT-800 4.2 Setting Main Bearing Frequency/Channel Selection of the main bearing frequency in the VHF and UHF air band and the Cospas-Sarsat band is usually done by direct input of the desired frequency. In the maritime radio band the input of the channel number (with related frequency) is usual. Both types of input are to your disposal. The system will accept only inputs within the permitted frequency ranges. 4.2.1 Adjusting Main Bearing Frequency Frequency step width depends on the selected frequency band. The last digits will be rounded by the system. Open dialogue window, using key Channel / Freq. Select with F1 or F2 Frequency The frequency input field is activated. Additionally the display shows a list of the permissible frequency ranges. Permissible frequency ranges of the system Frequency input field Fig. 22 Input of main bearing frequency Put in desired frequency by the means of the keyboard or directly using the arrow keys: inreases frequency by 5 kHz / 8,33 kHz / 25 kHz decreases frequency by 5 kHz / 8,33 kHz / 25 kHz moves cursor to the left for one digit in order to overwrite previous input Store adjustment using key Ok Device returns into bearing mode, working with adjusted frequency. Page 32 of 74 RHOTHETA User Manual RT-800 4.2.2 Setting a Main Operating Channel 56 Channels are available in the VHF marine band. (Channel 0 to 28 and channel 60 to 88). Open dialogue window using key Channel / Freq. Select with F3 or F4 Channel The channel input field is activated. Additionally the display shows a list of all permissible channels. Permissible channels of the system Channel input field Selection of point of reference for duplex channels Fig. 23 Input of a main bearing channel Put in desired channel directly by the means of the keyboard or by using the arrow keys: Increases channel for one step Decreases channel for one step Moves cursor to the left for one digit in order to overwrite previous input If a duplex channel is to be adjusted, the point of reference Ship for the maritime radio station (lower band) or Coast for the coastal radio station (upper band) can be selected by pressing key F5. Store the input using key Ok The device returns into bearing mode and is operating on the selected channel. Page 33 of 74 RHOTHETA User Manual RT-800 4.3 Adjusting the Squelch Our surrounding atmosphere contains always a certain electric field strength, designated as "noise". The received noise voltage is varying with frequency and location of the receiver. Signals can only be interpreted reasonably, if their level is above the surrounding noise level. The squelch electronics make it possible to adjust a threshold, below which incoming signals will not be processed. The DF-system will work only, if there is an incoming signal with a level above the squelch level. If the signal level is below the squelch level, reception will be switched off. 4.3.1 Hints for Squelch Level Adjustment The squelch level of the corresponding frequency/channel is to be adjusted only when receiving no bearing signal. The squelch level is to be adjusted as close as possible above the noise level. If the squelch level is adjusted too low, it is within the noise level and the DF-system is affected in its whole performance. If the squelch level is adjusted too high, very weak bearing signals will be suppressed by the squelch function: Correct Too low Too high Channel to be adjusted, here: Ch. 02 Squelch level for Ch. 02 Noise level on Ch. 02 Fig. 24 Adjustment squelch level Industrial areas (e.g. near harbours) may be featuring higher noise levels than offshore areas. Therefore it is important, to verify regularily the adjustment of the squelch level of all active frequencies (main frequency, emergency frequencies and monitoring frequencies) and, if necessary, to readjust in order to achieve full sensitivity of the DF-system. When bearing emergency transmitters with very weak signals, it may be useful to deactivate the squelch function on the corresponding frequency (see Off in the squelch diaglogue) in order to take full advantage of the DF-systems sensitivity. In this case check permanently if bearing the transmitter and not bearing disturbing signals. When verifying, a change of heading should cause a change of the bearing value. Page 34 of 74 RHOTHETA User Manual RT-800 Adjusting window for main bearing frequency (here Ch. 02) Adjusting window for emergency frequencies Adjusting window for additional monitoring frequencies Squelch level of corresponding frequency (here 121.650 MHz) Noise level of corresponding frequency (here 121.650 MHz) Automatic adjustment of all active frequencies Deactivation of squelch level of selected frequency (here CH. 02) Activation of Auto-Squelch-Function of selected frequency (here CH. 02) Automatic squelch level adjustment of selected frequency (here CH. 02) Fig. 25 Dialogue window: Squelch level adjustment 4.3.2 Manual Adjusting of Squelch Levels Please notice hints described in chapter 4.3.1 when adjusting the squelch level. The squelch levels of the adjusted surveilling frequencies (main frequency, emergency frequencies, monitoring frequencies) are to be adjusted individually: The system is scanning the displayed frequencies in the background and is showing on the display their noise levels as well as their squelch levels. Scanning and displaying of the corresponding frequencies takes a certain time. As soon as signal level and frequency are apearing on the screen, the squelch level for this frequency can be adjusted. Page 35 of 74 RHOTHETA User Manual RT-800 Open dialogue window using key Squelch When opening the dialogue window the system is scanning the signal levels of the surveilling frequencies/ channels and is showing the presently received signal levels and the previously selected squelch levels on the screen of the display. As soon as the noise level of a frequency is getting visible on the display, the squelch level of this frequency may be adjusted. Select frequency/channel to be adjusted using arrow keys The selected frequency/channel is displayed now brighter and framed red. Change squelch level of selected frequency: Increases squelch level Decreases squelch level F1 Auto Adjust Adapts automatically squelch level to noise level once F2 AutoSQL Activates the Auto-Squelch-Function (not available at monitoring frequencies 121.500 and 243.000 MHz) F3 Off Switches off squelch level of selected frequency Store adjustment using key Ok and return to bearing display. 4.3.3 Automatic Adjustment of Squelch Levels Please notice hints described in previous chapter when adjusting squelch level (see 4.3.1). Open dialogue window using key Squelch When opening dialogue window the system is scanning the signal levels of the selected surveilling frequencies / channels and is showing the presently received signal levels and the previously selected squelch levels on the display screen. Function keys F4 or F5 All AutoAdjust are now activating the automatic squelch level adjustment of all active frequencies The squelch levels are now being optimized automatically for all active frequencies (main bearing frequency, emergency frequencies, monitoring frequencies). A manual readjustment might be necessary (see 4.3.2). Store adjustment using key Ok and return to bearing display Page 36 of 74 RHOTHETA User Manual RT-800 4.3.4 Automatic Squelch For bearing very short signals the correct adjustment of the squelch level is very important. Because noise level varies by time and location, the squelch level must be adjusted continuosly. The Auto-Squelch function ensures that the squelch level is always adjusted to a value a little bit above the noise level. If noise level is rising, the squelch level is rising also. As soon as the noise level drops the squelch level is adjusted accordingly. Caution: Because the DF-system can not determine between noise and countinous signals, the Auto-Squelch will rise the squelch level slowly until the squelch level is above the signal level. The result is that the signal is lost. So, if you are bearing countinous signals, you have to deactivate the Auto-Squelch! This is done by changing the squelch level using the Up/Down Keys at the main window or at the squelch dialogue. The squelch marker then changes its appearance and displays the current squelch value. Activation: To activate the Auto-Squelch press the function key F2 AutoSQL in the squelch dialogue having selected the desired frequency. In frequency bands with short signals (eg. Cospas-Sarsat-Band) the Auto-Squelch is activated automatically. If the Auto-Squelch is activated the squelch marker turns into green and instead of the squelch level an A is displayed. Squelch-Marker with Auto-Squelch activated Fig. 26 Auto-Squelch Marker Notice: During Cospas-Sarsat-Scanning the Auto-Squelch function can not be deactivated! The Auto-Squelch function can not be activated for the emergency frequecies of the monitoring mode because this signals are mostly continuous signals! Page 37 of 74 RHOTHETA User Manual RT-800 4.4 Adjusting Monitoring Operation and ID-only Filtering For monitoring operation the emergency frequency 121.500 MHz is stored permanently in the system. For additional surveillance three more frequencies/channels can be stored in the specified frequency ranges. Each monitoring frequency can be combined with the selective emergency transmitter filtering function ID-only (selective squelch). Programmed, permanent emergency frequency Independently selctable surveiling frequencies Selected field Switching on/off of selected frequency resp. ELT/PLB function Opening dialogue window for adjusting new monitoring frequency Switching monitoring operation On and Off Fig. 27 Dialogue window Monitoring settings Open dialogue window, using key Monitor / Stdby. Select frequency field or selecting field for emergency transmitter filtering ( ID-only / selective squelch) by using keys The selected field is displayed with a red frame Change monitoring parameter with following functions: F1 On/Off Switching ON monitoring operation Monitoring operation is indicated by illumination of the monitoring LED. At the same time the selected monitoring frequencies are displayed on the left side of the bearing display. Switching OFF monitoring operation Top left the monitoring display is displaying "Monitoring Off" If the monitoring operation shall stay actived permanently, switching off by mistake can be avoided (see 5.3.6) F2 Edit Opening dialogue window for setting new monitoring frequency/channel F3 On/Off Switching on/off selected monitoring frequency and emergency transmitter filtering ELT/PLB (Setting new Frequency/Channel see 4.2) Confirm selection using key Ok and return to bearing mode Page 38 of 74 RHOTHETA User Manual RT-800 Note: Please verify correctly adjusted squelch level for set monitoring (see 4.3), for possible noise signals might release alert, thus delaying further monitoring operation. 4.5 Activating Standby Operation Open dialogue window using key Monitor / Stdby. Key F4 PLB will activate PLB standby operation The display gets dark and the emergency frequency 121.500 MHz is further on controlled in the background. The standby operation is indicated by the fast flashing monitoring LED. Additionally, the ID-only ON/OFF LED is blinking. Because there is no scanning necessary, this mode is useful for a fast reaction for PLB/ELT alarms transmitting on 121.500 MHz. Key F5 SAR will activate SAR standby operation The display gets dark and the emergency frequency 121.500 MHz and CospasSarsat frequencies are further on controlled in the background. The standby operation is indicated by the monitoring LED. This LED slowly flashes 3 times with a short break afterwards. Additionally, the ID-only ON/OFF LED is blinking. Fig. 28 Activation of Standby operation Deactivating Standby operation Press any key for re-activating the display. If an alarm is recognized during standby operation, the system will activate the display automatically. The alarm flag will indicate frequency and duration since release of alarm. If an operating error is recognized during standby operation, the display will be activated. An error message will be put out. Page 39 of 74 RHOTHETA User Manual RT-800 4.6 Setting Brightness (Dimming) The brightness of the display elements and key illumination may be adapted to surrounding lighting conditions (TFT-displays, LEDs). An integrated photometer is monitoring surrounding brightness and adapts automatically illumination of display and operating elements to ligthing conditions (= Automatic-Mode). Light sensor display (photometer) Input field brightness Mode selection for key illumination Maximum brightness Medium brightness Minimum brightness Mode selection Fig. 29 Dialogue window Dimming In order to enhance lifetime of the luminous foils and the TFT display we recommend to run the DF-system in its basic setting Automatic Mode (see chapter. 4.6.1). In case of insufficient automatically set illumination of the display elements (e.g. more dimming desired during night operation), the illumination setting may be adjusted manually (see chapter 4.6.2). The photometer is deactivated. Note: In order to avoid complete darkening of the display, the brightness setting is limited to a minimum value of 10%. Page 40 of 74 RHOTHETA User Manual RT-800 4.6.1 Automatic Adjustment of Brightness of Display and LEDs Open dialogue window using key Dimming Press left key Mode and select option Automatic. If necessary, readjust automatically set brightness using keys and function keys F2, F3 and F4 Store setting using key Ok Fig. 30 Automatic dimming 4.6.2 Manual Adjustment of Display and LED Brightness Open dialogue window using key Dimming . Press left key Mode and select option Manual. Set brightness using arrow keys Store setting using key Ok Fig. 31 Manual dimming 4.6.3 Adjustment of Key Illumination (legends) Note: In order to enhance lifetime of the luminous foils and the TFT display we recommend to operate the key illumination in mode Automatic. Open dialogue window using key Dimming . Select mode of key illumination by multiple pressing of the key Mode On Permanent key illumination Off Key illumination off Automatic Key illumination corresponding to surrounding lighting Store setting using key Ok Page 41 of 74 RHOTHETA User Manual RT-800 4.7 Setting the Volume (Volume) With this dialogue the volume of the speaker is controlled. The muting function (Mute) will switch off the speaker. An additional testing routine can test the speaker´s function. Adjusting fields volume Activating test function Maximum volume Medium volume Minimum volume Activation of mute function Fig. 32 Dialogue window Volume 4.7.1 Muting the Speaker (Mute) An emergency signal received, the speaker will give a permanent alarm signal. This signal or the received radiotelephony can be muted, if disturbing. Note: The period of the muting function is limited to a certain time if the setting “Monitoring / Off Blocked” is active in the system menu (See chapter 5.3.6 ). After that span the acoustic signal is switched on again automatically. Open dialoge window using key Volume Press F1 Mute and activate muting function of the speaker Store setting using key Ok and return to bearing display The speaker switched mute, the bearing display will show the flag "Mute" as a reminder. The basic setting of the DF-system is the option Normal . Fig. 33 Muting the speaker Page 42 of 74 RHOTHETA User Manual RT-800 4.7.2 Setting Speaker Volume The volume of the speaker can be set infinetely variable. In order to avoid switching off the speaker by mistake, the minimum volume is limited to a value of 10%. Note: In order to observe acoustically the setting of the speakers volume when receiving no signal, we recommend to activate the functional test of the speaker at first (see chapter. 4.7.3) and to use the received noise signal as a setting reference. Open dialogue window using key Volume Set volume using arrow keys Quick change of volume can be achieved by function keys F2 (Min), F3 (-I-) and F4 (Max). The volume is set to 10% (low), 50% (medium) and 100% (maximum volume). Key Ok will store the setting Fig. 34 Speaker volume 4.7.3 Functional Test of Speaker In order test volume setting and function of the speaker, the test function can be activated. When activating the test function the squelch is deactivated and the received noise signal becomes audible. Open dialogue window by using key Volume Activate test function using key Test On The noise signal kann now be heared if the speaker is working. In order to switch off the test function again, use key Test and select option Off Close dialogue window using key Ok and return to the bearing display Fig. 35 Speaker functional test Page 43 of 74 RHOTHETA User Manual RT-800 4.8 Activating Memory / Band function In order to call up quickly frequently used frequencies/channels, training frequencies etc., the DF-system can store and document these frequencies. For each of the four frequency bands an individual list may be provided. Stored frequencies/channels may be provided with own designations and comments, their sequence and position may be changed within the list, and they can be deleted, if neccessary. International valid emergency frequencies are already stored in the corresponding frequency band. They are on first position within the frequency band lists and cannot be moved or cancelled. Calling up frequency/channel of list Editing frequency/channel of list Moving frequency/channel in list Deleteing frequency/channel from list Storing of a new frequency/channel in list Emergency frequency in frequency band (here VHF marine band) Highlighted channel for editing Active frequency band Fig. 36 Dialogue window Memory / Band 4.8.1 Recall Frequency/Channel from Storage List Open dialogue window using key Memory / Band Select option Recall using arrow key This option is already preselected when opening the dialogue window. Select corresponding frequency band using function keys F1 to F4. The display will show your list. Select desired frequency/channel using arrow keys . The selected frequency/channel is marked with a green bar.. Key Ok will confirm your selection The device returns to bearing mode and work on the set frequencies / channels. Page 44 of 74 RHOTHETA User Manual RT-800 4.8.2 Edit Text (of Frequency/Channel) in Storage List Open dialogue window using key Memory / Band Select option Edit using arrow keys Select desired frequency band using function keys F1 to F4 The selected list is shown on the display. Select desired frequency/channel using arrow keys The selected frequency/channel is marked with a green bar. Key Ok will confirm the selection The text input window is opening (see Fig. ). The frequency/channel can now be provided with a name or comment. The text is limited to 35 digits. Frequency/channel to be edited Text input field Confirming end of input Backspacing one position, cancelling previous digit Inserting space Selected letter to be edited Fig. 37 Text input window Put in desired text by the means of the text input window o Select desired letter using the four arrow keys. The selected letter/digit is marked with a yellow frame o o o o Pressing key Ok overtakes the marked letter/digit. Numbers can be put in directly using the numeric keys. In order to insert a space mark, select field Space. In order to cancel a letter/digit, select field o In order to close the text input, select field End of Input and confirm using key Ok The text input window will be closed and the text is stored in the list. Page 45 of 74 RHOTHETA User Manual RT-800 4.8.3 Move a Frequency/Channel within a Storage List By the means of the function "Move", frequencies/channels can be sorted within a list. Note: International valid emergency frequencies on position 1 cannot be moved. Open dialogue window using key Memory / Band Use arrow keys for option Move Use function keys F1 to F4 to select corresponding frequency band your list will be shown on the display. Use arow keys to mark frequency/channel to be moved and confirm selection using key Ok The selected frequency/channel is marked with a green flashing bar Shove marked frequency channel using arrow keys to the desired position and confirm using key Ok 4.8.4 Delete a Frequency/Channel in the Storage List Note: International valid emergency frequencies, stored on first postion in each frequency band, cannot be deleted. Open dialogue window using key Memory / Band Select option Delete using the arrow keys Select desired frequency band using function keys F1 to F4 The list will be shown in the display. Mark frequency/channel to be deleted using arrow keys and confirm with key Ok The selected frequency/channel is marked with a green flashing bar. The DF-system now requires a confirmation of the deleting process. Confirm using key Ok Page 46 of 74 RHOTHETA User Manual RT-800 4.8.5 Store a new Frequency/Channel in a Storage List Open dialogue window using key Memory / Band Select option New using arrow keys Function keys F1 to F4 select desired frequency band The up to now provided list will be shown in the display. Open dialogue window using key Ok in order to put in the frequency/channel. Proceed as described in 4.2.1 (frequency) or in 4.2.2 (channel). The new frequency/channel will be taken over in the corresponding list and will be displayed. Option "Edit" allows adding of text to the new frequency/channel. Select option "Recall", if the frequency/channel is to be used as present operating frequency/channel. Page 47 of 74 RHOTHETA User Manual RT-800 5 Menu (Setup) All system settings, exceeding common operation of the DF-system (interface settings, offset setting…) will be made in the "Menu Setup”. Caution: Incorrect settings in the Menu setup may lead to considerable malfunctions of the DF-system RT-800. Therefore, sensitive parameters concerning the bearing operation are password protected against non authorized alterations. Alterations of settings which require password release are to be made only by instructed persons. Information on software revision and serial number of AU and DCU Selected option Setup Menu unlocked Unlocking menu items Setup Menu Service, password protected Setup Menu System, password protected Setup Menu Interface, password protected Setup Menu General (free admission for uncritical settings) Fig. 38 Operating Menu Setup (example: Interface / NMEA Standard Sentence) Open dialogue window Menu Setup using key Menu . Select corresponding Setup Menu using function keys F1 to F5 Function keys will open a list of further submenu items. Select submenu to be adjusted by using arrow keys Selected field is highlighted in bright green. Select option from listing of possible settings using the arrow keys the selection using key Ok = option not active / = option active Or: put in desired value by using the numeric keys and confirm Ok Page 48 of 74 , confirm RHOTHETA User Manual RT-800 5.1 Menu General Editable freely, uncritical settings Menu - Setup General Audio Beeper Key Pressing Fig. 39 Menu General, table default settings 5.1.1 Audio As a standard, there is a short beep when pressing a key. If the beep is to be suppressed, deactivate setting "Beeper Key Pressing“. Page 49 of 74 RHOTHETA User Manual RT-800 5.2 Menu Interface Settings, concerning data interfaces and functions, can be made in menu "Interface" (password protected) Menu - Setup NMEA Std Sentence NMEA mode Interface NMEA baud rate Compass source $PRHO,DFSTD $PRHO,DFVTS $DFBRG Only On Request Autotalk 2 sec Autotalk 1 sec Autotalk 500 ms Autotalk 250 ms 1200 Baud 4800 Baud 9600 Baud 19200 Baud 38400 Baud 57600 Baud 115200 Baud No ext. Compass (Off) NMEA: $HCHDT … NMEA: $HEHDT … NMEA: $xxHDT … NMEA: $HCHDG … NMEA: $HEHDG … NMEA: $xxHDG … Fig. 40 Menu Interface, table default settings 5.2.1 NMEA Std Sentence NMEA Std Sentence controls which standard sentence is sent when Autotalk is activated. $PRHO,DFSTD The RHOTHETA standard bearing sentence $PRHO,DFSTD is sent $PRHO,DFVTS The VTS-Standard sentence $PRHO,DFVTS of RHOTHETA is sent $DFBRG $DFBRG standard sentence is sent 5.2.2 NMEA Mode In NMEA mode, the NMEA data output of the DF-system is selected. Only on Request Data output on request only Autotalk ... sec/ms Continuous data output of standard DF data in fixed intervals For further information refer to “RT-500-M & RT-800 NMEA-Protocol Description”. Page 50 of 74 RHOTHETA User Manual RT-800 5.2.3 NMEA baud rate NMEA baud rate will set velocity of data transmission of serial NMEA interface (input and output). For further information refer to “RT-500-M & RT-800 NMEA-Protocol Description”. 5.2.4 Compass Source An external compass may be connected to the systems NMEA interface. Set here data format of connected compass. No external compass connected, select menu item „ No ext. Compass (Off)“. Select corresponding data format of external compass here. For further information refer to “RT-500-M & RT-800 NMEA-Protocol Description”. Page 51 of 74 RHOTHETA User Manual RT-800 5.3 Menu System Internal system settings (password protected) Caution: Faulty settings may lead to misfunctions of the system. Menu - Setup System Address ID [00] Antenna Unit Mounted Upside Down Audio Line Output [50]% Antenna Offset [000]Deg PS RAM Compass Compens. Off Monitoring Off Blocked S/N-Ration AutoSQL [Default] (Default-Value = 6) AU Calibration Calibration Off BeepTone Decoding Frequency High 875 Hz Frequency Low 725 Hz Decoding Time 500 ms 75 Seconds 5 Minutes 1 Hour 10 Hours CPSS Dialog Time Fig. 41 Menu System, table default settings 5.3.1 Address-ID In menu item "Address ID" the internal device addressing can be set. Addresses from 0 to 99 are possible. 5.3.2 Antenna Unit The systems dipole antenna can only be mounted in vertical alignment. The mounting flange is pointing to the ground for standard mounting. For hanging mounting (flange on the top) select menu item „ Mounted Upside Down“ for correct signal processing. This is strictly not recommended for VTS/fixed installations! 5.3.3 Audio Line Output Adjust level of Audio Line Output signal. The level is adjustable from 10% to 99%. The Audio Line output has a determined output level and is independent of the volume adjustment). This is the input signal of the IP-Audio encoder. 5.3.4 Antenna Offset The bearing antenna has to be mounted "North orientated", the "North" resp. 0° marker has to point exactly to north. If the antenna cannot be mounted (for differnet reasons) pointing Page 52 of 74 RHOTHETA User Manual RT-800 exactly to north, the deviation correction can be put in here. The offset is adjustable from 0° to 359° (e.g. -15° = 345°). 5.3.5 PS Ram An external compass connected, the bearing value determination is done by a special, improved compensating procedure. For a compass of minor quality (e.g. heavy and quick variations) it may be necessary, to switch off the compass compensation. Select „ Compass Compens. Off“. 5.3.6 Monitoring In the default setting " Off Blocked“ it is not possible to deactivate the monitoring operation (see 4.4). Thus, surveillance of the emergency frequencies cannot be switched off by mistake. If the monitoring operation is to be switched off manually, the setting " Off Blocked" has to be deactivated. The DF-systems monitoring/scanning function can now be switched on/off in the corresponding dialogue window (see 4.4). 5.3.7 S/N-Ratio AutoSQL This value controls the Auto-Squelch. It determines how many level-points the squelch marker is set above the noise level. If the value is 6 for example, the squelch marker is adjusted always 6 level-points above the noise level. Default value is “6”. 5.3.8 AU-Calibration This setting can disable the internal calibration values of the AU. Change this setting only in special cases or if you are told by RHOTHETA Elektronik GmbH. 5.3.9 BeepTone Decoding This parameters control the behaviour of the “Alarm Only Decoding / BeepTone” option of Fast Channel Scan. 5.3.9.1 Frequency High / Frequency Low With Frequency High / Frequency Low you specify the range of the audio-frequency which triggers an alarm. That means if a signal should trigger an alarm, the audio frequency of the signal must be greater than Frequency Low and less than Frequency High. 5.3.9.2 Decoding Time Decoding Time determines the minimum duration of an audio signal (within the specified frequency range) that should trigger an alarm. For example given the parameters Decoding Time = 800ms, Frequ. High = 875 Hz, Frequ. Low = 725 Hz, the signal must remain at least 800 milliseconds continuously with its frequency between 725 Hz and 875 Hz to start an alarm. 5.3.10 CPSS Dialog Time This setting could be used to select the duration until the dialogue Cospas/Sarsat-Decoding closes automatically. Page 53 of 74 RHOTHETA User Manual RT-800 5.4 Menu Service Internal settings and service dialogues (password protected) Menu - Setup Monitor Antenna Unit Password Change Fig. 42 Menu Service table 5.4.1 Monitor The Setup Menu item "Service-Monitor" is to be opened only for service and maintenance operation. Changes of settings are reserved to the firm RHOTHETA or instructed persons. 5.4.2 Password If the system has been unlocked by the default password during first installation (see 5.5) create and change your personal password now. Only one password can be stored. Press function key F4 and select option „Passwort Change“ A data input field will open Put in now your password by the means of the numeric keys or the editing fields. The input is limited to 8 digits. The password may consist of any numbers and signs, as well as special marks and space marks. A space mark at the beginning of the password is not possible. Confirm your input using key Ok . The password is stored for further operation. Page 54 of 74 RHOTHETA User Manual RT-800 5.5 Unlocking Setup Settings Caution: Wrong or faulty settings in setup menus as "Interface", "System" and "Service" may lead to dysfunctions. These settings are password protected. Before starting to change these settings, password protection has to be released. If the setting procedure is interrupted by pressing key Esc , password protection is automatically enabled again. The blocked menu setting is indicated by a closed grey padlock. The menu setting deblocked and opened, green padlock is visible. In this constellation all parameters may be changed . In order to unlock the setup menu press function key F5 Enter Password An input field for entering the password is opened. Enter password by the means of the numeric keys or the editing fields (operating editing fields see 4.8.2) Prior to first putting into operation the DF-system is protected by a preset password. The preset password is: 123 Confirm input by using key Ok Menu items as Interface, System, Service can be edited now and changed if desired. After unlocking the system as described in 5.4.2 you may create and change your personal password. Page 55 of 74 RHOTHETA User Manual RT-800 6 Interfaces 6.1 Overview 1 2 3 4 5 6 7 8 Fig. 43 Overview of Interfaces Pos. Designation Meaning See page 1 Power Supply Power supply connector with replacable fuse 60 2 IP-Audio Encoder (Channel-1) Audio Output for DF and ecoder cofiguration 59 3 Remote Control Channel-1 Ethernet ports for remote control (NMEA / Ethernet) and IP-Audio (AUDIO / Ethernet) 59 4 Devices Connector ports for AU (antenna unit) and optional GPS-connector for the option “UTC Time Base”; fuse for AU / GPS power supply 57 5 Slave DCU Ethernet connector for factory use only --- 6 Service & Maintenance Ports for optional connections, SW-Update and local NMEA-Output 61 7 Remote Control Channel-2 Option: “2nd Channel Remote Control” Ethernet ports for remote control (NMEA / Ethernet) and IP-Audio (AUDIO / Ethernet) 8 IP-Audio Encoder (Channel 2) Option: “2nd Channel Remote Control” Audio Output for DF and ecoder cofiguration Page 56 of 74 RHOTHETA User Manual RT-800 6.2 Device Ports 6.2.1 Antenna Unit Port (Connecting Cable DCU AU) Contact / Pin 3 8 5 9 Signal +24 V DC Output power supply to Antenna Unit GND 1 RS485 A 6 RS485 B 2 NF Serial data connection DCU AU (9600 Baud / semi-duplex / receive and transmit) Input audio signal resp. analog Test/Service Connecting cable DCU AU Connection Antenna Unit Connector type: RHOTHETA Article Number X-1067 connecting cable 6-poled with shield length 1 to 50 m: 6 x 0.38 mm2 cross section of conductor min. length 50 to100 m: cross section of conductor min. 6 x 0.50 mm2 Fig. 44 Connecting cable DCUAU Page 57 of 74 Connection Display Control Unit Connector type: SubD 9-poled male RHOTHETA User Manual RT-800 6.2.2 GPS / RS422 Port This optional (Build-To-Order Option) input is used to connect an external GPS-device to set the internal system clock. This is required for syncronisation of the bearing values if several direction finders are connected together by a command and control center. Contact / Pin Signal 6 RS422 Rx / A 1 RS422 Rx / B 5 GND 9 +24V DC Input of serial GPS data with RS422 level Output power supply for external GPS 6.2.3 Fuse F3 This protection fuse covers the power supply of antenna unit as well as external GPS. Page 58 of 74 RHOTHETA User Manual RT-800 6.3 Remote Control and IP-Audio Encoder Ports Item Marking 1 Status LED Blinks during boot process of IP Audio Encoder (red) 2 Status LED Blinking: On: (green) IP Audio Encoder is sending IP Audio Encoder is not sending 3 Head phones 4 Audio / Ethernet Ethernet connection of IP Audio Encoder must be connected to LAN! 5 NMEA / Ethernet Ethernet connection of NMEA remote control must be connected to LAN! After switching on the DCU, the current IP-address of the IP Audio Encoder is output to connected headphones. (This is only used during configuration process!) If the option “2nd Remote Control Channel” is used, so it has the same connectors as the Channel-1 Page 59 of 74 RHOTHETA User Manual RT-800 6.4 Power Supply Item / Pin Marking 1 N (Neutral) 2 PE (protective earth) 3 L (Line) 4 Built-In Fuse (replacable) IEC 60320 / C14 inlet for use of power cords with IEC 60320 / C13 plugs. 85 – 264 Volts / 1.3 – 0.4 Ampere / 47 – 63 Hz Embedded replaceable Fuse of type IEC 60127 / T5A / 250V / 5x20mm / slow Page 60 of 74 RHOTHETA User Manual RT-800 6.5 Service & Maintenance Ports 6.5.1 Power Supply and Optional Connections Contact / Pin Signal 15 +12 V to +30 VDC 8 GND (Ground) 7 Permanent Operation 14 PTT / SBS 6 GND 12 Squelch Out 4 GND 1 9 No connections required (internally connected)! Alarm Relay 3 Speaker + 11 Speaker - 13 Audio Line Out 5 GND No connections required (internally connected)! Optional input in order to suppress self bearing. When connecting input PTT/SBS (Self Bearing Suspression) to Ground, self bearing is suppressed Optional output for audio connection. When receiving a signal this pin is connected to ground by the means of an Open Collector output. Optional alarm contact (mechanical relay as NOC, Normal Open Contact) max. 1 A at 30 VDC resp. max. 0.3 A at 125 VAC No Connection required, because this ports are connected to the internal speaker! Connection not recommended, because this port is connected to the IP Audio Encoder! Audio output (connected to ground with fixed level. Adjustable in menu, from 200 mVSS at 10% to max. 2 VSS at 99% Page 61 of 74 RHOTHETA User Manual RT-800 6.5.2 NMEA Bus (RS 232) This is an additional NMEA interface of the DCU. It is recommended to use it only for local tests, because commands sent to the DCU may be interfere with commands sent through NMEA - Ethernet interface! Contact / Pin Signal 2 RS232 Tx Output of serial data with RS232 level 3 RS232 Rx Input of serial data with RS232 level 5 GND GND level for RS232 connection Page 62 of 74 RHOTHETA User Manual RT-800 6.5.3 Test / Program Port for service or test operation (Software and new firmware upload). Contact / Pin Signal 2 RS232 Tx Output serial data with RS232 level 3 RS232 Rx Input serial data with RS232 level 5 GND GND level for RS232 connection Page 63 of 74 RHOTHETA User Manual RT-800 7 Guideline for optimal DF antenna position The quality of the bearing results depends largely on the position of the antenna. So, an antenna position has to be found, where the transmitter´s wavefield can reach the bearing antenna as undisturbed as possible. If high bearing accuracy is demanded, no metallic resp. RF-conducting obstacles shall be around the antenna unit (in an angle of ± 45° towards the horizontal). Objects being in the “restricted area” will disturb the arriving wave field. Reflections will arise which might disturb bearing accuracy and so on decrease the bearing accuracy. This physical effect generally is valid for all bearing systems. In practice, often a compromise has to be found between bearing and other interests. Important: For more information on this topic please refer to RT-800 Installation and Configuration Manual! Fig. 45 Example for optimal DF antenna position Page 64 of 74 RHOTHETA User Manual RT-800 8 Technical Data Sheet 8.1 Electrical Characteristics Method of bearing: Doppler-principle (3 kHz rotational frequency, right / left rotation, CW/CCW) Bearing indication: Relative bearing and true bearing related to North (if external heading data available) Bearing accuracy1: ±2° RMS Internal resolution: 1° Sensitivity: HF-voltage at receiver input (50 Ω): VHF, UHF <100 nV; Cospas-Sarsat 406.000 MHz <150 nV Stability of frequency: ±2.0 ppm (∆f/f = ±2 x 10⁻⁶) [in temperature range -30 °C to +80 °C] Receiving bands: 5 (VHF-air band, VHF-marine band, UHF-air band, Cospas-Sarsat, UHF-FM Band) Receiving frequencies (frequency ranges) Standard Version VHF-Airband: VHF-Marineband: UHF-Airband: Cospas-Sarsat: UHF-FM Band: 118.000 – 123.975 MHz 154.000 – 162.995 MHz 240.000 – 245.975 MHz 400.000 – 406.092 MHz 406.100 – 410.000 MHz Optional Frequency Range 118.000 – 136.992 MHz 137.000 – 224.995 MHz 225.000 – 399.975 MHz 406.100 – 470.000 MHz Marine channels Channel 0 .. 28 / 60 .. 88 (ship station + coast station in each case) Channel pattern 25 kHz / 8,33 kHz / 5 kHz (depending on frequency band) Monitoring / Scanning modes: Monitoring: Four additional frequencies (emergency frequency 121.500 MHz and three free selectable frequencies) are monitored during normal operation. Standby: The Cospas-Sarsat and 121.500 MHz emergency frequency is monitored at all time in standby mode. Fast Marine Ship Band Scan (within approx. 3 sec): Fast scan (without gap) within the range of ship channels[01..88] = [156,050…157,425 MHz]. Detection of each signal (also between the channel grid). Fast Channel Scan (within max. 2 sec): Fast scan of up to eight freely selectable frequencies/channels. (Only with unlocked option “Fast Channel Scan Mode”!) 1 Undisturbed wave field and sufficient field strength supposed. Measuring by changing the angle of incidence, the bearing antenna rotates on a revolving table in order to eliminate influences of environment to the bearing result. Page 65 of 74 RHOTHETA User Manual RT-800 Signal filtering: Optional: all emergency frequencies can be filtered for ELTmodulation (false alarms disabled). Cospas-Sarsat analysis: Bearable modulation: Reception and analysis of Cospas-Sarsat data signal (112 or 144 bit, 400 baud, biphase L-phase modulated, with BoseChaudhuri-Hocquenghem error correction code, specified according Cospas-Sarsat C/S T.001 October 1999) Indication of data content (mode, country, GPS-coordinates) A3E, F3E, A2X (PLB-modulation); bearing largely independent of modulation. Polarisation: Vertical Polarisation error 5° at 60° field vektor rotation Garbling cone: approx. 30° to vertical Response time: 50 ms (with sufficient reception field strength) Foil on the front with integrated keyboard matrix and EL background illumination 320 x 240 pixel with max. brightness of approx. 450 cd/m2, continuously adjustable or automatic control. Keyboard TFT Graphic Display Operating voltage: Current consumption: 85 – 264 Volts / / 47 – 63 Hz 1.3 – 0.4 A Power consumption Nominal 30W @ 230V Audio out: Internal speaker 4 W Line out (adjustable from 100 mV pp to 2000 mV pp) Interfaces Ethernet Interface for NMEA remote control (TCP) Ethernet Interface for IP Audio output (e.g. Internet Radio, RTP, RawUDP, RawTCP, SIP, Icecast, Shoutcast) External GPS (RS422, optional) Headphone (only used for setup of IP Audio) NMEA In/Output (RS232, only for local test purposes) Testport (RS232) optional customer specific Alarm relay output (1.0 A, 30 V DC / 0.3 A, 125 V AC) PTT input for self-bearing suppression Squelch output for external audio control Page 66 of 74 RHOTHETA User Manual RT-800 8.2 Mechanical Characteristics 8.2.1 DCU Dimensions (built-in version) Measuring units: [mm] millimeters Fig. 46 RT-800, mechanical dimensions (built-in version) Page 67 of 74 RHOTHETA User Manual RT-800 8.2.2 DCU Dimensions (tabletop version) Measuring units: [mm] millimeters Fig. 47 RT-800, mechanical dimensions (tabletop version) 8.2.3 DCU Data Weight Approx. 5900 g Permitted operating temperature -20 °C to +60 °C Permitted storage temperature -30 °C to +80 °C Page 68 of 74 RHOTHETA User Manual RT-800 8.2.4 Antenna Unit Dimensions Measuring units: [mm] millimeters ca.475 ca.810 397 333 201 157 Fig. 48 Antenna Unit, mechanical dimensions Page 69 of 74 RHOTHETA User Manual RT-800 8.2.5 Antenna Unit Mast Flange Measuring units: [mm] millimeters 120 105 50 40.7 6.3 10 65 90 Fig. 49 Antenna Unit, mast flange (mechanical dimensions) 8.2.6 Technical Data Antenna Unit 2 Weight Approx. 5200 g Permitted operating temperature -40 °C2 to +60 °C Permitted storing temperature -55 °C to +80 °C Ingress protection IP 67 Temperatures below –10°C resp. 14°F may require a warming up time of up to 15 minutes! Page 70 of 74 RHOTHETA User Manual RT-800 9 Appendix 9.1 Error Messages Error message Error location Cause Error 01 AU No Receiver Error 04 AU Rec. No PLL Error 05 DCU>AU No Data Error 06 DCU>AU BadData Error 07 AU Low Voltage Error 08 AU>DCU BadData Antenna Unit: Receiver defective receiver circuit board in AU Antenna Error in receiver synthesizer oszillator in AU Error 09 No AntennaUnit Connection Antenna Display Connection Display Antenna Connection Display Antenna No serial data from DCU to AU Incompatible resp. bad data connection between DCU and AU Main voltage supply Voltage supply below 10 V Connection Antenna Display Incompatible resp. bad data connection between AU and DCU No serial data (RS485) from AU. Missing or damaged cable connection between AU and DCU resp. defective AU 9.2 Warnings Warning message Warning 01 AU low Voltage Warning 02 NoCompassFound Warning 10 NMEA DataRange Warning 11 NMEA Bad Data Warning 12 NMEA CheckSumm Warning 13 NMEA Bad Frame Warning 20 AU DataRange Warning 21 AU Decode Err Warning 22 Send Freq.OfsWarning 23 Send Freq.Ofs+ Warning 30 FLASH Config Warning 39 Simulation Warning 40 No Master DCU Error location Cause Main voltage supply Low voltage supply of AU External device Compass data not available (see page 51) External device Incorrect NMEA data: Value out of allowed range External device Defective data recognized on NMEA interface Defective data recognized on NMEA interface: Check Sum Defective data recognized on NMEA interface: Bad Frame External device External device Connection Display Antenna Radio distance transmitter direction finder Bad data of DCU, mismatch of telegram length Data error in Cospas-Sarsat data block, data could not be decoded Received transmitter Frequency of transmitter too low Received transmitter Frequency of transmitter too high DCU Flash memory The stored settings cannot be read. (Device is operating with default settings) Simulation Mode The AU simulation mode is active DCU A Slave DCU don’t find it’s corresponding master Page 71 of 74 RHOTHETA User Manual RT-800 9.3 Frequencies of channels on maritime band Channel No. frequency (ship - station) Frequency (coast - station) 0 1 2 3 4 5 6 7 8 9 10 11 12 13 14 15 16 17 18 19 20 21 22 23 24 25 26 27 28 60 61 62 63 64 65 66 67 68 69 70 71 72 73 74 75 76 77 78 79 80 81 82 83 84 85 86 87 88 156,000 MHz 156,050 MHz 156,100 MHz 156,150 MHz 156,200 MHz 156,250 MHz 156,300 MHz 156,350 MHz 160,600 MHz 160,650 MHz 160,700 MHz 160,750 MHz 160,800 MHz 160,850 MHz 160,900 MHz 160,950 MHz 156,400 MHz 156,450 MHz 156,500 MHz 156,550 MHz 156,600 MHz 156,650 MHz 156,700 MHz 156,750 MHz 156,800 MHz 156,850 MHz 156,900 MHz 156,950 MHz 157,000 MHz 157,050 MHz 157,100 MHz 157,150 MHz 157,200 MHz 157,250 MHz 157,300 MHz 157,350 MHz 157,400 MHz 156,025 MHz 156,075 MHz 156,125 MHz 156,175 MHz 156,225 MHz 156,275 MHz 156,325 MHz 161,500 MHz 161,550 MHz 161,600 MHz 161,650 MHz 161,700 MHz 161,750 MHz 161,800 MHz 161,850 MHz 161,900 MHz 161,950 MHz 162,000 MHz 160,625 MHz 160,675 MHz 160,725 MHz 160,775 MHz 160,825 MHz 160,875 MHz 160,925 MHz 156,375 MHz 156,425 MHz 156,475 MHz 156,525 MHz 156,575 MHz 156,625 MHz 156,675 MHz 156,725 MHz 156,775 MHz 156,825 MHz 156,875 MHz 156,925 MHz 156,975 MHz 157,025 MHz 157,075 MHz 157,125 MHz 157,175 MHz 157,225 MHz 157,275 MHz 157,325 MHz 157,375 MHz 157,425 MHz 161,525 MHz 161,575 MHz 161,625 MHz 161,675 MHz 161,725 MHz 161,775 MHz 161,825 MHz 161,875 MHz 161,925 MHz 161,975 MHz 162,025 MHz Page 72 of 74 RHOTHETA User Manual RT-800 9.4 List of abbreviation Abbreviation AU CP/SS DCU DF Deg ELT GND GPS ID IP LAN LCD LED MOB MSSI NF NMEA (0183) PLB PS RAM PTT/SBS RAM Rx S/N SAR SNR SQL TFT Tx VDC VTS Meaning Antenna Unit Cospas-Sarsat Display & Control Unit Direction finder Degree (° = 60' ) Emergency Locator Transmitter Ground Global Positoning System Identification Ingress Protection rating Local Area Network Liquid Crystal Display Light-Emitting Diode Man-Over-Board Maritime Mobile Service Identity Audio Frequency National Marine Electronics Association Personal Locator Beacon Averaging Random Access Memory Push-To-Talk/ Self Bearing Suppression Random Access Memory Receiver Signal to Noise Search And Rescue Signal to Noise-Ratio Squelch Thin Film Transistor (see also LCD) Transmitter Volts of Direct Current Vessel Traffic Service Page 73 of 74 Remarks IP67 Ship's Ident. No. Interface- and data telegram standard RHOTHETA User Manual RT-800 9.5 CE Declaration of Conformity Page 74 of 74