1
USING THE PROJECTOR
BATTERY COMPARTMENT
1. Remove the battery door and slide “UK / EU” switch to
select the desired country version.
2. Insert 2 new AA size batteries as per the polarity
information marked on the battery compartment.
3. Press “RESET” key to restart the clock.
4. Replace the battery door.
Radio Controlled Projection Clock
Model: RM303P
RECEPTION OF RADIO CONTROLLED TIME SIGNAL
The time and calendar are radio-controlled. The current time
and calendar are automatically synchronized with time signal
transmitted from Germany / UK.
USER MANUAL
pressing “RESET” key), the clock will start to receive the time
EN
5 minutes.
BRIEF INTRODUCTION
Thank you for your purchase of this Projection Alarm Clock.
Please read these instructions carefully and keep the manual
well for future reference.
NOTE:
1. Slide “PROJECTION ON / OFF” to turn on the projection
function.
2. Press “SNOOZE / LIGHT” to turn on the projector for 5
seconds.
3. When using DC power adapter, the projector will be
turned on all the time.
4. If the alarm is turned, the alarm icon “ ” will also be projected.
5. Press “180 FLIP” to rotate the projected image by 180°.
SIGNAL RECEPTION INDICATOR
The unit has a clear and easy-to-read display that shows the
time, date and alarm status.
This product is designed to synchronize its date andtime automatically once it is within range of the signal from the atomic
clock in Germany/UK.
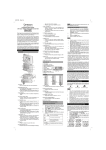
OVERVIEW
2.
3.
1.
13.
12.
16.
15.
14.
4.
5.
8.
Slide “PROJECTION ON / OFF” to turn on / off the projector,
and project to a dark background within 1-4 meters so that the
time will be shown as below:
6.
7.
9.
11.
1. Projector:
• Use it to project the time.
2. SNOOZE / LIGHT key:
• In normal time mode, press it once to turn on the backlight
for 5 seconds.
• Press it to silence the current alarm when it is going and
enter the snooze mode for 8 minutes.
3.
LCD display:
• Displays time, and date.
4.
key:
• In time setting mode, press it to increase the setting
values.
No signal
Weak signal
Excellent signal
NOTE:
1. The unit will automatically search for the time signal at
2:00 (3:00 or 4:00 is also available if the signal is not
received at 2:00), 8:00, 14:00 and 20:00 each day.
2. Always place the unit away from interfering sources such
as TV set, computer, etc.
3. Avoid placing the unit on or next to metal plates.
4. Closed area such as airport, basement, tower block or
factory is not recommended.
5. Do not start reception in moving articles such as vehicles
or trains.
key:
• In time setting mode, press it to decrease the setting
values.
6.
SET CLOCK key:
• In normal time mode, press it once to enter the normal
time setting mode.
• In normal time setting mode, press it once to step into
the setting items. Press and hold it to exit the setting
mode in any step.
7.
SET ALARM key:
• Press it once to turn on the backlight for 5 seconds, and
press it again to enter the alarm time setting mode.
• In alarm time setting mode, press it once to step into
the setting items.
8.
ALARM ON / OFF key:
• Press it once to turn on the backlight and display the
alarm time for 5 seconds.
• Press it again to turn on / off the alarm.
9.
DC jack:
• Plug DC adaptor to power the clock.
Low battery indicator
TIME AND CALENDAR MANUAL SETTING
If you are out of reach of the Radio Controlled sensor or if the
reception is not reachable, the time and calendar can be set
manually. As soon as the signal of sensor is received again,
the clock will automatically synchronize with the exact time
and calendar.
1. In normal time mode, press “SET CLOCK” key once to
enter the time setting mode.
2. Press “ ” or “ ” key to change the settings.
3. Press “SET CLOCK” to confirm. The setting order is:
12 / 24 -hr format, time, + / - 23 hours time difference,
year, day / month format, date.
4. Press “SET CLOCK” key to save and exit the setting
mode.
12/24 Hr setting
Time difference setting
Time setting
Month-Date setting
MD / DM setting
Year setting
NOTE:
1. During the setting period, press and hold “ ” or “ ” key
to speed up the change of settings.
2. Through “+ / - 23 hours time difference” setting, the
precise time of another area will be shown.
ALARM TIME SETTING
1. In normal time mode, press “SET ALARM” key once to
enter the alarm time setting mode.
2. Press “ ” or “ ” key to set hour / minute.
3. Press “SET ALARM” key to save and exit the setting
mode. “ ” indicates alarm is ON.
NOTE:
Attention! Please dispose of the used unit or batteries in an
ecologically safe manner.
SPECIFICATIONS
TYPE
MAIN UNIT
Weight
Power
DESCRIPTION
149 x 57 x 100 mm
(5.87 x 2.24 x 3.94 in)
2 x AA 1.5V batteries
NOTE: We recommend that you use alkaline batteries with this
product for longer usage and lithium batteries in temperatures
below freezing
PRECAUTIONS
• Do not subject the unit to excessive force, shock, dust,
temperature or humidity.
• Do not cover the ventilation holes with any items such as
newspapers, curtains etc.
• Do not immerse the unit in water. If you spill liquid over it,
dry it immediately with a soft, lint-free cloth.
• Do not clean the unit with abrasive or corrosivematerials.
Do not tamper with the unit’s internal components. This
invalidates the warranty.
• Only use fresh batteries. Do not mix new and old batteries.
• Images shown in this manual may differ from the actual
display.
• When disposing of this product, ensure it is collected
separately for special treatment and not as normal
household waste.
• Placement of this product on certain types of wood may
TM
10. BATTERY COMPARTMENT:
• Accommodates 2 AA size batteries.
11. RESET key:
• Press it to return all values to default values.
• In case of malfunction, the unit may be required to reset.
Normal time mode
12. PROJECTION ON / OFF slide switch:
• Slide it to turn on / off the projector.
13. 180° FLIP key:
• Press it to rotate the projected image by 180°.
14. RCC key:
• In normal time mode, press it once to receive the RC
signal for reception testing.
15. UK / EU slide switch:
• Slide it to select the country version between EU
(Germany) and UK (England).
16. BATTERY DOOR
LCD DISPLAY
Alarm time setting
NOTE:
1. The alarm will be automatically turned on when you set
the alarm time.
2. During the alarm time setting period, press and hold “ ”
or “ ” key to speed up the change of settings.
USING ALARM FUNCTION
1. Set the alarm time as the above section.
2. In normal time mode, press “ALARM ON / OFF” key once
to display the current alarm time.
3. Press it again to turn alarm ON / OFF.
TO SILENCE THE ALARM
1. Press “SNOOZE / LIGHT” to silence the alarm for 8
2.
3.
If the low battery indicator “
” displays beside the time, it
indicates that battery power of main unit is not enough and
you should replace with 2 new AA size batteries at once.
LxWxH
5.
1. Low battery indicator
2. Time
3. Alarm time & Date
BATTERY REPLACEMENT
1.
2. Press any other key to turn the alarm off and activate it
again after 24 hours.
3. If no key is pressed within 120 seconds, the alarm will be
turned off and be activated
again after 24 hours.
will not be responsible.
• Consult the furniture manufacturer’s care instructions for
information.
• The contents of this manual may not be reproduced without
the permission of the manufacturer.
• Do not dispose old batteries as unsorted municipal waste.
Collection of such waste separately for special treatment
is necessary.
• Please note that some units are equipped with a battery
safety strip. Remove the strip from the battery compartment
NOTE:
contents of the user manual are subject to change without
notice.
ABOUT OREGON SCIENTIFIC
Visit our website (
) to learn more
TM
products. If you’re in the US and
would like to contact our Customer Care department directly,
please visit:
OR
Call 1-800-853-8883.
For international inquiries, please visit:
EU-DECLARATION OF CONFORMITY
EU-DECLAR
Hereby, Oregon Scientific, declares that the Indoor/
Outdoor Thermometer (Model RM303P) is in compliance
with the essential requirements and other reievant
provisions of Directive 1995/5/EC.
A copy of the signed and dated Declaration of Conformity is
available on request via our Oregon Scientific Customer
Service.
COUNTRIES RTTE APPROVAL COMPLIED
ALL EU countries, Switzerland CH
and Norway N
FCC STATEMENT
This device complies with Part 15 of the FCC Rules. Operation
is subject to the following two conditions: (1)This device may
not cause harmful interference, and (2)This device must
accept any interference received, including interference that
may cause undesired operation.
WARNING
approved by the party responsible for compliance could void
the user’s authority to operate the equipment.
NOTE: This equipment has been tested and found to comply
with the limits for a Class B digital device, pursuant to Part
15 of the FCC Rules. These limits are designed to provide
reasonable protection against harmful interference in a
residential installation.
This equipment generates, uses and can radiate radio
frequency energy and, if not installed and used in accordance
with the instructions, may cause harmful interference to
radio communications. However, there is no guarantee
that interference will not occur in a particular installation. If
this equipment does cause harmful interference to radio or
television reception, which can be determined by turning the
equipment off and on, the user is encouraged to try to correct
the interference by one or more of the following measures:
• Reorient or relocate the receiving antenna.
• Increase the separation between the equipment and
receiver.
• Connect the equipment into an outlet on a circuit different
from that to which the receiver is connected.
• Consult the dealer or an experienced radio / TV technician
for help.
DECLARATION OF CONFORMITY
The following information is not to be used as contact for
support or sales. Please call our customer service number
(listed on our website at
or on the
warranty card for this product) for all inquiries instead.
We
Name:
Address:
Telephone No.:
19861 SW 95th AVe., Tualatin,
Oregon 97062 USA
1-800-853-8883
Declare that the product
Product No.:
Product Name:
Manufacturer:
Address:
RM303P
Radio Controlled Projection
Clock
IPM Concepts Limited
Block C, 9/F, Kaiser Estate,
Phase 1,41 Man Yue St.,
Hung Hom, Kowloon,
Hong Kong
is in conformity with Part 15 of the FCC Rules. Operation is
subject to the following two conditions:
1.) This device may not cause harmful interference.
2.) This device must accept any interference received, including
interference that may cause undesired operation.
. All rights reserved.
TM