1
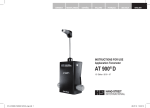
Protect
Primary protection of breastfeeding
2-Phase Manual Breast Pump
2-fazowy laktator ręczny
2-фазный ручной молокоотсос
PHASE
FAZOWY
ФАЗНЫЙ
DELICATE due to regulation of suction strength
DELIKATNY dzięki regulacji siły ssania
УДОБЕН благодаря регулировке силы сцеживания
NATURAL 2-phase suckling rhythm
NATURALNY 2-fazowy rytm ssania
ЕСТЕСТВЕННЫЙ 2-фазный режим работы
COMFORT expressing even with one finger
KOMFORTOWY odciąganie jednym palcem
ЛЕГКО ИСПОЛЬЗОВАТЬ даже одним пальцем
Instruction manual • Instrukcja obsługi • Руководство по эксплуатации
INTRODUCTION
Congratulations on your purchase of the 2-Phase Manual Breast Pump LOVI! Protect Breast Pump provides
primary protection of breastfeeding. Imitates the natural 2-phase baby suckling process. Perfect for everyday use
or occasionally, in the case of breastfeeding problems (such as mastitis or damaged nipples). Enables painless,
comfortable milk expression - even with one finger! It also provides support for active and working mums who use
alternative forms of feeding. Tested in cooperation with Polish hospitals*.
Basing on a natural sucking rhythm, Protect Breast Pump is equipped with two pumping settings:
Stimulation setting and Expression setting.
Stimulation setting – imitates fast suckling moves that stimulate milk production and let down.
Expression setting – reflects slower and deeper effective suckling. When milk starts to flow, the baby must put
more effort into suckling. Milk slowly becomes more dense and filling, that is why the suckling rhythm and the
pace slow down.
Range of rhythm and power of Protect Breast Pump suction has been developed to reflect the natural suckling
process and how the rhythm of sucking changes during breastfeeding.
Using both cycles, you will express more milk in less time.
Breast milk is the healthiest and most valuable food for newborns and infants. It is recommended as a sole food given to
your child in the first 6 months of life. After six months, it should be combined with solid food.
NOTE! Do not use a breast pump in circumstances when a hungry baby fails to empty the breast itself, i.e. if there is any
possibility that your milk ducts are blocked.
USEFUL HINTS
When to use a breast pump?
If possible, wait until lactation stabilizes, which usually occurs within 2-4 weeks after birth. Exceptions to this rule:
• If your breasts produce too much milk, they become swollen and hard (engorged). Expressing a small amount
of milk before or during a feed can give you relief and help your baby to grasp the nipple.
• If you have inverted nipples (which may occur because of long intervals between feeds).
• If you have a concave, flat or damaged nipples (using a breast pump can improve nipple shape).
• If you feel overflow between breast feeds and do not want to wake the baby.
• The baby is sick and does not want to suckle.
• If your breasts produce too little milk, using the pump between feeds will help increase milk production.
• When you are working or away from home and want to continue breastfeeding, you should regularly express
milk using a breast pump to sustain the natural process of lactation.
How often should you express milk?
If you temporarily cannot breastfeed it is recommended that you express milk using breast pump at least 8 times
a day. This will keep milk production at the appropriate level. In the beginning you may experience difficulty
expressing, but after a few days you will be pumping more.
Once the lactation is stabilized, the amount of milk, expressed during one pumping session, is smaller (30-60 ml)
that is why collecting one portion of milk may require several sessions.
* Study LOVI Prolactis breast pumps and LOVI Protect on the group of 40 women, supervised by midwives and lactation consultants.
1
GB
INSTRUCTION MANUAL
2-Phase Manual Breast Pump LOVI - Protect
Primary protection of breastfeeding
BASIC PRODUCT INFORMATION
Breast Pump PA103
2-Phase Manual Breast Pump LOVI – Protect, (later referred to in the manual as ‚a breast pump’), is a product
designed for breastfeeding mothers in order to express breast milk. It enables colleting portions of food for later
usage i.e. in the case of separation from the child. Breast Pump helps maintain lactation and prepares for your
planned absence or random events such as power outages, treatment, cracked and sore nipples.
• The device is intended for personal use.
• The device warranty is 12 months.
• Before using, please read the instruction manual and follow the rules of safe use.
• It is recommended to keep a manual with the unit.
• The expected life of the product is 5 years. The life of silicone parts is 2 years.
Silicone parts may change color permanently. These elements must be replaced
after finding discoloration or after the estimated time of use.
The manufacturer is not liable for damages resulting from the misuse of the devise,
the resulting damage in this way cannot be the basis for the claim or warranty.
Making any repairs or modifications to the product by unauthorized persons, results
in loss of warranty and may result in risks to health and life.
SAFETY RULES
• If you experience problems with breastfeeding, or feeding causes pain, it is necessary to seek medical advice,
before using the Breast Pump.
• The first use of the breast pump is best done under the supervision of specialists.
• It is recommended to read specialist literature and get to know the principles of baby feeding.
NOTE! Insufficient suction may result in a smaller amount of milk, but too high suction can cause soreness and reduce
production of milk. If you notice this type of failure, you should adjust the suction power (see INSTRUCTION FOR USE).
• Keep the product clean. Prevent deposition of dust and other contaminants that could adversely affect the
performance of the product.
• Attention to hygiene is important for the safety of mother and child.
PRODUCT MISUSE
• Never use a defective product, with visible damage characteristics.
• It is forbidden to use the device while bathing.
• Never use the product in locations exposed to contact with water, for example near a bathtub, wash bowl, kitchen sink
or shower enclosure.
• Never use the product discordant with the purpose and conditions of use.
2
GB
MANUAL BREAST PUMP COMPONENTS SET
Fig. 1 – MANUAL BREAST PUMP COMPONENTS SET
1. Expression collection combo kit
2. Spare parts
a. One-way valve – 2 pcs
b. Gasket (o-ring) – 2 pcs
c. Let-down silicone cushion – 1 pcs
d. Diaphragm for manual breast pump – 1 pcs
3. Food storage kit
a.Screw-cup
b. Sealing disk
c. Cup/hood for water newborns and infants
4. Protect storing case
5. LOVI ‘Day & Night’ Disposable Breast Pads – 6 pcs
Fig. 2 – Expression collection combo kit
A – Manual-pump diaphragm kit
1. Adjusting valve
2.Handle
3. Valve stem
4. Manual diaphragm case
5. Manual diaphragm
6. Cup with o-ring
B – Expression collection kit
7. Breastshield body
8. Let-down silicone cushion
9. One-way valve
10.Bottle Adapter
11.Bottle
3
Rys. 1 / Fig. 1
2
1
3
d
c
a
c
a
b
b
4
5
Rys. 2 / Fig. 2
1
2
3
4
A
5
6
7
8
9
10
11
B
ASSEMBLING INSTRUCTION
2-PHASE LOVI MANUAL BREAST PUMP - PROTECT
Hold the „Horn” of the breastshield body in one hand.
Make sure the bottle thread side opening is facing up.
With the thumb and fore-finger of the other
hand, hold the tip of the one-way valve and
place the flat circular bottom into the opening.
Be sure not to stretch, bend, or twist the tip of
the one-way valve. Seal the edges of the flat
circular bottom firmly.
NOTE: The one-way valve tip does not have to
align with anything, as long as all the edges are
securely sealed.
flat circular bottom
With your thumb and fore-finger, gently smooth closed and
opening on the tip of the one-way valve and shape into a
straight line.
tip
NOTE: This is critical to the optimal performance of the pump.
Carefully twist the bottle adapter to the breastshield body for a secure fit.
NOTE: Be sure not to pucker the one-way valve when twisting the breastshield
body & the adapter pieces together. If you pucker the one-way valve, repeat
above steps.
With the bottle adapter in one hand, twist
the collection bottle for a secure fit.
Holding manual silicone diaphragm in one hand (concave side up), put the
valve stem through the diaphragm so that the wide end of a valve stem
becomes the diaphragm base. Place the adjusting valve on the narrow end of
valve stem so that it covers the ending completely.
NOTE: Valve stem and adjusting valve need to be tightly connected.
4
GB
With the cup in one hand, place the manual silicone diaphragm
in the cup (matching the shape of the cup). Press around the edges
of the diaphragm for a secure fit. Make sure the diaphragm is evenly
mounted on the cup and there is no gap in between them.
Holding assembled elements of the diaphragm set
connect them with breastshield body, bottle adapter
and collection bottle. Twist the manual pump
diaphragm set clockwise into the breastshield body
until it locks.
Holding assembled elements of diaphragm set and breastshield body
with bottle, place on the collar of diaphragm the manual diaphragm
case in such a manner as the dent with LOVI sign will be placed on the
opposite side of the handle hinge.
Place the „U” shape slot of the handle onto the recess of
the valve stem.
There are 2 recesses on the valve stem. The upper
position is for the stimulation setting, and the bottom
position is for the expression setting.
stimulation
expression
hinge
Push the handle down onto the hinge
of the cup until it snaps into place.
With the breastshield body in one hand, place the silicone cushion inside
(fitting to the shape of the horn). Secure the tip of the cushion around the
edges of the horn. Your Manual Breast Pump will work with or without the
silicone cushion. Choose which is most comfortable for you.
NOTE: If you find the suction power insufficient (even at the highest setting) try
pumping without massage cushion.
5
PUMPING INSTRUCTION
Before each use:
• Wash your hands before using the Manual Breast Pump.
• Make sure, that all elements of the Breast Pump and diaphragm set have been cleaned and sterilized.
If not please follow the “Sterilization prior the first use” or “cleaning instructions”.
There are two recesses for attaching the handle to the manual pump. You can toggle between these two settings by
pushing the valve stem away from the “U” shape tip of the handle to dislocate the connection. Reattach the handle
by pushing the valve stem back into the “U” shape on the handle.
• expressing setting – tilt the handle up from the bottle as much as possible and release the valve stem base at
the same time (make sure that the handle is not separated from the hinge).
• stimulation setting – press the handle gently towards the bottle then push it as much as possible in the
opposite direction.
stimulation
expression
Stimulation setting: Fast, shallow suction. Often referred to as the
“Let-Down” phase of pumping where the breasts begin to release the milk.
Expression setting: Longer, deeper suction. The pumping phase when
the majority of breast milk is collected.
Hold the Manual Breast Pump to your breast so that your
nipple is centred inside the breastshield. Then squeeze
the handle toward the bottle to test the suction.
Note: If an adjustment is necessary, turn the round knob of the
adjusting valve until the suction is comfortable.
Increase
(invisible grooves in Stem)
You can adjust the suction level by turning the
round knob on the top of the adjusting valve.
Turn clockwise to increase the suction and
anti-clockwise to decrease it.
Decrease
(visible grooves in Stem)
6
GB
• During pressing a vacuum should occur. A vacuum is necessary for the breast pump to function properly.
• Begin pumping process in breast stimulation mode: press the handle with short, gently squeezes. There is no
need to press the handle to the limit.
• When the milk starts to flow, press the handle with short, gently squeezes few times more and begin deep
pumping: press the handle to the end and release after 2-3 seconds. You will notice that milk starts to flow
regularly. Slower and deeper pumping imitates infants suckling process.
• For faster milk flow lean a little forward (in this position milk will often flow from the breast by itself).
Remember, that the bottle needs to stay in vertical position and the position you sit in needs to be comfortable
for you.
• Initially try to express milk from each breast for a few minutes only. Do not assume that you will immediately
fill the bottle. In time the quantity of expressed milk will increase.
• Express milk from one breast until the flow is reduced, than place the breast pump on the other breast to
continue.
• Remember that about 10 min. is needed for expressing 60/120 ml of milk. There can be huge differences in the
amount of expressed milk during this period.
• After expressing, detach the pump body, disassemble and wash in warm water with delicate detergent, then
rinse. Dry all components with a use of cloth or drying rack.
Depending on your health status and lactation, it is possible that stages of free flow of breast milk will be repeated
several times during one pumping cycle. You may change suction strength between stimulation setting and
expression setting by moving the handle position on valve stem (check “PUMPING INSTRUCTION”).
Remember, that effective pumping is a skill that must be learned. Your milk supply responds to your baby’s needs;
regular milk expressing stimulates and sustains lactation.
If you feel discomfort or pain in the breast whilst expressing, reduce the suction strength by turning the adjusting
valve. You can also try using the breast pump with / without the silicone cushion. If you still experience pain or
discomfort, call your doctor or lactation consultant.
ICleaning Instructions
Sterilization Prior to First Use:
Before you use your breast pump for the first time, disassemble and boil all parts (which may come into contact
with breast or milk) in water for 5 minutes.
• Be sure to use enough water to keep all parts afloat while boiling.
• Remove all parts from the water immediately after boiling.
• Completely air- or towel-dry before reassembly and next use. It is recommended to keep all drained parts in
tight container or plastic food-bag.
Moisture may affect the operation of your Manual Breast Pump. Please ensure that all parts are completely dry
before use.
Cleaning Instructions:
• All parts of the collection set and manual pump diaphragm set need to be hand washed in hot water with
delicate detergent.
• Do NOT use solvents, abrasives or tools with sharp edges as it may damage Manual Breast Pump elements.
• Rinse with hot, clean water.
• WARNING! The one-way valve needs to be cleaned very carefully. Milk residue inside the valve is not
allowed.
7
NOTE! Always disassemble the valve grasping the circular base with two fingers. Never grasp the end of the valve as it can
get damaged and weaken the strength of suction.
circular bottom
tip
NOTE: Before each use, visually inspect the individual components for cracks, chips, tears, discoloration or deterioration, as
they may affect the efficiency of the Manual Breast Pump.
TROUBLESHOOTING
While using the breast pump you may encounter small difficulties. Before you decide to complain, try to solve
these minor problems by yourself. Here are some useful tips that will solve most problems faced.
Decreased Suction:
If it feels like the suction has decreased, try the following:
• Make sure the breast fits tight to the breastshield body.
• Verify that the handle “U” shape socket is “snapped” into place against the valve stem.
• Make sure the diaphragm is sealed properly and that there is no gap between the manual
diaphragm and the cup.
• Check the o-ring to make sure it is seated in the groove.
• Make sure the manual pump diaphragm set is locked into place on the collection set.
• Verify that the one-way valve tip is securely seated and properly sealed.
This element is essential for achieving adequate suction strength. If damaged,
eplace it with a new one. Replacement valves are included in the set.
Breast milk build up in the breast shield body:
• If breast milk doesn’t appear to be draining fast enough into the collection bottle, reduce the suction strength.
• Make sure that you position the breast pump properly. The bottle should be in an upright position.
How to store and use your expressed breast milk?
• Milk can be stored in bottle or in breast milk storage bags.
• Freeze only fresh milk. Do not fill the bottle completely as frozen breast milk increases its volume.
• Breast milk can be heated in the same way as any other feed (but never in the microwave as this may destroy valuable
nutrients and antibodies).
• Frozen breast milk can be defrosted overnight in the refrigerator, the warmed gradually in bottle warmer or hot water.
• Shake the bottle to combine separated fat molecules with the remaining volume of milk.
• Once defrosted, milk should be served to your baby within 24 hours. It should be stored in the fridge at this time.
• NEVER refreeze defrosted milk.
• DO NOT add fresh breast milk to already frozen milk for storage.
• DO NOT add fresh breast milk to already frozen milk.
• NEVER heat breast milk by boiling or putting it in the microwave.
• ALWAYS check food temperature before feeding.
• Dispose of any left-over breast milk after the feed.
8
GB
Fresh breast milk
Defrosted breast milk
Room temperature
Up to 12h
Do not store
Refrigerator (+4°C)
2-5 days
24h
Freezer (-10°C)
2 weeks
Never refreeze defrosted milk
Up to 6 months
Never refreeze defrosted milk
Deep freezing (-18°C do -20°C)
As the Breast Pump is for personal use, it cannot be refunded. In the case of mechanical failure, please contact your local
distributor or manufacturer. Please, keep your receipt as a proof of purchase.
WARNING!
• Do not use this product for purposes other than those listed in the attached instruction.
• Do not place the product near sources of fire.
• Before using the pump, make sure that all parts were assembled correctly.
• Immediately stop using the breast pump if you feel breast or nipple discomfort.
• Wash your hands before using the product.
• Keep the product out of reach of children.
• Do not drop the product to avoid any damage.
• To avoid burns do not touch the product with bare hands immediately after sterilization in boiling water.
9
NOVILAB AG,
c/o Unitreu, Gartenstrasse 4,
6300 Zug, Switzerland,
[email protected], www.lovi.ch
Licensee: Canpol sp. z o.o. SKA
02-884 Warszawa,
ul. Puławska 430, Poland.
Biuro, sprzedaż:
Słubica B, ul. Graniczna 4,
96-321 Żabia Wola, Poland.
tel. (+48 46) 858 00 00,
fax:(+48 46) 858 00 01
[email protected]
www.lovi.pl
ISO 9001:2008