1
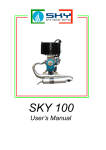
User Manual
For paramotors
Sky100
and
Sky100 Light
We reserve all rights including technical modification and possibility of errors.
Reprinting, translation or copies in whole or in part, authorized only by:
Propeller OÜ
1
Thank you for choosing the Propeller Paramotor equipped with the Sky100 engine type!
Propeller OÜ has been specialised in the development of powered paragliding since 2001.
Our paramotors are built for performance and resistance.
Warning: Before starting with installation and operation of the engine, observe the carefully this
manual and attached Sky100 engine manual and follow all written instructions.
NB!
●
●
●
This is not a „How-to-fly“ manual.
Don't take risk to fly without proper training.
You need to learn paramotor piloting by a professional instructor.
The paramotor package contains the following parts:
Qty.
1
4
1
1
2
Description
Propeller paramotor with Sky100 engine
Propcage elements
Sky100 engine manual and Paramotor end user manual
2 or 3-blade Helix-Carbon propeller with mounting equipment
propeller covers
Technical specification
Engine type
CC
Carburator
Power
Reduction
Reduction ratio
Clutch
Starter
Thrust
Fuel
Fuel tank
Fuel Consumption
Frame
Propcage
Propcage diameter
Propeller
Propeller diameter
Weight
Max pilot weight
Recommended pilot weight
Harness
Sizes cm
Sky100
Sky100 Light
Sky 100 , monocyl. 2-stroke, water cooled
102 cm3
Walbro W8
18 hj / 10200 rpm
Mechanical, oil lubrificated
1 :4
Centrifugal
Manual
up to 60 kg
up to 56 kg
Unleaded 95 + 2-3% synthetic oil
14 l
Ca 3-4 l/h
Aluminium alloy D16T
4 parts
1,4
1,28
Carbon 2 or 3 blade
1,25
1,20
25 kg
22,5 kg
110 kg
100 kg
80 - 100 kg
75-95 kg
APCO automatic buckles
140 x 140 x 40
128 x 128 x 40
2
Frame mounting procedure
The Propeller paramotor frame and propcage are made using a aluminium alloy D16T welded with
argon gas. Its simplicity should not let you forget its technical level of construction. The ratio
between its weight and strength properties represent ideal protection for the pilot in case there is an
impact because it property warps and smoothly absorbs the impacts.
The frame and propcage also helps to protect the pilot from the propeller.
Turning propeller is the most dangerous part of your paramotor!
You should always mount properly your propcage before starting the engine!
The netting is an important part of this protection disposal because it can prevent medium size
objects going into your propeller (and therefore damaging or breaking it). But mostly, it is there to
prevent any exposure of the pilot with the propeller. It is important for the netting to remain tensed
and well maintained – make sure to have spare cable ties in your tool kit.
Propcage come in 4 parts
NB! When tightening the Velcros: use one hand to press firmly the parts together and the other hand
to secure the Velcros into place.
Four part propcage
3
1. Assemble parts A and B of the propcage to the 2. Then join the lateral 2 connectors.
frame. First join firmly lower connector(s)
3. Proceed to tighten lower Velcros
(Sky100 Light has only lateral Velcros)
4. Tighten lateral Velcros in a bottom to top order.
4
5. Plug comfort bars of the harness into
appropriate hole on the frame and push them to
the end.
6. Pay attention not to twist any straps or webbing
on the harness. Comfort bar must be outside of
any webbing.
7. Turn comfort bar so that it points vertically up. 8. Secure the comfort bars with the pins attached
on propcage.
5
9. Then assemble parts C and D.
10. First join firmly connectors placed on the top 11. Join firmly lateral and top plastic connector(s)
of the frame
on the propcage
12. Proceed to tighten lateral and upper Velcros in a bottom to top order.
13. Tighten all remaining Velcros on the propcage.
6
Starter chord mounting
1. Open the shackle screw fixed on the propcage. 2. Put the pulley on starter rope into the shackle
as shown.
3. Close the shackle screw.
NB! If you let the shackle screw open the forces applied by starting procedure will certainely
damage the shackle.
7
Propeller mounting procedure
The propeller included in your paramotor pack is 2-blade (or 3-blade) carbon fibre propeller. It
dismantles into two parts and therefore is particularly interesting for those who travel often. It is
quite resistant to impacts produced by small stones, pebbles, and sand. Also, compared to wooden
propeller, it will give you a couple of kilos more of thrust and reduce considerably the noise made
by your paramotor.
Use the six bolts, six nuts and front plate provided.
Always tight the propeller bolts following an “X” shape order (1, 4, 2, 5, 3, 6 etc.)
Attention! You have to use always the same type of propeller with the Sky100 engines. If you plan
to use a different propeller model then you have to contact your local dealer or directly speak to us.
Otherwise you risque to make serious damage your engine which are in this case not covered by
any warranty!
8
Harness adjustment
We equipe our paramotors with the prestigious APCO harness. This harness has been specially
designed for Propeller paramotors
Harness include:
● 3 automatic metallic buckles, one ventral and two for the legs;
● 1 small plastic buckle on chest to secure harness on shoulders
● Adjustable extension for the harness seatplate;
● High-quality pulleys for the foot accelerator;
● Connection points for rescue system;
● 1 very large pocket below the seatplate
● AustriAlpin automatic steel karabiners
Harness is specially designed to provide the best comfort for long-lasting flights. Take opportunity
to familiarise yourself with your harness and adjust all the straps that can be adjusted.
●
●
●
●
Ventral strap should never be loose. Otherwise the forces will damage comfort bars.
Small strap with a plastic buckle secure the harness on shoulders.
For take off and landing convenience, dont loose too much leg straps. When straps properly
adjusted the pilot can get into harness without any additional helping with hands.
Check that the belts of your harness are properly tightened around the paramotor frame
9
Fuel system
Your paramotor has a simple and very effective fuel system which gives you approx 3 hours of
autonomy. It has 14 l tank with maintenance-free air valve and priming pump located on the frame.
The tank is secured to the frame with 3 bolts (Sky100 Light with 2 bolts). Check them after every 10
flights.
Fuelling up procedure
This engine needs fuel and oil mixture.
NB! Using unmixed fuel will surely damage your paramotor engine.
Always fuel up your paramotor according to your flight plan. If you are going to do an half an hour
flight, there is no need to fill your tank to the brim.
Try always do the oil and fuel mixture before going to the air field.
Always respect the proportions of fuel and oil in the mixture (see engine manual).
Always use the type of oil recommended by the engine manufacture and when ever possible, use
the same brand and reference (see motor manual). Always use clean and uncontaminated fuel. Make
sure that your tank is clean and when ever possible use filters to prevent any residues or dirt going
into the fuel system of your paramotor.
●
●
●
●
Prepare your fuel mixture in a separate jerry can.
Before fuelling put your paramotor on a clean and flat surface
Pour the already mixed fuel in the gas tank using special pouring gate
Make sure not to splatter the fuel/oil mixture onto the harness or parts of your paramotor.
NB! Beware of external disturbance that may perturb you during fueling procedure.
10
Pre flight check
Most incidents, failures, mistakes, etc., on a paramotor could be easily avoided, or at least,
minimized if the pilot would regularly go through a pre-flight check. In fact, all other air disciplines
go through a COMPULSORY pre-flight check by means of a check-list. This works as a previous
procedure against failures and, most important, to avoid accidents.
Therefore, we recommend apart from a pre- flight check, also a post flight check of the paramotor
in general, engine, and all other parts.
Now that your unit is well positioned for the warming up of your engine
Before starting it, this is the ideal time to do your pre-flight check:
Do a physical inspection of all the following parts:
1. Harness check:
• Carabiners should be in working order and well positioned;
• Harness to frame connections: all straps tightened and locked, look for the stitches at the top
connection of your harness
• Check all stitches, straps and buckles are in working order;
• Check that your seatplate can move properly to pick you up upon take off;
• Check your speed bar system if connected: it should be well stowed under your harness, and
ready to be coupled with your wing.
2. Frame check:
• Check comfort bars: they should be well secured with the pins;
• Check that the frame and propcage have been well mounted and that the welds are not
damaged;
• Check that all Velcros on your frame and propcage are tightened;
• Check that your frame and propcage have not been bent;
• Check that your propcage netting is intact and well tensed.
3. Engine check:
• Air filter should be secured to the frame and well connected to the carb;
• Ignition and spark system – check that spark plug is properly put on the spark, that the cable
leading to the coil is well connected;
• Exhaust system check – check that all the safety cables are in place to prevent things going
into the prop. Place a foot on the lower frame and take the exhaust system with both hands.
Then shake gently the exhaust system to see if it is well fixed.
11
4. Fuel system check:
• Follow the fuel line to see if it not strangled at any point;
• Check that the tubes are well connected and tightly secured;
5. Prop check:
• Check that your propeller is not damaged and correctly mounted (leading edges of your prop
should be penetrating the air before the trailing edges);
• Prop to frame check: distance between prop tips and frame should be equi-distant in all parts
of the frame and run parallel;
• Bearing check - Place a foot on the lower frame and take the propeller with both hands.
Then shake gently the propeller to see if it is well fixed. This is to test the bearings in the
reduction casing and also to check that the engine is properly mounted and firmly fixed onto
the frame.
6. General check:
• Check that there are no loose objects nearby or that any article of clothing can get sucked
into the propeller, and that the Paramotor is properly placed. Keep stones, grass, and/or
ground dirt from the propeller;
• Check, as told by your instructor, that your environment is adequate for taking off (weather
conditions, take off area);
• Check all flying accessories (variometer, GPS, wind line, radio, antennas, map-holder,
mirrors, helmet, gloves, glasses, warm clothing etc.) and all fastening parts.
Fill in your log book and note down any intervention you might have done on your paramotor. If
you have any doubt, do not go fly and check with your instructor, local dealer, and/or manufacturer.
Starting the engine
Your engine is equipped with very comfortable Walbro WG8 carburattor. This model of carburators
have choke. Choke handle is placed on carburator
UPDATE! 01.05.2010 Recent series of W8 carburator do not have choke. If your carburator
does not have choke jump to the step 11!
Sky100 paramotors have a priming pump located on the right side of harness. If you have
dismounted fuel system components or/and the paramotors is not flown for a long period then you
need to use priming pump.
1.
Take the throttle handle.
2.
Check that the throttle is not sticking by squeezing it several times.
3.
Prime the carburator.
Priming is necessary to get the fuel mixture up to the carburettor. Over priming will surely
flood your engine so please do not be over zealous
12
Push and hold the membrane on the
carburator
At the same time squeeze the priming pump 1-2
times
4.
Close the choke on the carburator. It should be perpendicular ie. points toward the pilot.
5.
Put your feet firmly so you will nave a strong support in order to avoid falling down or
unbalancing when you pull the start chord.
6.
Your left arm holding the throttle should hold strongly the propcage just near the starter
chord pulley whilst you grab hold of the pull start handle with your right hand. Do not leave
the throttle hanging from the net, or on the ground
13
7.
Take the start chord handle and pull it very gently till you find a resistance point. This point
is called the minimum point of compression. Starting pulling from that point helps to start
the engine more easily and also will give a longer life your pull start system.
8.
Now pull firmly the start chord. If you pull too gently then the engine can have a „kickback“
which is not good at all for the starter mechanism. To avoid this pull always firmly (not
brutally) the starting handle. After 1-3 pulls the engine will start but die out almost
immediately.
9.
Wait for the prop to stop turning and put the choke on his off position.
10.
Start procedure again from step 5.
Now your engine should start after 1-2 pulls and stay on tick over.
NB! If you have recently flown and/or not dismount any part of the fuel system then you dont need
prime the carburator. Usually you can start the engine starting procedure from step 4.
11. UPDATE – carburators without choke have always transparent fuel hoses.
To start the engine you have to prime as described on step 3. The moment you see fuel
entering into carburator stop priming immediately!
Start engine as described step 5, 6, 7, 8. Your engine should start after 1-2 pulls and stay on
tick over.
NB! It is useless to pull the starter more than 10 times. If the engine will not start within 5-6 pulls
then it could be flooded, have a fuel leak or other problems. Continous start chord pulling simply
damages your starter.
Problem!
I have flooded my engine, fuel mixture is dripping off the carburettor. How do I drain my engine
to get it ready to start again?
1. Using your spark plug key, remove your spark plug. Pull five to ten times the start chord to
drain the engine. You can put your thumb on the spark plug hole to prevent fuel mixture
splattering your engine.
2. Dry and clean your spark plug
3. Put it back on again using your spark plug key.
4. Put the spark plug cap on again and immediately, following the start procedure from step 5,
try to start your engine. It should start on the first pull;
14
The warm up
Your engine should now be running on Tick over.
If your propeller is turning it means that the idle is set to high either your clutch is badly adjusted or
broken. Set your idle or tick over by firstly switching off your engine. With a small screw driver,
turn the idle screw till tick over is reached (For tick over setting turn to page of you engine manual).
Repeat the start procedure again.
Have your engine running on tick over and below 4000 RPM during 5 minutes.
You can gently accelerate your engine to check engine response, but there is no point revving your
engine at high or full RPM. You can only damage your propeller, yourself or any incoming person
by doing so.
WARNING: At full revs, be aware that a propeller turns at 700 km/h becoming a giant blade!
Any piece flying through or from the propeller can become a bullet.
Always remain close to your paramotor during the warm up procedure, do not let people approach
your paramotor whilst running and always keep a finger very close to the kill switch
If the kill switch is not operating properly, you can kill your engine by simply taking your spark
plug cap off.
Your engine is now warmed up and ready for flying. Do not wait too long to get yourself ready for
take off or you may have to repeat the warm up procedure again. You should now stop the engine to
check that the stop switch is functioning.
Starting before take off.
The engine Sky100 is very easy to start when the paramotor is on your back
This is the usual procedure when you start the engine before the take off
1.
Check that your throttle is properly in your left hand, tightening strap around your hand.
2.
With your right hand, reach the pull start chord.
3.
Step forward with your left foot and keep your right foot firmly camped on the ground.
4.
Proceed to search for the minimum compression point. Once you have found it, using both
hands, firmly pull the chord away from you making sure that your upper body remains
straight. If your paramotor has been properly warmed up it should start the first pull.
If there is a long interval since you turned the engine off, and the engine is not starting with the first
1-2 pulls, you can try following option:
●
●
●
Squeeze the priming pump (located under your right hand) 1-2 times. It requires force as the
membrane on the carburator is closed. Dont squeeze brutally!
Start the procedure as described above. If the engine will not start, take off the paramotor
and follow the cold start instructions (page 9)
NB! Squeezing the primer pump while engine on your back can damage carburator
membranes. Do it gently!
15
Full power test
1.
2.
With engine turning on your back lean forward and proceed to steadily rev up your engine
till you reach full power.
Keep the full power for 2-3 seconds and then go steadily back to idle. Now you are ready to
go.
NB! Before full power test take care that no another person is in your surroundings
If engine is not revving up or looses the power find out why and fix the problem. If you have the
slightest doubt, then you should not launch. You have to resolve the problem before take off. If no
solution is found then the wisest thing to do is to put off your flight to another day.
Dismantling procedure
Same as frame mounting procedure but in reverse order.
1. First open the shackle and undo the starter chord pulley.
2. Put the prop covers back on.
3. Start undoing the Velcros from bottom to top
4. Disconnect the propcage starting from C and D. First lateral and top connectors then
connectors on the frame.
5. Disconnect propcage A and B. First lateral connectors on the frame then low connectors.
6. Always tie your velcros around the netting to keep them from hanging around and getting
damaged.
7. It is very important whilst transporting your paramotor in your car to secure it by a tying belt
so that it does not get damaged in the transport. Do not use a bungee.
8. Make sure that oil residues do not stain your wing or your car during the transport.
9. For long term stowing and winter maintenance, turn to your engine manual
WARRANTY
This following section is related and attached to the engine warranty section in your engine
manual. Please read it carefully.
A Propeller Paramotor includes a 6 (six) months warranty in chassis welding and engine
(manufacturing and/or assembly faults).
Seizing of the engine not included in warranty.
In the event of a problem, please contact your dealer and then please send the faulty parts to
factory. When requested by the manufacturer you will have to include pictures of the faulty
parts of the engine and/or Paramotor. For more information on your engine warranty please
read the section in your engine manual.
NOTE: The owner or client will be liable for the courier and/or mail expenses.
Warning: Modifications on engine or equipment are not allowed.
16