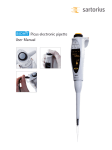
1
Picus® & Picus® NxT Electronic Pipette User Manual Table of Contents 1. Introduction 1.1. Intended Use 1.2. Product Overview 1.2.1. Single and Multichannel Pipettes 1.2.2. Display 1.2.3. Optifit Tips and SafetySpace Filter Tips 1.3. Contents of Delivery Package 2. Getting Started 2.1. Charging 2.2. Power Up 3. Operation 3.1. Operating Principles 3.2. Pipetting Modes 3.2.1. Pipetting (Forward Pipetting) 3.2.2. Reverse Pipetting 3.2.3. Multi-Dispensing 3.2.4. Manual Pipetting 3.2.5. Diluting 3.2.6. Sequential Dispensing 3.2.7. Multi-Aspirating 3.2.8. Titration 3.2.9. Protocols (only in Picus® NxT) 3.2.10. Advanced Functions 3.3. Saving Pipetting Programs to Memory 3.4. Setup 3.4.1. Adjustment 3.4.2. Sound 3.4.3. Backlight 3.4.4. User ID 3.4.5. GLP Info (only in Picus®) 3.4.6. Reset 3.4.7. Information 3.4.8. Languages 3.4.9. Pipette Lock 3.4.10. Passwords (only in Picus® NxT) 3.4.11. Date and Time (only in Picus® NxT) 3.4.12. Reminders (only in Picus® NxT) 4. Care and Maintenance 4.1. Cleaning and Maintenance 4.1.1. Single-Channel Pipettes 4.1.2. Multichannel Pipettes 4.2. Sterilizing 4.2.1. Autoclaving 4.2.2. UV Sterilization 4.2.3. Using Disinfectant Liquid 4.3. Performance Testing 4.4. Replacing the Battery 4.5. Replacement Parts 4.6. Storage 5. Warranty 6. Hazardous Substances (RoHS II) 7. Disposal (WEEE) 8. Troubleshooting 8.1. Hardware Reset 8.2. Troubleshooting Guide 9. Technical Data 9.1. Performance Specifications 9.2. Speed Table 10. Ordering Information 11. Declaration of Conformity 12. Certificate of Quality 2 3 4 4 4 5 5 6 7 7 7 8 8 9 10 10 11 12 13 13 14 15 16 17 20 21 21 23 23 24 24 25 25 25 26 26 27 28 30 30 30 32 32 32 32 32 33 34 34 34 34 35 35 35 35 35 36 37 38 39 40 41 1.Introduction The Sartorius Picus®/Picus® NxT electronic pipette brings ergonomics to a completely new level with its exceptionally lightweight and compact design, and its ease of operation. This versatile air displacement pipette has been designed by an experienced R&D team in cooperation with laboratory personnel and ergonomists to ensure safe and comfortable pipetting. The Picus®/Picus® NxT is available in single and multichannel models (8 and 12-channel). Tips can be attached and ejected safely and comfortably using the Optiload tip-loading feature and the electronic tip ejection function. To improve safety by reducing the risk of contamination, replaceable Safe-Cone Filters can be used in all Picus®/Picus® NxT models greater than 10 µl. The fully electronic operation, unique DC motor, and the electronic brake and piston control system guarantee excellent accuracy and precision. The desired volume can be quickly selected using the light and easy-to-use adjustment wheel on top of the pipette. Picus® NxT offers advanced safety and efficiency features for highly regulated laboratories. These features include a certificate of accredited 3-point calibration, user-definable pipetting protocols, and calibration and service reminders. Congratulations on becoming a new Picus®/Picus® NxT owner! 3 1.1. Intended Use The Picus®/Picus® NxT pipette is intended for liquid handling applications to dispense liquids in the volume range of 0,2 μl to 10 ml. It is recommended that Sartorius Optifit Tips or SafetySpace Filter Tips are used with Sartorius pipettes to ensure optimum compatibility and performance. This liquid handling device is designed and manufactured to be used as general purpose laboratory equipment. This manual contains useful information, incuding information on good pipetting practice. 1.2. Product Overview Before using the Sartorius Picus®/Picus® NxT electronic pipette for the first time, please review this operating manual carefully. This manual can be downloaded from the Sartorius website at: www.sartorius.com. Hardcopies may be ordered by e-mail from [email protected]. 1.2.1. Single and Multichannel Pipettes 1. Electronic tip ejector 2. Charging contacts 3. ON/OFF button 4. USB-charging port 5. Operating button & volume range colour-code 6. Adjustment wheel 7. Hotkey for memory places (black in Picus® NxT) 8. Softkeys for programming (black in Picus® NxT) 9. Dot-matrix display 10.Maximum volume 11.Dispensing head (tip ejector collar and tip-cone), autoclavable (excl. 8/12-ch 1200 µl) 12.Optiload, spring-loaded tip-cones in multichannel pipettes 13.Safe-Cone Filters (excl. <10 µl pipettes) 14.Pipette tip 1 2 3 4 5 6 1 7 8 9 10 11 12 13 14 4 1.2.2Display The multi-colour backlit dot-matrix display is clear and is logically structured. 1. 2. 3. 4. 5. 6. Softkey functions Current mode Pipetting volume and aliquots in multidispensing modes Speed Battery charging indicator Arrows indicating aspiration and dispensing 1 2 3 4 5 1.2.3 Optifit Tips and SafetySpace Filter Tips 6 We recommend using Sartorius Optifit Tips or SafetySpace Filter Tips. These tips are designed for Sartorius pipettes and therefore ensure optimal compatibility, accuracy, and precision. For optimum results you should also: −Ensure − that the liquid and the pipette/tip combination are at approximately the same temperature −Choose − the right tip volume for your pipette: the colour of the tip tray should match the colour code on the pipette −Use − Optifit Tips in rack, refill, or bulk packaging, and choose the purity level your application requires: free of DNase, RNase and endotoxin, and/or sterilized −If − aerosol contamination needs to be avoided, choose Safe-Cone Filters, which are attached to the tip-cone and should be changed daily, or SafetySpace Filter Tips, which are discarded after each pipetting −SafetySpace − Filter Tips should also be chosen when you want to avoid sample loss due to the sample reaching the filter. The extra space between the sample and the filter ensures that even foaming or viscous liquids don’t reach the filter in reverse pipetting or repetitive/multiple dispensing modes −Pre-rinse − the tip three to five times before pipetting (this is especially important in the forward pipetting mode) −Wipe − the tip against the receiving vessel’s wall to catch the last droplet after dispensing −Change − the tip after every pipetting ] SafetySpace air gap 5 1.3. Contents of Delivery Package −Picus®/Picus® − NxT electronic pipette −−Universal USB charger (EU, UK, US, JPN, KOR, AUS, and CHN plugs) −−Sartorius tip rack (10x96 tips) of corresponding volume with up to 1000 μl single-channel models / 1200 μl multichannel models −−One tip with 5 ml and 10 ml single-channel models −−Safe-Cone Filters and tweezers with >10 μl models −−Autoclavable grease with the single-channel models −−QC-certificate (Picus®), certificate of accredited 3-point calibration (Picus® NxT) −−Quick Start Guide If any item in this delivery package is missing or damaged, please contact your local Sartorius representative. 6 2. Getting Started Please read this manual before using your Picus®/Picus® NxT electronic pipette. 1. Your Picus®/Picus® NxT is delivered, with the battery partially charged. We recommend the pipette is charged fully, before first use; charge at least one (1) hour. 2. Insert a replaceable Safe-Cone Filter into the tip-cone before use, to prevent contamination of the pipette. 3. Press the ON/OFF button on the top of the pipette to turn the power on. 4. Press the tip ejector button when advised by the display. 5. The pipette is now ready to be programmed and used. 2.1.Charging It is recommended that you charge the pipette before first use for one (1) hour. −Charging − via USB: Connect the USB cable to the pipette and plug the charger into the mains power outlet. −Charging − using charging stand or carousel: Make sure that the charging stand is connected to the mains power outlet via the AC charger, and that the charging contacts of the pipette are properly in contact with the charging grooves of the charging stand. Charging options for Sartorius electronic pipettes: −USB − charger, universal, included in the package −−Sartorius Charging Stand for one pipette, order code: 730981 −−Sartorius Charging Carousel for four pipettes, order code: 730991 The battery sign in the bottom right corner of the display indicates the battery’s level of charge. When the battery is low, the indicator blinks LOW and the pipette needs to be charged. NOTE! Before connecting the AC charger to the charging stand and the mains electrical outlet, make sure that the power supply output voltage level and power capacity are correct. The use of incorrect power supplies may damage the device. Only use the power supplies recommended by the manufacturer. 2.2. Power Up 1. Press ON/OFF button: pipette will turn on. 2. Press the tip ejector button as advised on the display. The pipette is now ready to be programmed and used. 3. While being used and/or charged, the pipette is in active mode, all the processor functions are activated and the display backlight is on. 4. One minute after last activity the pipette will switch to power saving mode and the backlight will dim. The pipette returns to active mode when any buttons are pressed or if the adjustment wheel is turned. 5. 10 minutes after last activity the backlight turns off, but the display is still visible. The pipette returns to active mode when any buttons are pressed or if the adjustment wheel is turned. 6. 60 minutes after last activity the pipette turns off. To power up the pipette again, press either operating button or the ON/OFF button. The pipette will also turn on when charged. If the pipette is turned off from the ON/OFF button, it can only be turned on by again using the same button. 7 3.Operation 3.1. Operating Principles Pipetting functions are controlled using the operating button, adjustment wheel, and Softkeys. The Hotkey is used to store or activate programs. Operating button −Confirms − settings (can be used as an alternative to the Softkey for OK) and initiates piston movement for aspiration, dispensing and repeated blow-out. Adjustment wheel −Scrolls − the menu and adjusts volume settings. −Moves − the piston in manual and titrating modes for aspiration and dispensing. −Unlocks − volume adjustment for editing when turned fully in one direction. Electronic tip ejector −Ejects − the tip(s) with the light touch of a finger Left Softkey −−MENU: Displays the main mode selection. −BACK: − Exits the currently displayed, MENU, EDIT, or ADV functions, without saving changes. −QUIT: − Quits the pipetting task. −LOCK: − Shown when reminders are triggered. Locks the pipette. Middle Softkey −EDIT: − Activates the editing mode so that settings can be changed. −NEXT: − Active in editing mode. Confirms a setting and moves to the next one. −SAVE: − Active in memory settings. Saves the current program to the selected memory place. −−ABC/abc/123/#@!/CLEAR: Active in memory settings and setup settings. Allows you to select letters, numbers, or symbols, or clear existing text. −RESET: − Active in the reminders menu. Resets the date and cycle counters. −PREV: − Active in editing mode. Moves back to the previous setting. −SNOOZE: − Shown when reminders are triggered. Snoozes the reminder. −UNLOCK: − Active when pipette is locked. Unlocks the pipette. If password protection is enabled, the administrator password is required. Right Softkey −ADV: − Displays available advanced functions for the activated main mode. −OK: − Confirms the setting or selection and exits. Hotkey −10 − memory places to save and activate frequently used or favorite pipette settings. 8 3.2. Pipetting Modes The Picus® NxT electronic pipette has nine (9) main pipetting modes, while the Picus® has eight (8). The Picus® NxT has seven (7) advanced functions and the Picus® has six (6). Pipetting Modes Advanced Functions (ADV)* Tracker Pipetting Reverse Pipetting Multi-Dispensing Mixing Counter Excess Volume Adjustment Auto Dispensing Fast Dispensing Manual Pipetting Diluting Sequential Dispensing Multi-Aspiration Titration Protocols **/ *** Repeated Blow-out** * Are used in conjunction with pipetting modes ** Only in Picus® NxT models. *** Availabilty of the advanced functions varies according to the pipetting mode selected for the protocol. 9 3.2.1. Pipetting (Forward Pipetting) Pipetting mode aspirates and then dispenses the selected volume of liquid. It is recommended for aqueous liquids, liquids containing small amounts of detergent or proteins, and solvents. To select Pipetting mode: 1. Select MENU by pressing the left Softkey. 2. Confirm Pipetting mode by pressing the operating button or the right Softkey for OK. The latest settings used will then be displayed. To edit the volume and speed settings: 1. Press the middle Softkey for EDIT or turn the adjustment wheel all the way to the right or left. The first setting to be edited is now highlighted. 2. Turn the adjustment wheel to set the desired value. 3. Confirm the setting by pressing a.the operating button or the right Softkey for OK, which will exit the editing mode. OR b.the middle Softkey for NEXT, to move on to edit the next highlighted setting. 4. Repeat steps 2 and 3 for all the settings you wish to edit. 5. To exit the editing mode without saving changes, press the left Softkey for BACK. To use the pipette with the selected program: 1. Press the operating button to aspirate the liquid. 2. Press the operating button again to dispense the liquid. 3. Eject the tip by pressing the electronic tip ejector button. Advanced Functions Counter, Mixing, and Tracker can be used in conjunction with Pipetting mode. In Picus® NxT, Repeated Blow-out can also be used. Repeated Blow-out helps to remove residual liquid from the tip, for liquids where normal dispensing does not empty it sufficiently. −Counter − counts the number of times a liquid is dispensed. Counting can be set to start at any number. −Mixing − mixes liquids manually or automatically. The mixing volume can be adjusted according to the pipette’s maximum volume. −Tracker − displays the location to next dispense liquid in a microplate. Press the Softkey for MENU Choose the mode Press the Softkey for EDIT For more information on using advanced functions see section 3.2.10. NOTE! Only one advanced function can be selected at a time. Repeated Blowout can be combined with other advanced functions. 3.2.2. Reverse Pipetting Reverse Pipetting aspirates the selected volume as well as an excess volume. It is recommended for biological, foaming, and viscous liquids. In Reverse Pipetting mode the excess is left inside the tip and then discarded. To select Reverse Pipetting mode: 1. Select MENU by pressing the left Softkey. 2. Use the adjustment wheel to select Reverse and confirm by pressing the operating button or the right Softkey for OK. The latest settings used will then be displayed. To edit the volume and speed settings: 1. Press the middle Softkey for EDIT or turn the adjustment wheel all the way to the right or left. The first setting to be edited is now highlighted. 10 Change settings and press OK or NEXT 2. Turn the adjustment wheel to set the desired value. 3. Confirm the setting by pressing a.the operating button or the right Softkey for OK, which will exit the editing mode. OR b.the middle Softkey for NEXT, to move on to edit the next highlighted setting. 4. Repeat steps 2 and 3 for all settings you wish to edit. 5. To exit the editing mode without saving changes, press the left Softkey for BACK. To use the pipette with the selected program: 1. Press the operating button to aspirate the liquid (selected volume + excess). 2. Press the operating button again to dispense the selected volume. 3. To continue reverse pipetting without discarding the excess volume, press the left Softkey for NO and return to step 1. 4. To discard the excess volume and empty the tip, press the operating button twice. 5. Eject the tip by pressing the electronic tip ejector button. Advanced Functions Counter, Excess Adjustment, and Tracker can be used in conjunction with Reverse Pipetting. −Counter − counts the number of times a liquid is dispensed. Counting can be set to start at any number. −Excess − Adjustment can be used to set the excess volume. Otherwise a default value is used. −Tracker − displays the location to next dispense liquid in a microplate. For more information on using advanced functions see section 3.2.10. NOTE! Only one advanced function can be selected at a time. 3.2.3.Multi-Dispensing Multi-Dispensing aspirates the total volume as well as an excess volume, then repetitively dispenses equal volumes of liquid. It is recommended for long pipetting series and microplate dispensing. To select Multi-Dispensing mode: 1. Select MENU by pressing the left Softkey. 2. Use the adjustment wheel to select Multi-Disp and confirm by pressing the operating button or the right Softkey for OK. The latest settings used will then be displayed. To edit the settings for volume, speed, and number of dispensings: 1. Press the middle Softkey for EDIT or turn the adjustment wheel all the way to the right or left. The first setting to be edited is now highlighted. 2. Turn the adjustment wheel to set the desired value. 3. Confirm the setting by pressing a.the operating button or the right Softkey for OK, which will exit the editing mode. OR b.the middle Softkey for NEXT, to the next highlighted setting. 4. Repeat steps 2 and 3 for all settings you wish to edit. 5. To exit the editing mode without saving changes, press the left Softkey for BACK. To use the pipette with the selected program: 1. Press the operating button to aspirate the liquid (selected volume + excess). 2. Press the operating button again to discard the prime excess. Dispensing 10 µl twelve times. 11 3. Press the operating button repeatedly until all aliquots have been dispensed. 4. To continue repetitive dispensing without discarding the excess volume, press the left Softkey for NO and return to step 1. 5. To discard the excess volume and to empty the tip, press the operating button twice. 6. Eject the tip by pressing the electronic tip ejector button. Advanced Functions Excess Adjustment, timed Automated Dispensing, and Tracker can be used in conjunction with Multi-Dispensing. −Excess − Adjustment can be used to set the excess volume. −Timed − Automated Dispensing dispenses automatically without needing the operating button to be pushed each time. −Tracker − displays the location to next dispense liquid in microplate dispensing. For more information on using advanced functions see section 3.2.10. NOTE! Only one advanced function can be selected at a time. 3.2.4. Manual Pipetting In Manual Pipetting the piston movement in aspiration and dispensing is controlled manually by turning the adjustment wheel. It is ideal for measuring reagents, and for applications in which the pipetting speed needs to be controlled manually. To select Manual Pipetting mode: 1. Select MENU by pressing the left Softkey. 2. Use the adjustment wheel to select Manual and confirm by pressing the operating button or the right Softkey for OK. To edit the volume and speed settings: 1. Press the middle Softkey for EDIT or turn the adjustment wheel all the way to the right or left. The first setting to be edited is now highlighted. 2. Turn the adjustment wheel to set the desired value. 3. Confirm the setting by pressing a.the operating button or the right Softkey for OK, which will exit the editing mode. OR b.the middle Softkey for NEXT, to move on to edit the next highlighted setting. 4. Repeat steps 2 and 3 for all settings you wish to edit. 5. To exit the editing mode without saving changes, press the left Softkey for BACK. To use the pipette with the selected program: 1. Press the operating button to begin aspiration. 2. To aspirate the liquid, press the operating button again and hold it down, or turn the adjustment wheel to the right. The aspiration speed can be adjusted by how far the adjustment wheel is turned. To pause aspiration, briefly release the operating button or adjustment wheel. 3. To begin dispensing, turn the adjustment wheel to the left. Hold the adjustment wheel to the left or press the operating button down to continue dispensing. 4. When the entire volume is dispensed, press the operating button to empty the tip or press the left Softkey for NO to continue with aspiration. 5. Eject the tip by pressing the electronic tip ejector button. 12 Manual pipetting Advanced Functions Repeated Blow-out, available with Picus® NxT, can be used in conjunction with Manual Pipetting mode for liquids where normal dispensing does not completely empty the tip. For more information on using advanced functions see section 3.2.10. 3.2.5.Diluting In Dilution mode liquids separated by an air gap are aspirated and then dispensed simultaneously. Diluting can be used to dilute samples and reagents. The diluent is aspirated first followed by an air gap, then the sample or reagent to avoid contamination. To select Diluting mode: 1. Select MENU by pressing the left Softkey. 2. Use the adjustment wheel to select Diluting and confirm by pressing the operating button or the right Softkey for OK. To edit the volume and speed settings: 1. Press the middle Softkey for EDIT or turn the adjustment wheel all the way to the right or left. The first setting to be edited is now highlighted. 2. Turn the adjustment wheel to set the desired value. 3. Confirm the setting by pressing a.the operating button or the right Softkey for OK, which will exit the editing mode. OR b.the middle Softkey for NEXT, to move on to edit the next highlighted setting. 4. Repeat steps 2 and 3 for all settings you wish to edit. 5. To exit the editing mode without saving changes, press the left Softkey for BACK. To use the pipette with the selected program: 1. Press the operating button to aspirate the diluent. 2. Press the operating button again to aspirate the air gap. 3. Press the operating button a third time to aspirate the sample. 4. Dispense the entire volume by pressing the operating button. 5. Empty the tip by pressing the operating button again. 6. Eject the tip by pressing the electronic tip ejector button. Advanced Functions Repeated Blow-out (Picus® NxT only) and Mixing can be used in conjunction with Diluting. −Mixing − mixes liquids manually or automatically. The mixing volume can be adjusted according to the pipette’s maximum volume. −Repeated − Blow-out helps to remove residual liquid from the tip, for liquids where normal dispensing does not empty it sufficiently. For more information on using advanced functions see section 3.2.10. 3.2.6. Sequential Dispensing Sequential Dispensing repeatedly dispenses selected volumes in any desired order. This is a useful mode for diluting series and making calibration curves. To select Sequential Dispensing mode: 1. Select MENU by pressing the left Softkey. 2. Use the adjustment wheel to select Seq. Disp. and confirm by pressing the operating button or the right Softkey for OK. The latest settings used will then be displayed. 13 To edit the settings for speed, number of aliquots, and aliquot volumes: 1. Press the middle Softkey for EDIT or turn the adjustment wheel all the way to the right or left. The first setting to be edited is now highlighted. 2. Turn the adjustment wheel to set the desired value. 3. Confirm the setting by pressing a.the operating button or the right Softkey for OK, which will exit the editing mode. OR b.the middle Softkey for NEXT, to move on to edit the next highlighted setting. 4. Repeat steps 2 and 3 for all settings you wish to edit. 5. To exit the editing mode without saving changes, press the left Softkey for BACK. To use the pipette with the selected program: 1. Press the operating button to aspirate the selected volume. 2. Press the operating button again for pre-out to make sure that the first aliquot will be of the correct volume. 3. Dispense the set aliquots by pressing the operating button each time. 4. After the last aliquot has been dispensed, press the operating button to empty the tip or press NO to start aspirating without emptying the remaining liquid. 5. Eject the tip by pressing the electronic tip ejector button. Advanced Functions Repeated Blow-out (Picus® NxT only) and Excess Adjustment can be used in conjunction with Sequential Dispensing. −Excess − Adjustment can be used to set the excess volume. −Repeated − Blow-out helps to remove residual liquid from the tip, for liquids where normal dispensing does not empty it sufficiently. For more information on using advanced functions see section 3.2.10. 3.2.7.Multi-Aspirating Multi-Aspiration aspirates a selected volume a set number of times. MultiAspirating is useful for sample pooling and microplate washing. Select the volume and the number of aspirations, aspirate until the series is completed, then discard the full aspirated volume in a single step. To select Multi-Aspiration mode: 1. Select MENU by pressing the left Softkey. 2. Use the adjustment wheel to select Multi-Aspiration and confirm by pressing the operating button or the right Softkey for OK. The latest settings used will then be displayed. To edit the settings for speed, volume, and number of aspirations: 1. Press the middle Softkey for EDIT or turn the adjustment wheel all the way to the right or left. The first setting to be edited is now highlighted. 2. Turn the adjustment wheel to set the desired value. 3. Confirm the setting by pressing a.the operating button or the right Softkey for OK, which will exit the editing mode. OR b.the middle Softkey for NEXT, to move on to edit the next highlighted setting. 4. Repeat steps 2 and 3 for all settings you wish to edit. 5. To exit the editing mode without saving changes, press the left Softkey for BACK. 14 To use the pipette with the selected program: 1. Press the operating button repeatedly until all the set volumes are aspirated. 2. To dispense the liquid and empty the tip, press the operating button again. 3. Eject the tip by pressing the electronic tip ejector button. Advanced Functions Repeated Blow-out, available with Picus® NxT, can be used in conjunction with Multi-Aspiration mode, for liquids where normal dispensing does not completely empty the tip. For more information on using advanced functions see section 3.2.10. 3.2.8. Titration In Titration mode, the full volume is aspirated and then dispensing speed is manually controlled. The display shows the dispensed volume in real time during dispensing. Titration is used to determine the unknown concentration of an identified analyte. To select Titration mode: 1. Select MENU by pressing the left Softkey. 2. Use the adjustment wheel to select Titration and confirm by pressing the operating button or the right Softkey for OK. The latest settings used will then be displayed. To edit the settings for speed, volume, and volume for Fast Dispensing (if enabled): 1. Press the middle Softkey for EDIT or turn the adjustment wheel all the way to the right or left. The first setting to be edited is now highlighted. 2. Turn the adjustment wheel to set the desired value. 3. Confirm the setting by pressing a.the operating button or the right Softkey for OK, which will exit the editing mode. OR b.the middle Softkey for NEXT, to move on to edit the next highlighted setting. 4. Repeat steps 2 and 3 for all settings you wish to edit. 5. To exit the editing mode without saving changes, press the left Softkey for BACK. Titration mode To use the pipette with the selected program: 1. Press the operating button to aspirate the set volume. 2. Press the operating button again and hold it down, or turn the adjustment wheel to the left to dispense the liquid. The dispensing speed can be adjusted by how far the adjustment wheel is turned. To pause dispensing, briefly release the operating button or adjustment wheel. 3. To finish titrating, empty the tip by pressing the operating button twice. 4. When the titration cycle is completed, eject the tip by pressing the electronic tip ejector button. Advanced Functions Fast Dispensing can be used with the Titration mode. Fast Dispensing dispenses the first volume automatically, then subsequent volumes are dispensed manually. For more information on using advanced functions see section 3.2.10. 15 3.2.9.Protocols (Only in Picus® NxT) User-definable protocols speed up routine pipetting sequences. A maximum of ten pipetting and advanced funtion combinations can be used within a protocol. For example, pipetting with mixing counts as one combination. To set up or edit a pipetting protocol: 1. Select MENU by pressing the left Softkey. 2. Use the adjustment wheel to select Protocols and confirm by pressing the operating button or the Softkey for OK. 3. Use the adjustment wheel to select the desired protocol to set up or edit (P1-P3). 4. Press the middle Softkey for EDIT. a.If the protocol has not yet been set up, you are first asked to enter a protocol name. b.If the protocol already exists either: i. Continue editing by pressing the Softkey for EDIT. Then go to step 6. When editing an existing protocol, it is not possible to edit the protocol name. OR ii. Clear the existing protocol by pressing the operating button or the Softkey for OK. 5. Edit the name of the protocol by pressing the Softkey for EDIT, or accept the name with the Softkey for OK. a.When entering editing mode, the first character becomes highlighted and can be edited. b.Capital letters are used by default. Use the middle Softkey to change the character type: ABC for capital letters, abc for lower case letters, 123 for numbers and #@! for other characters. c.Turn the adjustment wheel to select your chosen character and confirm by pressing the operating button or the right Softkey for OK. d.The next character to be edited is then highlighted. Repeat steps b and c until you have entered the name. e.Press the operating button or the softkey for OK to accept the changes and exit the editing mode. 6. To add a step into a protocol: a.Select Add step with the adjustment wheel and confirm with the operating button or Softkey for OK. b.Select the desired pipetting mode with the adjustment wheel and confirm with the operating button or Softkey for OK. i. You can select all main pipetting modes and the timer. The timer alerts the user when a defined period of time has elapsed. ii. Each main pipetting mode, optionally combined with an advanced function and the timer, counts as one step in a protocol. A maximum of 10 steps can be included in a protocol. c.If needed, edit the mode settings. Move from one setting to the next (including additional modes) using the Softkey for NEXT. Change settings using the adjustment wheel. i. Settings order: basic mode settings (volume/number of dispenses/ number of aspirations) – speed settings – advanced function settings. ii. Advanced function settings can be changed using the adjustment wheel. d.When in basic mode settings or speed settings, you can save the step using the operating button or the Softkey for SAVE. When the Softkey for SAVE is pressed, all settings in the step are saved. e.Repeat the process from 6. a. to 6. d. until the protocol is ready. 7. To edit a step: a.Use the adjustment wheel to select the step you wish to edit and confirm by pressing the operating button or the Softkey for EDIT. b.Follow the steps in 6. c. to 6. d. until the editing is completed. 16 8. To remove a step: a.Use the adjustment wheel to select Delete step and confirm with the operating button or the Softkey for OK. The pipette then lists the available steps. b.Use the adjustment wheel to select the step to be deleted and confirm with the operating button or the Softkey for OK. 9. To save the protocol, press the Softkey for SAVE. OR Press the Softkey for BACK to discard your changes and return to the Protocols menu. You will be asked to confirm if you want to discard your changes: press the appropriate Softkey for YES or NO. If you select NO you will be returned to the editing menu. To activate a pipetting protocol: 1. Select MENU by pressing the left Softkey. 2. Use the adjustment wheel to select Protocols and confirm by pressing the operating button or the Softkey for OK. 3. Use the adjustment wheel to select the desired protocol (P1-P3). Confirm by pressing the operating button or the Softkey for OK. The selected Protocol is now active. You can only activate a protocol that has been set up. To set up protocols please go to the start of section 3.2.9. To use a pipetting protocol: 1. When a pipetting protocol is activated, you automatically start on the first step. 2. Operate the pipette by pressing the operating button. a.On the screen, next to the mode name, you can see the number of the current step and the total number of steps, e.g. 1/3 means that you are on the first step of three. b.The pipette automatically takes you to the next step after each one is completed. c.Alternatively you can navigate through the steps by using the Softkeys for NEXT (next) and PREV (previous). 3. When all the steps in the protocol are completed, the pipette will notify you with a sound (if enabled) and the text “Protocol completed!”. a.To restart the protocol, press the operating button or the Softkey for NEXT. b.To return to the last step, use the Softkey for PREV. c.To finish using the protocol, press the Softkey for MENU and choose the next pipetting mode you wish to use. Titration has been programmed as the first step out of five. The protocol has run through all its steps. Mode Settings and Advanced Functions In Protocols, the mode settings and advanced functions are defined based on the modes selected inside the protocol. Please see main mode settings in sections 3.2.1 - 3.2.8 and advanced functions in section 3.2.10. 3.2.10. Advanced Functions Advanced functions can be optionally used in conjunction with the main pipetting modes as shown on the table on page 9 of this manual. To activate or deactivate advanced functions, once you have already selected the main mode: 1. Press the right Softkey for ADV. All available advanced functions are listed and their current status (On/Off) is displayed. 2. Scroll through the list of advanced functions using the Softkey for NEXT. 3. Turn the selected highlighted advanced function on or off by turning the adjustment wheel. 4. Press the operating button or the Softkey for OK to accept the changes, or press the Softkey for BACK to discard. 17 Not all advanced functions can be used together. Tracker, Mixing, Auto Dispensing, and Counter cannot be active at the same time, but Repeated Blow-out (only in Picus® NxT) can be used together with all other advanced functions. Excess Volume Adjustment doesn’t affect other advanced functions. Tracker Tracker helps users to dispense into the correct microplate wells. It is only available on Picus® and Picus® NxT pipettes and can be used with the following main modes: Pipetting, Reverse Pipetting, and Multi-Dispensing. Once Tracker is activated, continue choosing the related settings. Single-channel pipettes: 1. Select the microplate size (96 or 384 well plate) and the pipetting direction (rows or columns) by scrolling the adjustment wheel. 2. Press the operating button or the right Softkey for OK to activate Tracker. 3. The well to dispense into is shown on the display: a.If pipetting in rows: A1 - A2 - A3… B1 - B2 - B3… C1 - C2 - C3…is displayed. b.If pipetting in columns: 1A - 1B - 1C… 2A - 2B - 2C… 3A - 3B - 3C… is displayed. 4. The first dispensing location can be selected using the EDIT function of each main mode. 8-channel pipettes: 1. Select the microplate size (96 or 384 well plate). Only pipetting in columns is supported. 2. Press the operating button or the right Softkey for OK to activate Tracker. 3. The wells to dispense into are shown on the display: For 96 well plates, columns 1, 2, 3… are shown. For 384 well plates, columns are shown as follows: 1. pipetting: A1 – C1 – E1… 2. pipetting: B1 – D1 – F1… 3. pipetting: A2 – C2 – E2… 4. pipetting: B2 – D2 – F2… etc. 4. The first dispensing column can be selected using the EDIT function of each main mode. 12-channel pipettes: 1. Select the microplate size (96 or 384 well plate). Only pipetting in rows is supported. 2. Press the operating button or the right Softkey for OK to activate Tracker. 3. The wells to dispense into are shown on the display: For 96 well plates, rows are shown as A, B, C…. For 384 well plates, rows are shown as follows: 1. pipetting: A1 – A3 - A5… 2. pipetting: A2 – A4 – A6… 3. pipetting: B1 – B3 - B5... 4. pipetting: B2 – B4 – B6… etc. 4. The first dispensing column can be selected using the EDIT function of the main mode. 18 Counter Counter counts the number of pipetting cycles up to 384 and can be used in conjunction with Pipetting and Reverse Pipetting modes. You can start counting from any number up to 384. The starting number can be set with the adjustment wheel directly after the advanced function has been activated, or using the EDIT function in the main mode. Mixing With the Mixing mode the pipette mixes the liquids either manually when the operating button is held down or automatically a set number of times. The Mixing mode can be used in conjunction with Pipetting and Diluting modes. The volume for mixing can be selected freely up to the maximum volume of the pipette. To edit the volume settings and select manual or automatic: 1. Select Mixing mode. The display shows the volume used for mixing (80% of the volume to be dispensed). 2. Turn the adjustment wheel to set the desired volume for mixing. 3. Confirm the setting by pressing either: a.the operating button or the right Softkey for OK. This also exits the editing mode. OR b.the middle Softkey for NEXT, to move on to select manual or automatic mixing and the number of mixing cycles. 4. If you chose 3.b, either turn the adjustment wheel to select Manual or choose the number of automatic dispensings. 5. Confirm the setting by pressing the operating button or the right Softkey for OK, which will also exit the editing mode. To activate/deactivate mixing: 1. Start your chosen main mode and when the display tells you to “Start mixing”, either: a.press and hold down the operating button for the duration of manual mixing. OR b.press the operating button once to activate the automatic dispensing cycles. OR c.press the left Sofkey for NO to exit Mixing. 2. You may pause mixing by pressing the operating button during the mixing cycle. By pressing it again, mixing continues. 3. You may also exit mixing during the mixing cycle by pressing the left Softkey for QUIT. 4. Continue by emptying the tip. Excess Adjustment Excess Adjustment can be used to set the excess volume in Reverse Pipetting, Multi-Dispensing, and Sequential Dispensing modes, where excess volume is being used. The excess volume varies according to the volume range of the pipette. To set the excess volume: 1. Turn the adjustment wheel to select the desired volume after the advanced function has been activated. You may also press the middle Softkey for DEFAULT to choose the default excess volume. 2. Confirm the selection by pressing the operating button or the right Softkey for OK. 19 Automated Dispensing Automated Dispensing dispenses aliquots automatically, in timed intervals, in Multi-Dispensing mode. The user does not need to press the operating button each time liquid is dispensed. The dispensing interval can be set from 0,1 to 9,9 seconds. To set the interval: 1. Turn the adjustment wheel to set the interval immediately after the advanced function has been activated. 2. Confirm by pressing the operating button or the right Softkey for OK. Fast Dispensing Fast Dispensing can only be used in Titration mode. In Fast Dispensing, the first selected portion of the total volume is dispensed automatically, and the remaining volume is dispensed manually. To set the volume for Fast Dispensing: 1. Turn the adjustment wheel to set the desired volume immediately after the advanced function has been activated. 2. Confirm by pressing the operating button or the right Softkey for OK. Repeated Blow-out (only in Picus® NxT) Repeated Blow-out allows the user to activate and repeat the blowout of remaining liquid droplets, for dispensing liquids that would normally leave a residue in the tip. Repeated Blow-out is available with Pipetting, Manual Pipetting, Diluting, and Multi-Aspiration modes. To exit Blow-out, turn the adjustment wheel or eject the tip by pressing the tip ejector button. B A To activate/deactivate Blow-out: 1. Start your chosen main mode. 2. Once the pipetting cycle has ended, you may repeat the blowout by pressing the operating button as many times as necessary. 3. To exit Blow-out, turn the adjustment wheel or eject the tip by pressing the tip ejector button. H R 3.3. Saving Pipetting Programs to Memory S All Picus® and Picus® NxT models allow 10 programs to be saved in the pipette memory. In the Picus® NxT, sequences of pipetting modes can be stored as protocols (see section 3.2.9). To save a program: 1. Choose the pipetting mode and edit the settings (see previous section), then press the Hotkey (H) to see available memory places. 2. Choose a memory place by turning the adjustment wheel (A). 3. Press the middle Softkey for SAVE (S). a.In Picus® NxT models, if the password feature has been activated, only the administrator profile can save programs. 4. Next the pipette asks for a name for the memory place. Activate the name editor by pressing the operating button (B). 5. With the middle Softkey (S) you can switch between characters, numbers and symbols. Turn the adjustment wheel (A) to change the characters and press the operating button (B) or the right Softkey (R) for OK to confirm the selection and to move on to the next character. If you want to cancel the character change, you can press the left Softkey for BACK. 6. Repeat the sequence for all characters. Confirm the last character with OK or the operating button, and the pipette will exit the editing mode. 7. If you want to clear any of the characters in the name, turn the adjustment wheel until the character is underlined and press the right Softkey for CLEAR. Repeat this until the desired characters are cleared. 8. Save the program name by pressing the middle Softkey for SAVE (S) and the pipette will return to the list of memory places. 9. If you wish to exit without saving the latest change, press the left Softkey for BACK at any time. 20 M10 indicates that the pipetting program shown has been saved in memory place 10. To activate the program from a memory place: 1. Press the Hotkey (H) to see the list of memory. 2. Choose a memory place by turning the adjustment wheel (A). 3. Press the operating button (B) or the right Softkey for OK to activate the saved program. 4. The pipette is now ready to run the program. The memory place is displayed next to the main mode name. 3.4.Setup The pipette settings can be changed through the Setup menu. The following sections explain the various settings and how to modify them. In Picus® NxT models, if password protection is enabled, some settings can only be modified using the administrator profile (see section 3.4.10). 10 % 50 % Pipette without adjustment 100 % Target Volume Theoretical comparison of target and actual values without adjustment 3.4.1. Adjustment The default length of the piston stroke in Picus® and Picus® NxT pipettes is defined by the manufacturer. This factory setting should be used in normal circumstances: with aqueous liquids, at standard atmospheric pressure, and with the pipette, tip, and liquid at standard room temperature. When these circumstances change, the accuracy of the dispensed volume may be affected. To maintain accuracy, the Adjustment function can be used to change the default settings to take into account environmental factors or the type of liquid being used. Adjustment is needed to correct the dispensed volumes in the following cases: −when − pipetting liquids with characteristics that greatly differ from water (for example viscous or volatile liquids) −when − the temperature between the pipette, pipette tip, and liquid differs greatly −when − the ambient air pressure differs from that of standard atmospheric pressure 10 % 50 % 1-point adjustment in Picus 100 % Target Volume In this 1-point adjustment, 50% of maximum volume is being used to match actual and target results NOTE! When factory settings are replaced with adjusted settings, the pipette’s stated performance specifications (random and systematic error) are no longer applicable. However, when the factory settings are reactivated, the performance specifications will once again apply. The Adjustment function enables the user to adjust the pipette at one, two or three calibration points. The more measurement points selected, the greater accuracy is reached over the whole volume range of the pipette. Singlepoint adjustment is recommended when pipetting a constant volume within a range, and two or three point adjustment if performance over the whole range is required. 10 % 50 % 2-point Adjustment in Picus 100 % Target Volume In 2-point adjustment, 10% and 100% of maximum volume are used to match actual and target results The adjustment options are: −1-point − adjustment: adjustment at one point only, the user can choose the desired adjustment point/volume −2-point − adjustment: adjustment at 10% and 100% of the nominal volume −3-point − adjustment: adjustment at 10%, 50%, and 100% of the nominal volume When adjusting for accuracy, the actual volumes delivered should be measured in Pipetting mode. Once the adjustment has been made it is applied to, all modes and an ADJ symbol is displayed on the screen. 10 % 50 % 3-point Adjustment in Picus It is possible to store three (3) adjustments in the adjustment memory: ADJ1, ADJ2, ADJ3. These can be activated at any time when specific uses require accuracy adjustments of the pipette. 100 % Target Volume In 3-point adjustment, 10%, 50% and 100% of maximum volume are used to match actual and target results 21 To change the accuracy adjustment settings: 1. If password protection is enabled, log in using the administrator profile, (only in Picus® NxT). 2. Select MENU by pressing the left Softkey. 3. Use the adjustment wheel to select Setup and confirm by pressing the operating button or the Softkey for OK. 4. Highlight Adjustment by turning the adjustment wheel. Confirm the selection by pressing the operating button or the Softkey for OK. 5. Use the adjustment wheel to select ADJ1, ADJ2, or ADJ3. Press the middle Softkey to EDIT. 6. Use the adjustment wheel to select 1 Point, 2 Points, or 3 Points. Confirm your selection by pressing the operating button or the Softkey for OK. 7. For 1-point adjustment, first set the target volume for accuracy adjustment by turning the adjustment wheel and confirm by pressing the operating button or the Softkey for OK. 8. For 2 or 3-point adjustment, the target volumes are already set. Just confirm them by pressing the operating button or the Softkey for OK. 9. After setting or accepting the target volume, insert the actual volume delivered as per your measurement result by turning the adjustment wheel. Confirm by pressing the operating button or the Softkey for OK. If the difference between the target volume and the actual volume exceeds the limits for calibration, then the display will show “Calibration values out of range”. 10.Repeat steps 7 and 8 for 2 or 3-point adjustment, until all volumes are set. 11.When the pipette asks if you want to save the adjustment data, confirm by pressing the operating button or the right Softkey for YES. If you do not wish to save the data, press the left Softkey for NO. 12.Note that you may exit the editing mode at any time, without saving any changes by pressing the left Softkey for BACK. To activate saved adjustment settings: 1. If password protection is enabled, log in using the administrator profile (only in Picus® NxT). 2. Select MENU by pressing the left Softkey. 3. Use the adjustment wheel to select Setup and confirm by pressing the operating button or the Softkey for OK. 4. Highlight Adjustment by turning the adjustment wheel. Confirm the selection by pressing the operating button or the Softkey for OK. 5. Use the adjustment wheel to select ADJ1, ADJ2, or ADJ3. Confirm the selection by pressing the operating button or the Softkey for OK. 6. When the pipette asks if you wish to set the custom adjustment values, confirm by pressing either the operating button or the right Softkey for OK. If you do not wish to set the adjustment, press the left Softkey for NO. 7. If you confirmed the setting, ADJ1, ADJ2, or ADJ3 is now displayed on the lower left corner of your screen, and the pipette has returned to the Setup menu. Press the left Softkey for BACK two times to get back to the main display. Choose the desired target volume Enter the volume actually measured To save the adjustment, press either the Softkey for YES or the operating button. The difference between the target volume and the actual volume exceeds the limit that can be calibrated. 22 The pipette is set to use the adjustment values saved to ADJ1. To reset the pipette to factory adjustment settings: 1. If password protection is enabled, log in using the administrator profile (only in Picus® NxT). 2. Select MENU by pressing the left Softkey. 3. Use the adjustment wheel to select Setup and confirm by pressing the operating button or the Softkey for OK. 4. Highlight Adjustment function with the adjustment wheel and confirm by pressing the operating button or the Softkey for OK. 5. Use the adjustment wheel to select Factory and confirm by pressing the operating button or the Softkey for OK. 6. When the pipette asks if you want to set factory adjustment values, confirm by pressing the operating button or the right Softkey for YES. If you do not wish to reset to factory adjustment values, press the left Softkey for NO. 7. Once you have reset to factory adjustment settings you will no longer see the ADJ text in the lower left corner of the main display. 3.4.2. Sound Sound effects when turning the adjustment wheel and for messages are on by default, but can be switched off. To change the sound settings: 1. Select MENU by pressing the left Softkey. 2. Use the adjustment wheel to select Setup and confirm by pressing the operating button or the Softkey for OK. 3. Use the adjustment wheel again to select Sound. Confirm by pressing the operating button or the Softkey for OK. 4. The Adj. Wheel setting is highlighted and listed as On or Off. a.If you wish to change the setting, turn the adjustment wheel and press the operating button or the right Softkey to confirm the change. OR b.Leave the setting as it is by pressing the operating button or the right Softkey to accept the setting. 5. The Messages setting is then highlighted and listed as On or Off. Repeat step 4.a or 4.b. 6. Press the left Softkey for BACK to exit the editing mode at any time without saving changes. 7. Once you are back in the Setup menu, press the left Softkey for BACK two times to return to the main display. 3.4.3. Backlight The backlight colour of the display can be changed. By default it is whitegray while the pipette is in use and matches the volume colour code while charging. The operating button and matching tips are similarly colour coded to aid tip selection. If the backlight colour is changed by the user, the selected colour is applied both while the pipette is in use and while it is charging. Colour code matching backlights To change the display backlight colour: 1. Select MENU by pressing the left Softkey. 2. Use the adjustment wheel to select Setup and confirm by pressing the operating button or the Softkey for OK. 3. Use the adjustment wheel again to select Backlight and confirm by pressing the operating button or the Softkey for OK. 4. All colour options are listed. Choose a colour with the adjustment wheel. a.Confirm your selection by pressing the operating button or the Softkey for OK. OR b.Press the left Softkey for BACK to exit the list without saving any changes. 5. Once you are back in the Setup menu, press the left Softkey for BACK two times to return to the main display. 23 3.4.4. User ID The pipette can be named to help with identification. For example, users can add their name to their pipette so laboratory technicians know whose pipette is whose. When the pipette is turned on, the name is displayed on the screen. To change the ID/name: 1. Select MENU by pressing the left Softkey. 2. Use the adjustment wheel to select Setup and confirm by pressing the operating button or the Softkey for OK. 3. Use the adjustment wheel again to select User ID and confirm by pressing the operating button or the Softkey for OK. 4. The current name is displayed on the screen. 5. To edit the name press the Softkey for EDIT. The first chracter becomes highlighted and can be edited. 6. Capital letters are used by default. Use the middle Softkey to change the character type: ABC for capital letters, abc for lower case letters, 123 for numbers and #@! for other characters. 7. Turn the adjustment wheel to select your chosen character and confirm by pressing the right Softkey for OK or the operating button. 8. The next character to be edited is highlighted. Repeat steps 6 and 7 until you have finished your chosen ID, then press the middle Softkey to SAVE. If you do not want to save your new ID, press the left Softkey for BACK. 9. Once you are back in the Setup menu, press the left Softkey for BACK two more times to return to the main display. To delete characters: 1. Follow steps 1 to 4 above to see the current ID. 2. Turn the adjustment wheel to highlight the character to be deleted and press the middle Softkey for EDIT. 3. Press the middle Softkey four times until it shows CLEAR. Press the operating button or the right Softkey for OK to move on to the next character. 4. Repeat step 2 for every character to be deleted. 5. Press the middle Softkey for SAVE to return to the Setup menu, or continue editing the ID. Please note that not all characters can be deleted. 6. If you do not want to save your changes, press the left Sofkey for BACK. 7. Once you are back in the Setup menu, press the left Softkey for BACK two more times to return to the main display. 3.4.5 GLP Info (only in Picus®) The GLP (Good Laboratory Practice) Info function allows dates to be saved to show when the pipette was last serviced or calibrated and when the next service or calibration is due. In Picus® NxT pipettes, service, calibration, and check reminders can all be programmed. Please see section 3.4.12. To change the dates: 1. Select MENU by pressing the left Softkey. 2. Use the adjustment wheel to select Setup and confirm by pressing the operating button or the Softkey for OK. 3. Use the adjustment wheel again to select GLP Info and confirm by pressing the operating button or the Softkey for OK. 4. The previously used dates are displayed on the screen. Turn the adjustment wheel to edit the date/month/year and confirm by pressing the operating button or the Softkey for OK. The next field then becomes editable. 5. When you have finished editing, confirm the last field with the operating button or the Softkey for OK and you will be returned to the Setup menu. 6. To exit without saving any changes, press the left Softkey for BACK at any time. 24 Setting the user ID 7. Once you are back in the Setup menu, press the left Softkey for BACK two more times to return to the main display. 3.4.6. Reset The Reset function allows you to overwrite all personal settings including stored programs and revert to factory settings. To reset pipette settings: 1. If password protection is enabled, log in using the administrator profile, (only in Picus® NxT). 2. Select MENU by pressing the left Softkey. 3. Use the adjustment wheel to select Setup and confirm by pressing the operating button or the Softkey for OK. 4. Use the adjustment wheel again to select Reset and confirm by pressing the operating button or the Softkey for OK. 5. The pipette will ask if you want to reset all settings. a.If yes, press the right Softkey or the operating button. Follow the instructions on the screen and press the tip ejection button. The settings are now reset to factory defaults. OR b.To cancel the reset, press the left Softkey for NO. The settings will not be reset and you will be returned to the Setup menu. 6. Once you are back in the Setup menu, press the left Softkey for BACK two times to return to the main display. 3.4.7. Information Reseting the pipette to factory settings Information displays the current sofware version of the pipette and the level of charge in the battery. This information cannot be edited. To view Information: 1. Select MENU by pressing the left Softkey. 2. Use the adjustment wheel to select Setup and confirm by pressing the operating button or the Softkey for OK. 3. Use the adjustment wheel again to select Information and confirm by pressing the operating button or the Softkey for OK. 4. The display shows the current software version and the battery charge level. 5. To exit, press the operating button or the right Softkey for OK and you’ll be returned to the Setup menu. 6. Once you are back in the Setup menu, press the left Softkey for BACK two times to return to the main display. 3.4.8. Languages The user interface language can be changed using the Language setting. The available languages are English, French, German, Chinese, and Russian (available from software version 1.07 onwards). To change the language: 1. Select MENU by pressing the left Softkey. 2. Use the adjustment wheel to select Setup and confirm by pressing the operating button or the Softkey for OK. 3. Use the adjustment wheel again to select Languages and confirm by pressing the operating button or the Softkey for OK. 4. The list of available languages is shown on the display. a.Use the adjustment wheel to select a language and confirm by pressing the operating button or the right Softkey for OK. Confirming will return you to the Setup menu. OR b.If you do not wish to change the language, press the left Softkey for BACK to return to the Setup menu. French German Chinese Russian 25 5. Once you are back in the Setup menu, press the left Softkey for BACK two times to return to the main display. 3.4.9. Pipette Lock (only in Picus® NxT) Pipette lock allows the pipette to be locked so that it cannot be used. When Pipette lock is enabled “Pipet locked. Service required!” is shown on the display and the pipette’s functions are disabled. This can be used when something is wrong with the pipette or it has become contaminated, preventing it from being used until it is next serviced or cleaned. Pipette lock can be activated from Setup by any user. The pipette can be unlocked by pressing the Softkey for UNLOCK. If password protection is enabled, the administrator password is needed to unlock the pipette. To activate Pipette lock: 1. Select MENU by pressing the left Softkey. 2. Use the adjustment wheel to select Setup and confirm by pressing the operating button or the Softkey for OK. 3. Use the adjustment wheel again to select Pipette lock and confirm by pressing the operating button or the Softkey for OK. 4. The pipette shows “Lock pipette?” a.To lock, press the operating button or the Softkey for YES. b.To leave the pipette unlocked, press the Softkey for NO. Pipette locked for service To unlock the pipette: 1. The pipette shows “Pipet locked. Service required!” 2. To unlock press the Softkey for UNLOCK. a.If password protection is enabled, the pipette asks for a password. The administrator password is required to unlock the pipette. 3.4.10. Passwords (only in Picus® NxT) Picus® NxT pipette has two-level password protection. The first level is administrator level, with unrestricted permissions, and the second is the user level, which is restricted. In password settings, password protection can be activated, deactivated, and both passwords set. If password protection is enabled, only the administrator can access Adjustment, Passwords, Date & Time, and Reminders, save programs under the Hotkey feature, and edit and save protocols. The user profile can use all modes, and can access Sound, Backlight, User ID, Information, Languages, and Pipette lock. The user profile can use saved programs and protocols, but cannot edit or save them. To log out if password protection is enabled, press the power button briefly. To log in, enter the administrator password or a user password. Password To set the administrator or user password: 1. Select MENU by pressing the left Softkey. 2. Use the adjustment wheel to select Setup and confirm by pressing the operating button or the Softkey for OK. 3. Use the adjustment wheel to select Passwords and confirm by pressing the operating button or the Softkey for OK. 4. Use the adjustment wheel to select Set Admin or Set User. Confirm by pressing the operating button or the Softkey for OK. 5. Enter a new password by selecting numbers with the adjustment wheel and confirming them by pressing the operating button or the Softkey for OK. Four numbers (0-9) are required. 6. Once you have confirmed the fourth digit, the new password is set, and the pipette display shows “New password set!” Entering the password 26 NOTE! If password protection has already been enabled, log in using the administrator profile, to set and edit passwords. To turn password protection on: 1. Select MENU by pressing the left Softkey. 2. Use the adjustment wheel to select Setup and confirm by pressing the operating button or the Softkey for OK. 3. Use the adjustment wheel to select Passwords and confirm by pressing the operating button or the Softkey for OK. 4. Use the adjustment wheel to select Login. This also shows whether password protection is currently ON or OFF. 5. Switch from OFF to ON by pressing the operating button or the Softkey for OK. 6. The pipette will ask for a password. Either: a.Enter the administrator password OR b.If no password has yet been set, enter the default administrator password 0000 7. The word ON next to Login confirms that password protection is enabled. To log in using an administrator or user profile: 1. The pipette will ask for a password. 2. Use the adjustment wheel to select the first number of the administrator or user password. Confirm by pressing the operating button or the Softkey for OK. 3. Repeat step 2 for the next three digits. Once the last number of the password is confirmed, the user is logged in. To log out: 1. Password protection must be enabled and administrator/user passwords set (see above). 2. Press the power button briefly to log out. This cannot be done while using any of the modes. To turn off password protection: 1. Log in using the administrator profile (only in Picus® NxT). 2. Select MENU by pressing the left Softkey. 3. Use the adjustment wheel to select Setup and confirm by pressing the operating button or the Softkey for OK. 4. Use the adjustment wheel to select Passwords and confirm by pressing the operating button or the Softkey for OK. 5. Use the adjustment wheel to select Login. ON will be displayed next to Login if password protection is enabled. 6. Switch password protection to OFF by pressing the operating button or the Softkey for OK. 3.4.11. Date and Time (only in Picus® NxT) The Picus® NxT pipette has a calendar and clock that are used for reminders and timers. The date and time are asked for during the initial setup of the pipette, but can also be modified later. To change the date and time: 1. If password protection is enabled, log in using the administrator profile. 2. Select MENU by pressing the left Softkey. 3. Use the adjustment wheel to select Setup and confirm by pressing the operating button or the Softkey for OK. 4. Use the adjustment wheel to select Date & time. Confirm by pressing the operating button or the Softkey for OK. 5. Use the adjustment wheel to change the highlighted digit. Confirm the change and move to the next digit by pressing the operating button or the Softkey for OK. To return to the previous digit, use the Softkey for PREV. Setting the date and time 27 6. O nce the final digit has been selected, save the changes by pressing the operating button or the Softkey for SAVE. To discard your changes at any point, press the Softkey for BACK. 3.4.12. Reminders (only in Picus® NxT) Picus® NxT has built in reminders for Maintenance, Calibration, and Pipette checking. The reminders help the user to remember important service dates. Having the pipettes maintained and calibrated at regular intervals is an important factor in ensuring the quality and accuracy of results. Reminders can be set to time and/or cycle intervals. For example, a calibration reminder can be set for six months or 5 000 pipetting cycles, whichever comes first. When the criteria is reached, the pipette notifies the user with a message and sound. With time-based reminders for maintenance and calibration, the pipette also alerts the user 14 days before the set date. To set a reminder: 1. If password protection is enabled, log in using the administrator profile. 2. Select MENU by pressing the left Softkey. 3. Use the adjustment wheel to select Setup and confirm by pressing the operating button or the Softkey for OK. 4. Use the adjustment wheel to select Reminders and confirm by pressing the operating button or the Softkey for OK. 5. Use the adjustment wheel to select the reminder type. Confirm the selection by pressing the operating button or the Softkey for OK. 6. Use the Softkeys for NEXT and PREV to move forward and backward in the menu. a.Last: shows the last time that the pipette was maintained, calibrated, and/or checked. This date needs to be reset manually, by pressing the Softkey for RESET. b.Months/Weeks: shows the interval between maintenance and between calibration in months and between checks in weeks. This interval can be modified with the adjustment wheel. The options available are OFF and from 1 to 12. Confirm the change and move to the next setting by pressing the Softkey for NEXT. c.Cycles: shows the number of pipetting cycles between maintenance, calibration, and/or checks. The number options are OFF and from 100 to 20000. Use the adjustment wheel to change the number of cycles. Confirm the change and move to the next setting by pressing the Softkey for NEXT. d.Snooze dd: shows the number of days a reminder can be snoozed. If enabled, users can snooze reminders for the set number of days. The options available are OFF and from 1 to 30. e.Press the Softkey for SAVE. This saves all reminder settings. Information when the last calibration has been made Calibration pre-reminder NOTE! If both time intervals and number of cycles are set, the reminder will alert you when the first one is reached. To turn off a reminder: 1. If password protection is enabled, log in using the administrator profile. 2. Select MENU by pressing the left Softkey. 3. Use the adjustment wheel to select Setup and confirm by pressing the operating button or the Softkey for OK. 4. Use the adjustment wheel to select Reminders and confirm by pressing the operating button or the Softkey for OK. 28 Calibration reminder 5. U se the adjustment wheel to select the reminder to turn off. Confirm by pressing the operating button or the Softkey for OK. 6. Use the Softkeys for NEXT and PREV to move in the menu. 7. Use the adjustment wheel to set the date and cycle intervals to OFF. 8. Confirm changes with the Softkey for SAVE. When a Reminder Occurs Reminders are shown as a text alert on the screen accompanied by a sound, if it has been enabled in the setup. Options for reacting to the reminder: 1. LOCK: Lock the pipette from being used. The user can lock the pipette by pressing the Softkey for LOCK. If password protection is enabled, the administrator password is required to unlock the pipette (see section 3.4.9). 2. SNOOZE: If the snooze feature is ON in Reminders, users can snooze reminders by pressing the Softkey for SNOOZE. This snoozes the reminder for the number of days specified in Reminders. 3. OK: Users can dismiss reminders by pressing the Softkey for OK. The reminder will pop up again after the next pipetting cycle. This allows users to complete a pipetting series before locking the pipette for maintenance, calibration, or checking. To reset a reminder: 1. If password protection is enabled, log in using the administrator profile. 2. Select MENU by pressing the left Softkey. 3. Use the adjustment wheel to select Setup and confirm by pressing the operating button or the Softkey for OK. 4. Use the adjustment wheel to select Reminders and confirm by pressing the operating button or the Softkey for OK. 5. Use the adjustment wheel to select the reminder to reset (maintenance, calibration, or check). Confirm by pressing the operating button or the Softkey for OK 6. Use the Softkeys for NEXT and PREV to highlight the last date. 7. Press the Softkey for RESET to reset both date and cycle intervals. 8. Confirm by pressing the operating button or the Softkey for YES, or cancel by pressing the Softkey for NO. 29 4. Care and Maintenance Like any precision instrument, pipettes have many mechanical and electronic parts that are subject to wear and tear. By taking care of your pipette and carrying out regular maintenance and calibration, its functionality and performance can be ensured. To avoid pipette and sample contamination and to extend the pipette’s lifetime, Sartorius Safe-Cone Filters (available for pipettes >10 µl) or Sartorius SafetySpace Filter Tips should be used. Sartorius provides service, maintenance, and calibration services through its global network of service centres. Please contact your nearest service centre for assistance. The warranty will be voided if the pipette is disassembled or assembled by an unauthorized person. 4.1. Cleaning and Maintenance Sartorius electronic pipettes can be cleaned and decontaminated using disinfectant or decontaminant liquids such as 70% ethanol, 60% isopropanol, mild detergent, or similar. Always check the chemical compatibility between the pipette materials and the disinfectant or decontaminant liquid. 1. Turn off the pipette prior to cleaning. 2. It is recommended that gloves are worn. 3. Change the Safe-Cone Filter regularly with the tweezers provided with the pipette. 4. Cleaning is always recommended after possible contamination or after dispensing corrosive or other aggressive chemicals. 5. Never let liquids enter the inner parts of the pipette. 6. Never use the pipette without a tip attached to the tip-cone. 7. Tools needed: lint-free cloth and cleaning solution, e.g. 70% ethanol. 4.1.1. Single-Channel Pipettes Cleaning the outer surface (all models) Clean any visible dirt with mild detergent and a lint-free cloth. Wipe dry. Cleaning and maintaining 10 and 120 µl models: 1. Turn off the pipette. 2. Remove the Safe-Cone Filter, if attached. 3. Unscrew the tip ejector collar counter-clockwise and remove it. 4. Unscrew the tip-cone locking ring counter-clockwise and carefully remove it. 5. Unscrew the exposed piston counter-clockwise. 6. Clean the tip ejector collar, tip-cone locking ring, tip-cone, and piston with cleaning solution and a lint-free cloth. 7. Rinse with distilled water if needed and let the parts dry. 8. Install the piston by screwing it clockwise - do not over tighten. 9. Apply a thin layer of autoclavable grease (order code 731141) to the piston. 10.Carefully replace the tip-cone and attach it by turning the tip-cone locking ring clockwise. 11.Use tweezers to insert a Safe-Cone Filter. 12.Turn the pipette on. 30 Cleaning and maintaining 300 and 1000 µl models: 1. Turn off the pipette. 2. Remove the Safe-Cone Filter, if attached. 3. Unscrew the tip ejector collar counter-clockwise and remove it. 4. Unscrew the tip-cone locking ring counter-clockwise and carefully remove it. 5. Unscrew the exposed piston counter-clockwise. 6. Clean the tip ejector collar, tip-cone locking ring, tip-cone, and piston with cleaning solution and a lint-free cloth. 7. Rinse with distilled water if needed and let the parts dry. 8. Install the piston by screwing it clockwise - do not over tighten. 9. Apply a thin layer of autoclavable grease (order code 731141) around the seal. 10.Carefully replace the tip-cone and attach it by turning the tip-cone locking ring clockwise. 11.Attach the tip ejector collar by screwing it clockwise. 12.Use tweezers to insert a Safe-Cone Filter. 13.Turn the pipette on. Cleaning and maintaining 5 ml model: 1. Turn off the pipette. 2. Remove the Safe-Cone Filter, if attached. 3. Unscrew the tip ejector collar counter-clockwise and remove it. 4. Hold the tip-cone holder between your fingers, unscrew it by turning it counter-clockwise, and then remove it. 5. Unscrew the exposed piston counter-clockwise. 6. Clean the tip ejector collar, tip-cone locking ring, tip-cone, and piston with mild detergent and a lint-free cloth. 7. Rinse with distilled water if needed and let the parts dry. 8. Install the piston by screwing it clockwise - do not over tighten. 9. Apply a thin layer of autoclavable grease (order code 731141) to the seal and the interior of the tip-cone. Avoid excess grease. 10.Carefully place the tip-cone onto the piston, hold the tip-cone holder, and screw it in by turning it clockwise. 11.Attach the tip ejector collar by screwing it clockwise. 12.Use tweezers to insert a Safe-Cone Filter. 13.Turn the pipette on. Cleaning and maintaining 10 ml model: 1. Turn off the pipette. 2. Remove the Safe-Cone Filter, if attached. 3. Unscrew the tip ejector collar counter-clockwise and remove it. 4. Hold the tip-cone between your fingers, open the bayonet lock by turning the bayonet locking-ring clockwise until it stops, and remove the tip-cone. 5. Unscrew the exposed piston counter-clockwise. 6. Clean the tip ejector collar, tip-cone locking ring, tip-cone and piston with cleaning solution and a lint-free cloth. 7. Rinse with distilled water if needed and let the parts dry. 8. Install the piston by screwing it clockwise - do not overtighten. 9. Apply a thin layer of autoclavable grease (order code 731141) to the seal and the interior of the tip-cone. Avoid excess grease. 10.Carefully place the tip-cone onto the piston, hold the tip-cone, and lock it by turning the bayonet locking-ring counter-clockwise until it stops. 11.Make sure that the tip-cone is properly tightened - do not over-tighten. 12.Attach the tip ejector collar by screwing it clockwise. 13.Use tweezers to insert a Safe-Cone Filter. 14.Turn the pipette on. NOTE! Always check the performance of the pipette after cleaning or maintenance. 31 4.1.2. Multichannel Pipettes Cleaning the outer surface (all models): Clean any visible dirt with cleaning solution and a lint-free cloth. Wipe dry. Cleaning and maintaining the lower parts of all models Opening the lower part of a multichannel pipette should only be done by an authorized Sartorius service provider. Please contact your nearest Sartorius service provider or distributor. 4.2. Sterilizing The lower parts of Sartorius electronic pipettes can be sterilized by autoclaving, with UV or by using disinfectant or decontaminant liquids such as 70% ethanol, 60% isopropanol, mild detergent, or similar. Always make sure the materials of the pipette and the disinfectant or decontaminant liquid are chemically compatible. Always follow the autoclaving instructions below. 4.2.1.Autoclaving The lower parts of Sartorius electronic pipettes are autoclavable, excluding the 1200 µl multichannel model. Please see the autoclaving symbol printed on the lower part of your pipette to ensure the section is autoclavable. Autoclaving Instructions: 1.Remove the Safe-Cone Filter if attached. 2.Unscrew the lower part by turning the connecting collar and dispensing head counter-clockwise until it comes off. 3.Sterilize the part at 121°C, 1 bar overpressure for 20 minutes. 4.Let the parts cool and dry before reassembling. Autoclavable lower part NOTE! The lower parts of multichannel pipettes can be autoclaved as one unit or separately as individual parts. 4.2.2. UV Sterilization Sartorius electronic pipettes are made of UV-resistant materials. The UV resistance of the products has been tested in continuous UV light under the following test conditions, which we also recommend for UV sterilization in labs: −Wave − length: Shortwave ultraviolet (UVC) −Power: − 2x20W (twin tubes) −Distance − from tube surface to table/product surface: 620 mm −Tested − UV dosage: 33000 mJ/cm2 4.2.3. Using Disinfectant Liquid Sartorius electronic pipettes can be cleaned and decontaminated using disinfectant or decontaminant liquids such as 70% ethanol, 60% isopropanol, mild detergent, or similar. Always make sure the materials of the pipette and the disinfectant or decontaminant liquid are chemically compatible. Single-channel pipettes Wipe the outer surface of single-channel pipettes with a decontaminant fluid, 70% ethanol, 60% isopropanol, mild detergent, or similar. For complete decontamination of the lower parts (tip ejector collar, tip-cone, spring, and piston), place them into a dish containing disinfectant or decontaminant liquid. Leave the parts to soak for 30 minutes. Rinse the parts with distilled water and leave to dry before reassembling. 32 Not autoclavable lower part Multichannel pipettes Wipe the outer surface of multichannel pipettes with a decontaminant fluid, 70% ethanol, 60% isopropanol, mild detergent, or similar. The lower part of a multichannel pipette should be opened only by an authorized Sartorius service provider. 4.3. Performance Testing It is recommended that the performance of Sartorius pipettes is checked regularly (e.g. every three months) and always after in-house maintenance. A regular testing routine should be established by users, taking into consideration the accuracy requirements of the application, frequency of use, number of operators using the pipette, nature of the liquid dispensed, and the acceptable maximum permissible errors (ISO 8655-1). Performance tests should take place in a draught-free room at 15–30°C, kept constant within ±0.5°C and with relative humidity above 50%. The pipette, tips, and test water should have stood in the test room for long enough to reach equilibrium with the room conditions (at least two hours). Use distilled or de-ionised water (ISO 3696, grade 3) and an analytical balance that conforms to ISO 8655-6. Weighing 1. Adjust the desired test volume (VS). 2. Carefully fit the tip onto the tip-cone. 3. Fill the tip with test water and empty it five times to achive humidity equilibrium in the dead air volume. 4. Replace the tip. Pre-wet the tip by filling it once with the test water and emptying. 5. Aspirate the test water, immersing the tip only 2-3 mm below the surface of the water. Keep the pipette vertical. 6. Withdraw the pipette vertically and touch the tip against the side wall of the test water container. 7. Pipette the water into the weighing vessel, touching the tip against the inside wall of the vessel just above the liquid surface at an angle of 30° to 45°. Withdraw the pipette by drawing the tip 8-10 mm along the inner wall of the weighing vessel. 8. Read the weight in mgs (mi). 9. Repeat the test cycle until 10 measurements have been recorded. 10.Convert the recorded masses (mi) to volumes (vi) by multiplying the mass with the correction factor Z (Z-values in the table below): Vi = mi Z Z-values (µl/mg) Temp. (°C) Air Pressure (kPa) 95 100 101.3 105 20.0 20.5 21.0 21.5 22.0 22.5 23.0 23.5 1.0029 1.0030 1.0031 1.0032 1.0033 1.0034 1.0035 1.0036 1.0029 1.0030 1.0031 1.0032 1.0033 1.0034 1.0036 1.0037 1.0028 1.0029 1.0030 1.0031 1.0032 1.0033 1.0034 1.0036 1.0028 1.0029 1.0031 1.0032 1.0033 1.0034 1.0035 1.0036 11.Calculate the mean volume (V) delivered: V = (Vi)/10 12.For conformity evaluation calculate the systematic error eS of the measurement: in μl: eS = V – VS VS = selected test volume or in %: eS = 100 (V – VS)/VS 33 13.And calculate the random error of the measurement as standard deviation: or as coefficient of variation CV =100s/V 14.Compare the systematic error (inaccuracy) and random error (imprecision) to the performance specification values of your own laboratory. NOTE! Systematic error is the difference between the dispensed volume and the target volume. Random error is the scatter of the dispensed volumes around the mean of the dispensed volume (ISO 8655-1). NOTE! Sartorius specifications are achieved in strictly controlled conditions (ISO 8655-1). Users should establish acceptable maximum permissible errors based on the field of use and the accuracy requirements placed on the pipette (ISO 8655-1). 4.4. Replacing the Battery We recommend that the Picus®/Picus® NxT battery is replaced only by an authorized Sartorius service provider. Please contact your nearest Sartorius representative. 4.5. Replacement Parts Sartorius offers a full range of replacement parts. Always contact Sartorius or an authorized representative for original spare parts for your Sartorius pipette. 4.6.Storage We recommend storing Picus®/Picus® NxT electronic pipettes on the charging stand when not in use. During storage periods of several months of more, we recommend disconnecting the charging stand from the mains power outlet, and turning the pipette off by pressing the power button on the top of the pipette. 5.Warranty Sartorius products are meant to be used as described in this user manual. Picus®/Picus® NxT electronic pipettes are covered by a two-year warranty against defects in workmanship and materials. The battery is not covered by our warranty. ANY WARRANTY WILL, HOWEVER, BE DEEMED AS VOID IF THE FAULT IS FOUND TO HAVE BEEN CAUSED BY MISTREATMENT, MISUSE, UNAUTHORIZED MAINTENANCE OR SERVICE, NEGLIGENCE OF REGULAR MAINTENANCE AND SERVICE, ACCIDENTAL DAMAGE, INCORRECT STORAGE, OR USE OF THE PRODUCT FOR OPERATIONS OUTSIDE THEIR SPECIFIED LIMITATIONS, OUTSIDE THEIR SPECIFICATIONS, CONTRARY TO THE INSTRUCTIONS GIVEN IN THIS MANUAL, OR WITH TIPS OTHER THAN THE MANUFACTURER’S ORIGINAL ONES. Each Picus®/Picus® NxT electronic pipette is tested before shipping by the manufacturer. The Sartorius Quality Assurance Procedure guarantees that the Picus®/Picus® NxT electronic pipette you have purchased is ready for use. Each Picus®/Picus® NxT electronic pipette is CE marked, fulfilling the requirements of EN 55014, 1993/EN 55104, 1995/ ISO 13485:2003, and Directive (98/79 EC). 34 6. Hazardous Substances (RoHS II) This product is in compliance with the European Directive RoHS II (2011/65/ EC) on the restriction of hazardous substances in electrical and electronic equipment. The compliance is based on information provided by our supplier. Confirmation of compliance by our suppliers means that either the product does not contain any of the restricted substance(s), or the used concentrations are below the given threshold levels. 7. Disposal (WEEE) In compliance with European Directive WEEE (2012/19/EU) on waste and reduction of hazardous substances of electrical and electronic equipment, it must not be disposed of as unsorted municipal waste. Instead this device must be collected separately in accordance with local recycling regulations. Batteries should also be disposed of in accordance with local legal regulations. 8. Troubleshooting 8.1. Hardware Reset If the pipette becomes unresponsive it is possible to force a reset. This will not affect saved settings such as adjustments or memory. To turn off an unresponsive pipette, simultaneously press the ON/OFF button and the right Softkey for a few seconds. The pipette will turn off and can then be turned on again by pressing the ON/OFF button. NOTE! Make sure the pipette is not on the charging unit or connected to the USB cable while being reset. 8.2. Troubleshooting Guide Problem Possible Cause Solution Leakage – Incompatible tip – T ip is loose –P ipette is dirty –P ipette is broken –P ipette is dirty –P ipette is broken –P ipette is in OFF mode – E mpty battery – Inner lower parts are loose –P ipette is dirty –P ipette is broken – S afe-Cone Filter is dirty –P ipette is dirty –P ipette is broken –U se original Sartorius tips –A ttach the tip firmly –C lean the pipette –R eplace the broken parts or send the pipette for service –C lean the pipette –R eplace the broken parts or send the pipette for service – T urn the pipette on by pressing the ON/OFF button –C onnect the pipette to the charger –O pen the bottom of the pipette and tighten the parts –C lean the pipette –R eplace the broken parts or send the pipette for service –R eplace the Safe-Cone Filter –C lean the pipette –R eplace the broken parts or send the pipette for service Inaccuracy Pipette is turned off Piston is jammed Pipette does not aspirate liquid properly 35 9. Technical Data Rechargeable battery Type Capacity Charging time Chargers, charging stands USB charger for Picus®/Picus® NxT pipette Input voltage Output voltage Output connector type Universal charger for charging stand for 1 pipette* Input voltage Output voltage Universal charger for charging stand for 4 pipettes* Input voltage Output voltage Picus®/Picus® NxT electronic pipette Operating temperature Air humidity Weight Single-channel 10-300 µl Single-channel 50–1000 µl 8-channel 10–300 µl Length Single-channel 10-300 µl Single-channel 50–1000 µl 8-channel 10–300 µl Pipetting force for single and multichannel models Tip ejecting force for single and multichannel models Li-Polymer battery with protection circuit 3,7 V/350 mAh Approx. 1 hour For indoor and office equipment use only 100 – 240 V ~ 50/60 Hz, 125 mA 5 V, 900 mA LPS Micro-USB According to local requirements 9 VDC/600 mA According to local requirements 10,5 VDC/1600 mA +15°C to +40°C Max. 80% 100 g 110 g 160 g 21,0 cm 21,6 cm 21,6 cm 1,3 N 3,1 N * All pipettes are supplied with a universal charger (EU, UK, US, JPN, AUS, KOR, and CHN plugs). 36 9.1. Performance Specifications 1-channel Increment Test Volume (µl) (µl) Systematic Error* +/- % +/- µl Random Error* +/- % +/- µl 0,2-10 µl 0,01 5–120 µl 0,10 10-300 µl 0,20 50-1000 µl 1,00 0,1–5 ml 5,00 0,5–10 ml 10,00 10 5 1 120 60 12 300 150 30 1000 500 100 5000 2500 500 10000 5000 1000 0,90 1,00 2,50 0,40 0,60 2,00 0,40 0,60 1,50 0,40 0,60 1,50 0,50 0,80 1,00 0,60 1,20 3,00 0,09 0,05 0,025 0,48 0,36 0,24 1,2 0,9 0,45 4,00 3,00 1,5 25,00 20,00 5,00 60,00 60,00 30,00 0,40 0,70 1,50 0,15 0,20 1,00 0,15 0,20 0,80 0,15 0,20 0,50 0,15 0,20 0,40 0,20 0,30 0,60 0,04 0,035 0,005 0,18 0,12 0,12 0,45 0,3 0,24 1,5 1,0 0,5 7,5 5,00 2,00 20,00 15,00 6,00 10 5 1 120 60 12 300 150 30 1200 600 120 0,90 1,50 4,00 0,50 0,70 2,00 0,50 0,70 2,00 0,50 1,00 2,50 0,09 0,075 0,04 0,6 0,42 0,24 1,5 1,05 0,6 6,00 6,00 3,00 0,50 0,80 3,00 0,20 0,30 1,50 0,20 0,30 1,00 0,20 0,30 1,00 0,05 0,04 0,03 0,24 0,18 0,18 0,6 0,45 0,3 2,4 1,8 1,2 10 5 1 120 60 12 300 150 30 1200 600 120 0,90 1,50 4,00 0,50 0,70 2,00 0,50 0,70 2,00 0,50 1,00 2,50 0,09 0,075 0,04 0,6 0,42 0,24 1,5 1,05 0,6 6,00 6,00 3,00 0,50 0,80 3,00 0,20 0,30 1,50 0,20 0,30 1,00 0,20 0,30 1,00 0,05 0,04 0,03 0,24 0,18 0,18 0,6 0,45 0,3 2,4 1,8 1,2 8–channel 0,2–10 µl 0,01 5–120 µl 0,10 10-300 µl 0,20 50–1200 µl 1,00 12–channel 0,2–10 µl 0,01 5–120 µl 0,10 10-300 µl 0,20 50–1200 µl 1,00 * The listed systematic and random error values are valid for Pipetting mode only and are achieved under strictly controlled conditions during type tests per ISO 8655. Due to Sartorius’ continuous product development, the systematic and random error values may change without prior notice. 37 9.2. Speed Table Speed is measured in Pipetting mode using the maximum volume. In all main pipetting modes, speed can be adjusted separately for aspiration and dispensing. The speed ranges from 1 (slow) to 9 (fast). 38 Single-channel pipettes (speed in seconds) Speed 10 µl 120 µl 300 µl 1000 µl 5 ml 10 ml 1 2 3 4 5 6 7 8 9 7,7 5,3 3,7 2,7 1,9 1,4 1,1 0,9 0,8 10,1 7,4 5,4 3,8 2,8 1,9 1,2 0,8 0,6 10,2 7,4 5,4 3,8 2,7 1,8 1,1 0,8 0,6 10,2 7,4 5,4 3,8 2,9 2,2 1,7 1,3 0,9 Multichannel pipettes (speed in seconds) Speed 10 µl 120 µl 300 µl 1200 µl 1 2 3 4 5 6 7 8 9 5,4 3,9 2,9 2,1 1,6 1,2 1,0 0,8 0,7 6,1 4,4 3,3 2,5 1,9 1,4 11 0,9 0,7 2,5 1,8 1,3 1,0 0,8 0,6 0,5 0,4 0,3 2,5 1,8 1,3 1,0 0,8 0,6 0,5 0,4 0,3 6,0 4,2 2,9 2,1 1,5 1,1 0,9 0,7 0,6 6,1 4,4 3,3 2,4 1,8 1,4 1,1 0,9 0,7 10. Ordering Information Picus® NxT and Picus® Picus® NxT Order Code Picus® Channels Volume Range Order Code (µl) Safe-Cone Filters Standard Plus Optifit Tips* (µl) SafetySpace Filter Tips* (µl) LH-745021 LH-745041 735021 735041 1 1 0,2-10 5-120 721008 721018 10 10 200 350 120 LH-745061 735061 1 10-300 721007 721017 350 300 LH-745081 735081 1 50-1000 721006 721016 1000 1000 LH-745101 735101 1 100-5000 721005 721015 5000 – LH-745111 735111 1 500-10000 721005 721015 10000 – LH-745321 735321 8 0,2-10 - - 10 10 LH-745341 735341 8 5-120 721008 721018 200 350 120 LH-745361 735361 8 10-300 721007 721017 350 300 LH-745391 735391 8 50-1200 721006 721016 1200 1200 LH-745421 735421 12 0,2-10 - - 10 10 LH-745441 735441 12 5-120 721008 721018 200 350 120 LH-745461 735461 12 10-300 721007 721017 350 300 LH-745491 735491 12 50-1200 721006 721016 1200 1200 *Low Retention Tips are available in volumes up to 1200 μl All pipettes are supplied with a universal charger (EU, UK, US, JPN, AUS, KOR, and CHN plugs). Picus® NxT Picus® 39 11. Declaration of Conformity EC Certificate of Conformity I, the undersigned, hereby declare that the Product(s) Picus® NxT Electronic Pipette conforms to the protection requirements of Council Directive 2004/108/EC, relating to Electromagnetic Compatibility, EN61326 and Safety IEC 61010-1 ed 3.0, by the application of: Technical Construction File No. 02/14 dated 04/07/2014 and Competent Body Technical Report/Certificate No. 2810231 dated 04/09/2015 and Report No.281012-1, dated 08/09/2015/2015 issued by: SGS Fimko Ltd, Särkiniementie 3, FI-00211 Helsinki, Finland, Tel: +358-9 6963 361 Picus® Electronic Pipette Conforms to the protection requirements of Council Directive 2004/108/EC, relating to Electromagnetic Compatibility, EN61326 and Safety IEC 61010-1 ed 3.0, by the application of: Technical Construction File No. 01/12 dated 26/04/2012 and Competent Body Technical Report/Certificate No. 198349 dated 25/04/2012 and Report No.198349E, dated 31/05/2012 issued by: Nemko Oy , Perkkaantie 11, FIN-02601 Espoo, Finland, Tel: +358424 545 41 Charging Stand and Charging Carouse: Conforms to the protection requirements of Council Directive 2004/108/EC, relating to Electromagnetic Compatibility, EN61326 and Safety IEC 61010-1 ed 3.0, by the application of: Technical Construction File No. 01/12 dated 26/04/2012 and Competent Body Technical Report/Certificate No. 198349 dated 25/04/2012 and Report No.198349E, dated 31/05/2012 issued by: Nemko Oy , Perkkaantie 11, FIN-02601 Espoo, Finland, Tel: +358-424 545 41 All product lines are designed and manufactured according to the Essential Requirements listed in Annex I of EC Directive 98/79/EC. This declaration is supported by following EC quality system approval certificates: ISO 9001 / ISO 13485 Certificate No.108129-2011-AQ-FIN-FINAS issued by DNV on 3 March 2015 ISO 17025 Certificate No. K041 issued by FINAS on 16 December 2011 ISO 14001 Certificate No.108133-2011-AE-FIN-FINAS issued by DNV on 3 March 2015 Date: 14 September 2015 Signed: _______________________________ _______________________________ Full Name: Title: Jussi Heiniö CEO Seppo Riikonen Director, Quality & Process Development Company: Sartorius Biohit Liquid Handling Oy, Laippatie 1, 00880 Helsinki, Finland _______________________________________________________________________________________________ Sartorius Biohit Liquid Handling Oy, Head Office: Laippatie 1, 00880 HELSINKI, FINLAND Tel: +358 9 755 951, Fax: +358 9 755 95 200, Business ID: FI2441885-8. Internet site www.sartorius.com. Contact us: [email protected]. Factory in Finland, Tietokatu 4, 87400 KAJAANI, FINLAND. 40 12. Certificate of Quality _______________________________________________________________________________________ Contact Details Sartorius Liquid Handling Oy Laippatie 1 00880 Helsinki Finland Phone +358.9.755.951 [email protected] Sartorius Lab Instruments GmbH Weender Landstrasse 94-108 37075 Goettingen Germany Phone +49.551.308.0 Fax +49.551.308.3289 www.sartorius.com The status of the information, specifications, and illustrations in this manual are subject to change. Sartorius reserves the right to make changes to the technology, features, specifications, and design of the equipment without notice. www.sartorius.com Publication No. SUL6001-e150604 • Order No. 85032-542-12 • Ver. 09 | 2015 © Sartorius Liquid Handling Oy All trademarks are Sartorius property unless otherwise stated. Patents granted or pending.