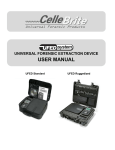
Download Cellebrite UFED Physical Pro Cell Phone Extraction Guide
Transcript
Cellebrite UFED Physical Pro Cell Phone Extraction
Guide
By
Colby Lahaie
Patrick Leahy Center for Digital Investigation
Champlain College
May 16, 2012
Table of Contents
1
2
3
4
Introduction ......................................................................................................................................... 2
1.1
Research Problem ....................................................................................................................... 2
1.2
Report Overview ......................................................................................................................... 2
Methodology and Methods ................................................................................................................. 3
2.1
Extract Phone Data ..................................................................................................................... 3
2.2
Extract SIM/USIM Data ............................................................................................................ 4
2.3
Clone SIM ID............................................................................................................................... 4
2.4
Physical Extraction ..................................................................................................................... 4
2.5
File System Extraction ................................................................................................................ 5
2.6
Extract Passwords ....................................................................................................................... 5
Licensing/Updating Cellebrite UFED Physical Pro ......................................................................... 5
3.1
Licensing Cellebrite .................................................................................................................... 6
3.2
Updating Cellebrite ..................................................................................................................... 6
Other Services and Device Tools ....................................................................................................... 6
Patrick Leahy Center for Digital Investigation (LCDI)
1
Introduction
1.1 Research Problem
Many people use their cell phones to do a variety of different things, from storing word documents, using
programs, playing games, using the GPS for travel, and other such things. Many criminal cases involve
some sort of mobile phone or device either as part of the criminal activity or containing evidence of
criminal activity. Mobile phones provide many different types of evidence from pictures, videos, text
messages, downloaded content, and location of the phone during a crime through GPS location services
or triangulation. It is beneficial to be able to prove that information was stored on a mobile and where the
phone could have been during the crime.
1.2 Report Overview
This report will specifically cover data extraction, physical extraction, file system extraction, password
extraction, and SIM cloning using the Cellebrite UFED Physical Pro.
2
Definitions
Source: The “Source” port, located on the left side of the Cellebrite, is where an investigator will connect
the mobile device in question that needs to be analyzed.
Target: The “Target” port, located on the right side of the Cellebrite, is where an investigator will
connect the device to extract the mobile phone data onto. There are three different “Target” device
options that Cellebrite will let you choose from (PC, USB Flash Drive, and SD Card).
Source Vendor: The source vendor is the manufacturing company of the phone (ex. LG CDMA).
Source Model: The source model is the phone’s model number (you can typically find this number on
the box that the device came in or you can take out the battery and look on the ID sticker on the back of
the phone).
Content Types: The content types are the different types of data that you would like to extract from the
mobile phone in question (Call logs, SMS text messages, audio, etc).
SIM/Smart Card Slot: The “SIM/Smart Card” slot, located on the front of the Cellebrite, is where an
investigator will insert a SIM/Smart card in question to extract data off of. (Note: When inserting the
card into the device, make sure the SIM card’s contacts are facing down and the clipped corner is pointing
out towards you.)
SIM: SIM stands for Subscriber Identity Module. GSM mobile devices will always have a SIM card
(CDMA devices don’t usually have SIM cards) and will typically either be on the 2G or 3G network (3G
is faster). A SIM card stores account information and sometimes phone books on an individual’s mobile
device. GSM devices must have a SIM card in order to receive service.
Target SIM ID Access Card: The Target SIM ID Access Card is a blank SIM that an investigator can
copy an original SIM to (some SIM ID Access Cards are provided in the Cellebrite kit). Once the original
SIM has been cloned to the SIM ID Access Card, an investigator can insert it into the phone and evaluate
the phone.
Version: 0.5 – Document Name: Cellebrite UFED Physical Pro Guide – Cellebrite UFED Physical Pro
Page 2 of 6
Patrick Leahy Center for Digital Investigation (LCDI)
ICCID: ICCID stands for Integrated Circuit Card ID. The ICCID is a 1-20 digit number code of a SIM
card.
IMSI: IMSI stands for International Mobile Subscriber ID. The IMSI is a different 1-15 digit number
code of a SIM card.
SPN: SPN stands for Service Provider Name. The SPN is the name of the carrier of the phone/SIM (ex.
AT&T).
GID: GID stands for Group Identifier Level. There are two GID’s of a SIM card (GID1 and GID 2).
EFS: EFS stands for Encrypted File System.
Normal EFS: Normal EFS extracts the files of the file system file by file and folder by folder. Normal
EFS can sometimes access hidden or inaccessible (locked) files, but typically it cannot.
Raw EFS: Raw EFS, whenever available, extracts the whole EFS partition and is able to access hidden or
inaccessible (locked) files.
3
Methodology and Methods
Please note: This guide will give instructions for the LG VX-5300 on the Verizon network (CDMA) and
a 3G SIM card on the AT&T Network (GSM); using a USB flash drive as the target to extract the data
onto. These methods can be used with any mobile phone supported by Cellebrite.
(Before each extraction, after you have gone through all of the steps of each option, Cellebrite will tell
you the exact USB cable to use to connect the mobile phone to the Cellebrite before the actual extraction
begins). Attach a USB Flash Drive to the “Target” USB port of Cellebrite. You can also connect the
Cellebrite to a PC or a SD card for data extraction. (Note: Make sure the mobile phone is turned on
before starting the extraction). After each extraction, there will be a folder that is labeled the same name
as the mobile phone or SIM card. It will contain an examination report that will contain a summation of
the data extracted from the phone/SIM card and a folder for each content type extracted. (Note:
depending on the phone support by the Cellebrite, some of the mobile phones will not have every one of
these options).
3.1 Extract Phone Data
The “Extract Phone Data” option will allow an investigator to extract call logs, contacts, SMS text
messages, pictures, audio, video, Calendar/Notes/Tasks, MMS – Multimedia Messages, Instant Messages
and ringtones off of the mobile phone in question. (Note: Some of these options are not offered for every
phone).
1. To extract phone data click the “OK” button on “Extract Phone Data”. Find the vendor of the mobile
phone in question and click the “OK” button. In this case I will choose “LG CDMA”. Select the
source model, in this case “VX-5300”, and click “OK”. Select the target device that you would like to
save the extracted mobile phone data to as “USB Flash Drive” (or “PC” or “SD card”) and click
Version: 0.5 – Document Name: Cellebrite UFED Physical Pro Guide – Cellebrite UFED Physical Pro
Page 3 of 6
Patrick Leahy Center for Digital Investigation (LCDI)
“OK”. Select the different content types that are needed to be extracted from the mobile phone
(“Phonebook”, “Pictures”, “Audio/Music”) and click “OK”. Click the right button to go to the next
screen. On the next screen, click the right button to start the mobile phone data extraction.
3.2 Extract SIM/USIM Data
The “Extract SIM/USIM Data” option allows an investigator to extract call logs, contacts, and SMS text
messages from the SIM/USIM card. (Note: When inserting the card into the device, make sure the SIM
card’s contacts are facing down and the clipped corner is pointing out towards you.)
1. To extract data from a SIM/USIM card, click the “OK” button on “Extract SIM/USIM Data”. Select
either “2G/3G SIM” or “Iden SIM” and click “OK”. Select “USB Flash Drive” as the target and
click “OK”. Choose which content types you would like to extract (“Call Logs”, “Phonebook”,
and/or “SMS”) by clicking “OK” on each type. Then click the right arrow to advance to the next
screen. Press the right arrow to start the extraction. A screen will appear telling you how to insert the
SIM card. Press the right arrow to continue. Another window will appear asking you to choose which
partition to read ((“USIM (3GPP)” or “SIM (GSM)”)). Click “OK”. The Cellebrite will begin
extraction.
3.3 Clone SIM ID
The “Clone SIM ID” option allows an investigator to create an exact replica of the original SIM ID and
extract phone data without allowing the cellular device to connect to the internet, which preserves the
current call and SMS history and no Faraday Bag is needed. This option also allows an investigator to
manually enter the ICCID or IMSI of the SIM, if the SIM card is missing, so that they can create a SIM
card that mimics the original SIM card. This option also allows an investigator to clone and extract data
from the original SIM card if it is locked by a PIN.
1. To clone a SIM card ID, if you have the original SIM card, click the “OK” button on “Clone SIM ID”.
Click “OK” on “Clone an existing SIM card”. Select the partition to read, “USIM (3GPP)” or “SIM
(GSM)” and click “OK”. Remove the SIM card that you want to clone and then insert the Target SIM
ID Access Card into the SIM card slot and click the right arrow to continue. The SIM ID will be
cloned.
2. To manually clone a SIM card ID, if the original SIM car is missing, click the “OK” button on “Clone
SIM ID”. Click “OK” on “Manually enter SIM data”. Type in the “ICCID” (1-20 digits) of the
SIM card (Select the different numbers with the arrow keys and click the “OK” button to enter the
number). Click “F3” to end. Type in the “IMSI” (1-15 digits) of the SIM card and click “F3” to end.
Choose the language of the SIM and click “OK”. Click “No” to skip passed advanced settings unless
you have the SPN and the GID of the SIM. Insert the Target SIM ID Access Card into the SIM card
slot and click the right arrow to continue. The SIM ID will be cloned.
3.4 Physical Extraction
The “Physical Extraction” option allows an investigator to create a physical image of the mobile
device’s flash memory or address range, allowing an investigator to bypass the phone’s operating system,
which also includes unallocated space where you will be able to find deleted content such as: deleted
SMS text messages, contacts, call logs, etc. The extracted data is outputted into a UFD file to be analyzed
Version: 0.5 – Document Name: Cellebrite UFED Physical Pro Guide – Cellebrite UFED Physical Pro
Page 4 of 6
Patrick Leahy Center for Digital Investigation (LCDI)
further with the separate UFED Physical Analyzer software, which allows you to view all of the data on
the mobile phone at the same time.
1. To extract the file system of a phone, click the “OK” button on “Physical Extraction”. Find the
vendor of the mobile phone in question, “LG CDMA”, and click the “OK” button. Select “VX-5300”
as the source model, and click “OK”. Select the target device that you would like to save the extracted
mobile phone data to as “USB Flash Drive” and click “OK”. Click the right arrow to start the
physical extraction. (Note: If the mobile phone’s battery is not fully charged, a window will appear
telling you to fully charge the mobile phone’s battery and make sure the phone is on).
3.5 File System Extraction
The “File System Extraction” option allows an investigator to extract the logical file system of the EFS
(Encrypted File System) of a phone as a directory structure; this doesn’t include unallocated space and
deleted files. It allows an investigator to gain access and recover hidden databases which cannot be
accessed by other file system acquisition tools. The extracted data is outputted into a UFD file to be
analyzed further with the separate UFED Physical Analyzer software, which allows you to view all of the
data on the mobile phone at the same time.
1. To extract the file system of a phone, click the “OK” button on “File System Extraction”. Find the
vendor of the mobile phone in question, “LG CDMA”, and click the “OK” button. Select “VX-5300”
as the source model, and click “OK”. Choose “Normal EFS” for the mode that you would like for the
file system extraction, there is also a “RAW EFS” option, by clicking “OK”. Select “USB Flash
Drive” as the target device to save the extracted data to and click “OK”. Click the right arrow to start
the extraction.
3.6 Extract Passwords
The “Extract Passwords” option allows an investigator to extract the password, or user code/pin, locking
the phone. This option also gives an investigator the ESN/MEID, the phone number, and the MIN of the
phone.
1. To extract passwords of a phone, click the “OK” button on “Extract Passwords”. Find the vendor of
the mobile phone in question, “LG CDMA”, and click the “OK” button. Select “VX-5300” as the
source model, and click “OK”. Select “USB Flash Drive” as the target device to save the extracted
data to and click “OK”. Click the right arrow to start the password extraction. Once the extraction is
done, Cellebrite will provide a preview of the user code, the ESN/MEID, the phone number, and the
MIN.
4
Licensing/Updating Cellebrite UFED Physical Pro
To find out the current software versions are on your Cellebrite UFED device click “OK” on “Services”
and then click “OK” on “Software Versions”.
1. Navigate to www.cellebrite.com, go to the bottom of the page and under “General”, click “My
Cellebrite”. Enter your username and password. Under “My Devices” select the device that you are
upgrading or licensing. To retrieve a license, click the “Retrieve Licenses” button. To renew licenses
click the “Renew Licenses” button. You will receive an email containing the licenses.
Version: 0.5 – Document Name: Cellebrite UFED Physical Pro Guide – Cellebrite UFED Physical Pro
Page 5 of 6
Patrick Leahy Center for Digital Investigation (LCDI)
2. To download software updates, click the drop down window next to “Downloads”. Choose the
updates to download and save them to a USB flash drive. Plug the USB flash drive into the USB port
on the back of the Cellebrite UFED device.
4.1 Licensing Cellebrite
1. On the Cellebrite UFED Physical Pro, click “OK’ on “Services”. Then, click “OK” on “Upgrade”.
Click “OK” on either “UFED License” and/or “PC License”. Click “OK” on “Activate License” to
activate the UFED.
4.2 Updating Cellebrite
1. On the Cellebrite UFED Physical Pro, click “OK’ on “Services”. Then, click “OK” on “Upgrade”.
Click “OK” on the desired upgrade (“Upgrade Application Now”, “Upgrade Image Now”, or
“Upgrade Settings”). Click “OK” to select “USB Flash Drive” as the upgrade source. Click “OK”
to select the upgrade file to start updating Cellebrite.
5
Other Services and Device Tools
For help with other services and device tools offered by the Cellebrite UFED Physical Pro, please review
the user manual.
Version: 0.5 – Document Name: Cellebrite UFED Physical Pro Guide – Cellebrite UFED Physical Pro
Page 6 of 6


