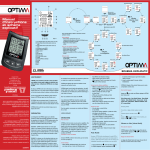
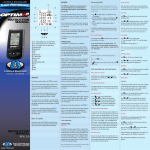
Download Owner`s Manual ()
Transcript
LARSEN & BRUSGAARD Mosevej 3 4070 Kirke Hyllinge, Denmark Phone: +45 4648 2480 Fax: +45 4648 2490 E-mail: [email protected] WARNING! FAILURE TO FOLLOW ALL WARNINGS, INSTRUCTIONS, AND REQUIRED PROCEDURES MAY INCREASE THE RISK OF SERIOUS INJURY AND DEATH. Always ensure your altimeter is adjusted to zero prior to jumping to account for any changes in barometric pressure. ALTITRACK is a trademark of Larsen & Brusgaard, Denmark. Altimeters may give erroneous readings if you are tumbling or the altimeter is in a burble (wake), such as when sit flying or sky surfing. Chest mount altimeters are more vulnerable to this problem. If you are in doubt about how this limitation affects your skydiving, consult a licensed instructor. ©2006. Larsen & Brusgaard ApS. All rights reserved. Larsen & Brusgaard operates a policy of continuous development. DO NOT use this equipment unless you are on, or have passed an approved skydiving course. Therefore, we reserve the right to make changes and improvements to any of the products described in this guide without prior notice. Use the ALTITRACK™ at your own risk. INDEX Introduction............................................................................................................................. 8 Delete Jump.......................................................................................................................... 24 Analog Display with Digital Accuracy......................................................................................... 8 Set Total Number of Jumps...................................................................................................... 25 Features............................................................................................................................... 9 Set Total Freefall Time............................................................................................................ 26 Software & functions.............................................................................................................. 10 Set Current Date.................................................................................................................... 27 Description............................................................................................................................... 11 Set Current Time.................................................................................................................... 28 Analog Face.......................................................................................................................... 11 Delete Logbook...................................................................................................................... 29 Digital Face........................................................................................................................... 12 MPH / KMH Selector............................................................................................................... 30 PC Connection....................................................................................................................... 13 Feet / Meter Selector.............................................................................................................. 31 Display................................................................................................................................. 14 TAS / SAS Selector.................................................................................................................. 32 Power ON.................................................................................................................................. 16 Canopy Log Enable / Disable.................................................................................................... 34 Road Map.................................................................................................................................. 17 Dive Type Selector.................................................................................................................. 35 Customising the ALTITRACK Settings........................................................................................... 17 * Dive Type, STu (Student).................................................................................................. 37 SETUP Selector.......................................................................................................................... 18 ** Dive Type, SLO (Slow).................................................................................................... 37 To enter the SETUP Selector..................................................................................................... 19 Celsius / Fahrenheit Selector.................................................................................................... 38 To leave the SETUP Selector..................................................................................................... 19 Beep ON / OFF....................................................................................................................... 39 Main Setup Display................................................................................................................. 20 Zeroing and Altitude Offset........................................................................................................ 40 Turn the ALTITRACK OFF.......................................................................................................... 22 Zeroing................................................................................................................................. 40 Altitude Offset....................................................................................................................... 42 TAS and SAS.............................................................................................................................. 68 Enable / Disable Backlighting..................................................................................................... 43 Specifications........................................................................................................................... 70 Jump Mode............................................................................................................................... 43 Accessories............................................................................................................................... 73 MAIN Selector........................................................................................................................... 44 Jump-Track............................................................................................................................... 73 Logbook Screen # 1. (Main information).................................................................................... 46 Warranty................................................................................................................................... 75 Logbook Screen # 2. (Playback, Jump Profile)............................................................................. 49 Logbook Screen # 3. (Date, Time and Dive Type)......................................................................... 51 Remaining Logbook Storage....................................................................................................... 52 Resetting the ALTITRACK............................................................................................................ 53 Battery Replacement................................................................................................................. 54 Battery Cover............................................................................................................................ 55 Battery Status........................................................................................................................... 55 Upgrading the ALTITRACK Firmware............................................................................................. 56 Operational hints and trouble-shooting....................................................................................... 57 APPENDIX Removing and Mounting the ALTITRACK Rubber Support............................................................... 58 Introduction Features Analog Display with Digital Accuracy At first glance, the ALTITRACK™ looks like many of the more common analog altimeters used throughout the world... but look a little closer. The ALTITRACK™ is the only sport altimeter with an analog face, but utilizes the most high tech and durable digital components for accuracy that surpasses every other mechanical sport altimeter currently available. · · · · · · · · · · · · Imagine a visual altimeter that records your jump information from exit to landing, has the ability to download jump information to a computer, has an ergonomic fit, is both shock and water resistant, has upgradeable software... and most of all... is extremely easy to use. You just found the answer you’ve been looking for...ALTITRACK™. Electronic altimeter with analog scale. First altimeter with ergonomic fit. First altimeter with 45 deg. offset scale for easy line of sight viewing when mounted on the hand/wrist. Electroluminescent backlight for night jumping. Can remain on for several hours. Smooth pointer movement...no erratic movement, no guessing. Shock and water resistant. Automatic calibration to local elevation. Scratch proof, antiglare lens made from high-impact etched glass. LCD screen for easy and intuitive operation and information review. Powerful electronic logbook packed with advanced features – easy access by simply turning over the altimeter. Operational at sub-zero temperatures. Always ON. No need to be powered OFF. Software & functions ·Storing up to 15 minutes of data of each jump with a total of 6.5 hours recording time (e.g. 200 jumps with two minute profiles). ·Records and displays jump details from exit to landing, date, jump number, exit altitude, opening altitude, freefall time and complete speed statistics for maximum and average speeds in TAS or SAS. ·Choice of readings in feet or meters, mph or kmh. ·Accumulates the total number of jumps up to 19,999 jumps. ·Compatible with the new Jump-Track 3.0 for download of jump data to a PC via USB, (Jump-Track 3.0™ and USB-Track™ sold separately). ·Upgradeable firmware (requires Jump-Track 3.0™ and USB connection). ·Replay of any jump stored in the logbook with true pointer movement and display of speeds, altitudes, etc. (great for student altitude awareness training). ·Long lasting ½ AA lithium battery. ·Velcro straps for fast and easy mounting in a variety of locations. ·A selection of optional silicone rubber platforms are available for mounting on the hand, wrist, chest or leg-strap. 10 Description 2 Analog Face 1 4 3 1. 2. 3. Right Front Button Enable / Disable backlight after performing Right Front Button ACCESS (see page 43). Left Front Button Zeroing and Altitude Offset after performing Left Front Button ACCESS (see page 40). ACCESS indication (Flashes every 15 seconds when unit is powered ON, except when backlight is ON (night jumping) 4. Low battery indicator (see page 55) 11 Digital Face 6 12 PC Connection 7 8 6. Rubber support To change the rubber support see page 58 7. Battery compartment To replace the battery, see page 54 8. LCD display (see page 14) 9. Left button 10. Mode button 11. Right button 12. Reset button (below battery cover) To perform reset, see page 53 12 5 5. Connector for PC data download and firmware upgrade (under rubber cover) (Jump-Track ver. 3.0 and USB-Track required) 9 10 11 13 Display 20 19 18 17 16 15 14 13 12 1 2 11 10 3 4 5 6 7 8 1. Jump Number in logbook Shows year when displaying date Shows hours when displaying time 14 2. 3. 4. 5. Date / Time icons Freefall and Canopy log indication Exit Altitude in logbook Freefall time in logbook Shows month when displaying date Shows minutes when displaying time 6. Dive Type icon 9 7. Jump Mode indicator Flashes when the ALTITRACK is in Jump Mode 8. Deployment altitude in logbook Displays current altitude when in “Altitude Screen” 9. Battery status 10. Feet / Meter status 11. Average / Minimum / Maximum speed in logbook 12. Speed in logbook Shows day when displaying date Shows seconds when displaying time 13. MPH / KPH status 14. True Airspeed / Skydiver´s Airspeed status 15. PC status ON when connected to a PC 16. Delete logbook icon 17. Clock icon Used when displaying current time and total freefall time 18. Total icon Used when displaying total jumps and total freefall time 19. Delete current jump icon 20. OFF icon Used when turning the ALTITRACK OFF (see page 22) 15 Power ON The ALTITRACK has been powered OFF prior to shipping from our factory. To turn the power ON, press and hold any button until the unit beeps, then release the button. The ALTITRACK runs a self-test and moves the pointer from ”6” to zero. The unit displays “Logbook screen # 1”. (Main information)” on the LCD. NOTE: If no button has been pressed within 5 minutes the ALTITRACK switches to the “Main Display” (showing Time, Temperature inside instrument and Altitude). Example Road Map Example No data stored The ALTITRACK uses very little battery power and does not need to be switched OFF. However, we recommend that you switch OFF the ALTITRACK when traveling on commercial flights, when driving in mountanious areas and when the jump season is over. To power OFF the ALTITRACK, see page 22. 16 It is recommended that you familiarize yourself with the ALTITRACK ROAD MAP which is a very helpful tool when using the ALTITRACK for the first time. Customising the ALTITRACK Settings The ALTITRACK can be customised to your personal settings. Your settings will be stored and recalled also after replacing batteries. When you first get the ALTITRACK, we recommend you to go through the SETUP Selector to customise the ALTITRACK. 17 SETUP Selector In the SETUP Selector the following options can be selected: · Main Setup display · Turn the ALTITRACK OFF · Delete jump · Set total number of jumps · Set total freefall time · Set current date · Set current time · Delete logbook · MPH / KMH · Feet / Meter · True Airspeed (TAS) / Skydiver’s Airspeed (SAS) · Canopy log Enable / Disable · Dive Type · Celsius / Fahrenheit · Beep ON / OFF 18 To enter the SETUP Selector Press and hold for 3 seconds. To leave the SETUP Selector Wait until the display times out or, press or repeatedly until returning to the Main Setup Display, then press to exit. NOTE: If no button has been pressed within 5 minutes after choosing any SETUP window, the ALTITRACK will return to the Main window (showing Time, Temperature inside instrument and Altitude). 19 Main Setup Display Main Setup Display Explanation The Main setup display accesses to the following functions: Turn the ALTITRACK OFF- Delete Jump - Set total number of jumps - Set total freefall time - Set current date - Set current time - Delete logbook - MPH / KMH - Feet / Meter - True Airspeed (TAS) / Skydiver’s Airspeed (SAS) - Canopy log Enable / Disable - Dive Type - Celsius / Fahrenheit - Beep ON / OFF Shows factory default set-up Displays all current settings Press Press to move forward in setup options. to move backward in setup options. To return to the “Main Selector”, press then press 20 or repeatedly to return to this screen, 21 Turn the ALTITRACK OFF Press to select OFF. Main Setup Display - Turn the ALTITRACK OFF - Delete Jump - Set total number of jumps - Set total freefall time - Set current date - Set current time - Delete logbook - MPH / KMH - Feet / Meter - True Airspeed (TAS) / Skydiver’s Airspeed (SAS) - Canopy log Enable / Disable - Dive Type - Celsius / Fahrenheit - Beep ON / OFF “Match Value” Counter We recommend that you switch OFF the ALTITRACK when traveling on commercial flights, when driving in mountainous areas and when the jump season is over. NOTE: When switched OFF the ALTITRACK cannot be used for jumping. Customer settings and clock are not lost when switched OFF. To power the ALTITRACK ON, see page 16. For information about “Remaining Logbook Storage”, see page 52. Remaining Logbook Storage (in minutes) Press (“OFF” flashes). Press to increase the counter to “Match Value”. Press to decrease “Match Value”. At “Match Value” press The pointer will move to the 6 o’clock position and the unit turns OFF. 22 23 Delete Jump Press again to select Delete Jump Icon Set Total Number of Jumps Press again to select TOTAL Main Setup Display - Turn the ALTITRACK OFF - Delete Jump - Set total number of jumps - Set total freefall time - Set current date - Set current time - Delete logbook - MPH / KMH - Feet / Meter - True Airspeed (TAS) / Main Setup Display - Turn the ALTITRACK OFF - Delete Jump - Set total number of jumps - Set total freefall time - Set current date - Set current time - Delete logbook - MPH / KMH - Feet / Meter - True Airspeed (TAS) / Skydiver’s Airspeed (SAS) - Canopy log Enable / Disable - Dive Type - Celsius / Fahrenheit - Beep ON / OFF Skydiver’s Airspeed (SAS) - Canopy log Enable / Disable - Dive Type - Celsius / Fahrenheit - Beep ON / OFF Example At “Match Value” press If you press Press (“Delete Jump Icon” flashes). Press Press to increase the counter to “Match Value”. to decrease “Match Value”. to delete current jump. before you select the match value, the delete jump action is cancelled. Press (“TOTAL” flashes). Press to increase the jump total. Press to decrease the jump total. Press to store the new total number of jumps and end. NOTE: Total number of jumps cannot be set to a value below the highest stored jump number. NOTE: At the same time the accumulated number of jumps and freefall time are updated if the deleted jump is the last jump logged. 24 25 Set Total Freefall Time Press again to select TOTAL FF TIME. Set Current Date Press again to select “Clock and Date” icon. Main Setup Display - Turn the ALTITRACK OFF - Delete Jump - Set total number of jumps - Set total freefall time - Set current date - Set current time - Delete logbook - MPH / KMH - Feet / Meter - True Airspeed (TAS) / Main Setup Display - Turn the ALTITRACK OFF - Delete Jump - Set total number of jumps - Set total freefall time - Set current date - Set current time - Delete logbook - MPH / KMH - Feet / Meter - True Airspeed (TAS) / Skydiver’s Airspeed (SAS) - Canopy log Enable / Disable - Dive Type - Celsius / Fahrenheit - Beep ON / OFF Skydiver’s Airspeed (SAS) - Canopy log Enable / Disable - Dive Type - Celsius / Fahrenheit - Beep ON / OFF Press Press Press Press (“TOTAL” flashes). to increase total freefall time. to decrease total freefall time. to store the new feefall time and end. Press Press Press (“Clock” icon flashes). to increase date value. to decrease date value. Press to store the new date and end. NOTE: Date format is YYYY:MM:DD. 26 27 Set Current Time Press again to select “Clock and Time” icon Delete Logbook Press again to select “Delete Logbook” icon. Main Setup Display - Turn the ALTITRACK OFF - Delete Jump - Set total number of jumps - Set total freefall time - Set current date - Set current time - Delete logbook - MPH / KMH - Feet / Meter - True Airspeed (TAS) / Main Setup Display - Turn the ALTITRACK OFF - Delete Jump - Set total number of jumps - Set total freefall time - Set current date - Set current time - Delete logbook - MPH / KMH - Feet / Meter - True Airspeed (TAS) / Skydiver’s Airspeed (SAS) - Canopy log Enable / Disable - Dive Type - Celsius / Fahrenheit - Beep ON / OFF Skydiver’s Airspeed (SAS) - Canopy log Enable / Disable - Dive Type - Celsius / Fahrenheit - Beep ON / OFF Press Press Press Press NOTE: Time format is 24 hours. (“Clock” icon flashes). to increase time value. to decrease time value. to store the new time and end. “Match Value” Counter Press (“Delete Logbook” icon flashes) Press to increase the counter to “Match Value” Press to decrease “Match Value” At “Match Value” press to delete logbook. NOTE: Caution: The accumulated number of jumps and freefall time are also erased. 28 Warning: Once is pressed at match value, there is no way to restore the information. 29 MPH / KMH Selector Press again to select “MPH/KMH” icon. Feet / Meter Selector Press again to select “FT/MTR” icon. Main Setup Display - Turn the ALTITRACK OFF - Delete Jump - Set total number of jumps - Set total freefall time - Set current date - Set current time - Delete logbook - MPH / KMH - Feet / Meter - True Airspeed (TAS) / Main Setup Display - Turn the ALTITRACK OFF - Delete Jump - Set total number of jumps - Set total freefall time - Set current date - Set current time - Delete logbook - MPH / KMH - Feet / Meter - True Airspeed (TAS) / Skydiver’s Airspeed (SAS) - Canopy log Enable / Disable - Dive Type - Celsius / Fahrenheit - Beep ON / OFF Skydiver’s Airspeed (SAS) - Canopy log Enable / Disable - Dive Type - Celsius / Fahrenheit - Beep ON / OFF Press 30 to toggle between MPH and KMH. Press to toggle between FT and MTR. NOTE: Jump data are continuously stored in mph and kmh. NOTE: Jump data are continuously stored in both feet and meters. At any time stored information may be displayed in either unit of measurement by selecting the respective mode. At any time stored information may be displayed in either unit of measurement by selecting the respective mode. 31 TAS/SAS Selector Press again to select “TAS/SAS” icon. Main Setup Display - Turn the ALTITRACK OFF - Delete Jump - Set total number of jumps - Set total freefall time - Set current date - Set current time - Delete logbook - MPH / KMH - Feet / Meter - True Airspeed (TAS) / Skydiver’s Airspeed (SAS) - Canopy log Enable / Disable - Dive Type - Celsius / Fahrenheit - Beep ON / OFF Definitions: TAS A skydiver’s True Airspeed (TAS) relative to the ground changes as a function of the altitude (air pressure) and temperature which makes it difficult to compare fall-rates. Example: A skydiver (in a fixed freefall position) who has a terminal fallrate of 62 meters/sec at 10,000 feet will have a terminal fallrate of 50 meters/sec at 3,000 feet. It will be seen that the difference in altitude (air pressure) makes it difficult to compare the fall-rates when measured using TAS. See separate section in the appendix for more information about TAS and SAS. True Airspeed (TAS) and Skydiver’s Airspeed (SAS) are two methods of calculating the airspeed of a moving/flying/falling object. True Airspeed (TAS) / Skydiver’s Airspeed (SAS) TAS is a term used in aviation: It is the speed of an object relative to the surrounding air, regardless of the altitude. SAS is a new concept developed by LARSEN & BRUSGAARD: SAS is the speed of a skydiver calculated from measurements of air pressure and temperature and converted to a fixed air pressure (875.3 mb) and a fixed temperature (+7.080C) which corresponds to 4,000 feet ASL 32 Press to toggle between TAS and SAS. NOTE: Jump data are continuously stored in both TAS and SAS. Stored information maybe displayed in either unit of measurement by selecting the respective mode. 33 Canopy Log Enable / Disable Press again to select “Freefall+Canopy” icon. Dive Type Selector Press again to select DIVE TYPE. Main Setup Display - Turn the ALTITRACK OFF - Delete Jump - Set total number of jumps - Set total freefall time - Set current date - Set current time - Delete logbook - MPH / KMH - Feet / Meter - True Airspeed (TAS) / Main Setup Display - Turn the ALTITRACK OFF - Delete Jump - Set total number of jumps - Set total freefall time - Set current date - Set current time - Delete logbook - MPH / KMH - Feet / Meter - True Airspeed (TAS) / Skydiver’s Airspeed (SAS) - Canopy log Enable / Disable - Dive Type - Celsius / Fahrenheit - Beep ON / OFF Skydiver’s Airspeed (SAS) - Canopy log Enable / Disable - Dive Type - Celsius / Fahrenheit - Beep ON / OFF Description Choice of storing freefall profile, or freefall and canopy profiles. More jumps can be stored in memory when choosing freefall profile only. Description This mode can be used to: : : Logging freefall profile Logging freefall and canopy profiles 1. Store the Dive Type to be performed on the next jump The selected Dive Type is displayed in the Logbook Screen #3 and inserted into Jump-Track if downloading jump data to a PC. 2. Change freefall sensitivity Only when Dive Type is set to Stu or SLO. See on next page. 34 Press to enable / disable canopy profile log. 35 Dive Types: 0 = (factory default) 1 = 1 (User selectable in JUMP-TRACK) 2 = 2 (User selectable in JUMP-TRACK) AFF = (Accelerated Free Fall) TAn = (Tandem) STu = (Student)* PHO = (Photo) 4 = (4-way) 8 = (8-way) FrE = (Freestyle) SLO = (Slow) ** Dive Type Selector Press Press Press Press (“DIVE TYPE” flashes). to scroll forward through the Dive Type list. to scroll backward through the Dive Type list. to store your selection before moving to another menu * Dive Type, STu (Student) In STU the descent rate parameters are changed to allow detection of short freefalls,(2 sec). ** Dive Type, SLO (Slow) In SLO the exit fallrate and deployment calculation parameters are changed to fit very slow falling types of dives, like wing suit dives, etc. 36 37 Celsius / Fahrenheit Selector Press again to select “C” icon Beep ON / OFF Press again to select “BEEP” icon. Main Setup Display - Turn the ALTITRACK OFF - Delete Jump - Set total number of jumps - Set total freefall time - Set current date - Set current time - Delete logbook - MPH / KMH - Feet / Meter - True Airspeed (TAS) / Skydiver’s Airspeed (SAS) - Canopy log Enable / Disable - Dive Type - Celsius / Fahrenheit - Beep ON / OFF Main Setup Display - Turn the ALTITRACK OFF - Delete Jump - Set total number of jumps - Set total freefall time - Set current date - Set current time - Delete logbook - MPH / KMH - Feet / Meter - True Airspeed (TAS) / Press to toggle between Celsius and Fahrenheit. 38 Skydiver’s Airspeed (SAS) - Canopy log Enable / Disable - Dive Type - Celsius / Fahrenheit - Beep ON / OFF Press to toggle between BEEP ON/OFF. 39 Zeroing and Altitude Offset Zeroing the ALTITRACK Explanation: The ALTITRACK continuously adjusts itself to the local elevation and the pointer will set itself at the zero ”0” position. If the pointer on the ALTITRACK is not on the zero ”0” position, or within one pointer’s width of it, the unit has not yet adjusted itself to the local elevation and it must be manually zeroed. To manually zero the Altitrack you must first perform ACCESS: 1. Press the Left Front Button and release quickly 2. When the green ACCESS indicator light on the front of the ALTITRACK dial Then move the pointer to “0” by using the Right Front Button or Left Front Button. The unit is now zeroed and the LCD displays “0” altitude. Note: The ALTITRACK goes out of ACCESS if no button has been pressed within 5 sec. Note: When performing zeroing the ALTITRACK enters Jump Mode (see chapter ”Jump Mode”, page 43) and remains in Jump Mode for 5 hours, if no jump is made. After 5 hours the ALTITRACK recalibrates to its current local elevation. illuminates, immediately press the Left Front Button again and keep it pressed (ACCESS indicator light goes OFF) 3. When the ACCESS indicator illuminates again, release the button immediately 40 41 Altitude Offset If the DZ landing elevation differs from that of the aircraft take off elevation, offset the ALTITRACK prior to entering the aircraft as follows: Enable / Disable Backlighting Perform Left Front Button ACCESS and move the pointer to the DZ landing elevation offset by using Right Front Button or Left Front Button. The offset altitude is displayed on the LCD. If the backlight is turned ON while the ALTITRACK is not in Jump Mode, the backlight will automatically turn OFF after 2 hours, if still not in Jump Mode. Notes: -W hen performing altitude offset, the ALTITRACK enters Jump Mode and the altitude offset will be retained for 5 hours, if no jump is made. After 5 hours the ALTITRACK recalibrates to the field elevation where it is currently located. - The altitude offset is not retained when the ALTITRACK is powered OFF. 42 Perform Right Front Button ACCESS. Press Right Front Button to switch electroluminescent backlight ON / OFF. If the backlight is turned ON while the ALTITRACK is in Jump Mode, the backlight will remain ON until the unit goes out of Jump Mode. Jump Mode Shortly after take-off the “airplane icon” on the digital display starts to flash, indicating that the unit has switched to Jump Mode. 43 MAIN Selector In the MAIN SELECTOR press repeatedly to scroll through the menu functions in this order: logbook screen # 1. (Main information) logbook screen # 2. (Playback, Jump Profile) logbook screen # 3. (Date, Time and Dive Type) Main Display (Time/date, temperature and altitude) The information includes: · Current time (24 hours’ format) or current date (yyyy:mm:dd). · Current temperature inside instrument in Celsius or Fahrenheit. · Current altitude. · Freefall and canopy log status. Press or to toggle between current time and date. Main Display (view current time/date, temperature and altitude) Example 44 45 Press Logbook Screen # 1. (Main information) To scroll through the previous jumps, press To scroll forward, press To go to highest jump #, press and hold for 3 seconds To go to lowest jump #, press and hold for 3 seconds The ALTITRACK will display three different terminal speed informations in mph and kmh Example The information includes: · Jump number · Freefall time · Speeds (scrolls automatically through AVG, MAX and MIN) · Exit altitude · Deployment altitude 46 1. Average speed, 2. Max speed, 3. Min speed All speeds are calculated from 15 sec after exit to 7 sec before deployment. If the freefall lasted between 20 and 30 sec. the display only shows: - Min speed - Max speed If the freefall lasted more then 30 sec. the display shows: - Average speed - Min speed - Max speed 47 NOTE: If the freefall lasted less than 20 sec. the display shows no speed information. Speed information is available in scroll mode, after freefall has lasted 6 sec. Press again Logbook Screen # 2. (Playback, Jump Profile) Important Notice About Speed Recordings: Experience has shown that when mounting the ALTITRACK on the hand or belly, different air pressures induced by hand or body movements may result in incorrect recordings of speeds. Example The information on the display includes: - Time after exit in seconds and ¼ seconds - Speed at time - Temperature inside instrument at exit and then updated every 30 sec. - Altitude at time - Freefall and canopy status 48 49 Press Press Press Press to playback the jump profile at ¼ speed twice to playback in real time three times to playback at 2x speed four times to playback at 5x speed Press Press Press Press to playback the jump profile in reverse at ¼ speed twice to playback in reverse in real time three times to playback in reverse at 2x speed four times to playback in reverse at 5x speed Press Example to stop playback Press AND to playback jump on analog face. Wait for pointer to go to EXIT point, then press “Left Front Button” to start playback. Press “Right Front Button” to stop playback. Note: For safety reasons, playback is disabled when in Jump Mode. 50 Press again Logbook Screen # 3. (Date, Time and Dive Type) The information on the display includes: - Jump Date - Jump Time - Dive Type To scroll through the previous jumps press To change direction, press 51 Remaining Logbook Storage Resetting the ALTITRACK Explanation The ALTITRACK flash memory can store 400 minutes of data (e.g. 200 jumps with two minute profiles or 26 jumps with 15 minute profiles) The ALTITRACK flash storage is organized in ½ minute sectors; meaning that a 20 sec. profile will fill up ½ minutes storage and a 61 second profile will fill up 1½ minutes storage. When the storage is full, the ALTITRACK automatically erases the first jump(s) stored to make sure it always has 15 minutes of storage for the next jump. Reset 1. Unscrew and remove battery cover. 2. Press a paperclip into the tiny hole next to the battery and release. The unit restarts. 3. Replace battery cover. After resetting, the battery system requires 2 minutes to calibrate itself before displaying the correct status. ”Match Value” Remaining Logbook Storage (in minutes) 52 Counter While calibrating, the battery icon toggles between full and low. Note: Reset the unit after battery replacement, when troubleshooting and when verifying software version number. 53 Battery Replacement Battery Cover 1. Unscrew and remove battery cover 2. Remove old battery 3. Install new battery noting polarity 4. Perform reset 5. Replace battery cover Use SAFT Lithium LS 14250 (3.6V) or equivalent The ALTITRACK is water resistant and the battery cover functions as an air filter, preventing water to get inside the unit. In case the ALTITRACK becomes wet, please check the air filter on the battery cover. If it is wet, dry it up using a hair dryer or replace the battery cover. Battery Status After battery replacement, the battery system requires 2 minutes to calibrate itself before showing the correct status. While calibrating, the battery icon toggles between full and low. Note: Customer settings are not lost when removing battery. However, the built-in clock may need to be reset to the current time. 54 Full capacity: Symbol shows two black bars inside the battery icon. Half capacity: Symbol shows one black bar inside the battery icon. Low capacity: Symbol shows no black bars, just an “empty” battery icon. Battery should be replaced as soon as possible. The “Low bat” flashes once every 15 sec. Caution: Do not make night jumps at sub zero temperatures when bat. shows low capacity. Empty battery: The battery icon flashes. Replace battery immediately. 55 Firmware Version Operational hints and trouble-shooting Perform reset or turn the unit OFF and then ON The version number is displayed in the upper part of the screen. The number displayed in the lower part of the screen is the scale type If the pointer moves past “0” during climb, the new scale indication will be the same as the fourth quadrant. If the unit becomes wet, see ”Battery Cover” page 55. Firmware Version Scale Type When the ALTITRACK detects a fault, an error (“ERR”) symbol and trouble shooting numbers 2 to 5 and 100 are displayed in the upper part of the screen. At the same time the unit beeps every minute. The “ERR” trouble shooting codes are as follows: ERR 2 (transducer defective), ERR 3 (transducer out of range), ERR 4 (crystal defective), ERR 5 (comm. error to flash), ERR 100 (flash defective). Remedy: perform reset. Upgrading the ALTITRACK Firmware The ALTITRACK has upgradeable firmware. To upgrade the firmware and check for new versions, please visit http://www.L-and-B.dk Note: Jump-Track ver. 3.0 and USB-Track are required to upgrade the firmware. 56 If the unit still does not function correctly even after replacing the battery and performing reset, then perform following: Press and hold while resetting. The ALTITRACK resets to factory settings and sounds three beeps. If the unit is still faulty, please contact your local dealer or LARSEN & BRUSGAARD. 57 APPENDIX Removing and Mounting the ALTITRACK Rubber Support As optional accessories, you may choose a high angle rubber support for mounting the ALTITRACK on the back of the hand or a flat rubber support for mounting the unit on a cushion. Removing the Rubber Support No tools are necessary. The rubber support is fastened on the altimeter by its elastic tension. Rubber support ALTITRACK Carefully pull the flap on the part which covers the PC connection and remove the rubber support from the altimeter. Description The ALTITRACK is delivered with a standard rubber support for mounting the unit at a slight angle on the hand. The comfortable fit allows you to watch the altimeter face without rotating the wrist. 58 59 Mounting the Rubber Support Carefully fit the closing plug into its oval guide at the bottom of the back end of the altimeter. Do not yet press the closing plug into the PC connector opening. 60 Then, guide the rubber support into the slot/guide around the circumference of the altimeter bottom. Press to fit the rubber support tightly into place. The elastic tension of the rubber support will keep the altimeter in place. 61 Arrow points to the guide which must fit into the PC connector. The thinner guide next to it fits into position below the PC connector. 62 Arrow points to the inside of the PC connector where the larger rubber guide must be fitted into place. Carefully align one end of the closing plug with the PC connector and ensure that the larger rubber guide is pressed into the PC connector and the thinner part is into position below the connector before continuing closing the plug. 63 Press the plug firmly into place by working the rubber from one end to the other, paying attention that the upper sealing (see arrow) is pressed completely into the opening. 64 A tight fit is important when pressing the closing plug into place. 65 To ensure that the closing plug is firmly in place, it must be flush with the altimeter surface. Finally, rotate the altimeter and press the rubber support in order to ensure that it follows the curvature of the unit. Note: A tight fit of the closing plug into the PC connector is very important to ensure that this part of the altimeter remains water resistant. 66 67 TAS/SAS Definitions True Airspeed (TAS) and Skydiver’s Airspeed (SAS) are two methods of calculating the airspeed of a moving/flying/falling object. TAS is a term used in aviation: It is the speed of an object relative to the surrounding air, regardless of the altitude. SAS is a new concept developed by LARSEN & BRUSGAARD: SAS is the speed of a skydiver calculated from measurements of air pressure and temperature and converted to a fixed air pressure (875.3 mb) and a fixed temperature (+7.080C) which corresponds to 4,000 feet ASL. TAS A skydiver’s True Airspeed (TAS) relative to the ground changes as a function of the altitude (air pressure) and temperature which makes it difficult to compare fall-rates. Example: A skydiver (in a fixed freefall position) who has a terminal fallrate of 62 meters/sec at 10,000 feet will have a terminal fallrate of 50 meters/sec at 3,000 feet. It will be seen that the difference in altitude (air pressure) makes it difficult to compare the fall-rates when measured using TAS. 68 SAS The SAS formula calculates airspeed (using the same metrics used with TAS) as though the complete skydive had been performed at a fixed air pressure and a fixed temperature which corresponds to 4,000 feet ASL. 4,000 feet is chosen as the reference altitude by LARSEN & BRUSGAARD since this is the average altitude at which the working time of a skydive is normally ended. Conclusion Using SAS, skydivers in any body position can express their vertical speed by a number (SAS). This number remains virtually constant regardless of altitude with little or no variance due to temperature differences and can be compared with the airspeeds of other skydivers. This means that regardless of the elevation of the DZ you are jumping at, SKYDIVER’S AIRSPEED (SAS) will be the same for the same body position. SAS is very useful when doing big formation skydiving. If using TAS, it will seem like the base is slowing down the fall rate during the entire skydive. To set TAS/SAS see page 32. 69 Specifications Mechanical Dimensions: 81 x 69 x 23 mm (3 1/8” x 2 ¾” x 3/4”) Weight: 90 g (3.9 oz) LCD area: 9.5 cm2 (1.5 inch2) Logbook Maximum display indication: Profile storage: 400 minutes Accumulated number of jumps: 19,999 Exit altitude: 39,999 feet (12,191 m) Accumulated freefall time: 999 hours Tolerances: Exit altitude: +/- 1.2% Deployment altitude: +/- 1.2% Freefall time: +/- 1 sec Speed (TAS/SAS): +/- 3 mph (+/- 5 kmh) 70 Datalogger Continued storage of freefall profiles: Last 400 minutes Maximum logging altitude: 39,999 feet (12,191 m) Maximum logging time: 15 minutes per jump Sampling rate: 4/sec. Factory default settings Temperature: Celsius Canopy Log: Enabled Feet / Meter: Feet Mph / Kmh: Mph TAS / SAS: TAS Sound ON / OFF: ON Type of Dive: 0 Date format: 2006:01:01 (year, month, date) Time format: 00:00:00 (hours, minutes, seconds) 71 Other Present altitude: +/- 10 ft Operating altitude: 0 to 40,000 ft (0 to 12,191 m) Clock: +/- 4 min/month Operating Temperature Range: -30C to +60C (-22F to +140F) Battery type: SAFT Lithium LS 14250 (3.6V) or equivalent Battery Life Time (at normal use): approximately 2 years L&B part no.: 205330 NATO Stock no. 6605-22-609-1691 Accessories Wrist Mount FLAT Platform Mount Standard Platform Mount XL Platform Mount Wrist Wrap Finger Loop Battery Battery Door & Seal Jump-Track The JUMP-TRACK™ is an advanced PC logbook. JUMP-TRACK™, when combined with data captured by the ALTITRACK™, facilitates accurate record keeping of an individual’s skydives in a user-friendly Windows 98SE/XP environment. 72 73 JUMP-TRACK™ offers jump analysis, the ability to synchronize freefall video, time placing of pictures on a freefall curve and comparison/tracking of skydives by integrating a graphical analysis tool with an easy to use, highly detailed electronic logbook. Detailed JUMP-TRACK™ information includes freefall jump profile, vertical speed profile, exit altitude, freefall time, deployment altitude, freefall speeds, accumu lated number of jumps and freefall time, and much more. The logbook has advanced search and print options and can sort many types of skydives such as Tandem, AFF, freefly, etc. The JUMP-TRACK™ / ALTITRACK™ combination is an invaluable tool for all skydivers to study their performance in the air. For more information, please visit, http://www.L-and-B.dk/jumptrack3.html 74 Warranty The following conditions apply to the ALTITRACK™ warranty: If within 12 months of the purchase of ALTITRACK™ a defect or damage is identified by faulty manufacture, LARSEN & BRUSGAARD will repair the unit at no cost to the end user. To make a claim under this warranty, send the unit to an authorized dealer or directly to LARSEN & BRUSGAARD together with the dated purchase invoice or receipt. The warranty becomes void if damage is caused by external circumstances or if the unit has been serviced or repaired by third parties unauthorized by our national agents or LARSEN & BRUSGAARD. All further claims, especially for defects after skydiving accidents, are excluded. LARSEN & BRUSGAARD has no obligation to honor any extension of warranty granted by any national agent. Waiver of Liability The buyer and user of the ALTITRACK™ indemnify the manufacturer and vendor from any liability for damage incurred before, during and after skydiving with the instrument. 75 76