1
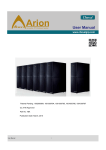
Arion 3001-4
Router and Firewall
User’s Manual
Rev 1.0
Mar 2004
Table of Contents
1.
INTRODUCTION................................................................................................................................... 1
1.1.
2.
PRODUCT OVERVIEW ......................................................................................................................... 1
HARDWARE DESCRIPTION.............................................................................................................. 2
2.1.
FRONT PANEL..................................................................................................................................... 2
Arion 3001-4 – Front Panel ...................................................................................................................... 2
2.2.
REAR PANEL ...................................................................................................................................... 3
Arion 3001-4 Rear Panel ........................................................................................................................ 3
3.
DEFAULT VALUES............................................................................................................................... 4
3.1.
3.2.
3.3.
PASSWORD ......................................................................................................................................... 4
DEFAULT NETWORK SETUP ................................................................................................................ 4
OTHER DEFAULT SETUP ..................................................................................................................... 4
4.
CONFIGURING YOUR ARION 3001-4 – LOGIN............................................................................. 5
5.
CONFIGURING YOUR ARION 3001-4 – GENERAL SETUP ........................................................ 6
5.1.
SYSTEM .............................................................................................................................................. 6
5.1.1.
Time Zone.................................................................................................................................. 6
5.1.2.
Password Settings ..................................................................................................................... 6
5.1.3.
Remote Management ................................................................................................................. 7
5.2.
WAN SETTINGS ................................................................................................................................. 8
5.2.1.
Dynamic IP................................................................................................................................ 8
5.2.2.
PPPoE ....................................................................................................................................... 8
5.2.3.
Static IP ..................................................................................................................................... 9
5.2.4.
DNS ......................................................................................................................................... 10
5.3.
LAN SETTINGS ................................................................................................................................ 11
5.4.
NAT SETTINGS ................................................................................................................................ 12
5.4.1.
Address Mapping..................................................................................................................... 12
5.4.2.
Virtual Server .......................................................................................................................... 12
5.4.3.
Special Application ................................................................................................................. 13
5.5.
FIREWALL ........................................................................................................................................ 15
5.5.1.
Access Control......................................................................................................................... 15
5.5.2.
URL Blocking .......................................................................................................................... 17
5.5.3.
Schedule Rule .......................................................................................................................... 18
5.5.4.
Intrusion Detection.................................................................................................................. 19
5.5.5.
DMZ ........................................................................................................................................ 21
6.
UPNP ...................................................................................................................................................... 22
7.
DDNS ...................................................................................................................................................... 23
8.
TOOLS ................................................................................................................................................... 24
8.1.
8.2.
8.3.
9.
CONFIGURATION TOOLS ................................................................................................................... 24
FIRMWARE UPGRADE ....................................................................................................................... 24
RESET ............................................................................................................................................... 24
STATUS ................................................................................................................................................. 26
9.1.
9.2.
INTERNET CONNECTION ................................................................................................................... 26
DEVICE STATUS ............................................................................................................................... 27
9.3.
9.4.
9.5.
SECURITY LOG ................................................................................................................................. 27
DHCP CLIENT LOG .......................................................................................................................... 28
VOIP STATUS ................................................................................................................................... 28
GLOSSARY ................................................................................................................................................... 29
1. Introduction
The Arion 3001-4 is an Integrated Access Device that combines a Voice Gateway and a
Broadband Router in a single device. The Broadband router is designed to share a single
Internet Access among two or more PCs in a household and to provide Internet security for
the PCs connected to its LAN ports. The Arion 3001-4 also provides voice over IP (VoIP)
functionality that enables you to make voice calls over the Internet. The Arion 3001-4’s
simple installation and setup can be used by a wide range of people, while providing
networking professionals with easy to configure advanced features. Please read this
Router/Firewall User Guide for advanced features of this product.
With Arion 3001-4, ATIU can deliver Voice services over high-speed internet access as well
as an interface unit that will allow you to connect multiple PCs or other IP devices in a cost
effective manner.
1.1. Product Overview
The Arion 3001-4 is an Integrated Access Devices (IAD) equipped with one standard analog
telephone port, one WAN Fast Ethernet 10/100BaseTX port and four LAN Fast Ethernet
10/100BaseTX ports.
By transporting voice signal over the Internet connection, the Arion 3001-4 offers the
residential customer a second line without the need for the second subscriber copper loop. It
also has the ability to route data between multiple user PCs on the LAN side to/from the
Internet. The Arion 3001-4 is H.323 v2 compliant for Voice over IP (VoIP) and it is
compatible with Cable and ADSL Broadband Internet Service with built-in DHCP and PPPoE
client.
The services offered to the internal network are:
• DHCP Server,
• Network Address Translation (NAT),
• Network Address Port Translation (NAPT) and
• IPSEC pass through.
The Arion 3001-4 has the ability to prioritize voice over data through IP Layer QoS, Ethernet
Layer CoS (Classes of Service) and VLAN Tagging. It also supports voice compression
(G.723.1 and G.729 AB voice CODECs), echo cancellation, dynamic jitter buffer, silence
suppression and comfort noise generation.
The Arion 3001-4 also has 8 LEDs on the front panel that provide status indication and can be
for troubleshooting purposes. See section 2.1
Arion 3001-4 Router and Firewall User’s Guide
2. Hardware Description
2.1. Front Panel
Arion 3001-4 – Front Panel
POWER MODEM
OK
LAN1
LAN2 LAN3 LAN4
PHONE
Figure 2-1
Function
Power
WAN
Internet Link
Label
POWER
MODEM
LAN2
LAN3
LAN4
Phone
Meaning
Light (Green)
Power on, normal operation
Blink
Firmware loading
Off
Power off or failure
WAN Light
(Green)
Green Link /Active : WAN Connection
is OK
WAN Blink
(Green)
Link /Active : data transmitting or
receiving
Off
Link /Active : connection is not
established
Light (Green)
Internet connection is OK
Off
Internet connection is failed
Light (Green)
Link /Active : Connection is OK
Blink
Link /Active : data transmitting or
receiving
Off
Link /Active : connection is not
established
Light
(Orange)
Off hook
Blink(Ring)
Ring for Incoming call (follow the
ring pattern)
Blink(Alert)
Gatekeeper register failed(One
second on, One second off)
Off
On hook
OK
LAN1
LAN
Display Color
PHONE
Table 2-1
2
Arion 3001-4 Router and Firewall User’s Guide
2.2. Rear Panel
Arion 3001-4 Rear Panel
Figure 2-2
Item
Connector
1
Phone
2
LAN (1-4)
3
MODEM
4
5
RESET
(Reboot)
12V DC
Function
Connect to Phone set。
4 port (10/100Mbps) RJ-45 connector,
connect to PC or local switch/hub.
Connect to Cable or ADSL Modem 。
Reset button.
Press for one second to
reset the device or press for 5 seconds to
reset to the factory default.
Power connector.
Table 2-2
3
Arion 3001-4 Router and Firewall User’s Guide
3. Default Values
3.1. Password
The default user name/password is user/user. For security and management reasons, we
recommend that you set up a new password after you first login to the system. Once you
have changed the password, it is important that you write it down and keep this
information in a safe location. If you happen to forget the user name / password, you can
push and hold the reset button for at least 5 seconds, until all of the LEDs flash; your
Arion 3001-4 now be reset to factory default.
3.2. Default Network setup
LAN Setup
IP
Address
Subnet
Mask
DHCP
server
DHCP IP
range
WAN Setup
192.168.1.1
DHCP Client enabled
255.255.255.0
Enable
100
IP
addresses
from
192.168.1.100 to 192.168.1.199
Table 3-1
3.3. Other Default setup
Time Zone
Firewall
UPnP
DDNS
Eastern Standard Time
Off
Off
Off
Table 3-2
4
Arion 3001-4 Router and Firewall User’s Guide
4. Configuring Your Arion 3001-4 – Login
Now that you have successfully connected your computer to the Internet and activated your
voice service, you will need to login into the Arion 3001-4 to configure it for your LAN.
1.
Open your Web browser (i.e., Internet Explorer or Netscape Navigator).
2.
In the “Address” field type “http://192.168.1.1” and press <ENTER>.
Figure 4-1
3.
The Arion 3001-4 login screen will appear. The default User name/Password setting
is user/user. For security reasons, you should assign a new password as soon as
possible. Note. The password login in case sensitive.
Figure 4-2
4.
Once you have logged in successfully, the first page will appear as below:
Figure 4-3
5
Arion 3001-4 Router and Firewall User’s Guide
5. Configuring Your Arion 3001-4 – General Setup
5.1. System
5.1.1. Time Zone
Set the proper time zone and the configure time server for the Arion 3001-4. The default time
zone is “Eastern Standard Time, Toronto, Canada”.
When you enable the Automatic Time Server Maintenance option you will need to configure
two timeservers, see example provided below.
Figure 5-1
5.1.2. Password Settings
Set the password of the user. The Idle Time Out value is used for Arion 3001-4 to log out
automatically when no access to the web after this timeout value. The default Idle Time out
value is 10 minutes.
Figure 5-2
6
Arion 3001-4 Router and Firewall User’s Guide
5.1.3. Remote Management
The "Remote Management" feature can restrict the access to your Arion 3001-4 from the
Internet. Unless you have a need to access Arion 3001-4 from outside your home, this feature
should be disabled. You can enable it from a specific IP address or from any outside IP
address. The IP setting of "0.0.0.0" allows any person from any IP address to login into the
device. When the 'Enabled" is not checked, the remote login feature will be disabled. The
default setting is that Enable is not checked.
Figure 5-3
The remote user can login using WAN IP. The default port number is 8080. For example, if
your public IP address is 211.20.16.1, then you would type the following string into your
browser to remotely access your Arion 3001-4.
Figure 5-4
7
Arion 3001-4 Router and Firewall User’s Guide
5.2. WAN Settings
The Arion 3001-4 supports 3 types of WAN connection – Dynamic IP (DHCP Client), PPPoE,
and Static IP.
5.2.1. Dynamic IP
This mode allows the Arion 3001-4 to enable its DHCP client to get an IP address from your
high-speed service provider. The Host Name is optional, but may be required by some highspeed Service Providers. The default MAC address is set to the WAN’s physical interface on
the Arion 3001-4. If required by your high-speed Service Provider, you can use the <Clone
MAC Address> button to copy the MAC address of the Network Interface Card installed in
your PC and replace the WAN MAC address with this MAC address. If necessary, you can
reach restore the MAC address to the factory setting <See Section 8.1>.
Figure 5-5
5.2.2. PPPoE
This mode allows the Arion 3001-4 to act as a PPPoE client. You will be required to enter the
PPPoE user name and password originally provided by your high-speed Service Provider. The
Service Name is normally optional; some high-speed service providers may require it. Enter a
Maximum Idle Time (in seconds) to define a maximum period of time for which the Internet
connection is maintained during periods of inactivity. If the connection is inactive for longer
than the Maximum Idle Time, then the connection to your high-speed provider will be
dropped. You can enable the Auto-reconnect option to automatically re-establish the
connection as soon as you attempt to access the Internet. The default is Maximum Idle Time
of 0 (Zero) and Auto Reconnect is enabled. This setting is required to enable incoming VoIP
calls to complete.
8
Arion 3001-4 Router and Firewall User’s Guide
Figure 5-6
5.2.3. Static IP
If your Service Provider has assigned a fixed IP address, enter the assigned IP address, subnet
mask and the gateway address provided.
Figure 5-7
9
Arion 3001-4 Router and Firewall User’s Guide
5.2.4. DNS
Most service providers provide a DNS server via DHCP or PPPoE for speed and
convenience. If you have a static IP address, or if there is a DNS server that you would rather
use, you need to specify the primary and secondary IP address here. When primary DNS does
not work, system will automatically use secondary DNS.
Figure 5-8
10
Arion 3001-4 Router and Firewall User’s Guide
5.3. LAN Settings
You can enable DHCP to dynamically allocate IP addresses to each of your PCs connected to
the Arion 3001-4. When DHCP server is enabled, you need to enter the IP address range for
the local hosts. The default range is 192.168.1.100 through 192.168.1.199.
Figure 5-9
The domain name field is empty in most case. In some special ISP need input domain name
field.
11
Arion 3001-4 Router and Firewall User’s Guide
5.4. NAT Settings
5.4.1. Address Mapping
Arion 3001-4 supports multiple public IP addresses. It allows IP addresses used in a private
local network to be mapped to one or more addresses used in the public, global Internet. This
page allows you to enter up to 10 address mappings between a set of private IP addresses and
one global IP address. After these settings have been completed, the Arion 3001-4 will map
the set of private IP addresses to the global IP address when accessing to the Internet. This
could be useful in the gaming and some particular multimedia applications; however most
users have only one public address and will use only the first mapping on this page.
Figure 5-10
5.4.2. Virtual Server
Arion 3001-4 is a NAT router. All the IP addresses coming in and going out to Arion 3001-4
can be converted between public and private IP addresses. You can configure the Arion
3001-4 as a virtual server so that remote users accessing services such as the Web or FTP at
your local sites via public IP address can be automatically redirected to local servers
configured with private IP address. In other words, depending on the requested service
(TCP/UDP), the Arion 3001-4 redirects the external service request to the appropriate server.
After entering parameters for some application, you must press “Add” button to confirm this
setting. In the other way, you also can press “Clean” button to clean all fields and ready for
another parameter retrying.
Figure 5-11
12
Arion 3001-4 Router and Firewall User’s Guide
Some of the popular applications and protocol/port numbers mapping are defined below:
Application
Protocol Port Number
Telnet
TCP
23
FTP
TCP
21
SMTP
TCP
25
POP3
TCP
110
H.323
TCP
1720
SNMP
UCP
161
SNMP Trap
UDP
162
HTTP
TCP
80
PPTP
TCP
1723
PC Anywhere TCP
5631
PC Anywhere UDP
5632
Table 5-1
5.4.3. Special Application
Some applications require multiple connections, such as Internet gaming and video
conferencing. These applications cannot work when Network Address Translation (NAT) is
enabled. If you need to run applications that require multiple connections, specify the port
normally associated with an application in the "Trigger Port" field, select the protocol type as
TCP or UDP, then enter the public ports associated with the trigger port to open them for
inbound traffic.
Figure 5-12
13
Arion 3001-4 Router and Firewall User’s Guide
Some of the applications are listed below:
Example:
ID
Trigger Port Trigger Type Public Port Public Type Comment
1
28800
UDP
2300-2400,
UDP
47624,
28800
MSN Game Zone
2
28800
UDP
2300-2400,
47624,
TCP
28800
MSN Game Zone
3
6112
UDP
6112
Battle.net
UDP
Table 5-2
14
Arion 3001-4 Router and Firewall User’s Guide
5.5. Firewall
The Arion 3001-4 provides extensive firewall protection by restricting connection parameters
to limit the risk of hacker attack, by defending against a wide array of common attacks. When
the firewall is enabled, extra checking will be performed for each of the packets passing
through the device. However, this extra checking will also affect the performance of the
device, so it should be used on an as-needed basis. To enable the firewall feature, select
<Enable> from firewall page. By default, Firewall is not selected.
Figure 5-13
5.5.1. Access Control
Access Control allows you to block specific PCs on your network from gaining access to the
Internet. You can block PCs based on either the IP address or the MAC address. When the
firewall is enabled, Access Control will be enabled automatically. You can disable filtering
feature manually. When Access Control is enabled, all the packets will be allowed by default
and you can use the <Normal Filtering Table> and the <MAC Filtering Table> to filter out
disallowed traffic.
Figure 5-14
Normal Filtering Table
You can press <Add PC> to edit packet filtering rules.
Figure 5-15
15
Arion 3001-4 Router and Firewall User’s Guide
When you select <Add PC>, the following <Access Control Add PC> page will show up:
Figure 5-16
This page allows you to define service limitations of a client PC, including IP address, service
type and scheduling rule criteria. For URL blocking function, you will need to configure the
URL address first in "URL Blocking Site" page. For scheduling function, you will also need
to configure schedule rule first in the "Schedule Rule" page.
As shown above, you will need to enter the Client PC Description (e.g. NoteBook1), and it’s
associated IP address (192.168.1.100), then select the service name <WWW> and <E-mail
Sending>, and then press <OK>. The following page will then be displayed. In the example
below, the PC with IP address 192.168.1.100 will not be able to use WWW or send e-mail.
The Arion 3001-4 supports up to 32 filtering rules.
Figure 5-17
16
Arion 3001-4 Router and Firewall User’s Guide
MAC Filtering Table
You can enter up to 32 MAC addresses. The PCs with these MAC addresses will not be
permitted to access Internet.
Figure 5-18
5.5.2. URL Blocking
You can block access to certain Web sites from a particular PC by entering either a full URL
address or just a keyword of the Web site.
To specify the particular PC, go back to the "Access Control" page and check the box for
"Http with URL Blocking" in the "Normal Filtering Table".
Figure 5-19
As shown above, when the string ”chat” is entered into the URL Blocking page, the PCs
connected to the Arion 3001-4 will not be able to access any web-site that contains “chat” in
its URL address.
17
Arion 3001-4 Router and Firewall User’s Guide
5.5.3. Schedule Rule
This page allows you to define a schedule rule for use in <Access Control> page. If you press
the <Add Schedule Rule>, you will be required to enter a start time and an End time. This
defined schedule rule will be used under <Access Control Add PC>.
Figure 5-20
As shown above, for the schedule rule called “Office Hour”, the active time period is Monday
to Friday, 9:00 am to 5:00 pm. After pressing <OK>, the following page will show up:
Figure 5-201
Then when we go to <Access Control> page, select <Add PC>, in the bottom of the page
<Access Control Add PC>, the scheduling rule will show “Office Hour”, as shown below:
Figure 5-212
18
Arion 3001-4 Router and Firewall User’s Guide
If we setup the PC of finance department in our company (IP address 192.168.1.100 to
192.168.1.130) can not access the Internet during office hours, then in <Access Control> page,
we will see the following page:
Figure 5-223
5.5.4. Intrusion Detection
When the SPI (Stateful Packet Inspection) firewall feature is enabled, specific packets can be
blocked. Stateful Packet Inspection (SPI) allows full support of different attack types that are
using dynamic port numbers.
This product’s firewall can block common hacker attacks, including:
• IP Spoofing,
• IP with zero length,
• IP With Option,
• Too Short ICMP,
• Too Short TCP,
• Too Short UDP,
• Tiny Fragment Attack,
• NewTear Attack,
• Smurf Attack,
• Land Attack,
• Ping of Death,
• UDP Loop Attack,
• Tear Drop Attack,
• Snork Attack,
• Winnuke Attack,
• Bonk Attack,
• ASCEND Probe Attack,
• Boink Attack,
• SYN Drop Attack,
• Empty Fragment Attack,
• Oshare Attack,
• TCP null scan,
• TCP Xmas scan,
• RIP defect,
• ICMP defect,
• TCP SYN flood,
• UDP flood and Fragmentation Flood.
19
Arion 3001-4 Router and Firewall User’s Guide
Intrusion Detection Features:
SPI
and
Anti-DoS
Firewall Protection
RIP Defect
Discard
PING
from
WAN
Activate SPI and Anti-DoS protection
Reject the RIP packets from WAN
Reject all the PING request to the WAN
port
Table 5-3
Figure 5-234
When a hacker tries to attack, the Arion 3001-4 can send e-mail alert to the specified person.
You will be required to enter the related e-mail information, such as e-mail address and SMTP
server. Some e-mail service providers require you to also enter POP3 information when trying
to send e-mail. In this case, you will have to enter the POP3 server, user name and password.
Figure 5-245
20
Arion 3001-4 Router and Firewall User’s Guide
5.5.5. DMZ
A DeMilitarized Zone (DMZ) can expose a selected PC to the Internet, while still keeping other
PCs protected. This feature could be required if an application running on that PC needs direct
access from the Internet, and/or if the ports that need to be opened for inbound requests cannot
be predicted.
Figure 5-256
21
Arion 3001-4 Router and Firewall User’s Guide
6. UPnP
The Universal Plug and Play architecture offers pervasive peer-to-peer network connectivity
of PCs of all types, intelligent appliances, and wireless devices. UPnP enables seamless
connectivity between the router and various networked devices at home.
For example, if user wants to use Windows XP Messenger application, this feature should be
enabled.
Figure 6-1
22
Arion 3001-4 Router and Firewall User’s Guide
7. DDNS
Dynamic DNS provides users on the Internet a method to tie their domain name to a
temporary IP address automatically, by changing the DDNS records every time your IP
address changes.
Two DDNS providers are supported, TZO.com and DynDNS.org. You must apply for DDNS
service to get a Key from the DDNS provider and then enable the DDNS service using the
following page.
Figure 7-1
23
Arion 3001-4 Router and Firewall User’s Guide
8. Tools
The tools feature provided with the Arion 3001-4 includes configuration tools – save /restore
configuration and restore to factory defaults, system log, firmware upgrade and reset. The
main page is shown below.
8.1. Configuration Tools
The configuration tools includes backup, restore and restore to factory defaults. The
“Backup” tool saves the Arion 3001-4’s current configuration to a file named
“backup_config.bin” on your PC. You can then use “Restore” tool to restore the saved
configuration to the Arion 3001-4. The “Reset to Factory Defaults” tool will force the
configuration of Arion 3001-4 back to the original factory setting and perform a power reset.
Figure 8-1
8.2. Firmware Upgrade
The firmware upgrade tool allows you to upgrade the Arion 3001-4 system’s firmware. You
need to download the image file to your local PC first, and select the target file to upload.
The Arion 3001-4 has 3 items target, one for core firmware, one for the user interface, and
another one is Voice file. If you have more then one item to be upgraded, please upgrade User
Interface first
Figure 8-2
8.3. Reset
In the event that the system stops responding correctly or in some way stops functioning, you
can perform a reset. Your settings will not be changed. To perform the reset, click on the
24
Arion 3001-4 Router and Firewall User’s Guide
APPLY button below. You will be asked to confirm your decision. The reset will be complete
when the power light stops blinking
25
Arion 3001-4 Router and Firewall User’s Guide
9. Status
These status pages display the status of the system, including the connection status of the
interfaces, firmware and hardware version numbers, system log and DHCP client information.
The Status and Information page below, shows MAC addresses, and hardware/software
versions.
Figure 9-1
9.1. Internet Connection
The Internet Connection page displays the status of the Internet Connection, including the
connection status of the Internet interfaces, WAN port IP, Subnet Mask, Gateway IP and
Primary/ Secondary DNS IP.
Figure 9-2
When WAN port setting is dynamic IP, user can use <Disconnect> and <Connect> to release
and update WAN port IP
26
Arion 3001-4 Router and Firewall User’s Guide
9.2. Device Status
The Device Status page displays the current setting of this device, including IP address,
Subnet mask, DHCP server, Firewall and UPnP.
Figure 9-3
9.3. Security Log
This page provides the system security log record when the Arion 3001-4 boots, including
user login/logout, hacker attack, PPPoE connection, NTP connection, Get IP from DHCP,
etc…
These records can be saved to host PC. User also can clear all security records in Security log
window and press <Refresh> to update current security records.
Figure 9-4
27
Arion 3001-4 Router and Firewall User’s Guide
9.4. DHCP Client Log
The DHCP Client Log page displays the IP addresses assigned to PCs in your network. You
can press the <Refresh> button to update current IP allocation records.
Figure 9-5
9.5. VoIP Status
This page displays the gateway status, including Port type, port Status, time information of
each call and Destination. This page also displays gatekeeper status. You must make sure the
gatekeeper is registered.
Figure 9-6
You can press the <Refresh> button to update the current VoIP status.
28
Arion 3001-4 Router and Firewall User’s Guide
Glossary
ITSP: Short for Internet Telephony Service Provider, which is a general term for the
organization which provides the Internet Telephony service to the general public.
POTS: Short for Plain Old Telephone Service, which refers to the standard telephone service
that most homes use. In contrast, telephone services based on high-speed, digital
communications lines, such as ISDN and FDDI, are not POTS. The main distinctions
between POTS and non-POTS services are speed and bandwidth. POTS is generally
restricted to about 52 Kbps (52,000 bits per second).
PSTN: The POTS network is also called the Public Switched Telephone Network (PSTN).
PBX: Short for Private Branch eXchange, a private telephone network used within an
enterprise. Users of the PBX share a certain number of outside lines for making
telephone calls external to the PBX.
FXO: Short for Foreign Exchange Office interface, which is used to connect to the central
office of the PSTN to receive signals from PSTN.
FXS: Short for Foreign Exchange Station interface, which is used to connect to the telephone
set or PBX, it provides ringing back, dial signal to the telephone devices.
H.323: H.323 is an International Telecommunication Union (ITU-T) standard that describes
packet-based video, audio, and data conferencing. H.323 is an umbrella standard that
describes the architecture of the conferencing system and refers to a set of other
standards (H.245, H.225.0, and Q.931) to describe its actual protocol.
Gatekeeper: The gatekeeper maintains a registry of devices in the multimedia network.
The devices register with the gatekeeper at startup and request admission to a call
from the gatekeeper. The gatekeeper is an H.323 entity on the LAN that provides
address translation and control access to the LAN for H.323 terminals and gateways.
The gatekeeper may provide other services to the H.323 terminals and gateways, such
as bandwidth management and locating gateways.
H.245: H.323 is an International Telecommunication Union (ITU-T) standard that defines the
control functions of the network multimedia communication, such as the agreement of
the mutual communication capability, the establishment of the voice and video
channel, etc. It could be used in H.323 and H.324.
E.164: Phone number: The international standard telephone number. It starts with the
country code, area code and local phone number.
29