1
Users manual
Ht40AL
User - friendly programmable controller
Ht40AL, 08/07, soft 4.41/rev. 1
1
1 Important
Ht40AL is a temperature / process controller intended for the built-in to panel. The format of controller is 96 x 96 mm
(1/4 DIN).
The controller enables simple controlling via program … 2 x ramp and soak or controlling to stp value.
It is equipped with 1 input (thermal or process) and 3 outputs (control, auxiliary and alarm).
The controller is easy to run and operate. The parameters set can be locked and thus preventing from deleting by a user.
User manual for the controller Ht40AL is divided into the particular chapters. When you install and put it into operation we
recommend proceeding in the following way:
If you are a final user, the controller is in the default setting by the suplier
If you are a final user, you will get the device in the customized setting and you can view and change only the parameters
that you need for your own work on the controller.
If you are a new user of the device, focus on the following chapters:
•
•
•
Basic terms, here it is explained the key functions, displays, and so on….
Basic mode, the description of basic mode of controller.
Controlling of stp value, program, all you need to know when you start programming.
If you are carring out the complete installation and setting of the controller
In this case you proceed in accordance with the following chapters:
• Installation, in this chapter it is described how to build in a controller into panel.
• Principals of installation, we recommend you to observe the guidelines described in this chapter.
• Wiring, the description for wiring of the controller.
• Putting into operation, at first power-up you enter the initial menu in which you can configure and set the most
important parameters of controller.
According to the procedure you will perform installation, wiring and basic setting of controller. You can find out more
details on the scope of the controller and its operation in the following chapters.
For the users who have the controller completely set, we recommend to perform the setting of all the parameters in service
level, menu ConF. Initial password for the entry to service level is set to 995.
2
2 Basic terms
To avoid problems in operation of device the user should be able to manage its operation, setting parameters, ...
2.1 Operation and description of controller
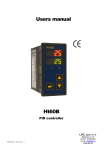
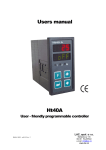
On the front panel board you can see 2 displays, 6 control lights (LED diodes) for indicating a status of outputs and program.
The device is set and configured via 5 key-buttons.
Function of indicators
Upper display:
• Indicates procees value in
Basic mode
• When you set, it shows
parameter value
LED diode „1“
Indicates the state of output 1
LED diode „2“
Indicates the state of output 2
LED diode „Al“
Lower display:
• Indicates stp value in
Basic mode.
• When you set, it shows the
type of parameter
Indicates the state of alarm output
LED Diodes „rate“, „sp“, „time“
Indicate that the program runs.
Function of key-buttons
The setting of parameters of the controller is performed via key-board. The function of each key-button is as follows:
•
, key for setting and viewing of parameters of user, operation, configuration and user level. By pressing this key you
confirm the change in configured parameter and the controller comes to another parameter.
•
, key for decreasing a value of parameter. The value of parameter is either the figure or abbreviation composed of
maximum 4 letters.
•
•
•
•
, key for increasing a value of parameter.
PROG
, the key intended for editing and reading a program. When you press this key, the actual parameter of program is
written and the controller comes to the following parameter.
START
STOP
, the key intended for the starting and the ending of a program. By double press of the key you start / end a program.
, the contemporary pressing of both arrow-keys. Short pressing returns the controller to basic mode, see page 5.
Long pressing allows to get to the higher levels of menu (operational, configuration, service).
3
2.2 Information and error messages
Information and error messages are indicated only in basic mode, see page 5.
Information messages, upper display
•
----
… error of input sensor or input is not set.
Information messages, lower display
•
•
•
•
•
ProG
tdEL
Gsd
Aut1
Aut2
… the indication of the program running.
… indication of time-delayed start of program.
… GSD function, process value is beyond the defined soak band.
… starting autotunning of PID set 1, Pb1A ,It1A ,dE1A see page 11.
… starting autotunning of PID set 2, Pb1b ,It1b ,dE1b see page 11.
Error messages, lower display
If there is an error message indicated, then the control outputs are switched OFF, the signal output is switched OFF, the
alarm output is activated.
• Err0 … error in FLASH memory of program. Switch the controller OFF and ON again. If the problem persists,
contact your supplier.
• Err1 … error in EEPROM memory for configuration and operation parameters. The troubleshooting error can be
made by restarting of all parameters in service level. After restart it is necessary to set up all parameters again. This can
be done only by an experienced user. If the trouble persists, contact your supplier.
• Err3 … error in A/D converter. It can be caused by electrical impulse at input, too low temperature and excessive
humidity, … . Switch the controller OFF and ON again. If the problem persists, contact your supplier.
2.3 Overview of levels, menus
For the right function of the controller it is necessary to set up its parameters properly. For better understanding the
parameters are sorted out to groups (levels and menus). Level is superior to menu, menu is a part of level (menu out1).
The structure of sorting shows the following picture.
Scrolling through the parameters for user
If a program does not run, you can scroll the parameters of program. When program
runs and you press the key , time to the end of program is shown.
PROG
START
STOP
Editing / reading of program
Menu is intended for editing / reading a program.
Start / end of program
By double pressing of the key you start / end the program
Double press
for 3 seconds
oPEr
LEVEL
Choose requisite
level by arrowkeys.
x
PASS
ConF
LEVEL
The level where the operation parameters find themselves.
x
Configuration level
PASS
SErV
LEVEL
Is intended for the configuration of the controller.We recommend to secure this
level with password.
x
PASS
If there is no password set for the
particular level, parameter PASS will
not apear.
4
Operation level
Service level
Is intended for service level.We recommend to secure this level with password.
3 Basic mode
The controller is in Basic mode when powered up (the initial set-up must be performed, see page 26 ).
On upper display process value is shown, on lower display there can be stp value or heading
oFF
On upper display process
value is shown
When in control stp value is
shovn or if the output is
OFF it shows
oFF
•
•
•
•
•
If there is a heading
oFF on lower display, the controller is in basic mode, stp value is turned OFF, the control output
is switched OFF.
If there is a figure on lower display, heading ProG does not blink, the controller is in basic mode and controls to stp
value SP1.
If there is a figure on lower display, heading ProG blinks, the controller is in basic mode and runs acc. to the requested
program.
If there is any other heading on lower display, the controller is not in basic mode, parameters are set or viewed.
Information and error messages are indicated only in basic mode, see page 4
Return to basic mode
•
•
To return to basic mode press shortly the keys
.
If there is no key pressed for 60 seconds, the controller itself returns to basic mode.
5
4 Controlling of stp value, program
The controller is designed as simply programmable. It enables controlling to stp value or controlling by the simple program
(ramp and soak).
4.1 Controlling of stp value
When the controller maintains stp value, lower display shows stp value and upper display shows process value. Setting of stp
value can be changed with the arrow-keys, the new stp value is edited after approx.
2 seconds since the last pressing of the key.
Process value
Stp value
Keys for setting of
Stp value
Setting of controlling to stp value
Carry out the setting in configuration level, menu SYS
shown on lower display.
6
, parameter SLEEP =
SP1.
After return to basic mode stp value is
4.2 Controlling by simple program
In the controller you can set the program with 1 or 2 ramp functions.
Setting is done in configuration level, menu SYS , parameter SP1C :
• SP1C = PG1 … is set the program with 1 ramp function.
• SP1C = PG2 … is set the program with 2 ramp functions.
Program with 1 ramp function
Stp value
(temperature)
Soak at temperature EnSP2
You set soak time with parameter tIME 2
[hour.minute]
EnSP 2
Ramp up or down
When not in program controler
can maintain stp value SP1
(SLEEP = SP1) or it has the
control output turned OFF
(SLEEP = oFF).
Ramp rate up/down of stp value is set
with parameter rAtE 1 [ ºC/hour]
time
Time-delayed start of program
Start a program
(double pressing key
)
Program will start after elapsing the time set
with parameter tdEL [hour.minute]
Setting of program parameters
By the key
parameters.
you scroll the parameters for setting a program. The following table shows the overview of all the
Display
Meaning
tdEL
Time-delayed start of program [hour.minute]
If you set oFF, program starts at once.
Range: oFF, 0.01 to 23.59 [hour.minute].
Parameter is shown and time-delayed starts allowed, if in configuration level, menu SYS
rAtE 1
Rate up/down to stp value [ºC/hour]
If you set oFF, the function of rate up/down to stp value is omitted, soak at temperature EnSP2 starts.
Range: oFF, 1 to 999 [ºC/hour].
EnSP 2
Stp value for soak
Range: r Lo1 to r hI1 .
tIME 2
Soak [hour.minute]
If you set oFF, soak is turned OFF.
Range: oFF, 0.01 to 99.59 [hour.minute].
, parameter is set to tdEL
=
on.
7
Program with 2 ramp functions
Stp value
(temperature)
Soak at temperature EnSP4
You set soak time with parameter
tIME 4 [hour.minute]
EnSP 4
Soak at temperature EnSP2
Ramp up or down
Ramp rate up/down of stp
value is set with parameter
rAtE 3 [ ºC/hour]
You set soak time with parameter
tIME 2 [hour.minute]
EnSP 2
When not in program controler
can maintain stp value SP1
(SLEEP = SP1) or it has the
control output turned OFF
(SLEEP = oFF).
Ramp up or down
Ramp rate up/down of stp
value is set with parameter
rAtE 1 [ ºC/hour]
time
Start a program
(double pressing key
Time-delayed start of program
)
Program will start after elapsing the
time set with parameter tdEL
[hour.minute]
Setting of program parameters
By the key
parameters.
you scroll the parameters for setting a program. The following table shows the overview of all the
Display
8
Meaning
tdEL
Time-delayed start of program [hour.minute]
If you set oFF, program starts at once.
Range: oFF, 0.01 to 23.59 [hour.minute].
Parameter is shown and time-delayed starts allowed, if in configuration level, menu SYS
rAtE 1
Rate up/down to stp value [ºC/hour]
If you set oFF, the function of rate up/down to stp value is omitted, soak at temperature EnSP2 starts.
Range: oFF, 1 to 999 [ºC/hour].
EnSP 2
Stp value for soak
Range: r Lo1 to r hI1 .
tIME 2
Soak [hour.minute]
If you set oFF, soak is turned OFF.
Range: oFF, 0.01 to 99.59 [hour.minute].
rAtE 3
Rate up/down to stp value [ºC/hour]
If you set oFF, the function of rate up/down to stp value is omitted, soak at temperature EnSP4 starts.
Range: oFF, 1 až 999 [ºC/hour].
EnSP 4
Stp value for soak
Range: r Lo1 to r hI1 .
tIME 4
Rate up/down to stp value [ºC/hour]
If you set oFF, the function of rate up/down to stp value is omitted, soak at temperature EnSP4 starts.
Range: oFF, 1 to 999 [ºC/hour].
, parameter is set to tdEL
=
on.
Starting, ending a program
If a program does not run, you can start it by double pressing
.
The program will end up after elapsing the requested time. If you interrupt the program before it ends itself, press twice the
again.
key
Time-delayed start of the program (parameter tdEL ) you can set it in configuration level, menu SYS
parameter tdEL = on.
The time-delayed start is indicated with blinking heading tdEL
time remaining to the start of program is shown.
,
on lower display. When you press the key
Running a program
The run of program is indicated with blinking heading ProG
on lower display.
The chosen duration of soak is ensured with the function „GSD“(guaranteed soak deviation). At the beginning of the soak
the controller waits for the process value to get into the soak band GS dE within a window around stp value, only the
counting down starts:
• You can set the soak band in configuration level, menu SYS , parameter GS dE .
• If parameter GS dE = oFF, the function „GSD“ is turned OFF.
• If the process value is beyond the set soak band with the parameter GS dE , time is paused and heading GSd
blinks on
lower display.
GSD at the beginning soak
Stp
value
GS dE
Process value
Start of soak
time
When in program after the pressing the key
it shows the time till the end of the program, parameter trEM .
This particular is only informative. The real time can be influenced by the function „GSD“.
When the program runs, you can change the setting of the program, the change is immidietelly carried out.
The enter to the setting of program can be secured with password. The password is set in configuration level, menu
PASS , parameter PAS Pr.
When in program, you can not enter configuration neither service level.
9
5 Operation level
In operation level you can set parameters which are available to a user.
From basic mode to operation level you will get by pressing the keys
LEVEL
, on upper display set oPEr and confirm with the key
. If PASS
for 3 seconds. On lower display it appears
appears on lower display the level is secured with
the password. In this case set the right password with the arrow-keys and confirm with the
.
PCnt 1
Aut
ot2 hI
AL hI
Pb1A
It1A
dE1A
Pb1b
It1b
dE1b
hYS1
Menu of operation level
Display
PCnt 1
Aut
ot2 hI
AL hI
Pb1A
It1A
dE1A
Pb1b
It1b
dE1b
hYS1
10
Meaning
Shows the actual power of the output 1 in %.
Starting / turning OFF of autotunning of PID parameters:
•
oFF, turning OFF of autotunning of PID parameters.
•
ht, starting of autotunning of PID parameters, heating.
High limit of signalling. Signal output is activated when measured value is higher than the set limit.
Range: 1 to 2499 °C.
High limit of alarm. Alarm is activated, if process value is higher than the set limit.
Range: - 499 to 2499 °C.
Proportional band of the output 1, the first set of PID parameters.
Range: 1 to 2499 °C.
Integral value of the output 1, the first set of PID parameters.
Range: oFF, 0.1 to 99.9 minutes.
Derivative value of the output 1, the first set of PID parameters.
Range: oFF, 0.01 to 9.99 minutes.
Proportional band, the second set of PID parameters.
Range: 1 to 2499 °C.
Integral value, the second set of PID parameters.
Range: oFF, 0.1 to 99.9 minutes.
Derivative value, the second set of PID parameters.
Range: oFF, 0.01 to 9.99 minutes.
Hysteresis of the output 1, this single parameter is set only for ON/OFF control.
Range: 1 to 249 °C.
5.1 Parameters of the control output, PID controlling
Parameters Pb1A , It1A , dE1A , Pb1b , It1b , dE1b , define the behavior of the controller. They can be set from the
keyboard or with the controller, with starting autotunning (the function Aut ).
The controller can use 1 PID set (Pb1A , It1A , dE1A ) or both PID sets (Pb1A , It1A , dE1A , Pb1b , It1b ,
dE1b ).
The complete description of setting for the control output is on page 16.
Autotunning
The controller is fitted with the function that sets automatically PID parameters.
You can start autotunning in a program as well as in controlling to stp value, but the control output must not be turned OFF.
Start of autotunning
End of autotunning
Procedure of starting autotunning:
•
•
•
•
The controller must switch the output ON/OFF, it means that the control output must not be turned (in basic mode on
lower display there must not be
oFF.
Autotunning you can start with parameter Aut
= ht (setting parameters for heating). Parameter Aut
you will
find in operation level. The control output must be set for PID controlling.
The controller explores the characteristics of system from switching ON/OFF on the output and determines optimal PID
parameters. It can cause an overshoot.
On lower display the information message Aut1 blinks (setting parameters for heating Pb1A , It1A , dE1A ),
Aut2
blinks (setting parameters for heating Pb1b , It1b , dE1b ).
Important:
•
Parameters Pb1A , It1A , dE1A , are set when 1 set of PID parameters is used (ALGo = PId) or the both sets of
PID parameters are used (ALGo = 2PId) and the actual set point value is lower than parameter SWPId.
• Parameters Pb1b , It1b , dE1b , are set if the actual set point value is higher than parameter SWPId when the both
sets of PID parameters are used (ALGo = 2PId)
Parameters ALGo and SWPId are found in configuration level, menu out1 .
5.2 Alarm output
Alarm output is intended for the indication that
process values exceeded the limit temperature set with
the parameter AL hI .
This parameter is found in operation level.
If alarm is not active, relay is switched ON, if alarm
is active, relay is switched OFF.
Alarm is also activated when a sensor is broken and if
there is a system error of controller.
Process
value
Active
Deactivated
AL hI
time
11
6 Configuration level
Configuration level is intended for the basic setting of the controller. In this level the control output is turned OFF and
alarm and signal outputs are deactivated.
To enter configuration level from basic mode press both the keys
on upper display set via the arrow-keys ConF and confirm. If PASS
for 3 seconds. On lower display it appears LEVEL ,
appears on lower display, configuration level is secured
with the password. In this case set the password via the arrow-keys and confirm again
InPt1?
SEn1
dEC1
Yes
CAL1
no
CoMM ?
r Lo1
CoMM
Addr
no
out1 ?
r hI1
bAud
Yes
out1
Pr1 tY
Ct1
Yes
no
ALGo
out2 ?
out2
F1 SP
Yes
F1 tI
no
SYS
?
Yes
no
PASS ?
Yes
no
SLEEP
SWPId
PL Lo
F2 oFF
F2 on
SW PL
PL hI
SP1 Lo
SP1 hI
SP1 C
PAS SP
tdEL
PAS Pr
GS dE
PAS oP
dEr tI
PAS Co
PAS SE
InPt1 , input setting
Display
SEn1
12
Meaning
Setting of input sensor – thermal input.
•
no … input is not set.
•
J … thermocouple J, range -200 to 900°C.
•
K … thermocouple K, range -200 to 1360°C.
•
t … thermocouple T, range -200 to 400°C.
•
n … thermocouple N, range -200 to 1300°C.
•
E … thermocouple E, range -200 to 700°C.
•
r … thermocouple R, range 0 to 1760°C.
•
S … thermocouple S, range 0 to 1760°C.
•
b … thermocouple B, range 300 to 1820°C.
•
C … thermocouple C, range 0 to 2320°C.
•
d … thermocouple D, range 0 to 2320°C.
• rtd … rtd sensor ( Pt100), range -200 to 800°C.
Setting of input sensor … process input:
•
no … input is not set.
• 0-20 … 0 – 20 mA, range -499 to 2499 units.
• 4-20 … 4 – 20 mA, range -499 to 2499 units.
•
0-5 … 0 – 5 V, range -499 to 2499 units.
•
1-5 … 1 – 5 V, range -499 to 2499 units.
• 0-10 … 0 – 10 V, range -499 to 2499 units.
.
Display
dEC1
CAL1
r Lo1
r hI1
CoMM
Meaning
Setting of decimal point for displaying – thermal input.
•
0 … no decimal point.
•
0.0 … 1 decimal point.
Setting of decimal point for displaying – process input:
•
0 … no decimal point.
•
0.0 … 1 decimal point.
•
0.00 … 2 decimal points.
• 0.000 … 3 decimal points
Correction of sensor. The set value is added to process value.
Range: -999 to 999 °C.
Together with parameter r hI1 you also set the scale of displaying measured values for process input ranges.
Range: -499 to r hI1 .
Together with parameter r Lo1 you also set the scale of displaying measured values for process input ranges.
Range: r Lo1 to 2499.
, communication line
Display
CoMM
bAud
Addr
out1
Meaning
Setting of communication line:
•
Mod … the controller is set for communication with PC.
• SGnL … the controller transmits information for controlling of SLAVE units.
Baudrate of communication, is in default setting - 9600Bd.
Address of the equipment, it is shown when CoMM = Mod.
, output 1
Display
out1
Pr1 tY
Ct1
ALGo
SWPId
PL Lo
SW PL
PL hI
out2
Display
out2
F1 SP
Meaning
Function of the control output 1:
•
ht … the heating control, PID controlling.
•
ht2 … the heating control, ON/OFF controlling.
Setting of 1. process output, voltage output:
• 0-10 … 0 až 10V.
•
0-5 … 0 až 5V.
Setting of 1. process output, current output:
• 0-20 … 0 až 20mA.
• 4-20 … 4 až 20mA.
Time cycle for switching of the output 1.
Range: 1 to 200 seconds
Algorithms of PID controlling:
•
PId … one set of PID parameters is used.
• 2PId … both sets of PID parameters are used.
Limit between PID set 1 and PID set 2.
Range: -499 to 2499 °C.
Power limit function for the limiting of output power at low measured values, in %.
Range: 0 to 100 %.
Setting of limit between low and high values of power limit function.
Range: -499 to 2499 °C.
Power limit function for the limiting of output power at high measured values, in %.
Range: 0 to 100 %.
, output 2
Meaning
Function of the output 2:
•
oFF … output 2 is turned OFF.
• SGPr … signalling of exceeding measured value. You set the limit of signalling in operation level, parameter ot2 hI
• ProG … signalling if the program runs.
• PEnd … signalling if the program has been finished, the duration of signaling is 10 seconds.
•
F1 … user function F1
•
F2 … user function F2
Setting of the temperature of the function F1.
Range: -499 až 2499 °C.
13
F1 tI
F2 oFF
F2 on
SYS
Setting of the time of the function F1.
Range: 1 až 99 minut.
Setting of the temperature for turning OFF of the second output of the function F2. It is active when the program runs.
Range: -499 až 2499 °C.
Setting of the temperature for turning ON of the second output of the function F2. It is active when the program does not run.
Range: -499 až 2499 °C.
, system parameters
Display
SLEEP
SP1 Lo
SP1 hI
SP1 C
tdEL
GS dE
dEr tI
PASS
Display
PAS SP
PAS Pr
PAS oP
PAS Co
PAS SE
14
Meaning
Function of the key „F“:
•
oFF … the key „F“ has no function.
•
SP1 … the key „F“ is intended for switching between automatic and manual operation.
The limit of low range for stp value.
Range: -499 to SP1 hI °C.
The limit of high range for stp value.
Range: SP1 Lo to 2499 °C.
Settnig of the program type:
•
PG1 … is set the program with 1 ramp function.
•
PG2 … is set the program with 2 ramp function .
Time-delayed start of program:
•
oFF … time-delayed start is inhibited.
•
on … time-delayed start is allowed.
Setting of soak band around stp value when a program runs.
Range: oFF, 1 to 999 °C.
If it is set Gs dE = oFF the function GSD is turned OFF.
It makes the character of derivative value more accurate. The more value is set, the more derivative value is damped down.
Range: 1.0 to 100.0 seconds.
, passwords for the entry to higher levels of menu
Meaning
Locking of the change of set point value SP1:
•
oFF … set point value SP1 is not locked, you can change it.
•
on … set point value SP1 is locked.
The password for entering the menu for editing a program. If it is set oFF, the entry is not secured with password.
Range: oFF, 1 to 9999.
Password for the entry to operation level. If it is set oFF, the entry is not secured with password.
Range: oFF, 1 to 9999.
Password for the entry to configuration level. If it is set oFF, the entry is not secured with password.
Range: oFF, 1 to 9999.
Password for the entry to service level. If it is set oFF, the entry is not secured with password.
Range: oFF, 1 to 9999.
6.1 Measurement
The right selection, the installation, the wiring, the location of sensor in the equipment and the corresponding setting of
parameters of the controller has the essential importance for the correct function. Parameters for the configuration of the
measurement input are in configuration level, menu InPt1 .
Setting of input sensor
Set the corresponding input sensor in parameter SEn1 . You will find the survey of input sensors in the chapter Technical
parameters, see page 27.
You can set the position of decimal point by parameter dEC1 . For thermal sensors it is possible to display without decimal
point or with 1 decimal point.
Set the calibration of sensor with the parameter CAL1 . The set value is added to process/measured value.
You can set the limit for set point value in configuration level, menu SYS , parameters SP1 Lo and SP1 hI.
Important:
•
Thermocouple and RTD inputs have the detection of improperly wired sensor. When the sensor is open or broken, the
control output is turned OFF, the alarm output is activated.
Measuring range of process inputs
In configuration level, menu InPt1 , you can define the measuring range of the process inputs with parameters r
r hI1 and dEC1 .
Lo1
,
Example of setting process input:
You want the input signal 4 to 20 mA to be displayed in the range 6.0 to 24.0.
Set dEC1 = 0.0, r Lo1 = 6.0 a r hI1 = 24.0. The distribution between the values 6.0 and 24.0 will be linear.
Displaying
of process
value
24.0
6.0
4 mA
20 mA
Input signal
15
6.2 Controlling, the control output
You can select in the controller ON/OFF or PID controlling for heating. If PID controlling is set, you can use the autotuning
of PID parameters, see page 11 and the power limit function, see page 17.
The parameters for configuration of the control output 1 are in configuration level, menu out1 .
ON/OFF controlling
ON/OFF control is selected by setting out1 = ht2 . It is used for less exacting application. It is not possible to achieve
zero hysteresis value on principle. The process value rises and drops about set point value in the characteristic way.
Stp value
Process
value
hysteresis
time
State of
control
output
ON
OFF
time
PID controlling
PID control is selected by setting out1 = ht. It provides the precise control. For the correct function of the controller,
however, it is necessary to set properly PID parameters. Autotunning for setting of PID parameters is described on page 11.
PID parameters have the following meaning:
• Pb proportional band is set in measured units. It is the band about the set point value in which the controller keeps the
temperature.
• It integral factor, in minutes. Integral factor compensates the loss of system. A low integral value causes a fast
integrating action.
• dE derivative factor, in minutes. Derivative responses to fast changes and tries to react against them. The more value is,
the more derivative factor reacts.
If the control output is 2 state (ON/OFF) (relay or SSR), the power is (given in %) transferred to the output with so called
pulse width modulation. In each time cycle (parameter Ct1 , you will find it in configuration level, menu out1 ) the
control output is switched ON once and once OFF. The more the power is necessary, the wider the width of switching is.
The output responses are illustrated in the third part of the drawing.
Example of pulse width modulation of
the output:
•
•
Time cycle is 10 seconds, the power requested
is 30%. The output is ON for 3 seconds and
OFF for 7 seconds.
Time cycle is 10 seconds, the power requested
is 5%. The output is ON for 0,5 second and
OFF for 9,5 seconds.
Process
value
STP value
Time
Output
power
100 %
Important:
•
•
•
•
16
The duration of time cycle has the influence
on the quality of control. The longer the cycle
is, the less the quality of control is.
If the electromechanical unit (relay, switching
contactor) is used for the control out
(Temperature)
on of time cycle must be set longer with regard
to lifetime of switch.
Time
State of
control
output
ON
OFF
Time
Time cycle
Power limit function
You can improve the quality of control by limiting of the output power.
Examples how to use the power limit function:
When rising at set point value the big overshoot occurs. One of
possible solution is the power limit in the vicinity of set point
value. The procedure is the following:
• Find out the power supplied to the stable system.
• Set the switcher S PL on the value by several oC less than
set point value.
• Set power limit PL Lo to 100%.
• Set power limit Pl hI approx. by 10 to 20% higher than
the power supplied to the stable system.
Process
value
Power
limit
function above
PL hI
SW PL
Power
limit
function below
PL Lo
time
17
6.3 Function of the output 2
The second output can be set to 1 of the following functions:
•
•
•
out2 = SGPr … signalling of exceeding the measured value, absolute value. Limit of signalling is set in operational level, parameter ot2 hI.
out2 = ProG … signalling that the program runs. The output is switched ON when program runs.
out2 = PEnd … signalling that program has ended up. The output is switched ON after the end of a program, the time when the the contact is
switched ON is 10 seconds.
out2 = F1 … users function F1, it is described below.
out2 = F2 … users function F2, it is described below.
•
•
Function F1
Function can be used for example for controlling the fan of the oven/furnace.
The output is switched ON when at least one of the following conditions is fulfilled:
Temperature is higher than the set value F1 SP
Hysteresis is firmly set to 5 ºC
temperature
When there is some power on 1. (control) output and
for the time F1 tI after the last switching ON of
output 1
Power of
1. output
hysteresis = 5 ºC
F1 SP
100%
0%
time
State of
output
„F1“
time
State of
output
„F1“
ON
OFF
F1 tI
time
Funkce F2
Function can be used for example for the control of ventilation damper of ceramic furnace.
• When program runs, the output 2 is switched ON depending on the set value F2 oFF.
• When the program does not run, the output 2 is switched ON depending on the set value F2
Program runs
temperature
on
.
Measured value
F2 on
STP value
F2 oFF
time
State of
output
„F2“
ON
OFF
time
18
time
7 Service level
Service level is intended for service workers. In this level the control output is switched OFF and alarm and signal
output is deactivated.
To get from basic mode to service level press the keys
for about 3 seconds. On lower display LEVEL appears, on
upper one set SErV and confirms. If PASS appears on lower display, level is secured with password. In this case set the
correct password with arrow-keys and confirm again.
SoFt
AMb1
tC1
rtd1
I1
u1
ConF ?
SEn1
dEC1
Yes
CAL1
no
r Lo1
PL Lo
SW PL
PL hI
rESEt?
Yes
no
Display
SoFt
AMb1
tC1
rtd1
I1
u1
ConF ?
rESEt?
rESEt?
rESEt?
rESEt?
rESEt?
rESEt?
r hI1
CoMM
bAud
out2
Addr
PAS Pr
SLEEP
out1
PAS oP
SP1 Lo
PAS Co
Pr1 tY
SP1 hI
PAS SE
Ct1
ot2 hI
SP1 C
SP1
ALGo
tdEL
AL hI
SWPId
tdEL
Pb1A
GS dE
rAtE 1
It1A
dEr tI
EnSP 2
dE1A
PAS SP
tIME 2
rESEt?
Pb1b
rAtE 3
rESEt?
It1b
EnSP 4
rESEt?
dE1b
tIME 4
rESEt?
hYS1
rESEt?
Meaning
Number of software version.
Actual ambient temperature.
Measured voltage, thermocouple input 1. Range 60mV.
Measured resistance, rtd input 1. Range 350 ohms.
Measured current, current input 1. Range 20mA.
Measured voltage, voltage 1. Range 10V.
By setting YES and confirming you enter the menu for setting all the parameters. This menu can be used e. g. in initial setting of the
controller.
Editing of initial parameters is the significant action to controller’s setting. First it must be confirmed by 6x setting YES.
19
8 Table of parameters
Table of parameters for configuration level:
SEn1
dEC1
CAL1
r Lo1
r hI1
out2
F1 SP
F1 tI
F2 oFF
F2 on
CoMM
bAud
Addr
SLEEP
SP1 Lo
SP1 hI
SP1 C
tdEL
GS dE
dEr tI
out1
Pr1 tY
Ct1
ALGo
SWPId
PL Lo
SW PL
PL hI
PAS
PAS
PAS
PAS
PAS
SP
Pr
oP
Co
SE
Table of parameters for operation level:
ot2 hI
AL hI
Pb1A
It1A
dE1A
Pb1b
It1b
dE1b
hYS1
20
9 Installation
The controller is designed to be mounted to the panel cutout. Slide the controller into the cutout and fix it with 2 flanges that
are supplied with the controller. The installation requires the access to the back of the panel.
Mounting dimensions
•
•
•
•
Width x height x overall length: 96 x 96 x 121 mm (including terminal board).
Behind panel length: 114 mm ((including terminal board).
Cutout in the panel: 91 x 91 mm.
The thickness of panel: 1, 5 to 10 mm.
Mounting
•
•
•
•
Make the panel cutout 91 x 91 mm.
Slide the controller into the panel cutout.
Insert the flanges for holding into the holes upward and downward or on both sides of the controller.
Tighten the screws firmly on the flanges.
The controller is now installed, before wiring we recommend to read thoroughly the chapter on the possible sources of
interference and principals for installation.
Wiring of the controller begins on page 22.
9.1 Principals for installation, the sources of interference
There are many possible sources of interference in environment of the controller. Among the most harmful sources of
interference are the following:
• Equipment with inductive load, e.g. electromotors, winding of relays and breakers, … .
• Thyristors and other semiconductor equipment
• Welding devices.
• Wires carrying high currents.
• Fluorescent lightings and neon lights.
9.2 Reduction of influence of interference
Making a design of system, try to observe these guidelines:
• All wires of power supply voltage and power wires carrying high currents must be lead separately from signal leads (e.g.
thermocouple lead wire, communication lines). Minimum distance between these types of wires should not be smaller
than 30 cm.
• If signal and power wires cross each other it is suitable for them to be crossed in right angle.
• From the beginning try to find the possible sources of interference and keep the wires away from them.
• Do not install relays and breakers very close to the controller.
• Do not use supply voltage for the controller also for supplying inductive and phase angle control equipment.
• Twisted and shielded wires should be used for signal leads. Shielding should be earthed several times.
When necessary the uninterruptible power sources (UPS) could be used.
21
10 Wiring
To avoid potential electric shock, use safety practices laid down by national standards when wiring and connecting
this unit to a power source. Failure to do so could result in such damage, and / or injury. The wiring must be done
only by the authorized person.
If there is any default of the device could cause damage, the equipment with the controller must be fitted with the
independent protection unit (thermal cut-out).
Supply voltage
Before you connect the unit to a supply power source, check the level of supply voltage.
The controller is intended for use in industrial or in laboratory equipment.
22
Alarm output 3
Auxiliary output 2
Control output 1
Communacation
Input
1 2 3 4 5 6 7 8 9 10 11 12 13 14 15
N
L
Fuse
T 1A
100-240 VAC / 50Hz
max. 15VA
measuring input (InPt1)
Thermal input
Process input
1 2 3 4 5 6 7 8 9 10 11 12 13 14 15
-
+
1
2
1 2 3 4 5 6 7 8 9 10 11 12 13 14 15
Thermocouple
input impedance is
20MOhm
Voltage input
input impedance
10 kOhm
3
Pt1OO
2-wire connection
1
2
3
1
3
Current input
input impedance
40 Ohm
Pt1OO
3-wire connection
Measuring input is not
isolated from the ground of
controller
communication line (CoMM)
Communication is
galvanicly isolated from
the ground
Com
T+/R+
5
EIA 485
Com. line RS232 connected to PC
6
RxD TxD
5 4
Com
TxD
4
RxD
T-/R-
1 2 3 4 5 6 7 8 9 10 11 12 13 14 15
TxD RxD
4 5
Com
6
Com
6
RS 232
1
2
3
4
5
6
7
8
20
Canon 25
1
2
6
3
7
4
8
5
9
Canon 9
23
control output 1 (out1)
SSD
RELAY
dc voltage
Relay output
1 2 3 4 5 6 7 8 9 10 11 12 13 14 15
-
+
max. 30mA
voltage, open
state: 12-18Vdc
SSD is not isolated
from controllers
ground
230Vac/5A
or
30Vdc/5A
RELAY output is galvanicly isolated from the
ground of the controller. For this output it is
necessary to fix the wires in the way that in case
of loosening the wire from the terminal the
insulation would not be reduced between supply
voltage and safety voltage.
0-20mA, 4-20mA
0-10 Vss, 0-5 Vss
Current output
Voltage output
U
+
-
+
Voltage output is
isolated from
controllers ground
-
I
+
1 2 3 4 5 6 7 8 9 10 11 12 13 14 15
24
1 2 3 4 5 6 7 8 9 10 11 12 13 14 15
input impedance
min. 1 kOhm
-
1 2 3 4 5 6 7 8 9 10 11 12 13 14 15
+
Current output is
isolated from
controllers ground
-
input impedance
max. 200 Ohmů
auxiliary output 2 (out2)
SSD
RELAY
dc voltage
Relay output
1 2 3 4 5 6 7 8 9 10 11 12 13 14 15
-
+
max. 30mA
voltage, open
state: 12-18Vdc
SSD is not isolated
from controllers
ground
1 2 3 4 5 6 7 8 9 10 11 12 13 14 15
230Vac/5A
or
30Vdc/5A
RELAY output is galvanicly isolated from
the ground of the controller. For this output
it is necessary to fix the wires in the way that
in case of loosening the wire from the
terminal the insulation would not be reduced
between supply voltage and safety voltage.
Alarm output
RELAY
Relay output
1 2 3 4 5 6 7 8 9 10 11 12 13 14 15
230Vstř/5A
or
30Vss/5A
RELAY output is galvanicly isolated from
the ground of the controller. For this output
it is necessary to fix the wires in the way that
in case of loosening the wire from the
terminal the insulation would not be reduced
between supply voltage and safety voltage.
25
11 Putting into operation
The initial set-up can be done only by the qualified and authorized person.
The wrong set-up can cause serious damage.
When you power the controller up for the first time, you must enter the most necessary data to the controller for its problemfree operation:
• Type of sensor, position of decimal point
• Operational range of set point value
• Set-up for the control output
11.1 Guidelines
Let’s suppose that the controller is installed in the panel and you have just power it up for the first time. Parameters of initial
operation are the following:
• SEn1 , set input sensor. The descriptions of this parameter see on page 12.
• dEC1 , set the position of decimal point. You will find the description of this parameter on page 15. This parameter is
shown only for the process input.
• r Lo1 , r hI1 , parameters for setting of the scale of displaying values for process inputs. These are not displayed for
thermal inputs. The description of parameters is on page 15.
• out1 , setting of the control output. The descriptions of this parameter see on page 13.
• SP1 Lo, set low limit of range of stp value. We recommend leaving 0.
• SP1 hI, set high limit of range of stp value. We recommend setting maximum working temperature of equipment. The
operator can not set higher stp value than this value of parameter.
• Further information about input setting you will find on page 15, information about output setting on page 16.
Important:
•
26
All the parameters that were set in the initial operation can be later changed in configuration level.
12 Technical parameters
The controller is intended for use in industrial or laboratory equipment, the category of overvoltage II.
Controlling
•
•
PID, PI, PD, P controlling, autotunning/automatic setting of PID parameters, controlling of heating.
ON/OFF controlling, controlling of heating.
Alarm
•
absolute alarm, high limit of alarm.
Controlling of stp value
•
•
simple program (rate up and soak or 2 x rate up and soak)
controlling to constant value.
Indicators and keys
•
•
•
one 4-figure LED display 14 mm, one 6-figure display 10 mm,
3 LED indicating diodes of outputs, 3 LED indicating diodes for program,
5 keys, setting is done via menu
Sensors, inputs
Thermal input is thermocouple or rtd, the detection of bad-wired/broken sensor:
•
no … no input is set,
•
J … thermocouple J, range -200 to 900°C,
•
K … thermocouple K, range -200 to 1360°C,
•
t … thermocouple T, range -200 to 400°C,
•
n … thermocouple N, range -200 to 1300°C,
•
E … thermocouple E, range -200 to 700°C,
•
r … thermocouple R, range 0 to 1760°C,
•
S … thermocouple S, range 0 to 1760°C,
•
b … thermocouple B, range 300 to 1820°C,
•
C … thermocouple C, range 0 to 2320°C,
•
d … thermocouple D, range 0 to 2320°C,
•
rtd … sensor rtd (Pt100), range -200 to 800°C, 2 or 3-wire connection, DIN curves.
Process input - current (input impedance 40 Ω), voltage (10 kΩ), without the detection of broken sensor:
•
no … no input is set,
• 0-20 … 0 – 20 mA, range -499 to 2499 units,
• 4-20 … 4 – 20 mA, range -499 to 2499 units,
•
0-5 … 0 – 5 V, range -499 to 2499 units,
•
1-5 … 1 – 5 V, range -499 to 2499 units,
• 0-10 … 0 – 10 V, range -499 to 2499 units.
Output 1
•
•
ss driver/open collector, 12 – 18 V dc in the state ON, max. 30 mA.
Electromechanical relay, 230Vac/5A or 30Vdc/5A, switching ON, without RC suppression unit.
Output 2
•
•
ss driver/open collector, 12 – 18 V dc in the state ON, max. 30 mA.
Electromechanical relay, 230Vac/5A or 30Vdc/5A, switching ON, without RC suppression unit.
Output 3
•
Electromechanical relay, 230Vac/5A or 30Vdc/5A, switching ON, without RC suppression unit.
27
Communication line
•
•
RS 232, galvanicly isolated, protocol Modbus RTU,
EIA 485, galvanicly isolated, protocol Modbus RTU.
Accuracy of inputs
•
•
•
±0,1% of span/range (min. 540ºC) , ±1 digit at 25ºC ±3ºC of ambient temperature and at ±10% rated supply voltage,
temperature stability ±0,1ºC/ºC in ambient,
voltage stability ±0,01%/% of change in supply voltage.
Supply voltage
•
•
•
100 to 240 VAC 50 Hz, internal slow fuse 2 A/250 V,
input power max. 15 VA,
data stored in memory upon power failure.
Operating environment
•
•
0 to 50 ºC,
0 to 90 % relative humidity, non-condensing.
Shipping and storage
•
-20 to 70 ºC.
Dimensions
•
•
•
28
width x height x length 96 x 96 x 121 mm,
depth behind panel surface 114 mm,
cutout into the panel 96 x 91 mm, , the thickness of the panel 1,5 to 10 mm.
12.1 Warranty
The supplier provides 36-month warranty on defects in material and workmanship on this controller with the exception on
defects caused by mechanical or electrical wearing out of the outputs. This warranty does not also apply to damage resulting
from inappropriate transportation and storage, misuse, wrong wiring, ambient influences (especially effects of electrical
overvoltage, electrical values and temperatures of inadmissible intensity, chemical materials, mechanical damage) electrical
or mechanical overloading of inputs and outputs.
12.2 Description of model
Ht40AL – a b – c d e – f g h
¾
a: input
T = thermal input
P = process input
¾
b: communication line
0 = none
X = communication line RS 232
A = communication line EIA 485
¾
c: output 1 (control)
K = ss driver
R = electromechanical relay
P = current 0-20 mA, 4-20 mA
N = voltage 0-5 V, 0-10 V
¾
d: output 2 (auxiliary)
0 = none
K = ss driver
R = electromechanical relay
¾
e: alarm output
R = electromechanical relay
¾
f, g, h: 0 0 0
29
13 Index
1
2
Important...........................................................................................................................................................................................2
Basic terms.........................................................................................................................................................................................3
2.1
2.2
2.3
3
4
Operation and description of controller...................................................................................................................................................................... 3
Information and error messages.................................................................................................................................................................................. 4
Overview of levels, menus.......................................................................................................................................................................................... 4
Basic mode .........................................................................................................................................................................................5
Controlling of stp value, program....................................................................................................................................................6
4.1
4.2
5
Controlling of stp value .............................................................................................................................................................................................. 6
Controlling by simple program................................................................................................................................................................................... 7
Operation level ................................................................................................................................................................................10
5.1
5.2
6
Parameters of the control output, PID controlling.................................................................................................................................................... 11
Alarm output ............................................................................................................................................................................................................. 11
Configuration level..........................................................................................................................................................................12
6.1
6.2
6.3
7
8
9
Measurement............................................................................................................................................................................................................. 15
Controlling, the control output ................................................................................................................................................................................. 16
Function of the output 2............................................................................................................................................................................................ 18
Service level .....................................................................................................................................................................................19
Table of parameters ........................................................................................................................................................................20
Installation .......................................................................................................................................................................................21
9.1
9.2
10
11
Principals for installation, the sources of interference ............................................................................................................................................. 21
Reduction of influence of interference ..................................................................................................................................................................... 21
Wiring ..............................................................................................................................................................................................22
Putting into operation .....................................................................................................................................................................26
11.1
12
12.1
12.2
13
30
Guidelines ........................................................................................................................................................................................................... 26
Technical parameters......................................................................................................................................................................27
Warranty.............................................................................................................................................................................................................. 29
Description of model .......................................................................................................................................................................................... 29
Index.................................................................................................................................................................................................30