1
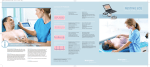
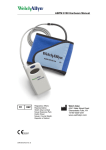
C A R D I O P E R F E C T
AMBULATORY BLOOD
PRESSURE MONITORING
QUICK START GUIDE
UNDERSTANDING ERROR CODES
ERROR CODE
DESCRIPTION
1
Unknown error
2
This can indicate one of the following problems:
• After 2 seconds the pulse has not reached the falling level
• Heart frequency has not reached its defined range
• Variation of the heart frequency is too large
• Less than 4 measurements were taken
• The rising level was not reached within 2 seconds after the falling level
• Pulse bandwidth is out of range
• Movement artefact
• Maximum number of beats encountered in a stage
3
This can indicate one of the following problems:
• The heart frequency was out of range in more than 3 pressure stages
• The difference between systole and diastole was too small
• The systole is considerably bigger than the pump pressure
• An oscillation value was smaller than the start or end value
• The pulse bandwidth is smaller than at start or end point
• The MAP is out of range
• The systole is out of range
• The diastole is too large
• The number of stages is too large
• The oscillation value is too large
• The total time is too long
• A function took too much time
4
The battery voltage is too low
5
No cuff was detected
6
Too many measurements were taken—OR—No memory was available in EEPROM
7
No measurements were taken—OR—The measurements were stopped
8
Hardware failure—OR—Error at zero alignment or pumping started unexpectedly
SIZING CHART
Correct cuff sizing is vital to the accuracy of monitoring data.
Find the circumference of the patient’s upper arm and refer to
this cuff sizing chart for proper cuff selection.
CUFF SIZE
ARM CIRCUMFERENCE
SOFT DISPOSABLE CUFFS
ARM CIRCUMFERENCE
REUSABLE SLEEVE CUFFS
ARM CIRCUMFERENCE
TRADITIONAL REUSABLE CUFFS
Pediatric Cuff
Part 5082-94-3
15.8–21.3 cm
NA
Part 6100-10
16.0–21.8 cm
Small Adult Cuff
Part 5082-95-3
20.0–27 cm
Part 101340
18–27 cm
Part 6100-11
21.1–26.6 cm
Adult Cuff
Part 5082-96-3
25.3–34.4 cm
Part 101341
25–35 cm
Part 6100-12
25.4–34.3 cm
Adult Plus Cuff
NA
Part 101342
33–40 cm
Part 6100-13
27.0–42.0 cm
Large Adult Cuff
Part 5082-97-3
32.0–43.4 cm
Part 101343
39–46 cm
Part 6100-14
34.3–48.2 cm
NOTE: The codes listed in the table are
the codes displayed by the CardioPerfect
software. They are different from the error
codes which can appear on the ABPM 6100
LCD display.
AMBULATORY
BLOOD PRESSURE
MONITORING
Q U I C K S TA R T G U I D E
!
IMPORTANT!
Make sure of the following before the patient leaves the office:
• The belt or shoulder strap and pouch are
positioned comfortably.
• The Start/Stop button is accessible to the patient.
(Even if the Start button is disabled in the Study Parameters,
the Start/Stop button will still allow the patient to
cancel a reading.)
• The ABPM 6100 monitor is concealed according
to the patient’s wishes.
• Remember the patient’s comfort and ability to perform
normal tasks can significantly impact the relevance
of monitoring data.
• If the display is on, briefly review with the patient how
to read the data.
• Explain to the patient the kind of information required in
the Patient Diary.
• If the Start button is enabled, explain to the patient that
he or she has the option to initiate readings using the
Start/Stop button.
1 Install software
•
This quick start guide is intended for use with CardioPerfect
Workstation Version 1.6.0 or higher.
•
For complete directions for use and warnings, please consult
your user manual located on the software CD.
2 Set up monitor
• Install two fresh AA batteries in the back of the ABPM 6100 recorder.
• Connect
the PC interface cable to the serial port on the back
of the computer.
• Connect the other end to the bottom of the ABPM 6100 recorder.
If you are using a USB port:
• Install the Keyspan USB to serial converter software first,
then plug in the adapter.
3 Communicate with your monitor
If you are using a USB port:
• Go
to Start/Programs/Keyspan USB Serial Adapter.
• Select
Keyspan Serial Assistant.
• Verify
which COM port was
assigned to adapter.
Start the CardioPerfect Workstation Software:
• Go
to File/Settings/ABPM.
• Select
Advanced.
• Match
proper COM port to Keyspan
Serial Assistant.
4 Select Patient
• Open
the CardioPerfect Workstation Software by
double clicking on the CardioPerfect icon.
• To
enter a new patient:
1. Click the Patient button.
2. Fill in Patient Card.
•
To select a patient from the database:
1. In the Search box, type the patient name or number (can be a partial entry).
2. Click the Go button.
3. Click on the patient for whom you want to record the test.
5 Program your monitor
• Click
on the ABP Icon.
• You will hear a few beeps followed by the New ABP Test window.
• Select
Protocol, Referring Physician, etc. and click OK.
• The recorder is now programmed with the patient information
and will turn itself off. Disconnect the monitor from
the computer.
6 Fit your patient with the monitor and cuff
• Place an appropriate size cuff around the patient’s
Sleeve Cuff
nondominant arm.
the cuff so that the Artery Marker label
is directly over the brachial artery.
• Position
• Connect
the hose of the cuff to the monitor, place
the monitor in the pouch, and attach the monitor
to the patient.
7 Prepare your patient
• If
the unit is in Sleep Mode (no display on the LCD), press
the Start/Stop button to “wake” the unit.
• Press
the Start/Stop button again to initiate a manual
reading. This will cause the cuff to inflate and a reading
to be taken.
NOTE: the automatic measurements will not start until at least
one manual measurement is taken
Review the following instructions with your patient:
• Avoid
excess movement during readings.
• Relax
arm slightly away from body.
• Avoid
hand movement.
• Avoid
flexing muscle during reading.
• Do
not remove cuff between readings.
8 Retrieve data
•
When your patient returns, remove the recorder and accessories.
• Turn
the recorder off by holding down the Start/Stop button
for five seconds or until the unit beeps five times.
• Connect
the recorder to the computer.
• Start
the CardioPerfect Workstation Software and search for
the patient in the database.
• Select
the Read Back icon.
• Make your selections from the ABP Measurement Read Back
window and press OK to transfer and save the data to
the computer.
9 Review data and print report
• You
can choose from multiple ABPM report templates.
• If
automatic printing is checked in the ABPM Print settings,
the report should print now.
• If
you did not select Automatic Printing in
the Settings, click on the down arrow next
to the Print icon and choose Print
Selected Formats to initiate printing.
• If
you just want to print one page, click on the Print icon,
and select the desired report page.
Traditional Cuff
i
AMBULATORY BLOOD PRESSURE MONITORING PATIENT INFORMATION
Ambulatory blood pressure monitoring (ABPM) takes numerous readings of your blood pressure over a
24-hour period or longer. It provides accurate and reliable information and can give you and your doctor
a truer picture of your blood pressure than occasional visits and readings taken at your doctor’s office.
How often will my blood pressure be taken?
Usually, your heart rate and blood pressure will be measured at 15- to 30-minute periods during the day and
every 30 minutes to one hour at night. Although you may notice the first few times the cuff inflates, you will
soon become used to the monitor. Most people find it very easy to wear.
How does APBM work?
This ABPM uses the oscillometric method, which involves measuring movement of the blood after closing off
the brachial artery, the main artery that runs from the shoulder down to the elbow. The data is stored and
then interpreted by trained professionals in your doctor’s office.
Be advised of the following:
• Pressing the Start/Stop button during a reading will cancel that reading and deflate the cuff regardless of
whether the Start button is set to On or Off in the Study Parameters.
•
Undress carefully at bedtime, using caution not to disconnect the hose from the monitor.
•
Placing a pillow over the monitor during sleep will reduce any electrical hum from the ABPM 6100 unit.
PATIENT DO’S AND DON’TS
DO
•
Wear a loose fitting blouse or shirt.
•
Record time, symptom/mood and activity/position in the patient diary.
•
Activate a reading (if the Start/Stop button is activated) at the first sign of symptoms.
•
Remain motionless during readings.
•
Keep vehicle driving and travel to a minimum.
•
Bring diary upon return.
DON’T
•
Remove the cuff.
•
Get the monitor wet.
•
Use power tools or heavy equipment during a reading.
•
Remove the batteries from the unit.
•
Wear long-sleeved sweaters or dresses during monitoring period.
•
Swim, shower, or bathe during monitoring.
•
Operate heavy equipment or power tools, as vibrations may functionally disrupt the monitor.
4341 State Street Road, PO Box 220, Skaneateles Falls, NY 13153-0220 USA
(p) 800.535.6663 (f) 315.685.2174 www.welchallyn.com
© 2007 Welch Allyn REF 101913 Mat. Number: 708553, Ver: B