1
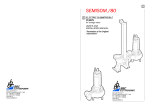
Photovoltaic pumping station ECOSOM
INSTRUCTION AND
INSTALLATION MANUAL
ECOSOM 4/80
For electric pump type
SRF 4/80 DC 24 V
ECOSOM 320 - 265 - 262
For electric pumps
type
SEMISOM DC 24 V
“Translation of the
Original
Instructions”
Via G. Di Vittorio, 9
61034 Fossombrone (PU) - Italy
Tel. +39 0721 716590
Fax +39 0721 716518
www.bbc.it
1
LIST OF THE REVIEWS OF THE
MANUAL
Code/Description
Code/Description
L17/1st ISSUE
Review No.
00
Date
SEPT. 2010
INDEX
Part
Page
WARRANTY
3
SOME NOTES ABOUT
THE USER’S MANUAL
3
INTRODUCTION
- MANUFACTURER’S STATEMENT
- IDENTIFICATION OF THE UNIT
- GENERAL NOTES AT DELIVERY
- DESCRIPTION OF THE PUMPING UNIT
-
ECOSOM
USE
- IMPROPER USE
- APPLICATION
- MAIN COMPONENTS
OF THE PUMPING STATION
SAFETY PRESCRIPTIONS
- SYMBOLS AND THEIR
-
1
1.1
1.2
1.3
1.4
4
4
4
4
5
1.4.1
5
1.4.2
1.4.3
5
5
1.4.4
6
2
7
7
MEANING
CONTENTS
8
TECHNICAL FEATURES
3
11
HANDLING, INSTALLATION AND
CONNECTION
- PRELIMINARY INFORMATION ABOUT
4
12
4.1
12
4.2
4.3
13
16
START
5
20
STOPPING AND CLEANING
6
20
MAINTENANCE
7
21
TROUBLES AND SOLUTIONS
8
21
HANDLING, INSTALLATION AND
CONNECTION
- INSTALLATION
- ELECTRIC CONNECTION
CE DECLARATION OF
CONFORMITY
23
2
WARRANTY
The products have a 24 month warranty against
manufacturing defects starting from their
installation.
SOME COMMENTS ABOUT THE USER’S
MANUAL
The User’s Manual is not an accessory of the
Pumping station, but is an integral part of the
station itself and represents a SAFETY MEASURE.
Warranty is limited to either replacement or
repairing, at our workshop, of defective products
or pieces and does not imply any possible request for
indemnity.
Warranty does not include troubles due to wrong
electric connection, lack of suitable protection,
faulty assembling, wrong operations, defects of
installation, any kind of corrosion and
abrasion due to the liquid pumped as well as nonobservance of the use provided for in the User’s and
Installation Manual.
The guarantee is not valid if products are
disassembled, repaired or tampered with by
unauthorized personnel.
In order to make usage of the Manual easier,
each subject has been divided into numbered
points, which, where required are supported on
drawings.
This manual has to be kept intact, near the
electric pump and delivered to any operator, user
or owner.
The manual shall not be damaged; it must be kept
intact – do not tear any sheets –, be kept far from
humidity and heat sources. While consulting, try
not to damage its readability.
The most important sections are highlighted by
symbols and detailed explanations above the
pictures.
Giving these notices, the Manufacturer aims, in an
unequivocal way, to alert the operator of
measures, dangers and warnings that should
concern him.
3
PART 1
PRELIMINARY INFORMATION
1.1
MANUFACTURER’S STATEMENT
The pumping station ECOSOM is manufactured in
accordance with 2006/42/CE e 2004/108/CE
Regulations.
BBC informs that any modifications or tampering to
pumping station ECOSOM and/or operations
carried out in nonnon-compliance with the provisions
of this manual, especially the nonnon-observance of
the Safety Regulations, imply the nonnon-validity of the
Warranty and, consequently, make the EC
Declaration of original Conformity invalid.
1.3
GENERAL INFORMATION AT DELIVERY
The pumping station ECOSOM is dispatched
inside a rigid packaging.
When you receive them, always check that:
- the package is not damaged;
- the solar panels and their accessories have not
been damaged.
Should there be any damage or missing parts,
inform the supplier, the forwarding agent or his
insurance company immediately, providing him
detailed information.
Please, remember that:
The technical data are referred to the pumping
station ECOSOM 4/80 and ECOSOM 320 - 265 262 (SEE PART 3 — TECNICAL FEATURES), drawings
and any other documents are owned by BBC who
owns all relevant rights that can not be placed at
any third parties’ disposal without BBC written
authorization.
Consequently, any reproduction – even partial –
of text and illustrations is strictly prohibited.
1.2
IDENTIFICATION OF THE UNIT
Always remember to quote the model of the
pumping station ECOSOM in case you call BBC or
its customer service.
Transcribe the type of unit, so that a copy of the
manual can be requested, should this one be lost
and/or should the label be unreadable.
4
1.4
DESCRIPTION OF THE PUMPING STATION
ECOSOM
1.4.1
USE
(PURPOSE - SPECIFIC USE)
The ECOSOM solar station, being delivered in a
stand-alone kit and being easy-to-install units,
allow to pump liquids wherever there is a good
solar radiation. They produce 24V DC renewable
energy by using available solar light.
1.4.2
IMPROPER USE
CAUTION, DANGER OF
FIRE AND TOXICITY!
THE PUMPING STATION ECOSOM MUST
NOT BE USED TO PUMP DANGEROUS
LIQUIDS (either inflammable or toxic)
Any use, other than that specified by the
manufacturer, has to be considered as improper
use.
1.4.3
PLACE OF USE
CAUTION, DANGER
OF EXPLOSION!
THE PUMPING STATION ECOSOM MUST
NOT BE INSTALLED IN EXPLOSIVE PLACES.
CAUTION, DANGER
OF ELECTROCUTION!
THE PUMPING STATION ECOSOM MUST NOT BE
INSTALLED IN PLACES WHERE THERE ARE
PEOPLE IN CONTACT WITH LIQUIDS (i.e. swimming
pools).
Minimum and maximum operating temperature of
the liquid pumped:
- 0 / 35°C for continuous duty (ECOSOM
262,265,320);
- 0 / 45°C for intermittent duty (ECOSOM
262 ,265 ,320).
- 0 / 30°C SERIES ECOSOM 4/80
The pumping station ECOSOM has no vibrations
and its noise is below 70 db (A).
In case of applications different from those
specified in this manual, please contact
BBC Elettropompe.
5
1.4.4
MAIN COMPONENTS OF THE PUMPING
STATION ECOSOM
14
1
3
7
16
17
15
12
5
2
6
13
4
9
8
18
Position
19
20
11
10
Description
Solar module 180W
(±3%)
Qty
Position
Description
Qty
2
11
Bracket 120°
6
2
UP Profile L = 0,75 Mt.
2
12
Bracket 150°
2
3
Profile UP L = 1,1 Mt.
(drilled)
2
13
Flat bracket
2
4
Profile UP L = 0,72 Mt.
2
14
Middle Clip 41-50 mm
2
5
Profile UP L = 1,24 Mt.
2
15
End Clip 42 mm
4
6
Profile UP L = 1,48 Mt.
1
16
Screw M10x30 A2
34
2
17
Fixing nut M10 A4
34
2
18
Cabinet
1
3
19
Fixing nut M8 A4
4
4
20
Square fixing clamp
2
1
7
8
9
10
Profile UP-S L = 1,7
Mt.
Profile UP-S L = 1,5
mt.
Profile UP-S L = 1,2
Mt. (drilled)
90° bracket
6
PART 2
SAFETY PRESCRIPTIONS
While consulting this user’s manual you will find
some symbols; each one has its precise meaning.
CONVENTIONAL SYMBOLS AND
THEIR DEFINITION
WARNING, DANGER OF ELECTROCUTION!
It shows the concerned personnel that the
operation described presents risk of electric shock
if not carried out in compliance with the safety
regulations.
MECHANICAL MAINTENANCE OPERATOR
Qualified technician able to manage the machine
in normal conditions. He/she is able to operate on
all mechanical parts so to carry out all
adjustments, maintenance interventions and
repairs required.
He/she is not allowed to operate on electric
systems with voltage presence.
ELECTRIC MAINTENANCE OPERATOR OR TRAINED
PERSON (See EN 6020460204-1 point 3.52)
Qualified technician able to manage the machine
in normal conditions. He/she is put in charge of
the interventions of electric adjustment,
maintenance and repairing.
He/she is able to operate with voltage presence
inside electric panels or control boxes.
WARNING, GENERAL DANGER!
It shows the concerned personnel that the
operation described presents risks to get physical
ly injured if not carried out in compliance with the
safety regulations.
Every time, risks are detailed, in TEXT AND
SYMBOLS.
NOTE!
It shows the concerned personnel which subject is
to be taken into better consideration.
PERSONAL PROTECTION
The operator is OBLIGED to use devices for
personal protection in presence of one of these
self explanatory symbols.
RECOMMENDATION
It is referred to a method of work experienced in
our facilities. Please, consider that each operator
can develop his/her own way to carry it out.
WARNING!
It shows the concerned personnel basic
information whose content, if not respected, can
determine, slight injuries to people or damages to
the machine.
SPECIAL INTERVENTIONS
OPERATION
Indicates that only qualified personnel with
specific skills should carry out the operation.
Any special maintenance intervention, evidenced
by this symbol, are to be requested to BBC
Elettropompe.
The operator cannot carry out any operation
reserved for MECHANICAL OR ELECTRIC
MAINTENANCE QUALIFIED PERSONNEL.
7
CONTENTS
2.1
Before installing the pumping station, the
customer shall make sure that the site is
sufficiently levelled and can stand its weight (see
Technical Features, Section 3). Furthermore, he/
she will verify the presence of technological
devices and sufficient room on all sides for any
possible maintenance.
2.6
ZERO POWER STATE
Before doing any operation, turn the switch on O
“ZERO”.
- Remove fuses;
- Indicate WORK IN PROGRESS;
- Lock the panel, remove the key and bring it with
you.
THE PUMPING STATION IS EQUIPPED
WITH RERE-SWITCHING DEVICES THAT
MAY RESTART IT AUTOMATICALLY!
2.2
For all electric wiring, refer to the electric drawing
(see 4.4.2).
2.3
The personnel chosen for the handling of the
electric pump and its accessories will have to
wear gloves and proper shoes to prevent
accidents.
2.7
The trained personnel called to operate on the
pumping station must have the following IPD
(Individual
Individual Protection Devices)
Devices at disposal:
helmet, protection glasses, oxygen set, safety
sling, gloves, accident prevention shoes when
required.
Said personnel must also:
2.4
For all handling operations of the machine,
once it is unpacked, See Section 4 Handling, Installation and Connection.
Connection
♦
Wear overalls with closed cuffs;
♦ Tie hair if this is long;
♦ Never wear fluttering and/or torn objects
and/or clothing (i.e., necklaces, watches,
rings, bracelets, scarves, neckerchiefs, ties,
etc.).
2.5
All necessary operations of assistance,
maintenance and repair must be carried out only
by a QUALIFIED ELECTRIC TECHNICIAN or by a
MECHANICAL MAINTENANCE OPERATOR who
knows the safety prescriptions and the content of
this manual.
8
2.8
2.11
CAUTION, DANGER OF INFECTIONS!
Before carrying out any intervention, the
personnel operating shall make sure to use all
hygiene and health measures.
Start the electric pump only when it is duly
installed and fixed.
NEVER START IT WITHOUT LIQUID.
2.9
NOTE!
Do not move nor handle any part of the
ECOSOM pumping station by using its wires.
OK
NO
2.12
CAUTION! DANGER OF ELECTROCUTION!
Never run nor start the electric pump if somebody
is in contact with the liquid to be pumped.
2.10
CAUTION! DANGER OF SHEARING, CUTTING AND
ABRASION!
Be particularly careful
aluminium profiles.
profiles
while
handling
the
2.13
IT IS FORBIDDEN TO CARRY OUT MAKESHIFT REPAIRS.
2.14
Make sure that there are no tools, rags and other
material left inside the panel or where the pump
has been installed.
9
2.15
2.17
The solar panels can reach high temperatures.
Consequently, handle them only once they are
cool.
When the machine has finished its life cycle,
please dispose of it in a responsible manner.
Contact a company specializing in Waste Disposal.
2.16
Always ask for and use original spare parts.
10
PART 3
TECHNICAL FEATURES
Portata - Flow
24V
Corrente Continua
Diret current
Caratt. Nominali Nominal
Charact.
Hp
KW
A
m
DNM
m3/d*
0
0,9
1,5
3
4,5
6
7,5
9
10,5
12
l/min
0
6
10
20
30
40
50
60
70
80
7
Prevalenza manometrica totale in metri - total manometric head in meters
Girante Radiale - Radial Impeller
ECOSOM 4/80
0,75
0,55
28
5
1"¼
40
38
37
34
30
26
21
17
11
0
5
15
22,5
30
37,5
45
52,5
60
0
30
100
150
200
250
300
350
400
*Massima portata giornaliera con irraggiamento ottimale • Maximum capacity with optimal daily sun irradiance
Portata - Flow
24V
Corrente Continua
Diret current
Caratt. Nominali Nominal
Charact.
Hp
KW
A
m
DNM
Passag- m3/d*
gio solidi
øø
Solids l/min
Prevalenza manometrica totale in metri - total manometric head in meters
Acque Torbide Girante Aperta - Dirty Water Open Impeller
ECOSOM 320
0,75
0,55
28
5
1"¼
13
11,5
11
9
7,5
5,5
3
0,5
5
1"½
40
8,5
8
6,5
5,5
4
3
1
10,5
10
9
8
7
6
4,5
Acque Luride Girante Arretrata - Sewage Water Vortex Impeller
ECOSOM 265
0,75
0,55
28
Acque Luride Girante Bicanale - Arretrata - Sewage Water Double-Channel Impeller
ECOSOM 262
0,75
0,55
28
5
2"
32
3
1
*Massima portata giornaliera con irraggiamento ottimale • Maximum capacity with optimal daily sun irradiance
11
PART 4
HANDLING,
HANDLING, INSTALLATION
AND CONNECTION
Read thoroughly Part 2 and Part 3 of this
manual before handling, installing or wiring
the pumping station.
4.1.4
CAUTION! DANGER OF INTOXICATION OR
POISONING BEACAUSE OF TOXIC GAS!
Make sure that there is neither toxic nor
inflammable gas in the area where the pumping
station ECOSOM will be installed.
4.1.5
CAUTION, DANGER OF SLIPPING!
Make sure that the area where the pumping
station ECOSOM will be installed is not muddy.
4.1
SOME PRELIMINARY INFORMATION ABOUT HANDLING, INSTALLATION AND WIRING
4.1.1
CAUTION, DANGER OF CRUSH, SHOCK AND
ABRASION!
The personnel operating while handling and
installing the solar pumping station shall always
wear gloves, accident prevention shoes and
helmet.
4.1.6
Make sure to have sufficient room where the
pumping station ECOSOM will be installed.
4.1.2
Bring the package/s near the place of installation
by means of lifting equipment, fork lift or hand
pallet truck.
4.1.7
Surround the installation area with suitable
barriers.
4.1.3
NEVER work alone during the installation of the
pumping station ECOSOM.
Always wear safety belts and Individual Protection
Devices (IPD
IPD
12
4.1.8
It is advisable to install a NON-RETURN valve at
least 1 (one) metre from the delivery outlet to
avoid a possible flow-back of liquid through the
delivery pipe.
4.1.9
Make sure that the electric pump to be installed is
suitable for the system (see Ø of the pipes, flow of
the electric pump, pipe length, etc.).
You can also consult the table of BBC General
catalogue “pressure loss”.
4.2
INSTALLATION
4.2.1
Unscrew all screws of the bottom of the case and
remove the lid from the base.
4.2.2
Necessary tools to assemble the station:
8 mm Allen key
13 mm wrench
15 mm wrench
15 mm socket wrench
4.2.3
Take the 0,75 Mt. UP profile (2), the 1.24 Mt. UP
profile (5), and the 1,50 Mt. UP-S profile (8). Fix
them using two 90° brackets (10).
The front must be 0.24 Mt. back from the end of
the lower UP profile.
Please remember to use extra screws between
the two studs.
16
5
17
2
75 cm
1.24 m
NOTE!
4.1.10
Before the installation, read all paragraphs (4.2,
4.3 and 4.4) so to be ready for any circumstance.
10
8
4.1.11
The preliminary information about HANDLING,
INSTALLATION AND WIRING, is now complete.
24 cm
1.09 m
1.5 m
13
4.2.4
Assemble the profile UP 0.72 Mt. (4) with a 150°
bracket (12) in the lower part of the frame, a
120° bracket (12) and a 150° one (11) in the
upper part.
4.2.7
Assemble the 1,70 Mt. upper profiles (7).
Assemble the last two 1,10 Mt. drilled profiles (3).
7
11
7
2
3
12
5
5
4
7
3
11
5
72
cm
4
4
8
70 cm
4.2.5
Repeat all operations mentioned on 4.2.3 and
4.2.4. Add also a flat bracket (13) in the lower
part of the profile UP (6).
Use the profiles (9) to put the others at the right
distance. Fix the stiffening profile (6) in the upper
part by means of a flat bracket (13) and a 120°
bracket (11)
4.2.8
Insert the 6 fixing clips of the panel and make
sure that the spring is in its correct position.
15
14
15
14
6
5
13
9
6
8
9
11
1.0
13
6
2
m
30
5
cm
4.2.6
Use the remaining 120° bracket (11) on the
remaining stud (5).
4.2.9
Insert the panels and tighten their screws.
1
5
11
5
YOU HAVE NOW ASSEMBLED THE SOLAR
PUMPING STATION!
14
4.2.10
POSITIONING:
Place the solar pumping station facing SOUTH if it
is installed in the northern Hemisphere, NORTH if
in the southern Hemisphere.
4.2.11
ANCHORAGE
The best way to secure the pumping station is to
fix the frame, firmly, to a rigid base. Its dimensions
must be proportionate to the weight of the station
and to the average wind speed of the area where
the ECOSOM pumping station is to be installed.
Use the proper fixing spots (A).
A
A
A
A
4.2.12
HOW TO FIX THE ELECTRIC PANEL
Put the panel on the frame, insert the fixing
clamps (20) in the screws coming out from the
bottom of panel itself. Tighten the fixing nuts (19).
18
20
19
18
19
20
15
4.3
ELECTRIC CONNECTION
4.3.1
CAUTION!
During the operation of electric connection, there
is a high RISK OF ELECTRIC SHOCK.
This is why this operation must be carried out only
by trained personnel (see EN 60204.1 point
3.52).
4.3.2
Take the electric diagram (see 4.4.2).
4.3.3
ELECTRIC PANEL
TECHNICAL FEATURES
- 30 A Unipolar thermal protector switch;
- 80 A power relay;
- Predisposed to be connected with float switches
for dry running protection;
- Predisposed to be connected with pressure
switches, start and stop float switch, etc.;
- HAND-OFF-AUTO selector switch;
-Spy lamps for: Pump running, pump cut-out, low
battery cut-out;
- 20A automatic charge controller to supply the
correct power to the batteries protecting them
from any possible damage;
- Fibreglass cabinet that can be fixed to the main
structure
- Fuse holder with fuses on both main and
auxiliary circuit;
- Rechargeable and easy-to-inspect batteries fit in
a slot on the frame.
4.3.4
SYMBOLS OF THE COMPONENTS OF THE PANEL
- QS1
40A Opening interlock
- SCM-N 20 20A Charge controller;
- FU1
Fuses for pump protection;
- FU2
Fuses for SCM-N 20 protection;
- FU3
1A fuse to protect commands from
batteries ;
- FU4
Fuse to protect commands from SCMN 20;
- RL1
Signal relay from SCM-N 20-FU4;
- RL2
Signal relay from G1-G2-FU1-FU3;
- RLA/B
80A Power relay for pump control;
- SW01
HAND-0FF-AUTO pump switch ;
- HL1
Lamp for low battery cut-out / FU4
interrupted;
- HL2
Lamp for thermal cut-out / level cutout / FU1 - 3 interrupted;
- HL3
Lamp for pump running;
- G1
RUN float switch;
- G2
STOP float switch;
- AUT
Automatic device: i.e.: float switch,
pressure switch etc.
16
4.3.5
ELECTRICAL DRAWING
17
4.3.6
POWER CABLE
The electric pump is supplied with 5 Mt. cable.
If an extra length is needed, choose the right
size according to the table ’CHOISE OF THE
CABLE’ on BBC CATALOGUE.
Cable joints must be ABSOLUTELY WATERTIGHT
Sezione cavo in mm2
Cable section mm2
Caratteristiche nominali
Characteristic
Nominal
Hp
A
0,75
28
2x6
2 x 10
2 x 16
2 x 25
Lunghezza massima cavo in metri - Maximum cable length in meters
10
15
20
30
Note
- Caduta di tensione:
Notes
- Voltage drop:
4%
4%
18
NOTE!
4.4
WIRING
Turn the MAIN SWITCH on “0” (zero).
4.4.1 How to reach the terminal
board
Make sure that the electric cables are always
in good conditions and that the terminals are
wellwell-tightened to their own clamps.
Check, frequently and periodically, that all
electric protections are duly working.
In case of intervention of one of the
protections, check the reason before
resetting the system.
Install the control and protection devices in
an ambient according to their IP protection.
4.4.3
CONNECTION OF THE SOLAR PANELS
Unscrew the fixing screws of the
panel where the ON-OFF switch is
placed and then take it out.
Turn the MAIN SWITCH on “0” (zero).
4.4.2
DRAWING OF THE TERMINAL BOARD
The electric pump is supplied with a two-wire
power cable.
Power cable (red - black):
Use the quick connectors to wire
the cables coming from the back
of the panel to those of the solar
panels. Be sure that polarities
and colours match each other.
4.4.4
HOW TO PLACE AND CONNECT THE BATTERIES
- DO NOT PUT TOOLS NOR ANY OTHER METAL
OBJECT ON THE BATTERIES
- NEVER MAKE TEMPORARY CONNECTIONS
- their section is 6 mm²;
- they must be wired to terminals 1 and 2 of the
control panel.
1 terminal ( + ) red wire;
2 terminal ( - ) black wire.
AUTOMATIC DEVICE:
- G1 Run float switch;
- G2 Stop float switch;
- AUT Automatic device (i.e. pressure switch).
Turn the MAIN SWITCH on “0” (zero).
Open the upper part of the control
panel, remove the lower panel by
unscrewing the fixing nuts.
The pre-wired cables to connect to
the batteries are also supplied with
eyelet.
Connect the batteries in series
according to the electric drawing.
Connect the sensor of temperature
to the battery.
+
-
+
-
4.4.5
THE ELECTRIC CONNECTION is now complete.
19
5.7 CHECK OF THE AUTOMATIC DEVICES
PART 5
STARTSTART-UP
5.7.1
Turn the selector switch on “AUTO”.
The electric pump is started and
stopped according to the status of the
automatic devices (i.e. float switches,
pressure switches, etc.).
5.1
The operator must have read and understood this
user’s manual, particularly Part 2, ‘Safety
Safety
prescriptions’.
5.2
PART 6
STOPPING AND CLEANING
Before starting the electric pump, make sure that
there is liquid inside the basin and that the
electric pump is submersed.
OK
6.1
The operator must have read and understood this
user’s manual, particularly Part 2, ‘Safety
Safety
prescriptions’.
prescriptions’
6.2
Stop the electric pump supplied with the pumping
station ECOSOM by turning the MAINS SWITCH on
“0”.
5.3
Make sure that the basin or the pit are firmly and
properly closed.
5.4
Start the electric pump supplied with the pumping
station ECOSOM by turning the
selector switch on MAN.
The electric pump is started and
the liquid is pumped.
6.3
IN CASE OF LONG PERIODS OF STOP, IT IS NECESSARY:
5.5
Stop the electric pump by turning the selector
switch on “0”.
5.6
The START-UP is now complete.
a - To turn the MAINS SWITCH on “0”.
b - CAUTION, DANGER
OF ELECTRIC SHOCK!
This operation must be carried out by an
ELECTRIC MAINTENANCE OPERATOR.
Disconnect the power cable of the pump from
the terminal board of the MAINS SWITCH.
20
c - Pull out the electric pump;
d - Clean all its parts using a hot water high
pressure cleaner;
PART 8
TROUBLES AND REMEDY
e - Wrap the power cable;
f - Store it in a place where the temperature does
not fall below 0°.
8.1
6.4
STOPPING AND CLEANING are complete.
PART 7
MAINTENANCE
Please, call BBC Elettropompe for any operation of
maintenance, repairing and clearing (LONG
LONG
STOPS OR PERIODS OF IDLENESS excluded).
Our Firm will give you all relevant and necessary
instructions on the matter.
The operator must have read and understood this
user’s manual, particularly Part 2, ‘Safety
Safety
prescriptions’.
8.2
These operations must be carried out by an
ELECTRIC MAINTENANCE OPERATOR. (SEE EN
60204-1 Point 3.52).
8.3
These operations must be carried out by MECHANICAL MAINTENANCE OPERATOR.
OPERATOR
8.4
These operations must be carried out by an
OPERATOR.
OPERATOR
21
TROUBLE
1) The electric pump does not
start.
POSSIBLE CAUSE
REMEDY
The batteries are low
The pump will start
as soon as the
batteries have been
re-charged
Intervention of the thermal
protection
See point 3)
Intervention of the
thermal protection
Burn-out fuses
Replace fuses
The battery has been
Change connections
connected inverting the poles
2) The electric pump runs but
its flow rate is reduced
3) Thermal protection cutcut-out
The charge regulator is
overheated
Wait until the
temperature goes
down
The power cable is damaged
Call BBC
Elettropompe
Clogged suction
Clean
Clogged pipes or valves
Clean
Impeller excessively worn out
Call BBC
Elettropompe
The sense of rotation of the
impeller is inverted
Invert two phases
The level of the liquid is too
low
Turn the MAINS
SWITCH on “0” and
wait until the level is
restored
The sense of rotation of the
impeller is inverted
Invert two phases
Clogged impeller
Clean
22
IT - Costruttore e luogo di archiviazione del fascicolo tecnico:
GB - Manufacturer and place where all technical records are filed:
FR - Constructer et place ou tout le dossier technique est déposé:
DE - Hersteller und Ort der Aufbewahrung der technischen Unterlagen:
ES - Fabricante y el lugar donde todos los expedientes técnicos se presentan:
BBC Elettropompe Srl - 61034 Fossombrone (PU) – ITALY
Tel. +39-0721-716590 - Fax +39-0721-716518 - www.bbc.it
IT - DICHIARAZIONE CE DI CONFORMITA':
Prodotti:
Prodotti ECOSOM 4/80 - ECOSOM 320 - 265 - 262
Dichiariamo che i prodotti sopraelencati sono conformi alle seguenti Direttive:
- MACCHINE 2006/42/CE;
- COMPATIBILITA' ELETTROMAGNETICA 2004/108/CE.
GB - CE STATEMENT OF CONFORMITY:
Products:
Products ECOSOM 4/80 - ECOSOM 320 - 265 - 262
We declare that the products listed above comply with the following Directives:
- MACHINERY 2006/42/EC;
- ELETROMAGNETIC COMPATIBILITY 2004/108/EC.
FR - DECLARATION CE DE CONFORMITE:
Produits:
Produits ECOSOM 4/80 - ECOSOM 320 - 265 - 262
Nous déclarons que les produits énumérès ci-dessus sont conformes aux Directives suivantes:
- MACHINES 2006/42/CE;
- COMPATIBILITE ELECTROMAGNETIQUE 2004/108/CE.
DE - KONFORMITÄTSERKLÄRUNG CE:
Produkte:
Produkte ECOSOM 4/80 - ECOSOM 320 - 265 - 262
Wir, den hier unterzeichnende, daß die vorgenannten Produkte entsprechen folgenden Richtlinien:
- MASCHINENRICHTLINIE 2006/42/EG;
- RICHTLINIEN DER ELEKTROMAGNETISCHEN KOMPATIBILITAT 2004/108/EG.
ES - DECLARACION CE DE CONFORMIDAD:
Productos:
Productos ECOSOM 4/80 - ECOSOM 320 - 265 - 262
Declaramos que los productos arriba indicados se hallan conformes a las Directivas siguientes:
- MAQUINAS 2006/42/CE;
- COMPATIBILIDAD ELECTROMAGNETICA 2004/108/CE.
Fossombrone, 15/09/2010
Il Legale Rappresentante
Mario Cecchini
Via G. Di Vittorio, 9
61034 Fossombrone (PU) - Italy
Tel. +39 0721 716590
Fax +39 0721 716518
www.bbc.it
[email protected]
23
PLATE DATA
Via G. Di Vittorio, 9
61034 Fossombrone (PU) - Italy
Tel. +39 0721 716590
Fax +39 0721 716518
www.bbc.it
[email protected]