1
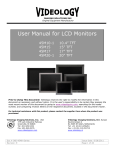
_________________
LYNX
VIDEO MAGNIFIER
© October 2007, Clarity
Clarity Lynx Video Magnifier
User’s Manual
CONTENTS
Welcome
2
Introduction
3
Safety Information
4
Basic Setup Instructions
6
Using the Mouse Camera
12
USB Software Installation
13
Using USB Software
34
Using Additional Lenses
38
Setup for the Lynx
39
Clarity Functions
41
Learning to use Clarity
48
Maintenance
51
Service
52
In case of Difficulty
53
Warranty Statement
56
1
Clarity Lynx Video Magnifier
User’s Manual
WELCOME
Thank you for choosing Clarity! We are pleased to provide you
with a video magnification system that will give you years of
dependable service. To find out about new products or
enhancements to Clarity, or for any service needs, please refer
back to this page.
• Model:
________________________________
• Serial #: ________________________________
• Purchase Date: _____________________________
For service or new product information, please contact:
• Dealer:
_________________________________
• Clarity at (800) 575-1456
2
Clarity Lynx Video Magnifier
User’s Manual
INTRODUCTION
Congratulations! You have purchased one of the most innovative
magnifier systems on the market. Your Clarity video magnifier
has been designed to assist people experiencing sight loss or visual
impairments by magnifying images with the touch of a button.
Some of the key features include:
• Auto-Focus
• Full color, black and white, inverse, blue/yellow, yellow/black
modes
• Zoom capability
• Contrast adjustment
• Magnification from 4-36X.
• Focus Lock
• Line Markers
• Masking
• Flexible positioning
• Close-up, distance viewing and self viewing
• Manual Focus Mode option
• Tilt Feature
• 10.4 inch LCD
• 5 hour battery life
• Focus Lock
• Part of the Flex™ Line of Video Magnifiers
This manual will familiarize you with the features of Clarity as
well as its usage. We strongly recommend you read the manual
before using the system.
3
Clarity Lynx Video Magnifier
User’s Manual
SAFETY INFORMATION
When using the video vision system, basic safety precautions
should always be followed to reduce the risk of fire, electric shock
and injury to persons.
1) Read all instructions.
2) Follow all warnings and precautions marked on the product.
3) When charging the battery, do not overload wall outlets and
extension cords as this can result in the risk of fire or electric
shock. Ensure that the outlets are properly grounded. A surge
protector is recommended.
4) Do not use this product near water or any liquids.
5) Do not place the product on an unstable cart, stand, or table.
6) To reduce the risk of electric shock, do not disassemble the
product. In addition, attempting to service the unit
yourself may void your warranty.
4
Clarity Lynx Video Magnifier
User’s Manual
SAFETY INFORMATION
7) Unplug the product and turn off. Contact qualified service
personnel under the following circumstances:
• if liquid has been spilled into the product;
• if the product does not operate normally by following the
operating instructions;
• if the product has been dropped or damaged; or
• if the product exhibits a large change in performance.
5
Clarity Lynx Video Magnifier
User’s Manual
BASIC SETUP INSTRUCTIONS
Setup Procedures for the Clarity:
• Carefully unpack the system. Inspect all items for shipping
damage. If shipping damage has occurred, notify the supplier
and shipper.
• Review the shipping checklist. Ensure all parts are intact.
• To properly setup your Lynx, first unfold the LCD. Using the
latch at the rear of the LCD, release the LCD and flip toward
you. Next, rotate it so the LCD is facing you.
Next unfold the arm from the back of the LCD. The arm will
swing toward you.
Next attach the camera to the arm. Make sure the camera is
firmly seated. Now attach the mouse camera to the rear of the
Lynx.
6
Clarity Lynx Video Magnifier
User’s Manual
BASIC SETUP INSTRUCTIONS
To Begin Using the Clarity:
Turn the system on by using the power switch located on the
front of the camera. The green light on the camera should light
up.
The picture should appear on the monitor within 20 seconds. If no
picture appears, check that the battery has been charged.
7
Clarity Lynx Video Magnifier
User’s Manual
BASIC SETUP INSTRUCTIONS
The following illustrates the Lynx controls.
Zoom
Contrast
Power
Mode
Zoom
Contrast
Mode
Mouse camera controls
Switches to mouse
camera
Charger
Mouse
camera
8
USB
Clarity Lynx Video Magnifier
User’s Manual
BASIC SETUP INSTRUCTIONS
Positioning the Camera:
In order to make optimum use of the Auto-focus and Zoom control
features of your video magnifier and have the maximum
magnification range available, it is important to position the
camera according to these instructions:
• Place a sheet of paper (or newspaper, magazine, etc.) on the
table underneath the camera. Position the camera so it is 8-9
inches above the paper.
• Ensure that the lens is in place and is not rotated.
• Ensure that the camera is not tilted with respect to the paper you
plan to read.
More Setup Instructions:
• Set System Color:
Your video magnifier has been set with our factory default
color settings. In some lighting environments, this can cause a
slight reddish cast to your pictures. To change this setting,
refer to Lighting, under the Clarity Functions section for
instructions.
• Use the contrast button (up and down arrows on the left side
of the camera) to adjust the contrast, pressing the up arrow and
down arrow respectively.
9
Clarity Lynx Video Magnifier
User’s Manual
BASIC SETUP INSTRUCTIONS
• Use the zoom button, the up and down button on the right side
of the camera, to zoom in and out, pressing the top and bottom
respectively (top is bigger, bottom is smaller).
• Your system comes with a remote control which provides the
same functions as the buttons on the front of the magnifier. The
range of the remote control is 10-15 feet depending on your
environment.
Two problems may occur while using the zoom control if the
bottom of the camera is not 9” from the top of the object it is
focusing on. First, if the camera is fairly far away from the object,
you may find that the camera will not auto-focus as it zooms in. To
solve this problem, move the camera closer to the object.
Second, if the camera is fairly close to the object, you may find
that the camera will not auto-focus as you zoom in. To solve this
problem, move the camera farther away from the object to focus at
that zoom level.
10
Clarity Lynx Video Magnifier
User’s Manual
BASIC SETUP INSTRUCTIONS
Battery:
When the battery is low, a low battery icon will appear on
the screen. You should shortly thereafter recharge the
battery.
Charging the Battery:
To charge the battery, plug the power supply into a power strip
with a surge protector and plug the other end into the connector
located near the power switch on the left side of the unit. Charge
for 4 hours for a 90% charge. A charging icon will appear on the
LCD screen when the unit is on.
Your system is now set up! Please read the "Learning to use
Clarity" sections to further understand the features of Clarity.
11
Clarity Lynx Video Magnifier
User’s Manual
USING THE MOUSE CAMERA
Plug in the mouse camera at the rear of the Lynx. To switch
between the mouse camera and normal camera, press the silver
button located on the top of the Lynx base.
The mouse camera has three controls, zoom, contrast and mode.
Use these controls to change magnification, contrast, and color
select options.
12
Clarity Lynx Video Magnifier
User’s Manual
USB SOFTWARE INSTALLATION (Windows
Vista)
Turn on your computer. Windows will try to install the driver.
Insert the CD into your CD ROM and follow the prompts.
After attaching the USB connectors, the Found New Hardware
Wizard will attempt to install the USB driver. Select “Locate and
install driver software (recommended)”.
13
Clarity Lynx Video Magnifier
User’s Manual
USB SOFTWARE INSTALLATION (Windows
Vista)
Select “Don’t search online”.
Select “Browse my computer for driver software (advanced)”.
14
Clarity Lynx Video Magnifier
User’s Manual
USB SOFTWARE INSTALLATION (Windows
Vista)
Enter in the location of your CD.
Select “Next”.
Select “Install this driver software anyway”.
15
Clarity Lynx Video Magnifier
User’s Manual
USB SOFTWARE INSTALLATION (Windows
Vista)
Select “Close” to finish installing the driver.
16
Clarity Lynx Video Magnifier
User’s Manual
USB SOFTWARE INSTALLATION (Windows
Vista)
To install the software:
Select “Run Setup.EXE” during AutoPlay or double click
“Setup.EXE” from the CD.
Select “Next”.
17
Clarity Lynx Video Magnifier
User’s Manual
USB SOFTWARE INSTALLATION (Windows
Vista)
Select “I accept the terms in the license agreement”. Click “Next”.
Click “Next”.
18
Clarity Lynx Video Magnifier
User’s Manual
USB SOFTWARE INSTALLATION (Windows
Vista)
Click “Install”.
Click “Finish”.
19
Clarity Lynx Video Magnifier
User’s Manual
USB SOFTWARE INSTALLATION (Windows
XP)
Turn on your computer. Windows will try to install the driver.
Insert the CD into your CD ROM and follow the prompts.
After attaching the USB connectors, the Found New Hardware
Wizard will attempt to install the USB driver. Select “No, not this
time” and “Next”.
20
Clarity Lynx Video Magnifier
User’s Manual
USB SOFTWARE INSTALLATION (Windows
XP)
Select “Next”
Select “Continue Anyway”
21
Clarity Lynx Video Magnifier
User’s Manual
USB SOFTWARE INSTALLATION (Windows
XP)
The installation will now attempt to install an audio driver. The
audio driver is not used, but must be installed.
Select “No, not this time” and then “Next”.
22
Clarity Lynx Video Magnifier
User’s Manual
USB SOFTWARE INSTALLATION (Windows
XP)
Select “Next”
Select “Continue Anyway”
23
Clarity Lynx Video Magnifier
User’s Manual
USB SOFTWARE INSTALLATION (Windows
XP)
Select “Finish”
Following the driver installation, the installation program will run.
Follow the prompts.
24
Clarity Lynx Video Magnifier
User’s Manual
USB SOFTWARE INSTALLATION (Windows
XP)
Click “Next”.
25
Clarity Lynx Video Magnifier
User’s Manual
USB SOFTWARE INSTALLATION (Windows
XP)
Click the “Accept” option to accept the license agreement. Click
Next.
26
Clarity Lynx Video Magnifier
User’s Manual
USB SOFTWARE INSTALLATION (Windows
XP)
Click “Next” to accept the location chosen for you, otherwise
select “Change” to change the installation location.
27
Clarity Lynx Video Magnifier
User’s Manual
USB SOFTWARE INSTALLATION (Windows
XP)
Click “Install” to install the program.
28
Clarity Lynx Video Magnifier
User’s Manual
USB SOFTWARE INSTALLATION (Windows
XP)
Click “Next” to install the driver.
29
Clarity Lynx Video Magnifier
User’s Manual
USB SOFTWARE INSTALLATION (Windows
XP)
Select “I Accept” and then “Next”.
30
Clarity Lynx Video Magnifier
User’s Manual
USB SOFTWARE INSTALLATION (Windows
XP)
The above screen will appear several times (up to three times).
Click “Continue Anyway” on all the screens.
31
Clarity Lynx Video Magnifier
User’s Manual
USB SOFTWARE INSTALLATION (Windows
XP)
Click “Finish” to finish installing the driver.
32
Clarity Lynx Video Magnifier
User’s Manual
USB SOFTWARE INSTALLATION (Windows
XP)
Click “Finish” to complete the installation.
33
Clarity Lynx Video Magnifier
User’s Manual
USING THE USB SOFTWARE
Using the Clarity Software:
To resize the window, drag any of the window sides. You can also
use the arrow keys.
•
Left arrow increases the width
•
Right arrow decreases the width
•
Up arrow increases the height
•
Down arrow decreases the height
To move the video, drag the window using the mouse. You can
also use the shift and arrow keys.
•
Shift + Left arrow moves the window right
•
Shift + Up arrow moves the window up
•
Shift + Right arrow moves the window left
•
Shift + Down arrow moves the window down
To view the menu, use the right mouse button when the cursor is
over the video window. Note: Shortcuts (i.e. HOTKEYS) can also
be used. (The video window must be activated first by clicking on
the window icon or using Alt-Tab to choose the Clarity Icon.)
34
Clarity Lynx Video Magnifier
User’s Manual
USING THE USB SOFTWARE
Video
Hotkeys
Keep on top CTRL K or F7
Keeps video window on top of
all other windows
Minimize
CTRL M
Minimizes the video window
Full screen CTRL F or F10 Expands the video to full
screen
Capture
CTRL C
Captures to .bmp file
Hotkeys
Change global hotkeys
Colors
F3
Red
Green
Blue
Yellow/Blue
(cycles color choices)
Changes the image to red
Changes the image to green
Changes the image to blue
Changes the image to
yellow/blue
Settings
Enhanced
CTRL E
Use the enhanced video
contrast settings
Views
View 0
F4
CTRL 0
View 5
CTRL 5
(cycles views)
Recalls the video window
associated with View 0
Recalls the video window
associated with View 5
35
Clarity Lynx Video Magnifier
User’s Manual
USING THE USB SOFTWARE
Save Views
Save view 0 SHIFT CTRL 0 Saves the current video
window as View 0
Save view 5 SHIFT CTRL 5 Saves the current video
window as View 5
Help
Contents
QuickStart
About
F1
F11
Views the help file
Views QuickStart
About Clarity Capture
Exit
Exits the program
Other hotkeys (always active)
Toggle Split Views F8
Toggle Split Views
F9
Activate Menu
Keep on Top
F2
F7
Toggles between preset split
views
Toggles between preset split
views without resizing
Activates the menu
Toggles keep on top
36
Clarity Lynx Video Magnifier
User’s Manual
USING ADDITIONAL LENSES
Using Additional Lenses:
Note that the use of additional lens is not recommended for this
product. However, the following table is useful when using the
camera on an arm other than that supplied with the Lynx.
Lens
Setup
Height
Mag.(20”
Monitor)
+1
16.5”
(419mm)
24X
+2
12”
(305mm)
32X
+4
9”
(229mm)
60X
+4,+2
5.5”
(140mm)
70X
+4,+4
4.5”
(114mm)
90X
37
Clarity Lynx Video Magnifier
User’s Manual
SETUP FOR LYNX
Positioning the Camera:
The Clarity Lynx has been designed to allow you to easily work
with objects on your desktop and objects at a distance (i.e. the
blackboard, etc.). The instructions below explain how to use the
unique features of this special option.
Desktop Viewing:
In order to make optimum use of the AutoFocus and Zoom control
features of your video magnifier and have the maximum
magnification range available, it is important to position the
camera according to these instructions:
Step 1:
Position the camera lens counter clockwise as far as it will go
to its stopping point as shown below.
Place your reading material on the table underneath the
camera.
38
Clarity Lynx Video Magnifier
User’s Manual
SETUP FOR LYNX
Step 2:
Ensure that the camera is not tilted with respect to the paper
you plan to read.
Step 3:
Adjust the magnification and contrast controls to your
preferences.
39
Clarity Lynx Video Magnifier
User’s Manual
SETUP FOR LYNX
Distance Viewing:
Step 1: Rotate the camera lens out of position as shown in the
illustration below.
Step 2: Aim the camera at the objects you wish to view.
Step 3: Adjust the camera magnification and contrast to your user
preferences. Note that when you switch back to desktop
viewing, the zoom level and video mode are
automatically retained.
40
Clarity Lynx Video Magnifier
User’s Manual
CLARITY FUNCTIONS
The following is a summary of Clarity functions and advanced
features.
• Power Button
Turn the camera on by pressing the round power button. A
green light will light up. Turn the camera off by pressing the
power button again.
• Contrast button
Adjusts the contrast level with the arrow up or down button.
• Zoom button
The zoom button controls the magnification. To zoom in or out,
press the top or bottom of the zoom button, the large oval button
the front right side.
41
Clarity Lynx Video Magnifier
User’s Manual
CLARITY FUNCTIONS
• Mode Button
The square mode button will cycle between color, black and
white, inverse, blue/yellow, and yellow/black each time the
mode button is pressed.
• Focus Lock
Focus Lock allows you to instantly lock the focus. To
access this feature, double click the Contrast up button.
The words “Focus Lock” will appear in the upper left
corner. To turn off Focus Lock, press any button or turn
the camera from desktop to distance viewing (or vice
versa). This feature is not accessible when you are in
Advanced Features. If you do not want to access focus lock, it
can be turned off so that you do not access it accidentally. Turn
it off by holding down the contrast up button when turning the
video magnifier on.
• Self viewing
Rotate the camera toward you for self-viewing on the
monitor. The image orientation will automatically flip.
42
Clarity Lynx Video Magnifier
User’s Manual
CLARITY FUNCTIONS
• Advanced Features:
Your Clarity Lynx video magnifier has six advanced features
arranged in a menu system for your convenience. They are Line
Markers, Masking, Manual Focus, Electronic Media, Lighting,
and Mirror. If you do not want to access the advanced features,
they can be turned off so that you do not access them
accidentally. Turn them off by holding down the mode button
when turning the video magnifier on. To turn the advanced
features menu system on again, follow the same procedure.
• To get into the advanced features menu, double click the mode
button (push twice quickly). See each feature below for
instructions to operate that feature.
• To move to the next menu item, single click the mode button.
Each time you single click, the letters in the upper left hand
corner will change to tell you which feature you are in.
• To exit the menu system, double click the mode button again.
The order below is the order in which the advanced features will
appear. You cycle through them until you get to the one you are
interested in.
43
Clarity Lynx Video Magnifier
User’s Manual
CLARITY FUNCTIONS
• Line Markers
This is the first of the advanced features. “MARKERS”
(meaning Line Markers) is displayed in the top left corner of the
monitor. Position Line Markers with the down or bottom
contrast button and adjust spacing with the zoom button.
Once set, Line Markers will remain on your video magnifier
until you move them out of the way with the up or top contrast
button. If you have moved the Line Markers off the monitor, but
you are still in the Line Markers feature (you can see the word
“MARKERS” displayed in the top left corner of the monitor),
you will not see the Line Markers, but you will be unable to use
the zoom button for zooming. To be able to use the zoom button,
you must double click the mode button to get out of Line
Markers feature.
If you are unable to move the Line Markers off, check to see if
you have turned the Advanced Features off. Turn them on again
and you will be able to move the Line Markers away.
• Masking:
To turn on Masking when in this mode, press the up Zoom
button. To turn it off, press the down Zoom button. Use the
Markers mode to control the size of your masked window.
Everything above and below the line markers appears with a
shadow.
44
Clarity Lynx Video Magnifier
User’s Manual
CLARITY FUNCTIONS
• Manual Focus Mode:
“FOCUS” (meaning Manual Focus) will be displayed in the top
left corner of the monitor. The zoom button can now be used to
manually focus. Note: This feature is beneficial when moving
material rapidly underneath the camera – i.e. speed-reading or
writing. Manual Focus will revert to Auto-focus if you single or
double click on the mode button (while you are in advanced
features) or turn the power off.
• Electronic Media Mode (For Watching TV)
This will put the system into the electronic media feature that
should be used for watching television, computer-driven
overhead projectors, and looking at a computer monitor screen
with your system. This procedure enhances the picture quality.
When you are going to view a computer screen or a computer
driven overhead projector, you must also set the refresh rate on
them to 60 Hz to synchronize with the video magnifier. This is
not necessary when viewing a television.
MEDIA ON = Top of zoom button
MEDIA OFF = Bottom of zoom button (default)
“MEDIA ON” is the correct feature for viewing electronic
devices. To get into this feature, press the top zoom button.
45
Clarity Lynx Video Magnifier
User’s Manual
CLARITY FUNCTIONS
“MEDIA ON” will appear in the top left hand corner of the
monitor. Pressing the bottom zoom button will turn off this
mode and “MEDIA OFF” will be displayed in the top left hand
corner of the monitor. “MEDIA ON” or “MEDIA OFF” will
remain in place when you single or double click the mode
button, but will default to “MEDIA OFF” when the video
magnifier is turned off.
• Lighting:
Your video magnifier has been set with our factory default color
setting, which in some lighting environments can cause a slight
reddish cast to your images. You can change this cast to be more
pleasing by following the directions below. Once you set the
cast, it will remain as is until you reset it, even if you turn off the
video magnifier.
“L 1 / L2 / L3” (meaning Lighting Mode) is displayed on the top
left hand corner of the monitor.
L1 = Red cast
L2 = Blue cast 1
L3 = Blue cast 2
Press either the top or bottom zoom button to cycle through the
different lighting modes. In general, the blue cast looks better in
outdoor lighting; the red cast looks better in indoor lighting.
46
Clarity Lynx Video Magnifier
User’s Manual
CLARITY FUNCTIONS
• Mirror:
When in the self viewing mode, the magnifier will mirror your
image. You can enable or disable this feature by pressing the
zoom button up or down.
47
Clarity Lynx Video Magnifier
User’s Manual
LEARNING TO USE CLARITY
The following exercises will help you learn to use the system.
Exercise 1:
• Adjust the table height and your seating to comfortable
positions.
• Put a piece of paper under the camera and turn on the system.
• Push the MODE button repeatedly to display either color, black
and white, inverse or one of the color options.
• Adjust lighting so that the paper is properly illuminated.
• Adjust the camera to a suitable working distance above the
paper. The working distance should be a distance at which the
camera will auto-focus. Note that if the camera does not autofocus, the camera may be out of range for auto-focusing. If so,
readjust the camera's distance from the paper as described in
"Setup."
48
Clarity Lynx Video Magnifier
User’s Manual
LEARNING TO USE CLARITY
• Practice drawing various shapes on the paper. As you move
your hand left on the paper, your hand on the monitor will also
move left. Continue to practice drawing shapes until you feel
comfortable.
• Practice writing your name and the alphabet. Look at the
monitor while writing instead of looking at the paper. Practice
this step until you feel comfortable.
Exercise 2:
• Place an object under the camera.
• Use the zoom button to magnify the object. The camera will
Auto-focus on the object. If you reach a point at which the autofocus is unable to focus, move the camera closer or further from
the object or zoom out.
• Use the zoom button to magnify the object.
49
Clarity Lynx Video Magnifier
User’s Manual
LEARNING TO USE CLARITY
Using Inverse Video Mode:
Press the MODE button until the Inverse image appears.
You are encouraged to experiment with the system to obtain a
better feel for its behavior and capabilities.
50
Clarity Lynx Video Magnifier
User’s Manual
MAINTENANCE
Lens Cleaning:
1) Turn off the monitor and the power supply.
2) Unplug the system from the surge protector.
3) Carefully clean the camera lens with a soft cloth and a lens
cleaning solution (available at most pharmacies).
Quickrelease Cleaning:
1) Unplug the camera from the arm.
2) Carefully clean the quickrelease prong with a cloth and an
alcohol cleaner.
3) With a damp cotton swab clean the prong receptacle.
Monitor Cleaning:
1) Wipe the monitor gently with a soft damp cloth. DO NOT
apply heavy pressure to the monitor.
51
Clarity Lynx Video Magnifier
User’s Manual
SERVICE
Contact Clarity if your power supply is lost or damaged for a new
power supply. Do not attempt to use over the counter power
supplies. This may disqualify your warranty.
52
Clarity Lynx Video Magnifier
User’s Manual
IN CASE OF DIFFICULTY
Problem #1: No picture on the monitor
a)
Charge the battery.
b) Make sure camera is firmly seated.
c)
Make sure the power is on for the camera and monitor.
Problem #2: Poor resolution
a)
Make sure the lens and monitor are clean.
b) Increase the lighting to improve the resolution and the
color of the picture.
a)
Turn the system off and on. Turn the camera off and on.
Unplug camera from the arm and reattach.
53
Clarity Lynx Video Magnifier
User’s Manual
IN CASE OF DIFFICULTY
Problem #3: Poor picture
a)
Increase the lighting on the object.
b) Turn the system off and on. Turn the camera off and on.
Unplug camera from the arm and reattach.
Problem #4: Line Markers cannot be moved off the screen with
the contrast button
a)
Double click the mode button and retry.
b) Check to see if you have turned off advanced features. If
so, turn them on again by holding down the mode button
while you turn the power on.
Problem #5: Objects become difficult to focus
a)
Read pages on Positioning the Camera and Zooming, and
on Manual Focus Mode.
c)
Move the camera closer or farther from the object.
d) Zoom out.
54
Clarity Lynx Video Magnifier
User’s Manual
IN CASE OF DIFFICULTY
A camera reset can be performed by holding the up zoom button
and turning on the camera. Continue to hold the up zoom for two
seconds after turning on the camera. This forces a complete reset.
If these above steps do not resolve the situation give Clarity
technical support, 800-575-1456 a call when you are with your
system for further steps.
55
Clarity Lynx Video Magnifier
User’s Manual
WARRANTY
Clarity warrants, to the individual end user, upon receipt of a valid product
registration card within 30 days of the date of purchase, defects in materials and
workmanship of this product which does not include any batteries or LCDs for its
LIFETIME. Clarity warrants defects in materials and workmanship of included
batteries and LCDs for 1 year. Clarity will repair or replace, at our option, this
product without charge should it fail due to a defect in material or workmanship
within that time period. Institutions will receive a FIVE YEAR warranty on the
product, not including any batteries or LCDs. Any item resold or distributed by
and not explicitly manufactured by Clarity will be covered by their respective
company’s product warranty.
This warranty does not apply to loss or damage which is the result of accident,
misuse, or negligence. This warranty is also non-transferable. All other warranties
expressed, implied, or statutory are limited to the time period listed and are
otherwise excluded from this warranty. Clarity may, at its option, void the
warranty if unauthorized repairs are attempted. Clarity shall not be liable for any
incidental or consequential damage or commercial loss, nor for any other loss or
damages.
To arrange for service, in or out of warranty, please call Clarity at (800) 575-1456.
Clarity assumes no responsibility for products returned without prior authorization.
Clarity will not honor any warranty without a valid registration card from the
original purchaser.
This device complies with Part 15 of the FCC Rules. Operation is subject to the
following conditions: (1) this device may not cause harmful interference, and (2)
this device must accept any interference received, including interference that may
cause undesired operation.
This class A/B digital apparatus meets all requirements of the Canadian
Interference-Causing Equipment Regulations. Cet appareil numerique de la classe
A/B respecte toutes les exigences du reglement sur le materiel brouilleur du
Canada.
56