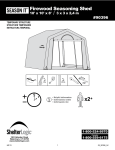
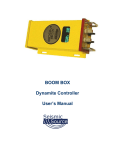
1
User’s Guide The FBA-23 Force Balance Accelerometer Document 302350 September 1997 Trademarks This manual copyright © Kinemetrics, Inc., 1997. All rights reserved. Kinemetrics products are covered by U.S. and foreign patents, issued and pending. Printed in U.S.A. The trademarks used throughout this manual, registered or not, are: Kinemetrics, QuickTalk, QuickLook , K2 , Mt. Whitney , Etna , Etna-SI , FBA-23 FerriShield IBM PC Microsoft, Windows Kinemetrics, Inc., 222 Vista Avenue, Pasadena, CA 91107 USA Phone: (626) 795-2220 Fax: (626) 795-0868 E-mail: [email protected] Website: www.kinemetrics.com Kinemetrics SA, Le Tresi 3, 1028 Preverenges, Switzerland Phone: 21.803.2829 Fax: 21.803.2895 E-mail: [email protected] Declaration of Conformity WE KINEMETRICS, INC. 222 VISTA AVENUE PASADENA, CA 91107 USA hereby declare that the equipment specified conforms to the following Directives and Standards: Product Name: Kinemetrics Altus K2 Systems Product Description: Strong Motion Recording Systems Model Number(s): K2 12-channel, K2 6-channel, K2 4-channel, GPS Option, Modem Option, External Sensors Option, FBA-23, FBA-23DH Directives: 89/336/EEC, 73/23/EEC (93/68/EEC) Standards: Safety: EN 61010-1 EMC: EN 55022, Class A EN 50082-2 Supplementary Information: Pasadena, CA USA 14 August 1997 _______________________________ IAN M. STANDLEY VICE PRESIDENT ENGINEERING Safety Symbols & Terms These symbols may appear on Kinemetrics equipment or in this manual: ! Signifies pay attention. When you see this symbol on the instrument, refer to the similarly marked, relevant part of this manual. Before attempting any service on the instrument, you must read the relevant parts of this manual. If you see this symbol, pay careful attention. Signifies a low-noise earth ground. The noted item should be grounded to ensure low-noise operation, and also to serve as a ground return for EMI/RFI and transients. Such a ground does not work as a safety ground for protection against electrical shock! ~ Signifies an Alternating Current (AC) power line. Signifies a Direct Current (DC) power line derived from an AC power line. Signifies an Electrostatic Sensitive Device (ESD), meaning that when handling the marked equipment you should observe all standard precautions for handling such devices. These safety-related terms appear in this manual: Note: statements identify information that you should consider before moving to the next instruction or choice. Caution statements identify conditions or practices that could result in damage to the equipment, the software, or other property. WARNING! statements identify conditions or practices that could result in personal injury or loss of life. FBA-23 Force Balance Accelerometer Safety Specific Precautions Follow the precautions below to ensure your personal safety and prevent damage to the FBA-23. Power Source The FBA-23 must be supplied with power either from an recorder or from a customer-supplied ± 12V power supply. If you plan to power the FBA from a recorder, connect the recorder to a power supply/charger supplied by Kinemetrics, as described in each recorder's user manual. To supply power directly to the FBA, you need a low-noise, regulated ±12V power supply that is safely grounded and meets all applicable local regulations. User-Supplied Power/Charging System If you supply your own power/charging system, be sure that the system provides the correct voltage and current required by the FBA-23 under all operating conditions. You are responsible for the safety of your charging system. If you get power from the mains supply, be sure you have supplied adequate grounding for all the equipment. If you supply your own batteries, follow the manufacturer’s safety recommendations. ! Sensor Grounding and Cabling In some cases the FBA-23 will be a long distance from the recorder. In these installations it is possible, due either to faulty AC wiring or extremely high earth-return currents, for a high potential difference to exist between the grounds at the two locations. When the cable is grounded at one end a potentially lethal voltage can exist between the other end of the cable and ground. Consider this danger during installation and get help from a qualified electrician if this danger exists. Do Not Operate in Explosive Atmosphere The FBA-23 provides no explosive protection from static discharges or arcing components. Do not operate the equipment in an atmosphere of explosive gases. FBA-23 Force Balance Accelerometer Safety Sicherheit Symbole & Begriffe Diese Symbole können auf Kinemetrics Geräte oder in diesen Manuel erscheinen: ! Bedeutet Achtung! Wenn sie dieses Symbol auf ein Gerät sehen, muss den gleich markierten Teil dieses Manuels beachet werden. Bevor irgend eine Unterhaltsarbeit angefangen wird, muss dieser Teil des Manuels gelesen werden. Wenn Sie dieses Symbol sehen, bitte besondere Achtung geben. Bedeutet Erdung. Das erwaente Teil sollte geerdet werden, um eine “low noise” operation zu versichern, und dann auch als Erdung für EMI/ FRI und Transienten und solch eine Erdung wird nicht als Sicherheit gegen elektrischen Schock dienen! ~ Bedeutet Wechselstromzufuhr (AC) mit Elektroschock Gefahr. Bedeutet Gleichstromzufuhr von AC Versorgung herkommend. Bedeutet Elektrostatisch Sensibeles Element (ESD) für dessen Handhabung alle vorbeugende Vorsichtsmassnahmen genommen werden müssen. Folgende Darstellungen werden in diesen Manuel erscheinen: Note: Darstellung welche Informationen Sie erhalten, die besonders beachtet werden müssen, bevor sie zum nächsten Schritt gehen. Caution: Darstellung bei dem die Missachtung in der Regel Gefahr für Defekte und Störungen im Gerät, Programm oder Zubehör besteht. WARNING! Darstellung bei dem die Missachtung in der Regel Verletzungs – oder Lebensgefahr besteht. FBA-23 Force Balance Accelerometer Safety Spezielle vorbeugende Massnahmen Alle vorbeugende Massnahmen müssen beachtet werden. Für Ihre persönliche Sicherheit, und um Schäden im FBA-23 zu vermeiden. Stromversorgung Die FBA-23 muss entweder mit Strom von einem Accelerograph oder Ihrer eigenen Stromquelle ±12 V versorgt werden. Sollten Sie planen, die FBA-23 mit Strom von einem Recorder zu versorgen, verbinden Sie den Recorder mit unserem Kinemetrics Stromladegerät, wie es in unserem “User Manuel” beschrieben ist. Um die FBA-23 direkt mit Strom zu versorgen, müssen Sie ein Ladegerät ±12 V, welches mit allen Sicherheitsbedingunge ausgestattet ist, benutzen. Optionelles Stromversorgungs/Ladegerät In manchen Fällen wird die FBA-23 eine lange Strecke von dem Recorder entfernt Sein, wo es dann möglich sein könnte, dass durch beschädigte ACWiring oder Hohe Erdbewegungen, ein Spannungsunterschied besteht. Es ist daher unbedingt notwendig, dass alle angeschlossenen Instrumente am gleichen Spannungspotential geerdet sind. Bitte folgen Sie den vom Hersteller gegebenen Empfehlungen. Verkablung und Erdung vom Sensor Wenn das Kabel an einem End geerdet ist, kann ein verhältnismässig grosser Unterschied in der Voltage bestehen, welcher sehr gefährlich ist. Bitte beachten Sie Diese Gefahr und wenn nötig, ziehen Sie das Gutachten eines qualifizierten Elektrikers Ein. Nicht in explosionsgefährdete Umgebung gebrauchen Der FBA-23 hat keinen Explosions-schutz von statischen Entladungen oder funkgefährdeten Bauteilen. Benutzen sie die Geräte nicht in Umgebungen mit explosiven Gasen. FBA-23 Force Balance Accelerometer Safety Seguridad Símbolos & Términos Estos símbolos podrían aparecer en los equipos Kinemetrics o en este manual: ! Significa poner atencion! Cuando Usted vea este símbolo en el instrumento, referirse a las partes de este manual marcadas similarmente. Antes de intentar cualquier servicio en este instrumento, Usted tiene que leer las partes relevantes de este manual. Si Usted ve este símbolo, ponga atención cuidadosamente. Significa un polo a tierra de bajo ruido. El ítem referido debe estar polarizado a tierra para asegurar la operación a bajo ruido y además sirve como un retorno a tierra para el EMI/RFI y transitorios. Tal polo a tierra no trabaja como un polo a tierra de seguridad para protección contra choques eléctricos! ~ Significa una línea de energía de Corriente Alterna (AC). Significa una línea de energía de Corriente Directa derivada de una línea de energía AC. Significa una Unidad Sensitiva a Electrostática (Electrostatic Sensitive Device ESD), indicando que usted debe tener cuidado y observar todas las precauciones para el manejo de tales unidades. Estos términos aparecerán en este manual: Note: sentencias identificando información que Usted debe considerar cuidadosamente antes de dirigirse a la siguiente instrucción u opción. Caution: sentencias identificando condiciones o practicas que podrían resultar en daño del equipo, el software u otra propiedad. WARNING! sentencias identificando condiciones o practicas que podrían resultar en una lesión personal o la perdida de la vida. Los últimos dos términos mencionados arriba podrían también aparecer en el equipo Kinemetrics que Usted ha comprado, pero no necesariamente FBA-23 Force Balance Accelerometer Safety indiferentemente, Usted debe definitivamente tomar notas serias de las precauciones y advertencias en este manual. Precauciones Específicas Siga las precauciones a continuación para garantizar su seguridad personal y prevenir daños al FBA-23. Fuente del poder El FBA-23 debe ser alimentado con energía ya sea desde un registrador o desde una fuente de ± 12V provista por el usuario. Si usted planea alimentar el FBA-23 desde un registrador, conecte el registrador a una fuente de poder/cargador suministrado por Kinemetrics, como se describe en cada manual del usuario para el registrador. Para suministrar energía directamente al FBA-23, usted necesita una fuente de poder de bajo ruido y regulado ± 12V, el cual debe ser apropiadamente conectado a tierra y cumplir con todas las regulaciones locales que apliquen. Sistema de Poder/Carga Provisto por el Usuario Si usted provee su propio sistema de poder/carga, usted tiene que estar seguro, que el sistema proporciona el voltaje correcto y la corriente requerida por el FBA-23 bajo todo las condiciones de operación. Usted es responsable por la seguridad de su sistema de carga. Si usted deriva energía de suministro principal, usted tiene que asegurarse que ha provisto un polo a tierra adecuado para todo el equipo. Si usted suministra sus propias baterías, siga las recomendaciones de seguridad del fabricante. Cableado y Polo a Tierra del Sensor En algunos casos el FBA-23 estará a una distancia lejos del registrador. En estas instalaciones existe la posibilidad de una elevada diferencia de potencial entre dos localidades de polo a tierra, debido ya sea a fallas en el alambrado del AC o corrientes de un extremadamente alto retorno de tierra. Cuando el cable esta polarizado a tierra en uno de sus lados terminales, un voltaje potencialmente letal puede existir entre el otro lado terminal del cable y el polo a tierra. Considere este peligro durante la instalación y obtenga ayuda de un electricista calificado si este peligro existe. No Opere en Atmósferas Explosivas El FBA-23 no proporciona ninguna protección explosiva para descargas estáticas componentes que generen arcos eléctricos. No operar el equipo en una atmósfera de gases explosivos. FBA-23 Force Balance Accelerometer Safety Sécurité Symboles & Terminologie Les symboles suivant peuvent figurer sur les équipements Kinemetrics ou dans ce manuel: ! Signifie Attention! Quand vous rencontrez ce symbole sur un instrument, veuillez vous référer à la section de ce manuel signalée par la même marque. Avant même d’effectuer la première opération sur l’instrument, vous devez lire la section correspondante de ce manuel. Faite attention si vous voyez cet symbole. Indique une mise à la terre “faible bruit”. Les objets portant cette marque doivent être reliés à la terre afin d’assurer un fonctionnement optimal. Elle est aussi utilisée pour les éléments de protection contre les interférences magnétiques, les perturbations hautes fréquences radio et contre les surtensions. Cette mise à terre n’est pas une mise à terre de sécurité pour une protection contre les choques électriques! ~ Indique une alimentation en courant alternatif (AC). Indique une Alimentation en courant continu (DC) dérivée d’une alimentation alternative Indique la présence d’un composant sensible aux décharges électrostatiques (ESD), Cela signifie qu’il faut observer toutes les précautions d’usage en manipulant ce composant. Les termes suivant apparaissent dans ce manuel: Note: Indique la présence d’une information que vous devez particulièrement considérer avant de passer à la prochaine instruction or operation. Caution: Indique une condition ou opération qui peut entraîner des dommages à votre équipement, au logiciel ou à d’autres propriétés . WARNING! Indique une condition ou opération qui peut entraîner des blessures corporelles ou la perte de la vie. Les deux derniers termes mentionnés peuvent apparaître sur les équipements de Kinemetrics que vous avez acquis, mais pas nécessairement indifféremment, il est conseillé de prendre au sérieux les avertissements de ce manuel. FBA-23 Force Balance Accelerometer Safety Précautions Spécifiques Observez toutes les précautions suivantes afin d’assurer votre sécurité personnelle et d’éviter des dégâts aux composants de votre capteur FBA-23. Alimentation Le FBA-23 doit être alimenté avec un courant de ±12 VDC fourni par l’enregistreur ou par votre propre système d’alimentation. Si vous alimentez le FBA-23 avec l’enregistreur, connectez l’enregistreur en utilisant le système d’alimentation fourni par Kinemetrics, et decrit dans le manuel d’utilisation délivré avec l’enregistreur. Pour fournir une alimentation au FBA, vous avez besoin d’une source à faible bruit ± 12V avec une mise a la terre adéquate et qui remplit les conditions de la reglementation locale. Option Systéme d’ alimentation fourni par l’utilisateur Si vous fournissez votre système d’alimentation, vous devez vous assurez que le système fournit une tension et un courant requis par le FBA-23. Veuillez noter que vous serez seul responsible pour la sécurité de votre système d’alimentation. Si vous utilisez le courant du réseau d’alimentation principal, vous devez vous assurez d’installer les mises a la terre adéquates pour tout votre equipement. Si vous utilisez vos batteries, vous devez vous référer aux recommendations fournis par le fournisseurs. ! Mise à la terre et connection du capteur Dans certain cas, le capteur FBA-23 est installé à distance de l’enregistreur. Dans ces installations il est possible, soit a cause d’une connection défectueuse au système d’alimentation principale où d’un fort courant de retour à la terre, pour une difference de potentiel qui existe entre la mise à la terre aux deux locations. Quand le cable est mise à la terre d’un coté, une tension potentiellement fatale peut exister entre l’autre coté du cable et la terre. Considerez ce danger pendant l’installation et demandez l’aide d’un electricien si ce danger existe. Ne Pas Utiliser en Atmosphère Explosif Le FBA-23 ne comprend pas de protection contre les explosions dues aux décharges statiques ou aux composants pouvant provoquer des arcs. Ne pas utiliser ces composants en présence de gaz explosifs. FBA-23 Force Balance Accelerometer Safety Contents 1. Getting Started Inspecting the FBA-23.....................................................................1 2. Installation Basics Requirements for Installation...........................................................3 Required Tools.................................................................................3 Required Supplies ............................................................................4 Required Equipment ........................................................................4 Mounting and Orienting the FBA-23...............................................4 Free-Field Mounting ................................................................4 Mounting the FBA-23......................................................................5 Using Kinemetrics Anchor ..............................................................6 Mounting in a Structure ...................................................................7 Orienting the FBA-23 ..............................................................8 Leveling the FBA-23 .......................................................................8 Cable Assembly ...............................................................................8 CE Compliant Cables.............................................................26 Connecting the FBA-23 to a Recorder...........................................26 3. Operating Basics Operating Concepts..........................................................................1 Power to the FBA.............................................................................2 Zero-Adjusting the FBA ..................................................................3 Methods of Measuring the DC Offset......................................3 Performing the Zero Adjustment .....................................................4 Performing a Functional Test on an FBA with an Altus Recorder..6 4. Maintenance Recommended Maintenance ......................................................... 11 Adjust the Accelerometers .................................................... 11 Complete a Functional Test................................................... 11 Desiccant Replacement ......................................................... 11 Troubleshooting and Repair .................................................. 11 Modification of Range or Natural Frequency ....................... 12 Calibration ............................................................................. 12 5. Reference Theory of Operation ........................................................................ 1 Pole Zero Representation of the FBA-23 ....................................... 3 The Dynamic System .............................................................. 3 Theoretical Second-Order Tranfer Function ........................... 4 Absolute Gain.......................................................................... 4 Practical Damping & Natural Frequency ................................ 5 Second-Order Transfer Function Poles for Nominal FBA-23 Parameters............................................................ 5 Polarity Conventions ....................................................................... 6 Electrical Interface .......................................................................... 7 6. Advanced Installation Topics CE Compliant Installations ............................................................. 1 Long Cables..................................................................................... 1 Cable Assembly with P/N 700045 .......................................... 1 CE Cable Assembly................................................................. 2 User Supplied Cable ........................................................................ 5 Grounding........................................................................................ 6 Use with Non-Kinemetrics Data Loggers ....................................... 7 Power Supply .......................................................................... 7 Output Voltage ........................................................................ 7 Calibration Sequence............................................................... 8 Grounding................................................................................ 8 FBA-23 Force Balance Accelerometer Safety 7. Appendix Tables and Figures Table 2-1: Assembly kit parts required for the Altus recorder mating connector assembly..........................................10 Table 2-2: Part order, recorder cable end.......................................12 Table 2-3: Parts required for the FBA-23-end mating connector assembly.......................................................................21 Table 2-4: Slide parts over jacket in this order:.............................22 Table 3-1: Overshoot Rates ............................................................7 Table 6-1: Required parts for the Altus recorder mating connector assembly........................................................2 Table 6-2: Required parts for the FBA-23-end mating connector assembly........................................................4 Table 6-3: FBA-23 cabling voltage drop calculator ........................6 Table 7-1: FBA-23 specifications....................................................1 Figure 1-1: The FBA-23 .....................................................................2 Figure 2-1: Dimensions of the FBA-23 ..............................................5 Figure 2-2: Anchoring the FBA-23.....................................................7 Figure 2-3: FBA-23 to Altus recorder cable .......................................9 Figure 2-4: Parts for the recorder-end mating connector assembly.......................................................................10 Figure 2-5: Preparing 3/8"-wide foil tape from 1" foil tape .............11 Figure 2-6: Recorder cable end with outer PVC jacket removed........................................................................12 Figure 2-7: Recorder cable end with rope and cellophane removed........................................................................13 Figure 2-8: Detail of the foil shields, drain wires, and foil tape...............................................................................14 Figure 2-9: The drain wires twisted together....................................15 Figure 2-10: Drain wire-to-black wire connection ...........................15 Figure 2-11: Outer foil tape and drain-wire shrink tubing................16 Figure 2-12: Schematic of external FBA-23 cable to both mating connectors ........................................................16 Figure 2-13: The foil tape and the stripped-and-tinned wires .......... 17 Figure 2-14: Wrapping the connection with PVC tape .................... 17 Figure 2-15: Wrapping foil tape around the outside of the connection ................................................................... 18 Figure 2-16: Slipping the Shrink-n-Shield tubing into place ........... 18 Figure 2-17: The Shrink-n-Shield tubing in correct position (after shrinking) ........................................................... 18 Figure 2-18: Completed assembly of the recorder-end of cable 840356................................................................ 18 Figure 2-19: Parts for the FBA-23-end mating connector assembly ...................................................................... 21 Figure 2-20: Preparing 3/8"-wide foil tape from 1" foil tape........... 22 Figure 2-21: The connection wrapped with PVC tape ..................... 23 Figure 2-22: Wrapping foil tape around the outside of the connection ................................................................... 23 Figure 2-23: Braid shield, shrink tubing, connector shell and boot .............................................................................. 23 Figure 2-24: Braid shield and shrink tubing in position (and shrunk)......................................................................... 24 Figure 2-25: Completed assembly of the FBA-23 end of cable 840356................................................................ 24 Figure 3-1: The FBA-23..................................................................... 1 Figure 3-2: One of three accelerometers inside the FBA-23.............. 2 Figure 3-3: QuickLook display of an FT at 100 sps........................... 7 Figure 3-4: QuickLook display of an FT at 200 sps........................... 8 Figure 3-5: Sensor response test of an FBA-23 ................................. 8 Figure 3-6: Sensor response test ringdown ........................................ 9 Figure 3-7: Component of a functional test........................................ 9 Figure 5-1: Simplified block diagram of an accelerometer inside the FBA-23 ......................................................... 1 Figure 5-2: Input connections: ........................................................... 7 Figure 6-1: Drawing 109712-xx, K2 external FBA-23 cable assembly ........................................................................ 2 FBA-23 Force Balance Accelerometer Safety 1. Getting Started This chapter provides an overview of the FBA-23 and the considerations and tools required to install it. Please read this chapter before starting the installation. The FBA-23 is a triaxial accelerometer optimized for recording signals from earthquakes. Inside the waterproof, cast aluminum housing are three lownoise force balance accelerometers mounted orthogonally to each other. Each accelerometer produces an analog voltage output with a full-scale output of ±2.5V. This output corresponds to the input acceleration range of the accelerometer that is factory set at 4g, 2g, 1g, 0.5g, 0.25g or 0.1g. Full specifications for the unit can be found in Appendix A. Kinemetrics is committed to ensuring a successful installation. For assistance with planning, installation, operation or maintenance, contact Kinemetrics at the locations listed in the front of this manual. Kinemetrics also has an extensive Services Group that can install, maintain, and analyze the data from your FBA-23. Inspecting the FBA-23 Remove the FBA-23 from its shipping container. Caution: If you expect to ship the FBA-23 again, save the shipping container and packing material. Note: Although Kinemetrics takes every precaution in packing its systems, shipping damage can still occur. If you find a problem, note the condition of the shipping container. Then contact the freight forwarder and Kinemetrics as soon as possible. Caution: Damage to sensors. Dropping the FBA onto a hard surface can damage the sensors. FBA-23 Force Balance Accelerometer 1-1 Figure 1-1: The FBA-23 Examine the FBA-23. Its black case should appear securely sealed, and show no sign of dents or scratches. The bubble level glass should appear undamaged, and the box's three large zero-adjustment access screws should be screwed in snugly. 1-2 Getting Started 2. Installation Basics Requirements for Installation Listed below are the tools, supplies and equipment required to install the FBA-23 in a typical configuration (remotely from a Kinemetrics recorder, and attached to that recorder via an external FBA-23 cable). However, certain installations may require additional tools, supplies or equipment, depending on specific sites and needs. These instructions also assume that all civil engineering work (concrete pad, conduit, etc.) has been finished. Caution: Kinemetrics recommends you collect all required tools, equipment and supplies before taking the FBA-23 or any related components into the field. Required Tools Soldering iron, electric- or butane-powered, approx. 50 watts Heat gun (electric- or butane-powered) Small portable vise Screwdrivers (1/8” flat blade, 1/4” flat blade) Wire cutters Wire strippers Long-nose pliers Utility knife An extension cord or small generator for AC power, if butanepowered soldering irons and heat guns are not available Hammer drill with 1/2” concrete bit or a chuck to hold the Red Head anchor for self-drilling Kinemetrics manual anchor drill (P/N 100208) if you are not using a hammer drill Wrench for 1/4-20 bolt Hammer Safety glasses FBA-23 Force Balance Accelerometer 2-3 Required Supplies Adequate length and appropriate type of cable for connecting the FBA-23 to the recorder. Depending on the length required, you may have purchased either Kinemetrics P/N 700045 or the Belden cable stocked by Kinemetrics as P/N 840356. Solder with rosin-core flux. Heat-shrink tubing (1/4” diameter), cable tie-wraps, and electrical tape. Mounting anchor (supplied with the FBA-23). Mating connector supplied with FBA-23 (if you did not order the pre-assembled cable from Kinemetrics). Cable Accessory Kits (supplied with Altus recorders and FBA-23 for Belden cable). Optional CE FerriShields (supplied with CE-certified Altus recorders). Required Equipment Battery-powered Digital Volt Meter (DVM) Compass for checking the orientation of the sensors. Camera to photograph the completed installations for the commissioning report (recommended). Mounting and Orienting the FBA-23 Free-Field Mounting For a free-field installation of the FBA-23, you will probably need a concrete pad or pier upon which to secure it. To make sure the pad or pier is large enough, compare its size with the dimensions shown in Figures 2-1 and 2-2. 2-4 Installation Basics Figure 2-1: Dimensions of the FBA-23 Note: Before pouring concrete or attaching the FBA-23, be sure the finished platform will line up with a true north-south axis and true east-west axis. Pouring the platform in this orientation will help in making sure that the white orientation arrow on the top of the FBA-23, when mounted, is pointed to true north, which is the normal orientation used for free field strong motion studies. Note: If you use a compass to determine true north-south axis, be sure to correct for the difference between magnetic north (the direction indicated by the compass) and true north. Mounting the FBA-23 If you do not wish to use the Red Head anchor stud (KMI P/N 869002) supplied with the FBA-23, you need to provide an anchor in the mounting surface that can accept the 1/4-20 bolt supplied with the FBA-23. To mount the FBA-23, first install the mounting anchor by following the manufacturer’s instructions. Refer to Figure 2-2, then center the FBA-23 over the mounting anchor with the orientation arrow aligned approximately to true north and insert the 4” FBA-23 Force Balance Accelerometer 2-5 bolt with the supplied washer through the FBA-23 anchor hole until it engages in the anchor. Tighten loosely and follow the instructions on leveling the unit. WARNING: When using power tools and or a hammer be very careful and always wear safety glasses to protect your eyes. Using Kinemetrics Anchor There are three ways to drill a hole in concrete for the heavy-duty anchor supplied with the FBA-23. One way is to hold the self-drilling anchor itself in the drill chuck and use the anchor to drill the hole to a depth of 1”-1¼”. If no drill is available, the hole can be drilled manually using the manual anchor drill option available from Kinemetrics as P/N 100208. The third way is to use a hammer drill with a ½” masonry bit and drill a hole 1”-1¼” deep. To manually drill the hole: 1. Place the stud in the desired location and insert the long rod into the top hole of the holder so that you can turn it. 2. Hit the top of the holder with the hammer while turning the holder. The serrated teeth on the bottom of the stud will start drilling into the concrete. 3. Continue hammering and twisting until the anchor is in the concrete to just under the cone-shaped head. This takes patience! 4. Now pull the anchor out of the hole and clean out the debris. To install the anchor: Once the hole has been drilled the anchor needs to be installed. Proceed as follows: 1. Insert the narrow end of the expanding cone-shaped piece in the bottom of the anchor. 2. Insert the anchor into the hole. Leave the Kinemetrics holder attached if you have it. 3. Hammer on top of the Kinemetrics holder or the anchor to expand the cone and firmly secure the anchor. 4. Finally, break the cone from the top of the anchor by hitting either the holder or the cone sharply on the side with the hammer. Note: 2-6 To re-use the Kinemetrics holder, insert the wedge-shaped end into the lower hole in the holder and use it to eject the cone. Installation Basics To anchor the FBA-23 Refer to Figure 2-2 as you anchor the FBA-23 to the ground. 1. Center the FBA-23 over the mounting hole. Be sure the orientation arrow points north. 2. Place the washer on the 1/4-20 bolt. 3. Insert the bolt and washer through the anchor hole in the FBA-23 until they engage the anchor. 4. Tighten loosely and follow the instructions for levelling the unit. Figure 2-2: Anchoring the FBA-23. Mounting in a Structure To install the FBA-23 in an existing structure, you may need to construct a custom mounting plate, then bolt that plate and the FBA-23 onto the structure. Note: FBA-23 Force Balance Accelerometer Before pouring concrete or attaching the FBA-23 to any floors or structural steel members, determine the final directional orientation of FBA-23. 2-7 Orienting the FBA-23 For installation in a structure, the FBA-23 is normally aligned parallel to the structure's main axis. Leveling the FBA-23 1. Check the bubble level on top of the FBA-23. 2. If the air bubble is centered in the ring, no leveling adjustments need to be made. Tighten the mounting bolt using a torque of between 30-70 inch-pounds. 3. If the air bubble is not in the center of the ring, loosen the mounting bolt and adjust the three leveling feet until the bubble is centered. 4. Retighten the mounting bolt using a torque of 30-70 inch pounds, being careful to maintain the true north orientation in a free-field installation or the structure-axis orientation in a structure. Cable Assembly This section provides instructions for assembling an FBA-23-to-Altus recorder cable based on a Belden cable (KMI P/N 840356). If you are using Kinemetrics P/N 700045 cable, refer to Chapter 6 for assembly instructions. CE 2-8 To be sure the installation meets the requirements of the European EMI/EMC regulations, these instructions must be followed exactly. The instructions assume the cable has already been pulled and routed through appropriate conduit. If possible, Kinemetrics recommends that cables be routed in grounded metal conduit. Installation Basics Figure 2-3: FBA-23 to Altus recorder cable Items from the reference list in the figure above are in the assembly kit. This kit contains items for attaching connectors on either end of the 840356 cable. Separate them carefully, according to the instructions below. Some items are used on one end of the cable and not the other end. Some items are interchangeable and can be used on either end of the cable. Much of the assembly process is the same for either end of the cable. Initial Assembly of the Altus Recorder End To assemble the recorder-end of the 840356 cable, open the assembly kit and pick out the parts listed in Table 2-1 and illustrated left-to-right in Figure 2-3. Keep the other parts in the assembly kit bag; you will need them later. To install mating connector P/N 851119, you require the following: FBA-23 Force Balance Accelerometer 2-9 Table 2-1: Assembly kit parts required for the Altus recorder mating connector assembly Part Name KMI P/N Commercial P/N Description of Item/s Mating connector 851119 851-06EC14-19PN50 1 connector Foil tape 880699 1183 (3/8" wide) 6 pieces, 3/8" x 1" Foil tape 880699 1183 (3/8" wide) 1 piece, 3/8" x 3" Foil tape 880700 1183 (1" wide) 1 piece, 1" x 3" Shrink tubing 850839 FIT 221-1/4" 1 piece, cut 1/4" long Shrink-N-Shield tubing 851366 SST-20 1 piece, 3" long Thermofit tubing 851186 DWP-125 3/4-black 1 piece, 3/4" long Required tools and supplies: Soldering iron (approx. 50 watts) Solder Wire cutters Wire strippers PVC insulating tape Utility knife Heat gun ½” 3½-digit DVM with 200 ohm range or equivalent Figure 2-4: Parts for the recorder-end mating connector assembly 2-10 Installation Basics Note: In place of the 3/8" foil, you may have received two 1"-wide foil tapes. If your kit contains this substitution, then make tape that is approximately 3/8" wide as follows: 1. Divide one of the 1" x 3" pieces into thirds the long way (as shown in the middle grouping in Figure 2-5), so you have three 3"-long pieces. 2. Divide two of the approx. 3/8"-wide strips into 1"-long segments (as shown in the bottom grouping in Figure 2-5). When finished, you should have 6 pieces approx. 3/8" x 1" and 1 piece approx. 1/4" x 3". Figure 2-5: Preparing 3/8"-wide foil tape from 1" foil tape With the parts you need pulled out of the kit and the proper width of tape prepared, begin assembling the recorder-end mating connector. 1. Strip off 3/4" of the outer black rubber tubing on one end of the Shrink-N-Shield tubing (shown on the right side of Figure 2-4). While stripping this off, be careful not to nick the remaining tubing or the cloth/screen mesh. 2. Gather the parts listed in Table 2-2 and slide them over the cable's outer jacket-a couple of feet up, so they are out of the way until needed. Slide them over the jacket in the listed order, top to bottom. If you are not sure which pieces of the connector to use, see Figures 2-16, 2-17 and 2-18 to help identify the right parts. FBA-23 Force Balance Accelerometer 2-11 Table 2-2: Part order, recorder cable end Part Name KMI P/N Thermofit tubing 851186 Connector back shell part of P/N 851119 Shrink-N-Shield tubing 850839 Connector’s plastic grommet ring part of P/N 851119 3. Discard the connector strain relief boot (a part of P/N 851119). Identical Assembly Procedures From this point up to the next section, the assembly procedures and illustrations are exactly the same for both ends of the cable. Once you have attached the recorder end, go to the Initial Assembly of the FBA-23 End section that contains procedures unique to the FBA-23 end. Then return here to repeat the Identical Assembly Procedures for the FBA23 end. Finally, follow the procedures in Final Assembly of the FBA-23 End. 1. Using a utility knife, strip and remove 2" of the cable's outer PVC jacket. 2. Fold back the cellophane and white string covering the shielded wires. 3. Spread the shielded pairs of wire outward from the center rope cord, as shown in Figure 2-6. Figure 2-6: Recorder cable end with outer PVC jacket removed 2-12 Installation Basics 4. Cut off and discard the center rope, cellophane and white string. Cut them back as near as possible to the "new" end of the cable outer jacket, as shown in Figure 2-7. Figure 2-7: Recorder cable end with rope and cellophane removed Figure 2-8 illustrates the steps described below: 1. Unwrap the foil shield from each of the twisted-wire pairs. 2. Separate out the non-insulated, stranded drain wires and pull them toward the cable center. 3. Rewrap the foil shields around the twisted pairs. 4. Take the six pieces of 3/8" x 1" foil tape. One at a time, take each and – beginning as close as possible to the pulled-out drain wires and the cable's outer jacket – wrap it tightly around a foil shield. Make sure your wrapping flows in the same spiraling direction as the shield you are wrapping it around. Wrap all six foil shields identically. 5. From each twisted pair, remove the excess shield above that shield's foil tape, as shown by the twisted wire pair to the left in Figure 2-8. FBA-23 Force Balance Accelerometer 2-13 Figure 2-8: Detail of the foil shields, drain wires, and foil tape 6. Bring all the drain wires together and twist together in the center of the cable. 7. Break out one of the drain wires from the group at 3/8" toward the blue and black twisted pair, as shown in the center of Figure 2-9. 8. At the 3/8" break-out point, quickly, but carefully, apply solder to the clustered drain wires. Note: In the blue-and-black twisted pair, strip off 1/16" of the black insulation, just above the foil tape and solder tinning. This will leave 1/16” of exposed wire in the black lead. 2-14 Installation Basics Figure 2-9: The drain wires twisted together 9. Wrap and solder the single drain wire to the stripped area of the black wire, then trim off all excess drain wires, as shown in Figure 2-10. Figure 2-10: Drain wire-to-black wire connection 10. Apply 1/4"-diameter by 1/4"-long shrink tubing over the soldered area of the drain wires and black wire, as shown in Figure 2-11. The cable is now ready for 3/8" x 3" foil-tape wrapping: 1. Tightly wrap the foil tape around the twisted-together drain wires in the center, as shown in Figure 2-11. 2. FBA-23 Force Balance Accelerometer While gathering the twisted-wire pairs toward the center of the cable, bring the tape tightly over the outside of all of them. See Figures 2-11, 2-12 and 2-13. 2-15 Figure 2-11: Outer foil tape and drain-wire shrink tubing 3. Now insert the twisted pairs of wires into the grommet. Use the schematic in Figure 2-12 to find the proper wire-to-solder cup locations. Be sure to follow the proper half of the schematic below, depending on whether you are currently assembling the recorder end or the FBA-23 end of the cable. Figure 2-12: Schematic of external FBA-23 cable to both mating connectors 2-16 Installation Basics 4. Once you have run the wires through the correct holes in the grommet, strip 1/8" off the wire tips, then solder tin them as shown in Figure 2-13. Figure 2-13: The foil tape and the stripped-and-tinned wires Final Assembly of the Recorder End If you are assembling the recorder end, continue through this section until you are finished. If you are assembling the FBA-23 end, go to Final Assembly of the FBA-23 End. To solder the wires into the recorder mating connector: 1. Start at the bottom and work toward the top (pin A marks the top), soldering the wires into the connector. Note: When cool, the soldered joints should have a smooth, shiny surface. Use enough solder to just fill the connector cup. 2. When done with the soldering, slide the grommet and plastic grommet ring forward and up against the connector head (shown on the right side of Figure 2-14). 3. Then apply two turns of insulating PVC tape between the back of the grommet and the foil tape (also shown in Figure 2-14). Figure 2-14: Wrapping the connection with PVC tape Now, between the back of grommet and end of the cable outer jacket, tightly wrap 1" x 3" foil tape around the cable, as shown in Figure 2-15 below. Note: The foil tape must be in tight contact with the 3/8"-wide foil tape. FBA-23 Force Balance Accelerometer 2-17 Figure 2-15: Wrapping foil tape around the outside of the connection Slide the Shrink-N-Shield tubing forward, as shown in Figure 2-16, then up over the plastic grommet ring. Figure 2-16: Slipping the Shrink-n-Shield tubing into place Now carefully place the tubing so its cloth shield is up against-but not covering over-the connector threads, as shown in Figure 2-17 below. Figure 2-17: The Shrink-n-Shield tubing in correct position (after shrinking) Now, using even heat, shrink the tubing until it is tightly in place over the foil tape (as shown in Figure 2-17), and begin the final assembly process: 1. Slide the connector shell forward and screw-tighten it onto the connector head. 2. Check the resistance from the connector shell to the shields at the other end of the cable. The resistance will vary depending on cable length, but should be very low (<0.3 Ω / 100'). 3. Place the two halves of the cable clamp in place, then tighten its screws. 4. Slide the Thermofit tubing up into place and then shrink it. The completed recorder-end connector assembly appears in Figure 2-18. Figure 2-18: Completed assembly of the recorder-end of cable 840356 2-18 Installation Basics Testing Connector Assembly #1 Now do a "buzzing out" test on the recorder-end of the cable, to make sure you connected the proper wires to the proper solder cups (per the schematic in Figure 2-12), and that none of the wires were shorted in the assembly process. For this testing procedure you need: A digital voltage meter A utility knife A wire stripper A test lead jumper with clips To prepare the FBA-23-end wires as response conductors: 1. Strip back 2" of the cable's outer jacket. 2. Cut off that 2", along with the cellophane, white string, and foil shields that it covered. 3. Separate the drain wires and insulated conductors. 4. Strip off 1/8" of insulation from all of the insulated wires. 5. Make sure to position each wire so that its exposed surface has no contact with any other wire. Now, using the DVM, test the connection of the conductor pairs in the recorder-end of the assembly: First set the DVM to measure resistance in the range of several hundred ohms. Then: 1. At the recorder end of the cable, connect one DVM lead to connector pin L (at the top right in Figure 2-12). Then, with the other DVM lead, check that all other pins in that connector are infinite with respect to pin L. 2. At the FBA-23 end of the cable, have another technician take the white-black wire pair and use a test-lead jumper to connect the white wire to the black wire. 3. When that is done, the DVM at the recorder end should show that pin L is now connected to pin M. The DVM should measure <2.5Ω per 100' of cable. If it does, have the other technician remove the test jumper at the FBA-23 end of the cable. 4. Disconnect the DVM lead from connector pin L on the recorder end and, with the other DVM lead still connected to pin M, confirm that pin M is infinite with respect to all the other connector pins. You have now "buzzed out" the top two connections (L and M) shown in Figure 2-12, for the two wires in the white-black pair. Now repeat Steps 1 FBA-23 Force Balance Accelerometer 2-19 through Step 4, but test connector pins A and B and the two wires in the green-black pair. Follow Steps 1 through 4 for each pair of connector pins and wire-pairs in he remaining five pairs of wires and 10 connections shown in Figure 2-12. Carefully check that all other pins in the connector are infinite with respect to the connector pin you are testing, that the two wires in each pair can be linked at the FBA-23 end without problems, and that the pin is infinite with respect to all the other connector pins. As you test, follow the right end of Figure 2-12 carefully. Caution: Do not proceed to the shield-to-shell testing until all the pairs of insulated conductors have passed the four test steps above. Once you've completed testing all the pairs of insulated conductors, test the connection of the wire shields to the recorder end of the connector shell. 1. At the FBA-23 end, take the white-black pair of wires and use a test lead jumper to connect the white wire to the exposed drain wires. 2. When that is done, the DVM at the recorder end should show that pin L is connected to the recorder-end connector shell and to pin U. The DVM should measure <1.5Ω per 100' of cable. If so, remove the test jumper at the FBA-23 end of the cable. 3. At the recorder end, disconnect the DVM lead from connector pin L and confirm that the connector shell and pin U are infinite with respect to all other connector pins. 4. With the preliminary cable testing completed, disconnect all test equipment. 5. At the FBA-23 end, gather the 2" of wires, shields, cord, etc., that you stripped back; cut off these exposed elements and discard them. Caution: Do not connect the recorder connector to the recorder until you have installed the FBA-23 connector and have completed the final testing described at the end of the cable assembly process. If all the recorder-end connections passed the above test, proceed to the next section. Initial Assembly of the FBA-23 End Having already assembled the connector on the recorder end of the cable, you should now have only those items necessary for assembling the FBA23 end of the cable left in the assembly kit. To make sure, select the parts listed in Table 2-3 and illustrated left-to-right in Figure 2-19. To install FBA-23 mating connector P/N 850407 on the FBA-23 end of the 840356 cable, you will require: 2-20 Installation Basics Table 2-3: Parts required for the FBA-23-end mating connector assembly Part Name KMI P/N Commercial P/N Description of Item/s Mating Connector 850407 MS3106F-20-29P 1 connector Rubber Boot 850034 MS39056-6 1 boot Foil Tape 880699 1183 (3/8" wide) 6 pieces, 3/8" x 1" Foil Tape 880699 1183 (3/8" wide) 1 piece, 3/8" x 3" Foil Tape 880700 1183 (1" wide) 1 piece, 1" x 3" Shrink Tubing 850839 FIT 221-1/4" 1 piece cut 1/4" long Thermofit Tubing 851186 DWP-125 3/4-black 1 piece 2" long Braid #20 AWG 1" wide 840458 1235 1 piece, 2" long Figure 2-19: Parts for the FBA-23-end mating connector assembly Note: In place of the 3/8" foil tape you may have received two 1"-wide foil. If your kit contains this substitution, then do the following: 1. Divide one of the 1" x 3" pieces into thirds the long way (as shown in the middle grouping in Figure 2-20), so you have three 3"-long pieces. 2. Then divide two of the approx. 3/8"-wide strips into 1"-long segments (as shown in the bottom grouping in Figure 2-20). When finished, you should have 6 pieces approx. 3/8" x 1" and 1 piece approx. 1/4" x 3". FBA-23 Force Balance Accelerometer 2-21 Figure 2-20: Preparing 3/8"-wide foil tape from 1" foil tape To assemble the FBA-23-end mating connector: Gather the parts listed in Table 2-4 and slide them over the cable's outer jacket-a couple of feet up it, so they are out of the way until needed. Make sure to slide them over the jacket in the order listed (top to bottom) in Table 2-4. Refer to Figure 2-23 if you need help in identifying these components. Table 2-4: Slide parts over jacket in this order: Part Name KMI P/N Connector Back Shell part of KMI # 850407 Rubber Boot 850034 Thermofit Tubing 851186 Braid #20 AWG, 1" wide 840458 Connector’s Plastic Grommet Ring part of P/N 850407 Now return to Identical Assembly Procedures, and follow it until you come to Final Assembly of the Recorder End. Then come back to here and begin the section below. Final Assembly of the FBA-23 End To properly solder the wires into the connector: 1. Starting at the bottom and working toward the top (pin A marks the top), begin soldering the wires into the connector following the left side of the schematic in Figure 2-12. 2-22 Installation Basics 2. Then slide the grommet and plastic grommet ring forward and up against the connector head (shown on the right side of Figure 2-21). 3. Now apply two turns of insulating PVC tape between the back of the grommet and the foil tape (also shown in Figure 2-21). Figure 2-21: The connection wrapped with PVC tape Now, between the back of the grommet and the end of the cable outer jacket, tightly wrap 1" x 3" foil tape around the cable, as shown in Figure 222. Note: The 1”-wide foil tape must be in tight contact with the 3/8"-wide foil tape. Figure 2-22: Wrapping foil tape around the outside of the connection Then slide the braid shield, Thermofit tubing, connector back shell, and the rubber boot forward, as shown in Figure 2-23. Figure 2-23: Braid shield, shrink tubing, connector shell and boot FBA-23 Force Balance Accelerometer 2-23 Slide the braid up over the plastic grommet ring. Then position it carefully, so it covers up to – but does not overlap – the connector threads (as shown in Figure 2-24). Press the braid into place around the back of the grommet; then, as shown in Figure 2-22, slide the Thermofit tubing over the braid and up to the back of the braid-covered grommet. Figure 2-24: Braid shield and shrink tubing in position (and shrunk) Now, using even heat, shrink the tubing until it fits tightly in place over the braid and foil tape (as shown in Figure 2-24), and begin the final assembly process: 1. Slide the boot and connector shell forward, and screw-tighten the connector shell onto the connector head. 2. Check the resistance from the connector shell to the connector shell at the other end of the cable. The resistance will vary depending on cable length, but should be very low (<0.3 Ω / 100'). 3. Place the two halves of the cable clamp in place, then tighten its screws. Figure 2-25: Completed assembly of the FBA-23 end of cable 840356 Testing Connector Assembly #2 You should also do a "buzzing out" test on this end of the cable, to make sure you connected the proper wires to the proper solder cups (per the 2-24 Installation Basics schematic in Figure 2-12), and that no wires have gotten shorted in the assembly process. To do this test, use the pins in the assembled connector at the recorder end as response conductors. Set the DVM to measure resistance in the range of several hundred ohms. Then: 1. At the FBA-23-end, connect one DVM lead to connector pin A (top left in Figure 2-12). Then, with the other DVM lead, check that all other pins in that connector are infinite with respect to pin A. 2. At the recorder end of the cable, have another technician take the connector and use a test-lead jumper to connect connector pin L to connector pin M. 3. Now the DVM at the FBA-23-end should show that pin A is connected to pin B (the DVM should measure < 2.5 Ω per 100' of cable. If it does, have the other technician remove the test jumper at the recorder end. 4. Disconnect the DVM lead from connector pin A and, with the other DVM lead still connected to pin B, confirm that it is infinite with respect to all other connector pins. You have now "buzzed out" the top two connections (A and B) shown top left in Figure 2-12, for the two wires in the white-black pair. Now repeat Step 1 through Step 4, but test connector pins C and D and the two wires in the green-black pair. Follow Steps 1 through 4 for each pair of connector pins and wire-pairs in the remaining five pairs of wires and 10 connections shown in Figure 2-12. Carefully check that all other pins in the connector are infinite with respect to the connector pin you are testing, that the two pins in each pair can be linked without problems, and that the pin you are testing is infinite with respect to all other connector pins. As you test, follow the left end of Figure 2-12 carefully. Note: Do not proceed to the shield-to-shell testing until all the pairs of insulated conductors have passed the four test steps above. To test the connection of the wire shields to the FBA-23-end connector shell: 1. At the recorder end, have another technician take the recorder connector and use a test-lead jumper to connect pin L to the recorder-end connector shell. 2. The DVM at the FBA-23-end should show that pin A is now connected to the K2-end connector shell and to pin T. The DVM should measure < 1.5 Ω per 100' of cable. If it does, have the technician remove the test jumper at the recorder end. FBA-23 Force Balance Accelerometer 2-25 3. Disconnect the DVM lead from connector pin A and confirm that your connector shell and pin T are infinite with respect to all the other connector pins. With the final cable testing completed, disconnect all test equipment. The fully assembled cable is ready to connect to the recorder and the FBA-23. CE Compliant Cables CE To ensure compliance with the electromagnetic emissions requirement of the European Community, two FerriShields (KMI P/N 840734) supplied with CE marked Altus recorders must be installed at each end of the cable as close to the connector as possible. Use the cable ties supplied with the kit to keep them in position. Connecting the FBA-23 to a Recorder You can now connect the cable to the FBA-23 and the recorder. Caution: Be sure the recorder is unpowered when connecting the cables. 2-26 Installation Basics 3. Operating Basics Operating Concepts The FBA-23 actually consists of three force-balance accelerometers inside a single cast-aluminum case. Each of the three accelerometers is orthogonally mounted on an internal deck plate, making the FBA-23 a "triaxial" accelerometer, capable of measuring ground motion simultaneously in the transverse, vertical and longitudinal planes. Figure 3-1: The FBA-23 FBA-23 Force Balance Accelerometer 3-1 The FBA-23's cast-aluminum exterior has: A gasket-sealed cover to prevent the entrance of moisture and dirt Three access screws (L, V and T) that cover holes through which the longitudinal, vertical and transverse zero offset can be adjusted Three adjustable leveling feet A vertical hole for the anchor bolt A connector for the analog output voltages from the accelerometers and for supplying power and control signals to the FBA. Figure 3-2: One of three accelerometers inside the FBA-23 Power to the FBA If you are using the FBA-23 with a Kinemetrics Altus recorder, the recorder will supply the necessary +/-12V power from the isolated DC/DC converters in the unit. If you are using another recording system you will need to supply the correct power. Refer to Chapter 6, Advanced Installation Topics, for more information. 3-2 Kinemetrics Operating Basics Zero-Adjusting the FBA After the FBA-23 has been installed and leveled, the accelerometer’s DC offset should be 0.0V ±25mV. Zeroing the FBA ensures that when the recorder receives and records data from the FBA-23, that data will have minimal DC offset, and also that the recorder can use its full scale range. Methods of Measuring the DC Offset If the FBA-23 is near the recorder, you may zero the accelerometers by using the recorder as if it were a DVM. Use the AQ DVM command in QuickTalk Terminal Mode. If the FBA-23 is located at the end of a long cable you have two choices: Choice #1 Remove the cover from the unit and measure the offset directly at the accelerometer circuit board. In this case you will directly connect a DVM using EasyHook leads to the FBA circuit board. This method has the disadvantage that you may allow dust or debris into the sensor that could damage the unit. Thus, you should only use this method in a reasonably clean environment such as inside a building. To use this method proceed as follows: 1. Remove the top of the FBA-23 by unscrewing the 12 small screws using a flat bladed screwdriver. Remove the lid taking care not to disturb the sealing gasket. 2. With the connector facing you, first adjust the “L” sensor. This is the sensor on the upper left. Connect the positive lead of the DVM to the output terminal (labeled F on the printed wiring board silkscreen) and the negative lead to the common connection (labeled G). See Figure 3-2. Follow the instructions in the section below for zeroing the “L” sensor. 3. Next adjust the “V” sensor at the front of the unit next to the connector. Leave the negative lead of the DVM connected to the “L” sensor (it is very difficult to get to pin G on the vertical sensor). Connect the positive lead to the F terminal of the vertical sensor. This is the first pin to the right of the adjustment pivot and has a white wire connected to it.) Follow the instructions in the next section for zeroing the “V” sensor. 4. Next adjust the “T” sensor at the back right of the unit next to the connector. Connect the positive lead of the DVM to the F terminal of the sensor. Connect the negative lead to the common connection (labeled G) on the circuit board. Follow the instructions in the next section on zeroing the “T” sensor. FBA-23 Force Balance Accelerometer 3-3 5. When all the sensors have been zeroed remove the DVM leads and replace the cover. Be sure that the cover is correctly aligned with the orientation arrow pointing away from the connector. Take care not to pinch the sealing gasket. Carefully tighten the 12 screws in an alternating pattern to evenly seat the cover on the gasket. The screws should be tightened to a torque of 10-15 inch lbs. Choice #2 The other method is to build a “break-out” cable that allows you get to each of the wires in the FBA cable. You can then measure all the voltages at this breakout cable. This is the best method to use if you have multiple FBA-23s to install. Be sure you are supplying the FBA-23 with ± 12 VDC going to the proper input. Performing the Zero Adjustment Caution: If you have an Altus-series recorder, its firmware will allow you to remove an offset from the data stream by subtracting a constant value from the data after it is recorded. However, you should only use this to remove a small residual offset. If you remove a large offset, you will reduce the instrument's recording range. Refer to Figure 1-5 to see the three screws that provide access to the zero adjustment pivots. To check the "zero adjustment" of the longitudinal accelerometer, use one of the methods described above to measure the sensor’s zero output voltage. If the voltage reading is more than +25 mV or less than -25 mV, then the longitudinal (L) accelerometer offset requires zero adjustment. To adjust the longitudinal accelerometer: 1. Remove the L access screw, then insert a small flat bladed screwdriver into the screw hole and into the slotted end of the longitudinal accelerometer's pivot. Caution: This adjustment is very small, not more than 1°. Do not turn the accelerometer's pivot more than 2°. The unit has a mechanical stop that prevents over rotation of the pivot. Do not try to force the adjustment beyond this stop. You will break the unit! 2. Apply gentle pressure with the screwdriver to the pivot until the voltage is between +25 mV and -25 mV. If the reading is too positive, turn the pivot clockwise-but not more than 1°. If the reading is too negative, turn the pivot counterclockwisebut not more than 1°. 3-4 Kinemetrics Operating Basics 3. Once the voltage reading is in the proper range, remove the screwdriver and replace the access screw. To check the "zero adjustment" of the vertical accelerometer, use one of the methods described above to measure the sensor’s zero output voltage. If the voltage reading is more than +25 mV or less than -25 mV, then the vertical (V) accelerometer offset requires zero adjustment. To adjust the vertical accelerometer: 1. Remove the V access screw, then insert a small flat bladed screwdriver into the screw hole and into the slotted end of the vertical accelerometer's pivot. Caution: This adjustment is very small, not more than 1°. Do not turn the accelerometer's pivot more than 2°. The unit has a mechanical stop that prevents over rotation of the pivot. Do not try to force the adjustment beyond this stop. You will break the unit! 2. With the screwdriver, apply gentle pressure to the pivot until the voltage is between +25 mV and -25 mV. If the reading is too positive, turn the pivot clockwise-but not more than 1°. If the reading is too negative, turn the pivot counterclockwisebut not more than 1°. 3. Once the voltage reading is in the proper range, remove the screwdriver and replace the access screw. To check the "zero adjustment" of the transverse accelerometer, use one of the methods described above to measure the sensor’s zero output voltage. If the voltage reading is more than +25 mV or less than -25 mV, then the transverse (T) accelerometer offset requires zero adjustment. To adjust the transverse accelerometer: 1. Remove the T access screw, then insert a small flat bladed screwdriver into the screw hole and into the slotted end of the transverse accelerometer's pivot. Caution: This adjustment is very small, not more than 1°. Do not turn the accelerometer's pivot more than 2°. The unit has a mechanical stop that prevents over rotation of the pivot. Do not try to force the adjustment beyond this stop. You will break the unit! 2. With the screwdriver, apply gentle pressure to the pivot until the voltage is between +25 mV and -25 mV. If the reading is too positive, turn the pivot clockwise-but not more than 1°. If the reading is too negative, turn the pivot counterclockwisebut not more than 1°. 3. Once the voltage reading is in the proper range, remove the screwdriver and replace the access screw. FBA-23 Force Balance Accelerometer 3-5 The FBA is now correctly zero adjusted. If you removed the cover to perform these adjustments follow the instructions to replace it. If you used a break out cable, remove it and reconnect the actual sensor cable. Performing a Functional Test on an FBA with an Altus Recorder An Altus recorder generates the exact signals required to perform a functional test sequence on the FBA-23. If you are not using a Kinemetrics recorder you should refer to Chapter 6 for information on how to simulate a functional test. Altus recorders have two types of functional tests. The standard functional test runs at the current sampling rate of the instrument. It fully tests the instrument in its operating configuration. However, the sensor’s response is combined with the response of the digital filter and this can make quantitative interpretation of the sensor response difficult, especially for an FBA with a high natural frequency. To allow the sensor response to be determined, a Sensor Response Test (SRT) function is also available. The SRT performs the functional test at a high sampling rate of 1000 samples per second. This removes any effects from the digital filters in the recorders and allows the sensor response to be directly observed. The functional test consists of two input pulses that stimulate an acceleration applied to the CAL input of the FBA. An undamp signal is enabled on the falling edge of the first pulse. It is disabled just before the second pulse. These signals result in the following effects on the FBA output. On the rising edge of the first pulse the FBA will respond as a second order system with a damping of 0.6-0.7. A small overshoot of 4.6-9.5% will be observed on the leading edge. The actual damping corresponding to various overshoot rates is given in Table 3-1. The sensor is undamped on the falling edge of the first pulse and responds as a lightly damped second order system. The impulse will cause the sensor to ring at its natural frequency. This ringing will die down in 0.5 to 1.5 seconds. The system will again be damped on the leading and trailing edges of the second pulse and show the overshot of a damped system. Figure 3-5 shows a functional test on a 50Hz FBA at 100 samples per second. In this instance, the bandwidth of the recorder is not sufficient to allow the ringdown to be seen. Figure 3-6 shows the same sensor at 200 samples per second and the ringdown is clearly visible. Figure 3-7 shows an SRT on a 50 Hz FBA with the ringdown clearly seen. In this figure the natural frequency and damping could easily be measured. Figure 3-8 identifies the various features of the functional test discussed in this section. 3-6 Kinemetrics Operating Basics Table 3-1: Overshoot Rates Damping 0.60 0.61 0.62 0.63 0.64 0.65 0.66 0.67 0.68 0.69 0.70 Overshoot % 9.5 8.9 8.35 7.8 7.3 6.8 6.3 5.9 5.4 5.0 4.6 Figure 3-3: QuickLook display of an FT at 100 sps FBA-23 Force Balance Accelerometer 3-7 Figure 3-4: QuickLook display of an FT at 200 sps Figure 3-5: Sensor response test of an FBA-23 3-8 Kinemetrics Operating Basics Figure 3-6: Sensor response test ringdown Figure 3-7: Component of a functional test. FBA-23 Force Balance Accelerometer 3-9 4. Maintenance Recommended Maintenance The FBA-23 is designed for many years of unattended use, but we recommend that you perform the following checks a minimum of once a year. If the FBA-23 is connected to an Altus recorder equipped with a modem this maintenance check can be performed remotely and more frequently. (See the Altus recorder manual for more details.) Adjust the Accelerometers If the offset of the FBA-23 sensors measures more than ±25 mV you should adjust them. Refer to Chapter 3 for instructions on adjusting the zero offset. Complete a Functional Test Kinemetrics recommends that you perform a functional test on the accelerometer at each service visit to check that the unit is operational and to keep as a baseline record for future visits. Refer to Chapter 3 for instructions on performing the functional test. If the unit is connected to an Altus or other Kinemetrics recorder refer to the recorder’s manual for instructions on performing the functional test. Refer to Chapter 6 if the unit is connected to a non-Kinemetrics data acquisition system. Desiccant Replacement The FBA-23 contains a small capsule of desiccant that is designed to maintain the inside of the unit at a low humidity level. If the case is open for a long period of time, opened repeatedly for inspection or adjustment, or in very humid conditions, this capsule should be replaced. New desiccant can be ordered from Kinemetrics as P/N 700233. Be sure to follow Electro Static Discharge (ESD) precautions when the sensor case is opened. Caution: Potential electrostatic discharge (ESD) hazard to equipment. Wear a grounded wrist strap with impedance of approximately 1 M Ω when handling the FBA-23 circuit boards to protect components from damage. Troubleshooting and Repair If your FBA-23 does not appear to be working we suggest you first check that the cabling and power supply are correct. If the problem persists we recommend you return the unit to Kinemetrics for repair and re-calibration. FBA-23 Force Balance Accelerometer 4-11 Modification of Range or Natural Frequency The range and natural frequency of the FBA-23 are factory set and can only be changed at the factory. Please contact Kinemetrics Services Group for the current pricing of these services. Calibration The FBA-23 is very reliable and maintains its calibration in the field for many years. A functional test will provide a good indication of whether the sensor is working properly. A further quick check of the calibration can be performed in the field by simply tilting the sensor +900 and –900 in each axis. By tilting the sensor, an acceleration of ± 1g can be measured. Kinemetrics can supply a tilt table and training in order to perform more accurate calibrations/verifications in the field. Kinemetrics can also provide on-site or factory calibrations traceable to national standards. 4-12 Maintenance 5. Reference Theory of Operation The FBA-23 consists of three orthogonally mounted force balance accelerometers (FBAs) – longitudinal, vertical and transverse – inside a sensor casing. The longitudinal accelerometer is aligned parallel to the orientation arrow on the case of the FBA-23. Each accelerometer is essentially identical, except that only the vertical accelerometer has an active oscillator. The carrier from this oscillator is supplied to the longitudinal and vertical accelerometer. The figure below shows a simplified block diagram of the major components of each of the FBAs. Figure 5-1: Simplified block diagram of an accelerometer inside the FBA-23 FBA-23 Force Balance Accelerometer 5-1 The FBA works as follows: The oscillator applies an AC signal of opposite polarity to the two moving capacitor plates. With the accelerometer “zeroed” and with no acceleration applied these plates are symmetrical to the fixed central plate and no voltage is generated on the plates. An acceleration causes the coil and capacitive sensor plates, which are one assembly mounted on mechanical flexures (springs), to move with respect to the fixed central plate of the capacitive transducer. This displacement results in the signal on the center plate of the capacitor becoming unbalanced and an AC signal of the same frequency as the oscillator is passed to the amplifier. The amplifier amplifies this AC signal. This error signal is then passed to the demodulator where it is synchronously demodulated and filtered creating a “DC” error term in the feedback amplifier. The feedback loop compensates for this error signal by passing current through the coil to create a magnetic restoring force to “balance” the capacitor plates back to their original null position. The current traveling through the coil is thus directly proportional to the applied acceleration and by sensing the voltage this current generates across the sensing resistor, we can produce a correctly scaled output voltage from the final amplifier. The FBA has two additional features to verify its calibration: The sensor has a connection (Cal) to allow a calibration step to be applied to the sensor to simulate an impulse response. This allows the damping of the sensor to be determined. This signal is injected through a diode and must be a positive pulse of +2.5V. When not in use this line must be connected to an electrical potential of –2.5V to –12V. It must not be left open or noise can be injected into the system. The sensor normally has a damping ratio between 0.6-0.7, but by applying a signal to the Undamp line, the damping capacitor can be removed, making the unit an approximation to a high-“Q” second order system rather than a critically-damped second order system. If an impulse response is applied to the Calibration input the sensor will then ring at its natural frequency. This is a useful check of the unit’s operation. A +12V pulse is required to undamp the system and in normal use this line should be grounded. 5-2 Reference Pole Zero Representation of the FBA-23 The Dynamic System The FBA-23 accelerometers are closed-loop, force-feedback sensors measuring the relative displacement of moving mass with respect to the sensor case. Their voltage output is proportional to the input acceleration in the frequency band from DC to 50 Hz (optionally to 100 Hz). The sensor's properties are essentially equivalent to a second-order dynamic system with one pair of complex conjugate poles. The sensors' transfer function (TF) depends almost entirely on the electronic components rather than on the mechanical components of the sensors. The influence on the Transfer Function of the physical mass, mechanical damping, spring elements and internal RC low-pass filter in the trans-conductance amplifier stage within the closed-loop path of the sensor are negligible for most applications. For more accurate transfer functions at high frequencies above 20 Hz, you can take into account the additional pole of a passive, low-pass RC filter in the post-amplifier stage of the sensor electronics. The sensors are factory-calibrated as second-order systems. Nominal resonant frequency is 50 Hz (or 100 Hz or 90 Hz for a 4 g unit) and nominal relative damping is 0.707. Resonant frequency, relative damping, and static gain are factory-adjusted close to the nominal values and are noted in the calibration sheet of each sensor. In order to be more precise, you must take into account poles based on values from the calibration sheet rather than the nominal values. Sensors with different absolute sensitivity have the same second-order poles. However, the low-pass filter in the post-amplifier stage depends on the sensor’s full-scale sensitivity. Poles pertaining to mechanical elements and the internal low-pass filter in the transconductance amplifier (which are insignificant in most cases) also depend on the full-scale sensitivity of the sensors. If you wish, you can determine the modification of the TF due to mechanical elements and the internal low-pass filter. An identification program like UNICAL based on the inversion of step or impulse response or MatLab functions can be used for this purpose. FBA-23 Force Balance Accelerometer 5-3 Theoretical Second-Order Tranfer Function The theoretical second-order transfer function of the FBA-23 is: 1 E OUT EDC ωn2 = 2 s + 2 ⋅ζ ⋅ωn ⋅ s + ωn2 where ω n is the natural frequency s E OUT is the Laplaceoperator is the relativedamping is the output voltage E DC is the sensitivity ζ This can be solved as a quadratic to find the two complex poles: 2 p1 = −ζ ⋅ ωn + j ⋅ ωn ⋅ 1 − ζ 2 3 p2 = −ζ ⋅ ωn − j ⋅ ωn ⋅ 1 − ζ 2 These equations can then be used with the calibration constants below or those taken from the unit’s calibration data to calculate these poles. Absolute Gain The FBA-23 is produced with 0.25, 0.5, 1, 2, and 4 g full-scale sensitivity. This corresponds to the following nominal absolute sensitivity at DC. Full Scale Range /gs 0.25g 0.5g 1.0g 2.0g 4.0g Absolute Gain Vs2/m 1.0190 0.5095 0.2550 0.1270 0.0637 Accurate calibration values for each sensor are given on the sensor’s calibration card included with the unit. 5-4 Reference Practical Damping & Natural Frequency The calibration card for the FBA-23 also contains the natural frequency and damping of the sensor. Thus, to most precisely determine the poles and zeroes these values can be substituted into equations 2 and 3. Second-Order Transfer Function Poles for Nominal FBA-23 Parameters If we assume that the FBA-23’s natural frequency is 50, 90, or 100 Hz, and the damping is precisely 0.707, we can obtain the following nominal poles for the second-order representation for constant input acceleration: FBA natural frequency /Hz 50 Pole P1 Real Imaginary component component [rad/s] [rad/s] - 222.1 + 222.1 Pole P2 Real Imaginary component component [rad/s] [rad/s] - 222.1 - 222.1 90 - 399.8 + 399.8 - 399.8 - 399.8 100 - 444.2 + 444.2 - 444.2 - 444.2 We can get a further improvement in the accuracy of the model by considering the pole due to the low-pass RC filter in the post amplifier. This pole is dependent on the natural frequency and range of the sensors. Pole P3 Real Imaginary component component [rad/s] [rad/s] FBA natural frequency /Hz FBA range/g 50, 100 0.25, 0.5, 1 - 1000 0 50, 90 2,4 - 1500 0 As an example of the full TF, a 50 Hz, 1g FBA-23 would have the following nominal poles: FBA natural frequency [Hz] Real component [rad/s] Imaginary component [rad/s] Note: FBA-23 Force Balance Accelerometer 50 Pole P1 Pole P2 Pole P3 -222.1 - 222.1 -1000 222.1 -222.1 0 To get the TF representation reduced to a constant input displacement compatible with the standardized GSE PAZ 5-5 calibration header (CAL1 format), two zeros at the coordinate origin of the s-plane must be added to the above transfer functions. FBA natural frequency [Hz] and full scale sensitivity [g] Zero Z1 Real component [rad/s] Imaginary component [rad/s] All Zero Z2 0 0 0 0 Kinemetrics’ web site contains the latest information on poles and zeroes for all Kinemetrics Instruments and sensors. Polarity Conventions The direction of response for a positive acceleration to the case for each axis is shown in the figure below. In the FBA-23, positive acceleration is defined as that motion which causes the mass to move toward the permanent magnet in the pole piece. Thus, for the Longitudinal sensor, positive acceleration corresponds to the direction of the orientation arrow. Kinemetrics FBA-23 complies with polarity standards for seismic sensors in the Special Report of the Subcommittee on Polarity Standards, Society of Exploration Geophysicists, 1975. A positive acceleration (upward motion of the case for the vertical channel) results in a negative output voltage. Vertical Longitudinal Transverse 5-6 Reference Electrical Interface Figure 5-2: Input connections: Pin Name I/O Description A L Signal Output Output Signal output from Longitudinal Accelerometer B L Signal Common Output Signal common for Longitudinal Accelerometer Ground M L Signal Shield Case Shield connection for Longitudinal Accelerometer Ground C V Signal Output Output Signal output from Vertical Accelerometer D V Signal Common Output Signal common for Vertical Accelerometer Ground P V Signal Shield Case Shield connection for Vertical Accelerometer Ground E T Signal Output Output Signal output from Transverse Accelerometer F T Signal Common Output Signal common for Transverse Accelerometer Ground G T Signal Shield Case Shield connection for Transverse Accelerometer Ground K Cal Input Calibration input to provide “step” voltage. When connecting to non-Kinemetrics data acquisition equipment must be held below –2.5V when not active. Should swing to +2.5V to produce Step in Functional Test. L Undamp Input Undamp signal input to FBA-23. When connecting to non Kinemetrics data acquisition equipment should be held at high impedance or 0V when not active. Should be held at +12V to undamp the sensors. R Power Common Input Power connection S +12 V Input +12 VDC power input. N -12 V Input -12 VDC power input. T Case Ground Case Ground Sensor Case Ground J N/C N/C No Connection H N/C N/C No Connection FBA-23 Force Balance Accelerometer 5-7 6. Advanced Installation Topics This chapter contains information on various advanced installation topics that may apply to your installation. Kinemetrics Services Group can provide additional information on these topics. CE Compliant Installations CE The FBA-23 has been tested with an Altus K2 and found to comply with the emissions and immunity requirements of the European Union. For the installation to meet these requirements the cabling construction must follow the recommendations given in Chapter 3 and the FerriShields supplied with the CE-certified recorder must be attached to each end of the cable. Failure to follow these instructions could result in the system being in violation of the EU directives. Long Cables The FBA-23 can be used with the normal Kinemetrics cable (P/N 840356 or Belden 9874) for distances up to 1000 feet with a variety of instruments. If the FBA-23 is used with an Altus accelerograph this distance can be extended up to 2000 feet. In the case of cable runs of this length we recommend installation in a grounded metal conduit. If cable is not installed in its own conduit and maximum resolution is required, it should not be run alongside cables carrying heavy AC or transient currents. For longer runs, Kinemetrics P/N 700045 cable is recommended, and this can be used for distances of up to 3000 feet. Brief assembly instructions for this cable are provided below. Cable Assembly with P/N 700045 CE The following section describes the necessary supplies and generalized steps for assembling a CE-quality FBA-23 cable using Kinemetrics P/N 700045 cable. The assembly techniques required are, in general, the same as those in the Cable Assembly section in Chapter 2 of this manual. Please read through those directions carefully to familiarize yourself with the process before beginning the instructions outlined below. FBA-23 Force Balance Accelerometer 6-1 Figure 6-1: Drawing 109712-xx, K2 external FBA-23 cable assembly CE Cable Assembly Table 6-1: Required parts for the Altus recorder mating connector assembly 6-2 Part Name KMI P/N Commercial P/N Description Mating connector 851119 851-06EC14-19PN50 1 connector Foil tape 880700 1183 (1” wide) 3 pieces 1” x 2-1/2” ea. Termofit tubing 851186 DWP-125 3/4-black 1 piece 4-1/2” ea. Braid #20 AWG-1” wide 840458 1235 1 piece 3-1/4” ea. Wire #18 AWG blk 840508 UL1429-18-1930-0 3 pieces 3” ea. Shrink tubing 1/4” 850839 FIT 221-1/4” 3 pieces 1/2” ea. Shrink tubing 1/8” 850818 FIT 221-1/8” 2 pieces1/2” ea. Teflon tubing 840392 TFT 200 18 1 piece 3” ea. Advanced Installation Topics Initial Assembly of the Altus Recorder End 4. Slide the Thermofit tubing, connector back shell, and braid over the outer jacket of the cable. 5. Remove 3-1/2” of the outer jacket from the end of the cable. 6. Remove 3-1/8” of the overall foil shield. 7. Remove 3-1/8” of the outer jacket from each of the 3 shielded twisted pairs, (white/red, white/green, and white/yellow). 8. Remove 2-3/4” of the braid shields from the end of each of the three twisted pairs. 9. Attach and solder 3” of #18 AWG black wire to each of the three braided shields. 10. Slide a piece of the 1/4” shrink tubing over the braided shield and the black wire solder joint. Shrink into place. 11. Cut off 3-1/8” of the orange and white wires, leaving them 3/8” longer than the overall shield. 12. Apply the 1/8” shrink tubing over the ends of the orange and white wire and shrink into place. 13. Slide the Teflon tubing over the drain wire, leaving it positioned 1/8” from the wire end. 14. Using Drawing 109712 as a guide, insert the wires through the connector grommet. 15. Strip wires 1/8” and solder tin. 16. Solder the wires into the connector starting at the bottom and working upward. 17. Push the grommet forward onto the connector. 18. Wrap one layer of PVC insulating tape between the overall foil shield and the back of the connector grommet. 19. Starting from the end of the overall cable jacket, use the three 1” x 2-1/2” lengths of foil tape to wrap the cable until you reach the back of the connector grommet. 20. Slide the braid #20 forward until it covers the back end of the connector grommet and foil tape. 21. Slide the connector back shell forward and tighten into place. The braid shield should just be caught inside the connector back shell when correctly installed. 22. Mold the braid around the foil-tape wrapped cable. 23. Slide the Thermofit tubing forward over the braid and shrink. 24. Install the two halves of the connector cable clamp. FBA-23 Force Balance Accelerometer 6-3 25. Using the schematic portion of Drawing 109712 as a guide, test the cable following the same concepts outlined in Testing Connector Assembly #1 in Chapter 2. The Altus end of the assembly is now completed. Initial Assembly of the FBA-23 End Table 6-2: Required parts for the FBA-23-end mating connector assembly Part Name KMI P/N Commercial P/N Description Mating connector 850407 MS3106F-20-29P 1 connector Extension tube 101189-20 Foil tape 880700 1183 (1” wide) 3 pieces 1” x 2-1/2” Termofit tubing 851186 DWP-125 3/4-black 1 piece 2-/2” Braid #20 AWG-1” wide 840458 1235 1 piece 3” Shrink tubing 1/4” 850839 FIT 221-1/4” 3 pieces 1/2” Shrink tubing 1/8” 850818 FIT 221-1/8” 2 pieces1/2” Teflon tubing 840392 TFT 200 18 1 piece 2 26. Slide the Thermofit tubing, connector back shell, and braid over the outer jacket of the cable. 27. Remove 2-3/4” of the outer jacket from the end of the cable. 28. Remove 2-3/8” of the overall foil shield. 29. Remove 2-3/8” of the outer jacket from each of the 3 shielded twisted pairs, (white/red, white/green, and white/yellow). 30. Remove 2-3/8” of the braid shields from the end of each of the three twisted pairs. 31. Cut off 2-3/8” of the orange and white wires, leaving them 3/8” longer than the overall shield. 32. Apply the 1/8” shrink tubing over the ends of the orange and white wire and shrink into place. 33. Slide the Teflon tubing over the drain wire, leaving it positioned 1/8” from the wire end. 34. Using Drawing 109712 as a guide, insert the wires through the connector grommet. 35. Strip wires 1/8” and solder tin. 36. Solder the wires into the connector starting at the bottom and working upward. 37. Push the grommet forward onto the connector. 6-4 Advanced Installation Topics 38. Wrap one layer of PVC insulating tape between the overall foil shield and the back of the connector grommet. 39. Starting from the end of the overall cable jacket, use the three 1” x 2-1/2” lengths of foil tape to wrap the cable until you reach the back of the connector grommet. 40. Slide the braid #20 forward until it covers the back end of the connector grommet and foil tape. The braid shield should cover just up to the beginning of the connector threads. 41. Mold the braid around foil-tape wrapped cable and connector grommet. 42. Slide the extension tube and connector back shell forward and tighten into place. 43. Install the two halves of the connector cable clamp. 44. Using the schematic portion of Drawing 109712 as a guide, test the cable following the same concepts outlined in Testing Connector Assembly #2 in Chapter 2. The FBA-23 end of the assembly is now completed. User Supplied Cable If you are using your own cable you must be sure that is has sufficient conductors of the required wire gauge for your installation and that it provides adequate shielding to maintain the noise performance of the FBA23. The conductors used for the signals and the control signals (Cal and Undamp) carry little current. The table below shows the resistance and calculated voltage drop for different lengths of cables. The length of cable run determines the required cable size. The figures below are for an Altus recorder. Substitute the worst case values for your power supply if you are using a non-Kinemetrics recorder. The standard Kinemetrics cable will work up to 2000 feet with an Altus recorder. The thicker Kinemetrics 700045 cable can be used for distances of up to 3000 feet. FBA-23 Force Balance Accelerometer 6-5 Table 6-3: FBA-23 cabling voltage drop calculator Sensor Type FBA-23 2g 10.5 V 15 mA Minimum Supply Voltage 11.1 V Allowed Cable Voltage Drop 0.6 V One-Way Allowed Cable Drop 0.3 V Allowable One-Way Resistance Active 30 Ohms Sensor Minimum Operating Voltage Sensor Active Current Cable AWG Cable Resistance per 1000 ft. Max. Cable Run/ft. 24 27.70 1083 22 17.50 1714 20 10.90 2752 18 6.92 4335 16 4.35 6897 14 2.73 10,989 Grounding CE The cable assembly technique used for the external K2 is designed to ensure compliance with the requirements of the Emissions and Immunity standards (EN 55022 Class A, EN 50082-2) of the European Community. If grounding the cable shield at both ends with a long cable results in excess noise in the instrument, the cable shields can be disconnected at the FBA-23 end. This may be required if significant current flows in the shield between the two grounds. This may result in better system noise performance. However, Kinemetrics cannot be responsible for any EMI/RFI emissions that may occur due to this change in the cabling. If changing the cabling does not solve the problem, the case grounds can be reconnected to the FBA-23 and the FBA-23 isolated by placing the mounting feet on isolation washers. The mounting screw should not normally provide a path to ground, as it contacts the non-conductive, black, anodized surface of the sensor case. These isolation washers can be obtained from Kinemetrics as P/N 109747-PL. Finally, a hybrid ground connector can be used. With the FBA-23 isolated, connect a ¼” copper braid from the overall shield of the cable to one side of a 0.1 µF, 200 V film capacitor. Connect the other side of the capacitor to a ¼” copper braid connected to a good earth ground. Cover the braid and the capacitor with shrink tubing. 6-6 Advanced Installation Topics Note: ! This technique provides a single point ground for low frequency signals at the recorder end of the cable, but at high frequencies the capacitor conducts providing an AC ground for EMI/RFI signals. WARNING! Potential lethal voltages. In these configurations, potentially lethal voltages can exist between the conductors on the cable or the exposed metal parts of the FBA-23. These occur due to differences in ground potential between the location of the K2 and the location of the FBA-23. Faulty electrical wiring returning large currents to ground normally causes these differences. It is the user's responsibility to ensure that hazardous conditions are not created and that all local electrical safety regulations are observed. Use with Non-Kinemetrics Data Loggers If you are using the FBA-23 with a non-Kinemetrics data logger you must match the power, calibration and output of the FBA-23 with that of the recorder. Kinemetrics Services group can provide help with this and can also supply conversion boxes to interface to some commonly used seismic instrumentation. Power Supply The FBA-23 requires a well regulated, low-noise +/-12V (+/-5%) supply that can supply 25 mA from each rail. In quiescent conditions the power required by the unit will be about 10 mA. During an event, additional current is required to restore the coil position. The supply should be lownoise -- less than 50 mV of ripple. ! Caution: Incorrect power to the FBA-23 can cause incorrect readings and may damage the sensor. Never supply more than +/-15V to the unit and be sure the connections are the correct polarity. There is no protection provided against reversed polarity connections. Output Voltage The FBA-23 produces a single-ended +/-2.5V output that is referenced to ground. The recorder input should be matched to this output for optimum performance. The output impedance of the FBA-23 is 500 Ω, which is used to ensure the unit is stable under capacitive loading from a long cable. Normally data loggers have an input impedance of 100 kΩ or more and the 500Ω output impedance is insignificant. The FBA-23 is calibrated for 100 kΩ. However, if your data logger has a lower impedance you should consider the effect this has on the full scale output of the sensor. For example, a data logger with a 10kΩ input impedance would read only 2.38V for a full scale signal. This represents an error of approximately 5%. FBA-23 Force Balance Accelerometer 6-7 Calibration Sequence To produce the functional test sequence the recorder must control the Cal and Undamp line to the FBA-23. If the recorder cannot produce a functional test it is still very important that these lines be held at the correct potential. The CAL line must be connected to a potential of <-2.5V when it is not operational. If the recorder does not provide this, connect the line to the –12V supply. The Undamp line should be connected to circuit common if it is not used. To produce the Kinemetrics functional test sequence the data logger needs to control both the Cal and Undamp line. If the data logger cannot perform these functions a simple test box can be built to simulate the desired calibration sequence. A suggested sequence is as follows: 1. Hold Cal at <-2.5V for 2 seconds – undamp unconnected 2. Change Cal to +2.5V for 2 seconds – undamp unconnected 3. Change Cal back to <-2.5V and at the same time connect undamp to +12V and leave for 1.5 seconds 4. Disconnect undamp and leave Cal at <-2.5V for 0.5 seconds 5. Change Cal to +2.5V for 2 seconds – undamp unconnected 6. Finally, hold Cal at <-2.5V for 2 seconds – undamp unconnected This will produce the classic Kinemetrics two-pulse waveform described in Chapter 3. Caution: Failure to connect the Cal line to a negative potential can result in severely degraded noise performance. Grounding When using the FBA-23 with non-Kinemetrics digitizers it is essential that the ground connections be carefully planned to prevent the occurrence of ground loops. This is especially important when using a PC-based data acquisition system. The signal returns should be connected to the negative input of the analog front-end’s differential or instrumentation amplifier and not to circuit common. The common connection should return to the power supply through only one path. If you are using a separate mains power supply for the FBA-23, be very careful that it does not provide a separate ground return through the AC mains ground to the data acquisition computer. You should use a star ground configuration for your system with the FBA-23 power supply, data acquisition system and PC all grounded at the same point. 6-8 Advanced Installation Topics 7. Appendix Table 7-1: FBA-23 specifications Type Triaxial force balance accelerometer Full scale range ± 1g (0.1g, 0.25g, 0.5g, 2g and 4g are optional) Natural frequency 50 Hz (90 Hz, 100 Hz optional) Damping 70% critical Full scale output ± 2.5V Zero offset Adjustable to less than 25 mV Cross-axis < .03 g/g Linearity < 1% of full scale Temperature span change < 2% full scale Temperature zero drift < 2% full scale Dynamic range > 135 dB from 0.01 Hz to 50 Hz > 145 dB from 0.01 Hz to 20 Hz (RMS sinus clipped signal to ½ octave bandwidth RMS noise, as measured by the dual-coherence method) Power supply voltage ± 12 volts DC, 10 mA (quiescent) Operating temperature -200 to +700 C Housing Watertight cast-aluminum case with leveling feet and level. Dimensions 2.75” x 5.5” x 5.5” (66 x 130 x 130 mm) Weight 5.2 lbs. (2.3 kg) FBA-23 Force Balance Accelerometer 7-1