Download - Carl Zeiss 3D Automation
Transcript
Industrial Metrology from Carl Zeiss
Probe System Equipment Surfcom
Original accessories from the technology leader
www.probes.zeiss.com
Original accessories from Carl Zeiss
Content
Roughness styli......................................................... 5
Contour styli............................................................. 7
Combined roughness and contour styli................... 11
Portable roughness measuring units.........................15
Machine parts..........................................................19
Productivity for
your contour
and surface
measuring.
Imprint
Important Notice:
Carl Zeiss 3D Automation GmbH
Prices are subject to change.
Schnaitbergstr. 3
Styli and accessory components are subject to
D-73457 Essingen bei Aalen
technical modifications and changes.
Prices are net without deduction.
Tel.: +49-7365-9208-210
All dimensions are in mm.
Fax: +49-7365-9208-29
Pictures can differ from actual products.
You can find our full T&C at:
Email: [email protected]
www.probes.zeiss.com
2
© Carl Zeiss 3D Automation GmbH
www.probes.zeiss.com (Imprint)
Carl Zeiss 3D Automation GmbH
You can always rely on Carl Zeiss
original products and on our service
Productivity for your Surfcom measuring machine
Tried and tested
We, as manufacturer, know the needs for your
CMM to measure accurate and efficient. Our
accessories, tuned for your Surfcom, save time and
increase your productivity. Benefit from our extensive know-how and experience .
Largest range of original Carl Zeiss accessories
Save time
Our team supplies you fast and worldwide with
our original accessories. You can always find the
right accessory for your application in our clearly
structured online shop www.probes.zeiss.com
Unrivaled as a service provider
Visible productivity
Fixtures, robot automation, custom-made
styli - we assist you with our know-how in every
individual measuring project you might have.
www.probes.zeiss.com
3
www.probes.zeiss.com
Global availability
Use our online shop for a fast and easy order process.
All over the world and around the clock.
Largest range of original ZEISS accessories
Become a registered user today and benefit from
Carl Zeiss 3D Automation GmbH
the advantages of our clearly structured online
Schnaitbergstr.3
shop.
D-73457 Essingen bei Aalen
Check availabilities and the status of your orders
Tel.:
+49-7365-9208-210
online. Never miss any of our special offers and
Fax:
+49-7365-9208-29
keep yourself always up-to-date on our newest
additions to our program.
Email: [email protected]
www.probes.zeiss.com
4
© Carl Zeiss 3D Automation GmbH
Roughness styli
Roughness styli
Roughness styli have a diamond or tungsten
carbide tip with a very small tip radius. 2 µm,
5 µm und 10 µm are available as tip radii. The
roughness styli are useable for Surfcom 130 / 480
/ 1400 / 1500 and for roughness detectors on
Contourecord 1800 / 2800 / 1900 / 2900 however
each are depending on the probe. Please check
your machine specification for the correct stylus.
2 µm roughness styli E-DT-SS01A
Roughness styli have a diamond or tungsten
carbide tip with a very small tip radius. Please
check your machine specification for the
correct stylus.
Art-Nr
000000-1079-359
000000-1079-356
000000-1059-167
000000-1079-358
000000-1128-388
000000-1084-496
000000-1138-925
000000-1054-833
000000-1084-495
000000-1079-360
L
33,5
33,5
33,5
33,5
39,2
62,0
62,0
73,0
73,5
73,5
L1
0,9
1,7
7,0
18,0
8,0
9,2
32,0
5,0
1,7
15,0
radius (µm)
2
2
2
2
2
2
2
2
2
2
W (°)
60
60
60
60
60
60
60
60
60
60
tactile power (mN)
0,8
0,8
0,8
0,8
0,7
4,0
4,0
3,0
3,0
3,4
TMAT
diamond
diamond
diamond
diamond
diamond
diamond
diamond
diamond
diamond
diamond
Accretech
DM43811
DM43812
DM43801
DM43815
DM43814
DM43824
DM43826
DM43822
DM43821
DM43825
Service
Do you need a custom-made stylus?
Call us or send us an email.
We will be happy to assist you.
www.probes.zeiss.com
5
Roughness styli
5 µm roughness styli for E-DT-SS08A
Roughness styli have a diamond or tungsten
carbide tip with a very small tip radius. Please
check your machine specification for the
correct stylus.
Art-Nr
625006-3057-000
625006-3059-000
625006-3054-000
625006-3047-000
625006-3048-000
625006-3060-000
625006-3063-000
625006-3064-000
L
L1
radius (µm)
W (°)
tactile power (mN)
TMAT
Accretech
15,0
15,0
22,0
22,0
22,0
22,0
41,0
62,0
1,7
8,0
2,6
7,0
7,0
15,0
1,7
5,0
5
5
5
5
5
5
5
5
90
60
90
90
90
90
90
90
4,0
4,0
4,0
4,0
5,0
5,0
5,0
5,0
diamond
diamond
diamond
diamond
diamond
carbide
diamond
carbide
0102512
0102514
0102509
0102501
0102502
0102515
0102521
0102522
10 µm roughness styli for E-DT-SS02A
Roughness styli have a diamond or tungsten
carbide tip with a very small tip radius. Please
check your machine specification for the
correct stylus.
Art-Nr
625006-3053-000
625006-3054-000
6
L
22,0
22,0
L1
7,0
2,6
© Carl Zeiss 3D Automation GmbH
radius (µm)
10
5
W (°)
90
90
tactile power (mN)
0,8
4,0
TMAT
diamond
diamond
Accretech
0102508
0102509
Contour styli
Contour measure with
Surfcom and Contourecord
Contour styli are used for contour measuring. There
are two different versions to build a complete stylus.
Stylus arms with inserted stylus tips:
These contour styli consist of a stylus arm, screwed to the probe,
and a stylus tip. The stylus arms are device-specific. The stylus
tips are for universal use.
Modular stylus arm:
These contour styli consist of a basic holding device and a special
stylus arm. On the opposite end, the basic holding device has a
M2 thread in which you can mount a special stylus arm.
www.probes.zeiss.com
7
Contour styli
Stylus arms
Stylus arms for C1600, C1700, S1800, S1900
These stylus arms are mounted on probes. A contour stylus tip, edge or sphere with the according
length is attachable at the front end.
Art-Nr
625006-3336-000
625006-3335-000
625006-3337-000
L
178,5
178,5
178,5
L1
13,0
26,0
52,0
Accretech
0102801
0102800
0102804
Stylus arms for C2600, C2700, S2800, S2900
These stylus arms are mounted on probes. A
contour stylus tip, edge or sphere with the
according length is attachable at the front end.
Art-Nr
625006-4098-000
625006-4097-000
000000-1794-623
L
178,5
178,5
178,5
Stylus arms
Modular stylus arms allow measurements
on hard to reach positions.
8
© Carl Zeiss 3D Automation GmbH
L1
13,0
26,0
52,0
Accretech
DM45529
DM45528
DM45531
Contour styli
Stylus insertions for stylus arms
Stylus tips
Stylus tips can be mounted to the device-specific
stylus arms. Be careful to only use tips with a functional length L according to the functional length L
of the stylus arm.
Art-Nr
625006-3097-000
625006-3096-000
625006-3095-000
L
21,0
34,0
60,0
L1
13,0
26,0
52,0
radius (µm)
25
25
25
W (°)
24
24
24
TMAT
carbide
carbide
carbide
Accretech
DM45506
DM45505
DM45504
radius (µm)
25
25
25
25
25
25
W (°)
12
24
12
24
12
24
TMAT
carbide
carbide
carbide
carbide
carbide
carbide
Accretech
DM45503
DM45509
DM45502
DM45508
DM45501
DM45507
Stylus blades
The stylus blades have a bevelled point and can be
attached to the device-specific stylus arms. Do only
use blades with the functional length L1 in stylus
arms with the appropriate functional length L1.
Art-Nr
625006-3094-000
625006-3100-000
625006-3093-000
625006-3099-000
625006-3092-000
625006-3098-000
L
21,0
21,0
34,0
34,0
60,0
60,0
L1
13,0
13,0
26,0
26,0
52,0
52,0
Stylus spheres
Stylus spheres can be attached to the device-specific stylus arms. Do only use spheres with the functional length L1 in stylus arms with the appropriate
functional length L1.
Art-Nr
625006-3119-000
625006-3273-000
625006-3275-000
625006-3272-000
625006-3113-000
625006-3271-000
625006-3274-000
L
21,0
21,0
21,0
34,0
34,0
60,0
60,0
L1
13,0
13,0
13,0
26,0
26,0
52,0
52,0
radius (µm)
250
350
500
350
500
350
500
TMAT
ruby
ruby
ruby
ruby
ruby
ruby
ruby
Accretech
DM45580
DM45524
DM45527
DM45523
DM45526
DM45522
DM45525
www.probes.zeiss.com
9
Contour styli
Modular stylus arms M2
Modular basic holding device M2 for C1600, C1700, S1800, S1900
The basic holding device is mounted to the probe
and has a M2 thread on the opposite end to which
you can mount a special stylus arm.
Art-Nr
625006-3081-000
L
115,0
L1
17,0
Accretech
0102802
Modular basic holding device M2 for C2600, C2700, S2800, S2900
Art-Nr
625006-4099-000
L
115,0
L1
17,0
Accretech
DM45530
Stylus insertions for stylus arms M2
Modular stylus arms M2 for C1600, C1700, S1800, S1900
These special stylus arms with M2 fixing are
installed in a modular stylus arms. They are used
for small holes and hard-to-access areas.
Art-Nr
625006-3253-000
625006-3252-000
625006-3251-000
L
65,0
65,0
65,0
L1
3,5
7,0
12,0
radius (µm)
25
25
25
W (°)
12
12
12
TMAT
carbide
carbide
carbide
Accretech
DM45083
DM45082
DM45081
Modular stylus arms M2 for C2600, C2700, S2800, S2900
Art-Nr
625006-4088-000
625006-3102-000
625006-4087-000
10
L
65,0
65,0
65,0
© Carl Zeiss 3D Automation GmbH
L1
4,5
8,0
12,0
radius (µm)
25
25
25
W (°)
12
12
12
TMAT
carbide
carbide
carbide
Accretech
DM45512
DM45511
DM45510
Combined roughness and contour styli
Surfcom 2000, 3000, 5000
In this chapter you will find combined roughness
Repair service on request!
and contour styli. These styli, depending on the
Send in your damaged stylus and our specialists
design, can be used in the Surfcom 2000, 3000
check the possibility of repair. This is normally
or 5000. They differ in the theoretical functional
cheaper than buying a new stylus. Please contact
lengths LH and LV and in the type and material of
us, we will be pleased to advise you.
the stylus tip.
Choose either the standard styli or the ThermoFit®
styli in carbon fiber design. Custom styli in ThermoFit ® design can be manufactured and delivered
fast based on our special production technology
for carbon fiber tubes. Take advantage of our
profound know-how in the field of ThermoFit®
applications in the coordinate measuring technology. Our worldwide proven carbon fiber styli and
extension are the perfect solution if it comes to
high precision and reliability.
www.probes.zeiss.com
11
Combined roughness and contour styli
Surfcom 2000
Standard styli for Surfcom 2000
Please keep the functional lengths LH65 and LH130
in mind before using the styli. There are no custom
elements possible for standard styli. The styli are
calibrated before the delivery and are instantly
ready for use.
Art-Nr
000000-1365-332
000000-1365-331
000000-0483-888
000000-1365-329
000000-1365-334
000000-1433-410
625006-3938-000
000000-1365-333
000000-1433-416
000000-1373-770
000000-1365-330
LH
65,0
65,0
65,0
65,0
65,0
65,0
65,0
65,0
65,0
130,0
130,0
LV
-4,6
-5,0
-12,5
-14,4
-14,4
-14,4
-14,5
-30,5
-30,5
-15,5
-21,5
radius (µm)
2
2
2
2
5
5
2
2
5
2
25
angle (°)
60
60
60
60
30
40
60
60
90
60
24
tactile power (mN)
0,8
0,8
0,8
0,8
5,0
4,0
0,8
0,8
4,0
4,0
5,0
TMAT
diamond
diamond
diamond
diamond
diamond
diamond
diamond
diamond
diamond
diamond
carbide
Accretech
DM47506
DM47505
DM47523
DM47501
DM47508
DM47548
DM47504
DM47507
DM47549
DM47547
DM47513
ThermoFit® styli for Surfcom 2000
Styli for Surfcom 2000. Made in Germany in
original Carl Zeiss ThermoFit design. The stylus
arm is made of high strength and very stiff and
light carbon fiber tubes. We obtain our diamond
tips only from European quality manufacturers.
We also manufacture custom styli according to
your wishes. Just give us a call! The styli are
calibrated before the delivery and are instantly
ready for use.
Art-Nr
626108-6006-010
626108-6007-010
626108-6000-010
626108-6005-010
12
LH
65,0
65,0
130,0
130,0
© Carl Zeiss 3D Automation GmbH
LV
-14,8
-30,5
-7,9
-15,5
radius (µm)
2
2
2
2
angle (°)
60
60
60
60
tactile power (mN)
0,8
0,8
5,0
4,0
TMAT
diamond
diamond
diamond
diamond
Combined roughness and contour styli
Surfcom 3000/5000
Standard styli for Surfcom 3000/5000
Please keep the functional lengths LH50, LH100
and LH125 in mind before using the styli. There
are no custom elements possible for standard styli.
The styli are calibrated before the delivery and are
instantly ready for use.
Art-Nr
000000-1098-592
000000-1098-591
000000-1138-881
000000-1262-181
000000-1138-888
000000-1098-589
000000-1098-593
000000-1138-885
000000-1098-590
LH
50,0
50,0
50,0
50,0
50,0
50,0
50,0
100,0
125,0
LV
-4,6
-5,0
-14,4
-14,4
-14,5
-15,5
-30,5
-21,5
-25,5
radius (µm)
2
2
2
2
2
2
2
500
500
angle (°)
60
60
60
30
60
60
60
tactile power (mN)
0,7
0,7
0,7
0,8
0,7
0,7
0,7
0,7
3,2
TMAT
diamond
diamond
diamond
diamond
diamond
diamond
diamond
ruby
ruby
Accretech
DM48514
DM48513
DM48505
DM48588
DM48511
DM48507
DM48515
DM48508
DM48509
ThermoFit® styli for Surfcom 3000/5000
Styli for Surfcom 3000 and 5000. Made in Germany
in original Carl Zeiss ThermoFit design. The
stylus arm is made of high strength and very stiff
and light carbon fiber tubes. We obtain our
diamond tips only from European quality manufacturers. We also manufacture custom styli according
to your wishes. Just give us a call! The styli are
calibrated before the delivery and are instantly
ready for use.
Art-Nr
626108-6003-020
626108-6004-020
626108-6001-020
626108-6008-020
626108-6000-020
626108-6002-020
LH
50,0
50,0
50,0
50,0
50,0
125,0
LV
-4,0
-6,0
-13,1
-15,5
-29,8
-34,8
radius (µm)
2
2
2
2
2
500
angle (°)
60
60
60
60
60
tactile power (mN)
0,8
0,8
0,8
0,8
0,8
3,2
TMAT
diamond
diamond
diamond
diamond
diamond
ruby
www.probes.zeiss.com
13
Combined roughness and contour styli
Fax request for styli
Surfcom 2000/3000/5000
Fax: +49 (0)7365-9208-29
Shaft material: carbon fibre/ThermoFit
* Note: This is your desired depth of
immersion and not the actual position
of the counterweight.
Stylus tip diamond
Device type
LH for S 3000 / 5000
LH for S 2000
55°/2 µm
Surfcom 2000
50 mm
65 mm
60°/2 µm
Surfcom 3000
100 mm
135 mm
40°/5 µm
Surfcom 5000
125 mm
60°/ 5µm
90°/5µm
Stylus arm dimensions
Quantity
B mm
pcs
ML mm
MLE mm
DSE mm (min. Ø1 mm)
Company:
Department:
Name, First:
Address:
Zip / City:
Phone:
E-Mail:
14
© Carl Zeiss 3D Automation GmbH
Fax:
Portable roughness measuring units
Measure everywhere
Measure the roughness of your workpiece simple
and quick with the Surfcom 130 and the Handysurf. Even for complicated workpiece geometries
you will find the proper solution in our wide
range of styli. The evaluation meets the currently valid standards and comprises all common
roughness parameters.
The portable measuring units from Carl Zeiss are
excellent for mobile operations, both in the shop
floor and in the measuring cabin. It’s best for
use directly in your CNC machine by separation
of the traverse and evaluation unit.
The variety of the fields of application is completed by a broad range of practical accessories.
Thus almost every measuring task is possible,
be it the Handysurf in any position or even with
an interface to the ZEISS measuring software
Calypso.
www.probes.zeiss.com
15
Portable roughness measuring units
Handysurf
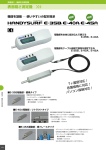
Handysurf E-35B
Handysurf makes it simple and mobile, whether
in the receiving control, the shop floor or in the
final inspection. Because this compact handheld
measuring unit is coming on the spot for the workpieces. Measurements can be done flexible in every
position. Of course, it disposes all current surface
standards and evaluates all common characteristic
values. You can see your measured values instantly
on the easily legible and high-contrast LCD-Display.
A printer is optionally available for the data output.
Measuring, evaluating and logging surface roughness can’t get much easier, than with the Handysurf E-35B.
Art-Nr
625006-8109-000
Description
Handysurf E-35B
Accessories
625006-3153-000
625006-3154-000
626108-9050-000
000000-1092-434
000000-1191-183
000000-1092-408
000000-1191-185
625006-3152-000
000000-1092-410
000000-1092-440
stylus extension 50 mm Handysurf
stylus extension angle 90° Handysurf
articulated arm with magnetic stand Handysurf
cable for small type printer Handysurf
thermoprinter standard DPU-H245
paper holder for printer Handysurf
paper, 10 rolls for Thermoprinter
AC-adapter Handysurf 230V
battery pack BP-3006
connection cable to PC RS-232C
Styli for Handysurf
These styli are the perfect complement for your
Handysurf 35B roughness measurement machine.
They are easily exchangeable and expand the field
of application of your machine.
Art-Nr
625006-3263-000
625006-3264-000
625006-3265-000
625006-3266-000
16
L
56,00
56,00
56,00
56,00
© Carl Zeiss 3D Automation GmbH
L1
12,30
14,50
14,50
7,20
DK
1,50
1,50
1,50
1,50
DG
9,50
9,50
9,50
9,50
DS
4,50
2,70
2,80
Accretech
E-DT-SM10A
E-DT-SM11A
E-DT-SM12A
E-DT-SM13A
Portable roughness measuring units
Surfcom 130
Surfcom 130
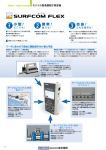
The comfortable surface measuring machine Surfcom 130 is engineered for the flexible use at the
shop floor level. It consists of a 50mm traversing
unit with high accuracy in straightness, a built-in
datum plane, and a powerful evaluation unit. The
operation takes place on the clear display (TouchScreen). Calibration and input helper, language
switcher and notepad are useful functions besides
the large measuring and evaluation performance.
The Surfcom 130 possesses a PCMCIA-Card-Drive
to save the programs and data. Additionally, the
results can be printed on the integrated thermal
printer or displayed via the RS232-interface on
your PC with the help of the optional surface software TIMS. You can find the matching styli in this
catalog in the section “roughness styli”. Treat your
equity with care. We offer fast and uncomplicated
leasing for these machines. Don’t hesitate to contact us.
Art-Nr
000000-1019-534
000000-1019-536
Description
Surfcom 130 monochrome
Surfcom 130 colour
Accessories
000000-0500-698
000000-1014-674
000000-1319-226
625007-0135-000
625007-0079-000
625006-3283-000
000000-1041-911
625006-3303-000
625006-3304-000
000000-1128-019
000000-1128-020
000000-1128-021
000000-1128-022
USB/Serial Converter
thermal paper 10 rolls/box
RS-232-C wire (9 pin to 9 pin) for TIMS-light
PC-Card 128 MB E-MU-S50C
AC adapter 230V Surfcom 130 E-SC-S371A
power cable for 230V, Europe E-SC-S101A
roll foot (Outer - o . 60mm) E-MA-S62A
universal pickup holder E-DH-S107A
pickup holder for horizontal tracing E-DH-S17A
Tims-Light Software, German
Tims-Light Software, English
Tims-Light Software, Italian
Tims-Light Software, French
www.probes.zeiss.com
17
Portable roughness measuring units
Surfcom Flex 50A
Surfcom Flex 50A
Model combination with small genuine type
50mm tracing driver of S130A. Small tracing
driver, available skidless measurement and
waviness measurement. Achieve class highest
straightness accuracy 3µm/50mm Easy levelling
adjustment by tilting support function.
Art-Nr
625006-9066-000
625006-9067-000
Accessories
625006-9072-000
625006-8204-000
625006-8205-000
625006-8206-000
Description
Surfcom Flex 50A
Surfcom Flex 35B with standrad tracing driver of Handysurf
Standard-Pickup D=12.3 mm (2µm tip) only for Handysurf 35B
Pickup D=4,5 mm E-DT-SM40A (geometry like E-DT-SM11A) for Handysurf HS35/40
Pickup D=2,7 mm E-DT-SM41A (geometry like E-DT-SM12A) for Handysurf HS35/40
Pickup for groove measurement 7,2 mm E-DT-SM42A (geometry like E-DT-SM13A) for Handysurf HS35/40
Accessories
Stand for portable devices
Hard stone plate with height adjustable seating for
Surfcom 130 or Handysurf (optional).
A Surfcom 130 can be quickly and easily mounted
to the height adjustable seating or also a Handysurf with the help of an optional adapter angle.
Workpieces or clamping systems can be applied
to the plate. The measuring point can be reached
smoothly with the accurate and robust z-adjustment. The height adjusting range is 300 mm. The
dimensions of the granite plate are 400x250x50
mm. (Delivery without measuring machine).
Art-Nr
626108-8200-001
626108-8100-002
18
Description
measuring stand for Surfcom 130A, Handysurf
adapter Handysurf for compact measuring stand
© Carl Zeiss 3D Automation GmbH
Machine parts
Useful for Surfcom
Keep your workpieces safe and stable during the
An additional precision positioning system is
measuring run with our clamping systems.
required if a fine adjustment was not installed.
Positioning systems, precision positioning systems
Precision positioning systems are rotary and sliding
and clamping systems are very important to positi-
units with micrometer screws and they enable the
on your workpieces for the measurement. All com-
sensitive positioning of the workpiece. XY-tables,
ponents have to be compatible to allow a quick
rotary and swivel units, or rotary and sliding units
and simple installation of the clamping to measure
can be created by stacking precision positioning
the workpiece.
systems.
Positioning systems are rotary and sliding units,
A clamping system will then lock the workpiece by
used to pre-position large and heavy workpieces
using bench vises and three jaw chucks in different
on the granite table of the measuring machine.
dimensions.
Index bolts are mostly used to arrest coarse positioning. Some of the systems already have an inte-
Additional accessories and care materials, to
grated fine adjustment. This adjustment helps to
improve the quality of your measurement, can be
position the measuring point directly beneath the
found at the end of the chapter.
stylus.
www.probes.zeiss.com
19
Machine parts
Positioning systems
XY-sliding table
Manual sliding table for Surfcom 1500, 1700,
1900, 2000, 2700, 2900.
A Surfcom can be installed on the sliding table.
The Surfcom can be moved freely in the XY plane
to easily and quickly reach measuring positions on
large workpieces. The sliding mechanism with linear guiding is lockable in every position on the hard
stone table. The table is placed on a base frame
with vibration isolation system. Two T groove rails
with a nominal dimension of 14 are mounted on
the plate and enable the mounting of devices.
The table will be delivered completely assembled
and with CE-Conformity, user manual and risk analysis. The delivery doesn’t include a Surfcom.
Treat your equity with care. We offer fast and
uncomplicated leasing for these machines. Don’t
hesitate to contact us.
Art-Nr
626108-8210-010
626108-8210-020
Description
Surfcom positioning table 1200x800 mm
Surfcom positioning table 1200x800 mm 1500x1000 mm
Positioning table
Positioning table for rotating and sliding of heavy
workpieces. The table is mounted to the granite
plate of the Surfcom. The coarse adjusting with
linear guiding in Y-direction of 200 mm adjustable
range is lockable in every position. The fine
adjusting of the Y-direction is being made by a
micrometer screw with an adjustable range of ±10
mm. The rotary unit is lockable in every position.
A micrometer screw additionally enables a fine
adjusting. Dimensions about 330 x 320 x 100 mm,
base plate rotary unit Ø 260 mm with threaded
hole M8 in the grid 25 mm and fastening screw
thread M5 for Surfcom standard accessories,
carrying capacity 100 kg.
Art-Nr
626108-9050-010
20
Description
Y-positioning table 200 mm with turntable
© Carl Zeiss 3D Automation GmbH
Machine parts
Precision positioning systems
Swivel unit
The goniometer tilting table with angle setting
range of +/- 20° allows small workpieces to be
tilted out of the horizontal level. Dimensions
60 x 60 x 20 mm. The swivel unit can be mounted
to the other precision positioning systems.
Art-Nr
626108-9081-000
Description
goniometer tilting table 60x60 mm
Rotary unit
The rotary unit with rugged sliding guide enables
the precise rotating of the workpiece around an
axis. It has a coarse adjustment and a fine adjustment
screw with scale division 1° and vernier scale 0.1°.
Dimensions: diameter 110 mm, height 25 mm. The
rotary unit can be mounted to the sliding unit. Additional clamping devices can also be mounted to the
rotary unit (adapter plate required).
Art-Nr
626108-9080-000
Description
sliding movement type rotation stage 110 mm
Sliding unit
Made of sturdy stainless steel, the axial sliding unit
has a carrying capacity of 100 kg. A fine adjustment
screw enables an adjustment range of +/- 6 mm.
Two sliding units can be combined to a cross table.
Rotary unit, swivelling unit or specific clamping devices from the Surfcom accessories can be mounted to
the sliding unit. Dimensions 120 x 120 x 25 mm.
Art-Nr
626108-9070-000
Description
axial adjustment unit with precision adjustable screw
Adapter plate
Adapter plate dia. 120 mm for mounting on Surfcom CNC units with center dia. 16. Incl. screws M4
and M5.
Art-Nr
626108-9090-000
Description
adapter plate Surfcom CNC dia. 120 mm
www.probes.zeiss.com
21
Machine parts
Clamping systems
Bench vises
Bench vise with adapter plate for the assembly on
Surfcom positioning systems or precision adjustment systems as well as directly on the Surfcom
granite table. The bench vise is made of steel and
delivered with the required fastening material. The
bench vises are moveable along the adapter plate.
Art-Nr
626108-9021-050
626108-9021-073
626108-9021-100
626108-9021-125
Description
bench vice 50 mm jaw width 50 mm, span width 67mm
bench vice 73 mm with adapter plate, span width 101 mm
bench vice 100 mm with adapter plate, span width 127 mm
bench vice 125 mm with adapter plate, span width 162 mm
Center bench vise
Center bench vises clamp workpieces with various
dimensions to the center. Workpieces don’t have
to be readjusted every time the workpiece changes. The bench vise is made of steel and has
exchangeable hardened jaws with a jaw width of
XX mm and a span width of XX mm.
Art-Nr
626108-9022-070
Description
centering bench vise, jaw width 70 mm, span width 70 mm
Rotatable bench vise
Bench vise can rotate and swivel in 2 axis with a
jaw width of 70 mm and a span width of 80 mm.
The tilting area is +/- 45°. The rotary area is 360°.
The rotatable bench vise is made of steel and delivered with the required fastening material. The
bench vise can be mounted directly to the Surfcom.
Art-Nr
626108-9010-000
22
Description
rotatable bench vice 70 mm jaw width
© Carl Zeiss 3D Automation GmbH
Machine parts
Three jaw chuck
Three jaw chucks, made of steel, are fastened
to an adapter plate and can be mounted to the
Surfcom positioning systems and fine adjustment
systems as well as directly to the granite table of
the Surfcom.
Fastening material as well as a jaw set for each,
inside and outside, is provided.
Art-Nr
626108-9031-050
626108-9031-080
626108-9031-100
626108-9031-125
Description
three jaw chuck
three jaw chuck
three jaw chuck
three jaw chuck
turret
turret
turret
turret
50 mm with adapter plate
80 mm with adapter plate
100 mm with adapter plate
125 mm with adapter plate
Vee blocks
Precision vee blocks made of hardened steel are
honed and have a 90° prism. Vee blocks are suited
for cylindrical parts.
Art-Nr
626108-9110-000
626108-9110-010
Description
Vee block 100x47 mm for shafts 5-55 mm
Vee block 250x65 mm for shafts 5-100 mm
Build customized positioning tables
Our positioning and clamping systems are additionally
combinable with each other.
www.probes.zeiss.com
23
Machine parts
Interchangeable pallet system 300x200
In case you need to measure many different work
Our interface pallets are an efficient and
pieces or have a variety of measurement tasks to
timesaving solution. No more loss of precious time,
complete, it is a major advantage if you are able to
because you won`t have to adjust the fixtures to
exchange your fixtures fast and easily.
the workpieces.
Interface pallet set
This handy interface set contains everything you
need as initial equipment:
- 1 x Support plate
- 1 x Raster interface 300x200
And either 1 x bench vice intreface (73 mm) or 1 x
three chuck interface (125 mm)
Art-Nr
626109-9220-130
626109-9220-140
Description
interface set bench vice
interface set jaw chuck
Accessories
626109-9220-040
626109-9220-030
626109-9220-020
626109-9220-010
jaw chuck interface
bench vice interface
raster interface M6
support plate
Support plate
This support plate can be installed directly within
the measureing range of your CMM.
On the statically defined 3-roll-support you can
fast and easily attach the appropriate interface.
Art-Nr
626109-9220-010
24
Description
support plate
© Carl Zeiss 3D Automation GmbH
Machine parts
Raster interface
This raster pallet for the changeable interface
system has a M6 25 mm hole spacing.
It allows you to assemble your own mounting fixtures with bracket clamps or other elements included in our clamping kit (000000-0411-562).
Art-Nr
626109-9220-020
Description
raster interface M6
Accessories
600062-0210-000
CARFIT® CMB KIT - System E
Bench vice interface
This interface pallet holds an attached bench vice
with a jaw width of 73 mm and a maximum spread
of 100 mm.
The bench vice is mounted with brackets to the
pallet and can be moved on the plate.
Art-Nr
626109-9220-030
Description
bench vice interface
Jaw chuck Interface
300 x 200 mm interface with an attached three
jaw chuck. A handy catch to operate the chuck is
also provided.
Art-Nr
626109-9220-040
Description
jaw chuck interface
www.probes.zeiss.com
25
Machine parts
CMB-E clamping kit
The extensive CARFIT® CMB KIT - System E includes clamping and positioning elements. This kit
allows a fast and simple assembly of workpiece
specific clamping devices. Base plate not included,
has to be ordered separately.
Art-Nr
600062-0210-000
Description
CARFIT® CMB KIT - system E
Accessories
626109-9220-020
raster interface M6x25
Cleaning material
Cleanliness is essential for precision measuring.
The workpiece has to be cleaned to achieve optimum measuring results. Our cleaning material was
tested in field by our users and is recommended
for roundness measuring machines.
Art-Nr
626119-0010-006
000000-1359-469
000000-0424-218
626119-0010-007
626119-0010-008
626119-0010-009
626119-0010-005
000000-0084-895
26
Description
Polyamide-stretch-glove with PU coated palm
microfiber cleaning tissue
cleaning cloths Absorbond TX409,9“ x9“
swabs Knitted Polyester 1,6mm, (500 pcs.)
swabs Knitted Polyester 3,2mm, (500 pcs.)
swabs Knitted Polyester 6,4mm, (500 pcs.)
dust off 360 Super
JFA-CLEAN bottle 1L
© Carl Zeiss 3D Automation GmbH
Machine parts
Artefacts
As an operator of measuring machines, you must
you manufacture. Accuracy monitoring at regular
be sure that your measuring equipment meets the
intervals provides the foundation for accurate,
required specifications at all times. This is absolute-
reliable measuring results. For this purpose, we
ly vital for the consistently high quality of the parts
offer artifacts for a wide variety of applications.
Reference blocks
Contour-Check can be used to test contour measuring machines in accordance with VDI/VDE directive 2629, sheet 1. The use of the contour standard
allows the user to regularly verify compliance with
the specifications of the contour measuring
machine.
The carrier of the standard consists of hard metal,
on which calibrated, high-precision dimensional
standards and form elements are mounted.
- 185 mm total length with 9 form elements
- 2 x 90° angle, convex
- 2 x 90° angle, concave
- 3 x radius, convex
- 2 x radius, concave
Contour-Check is delivered with a fixture that permits measurement of the standard at 0° and 20°
inclinations in accordance with the VDI directive.
Art-Nr
600332-9230-000
600332-9230-100
Description
Contour-Check with case
DKD-calibration Contour-Check
Roughness standard
The roughness standard is used for calibration and
inspection of the roughness measuring machine. It
features two different surfaces with known roughness values. The values are denoted on the standard. For use with Handysurf, Surfcom 130,1500,
1900,2000 and 5000.
Art-Nr
000000-1098-899
Description
roughness calibration, E-MC-S24B
www.probes.zeiss.com
27
Request Styli
Fax request for styli
Surfcom 2000/3000/5000
Fax: +49 (0)7365-9208-29
Shaft material: carbon fibre/ThermoFit
* Note: This is your desired depth of
immersion and not the actual position
of the counterweight.
Stylus tip diamond
Device type
LH for S 3000 / 5000
LH for S 2000
55°/2 µm
Surfcom 2000
50 mm
65 mm
60°/2 µm
Surfcom 3000
100 mm
135 mm
40°/5 µm
Surfcom 5000
125 mm
60°/ 5µm
90°/5µm
Stylus arm dimensions
Quantity
B mm
pcs
ML mm
MLE mm
DSE mm (min. Ø1 mm)
Company:
Department:
Name, First:
Address:
Zip / City:
Phone:
E-Mail:
28
© Carl Zeiss 3D Automation GmbH
Fax:
Carl Zeiss 3D Automation GmbH
RoboMax®
Visible Productivity
Automate your ZEISS cmm
Increased Productivity
Get higher throughput and have lower downtimes in your production.
Guaranteed Connectivity
By modularly connecting the Zeiss CMM, robot
and peripherals with the factory material flow.
Only a few steps from the idea to its completion
Clear concept
Simulation, visualization and constant communication
with our customer - from the quotation to the delivery
is the key to a successful RoboMax project.
Thinking ahead
To provide you with a future-proof solution, we only
use globally available components for easy spare parts
procurement.
Ask us
We can assist you to increase the
productivity of your quality control.
Send your inquiries to:
Tel.:
+49 7365 9208-210
Fax:
+49 7365 9208-29
Mail:
[email protected]
www.probes.zeiss.com
29
Carl Zeiss
3D Automation GmbH
Telefon: +49 73 65 9208-210
Telefax: +49 73 65 9208-29
Mail: [email protected]
Internet: www.probes.zeiss.com
Subject to change in design and scope of delivery and as a result of ongoing technical development
© Carl Zeiss 3D Automation GmbH © concept, text and design: Carl Zeiss 3D Automation GmbH


