1
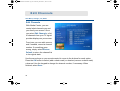
XL Series
Click on the guide you would like to read:
User Guide
Entertainment Guide
N
User Guide
Personal Computer
VG C - X L S e r i e s ( P C V- H 2 1 M )
Before Use
Congratulations on your purchase of this Sony VAIO computer, and welcome
to the on-screen User Guide. Sony has combined leading-edge technology in
audio, video, computing, and communications to provide state-of-the-art
personal computing.
Notice
© 2005 Sony Corporation. All rights reserved.
This manual and the software described herein, in whole or in part, may not
be reproduced, translated, or reduced to any machine-readable form without
prior written approval.
Sony Corporation provides no warranty with regard to this manual, the
software, or other information contained herein and hereby expressly
disclaims any implied warranties or merchantability or fitness for any
particular purpose with regard to this manual, the software or such other
information. In no event shall Sony Corporation be liable for any incidental,
consequential, or special damages, whether based on tort, contract, or
otherwise, arising out of or in connection with this manual, the software, or
other information contained herein or the use thereof.
In the manual, the ™ or ® marks are not specified.
Sony Corporation reserves the right to make any modification to this manual
or the information contained herein at any time without notice. The software
described herein is governed by the terms of a separate user license
agreement.
Documentation
Your documentation includes printed information and user guides to read on
your VAIO computer.
Guides are provided in PDF format, which you can easily browse through and
print out.
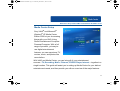
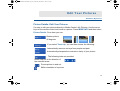
The My Club VAIO portal is a perfect starting point to use your computer — a
comprehensive collection of everything you need to get the most from your
computer.
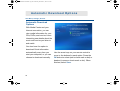
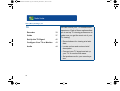
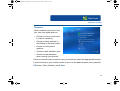
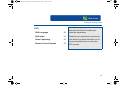
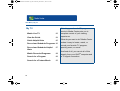
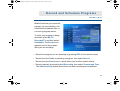
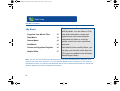
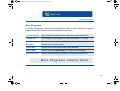
The user guides are collected under Documentation, which can be shown as
follows:
VGX-XL100 Living Room Entertainment Computer
2
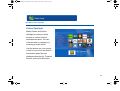
1
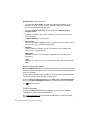
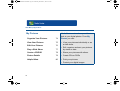
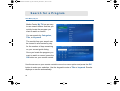
Click Start and then the My Club VAIO icon
2
Click Documentation.
3
Select the guide you want to read.
✍
You can manually browse to the user guides by going to My
.
Computer > VAIO (C:)
(your C drive) > Documentation > Documentation and opening the folder for your
language.
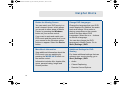
Printed Documentation
•
A Setting Up Poster — Describes the process from unpacking to starting
up your VAIO.
•
Troubleshooting Guide — Contains solutions to common problems.
•
Recovery Guide — Contains an explanation of how to recover your
computer's system if you need to.
•
Booklets containing the following information: Sony Guarantee
conditions, Safety Regulations, Modem Regulations and Wireless LAN
Regulations.
Non-printed Documentation
•
User Guide (this manual) — Contains features of your computer. It also
includes information about the software programs included with your
computer, as well as information on solving common problems.
•
Specifications — The online Specifications describe the hardware and
software configuration of your VAIO computer.
•
To view the online Specifications:
•
Connect to the Internet.
•
Go to the Sony VAIO-Link online support Web site at http://www.vaiolink.com
•
VAIO Recovery Guide — Provides information about restoring individual
software programs, software drivers, and drive partition(s) or your entire
hard disk drive to the original factory installed settings.
•
MCE guide — Provides information about using the Windows XP Media
Center Edition operating system.
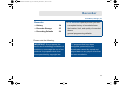
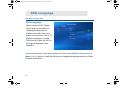
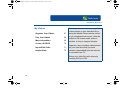
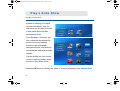
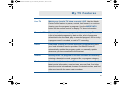
My Club VAIO
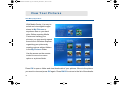
In My Club VAIO you can find:
3
VGX-XL100 Living Room Entertainment Computer
Documentation, which gives you:
•
Access to the User Guide. This manual explains the features of your
computer in detail, how to use these features confidently and safely,
connect peripheral devices and more.
•
Access to Help and Training. This is the portal of VAIO Help and
Support Center.
•
Important information about your computer, in the form of notices and
announcements.
•
In My Club VAIO you can also find:
•
Accessories
Want to expand the capabilities of your computer? Click on this icon and
have a look at your compatible accessories.
•
Software
Feeling creative? Click this icon for an overview of your software and
check out our upgrade options.
•
Wallpapers
Click this icon and check out our most popular Sony and Club VAIO
wallpapers.
•
Links
Click this icon and check out our most popular Sony and Club VAIO web
sites.
Help and Support Center
Help and Support Center is a comprehensive resource for practical advice,
tutorials, and demonstrations to help you learn to use Microsoft Windows XP
and your computer.
Use the Search feature, Index, or table of contents to view all Windows Help
resources, including those that are on the Internet.
To access Help and Support Center, click Start and then Help and Support.
Or go to the Help and Support Center by pressing the Microsoft Windows
key
and the F1 key.
Further Sources
Consult the Online Help files of the software you are using for detailed
information on features and troubleshooting.
Go to www.club-vaio.com to find online tutorials about your favorite VAIO
software.
VGX-XL100 Living Room Entertainment Computer
4
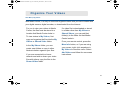
Ergonomic Considerations
Whenever possible, you should attempt to take account of the following
ergonomic considerations:
•
Position of your computer – Place the display directly in front of you .
Keep your forearms horizontal, with your wrists in a neutral, comfortable
position while using the keyboard, pointing device, or external mouse. Let
your upper arms hang naturally at your sides. Have breaks during
sessions with your computer. Excessive use of the computer may strain
muscles or tendons.
•
Furniture and posture – Sit in a chair with good back support. Adjust the
level of the chair so your feet are flat on the floor. A footrest may make you
more comfortable. Sit in a relaxed, upright posture and avoid slouching
forward or leaning far backwards.
•
Viewing angle of the display – Set the display at a confortable viewing
distance. Make sure the display screen is at eye or slightly lower. Use the
display tilting feature, if available, to find the best position. You can reduce
eye strain and muscle fatigue by adjusting the tilt of the display to the
proper position. Adjust the brightness setting of the display as well.
•
5
•
Lighting – Choose a location where windows and lights do not create
glare and reflection on the display. Use indirect lighting to avoid bright
spots on the display. You can also purchase accessories for your display
that help reduce glare. Proper lighting adds to your comfort and work
effectiveness.
•
Ventilation – Make sure you leave at least 5 cm of space behind and on
each side of the main unit.
VGX-XL100 Living Room Entertainment Computer
Chapter 1:
Getting Started
Introduction
Welcome to the VGX-XL100 Living Room Entertainment Computer User
Guide. This guide contains the following information:
•
Chapter 1: Getting Started
•
Chapter 2: Setting Up Your VGX-XL100 computer
•
Chapter 3: Hardware Upgrades & Maintenance
•
Appendix A: Wireless Local Area Networks
•
Appendix B: Troubleshooting
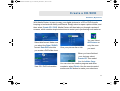
What is the VGX-XL100 Living Room Entertainment
Computer?
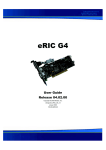
The VGX-XL100 is both a powerful computer and a state of the art home
entertainment system. Let VGX-XL100 lead you into the exciting world of
VAIO where new standards are established for digital content management.
•
Leverages the latest Intel
components
•
Uses the latest Microsoft®
Windows® XP Media Center
operating system
•
Offers High Definition
connectivity for Sony HD
Camcorders
VGX-XL100 Living Room Entertainment Computer
6
Operating System Software
The operating system for the VGX-XL100 Living Room Entertainment
Computer is Microsoft® Windows® XP Media Center Edition 2005. VAIO
value-added software provides you with additional features and capabilities
and when teamed with Media Center, provides you with an even greater
entertainment value.
Even though the digital entertainment features of the VGX-XL100 is designed
to work through Media Center, the features can also be accessed through
independent software applications pre-installed on the computer.
7
VGX-XL100 Living Room Entertainment Computer
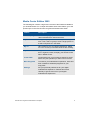
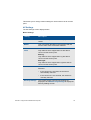
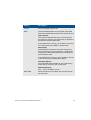
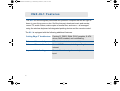
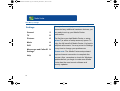
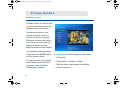
Media Center Edition 2005
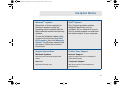
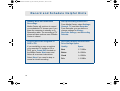
The following list contains a high-level overview of the features available to
you in Media Center. For in-depth information about each feature, go to the
specific topic in the VGX-XL100 Living Room Entertainment Guide.
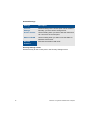
Feature
Description
Online Spotlight
The Online Spotlight provides Internet access to the
latest entertainment news and events.
My Pictures
Categorize your pictures in as many folders as you
wish. Then, select a group to view a single picture or
a slide of all pictures in the folder.
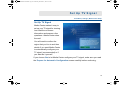
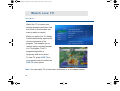
My TV
Take control of your TV viewing experience. Watch
live TV or record your favorite show for later viewing.
My Music
Enjoy access to all the music stored on your hard
drive. Organize, locate, and play your favorite music
files in Media Center.
Create DVD
Create DVDs from your favorite recorded TV series.
Select only the episodes you want to burn to DVD.
More Programs
To enhance you entertainment experience, links have
been included to additional programs for your
enjoyment.
Settings
Set your personal preferences for your digital
entertainment experience. Review this section
carefully to get the most out of your digital
entertainment experience.
VGX-XL100 Living Room Entertainment Computer
8
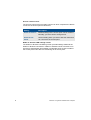
Getting to know the VGX-XL100
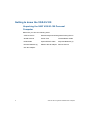
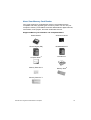
Unpacking the VAIO VGX-XL100 Personal
Computer
Make sure you have the following items:
VGX-XL100 PC
Wireless Keyboard w/Integrated Pointing Device
WLAN Antenna
Power Cord
Infrared Blaster Cable
HDMI Cable
Optical S/PDIF Cable
Keyboard Batteries (4)
Remote Batteries (2)
HDMI to DVI-D Adapter Remote Control
8cm disc adapter
9
VGX-XL100 Living Room Entertainment Computer
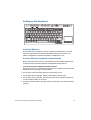
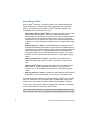
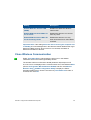
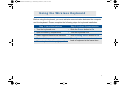
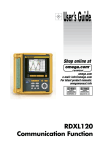
Setting up the Keyboard
HEADPHONES
Insert the Batteries
On the back of the Keyboard, remove the battery compartment cover and
insert four (4) Alkaline AA batteries (Supplied) oriented as shown in the
battery compartment. Replace the battery compartment cover.
Activate Wireless Keyboard Communication
Before using the keyboard, you must activate communications between the
computer and the wireless keyboard w/integrated pointing device.
To activate wireless keyboard communications
Make sure there are no obstructions between the computer and the wireless
keyboard when activating communications.
1 On the front of the keyboard, slide the Power button to On.
2 On the back of the keyboard, slide the Point Device button to On.
3 On the back of the keyboard, and the front panel of the computer, press the
connect buttons within 10 seconds.
4 Test the keyboard and the pointing device to make sure both are functioning
properly.
VGX-XL100 Living Room Entertainment Computer
10
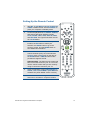
VAIO Remote Control
11
VGX-XL100 Living Room Entertainment Computer
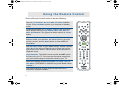
Setting Up the Remote Control
1
Start MY TV, MY MUSIC, MY PICTURES, MY
VIDEO in Media Center. Press STANDBY to
place your computer in Standby mode.
2
Control the playback for TV, MUSIC, VIDEOS,
and ends a slide show. Buttons include:
STOP, PAUSE, FWD, SKIP, REPLAY, REW,
and RECORD. The right arrow button serves
as a PLAY button.
3
Use the arrow buttons to move to a specific
location, the OK button to make your
selection, the BACK button to go to the
previous screen, and the MORE button to
view additional information.
4
Use the START button to open Media Center.
Volume Controls (VOL) are on the left and
Channel (CH) or Page (PG) on the right of
the START button. A MUTE button is also
provided to suppress sound.
Important Note: The VAIO remote control will
NOT control the sound for your TV. You must
use the remote control that you are currently
using to control the sound for your TV.
5
Open the following screens RECORDED TV,
GUIDE, LIVE TV, DVD MENU. (DVD MENU is
available only when Media Center is active.)
6
Use these buttons to change channels and
enter text or numbers in a specific location.
E
VGX-XL100 Living Room Entertainment Computer
12
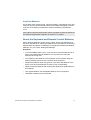
TV Preset for Europe
13
LG
Sharp
●
Sumsung
01
02
03
04
05
06
07
08
09
10
11
Philips
MCE(RC6) Default
501
515
518
534
535
556
557
558
570
571
Sony
Input Code #
Vendor
PrePro No.
PreNo
●
●
●
●
●
●
●
●
●
●
●
●
●
●
●
VGX-XL100 Living Room Entertainment Computer
Insert the Batteries
On the back of the remote control, remove the battery compartment cover and
insert two (2) Sony Super Mangan Alkaline AA batteries (Supplied) oriented
as shown in the battery compartment. Replace the battery compartment
cover.
Note: When using the VAIO remote control, remember to point the remote at
the VGX-XL100 personal computer, not at the TV or monitor.
About the Keyboard and Remote Control Batteries
When replacing batteries, please use the "same” kind of new batteries from
the same “manufacturer." Mixing new batteries and used batteries, and mixing
different kinds of batteries (combination of manganese batteries and alkaline
batteries, etc.) can cause "leaking and damage".
Help Hints
•
Turn the POWER switch "OFF" if you will not be using the keyboard for a
while. Also, please take the batteries out if you will not be using the
keyboard for a long time.
•
The capacity of the batteries in the keyboard can be checked using the
battery indicator located on the LCD panel of the keyboard.
•
Replace the batteries when they get low. If you leave the batteries in the
device even when the batteries are dead, it may cause leaking.
•
Replace with new batteries after cleaning the liquid when liquid leaks from
the batteries.
•
Use regular batteries. Re-chargeable batteries are not supported.
•
Use alkaline batteries for the keyboard.
VGX-XL100 Living Room Entertainment Computer
14
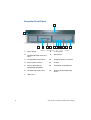
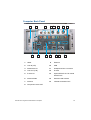
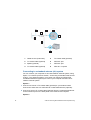
Computer Front Panel
6
1
2
15
3
4
5
7
8 9 10 11
12
13
1
Power button
8
i-Link (4 pin)
2
SmartMedia (SM) xD-Picture
Card
9
Microphone
3
Compactflash & Microdrive
10
Headphone/Line-out volume
4
Memory Stick Pro/Duo
11
S-video
5
Secure Digital (SD) &
MultiMediaCard (MMC)
12
Composite Audio/Video IN
6
CD-RW/DVD combo drive
13
Connect keyboard/pointing
device
7
USB 2.0 x2
VGX-XL100 Living Room Entertainment Computer
The Front Inputs and Outputs
Power Button
Press to turn on the power to this device. If you press this button during the
operation of this device, it will enter a hibernation state and the power lamp
will be turned off.
Power Lamp
The power lamp blinks green when the electric power to this device is turned
on. The power lamp blinks orange when it is in Standby mode.
(Hard Disk) Access Lamp
The access lamp blinks orange when you read or write data by accessing the
disc or hard disc.
WLAN (wireless Lan lamp)
The wireless LAN lamp turns green when the wireless LAN is ready to be
used.
DVD+/-RW Drive (Double layer recording capable)
It will read data from DVD-ROM/DVD+R DL/DVD+R/DVD+RW/DVD-R/DVDRW/CD-ROM/CD-R/CD-RW and write data to DVD+R DL/DVD+R/DVD+RW/
DVD-R/DVD-RW/CD-R/CD-RW.
Eject button
Press when the disc is to be removed from the drive.
SmartMedia™ (SM) xD-Picture Card™ memory card reader
Reads and writes data from and to SmartMedia or xD-Picture Card media.
Memory card access Lamp
It blinks orange when you read or write data from a "Memory Stick", xDPicture Card, Smart Media, Compact Flash, or SD memory card.
CompactFlash® & Microdrive™ memory card reader
Reads and writes data from and to CompactFlash and Microdrive media.
Memory Stick Pro/Duo™
Data from the "Memory Stick" is read and written.
VGX-XL100 Living Room Entertainment Computer
16
Secure Digital (SD) & MultiMediaCard™ (MMC) memory card reader
Data from the SD memory card is read and written.
USB Connector (x2)
Connects to a device which supports the USB standard.
The USB 2.0 is the standard for USB (Universal Serial Bus). The connector
supports the USB 2.0 standard and can also be connected to a device which
supports the USB 1.1 standard.
i.LINK® S400 port IEEE 1394 connector (4 pin)
Connects to an i.LINK supported device.
Note: A digital high vision device can not be connected.
MIC (Microphone Connector)
Connection for a microphone (stereo supported).
Headphone
Connection for headphones.
S VIDEO (S video input)
Connection for an S Video cable.
Composite Audio/Video IN
Connection for an Audio/Video cables.
Connect Keyboard/Pointing Device
Use this button when activating the wireless keyboard/pointing device.
Using Memory Cards and Memory Card Readers
This section provides basic information about using your computer’s installed
memory card readers and includes the following information:
17
•
About Your Memory Card Readers
•
About Memory Stick Media
•
Inserting a Memory Card
•
Removing a Memory Card
•
Sharing Memory Cards
VGX-XL100 Living Room Entertainment Computer
About Your Memory Card Reader
Your VAIO computer is equipped with memory card readers that are
compatible with many popular types of memory cards. You can use your
computer’s memory card readers to transfer data between digital cameras,
camcorders, music players, and other audio/video devices.
Supported Memory Card Readers and Compatible Media
Smart Media™
xD-Picture Card™
Secure Digital (SD)
MultiMediaCard™
Compact Flash®
Microdrive™
Memory Stick Duo™
Memory Stick®
Memory Stick Pro™
VGX-XL100 Living Room Entertainment Computer
18
About Memory Stick
Memory Stick® media are a compact, portable, and versatile data storage
media designed for exchanging and sharing digital data with compatible
devices. The following types of Memory Stick® media are available, but
compatibility with your computer can vary.
•
MagicGate™ Memory Stick® Media - Provides copyright protection with
authentication and encryption, using Sony MagicGate technology.
Authentication ensures that protected content is only transferred between
compliant devices and media. Protected content can be recorded and
transferred in an encrypted format that prevents unauthorized duplication
or playback. You can store different data formats on a single Memory Stick
media.
•
Memory Stick Pro™ media - Provides MagicGate copyright protection
and high-speed data transfer features when used with compatible Memory
Stick PRO devices. VAIO computers support Memory Stick PRO media for
data storage purposes only. High-speed data transfer and MagicGate
technology features, such as authentication and encryption, may not be
available. You can store different data formats on a single Memory Stick
media.
•
Memory Stick Pro Duo™ media - Provides the same features and
benefits of Memory Stick PRO™ media, in a form that is 1/3 smaller in
size.
•
Memory Stick® media - Provides data storage only. The Memory Stick
media does not provide MagicGate technology or high-speed data
transfer. You can store different data formats on a single Memory Stick
media.
•
Memory Stick Duo™ media - Provides the same features and benefits of
MagicGate™ Memory Stick media, in a form that is 1/3 smaller in size.
Compatibility between software programs and Memory Stick® media formats
may vary. At this time, Sony suggests using only MagicGate Memory Stick
media to store and transfer any data created with SonicStage™ software.
Visit the Sony online support Web site at http://www. vaio-link.com regularly
for the latest information on Memory Stick® media.
Note: Memory Stick media do not support AVI file playback directly from the
media. Copy the video file to your hard disk drive and then play back the file.
19
VGX-XL100 Living Room Entertainment Computer
Inserting a Memory Card
The memory card reader(s) are located behind a protective cover on the front
of the computer. To access the Memory Card Readers, flip the front cover
down.
To insert Memory Cards
1 From the front panel, locate the appropriate reader(s) for the memory card(s)
you want to use.
2 Insert the memory card into the reader, in the direction indicated of the arrow
on the media. Do not force the card into the reader.
Note: If the memory card does not go in easily, gently remove the card and
verify you are entering the card in the proper direction.
To Protect data on Memory Stick® Media
Some Memory Stick media are equipped with a write-protect tab*. The write
protect tab prevents accidental changes to information recorded on your
Memory Stick media. When you slide the write-protect tab to the LOCK
position, your Memory Stick media is write-protected. You cannot delete,
copy, or save information on the media while the write-protect tab in the
LOCK position. When you slide the tab to the un-LOCK position, you can
write to or modify your Memory Stick media’s contents.
Locking the Memory Stick
If your computer stops recognizing your Memory Stick® media, you may have
removed the media from the Memory Stick drive before the data access
process completed. If this occurs, follow these steps:
1 Remove the Memory Stick media from the slot.
2 Shut down your computer, closing any open software programs, and then turn
your computer off.
3 Wait approximately 30 seconds, and then restart your computer.
Your computer recognizes the Memory Stick media, when you insert it into the
Memory Stick slot again.
VGX-XL100 Living Room Entertainment Computer
20
Removing a Memory Card
The correct way to remove a memory card from a memory card reader varies,
depending upon the media, reader, or computer model. Use care when
removing a memory card to avoid damage to the reader or card.
Note: Do not remove a media card while the media access indicator light is
on. The card or its data may be damaged.
To remove a Memory Stick® media, Secure Digital (SD),
MultiMediaCard™, SmartMedia™, or xD-Picture Card™ media
1 Press the extended part of the memory card, causing it to extend out from the
reader’s slot.
2 When the card extends, carefully remove it.
To remove a CompactFlash® media
1 Firmly grasp the extended part of the memory card.
2 Pull to remove from the reader.
Sharing Memory Cards
If you plan to share your memory card between your VAIO computer and
devices such as a digital camera or music player, the card must be formatted
properly. Follow the steps below to format your memory card.
1 Format the memory card by using it in the device first. See the information
supplied with the device for details how to format the memory card.
2 If your device does not recognize memory card that has been formatted by
your computer, so the following:
21
•
Save the card’s contents to your hard disk drive.
•
Reformat the memory card using the device, not your computer.
VGX-XL100 Living Room Entertainment Computer
Computer Back Panel
1
2
9
10
5
3
4
11
12
13 14
9
Ethernet
6
7
8
15
1
HDMI
2
Line IN (L/R)
10
USB
3
Audio/Video IN
11
Headphone/Line-out volume
4
Line OUT (L/R)
12
S-video
5
S-video IN
13
Optical S/PDIF OUT & coaxial
S/PDIF OUT
6
Antenna/cable
14
Wireless LAN antenna
7
Antenna
13
Infrared transmitter OUT
8
Component Video OUT
VGX-XL100 Living Room Entertainment Computer
22
Back Inputs and Output.
Line IN (L/R)
Connection for an external device.
Audio/Video IN
Connection for an Audio/Video cable to bring signal to the VGX-XL100
computer.
S-Video IN
Connection for an S Video cable.
Antenna/Cable
Connection for cable provider or external antenna.
Line OUT (L/R)
Connection for an external device.
HDMI™
Connection for HDMI cable for high definition video and/or sound for TV.
Ethernet 10/100/1000baseT
Connection for a 10BASE-T/100BASE-TX Ethernet.
(The port marked with the Network symbol is for LAN connections only.)
USB 2.0 (x2)
Connects to a device which supports the USB standard.
The USB 2.0 standard is a new standard for USB (Universal Serial Bus). The
connector supports the USB 2.0 standard and can also be connected to a
device which supports the USB 1.1 standard.
Optical S/PDIF IN
Connection for Audio In.
i.LINK® (x2)
Your VAIO computer is equipped with a 4-pin (front panel) and a 6-pin (back
panel) i.LINK® port. A 4-pin i.LINK port cannot supply power to a connected
i.LINK device. A 6-pin i.LINK port can supply power (10V to 12V) to a
connected i.LINK device, if the device is equipped with a 6-pin connector.
23
VGX-XL100 Living Room Entertainment Computer
Optical S/PDIF OUT & Coaxial S/PDIF OUT
Connections for Audio Out.
Wireless LAN Antenna
Connection for Wireless LAN Antenna.
Infrared Transmitter OUT (x2)
Controls VCR, Setup box, and other devices in MCE.
Component Video OUT (480i, 480p, 1080i, 720p)
Connections for Video Out.
Power Cord
Connection for supplied power cord.
Display output support for HDCP
This device supports the HDCP (High-bandwidth Digital Content Protection)
standard, which makes it possible to receive digital video signals that have
been encrypted for the purpose of copy protection.
In this way it is possible to play output content that is required to have copy
protection, and you can enjoy a wider variety of high definition content.
In order to play the copy protected content, it is necessary to connect a
display that supports the HDCP standard. If a display that does not support
the standard is connected, you will not be able to play or display the copy
protected contents.
Copy protection
You can not use this device for recording of content for other than your
personal enjoyment without the copyright holders permission under the
copyright law.
It is necessary to obey the copyright law and permitted usage conditions for
each copyrighted work and for making multiple copies of copyrighted works. It
is prohibited to make copies or use, change, delete or make other revisions to
or alter the integrity of captured video, images, or audio without the copyright
owners permission.
VGX-XL100 Living Room Entertainment Computer
24
25
VGX-XL100 Living Room Entertainment Computer
Chapter 2:
Setting Up Your VGX-XL100
Before You Begin
Before setting up your VGX-XL100 Living Room Entertainment Computer,
consider the environment in which it will be placed. Listed below are some
general guidelines.
•
The maximum distance between the computer and the keyboard can be
up to 10 m.
•
Placing the keyboard near a metallic object may affect communication
between the keyboard and the computer.
•
Do not set up the VGX-XL100 in the following locations:
- in direct sunlight
- near a magnet or an item that generates a magnetic field
- areas with high heat, such as near a heater
- areas with excessive heat, dust, and humidity
- areas with poor ventilation
Please observe the following items to avoid damage.
•
Always turn off the power before the device is moved. Damage may be
caused to the hard disk if the device is transferred or moved with the
power on.
•
Do not tip or hit this device. Even a small impact or vibration may cause
some damage to your hard disk.
•
Do not set up where it is not secure.
•
Do not place an object over the ventilation holes.
•
If the computer is placed in an enclosed entertainment cabinet, make sure
there is sufficient airflow.
.
VGX-XL100 Living Room Entertainment Computer
24
Step 1: Connecting your TV
HDMI™ Connector
If your TV has an HDMI™ connector, use the supplied HDMI™ cable and
connect one end to your TV and the other end to the HDMI™ connector on
the back panel of the computer.
DVI-D Connector
If your TV has a DVI-D connector, use the supplied HDMI cable and the
HDMI™ to DVI-D adapter. Insert the adapter into the DVI-D TV/monitor. Then
using the supplied HDMI™ cable, connect one end of the cable to the adapter
and the other end to the HDMI™ connector on the back panel of the VGXXL100 computer.
Component Connectors (Y, Pb, Pr)
If your TV has component connectors, use an RCA cable (not supplied) and
connect one end to the corresponding outputs on your TV and on the back
panel of the VGX-XL100 computer.
Additional Notes:
25
•
If your TV has an HDMI™ connector and a DVI-D connector, Sony
recommends using the HDMI™ connector.
•
The HDMI cable carries both video and audio signals.
•
You cannot use HDMI™ and Component connections at the same time.
•
If a device driver other than the ones provided by Sony is used to update a
device driver related to the video and audio, the image will not be
displayed and the audio will not be heard. Always use the device driver
provided by Sony for updates.
•
You can connect the HDMI™ out to an A/V amp and audio will be heard
through the AV amp and then another HDMI™ cable can be connected
from the AV amp to the TV for the display.
•
The VGX-XL100 computer cannot support 192kHz sampling rate sound on
HDMI out connector. Please select less than 192kHz Rate on [HDMI] setting in "Advanced" tab of Sound Reality Control Panel.
•
If your display does not support HDMI, or if you connect the VGX-XL100 to
display via AV amplifier, then content protected source cannot be seen
because some software does not support this kind of connections. It is
VGX-XL100 Living Room Entertainment ComputerLiving
required that display can support HDMI and XL100 is connected to display
directly."
Additional TV Connections
Note: Your computer is supplied with certain video cables. Depending on
your in home cable access, you may require extra cables, adapters or
connection equipment not supplied with your computer.
Connecting to standard cable access (CATV)
Option 1
1 Connect one end of the TV coaxial cable (optional) to your cable service
access.
2 Connect the other end of the TV coaxial cable to the VHF/UHF port on the
back panel of your computer.
2
3
1
1
Cable service (wall outlet)
2
TV coaxial cable (optional)
3
VHF/UHF port
Option 2
1 Connect one end of a TV coaxial cable to your cable service access. Connect
the other end to the single-connection side of a splitter adapter.
2 Connect a second TV coaxial cable (optional) to the double-connection side
of the splitter adapter. Connect the other end to the VHF/UHF port on the
back panel of your computer.
3 Connect a third TV coaxial cable (optional) to the double-connection side of
the splitter adapter. Connect the other end to the VHF/UHF port on the back
of your TV monitor or display.
VGX-XL100 Living Room Entertainment Computer
26
2
5
6
3
8
1
4
7
1
Cable service (wall outlet)
5
TV coaxial cable (optional)
2
TV coaxial cable (optional)
6
VHF/UVF port
3
Splitter (optional)
7
VHF/UVF port
4
TV coaxial cable (optional)
8
VGX-XL1 computer
Connecting to a standard antenna (air) system
You can connect your computer to an indoor/outdoor antenna system, using
Option 1 or 2 from the previous section, “Connecting to standard cable access
(CATV).” The antenna system in your home may require a VHF/UHF RF
combiner/transformer (optional) to connect your computer and the indoor/
outdoor antenna system.
Option 1
1 Connect one end of a TV coaxial cable (optional) to your antenna outlet.
Connect the other end to a VHF/UHF RF combiner/transformer (optional).
2 Connect a second TV coaxial cable (optional) from the combiner/transformer
to the VHF/UHF port on the back panel of the VGX-XL100 Computer.
Option 2
27
VGX-XL100 Living Room Entertainment ComputerLiving
1 Connect both ends of the antenna’s twin lead cable to the screw-type grips on
the combiner/transformer.
2 Connect the TV coaxial cable (optional) from the combiner/transformer to the
VHF/UHF port on the back panel of your computer.
If you are connecting to an indoor/outdoor antenna system, you may need to
re-orient the antenna for better reception.
2
1
4
3
5
7
6
8
1
Antenna system
5
TV coaxial cable (optianal)
2
TV coaxial cable (optional)
6
VHF/UVF port
3
VHF/UHF RF combiner/
Transformer (optional)
7
Antenna system (air)
4
VGX-XL100 computer
8
300-ohm Twin lead cable
(optional)
Connecting a Cable or Satellite Set-top Box
You can connect your computer to cable or satellite service that requires a
set-top box.
Option 1
1 Connect one end of a TV coaxial cable (optional) to your cable service
access. Connect the other end to the In jack on the back panel of your set-top
box.
2 Connect a second TV coaxial cable (optional) to the Out jack on your set-top
box. Connect the other end to the single-connection end of a splitter adapter
(optional).
VGX-XL100 Living Room Entertainment Computer
28
3 Connect a third TV coaxial cable (optional) to the double-connection end of
the splitter adapter. Connect the other end to the VHF/UHF port on the back
panel of your computer.
4 Connect a fourth TV coaxial cable (optional) to the double-connection end of
the splitter adapter. Connect the other end to the VHF/UHF port on the rear of
your TV monitor or display.
29
VGX-XL100 Living Room Entertainment ComputerLiving
9
2
1
6
4
7
5
10
3
8
1
Cable service (wall outlet)
6
TV coaxial cable (optional)
2
TV coaxial cable (optional)
7
TV coaxial cable (optional)
3
VHF/UVF port
8
VHF/UVF port
4
Splitter (optional)
9
Set-top-box (STB)
5
TV coaxial cable (optional)
VGX-XL100 Living Room Entertainment Computer
10
VGX-XL100 computer
30
Option 2
1 Connect one end of the TV coaxial cable (optional) to your cable service
access. Connect the other end to the In jack on the back panel of your set-top
box.
2 Connect a second TV coaxial cable (optional) to the Out jack on your set-top
box. Connect the other end to the VHF/UHF port on the rear of your TV
monitor or display.
3 Connect one end of a stereo A/V dubbing cable with triple RCA plugs
(optional) to the Video-Out and Audio-OUT (L/R) jacks on the back panel of
your set-top box, matching the plug and jack colors.
4 Connect the other ends of the stereo A/V dubbing cable into the Audio InputL, Audio Input-R, and Video Input jacks on the back panel of your computer,
matching the plug and jack colors.
31
VGX-XL100 Living Room Entertainment ComputerLiving
7
10
4
6
5
9
3
2
8
1
1
Composite audio R-in
6
Video OUT
2
Composite audio L-in
7
Stereo A/V dubbing cables
(optional)
3
Composite video jack
8
VHF/UVF port
4
VGX-XL100 computer
9
TV coaxial cable (optional)
5
Audio OUT (L/R)
10
Cable service access
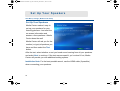
Step 2: Connecting your Home Theater / Speakers
Two-channel sound system
If your sound system has two channels, use the LINE OUT (L) (R) on the back
panel of the computer and the LINE IN composite audio connectors on your
speakers/receiver.
VGX-XL100 Living Room Entertainment Computer
32
More than two-channel sound system
If your sound system has more than two channels, use the supplied optical S/
PDIF cable and connect one end to the S/PDIF OPTICAL OUT connector on
the back panel of the computer and the other end to the OPTICAL IN
connector on your sound system. You can also use a coaxial S/PDIF
connection when connecting a multi-channel sound system.
Additional Notes
•
An optical/coaxial connection will provide a higher quality output than a
composite connection.
Configuring software for your speaker system
When using a multiple channel speaker system, certain software programs
require setting changes to make certain you have proper audio performance.
Your computer's factory default settings for audio can be changed using the
Media Center Settings feature. You can switch between 2-channel, 6-channel,
or S/PDIF output modes.
To change speaker settings, do the following:
This procedure will demonstrate how to set up 5.1 surround sound speakers.
Your selections may differ depending on your type of speakers.
1 From the Media Center Start menu, select Settings > General > Media
Center Setup, Set Up Your Speakers.
The Speaker Setup screen displays.
2 Select Next. The Choose number of speakers screen displays.
3 Select 5.1 surround speakers. The Speaker Connection Type screen
displays.
4 Select the appropriate connection type. Your selection depends on the type of
cable used to connect your 5.1 surround sound speakers. Select Single RCA
(digital) for coaxial S/PDIF or Toslink (digital) for optical S/PDIF and HDMI.
5 Select Next.
6 From the Test Your Speakers screen, select the Test button. The system will
test your speakers for sound.
Important: Then select I heard sound from all my speakers, even if you did
not hear sound from all your speakers. The You Are Done! screen displays.
7 Select Finish.
8 Return to the Media Center Start menu and select Settings > DVD > Audio.
InterVideo opens and displays the Welcome to Audio Settings screen.
33
VGX-XL100 Living Room Entertainment ComputerLiving
9 Select Configuration. The Speaker Configuration screen displays.
10 Verify that Analog - 5.1 Channel displays in the Set sound output to match
your system text box. Select Save and close Media Center.
Note: Even if you are using a S/PDIF connection, ALWAYS choose Analog 5.1 Channel. DO NOT SELECT S/PDIF.
To complete Speaker Setup, go to the Windows Control Panel.
1 Open the Control Panel. Select Windows Start > Control Panel.
2 From the Category view, select Sounds, Speech, and Audio Devices.
3 From the Sounds, Speech, and Audio Devices screen, select Sound Reality
Audio from the Pick a Control Panel icon section. The Sound Reality Control
panel displays.
4
Select the Advanced tab.
VGX-XL100 Living Room Entertainment Computer
34
From the S/PDIF group box:
•
Check the Enable Dolby Digital Live check box.
•
Verify that AC3 is the option selected for Format.
•
Verify that Enable Digital Output is checked in the S/PDIF group box.
Note: If you are using an HDMI connection through a TV or an amplifier that
supports 5.1 sound, do the following:
5
•
check Enable HDMI Output
•
select AC3 for the format
•
check Enable Digital Output
Close the Sound Reality Control Panel and the Windows Control Panel.
Your 5.1 Surround Sound Speaker Setup is complete.
Speaker Setup Notes
•
After the 5.1 channel sound is setup, sound will not be outputted through
the HDMI connection. To enable HDMI sound, uncheck the Enable Dolby
Digital Live check box and check/select the Enable HDMI Output check
box located on the Sound Reality Control Panel, Advanced tab. This will
disable the 5.1 channel sound output.
•
Dolby Digital 5.1 must be selected for the audio output of the DVD from the
DVD menu.
Note: The VGX-XL100 does not support dts sound decoding.
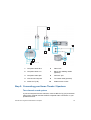
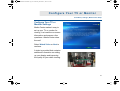
Step 3: Connecting to the Internet
Wired Network
Use an RJ-45 connector cable. Connect one end to the Ethernet connector on
the computer and the other end to your cable or modem.
35
VGX-XL100 Living Room Entertainment ComputerLiving
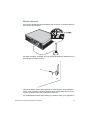
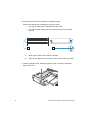
Wireless Network
Connect the WLAN antenna (included) to the connector on the back panel of
the VGX-XL100 computer.
For better reception, if needed, you may mount the wireless LAN antenna to a
wall using the included screws.
Launch the Marvel Client Utility Application. Select Station as the operation
mode. Then proceed to Windows Wireless Zero Configuration service to set
up your connection with your preferred Access Point.
For additional information about setting up a wireless LAN, go to Appendix A.
VGX-XL100 Living Room Entertainment Computer
36
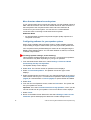
Step 4: Turning Power On
Make sure all hardware is connected and that power cables are plugged into
properly grounded electrical outlets.
Turn on the power to the computer, TV, and speakers.
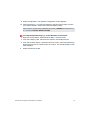
Activate Wireless Keyboard Communication
1 From the front of the keyboard, slide the Power button to On.
2 From the back of the keyboard, slide the Pointing Device button to On.
3 From the back of the keyboard, and the front panel of the computer, press
the Connect buttons simultaneously and hold for a few seconds.
4 Test the keyboard to make sure it is functioning properly.
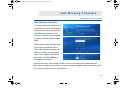
Step 5: Software Setup
Microsoft Windows operating system setup
The first time you start your computer your will be presented with a series of
screens for Windows XP Setup. Please follow the on-screen instructions.
Note: For information concerning Firewall, Automatic Updates, Virus
Protection, and other security related features of Microsoft Windows XP, see
the Windows Help file.
Software Setup Notes
37
•
If Media Center automatically opens, and you need to adjust your picture
quality, minimize Media Center and go to Step 6: Resolution Setup. When
complete return to Media Center.
•
Make sure your Internet connection is working properly.
•
Media Center Setup: The first time Media Center starts, you will be
presented with a series of screens that will guide you through Media
Center Setup. Please follow all on-screen instructions.
•
Media Center Wireless Network: If you have an existing wireless network,
and you wish to add your computer to the network, start Media Center and
from Settings, go to General > Media Center Setup > Join Wireless Network. Then follow all on-screen instructions.
VGX-XL100 Living Room Entertainment ComputerLiving
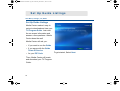
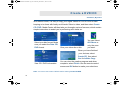
Step 6: Resolution Setup
To set the resolution for your TV or monitor, do the following:
1 Using the pointing device on your wireless keyboard, right click anywhere on
the Windows desktop.
2 From the menu, point to or click NVIDIA® Display. A new menu option opens.
The menu option name depends on what TV or monitor is connected to the
computer.
3 Click the new menu command. The following screen displays.
4 From the Directory list, click nView Display Settings, if necessary.
5 Click the Device Settings button.
6 From the side menu, click TV Format and select the appropriate option for
your TV from the list.
7 Continue with Media Center Setup.
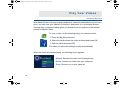
10 Feet User Interface
This application provides simple, dynamic tools to expand the capabilities of
Internet Explorer to make your web experience more productive.
With Internet Explorer
When Internet Explorer is launched, the Liquid Surf toolbar is loaded into the
Internet Explorer toolbar area at the top of the window. Liquid Surf includes a
Magnification tool for resizing web content from 75% to 250%, a View tool that
changes the Internet Explorer window to any one of three options: Full View,
Extended View, or Split View, and an option menu with links to the Help File,
online Updates, and online Technical Support.
See the Liquid Surf online help, for more info
With Windows MCE
You can also browse the web using your VAIO remote control.
Click More Programs and click the Internet Explorer icon to start the
application.
There are 3 navigation modes available: Navigation, Mouse Pointer and
Scroll that you can operate with the following buttons on your remote control.
1 Navigation
VGX-XL100 Living Room Entertainment Computer
38
•
Arrow buttons: to navigate links
•
OK button: to jump to the selected link
•
CH +/- buttons: to change navigation mode
•
More button: to display the toolbar
2 Mouse Pointer
•
Arrow buttons: to move the mouse pointer
•
OK button: to left-click
•
CH +/- buttons: to change navigation mode
•
More button: to display the toolbar
3 Scroll
•
UP & DOWN Arrow buttons: to scroll the web page
•
CH +/- buttons: to change navigation mode
•
More button: to display the toolbar Toolbar
To control the toolbar
39
•
Arrow buttons: to select a function
•
OK button: to execute the selected function
•
More button: to return to the selected Navigation mode
VGX-XL100 Living Room Entertainment ComputerLiving
Setting Up a Local Area Network
For detailed information on setting up your Wireless LAN, see Appendix A,
“Setting up a Wireless LAN.”
Wired Network
Use an RJ-45 connector cable. Connect one end to the Ethernet connector on
your computer and the other end to your cable or your modem.
Wireless Network
Wireless LAN removes all of the trouble of cable connections and helps to
build a wireless LAN (Local Area Network) environment. This device is
equipped with a 2.4 GHz wireless LAN (IEEE802.11b/g compliant).
Turning the Power Off
Please follow the following procedure when turning the power off to the
computer.
1 Select the Windows Start button.
2 Select Turn Off Computer and then from the Turn Off Computer screen,
select Turn Off.
VGX-XL100 Living Room Entertainment Computer
40
In a short time the power to the computer goes off automatically and the
power lamp goes off.
Note: If the power does not turn off by this procedure, you can turn the power
off by holding down the Power button on the VGX-XL100 computer for more
than four (4) seconds. WARNING: Any changes that have not been saved will
be lost.
Wireless LAN Antenna Setup Notes
If you put objects (especially, metal or wet objects) around this antenna,it
makes hard to send radio waves. Please do not put objects too close to the
antenna..
If you put objects (especially, metal or wet objects) between this antenna and
the other party, radio wave becomes hard to reach. Please put this antenna
on high position as much as possible, with avoiding obstacles between
antennas.
If you set antenna to wrong direction, radio wave becomes hard to reach. In
such a case, you can change antenna direction as much as you can do it
smoothly by finger.
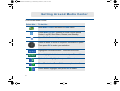
Power Saving Functions
The VGX-XL100 personal computer offers two power-saving function modes,
Standby and Hibernation, which are used to reduce power consumption when
not in use.
41
VGX-XL100 Living Room Entertainment ComputerLiving
The table below list the characteristics of each function:
Standby Mode
Power Lamp
Blinks in orange.
State
Reduces power consumption because it turns off the
components other than the minimum components
necessary while maintaining the current working
status.
Enter Standby
Mode
•
Press the Power/Standby key on the keyboard.
•
Click Standby in the Turn Off Computer screen,
which displays when selecting Start > Turn Off
Computer.
•
Press the Standby button on the remote control.
•
Either press the Space key or the Power/Standby
key on the keyboard, or press the power button on
the front of this device.
•
Press the Standby button on the remote control.
Return to normal
operation
Hibernation State
Power Lamp
Power lamp is off.
State
Main power is turned off and the fan for the internal
main power section is paused. Saves the current
working status to the hard disk and turns off the
power for this device.
Enter Standby
Mode
•
Press the power button on the front of this device.
•
Click Hibernate in the Turn Off Computer screen,
which displays when selecting Start > Turn Off
Computer.
Return to normal
operation
•
Press the Power button on the front of this device.
•
Press the Power/Standby key on the keyboard.
Note: This device will not return to normal operation by remote control when in hibernation.
VGX-XL100 Living Room Entertainment Computer
42
Chapter 3:
Hardware Upgrades & Maintenance
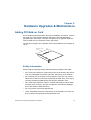
Adding PCI/Add-on Card
A PCI standard based expansion card can be installed in this device. Check if
the expansion card supports Windows XP and the PCI standard before
purchasing the card. There is an open slot (place for an upgrade expansion
card) to install one PCI expansion card in this device.
The maximum length of the expansion card to be installed in the computer is
16 cm.
Maximum Length
16 cm
Safety Information
Please read the following safety information before installing a PCI Card.
•
Do not touch the electronic components on the circuit board of this device.
They are susceptible to pressure and static, which may cause a failure.
•
Do not directly touch the parts on the expansion card. This may cause a
failure due to static from the body. Discharge the static from your body by
touching something metallic before touching the expansion card.
•
Do not leave the expansion card on a surface that easily produces static
electricity such as carpet. The part of expansion card may be damaged
due to the effects of static electricity.
•
Do not touch the connection pads directly.
•
There are delicate electronic components on the expansion card. Do not
drop or allow a strong impact to the expansion card.
VGX-XL100 Living Room Entertainment Computer
46
•
Always follow the user's manual for this device when removing the
expansion card. Forcefully removing the expansion card may cause failure
of this device.
•
Do not get the expansion card wet.
Warning: The entire repair cost will be charged if there is a failure or accident
when installing an expansion card by yourself.
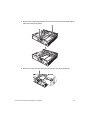
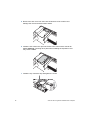
Installing a PCI Card
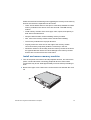
1 Turn off the power to this device and any peripheral devices, and remove the
power cord and all cables connecting peripheral devices.
Wait about one hour after turning off the power to this device. The inside of
this device may be hot right after the power is turned off and may cause
burns.
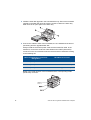
2 Remove the upper cover. Then remove the screws at the rear of the unit and
slide the cover off.
47
VGX-XL100 Living Room Entertainment Computer
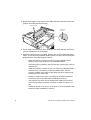
3 Remove the inside support panel. Remove the screws from the inside support
panel and remove the panel.
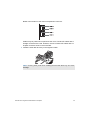
4 Remove the clip. Remove the screw and remove the clip by pulling up.
VGX-XL100 Living Room Entertainment Computer
48
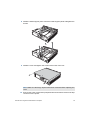
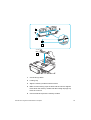
5 Remove the slot cover from the inside of this device. Be careful not to
damage the circuit board and cables inside.
6 Install the PCI card in the open slot. Refer to the card’s user's manual for
details. Warning: Touching other parts when installing the expansion card
may cause a failure.
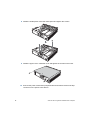
7 Install the clip. Insert the clip and tighten the screw.
49
VGX-XL100 Living Room Entertainment Computer
8 Install the inside support panel. Insert the inside support panel and tighten the
screws.
9 Install the cover and tighten the screws at the back of the unit.
Note: Make sure all foreign objects have been removed before replacing the
cover.
10 Connect the power cord and the peripheral devices that were removed in Step
1 and turn on the power.
VGX-XL100 Living Room Entertainment Computer
50
11 Follow the directions on the screen and in the PCI expansion card user's
manual once the message "Windows has found new hardware and is
installing the software for it." displays after starting Windows.
Note: A driver is software that is necessary to properly operate the peripheral
device, notifying the computer of what type of peripheral device is connected
in what way. A driver may need to be installed if an expansion card is
upgraded.
To remove the expansion card
If it becomes necessary to remove the PCI expansion card, reverse the
installation procedures to remove the card. Turn off the power to the
computer, any peripheral devices, and remove the power cord and all cables
connecting peripheral devices before removing the expansion card.
Adding Memory
Memory can be upgraded using the expansion memory slot inside this device.
Upgrading memory increases the data processing speed and allows faster
response time when running multiple programs at the same time.
There are 4 slots available in this device to install memory modules and it can
be upgraded to a total of 2 GB. Upgrade the memory by installing memory
modules sold separately.
Safety Information
Please read the following safety information before installing a memory
modules.
51
•
Please be careful not to get cut by the parts or the circuit board inside this
device when installing the memory.
•
Be careful not to catch your fingers on the cables inside this device and
remove or dislodge the cable when installing the memory.
•
Turning the power on with a foreign object (metal, such as a screw) left
inside the device at the time of upgrading the memory may cause damage.
Always remove any foreign objects and replace the cover before turning
the power on.
•
Don't touch the electronic components on the circuit board of this device.
They are susceptible to pressure and static, which may cause a failure.
VGX-XL100 Living Room Entertainment Computer
•
Wait about one hour after turning off the power. The inside of this device
may be hot right after the power is turned off and may cause burns.
Please be careful when upgrading memory. Mishandling when installing and
removing can cause a failure of this device. You are encouraged to request
the installation be done by a dealer or professional.
If you upgrade the memory by yourself and forget to close the inside
connector, insert the memory backward, or not completely seat the memory, a
failure or damage may result. Repair costs in these and similar situations will
be charged to the owner.
Contact customer support for questions about upgrading the memory. The
Sony repair centers provide a service for charge for those who can't install the
memory by themselves and for people who purchased or plan to purchase
Sony memory.
Sony Supported Memory Types
The following Sony memory modules can be installed in this device:
Capacity
512 MB
Speed
Memory Module
DDR2 533 (PC2-4200)
VGP-MM512J
Important Note: Always use DDR2 533 SDRAM DIMM VGP-MM512J.
Memory Capacity After an Upgrade.
Using Standard Memory: DDR2 533(PC2-4200)
Standard
Upgrade
Capacity
Bank 0
Bank 1
Standard (1024MB)
512MB x 2 DDR2 533
1536MB
256MB x 2 DDR2 533
VGX-XL100 Living Room Entertainment Computer
512MB x 2 DDR2 533
52
Removing Standard Memory and upgrading to 512MB x 4
Standard
Upgrade
Capacity
Bank 0
Bank 1
Speed
2048MB
512MB x 2
DDR2 533
512MB x 2
DDR2 533
8528MB/sec
Dual Channel
Note: Dual channel is a technology that doubles the memory bandwidth
capability to transfer 128 bits using two 64-bit wide channels for the DDR
memory interface. A total 128-bit wide dual channel DDR memory interface is
achieved by loading identical pairs of two DDR memory modules with the
same speed and the same capacity.
Precautions when selecting memory modules.
•
There are various types of memory modules. Make sure that the products
purchased at a store have a written warranty for the device when
installing.
•
Sony do not provide support for memory module purchased at stores.
Consult with the dealer where you purchased the memory module with
questions.
Install Notes:
Observe the following when installing a memory module in order to not
damage the memory module with static.
53
•
Do not work in a location where static builds up (such as on the carpet)
when upgrading the memory.
•
Touch the metal in this device to discharge the static in your body first and
then proceed with the work.
•
The memory module comes in a static protection bag. Do not take the
memory module out from the bag until right before installing.
•
Do not touch the semiconductor chip or the connectors when you hold the
memory module.
•
Cover the memory module with a static protection bag or aluminum foil to
store.
VGX-XL100 Living Room Entertainment Computer
Please be careful of the following when upgrading the memory as the memory
slots for this device are separated into two banks.
•
There are two banks and four slots (two in each bank) available to install
memory modules in this device. Each slot can hold a 512 MB memory
module.
•
Install memory modules of the same type, name, speed, and capacity in
both slots in the same bank.
•
Always install from bank 0 when installing memory modules.
•
Also, refer to the memory module user's manual when installing.
•
The memory modules have a proper direction.
•
Properly match the notch area on the edge of the memory module
connector and the projections (inside the connector) in the slot.
•
Please be careful not to forcefully insert the memory module in the slot in
the opposite direction which can cause damage to the memory module
and the slot or loosen it from the circuit board.
Install and remove memory modules
1 Turn off the power to this device and all peripheral devices, and remove the
power cord and all cables connecting peripheral devices. Some inside
components may be hot. Wait approximately one hour before proceeding to
work.
2 Remove the upper cover. Remove the screws at the rear and slide the cover
off.
VGX-XL100 Living Room Entertainment Computer
54
3 Remove the graphic card. Remove the cable and screw first and remove the
graphic card while pressing the latch.
Remove screw
Press down
on latch
4 Touch metal to discharge any static buildup in your body and then remove the
memory module from of the package.
5 Carefully install the memory module. (Please refer to the Install Notes listed
above.) If you have any problems please contact your Sony Technical Support
Representative. See VAIO Support Central.
55
•
Match the memory module to the slot by paying attention to the
direction of the notch as shown in the illustration below.
•
Insert the memory module in the slot vertically until the clips come up
and secure it.
•
Install two memory modules as one set. There is no guarantee that it
will work if only one memory module is installed. Also, use two
memory modules of the same model name and same capacity and
install them in the same bank.
•
Please be careful not to catch your finger on the cables inside this
device and remove the cable when installing the memory.
•
The harness connector may be raised when installing the memory.
Check by pressing the harness connector to make sure there is no
gap.
•
Please be careful not to get cut on the parts or the circuit board inside
this device when installing the memory.
VGX-XL100 Living Room Entertainment Computer
1
2
3
4
5
1
Connectors go down
2
Locking cap
3
Align the memory module notch as shown
4
Make sure the locking caps are back and the notch is aligned.
Press down the memory module until the locking caps pop up.
Press in to secore
5
Use both hands to place the memory module
VGX-XL100 Living Room Entertainment Computer
56
6 Make sure that the memory module is installed properly.
Check the following after installing the memory module:
•
The clips on both sides are aligned with each other.
•
The clips on both sides fit into the notches of the memory module
properly.
1
2
1
Align clips on both sides of memory module
2
Clips on both sides must fit into the notches on the memory module.
7 Install the graphics card. Install the graphics card, connect the cable and
tighten the screw.
57
VGX-XL100 Living Room Entertainment Computer
8 Install the upper cover. Install the cover and tighten the screws on the back.
9 Connect the power cord and the peripheral devices that were removed in Step
1 and turn on the power to this device.
10 Click the Start button and then point to All Programs, VAIO System
Information and then click VAIO System Information.
Make sure that System Memory displays the correct memory capacity. If the
memory capacity is correct, memory installation is complete. If the memory
capacity has not increased, remove the memory module after turning off the
power to this device, and repeat the procedure to properly install the memory
module again.
Remove Memory Module
Discharge static in your body by touching the metal inside this device, and
then press out and down on the clips on both of the memory slots. Carefully
lift the memory module out of the slot.
1
VGX-XL100 Living Room Entertainment Computer
58
1
59
Press out and down
VGX-XL100 Living Room Entertainment Computer
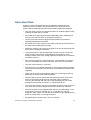
Add a Hard Disk
A total of 3 serial ATA hard disks (the pre-installed hard disk plus two
additional) can be installed in the hard disk drive bay inside this device.
Please read the following information before adding additional hard disks.
•
All of the repair cost may be charged if a failure or accident happens when
installing the hard disk by yourself.
•
Be careful when upgrading hard disks. Mishandling when installing and
removing can cause a failure or damage to this device.
•
Contact your VAIO Technical Support Representative for questions
regarding upgrading the hard disk.
•
Be careful not to catch a finger in the cable inside this device and remove
the cable when installing the hard disk.
•
Please be careful not to get cut by the parts or the circuit board inside this
device when installing the hard disk.
•
Turning the power on with a foreign object (metal, such as a screw) left
inside the device at the time of upgrading the hard disk may cause
damage. Always remove any foreign objects and replace the cover before
turning the power on.
•
Don't touch the electronic components on the circuit board of this device.
They are susceptible to pressure and static, which may cause a failure.
•
The size of the drive bay is 3.5 inches.
•
This device may not operate depending on the hard disk used to upgrade.
Contact the manufacturer of the device for more detailed information when
upgrading.
•
There may be a limit on downloading video from i.LINK support devices
depending on the hard disk used to upgrade.
•
Always install or remove a hard disk after pulling the power cord of this
device or the peripheral device from the power outlet. Installing or
removing the hard disk with the power cord still plugged in may cause
damage to the hard disk, this device, or a peripheral device.
•
The inside of this device may be hot right after the power is turned off and
may cause burns. Please wait to work until the device has cooled off.
•
The drive number for the upgraded hard disk may vary depending on the
environment you use ("Local disk (E:)" or "Local disk (F:)" may be
displayed). Also, please note that the drive number for the upgraded hard
disk may change when recovering this device.
•
Recorded video is saved to the C: drive, by default.
VGX-XL100 Living Room Entertainment Computer
60
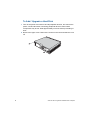
To Add / Upgrade a Hard Disk
1 Turn off the power to this device and all peripheral devices, and remove the
power cord and all cables connecting peripheral devices. Some inside
components may be hot. Wait approximately one hour before proceeding to
work.
2 Remove the upper cover. Remove the screws in the rear and slide the cover
off.
61
VGX-XL100 Living Room Entertainment Computer
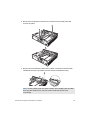
3 Remove the inside panel. Remove the screws from the inside panel and
remove the panel.
4 Remove the hard disk bay. Remove the cables connected to the hard disk
installed at the time of purchase and remove the hard disk drive bay.
Note: Touching other parts can cause a failure when installing the hard disk
drive bay. Be careful not to drop the screws inside this device when
unscrewing.
VGX-XL100 Living Room Entertainment Computer
62
5 Install the hard disk upgrade in the hard disk drive bay. Secure the hard disk
upgrade in the hard disk drive bay with the screws. Install in the lower bay
when there is an open space in the lower bay.
6 Connect the cables to both of the hard disks, the one installed at the time of
purchasing and the upgraded hard disk.
Always install the serial ATA power cable and the serial ATA cable. In the
meantime, connect the serial ATA cable between the PORT (Serial ATA)
connector on the circuit board inside this device and the hard disk according
to the following list:
Main Unit Expansion Connector
Designation
Hard Disk to Connect
PORT 0 (Port 0)
Hard disk in the lower drive bay
PORT 1 (Port 1)
Hard disk in the middle drive bay
PORT 2 (Port 2)
Hard disk in the upper drive bay
Below is the install location of the hard disk and the corresponding PORT
(Serial ATA) connector
63
VGX-XL100 Living Room Entertainment Computer
Below is the location of the main unit expansion connector.
Cables may be pulled out to open/close the cover if serial ATA cables with a
straight connectors are used. However, the use of serial ATA cables with a L
shaped connector areas is recommended.
7 Install the hard disk drive bay in the original location.
Note: Touching other parts when installing the hard disk drive bay can cause
damage.
VGX-XL100 Living Room Entertainment Computer
64
8 Install the inside panel. Insert the inside panel and tighten the screws.
9 Install the upper cover. Install the cover and tighten the screws on the back.
10 Connect the power cord and the peripheral devices that were removed in Step
1 and turn on the power to this device.
65
VGX-XL100 Living Room Entertainment Computer
Remove a Hard Disk
Remove a hard disk by doing the reverse of the installation procedures. Turn
off the power to this device and any peripheral devices and remove the power
cord and all cables connecting to peripheral devices before removing the hard
disk.
Using the upgraded hard disk
Login with administrator privileges and follow the procedures below for
"Creating the partition", "Setting the partition type", and "Formatting the
partition". The upgraded hard disk is created as an extended partition and this
device may not operate properly without NTFS formatting.
1 Turn the power on and log in with Administrator privileges.
2 Click Windows Start, then Control Panel.
3 From the Category View, click Performance and Maintenance and then click
the Control Panel icon Administrative Tools.
4 Double-click the Computer Management shortcut icon to display the
Computer Management properties box.
5 Click Disk Management located in the Computer Management directory tree.
The status of partitions displays in the right side of the window. A new hard
disk or a hard disk that has not been used will display a Status of Not
Assigned.
6 Right click on the upgraded hard disk, Disk “x” (where x equals 1 or 2) and
select Initialize Disk.
7 Make sure the disk selected in Step 6 is checked and click OK.
Note: The above procedure may not be necessary depending on the hard
disk to be upgraded.
8 Right click on the Not Assigned area and click New Partition. The New
Partition Wizard screen displays.
9 Click Next. The Select Partition Type screen displays.
10 Select Extended Partition and click Next. The Specify Partition Size screen
is displays.
Note: Always select Extended Partition when creating a partition. Failure in
the software operation happens if the Primary Partition is selected.
VGX-XL100 Living Room Entertainment Computer
66
11 Enter the size of the partition you want to create in the Partition Size field and
click Next. The Partition Creation Completion screen is displays.
12 Click Complete. The Partition Creation Completion screen closes and the
hard disk display now shows the partition has changed from Not Assigned to
Open Space.
13 Right click on the Open Space area and click Create New Logical Drive. The
Create New Partition screen displays.
14 Click Next. The Select Partition Type screen is displays.
15 Select the Logic Drive and click Next. The Specify Partition Size screen is
displays.
16 Enter the size of the partition you want to create in the Partition Size field and
click Next. The Assign Drive Letter or Path screen is displays.
17 Select Assign a Drive Letter and click Next. The Partition Format screen
displays.
18 Set the options in Format as follows:
•
File system to use: NTFS
•
Allocation size: Default
•
Volume label: Volume
19 When complete, click Next. The New Partition Completion screen is
displays.
Click Complete.
67
VGX-XL100 Living Room Entertainment Computer
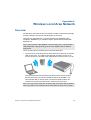
Appendix A:
Wireless Local Area Network
Overview
The Wireless LAN removes all of the trouble of cable connections and helps
to build a wireless LAN (Local Area Network) environment.
This device is equipped with a 2.4 GHz wireless LAN (IEEE802.11b/g
compliant). IEEE802.11g is capable of higher speed communication than
IEEE802.11b.
Note: 5 GHz wireless LAN (IEEE80.11a) technology and 2.4 GHz wireless
LAN (IEEE8022.11b/g) technology do not work together due to different
frequencies.
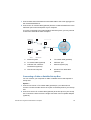
There are two types of wireless LAN connection topologies:
•
Infrastructure mode which has a network structure based on a wireless
LAN access point. The VGX-XL100 personal computer can act as an
access point for a LAN setup. When Infrastructure mode is used, you can
enjoy the Internet and E-mail communications where ever a wireless
access point is set up. Also, a broadband network is possible if you
communicate with an access point connected to ADSL modem, etc.
Furthermore, this device itself can be used as an access point.
Note: You may need to enter into a contract with a wireless LAN connection
service provider to use wireless LAN communications when you are away.
VGX-XL1 Living Room Entertainment Computer
68
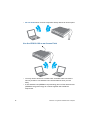
•
Ad hoc mode which connects computers directly without an access point.
Use the VGX-XL100 as an Access Point
69
•
You may need to enter into a contract with a wireless LAN connections
service provider to use wireless LAN communications when your are
away.
•
5 GHz wireless LAN (IEEE802.11a) technology and 2.4 GHz wireless LAN
(IEEE802.11b/g) technology do not work together due to different
frequencies.
VGX-XL1 Living Room Entertainment Computer
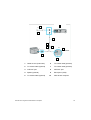
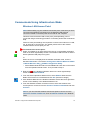
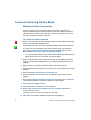
Communicate Using Infrastructure Mode
Wireless LAN Access Point
Note: Before setting up your wireless LAN access point, make sure you have
connected the Wireless LAN Antenna to the Wireless LAN Antenna
connector located on the back panel of the VGX-XL100 computer.
This device and a wireless LAN access point (sold separately) can be
connected using the following procedure. For details, please refer to Windows
Help.
Further access point settings are required to connect to the Internet or a LAN,
etc. at work via an access point. For details, please refer to the manual
included with the access point you use.
To connect to an access point:
1 Select Turn Radio On by right clicking the red icon in the taskbar notification
area on the lower right desktop screen. The wireless LAN is turned on and the
WLAN (wireless LAN) lamp turns green.
or
When the icon is not displayed in the taskbar notification area, click the
Windows Start button. Then select All Programs > Marvell Wireless SoftAP
> Marvell Wireless Soft_g_SoftAP Configuration Utility.
•
Select Station Mode and make sure that Radio Off check box is unchecked
from the Operation Mode screen. Then proceed to Step 4.
2 Right click
in the taskbar notification area on the lower right desktop
screen and select Select Mode.
3 From the Select Operations Mode screen, select Station. Make sure the
Radio Off check box is unchecked and click OK. (See above image)
4 Click Wireless Network in the taskbar notification area at the lower right of the
screen on the desktop or the Wireless Network icon.
5 From the Wireless network connection screen, select the wireless LAN
access point to connect to from the Choose a wireless network list and click
Connect.
Note: If you can't find the wireless LAN access point to connect to in the
Choose a wireless network list, click on Refresh network list in Network
tasks.
VGX-XL1 Living Room Entertainment Computer
70
6 The screen to enter the Network Key displays.
7 Input the "Network key" as needed, and click Connect. For information about
the network key, please refer to "About Network Keys".
“Connected” displays on the line of the selected wireless LAN access point
when it is connected.
To confirm the connection status of the wireless LAN access point
•
Click the Wireless Network On or the Wireless Network Off icon in the
taskbar notification area. The Wireless Network Connection Status screen
displays and you can confirm the connection status for the wireless LAN
access point.
Once you input the Network Key and connect, the wireless LAN access point
is registered and you can connect without entering the Network Key again.
To confirm the individual information for the wireless LAN access point
1 Click Windows the Windows Start menu and then click Control Panel.
2 From the Control Panel, click the Network Connections icon.
3 From the wireless network device listed, right-click the device and select
Properties. The Wireless Network Connections Properties screen displays.
4 Click the Wireless Networks tab. The list of Preferred Networks displays.
5 From the Preferred Networks list, select the network device you want to
confirm and then click Properties. The properties screen is displays. Confirm
the detailed information about the wireless LAN access point is correct.
To create a new connection or switch connections
You can create new location to connect to or switch connections to another
wireless LAN access point with wireless LAN while connected. For additional
information, please refer to Windows Help
1 Click the Windows Start button and then click Control Panel.
2 From the Control Panel, click the Network Connections icon. The Network
Connections screen displays.
3 Right click the Wireless Network Connections icon and then click
Properties. The Wireless Network Connection Properties screen displays.
4 Click the Wireless Networks tab. The list of Preferred Networks displays.
5 Click Add in the Preferred Networks. The Wireless Network Properties screen
displays.
Adjust the following access point settings to be used:
71
VGX-XL1 Living Room Entertainment Computer
•
Enter Network name (SSID). You can enter a maximum of 32 characters
(case-sensitive) for the Network name (SSID).
•
Set Network Authentication and Data Encryption.
•
If WPA-PSK and WEP are selected, remove the check mark by clicking
Key is Provided Automatically and, if necessary, enter the Network key.
6 Click OK. If you successfully connect to the new wireless LAN access point, a
message displays in the communication area saying you are connected.
To set the priority of the wireless LAN access points that are available
for connection
Note: If you move outside of the range for connecting to a wireless LAN
access point, it automatically switches to the next registered access point in
order of priority, choosing from available access points.
1 Click Start from the Windows task bar, and then click Control Panel.
2 From the Control Panel, click the Network Connections icon.
3 From anywhere on the Network Connections screen, right-click and select
Properties. The Wireless Network Connections Properties screen displays.
4 Click the Wireless Network Connections icon and click Properties.
5 From the Wireless Network Connections Properties screen, click the
Wireless Networks tab. The list of Preferred Networks displays.
6 Select the one you want to change from the Priority Network list and click
Move up or Move down.
7 Click OK.
VGX-XL1 Living Room Entertainment Computer
72
Communicate Using Ad Hoc Mode
Wireless Ad Hoc Connection
If Ad Hoc mode is used (connecting directly to another computer), the
wireless LAN devices can directly connect to each other without a wireless
LAN access point. Set the first computer to Ad hoc mode and then connect
the other computers to the first computer.
To create an Ad Hoc network
1 Select Turn Radio On by right-clicking the red icon in the taskbar notification
area on the lower right desktop screen.
The wireless LAN turns on and the WLAN (wireless LAN) lamp turns green.
Or, If the icon is not displayed in the communication area, click Windows
Start, point to All Programs > Marvell Wireless SoftAP and then click
Marvell Wireless Soft_g_SoftAP Configuration Utility.
•
From the Operation Mode screen, select Station Mode and make sure the
Radio Off check box is unchecked. Proceed to Step 4.
2 Select Select Mode by right clicking the red icon in the taskbar notification
area on the lower right desktop screen. The Select Operation Mode screen
displays.
3 Select Station in the Select Operation Mode screen and click OK.
4 Click Windows Start and then click Control Panel. The Control Panel screen
displays.
5 Click the Network and Internet Connections icon.
6 Click the Network Connections icon. The Network Connections screen
displays.
7 Right click the Wireless Network Connections icon and click on Properties.
The Wireless Network Connection Properties screen displays.
8 Click the Wireless Networks tab.
9 Click Advanced. The Advanced screen displays.
10 Select Only computer-to-computer (ad hoc) networks in Network to
Access and click Close.
This allows you to connect only to Ad Hoc networks.
11 Click Add. The Wireless Network Properties screen displays.
73
VGX-XL1 Living Room Entertainment Computer
12 Enter Network Name (SSID). You can enter a maximum of 32 characters
(case-sensitive) for the Network name (SSID).
13 Click to remove the check on The key is provided for me automatically, as
needed.
14 Enter the Network key and again to confirm the entry. Click OK.
Confirm that the Network name (SSID) entered in Step 12 is added to the top
of the list of Preferred Networks.
15 Click OK.
Please follow your computer setting method to set up the second computer.
To Participate in a Current Ad Hoc Network
1 Select Turn Radio On by right clicking the red icon located in the taskbar
notification area on the lower right desktop screen.
The Wireless LAN turns on and the WLAN (wireless LAN) lamp turns green.
Or, If the icon is not displayed in the communication area, click Windows
Start, point to All Programs > Marvell Wireless SoftAP and then click
Marvell Wireless Soft_g_SoftAP Configuration Utility.
•
From the Operation Mode screen, select Station Mode and make sure the
Radio Off check box is unchecked. Proceed to Step 4.
2 Select Select Mode by right clicking the green icon in the taskbar notification
area on the lower right desktop screen.
The Select Operation Mode screen displays.
3 Select a Station in the Select Operation Mode screen and click OK.
4 Click the Wireless Network On icon in the taskbar notification area at the
lower right of the screen on the desktop or the Wireless Network Off icon.
VGX-XL1 Living Room Entertainment Computer
74
5 Connecting to the Ad Hoc Network.
•
Select the Ad hoc network to connect to from the Select a Wireless
Network list and click Connect. If you can't find the Ad Hoc Network to
connect to in the Select a Wireless Network list, click Refresh the
Network List in Network task.
The screen to input the network key displays.
•
Enter the Network Key (case-sensitive) as needed, and click Connect.
•
Please follow your computer setting method to set up the second
computer.
Note: The channel for Ad hoc mode is automatically set for this device. Users
cannot change this setting.
75
VGX-XL1 Living Room Entertainment Computer
To quit Ad Hoc mode
Quit the Ad Hoc Mode with the following procedure and return to
Infrastructure Mode.
1 Click Start from the Windows taskbar, and then click Control Panel.
2 From the Control Panel, click the Network Connections icon.
3 From anywhere on the Network Connections screen, right-click and select
Properties. The Wireless Network Connections Properties screen displays.
4 Click the Wireless Network Connections icon and click Properties.
5 From the Wireless Network Connections Properties screen, click the
Wireless Networks tab. The list of Preferred Networks displays.
6 Click Advanced and select Any Available Network (access point preferred)
in Network to Access and click Close.
7 Select the network selected in Ad Hoc Mode from the Preferred Network list
and click Delete.
8 Click OK.
About network keys
This is a data key for encrypting the wireless LAN communication between
IEEE802.11b/g devices. This is also called a Private Key, Encryption Key or
WEP Key.
This enables the wireless LAN communication only between the wireless LAN
access points and computers which use same key information.
The network key is pre-set in each access point (please confirm that the
network key setting is changed after purchasing to prevent illegal usage). If
you don't know the network key, please refer to the manual that came with the
access point or check with the access point administrator.
VGX-XL1 Living Room Entertainment Computer
76
Use this device to function as an access point
Set this device to function as an access point for other computers.
To use this device as an access point
1 Select Turn Radio On by right-clicking the red icon in the taskbar notification
area on the lower right desktop screen.
The wireless LAN turns on and the WLAN (wireless LAN) lamp turns green.
Or, If the icon is not displayed in the communication area, click Windows
Start, point to All Programs > Marvell Wireless SoftAP and then click
Marvell Wireless Soft_g_SoftAP Configuration Utility.
•
From the Operation Mode screen, select Station Mode and make sure the
Radio Off check box is unchecked. Proceed to Step 4.
2 Select Select Mode by right-clicking the red icon in the taskbar notification
area on the lower right desktop screen.
The "Select Operation Mode" screen displays.
3 Select Access Point (AP) in the Select Operation Mode screen and click OK.
The Marvell(R) CB-35P/MB-35P Wireless Client Card Settings Utility screen
displays.
Note: When you set this as an access point for the first time or change the
settings, the AP Information screen displays. The current access point
settings are displayed in the AP Information screen.
Note: Do not continue displaying the settings because the network key is
displayed in the AP Information screen.
4 Click Cancel.
You can now use this device as an access point.
Set a Network Bridge.
Click How to use VAIO > Network (LAN) in "Internet/Network" > Use
Network Bridge.
Marvell(R) CB-35P/MB-35P Wireless Client Card Settings Utility screen
77
VGX-XL1 Living Room Entertainment Computer
This allows you to change various settings to use this device as an access
point.
AP Settings
The AP Settings screen displays below.
Basic Settings
Setting
Description
SSID
Enter an access point name to be displayed to the
clients.
BSSID
This is a network identifier in the wireless LAN and
has the same value as the MAC address.
IEEE 802.11
mode
802.11b:
Only stations which support 802.11b are able to
connect to this access point.
802.11g:
Only stations which support 802.11g are able to
connect to this access point.
802.11g/b:
Only stations which support 802.11g/b are able to
connect to this access point.
Channel
Security Settings
Selects the channel to use. Automatic Channel
Selection:
•
If the check box is checked, the channel is
automatically selected.
•
If the check box is not checked, the channel is
manually selected.
The current access point security settings are
displayed. Click Edit Security Settings to display the
Security Settings screen.
VGX-XL1 Living Room Entertainment Computer
78
Detailed Settings
Settings
Description
Protocol
Settings
Detailed settings of the access point can be modified.
Normally, you don't need to change these.
Access Control
Use this setting when you want to limit the clients that
can connect to the access point.
Wake on WLAN
Use this setting when you want to use the Wake on
Wireless LAN function.
Wireless
Disabled
Switches the wireless LAN on/off.
Security Settings screen
Set the security for the access point in the Security Settings screen.
79
VGX-XL1 Living Room Entertainment Computer
Setting
Description
Invalid
Security settings can't be set.
WEP
The transmitted packets are encrypted using WEP.
Select the authentication method in Authentication]
Open System:
This does not authenticate when connecting to the
access point. However, the network key is required to
decode the communication data.
If the network key is wrong, you are able to connect to
the access point, but unable to communicate.
Shared Key:
Authentication can be done using the network key
when connecting to the access point. A network key
is required for both authentication and encoding the
communication data.
If the network key is wrong, you are unable to connect
to the access point (authentication failed).
Automatic Switch:
The client determines whether to use a shared key,
and is able to connect to the access point.
WEP Key Settings:
Key 1 - key 4 are able to be set.
WPA-PSK
When the client is set to WPA, the access point can
be connected.
VGX-XL1 Living Room Entertainment Computer
80
Access control screen
The Access control screen provides control over which computers are able to
connect to the access point of this device.
Setting
Description
Allow all stations
Detailed settings of the access point can be modified.
Normally, you don't need to change these.
Allow the list
below
Use this setting when you want to limit the clients that
can connect to the access point.
Wake on wireless LAN settings screen
The Wake on Wireless LAN Setting screen provides settings related to the
Wake on Wireless LAN function. Wake on Wireless LAN is a function to run
this device automatically from standby or hibernate when access is made to
the access point if this device is functioning as an access point.
81
VGX-XL1 Living Room Entertainment Computer
Setting
Description
Disable Wake On wireless LAN
(WOW)
Disables the Wake On Wireless
LAN function.
Enable WOW and allow Wake On
for all clients
Enables this device to run access
from any client.
Enable WOW and allow Wake On
for the following clients
Enables this device to run only
when accessed from a client added
to the list.
Important Note: If the setting Allow this device to bring the computer out
of standby in Power Management in the “Marvell Livertas Wireless 802.11g/b
Wireless (CB35) property" driver screen is not checked, the Wake on
Wireless LAN does not function.
Close Wireless Communication
Select Turn Radio Off by right-clicking the green icon in the taskbar
notification area on the lower right desktop screen.
The wireless LAN turns off and the WLAN (wireless LAN) lamp turns off.
Or, if the icon is not displayed in the communication area, click Windows Start
point to All Programs, Marvell Wireless SoftAP, and then click Marvell
Wireless Soft_g_SoftAP Configuration Utility to display the Select
Operation Mode screen. Click the check box by Turn Radio Off to make it
checked, then click OK.
VGX-XL1 Living Room Entertainment Computer
82
Appendix B:
Troubleshooting
This section provides you with answers and additional information to
questions and issues that may arise during the set up and operation of the
VGX-XL100 Living Room Entertainment Computer. If the answers to your
questions are not contained in this appendix, go to VAIO Control Central for
additional help.
The Troubleshooting appendix is divided into the following sections:
Section Title
Page No.
Power/Start
141
Password
146
Screen/Display
146
Wireless Keyboard/Pointing Device
150
Hard Disk
152
Software Limitations
155
MCE Starting Up
155
DVD Playback Limitations
156
Sound Issues
156
Wireless LAN
157
VGX-XL100 Living Room Entertainment Computer
88
Power/Start
Event:
Power is not on and green power lamp is not lit.
Comment:
Confirm that the computer’s power cord is inserted firmly into an outlet.
•
Confirm that all of the cables are connected well.
•
Remove all the cables connected to this device, and connect them again
after waiting five minutes, then turn the power on again.
•
If the device does not run after doing the above, please contact VAIO Link.
Event:
The power is turned on and the power lamp (green) of the computer is on, but
there is no display on the screen.
Comment:
•
Make sure the proper input for the display unit (TV, DVI-D monitor) is
selected.
•
Please confirm that the display unit (TV, DVI-D monitor) power is turned
on.
If nothing is displayed on the screen after a time, please follow the procedures
below.
89
•
Make sure the computer is connected to the proper input.
•
Hold the power button of this device for at least four seconds, make sure
the power lamp turns off and then turn the power on again.
•
If nothing is displayed after the above operation, hold the power button of
this device again for at least four seconds, make sure that the power lamp
turns off, then remove all cables connected to this device, and re-connect
after waiting five minutes and then turn the power on again.
VGX-XL100 Living Room Entertainment Computer
Event:
Unable to shutdown the computer.
Comment:
Methods vary depending on the conditions when the power will not turn off.
Confirm the following and follow the procedures below.
•
Quit all software you are using, then try to turn off the power again.
•
If peripheral devices such as printers or USB devices, etc. are connected,
or if a network is used, make sure that they are not connected and then
turn off the power.
When Windows is communicating with a peripheral device or network, the
power can't be turned off.
•
Confirm any newly installed software, data, and its operation, etc.
•
The Turn Off Computer in the Start menu is selected and the Turn Off
Computer does not display. Hold down the Alt key and press F4. When the
Turn Off Computer screen displays, click Turn Off.
•
When the screen freezes or doesn't move, hold down the Ctl and Alt keys
and press Delete. Once the "Windows Task Manager" screen displays,
click Turn Off from the Shut Down menu.
•
When "Saving the settings" or "Shutting down Windows" displays and
does not change, follow these steps.
- Press Enter. If the power still will not turn off, hold the power button of
this device for at least four seconds and make sure the power lamp turns
off.
VGX-XL100 Living Room Entertainment Computer
90
Event:
When the power is turned on a message is displayed and Windows does not
load.
Comment:
•
Remove any third-party USB devices including floppy drives and printers.
•
When "Bad CMOS Checksum" is displayed, the battery needs to be
replaced due to the draining of the battery in this device.
Please contact the VAIO Customer Support for replacing the battery.
•
When "CMOS Checksum Error" is displayed, the BIOS configuration contents may be damaged.
To return the BIOS to the original configuration, perform the following
steps.
1 Press the power button, and when the "VAIO" logo is displayed on the screen,
press the F2 key on the keyboard. The BIOS setup menu runs and the "BIOS
SETUP UTILITY" screen is displayed.
2 Press the F5 key. The message "Load Setup Defaults" displays.
3 Press the Left Arrow or Right Arrow key and select OK, then press the Enter
key. All the configuration items return to the original configuration.
4 Press the F10 key (Save and Exit). The message "Save configuration
changes and exit now?" is displayed.
5 Press the Left Arrow or Right Arrow key and select OK, then press the Enter
key. The changed configuration is saved, the BIOS setup menu ends and
Windows XP starts.
Event:
A message with "Insert the disk with the Windows XP CD-ROM label and click
on OK." displays.
Comment:
This message may be displayed when the configuration of this device has
changed. Follow the procedures below. Do not insert the recovery disk into
the drive.
1 Click OK after the message displays. The Copy Files screen displays.
2 Enter C:\WINDOWS\I386 in the "Source to copy files from" and click OK. The
necessary files are copied.
91
VGX-XL100 Living Room Entertainment Computer
Event:
Windows doesn't start after installing the upgraded drivers.
Comment:
Run in Safe mode by following the following steps and re-install the driver.
1 Press the power button of this device, and when the VAIO logo is displayed
on the screen press the F8 key on the keyboard.
2 When "Windows extended options menu" displays, press the Page Up key or
the Page Down key, select Safe mode and press the Enter key.
3 When Windows runs, click the Start button. Then select Control Panel >
Performance and Maintenance > System. From the Systems Properties
screen, click the Hardware tab and click Device Manager.
4 Select the installed device or the updated device in the Device Manger
screen. Display the properties screen by clicking Properties in the list, which
displays by right clicking. Then click the Driver tab.
5 Click Roll Back Driver and install the driver that was running normally.
6 Restart this device with a normal restart.
VGX-XL100 Living Room Entertainment Computer
92
Event:
Windows operation becomes unstable.
Comment:
Quit the software you are using and restart this VGX-XL100 computer.
If this device doesn't restart, turn the power off by holding the power button of
this device for at least four seconds. The power lamp turns off when the
power is off. If the power lamp does not turn off and blinks in orange (standby
mode), try to turn off the power again by holding the power button for at least
four seconds. However, the file you are creating or editing may not be usable
if you turn off the power using this method.
Event:
How do I know if the battery level of the keyboard is sufficient.
Comment:
The level of the batteries in the keyboard can be checked using the battery
indicator located on the LCD panel of the keyboard.
Note: Please turn off the power to the keyboard when you replace the
batteries for the keyboard.
Event:
The unit will not stay in hibernation or standby mode.
Comment:
When using the wireless LAN of this device as an access point and the WOW
(Wake on Wireless LAN) function is enabled, it may return from Standby
mode or Hibernation as a result of a wireless packet from the VGX-XL100
computer if there is a wireless device near you.
Disable the WOW (Wake on Wireless LAN) function or the wireless function of
supported device.
93
VGX-XL100 Living Room Entertainment Computer
Password
Event:
Unable to log on to Windows XP.
Comment:
•
The password is case-sensitive. Confirm the password and re-enter.
•
If there is an account that was created by a user with administrative
privileges, change the password from a "Computer Administrator" account
other than that of the user who forgot the password.
•
If there is not a user with administrative privileges, and if no password is
set for "Administrator (username)", you can change the user password by
starting Windows in Safe mode and logging on as "Administrator
(username)".
Screen/Display
Event:
My display distorts for a few seconds while system starts up, or resumes from
standby/hibernation.
Comment:
This is normal. The display may distort for a few seconds while system starts
up, restarts, resumes from standby/hibernation when connected to a TV.
Event:
My MCE screen flickers sometimes.
Comment:
The MCE screen will flicker when it’s in a windowed screen and a balloon
pops up in the taskbar. You can close the pop-up balloon in the task bar or
maximize the MCE screen.
VGX-XL100 Living Room Entertainment Computer
94
Event:
Colors on the screen are not displayed clearly,
Comment:
•
Turn off the power, and then restart the computer.
•
Check the other inputs on your display to make sure the display is working
properly.
Event:
The screen is frozen
Comment:
•
Verify the keyboard is turned on, the battery level is sufficient, and the keyboard is connected to the PC (antenna icon on the keyboard display).
Restart this device according to the following procedure.
1 Hold down the Ctrl key and the Alt key and press Delete. The Windows Task
Manager screen displays.
2 Select the software application that displays as "Not responding" in the
"Windows Task Manager" screen, and click End Task.
3 Click Turn Off from the Shut Down menu. After the power to the VGX-XL100
computer has been off approximately 30 seconds, turn the power on again.
Note:If this device does not restart by following the above procedures, turn off
the power by holding the power button of this device for more than 4 seconds.
The power lamp turns off when the power is off. When the power lamp is on
(orange), turn off the power again by holding the power button for at least four
seconds. Files you are creating or editing may not be usable using this
method to turn off the power to the computer.
95
VGX-XL100 Living Room Entertainment Computer
Event:
The screen is dark
Comment:
•
Adjust the brightness of TV. Adjusting the brightness will vary depending
on the type of TV. For details, please refer to the TV users manual.
•
Verify if other inputs on the TV are dark, if they are please refer to the TV
user manual
Event:
When playing movies on the TV connected using a component video cable,
the following symptoms can occur.
•
When playing video, the screen is switched to 525p (480p)
•
DVD/video is played as a black screen from the beginning or from a
certain place (the audio is normal)
•
The DVD/video does not play.
•
No images are displayed while playing a movie.
Comment:
The above symptoms may occur when the output format is set to 1125i(1080i)
or 750p(720p), because a DVD/video labeled "Copy Prohibited" or images
which contain signals to protect the copyright cannot be displayed on a TV
with the signal format of 1125i(1080i) or 750p(720p) to protect the copyright.
In order to play the movie, quit the software and change the output signal
format to 525i(480i) or 525p(480p).
If the symptoms do not improve with the output signal format changed, restart
this device.
VGX-XL100 Living Room Entertainment Computer
96
Event:
Pictures on the TV screen are distorted
Comment:
•
Confirm that this device and the display device are properly connected.
•
When the TV is connected using a component video cable, make sure to
use an output format that matches the component terminal of the TV you
are using.
•
When the TV is connected using a component cable, make sure to use a
resolution that matches the component input of the TV you are using.
Event:
Part of the top, bottom, left or right of the screen is not displayed when the TV
is displayed.
Comment:
Adjust the over scan width using the over scan adjustment on the graphic
card.
Event:
Part of the top, bottom, left or right of the screen is not displayed and is black.
Comment:
Adjust the over scan width using the over scan adjustment on the graphic
card.
97
VGX-XL100 Living Room Entertainment Computer
Event:
When the TV or display is connected to the HDMI OUT (HDMI output)
connector, the image does not display.
Comment:
•
Re-connect the HDMI cable.
•
It may be connected to a device that does not support HDCP.
Connect to a device which supports HDCP.
•
When a HDMI-DVI adapter is used, the TV or display may not be
supported by the HDMI-DVI adapter.
Connect a TV or display which supports the HDMI-DVI adapter.
•
Make sure that HDMI cable cnnects the computer with the TV and restart
the computer.
Wireless Keyboard/Pointing Device:
Event:
My keyboard stops working after a period of time.
Comment:
The keyboard/Pointing Device will sleep when it is not in use. You must press
any key on the keyboard to resume the connection.
Event:
My keyboard works, but not the Pointing Device (or vice versa).
Comment:
1 Verify that the keyboard switch is on and that the pointing device switch on the
back of the keyboard is on.
2 Re-connect the keyboard/touchpad to the computer by pressing the Connect
buttons (on the back of the keyboard and the front panel of the computer)
within 10 seconds.
VGX-XL100 Living Room Entertainment Computer
98
Event:
Don't know how to enter text using the VAIO Remote Control.
Comment:
Refer to the Entertainment Guide.
Event:
Cannot enter text when I press the keys on the keyboard.
Comment:
Make sure that the "Num Lock" indicator on the LCD panel of the keyboard is
not displayed.
Event:
Cannot use the keyboard
Comment:
Reponse methods vary depending on the reason the keyboard is not able to
be used. Confirm the following and follow the procedures below.
Usage environment
The distance between this machine and the keyboard must be within about
10m. If metal is near the keyboard, short range communication may be
affected. Please use the computer and the keyboard 15 cm or more apart.
The keyboard operates at 2.4 GHz. If a wireless device which uses the same
2.4 GHz, such as a wireless LAN, is used nearby, it may not operate properly.
Power ON
Make sure the Power switch on the keyboard is turned on. When you are not
using the keyboard, turn off the power to perserve the batteries.
Event:
Check whether keys such as Caps Lock and NumLk are enabled.
Comment:
You can check with the various indicators on the LCD panel of the keyboard.
99
VGX-XL100 Living Room Entertainment Computer
Event:
Cannot use the pointing device.
Comment:
Make sure your pointing device is not disabled.
Refer to the Setting up the Keyboard topic in Chapter 1of this guide.
Event:
I Want to disable the pointing device.
Comment:
Turn the Pointing Device Switch on the back side of the keyboard to "OFF".
Event:
The “pointer” on the screen does not move.
Comment:
Follow the instructions below.
1 Turn off the power to the VGX-XL100 computer and the keyboard.
2 Restart the VGX-XL100 computer and the keyboard.
3 Perform the Activate Keyboard Communications procedure in Chapter 1, if
necesary.
Hard Disk Event:
Use 8cm discs in my computer’s optical drive.
Comment:
The drive only accepts 12cm discs.
Event:
Use 8cm disc with the 8cm disc adapter.
Comment:
VGX-XL100 Living Room Entertainment Computer
100
The 8cm disc adapter (included) can be used to insert 8cm discs but the disc
can only be read and not written to.
Event:
An error occurred in the initialization of the hard disk.
Comment:
•
101
The files on the hard disk cannot be recovered. This device must be
recovered by using the recovery function in the hard disk or your own
recovery disk.
VGX-XL100 Living Room Entertainment Computer
Event:
Cannot start-up from the hard disk.
Comment:
Please remove any media from the memory card reader and disconnect all
third-party devices such as scanners, printers, floppy drivers, etc. and try
again.
•
If the hard disk does not start-up with above process, you may need to
perform hard disk drive recovery. Go to VAIO Support Central. (Click Start
from the Windows® taskbar and select All Programs > VAIO Support
Central.
Event:
Available hard disk space is low.
Comment:
Clean up the disk.
Temporary files and backup files are automatically created to make Windows'
processes faster, so the free space on the hard disk is decreased. If you clean
up the disk, the temporary files, etc. are deleted and the free space is
increased.
Clean up the disk according to the following procedure.
1 Click Start on the Windows taskbar and select All Programs >Accessories
> System Tools and click Disk Clean Up. The "Select Drive" screen
displays.
2 Select Local disk (C:) or Local disk (D:) and click on OK.
3 Read the description of the files carefully, and check the files to delete.
4 Click OK. The message "Are you sure you want to perform these actions?"
displays.
Click Yes. Disk clean up proceeds.
VGX-XL100 Living Room Entertainment Computer
102
Software Limitations:
Event:
My software application does not launch.
Comment:
Some software applications require a minimum resolution higher than your
current resolution setting. Please check back to our support website at http://
www.vaio-link.com.
Event:
Some of my shortcuts in the start menu are not visible.
Comment:
At 480i/480p resolution, the Start Menu gets cut off and some of the shortcuts
are not visible. You can switch the Start Menu to Classic Start Menu will help
alleviate this but not complete resolve the issue.
MCE Starting Up:
Event:
MCE appears to be unresponsive after boot up.
Comment:
Even though MCE is launched, there are still other programs in the
background that have not finished loading as well as other MCE processes
that need to load as well.
103
VGX-XL100 Living Room Entertainment Computer
DVD Playback Limitations
Event:
What resolution does my DVD playback?
Comment:
•
You cannot view copy-protected DVD through component video
connection
•
with a higher resolution than 480i/480p due to Content Scrambling
System (CSS).
.
Sound Issues:
Event:
The sound volume control does not work (except from the headphone jack
output) from my XL100 computer.
Comment:
Windows/MCE cannot control the volume level of HDMI, Optical/Coaxial S/
PDIF, and Line Out sound. Windows/MCE will only control the volume of the
headphone jack output.
VGX-XL100 Living Room Entertainment Computer
104
Event:
The sound coming from HDMI or S/PDIF does not work.
Comment:
Check the Sound Reality Control Panel.
•
Go to the Windows Control Panel, and then from the Category view, select
Sounds, Speech and Audio Devices > Sound Reality Audio.
Make sure the appropriate boxes (HDMI or S/PDIF) are checked.
Wireless LAN
Event:
Cannot use the wireless LAN.
Comment:
Make sure that the wireless LAN function set up correctly and is turned on.
Refer to the Appendix A: Wireless Local AreaNetwork in this guide.
Make sure that the Wireless Zero Configuration service is started. Operate
according to the following procedure.
1 Click Start on the Windows taskbar and click Control Panel. The Control
Panel screen displays.
2 From the Category view, click Performance and Maintenance.
3 Click Administrative Tools.
4 Double-click the Services icon.
5 Check the Wireless Zero Configuration item. The Wireless Zero Configuration
service has started if the condition is Start and type of startup is Automatic.
Start the Wireless Zero Configuration service with the following steps if the
service has not started.
1 Right click Wireless Zero Configuration and click Properties. The
Properties of Wireless Zero Configuration screen displays.
2 Set the type of start-up as Automatic and click Apply.
3 Click Start in service condition.
4 Click OK and close the screen.
105
VGX-XL100 Living Room Entertainment Computer
Event:
This device can't communicate with the wireless LAN access point (can't
access the Internet)
Comment
•
Check the items in "Can't use the wireless LAN" above.
•
Make sure that the power is turned on to the wireless LAN access point.
•
Check the settings for the wireless LAN access point.
Refer to the Appendix A: Wireless Local AreaNetwork in this guide.
•
Check if this device and the wireless LAN access point are connected.
Refer to the Appendix A: Wireless Local AreaNetwork in this guide.
•
The communication distance between the devices varies depending on
the actual distance between the communication devices, the surrounding
environment such as obstacles, the equipment configuration, the radio
wave condition, the presence of walls, materials, and software used, etc.
Move the location of this device or the wireless LAN antenna for this
device, or bring both communication devices closer together.
Check if the wireless LAN access point displays in the "Choose a wireless
network" list on the "Wireless Network Connection" screen.
1 Click Start on the Windows taskbar and then click Control Panel. The
Control Panel screen displays.
2 From the Category view, click Network and Internet Connections.
3 Click Network Connections. The Network Connections screen displays.
4 Right click Wireless Network Connections and click Display Wireless
Network to use. The Wireless Network Connection screen displays.
5 Check if the wireless LAN access point displays in the Choose a Wireless
Network screen.
The network key entered may be wrong. Once the network key is set it is
displayed with "*" for security purposes and you can't read it. Re-enter the
security key. Follow the procedure.
1 Click Start on the Windows taskbar and then click Control Panel. The
Control Panel screen displays.
2 From the Category view, click Network and Internet Connections and then
Network Connections. The Network Connections screen displays.
3 Right click Wireless Network Connections and click Properties.
VGX-XL100 Living Room Entertainment Computer
106
4 Click the Wireless Networks tab.
5 Select the item you want to confirm from the Preferred Networks list and click
Properties.
6 Enter the Network Key and click OK.
7 Click OK in the Wireless Network Connection Properties screen and close the
screen.
If access to the internet is limited, communication may not be possible.
Change the settings to limit the access according to the instructions below.
1 Click Start on the Windows taskbar and then click Control Panel. The
Control Panel screen displays.
2 From the Category view, click Network and Internet Connections and then
Network Connections. The Network Connections screen displays.
3 Right click Wireless Network Connections and click Properties. The Wireless
Network Connection Properties screen displays.
4 Double click the Advanced tab.
5 Change the setting as needed by clicking Settings for "Windows firewall". The
confirmation screen displays.
6 Click Yes. Change the settings as needed if a firewall other than the Windows
firewall is used. Refer to the Help section of the firewall software you use for
details.
Event:
Can't play video or audio received through the wireless LAN or it is damaged.
Also, the communication speed is slow.
Comment:
•
Change the environment for receiving the signal by changing the location
of this device or bringing it closer to the wireless LAN device.
The communication speed for the wireless LAN or the communication conditions vary depending on the actual distance between the communication
devices, the surrounding environment such as obstacles, the equipment
configuration, the signal quality, the presence of walls, materials, and software used, etc.
•
There is a possibility of convergence in accessing the wireless LAN
access point.
Try to access again in a little while.
107
VGX-XL100 Living Room Entertainment Computer
•
Change the channel setting for the access point. The effect of band
interference may disappear and this may help to improve the
communication speed.
However, the communication speed for IEEE802.11g slows down automatically because IEEE802.11g retains compatibility with IEEE802.11b
under mixed circumstances with IEEE802.11b.
Also, channel band interference may cause a slow down in the communication speed for IEEE802.11b devices.
•
Set the wireless channel for the wireless LAN access point if it is used with
other wireless LAN access points. Refer to the user's manual that came
with the wireless LAN access point for detailed settings.
•
Make sure that a microwave is not used nearby.
The 2.4 GHz band used by IEEE802.11b/g is a signal band shared with
various devices. Using a microwave nearby when the wireless LAN is
communicating may cause a decrease in communication speed and the
communication distance, or interrupt the communication depending on the
circumstances.
Event:
Can't communicate with other computers (Ad Hoc mode).
Comment:
If communication settings are set for use with a wireless LAN access point,
communication may not be possible in Ad hoc mode. Change the
communication settings according to the instructions below.
1 Click Start on the Windows taskbar and then click Control Panel. The
Control Panel screen displays.
2 From the Category view, click Network and Internet Connections, and then
Network Connections.
3 Right click Wireless Network Connections and click Properties.
4 Click the Wireless Networks tab.
Click Advanced, select Computer-To-Computer (ad hoc) Networks Only in
"Networks to access" and click Close.
5 Click OK.
VGX-XL100 Living Room Entertainment Computer
108
Event:
I want to confirm a physical address (MAC address) for a built-in wireless LAN
Comment:
Check the physical address (MAC address) for the built-in wireless LAN of
this device. Follow the instructions below.
1 Click Start on the Windows taskbar and then select All Programs >
Accessories and click Command Prompt. The Command Prompt screen
displays.
2 Enter "ipconfig /all" and press the Enter key.
3 Check the physical address (MAC address) in the Physical Address field of
"Ethernet adapter Wireless Network Connection".
Cancel the network bridge if a network bridge has been created.
Event:
I want to end the wireless LAN communication.
Comment:
•
Turn off the wireless LAN function.
Refer to the Appendix A: Wireless Local AreaNetwork in this guide.
Event:
I cannot communicate using Access Point Mode.
Comment:
109
•
It is impossible to communicate with another access point via wireless
LAN using the Access Point Mode. Change your wireless LAN to Station
Mode when you want to communicate with another access point.
•
Please check your security settings when you connect other devices to
your VAIOaccess point. Old types wireless LAN devices may be
connected using the 64 bit WEP security only.
•
Your VAIO supports the wireless channels 1 - 13. Some wireless LAN
devices only support the channels 1-11 , so that you cannot use channels
12,13 with these devices. Please check which channnels your device is
supporting, and change your wireless channel on your VAIO to automatic
or to 1 - 11.
•
As your VAIO has a feature to access limitation, you can refuse
connections from devices which do not have registered MAC adresss.
VGX-XL100 Living Room Entertainment Computer
Please add the MAC address of the devices you want to connect via the
Access Limitation window to enable this feature. If you don't want to use
this feature, please select Allow all access from any stations in the
Access Limitation window.
•
When you cannot connect your VAIO access point to other wireless LAN
devices, please remove the AC cable from your VAIO computer, and leave
it for 5 minutes at least. Then plug the cable back in, turn on your VAIO
and launch the Marvell Wireless LAN Utility, after Windows has started.
•
When you change the WEP key of access point without selecting Key 1,
you will have to change the key index settings of the station:
1 Click the Start button and click Control Panel.
2 Click the Network & Internet connection icon and click Network
Connection.
3 Right-click the Wireless Network Connection icon and click
Properties.
4 Click the Wireless Network tab.
5 Select your access point under Wired Network and click Properties.
6 Change the settings under Key Index (detailed).
7 Click OK.
Summary
This completes the Troubleshooting Appendix. If still have unanswered
questions, go to VAIO Support Centrol and select a support option.
VGX-XL100 Living Room Entertainment Computer
110
Entertainment Book.book Page i Wednesday, December 7, 2005 8:56 AM
i
Entertainment Book.book Page 1 Wednesday, December 7, 2005 8:56 AM
VAIO® PC VGX-XL1
Welcome to the VGX-XL1: Sony’s Living Room Entertainment Computer
Welcome
What is VGX-XL1?
2
Benefits of the VGX-XL1
3
VGX-XL1 Features
4
Getting Started
5
Using the Remote Control
6
Using the Wireless Keyboard
7
Getting Around Media Center
8
Adding files to Media Center
9
Using the Search Feature
10
The VGX-XL1 is both a powerful
computer and a state of the art home
entertainment system.
Let VGX-XL1 lead you into the exciting
world of VAIO where new standards are
established for digital content
management.
The design of VGX-XL1 allows it to
easily fit into any decor, thus completing
your video, audio, and Internet
experience by bringing powerful PC
capabilities to your home theatre—all in
the comfort of your living room.
1
Entertainment Book.book Page 2 Wednesday, December 7, 2005 8:56 AM
What is VGX-XL1?
What is VGX-XL1?
VGX-XL1 works just like any other
computer, EXCEPT IT OFFERS MORE!
More of the latest technology and
excellence you have come to expect
from Sony.
• Leverages the latest Intel components
• Uses the latest Microsoft® Windows® XP Media Center operating system
• Offers High Definition connectivity for Sony HD Camcorders
2
Entertainment Book.book Page 3 Wednesday, December 7, 2005 8:56 AM
Benefits of the VGX-XL1
Sony establishes new standards in video and audio home entertainment, and digital
content management with the VGX-XL1 Living Room Entertainment Computer.
Playback and manage your media
Full Digital Living System functionality for
library using a remote control or wireless the living room.
keyboard. View it all on your TV or
• Operates using the latest Microsoft®
monitor for the optimal entertainment
Windows® XP operating system
experience.
(MCE) augmented with advanced
VAIO® functionality.
• Personal Content
Digital Pictures
• HD connectivity with Sony HD
HD Camcorder
Camcorder
Mini DV Camcorder
• Internet Content
Downloaded Music
Movies
Pictures
Recorded TV
Streaming Video
3
Entertainment Book.book Page 4 Wednesday, December 7, 2005 8:56 AM
VGX-XL1 Features
The XL1 is a technologically advanced and powerful computer that will be right at
home in your living room or den. Surf the Internet, download music and movies,
record TV, watch videos, make copies of media files, and more— all managed
using the wireless keyboard w/intragrated pointing device and the remote control.
The XL1 is equipped with the following additional features:
Cutting Edge IT Architecture
Pentium D, DDR 2 RAM, PCI-E graphics, S-ATA
drives, RAID enabled, and multitasking.
Enhanced Connectivity
PC, wired, and wireless connectivity.
Enhanced Remote Control
Control MCE features, including surfing the
Internet.
Improved Web Surfing
Remote Control navigation and alphanumeric
input.
4
Entertainment Book.book Page 5 Wednesday, December 7, 2005 8:56 AM
Getting Started
VGX-XL1 uses the Mircosoft® Windows® XP Media Center Edition operating system
(MCE). This version has all of the features and capabilities of other XP operating
systems, with one major difference—Media Center. This group of advanced features
takes you into the world of digital home entertainment, bringing all of your
entertainment sources together in a single location, easily managed by the VAIO®
remote control or the VAIO® wireless keyboard.
This guide provides an overview of Media Center and
additional advanced features unique to VGX-XL1
Living Room Entertainment Computer.
This guide will focus on the “living room” experience, using Media Center and the
remote control to perform all tasks. The next few pages provide examples of how to
get around and perform tasks in Media Center. Then, you will be guided through
setting up Media Center, and finally, an overview of available features.
5
Entertainment Book.book Page 6 Wednesday, December 7, 2005 8:56 AM
Using the Remote Control
Press a Remote Control button to do the following:
Start MY TV, MY MUSIC, MY PICTURES, MY VIDEO in Media
Center. Press STANDBY to place your computer in Standby
mode.
Control the playback for TV, MUSIC, VIDEOS, and end a side
show. Buttons include: STOP, PAUSE, FWD, SKIP, REPLAY,
REW, and RECORD. The right arrow button serves as a PLAY
button.
Use the arrow buttons to move to a specific location, the OK
button to make your selection, the BACK button to go to the
previous screen, and the MORE button to view additional
information.
Use the START button to open Media Center. Volume Controls
(VOL) are on the left and Channel (CH) or Page (PG) on the
right of the START button. A MUTE button is also provided to
suppress sound.
Important Note: The VAIO® remote control will NOT control
the sound for your TV. You must use the remote control that
you are currently using to control the sound for your TV.
Open the following screens RECORDED TV, GUIDE, LIVE TV,
DVD MENU. (DVD MENU is available only when Media Center
is active.)
Use these buttons to change channels and enter text or
numbers in a specific location.
6
E
Entertainment Book.book Page 7 Wednesday, December 7, 2005 8:56 AM
Using the Wireless Keyboard
Before using the keyboard, you must activate communication between the computer
and the keyboard. Please complete the following steps for keyboard installation.
Step 1: Insert the batteries
Step 2: Activate Communication
• Turn the keyboard over
• Slide the Power button to On
• Open the battery compartment
• Turn the keyboard over
• Insert supplied batteries as indicated
• Slide Pointing Device button to On
• Replace battery compartment cover
• Press Connect on computer and on
back of keyboard at the same time.
• Return keyboard to its upright position
7
Entertainment Book.book Page 8 Wednesday, December 7, 2005 8:56 AM
Getting Around Media Center
From inside Media Center:
Select this... To do this...
Start Media Center and return to Start menu.
Close Media Center. Options for close include Media
Center, Log Off, Shut Down, Restart, and Standby.
Open Media Center Help.
Press an arrow to move to a specific command or option.
Then press OK to make your selection.
Highlighted command button - Performs a function.
Green Highlight - Indicates selected object. Press OK.
Option button: Highlight, then press OK to select.
Minus/Plus button: Press OK for more options in a list.
Check boxes: Highlight, then press OK to select.
8
Entertainment Book.book Page 9 Wednesday, December 7, 2005 8:56 AM
Adding files to Media Center
In order to access your media files to view pictures, videos, recorded TV, or listen
to music you must place the files in a folder recognized by Media Center. Media
Center recognizes the following folders located in the My Documents directory.
Note: The Recorded TV folder may be located in a separate partition on your hard drive.
You can add media files to recognized folders in the following ways:
• Copy files or folders directly to recognized folders using Windows Explorer.
• Download media files (Internet, Music CD’s, Video) directly to recognized folders.
• Add additional folders, or shared folders for Media Center to recognize by pressing
the MORE button and selecting Add Pictures/Videgos/Music/Recording from
the menu. Then follow the on-screen instructions.
Each time you open My Pictures, My Videos, or My Music a message appears
asking if you would like to add new media files. You must respond to continue. To
add files, select Yes and follow the on-screen instructions. This method will allow
you to add folders, not individual files for Media Center to recognize. If you select
the Don’t ask me this again check box, you must add media files by pressing the
MORE button and selecting the “Add” menu command.
9
Entertainment Book.book Page 10 Wednesday, December 7, 2005 8:56 AM
Using the Search Feature
In Media Center, you can search through the TV listings or your media library to find
just the right TV show or movie to watch, or just the right song to listen too—all by
remote control.
Use the keypad on the remote control to enter text, much like you would using an
address book on a cellular phone.
Each time you press a button on the numeric keypad on the remote control, you scroll
through the characters that are available for that button.
Press a number repeatedly to scroll through the choices that are available for that
number. With each repeated press of a number, a different character appears. When
entering text, you can also do the following:
• To switch between uppercase, lowercase, and symbol modes, press the CH/PG+
or CH/PG- button on the remote.
• To backspace, press the CLEAR button on the remote control.
• To enter a space between words, press the (0) button on the remote control.
• When you find the character you want, press the ENTER button on the remote
control.
10
Entertainment Book.book Page 11 Wednesday, December 7, 2005 8:56 AM
Welcome to Sony VAIO and Microsoft Windows XP Media Center
Media Center Setup
Sony VAIO® and Microsoft®
Windows® XP Media Center
Edition 2005 let you do amazing
things with your VAIO Living
Room Entertainment Computer
Personal Computer. With a full
range of powerful, yet easy-touse digital entertainment
features, you can experience TV,
movies, music, and photos like
never before.
With VAIO and Media Center, you can bring all of your entertainment
sources—TV, Recording, Music, Pictures, CD/DVD Player, Internet— together in a
single location. This guide will assist you in setting up Media Center for your distinct
entertainment needs, and then provide you with an overview of the major features.
11
Entertainment Book.book Page 12 Wednesday, December 7, 2005 8:56 AM
Start Menu | Settings
Settings
General
13
TV
32
Pictures
45
Music
46
DVD
49
Messenger and Caller ID 54
Settings
Help
12
55
Once you have set up your computer and have
connected any additional hardware devices, you
are ready to set up your Media Center
preferences.
The first time you start Media Center, a setup
“wizard” (a series of setup screens) opens. To
enjoy the full benefit of Media Center, it is best to
complete all screens. You may return to Settings
at any time to change your preferences.
Please note: The Media Center setup wizard
requires Internet connection to complete the
process. Also, remember to check for Windows
updates before you begin to make sure Media
Center has the most recent software and
security updates.
Entertainment Book.book Page 13 Wednesday, December 7, 2005 8:56 AM
Start Menu | Settings | General
General
Start Up and Window Behavior
14
Visual and Sound Effects
15
More Programs Options
16
Media Center Setup
17
Parental Controls
27
Automatic Download Options
28
Optimization
29
About Media Center
30
Privacy Settings
31
The General settings are a series of
options that effect Media Center and
some general preferences for your
computer.
You might want to take the time to
review all of the General settings
options to see what might improve your
entertainment experience.
13
Entertainment Book.book Page 14 Wednesday, December 7, 2005 8:56 AM
Set Up and Window Behavior
Start Menu | Settings | General
Start Up and Window
Behavior
You can decide how Media
Center starts and reacts to your
environment. You can determine
if Media Center:
• is always the top window.
• will warn you if a file or action
is not designed for Media
Center.
• starts when Windows starts.
• shows task bar notification.
• shows TV tips.
Use the arrow keys on your remote control to move to the buttons for each option.
Press the OK button to select (add a check mark) or deselect (remove a check mark).
When finished, select Save.
14
Entertainment Book.book Page 15 Wednesday, December 7, 2005 8:56 AM
Visual and Sound Effects
Start Menu | Settings | General
Visual and Sound Effects
Adding visual and sound effects
can add a new dimension to your
entertainment enjoyment.
Here you can add transition
animations, play sounds when
navigating Media Center, and
even change your video
background color.
(Background colors include
Black, White and various shades
of Gray.)
Use the arrow keys on your remote control to move to the buttons for each option.
Press the OK button to select (add a check mark) or deselect (remove a check mark).
To change the video background color, select the (+) or (-) button and press the OK
button. When finished, select Save.
15
Entertainment Book.book Page 16 Wednesday, December 7, 2005 8:56 AM
More Programs Options
Start Menu | Settings | General
More Programs Options
Media Center has teamed with
other applications and Internet
sites to not only make your
entertainment experience better,
but to also make it easier to
create media, and to have
access to more entertainment
information.
You can control the media
experience in Media Center and
which application you can access
within Media Center.
Use the arrow keys on your remote control to move to the buttons for each option.
Press the OK button to select (add a check mark) or deselect (remove a check mark).
When finished, select Save.
16
Entertainment Book.book Page 17 Wednesday, December 7, 2005 8:56 AM
Start Menu | Settings | General
Media Center Setup
Set Up Internet Connection
18
Set Up TV Signal
19
Set Up Your Speakers
20
Configure Your TV or Monitor
Settings
21
Set Up The Remote Desktop
22
Automatic Updates
23
Join Wireless Network
24
Run Media Center Setup Again
25
Restore Start Page Defaults
26
Media Center Setup takes you to the
basic level of settings that are required
for you to use Media Center.
Most of these options will guide you
through a “wizard” (a series of screens)
to make it easier for you to set up Media
Center and your entertainment
preferences.
17
Entertainment Book.book Page 18 Wednesday, December 7, 2005 8:56 AM
Set Up Internet Connection
Start Menu | Settings | Media Center Setup
Set Up Internet
Connection
Media Center makes it easy to
set up your Internet connection.
Just read the on-screen
information and answer a few
questions—Media Center does
the rest!
Use the arrow keys on your remote control to
move the Yes or No option. Press the OK button
to select the option. Select Next to continue.
18
Entertainment Book.book Page 19 Wednesday, December 7, 2005 8:56 AM
Set Up TV Signal
Start Menu | Settings | Media Center Setup
Set Up TV Signal
Media Center makes it easy to
set up your TV signal for viewing.
Just read the on-screen
information and answer a few
questions—Media Center does
the rest!
You will need to confirm the
region that you live in and then
decide if you want Media Center
to automatically configure your
TV signal (recommended) or if
you want do it yourself.
If you choose Yes to let Media Center configure your TV signal, make sure you read
the Prepare for Automatic Configuration screen carefully before continuing.
19
Entertainment Book.book Page 20 Wednesday, December 7, 2005 8:56 AM
Set Up Your Speakers
Start Menu | Settings | Media Center Setup
Set Up Your Speakers
Media Center makes it easy to
set up your speakers for your
listening pleasure. Just read the
on-screen information and
answer a few questions—Media
Center does the rest!
Media Center will ask you for the
number (or type) of speakers you
have and then select the Test
button.
After the test, select whether or not you heard sound coming from all your speakers
and select Next to continue. If the test was successful, you’re done! If not, Media
Center will provide you with additional setting options.
Installation Note: For the best possible sound, use the HDMI cable (if possible)
when connecting your speakers.
20
Entertainment Book.book Page 21 Wednesday, December 7, 2005 8:56 AM
Configure Your TV or Monitor
Start Menu | Settings | Media Center Setup
Configure Your TV or
Monitor Settings
Media Center makes it easy to
set up your TV or monitor for
viewing. Just read the on-screen
information and answer a few
questions—Media Center does
the rest!
Select Watch Video or Next to
continue.
A video is provided that contains
additional information on setting
up your display and improving
the quality of your video viewing.
21
Entertainment Book.book Page 22 Wednesday, December 7, 2005 8:56 AM
Set Up The Remote
Start Menu | Settings | Media Center Setup
Set Up The Remote Desktop
Media Center makes it easy to
set up your Remote Desktop. For
each step, read the
on-screen information and
answer a few questions—Media
Center does the rest!
Select Next to Continue.
22
Entertainment Book.book Page 23 Wednesday, December 7, 2005 8:56 AM
Automatic Updates
Start Menu | Settings | Media Center Setup
Automatic Updates
Media Center can help you keep
your computer secure and
running efficiently by
automatically downloading and
installing critical updates from
Microsoft.
You should also continue to
check for additional software and
driver updates on a regular basis
by selecting Windows Update
from the Start | All Programs
Use the arrow keys on your remote control to
menu.
move the Yes or No option. Press the OK button
to select the option. Select Next to continue.
.
23
Entertainment Book.book Page 24 Wednesday, December 7, 2005 8:56 AM
Join Wireless Network
Start Menu | Settings | Media Center
Join Wireless Network
The advanced features of Media
Center and the Living Room
Entertainment Computer
personal computer let you easily
connect to an existing wireless
local area network.
Media Center will guide you
through a series of screens that
provide step-by step instructions
for connecting to your network.
Important Note: You must already have a working wireless local area network to use
this feature. Selections made on these screens may overwrite your existing wireless
network settings. Please follow the on-screen instructions carefully.
24
Entertainment Book.book Page 25 Wednesday, December 7, 2005 8:56 AM
Run Media Center Setup Again
Start Menu | Settings | Media Center Setup
Run Media Center Setup
Again
The first time you started Media
Center, you were guided through
a series of screens that helped
you set up Media Center.
To go through the entire set up of
Media Center again—screen by
screen, select Yes.
You will be guided through two
sections: Required Setup
(checks for components like
networking and Internet) and
Optional Setup (advanced
settings and features).
Select Next to Continue.
25
Entertainment Book.book Page 26 Wednesday, December 7, 2005 8:56 AM
Restore Start Page Defaults
Start Menu | Settings | Media Center Setup
Restore Start Page
Defaults
During the course of working with
various software programs and
many different types of
entertainment components, you
might find it advantageous or
necessary to restore the Start
page defaults.
Doing this will remove any
changes you may have made to
the Start menu and restore it
back to its original state.
Selecting Yes or No is the only action available for this option. Selecting Yes will
automatically restore your Start page to its default settings.
26
Entertainment Book.book Page 27 Wednesday, December 7, 2005 8:56 AM
Parental Controls
Start Menu | Settings | General
Parental Controls
Media Center provides a process by which selected programs can be blocked from
viewing. The first time you enter Parental Control, you will be asked to enter, and then
confirm a new four digit access code. Once complete, you will be given access to the
following parental controls:
If you turn on TV blocking, you can then select allowable
TV ratings for viewing, and by selecting Advanced, you
can choose more restrictive rating than TV-MA for specific
types of content.
If you turn on movie blocking, you can then select the
maximum allowed movie rating for viewing.
To change the access code, enter and then confirm a new
code. You must be logged on as Administrator.
Resets the Parental Control back to the default settings.
Use the arrow keys on your remote control to move to the buttons for each option.
Press the OK button to select (add a check mark) or deselect (remove a check mark).
When finished, select Save.
27
Entertainment Book.book Page 28 Wednesday, December 7, 2005 8:56 AM
Automatic Download Options
Start Menu | Settings | General
Automatic Download
Options
With Media Center and your
Internet connection, you can
view media information for your
CDs, DVDs, and movies. Learn
interesting new details about the
music and movies you listen to
and watch.
You also have the option to
download Guide information
automatically every time you
start your computer, or you can
choose to download manually.
28
Use the arrow keys on your remote control to
move to the buttons for each option. Press the
OK button to select (add a check mark or dot) or
deselect (remove a check mark or dot). When
finished, select Save.
Entertainment Book.book Page 29 Wednesday, December 7, 2005 8:56 AM
Optimization
Start Menu | Settings | General
Optimization
The Optimization feature is designed to help you keep your system running
efficiently and smoothly.
Select the Perform Optimization check box and then select the plus (+) or minus () options to set a schedule time.
You might want to set the Optimization schedule to run when you are certain you will
not need to access Media Center.
For additional information, go to Media Center help.
29
Entertainment Book.book Page 30 Wednesday, December 7, 2005 8:56 AM
About Media Center
Start Menu | Settings | General
About Media Center
About Media Center provides
you with information concerning
the version of Media Center that
you are currently using, and
Internet connections to the Guide
Terms of Service from your TV
signal provider, and Data
Provider Credits.
Simply select an option to view
the information.
Use the arrow keys on your remote control to move to the About Media Center menu
button of your choice. Press the OK button to view your selection. When finished,
select Save/Done or the Back button.
30
Entertainment Book.book Page 31 Wednesday, December 7, 2005 8:56 AM
Privacy
Start Menu | Settings | General
Privacy Settings
Your privacy is very important to
us. You can view Media Center
and Guide privacy statements in
detail directly from the vendor
with your Internet connection.
You can also use the Guide and
an Internet connection to
anonymously send information to
Microsoft for the purpose of
improving the quality and
accuracy of services.
Use the arrow keys on your remote control to move to the Privacy menu button of
your choice. Press the OK button to view your selection. When finished, select Save/
Done or the Back button.
31
Entertainment Book.book Page 32 Wednesday, December 7, 2005 8:56 AM
Start | Menu | Settings | TV
TV
Recorder
33
Guide
37
Set Up the TV Signal
42
Configure Your TV or Monitor
43
Audio
44
You can control your TV entertainment
experience. Each of these options allow
you to set up TV viewing preferences to
make sure you get the most out of your
TV viewing.
• Record shows for viewing at a later
date.
• Locate a show and review a brief
description.
• Connect your TV signal and set up
your TV or monitor with ease.
• Set preferences for your sound system.
32
Entertainment Book.book Page 33 Wednesday, December 7, 2005 8:56 AM
Recorder
Start Menu | Settings | TV
Recorder
The TV Recorder options provide you with:
— History
34
• a complete history of recorded shows.
— Recorder Storage
35
— Recording Defaults
36
• the location, limit, and quality of recorded
shows.
• general programming defaults.
Please note the following:
IMPORTANT: Sony supports the
.
lawful use of technology and does not
endorse or encourage the use of our
products for purposes other than
those permitted by copyright law.
TV programs that have been
encrypted (protected) by the
broadcaster cannot be copied and
played back on any player other than
the one recorded to.
33
Entertainment Book.book Page 34 Wednesday, December 7, 2005 8:56 AM
History
Start Menu | Settings | TV | Recorder
History
Media Center stores a complete
history of all recorded
programing. Information such as
the recording date, name of the
program and the current status is
stored.
The list can be sorted by Date,
Status, and Title.
The information for every
recording remains in the list until
you select Clear History.
Use the arrows on your remote control to move to the menu options and each
recorded program in the history list. Press the OK button to perform a menu
command or to view status information about the selected show.
34
Entertainment Book.book Page 35 Wednesday, December 7, 2005 8:56 AM
Recorder Storage
Start Menu | Settings | TV | Recorder
Recorder Storage
Media Center provides you with
complete information about
where and how your recorded
programs are stored. You also
have the ability to manage that
information and make changes, if
necessary.
The Available recording time
graph moves in relation to the
Maximum TV limit selection.
Use the arrow keys on your remote control to move to the (+) or (-) buttons
associated with the option of your choice. Press the OK button to change the option.
When finished, select Save.
35
Entertainment Book.book Page 36 Wednesday, December 7, 2005 8:56 AM
Recording Defaults
Start Menu | Settings | TV | Recorder
Recording Defaults
Media Center lets you create a
list of defaults or conditions that
determine the actions Media
Center takes with your recorded
programs. There are also
specific defaults or conditions
that are specific to the recording
of a TV series.
Use the arrow keys on your remote control to move to the (+) or (-) buttons
associated with the option of your choice. Press the OK button to change the option.
When finished, select Save.
36
Entertainment Book.book Page 37 Wednesday, December 7, 2005 8:56 AM
Guide
Start Menu | Settings | TV
Guide
Edit Channels
38
Add Missing Channels
39
Set Up Guide Listings
40
Additional Guide Information
41
The Media Center Guide gives you the
control you need to manage your TV
channels and your TV guide listing.
View a channel listing from your TV
signal provider where you can add,
remove, and even rename channels.
Have Media Center automatically
download new listings every time you
start Media Center, or download the
guide listings at your convenience.
Media Center puts you in control!
37
Entertainment Book.book Page 38 Wednesday, December 7, 2005 8:56 AM
Edit Channels
Start Menu | Settings | TV | Guide
Edit Channels
With Media Center, you can
control what channels you and
your family can access. Once
you select Edit Channels, a list
of channels from your TV signal
provider displays on your screen.
From here you can add, remove,
and if needed, correct a channel
number. If something goes
wrong, simply select Restore
Default to return the channel list
to its original state.
Use the arrow keys on your remote control to move to the buttons for each option.
Press the OK button to select (add a check mark) or deselect (remove a check mark)
a channel. Use the keypad to change the channel number, if necessary. When
finished, select Save.
38
Entertainment Book.book Page 39 Wednesday, December 7, 2005 8:56 AM
Add Missing Channels
Start Menu | Settings | TV | Guide
Add Missing Channels
If for any reason you need to add
a channel to your list of available
channels, you can do so through
Add Missing Channels. For
example, you previously deleted
a channel and now want to add it
back.
Simply select Add Channel and
then enter the channel name.
Then select Next and enter the
channel number. Finally select
Done. Your added channel will
be listed on the Add Missing
Channels first screen.
Use the arrows on your remote control to move to a menu option and press the
OK button to make your selection. Use the numeric keypad to enter a channel name
and number. When finished. select Done.
39
Entertainment Book.book Page 40 Wednesday, December 7, 2005 8:56 AM
Set Up Guide Listings
Start Menu | Settings | TV | Guide
Set Up Guide Listings
Media Center makes it easy to
set up to download and view your
TV Program Guide. Just read
the on-screen information and
answer a few questions—Media
Center does the rest!
Media Center will ask you:
• If you want to use the Guide
• if you agree with the Guide
Terms of Service
• for your ZIP Code
Then, Media Center will locate
and download your TV Program
Guide.
40
To get started, Select Next.
Entertainment Book.book Page 41 Wednesday, December 7, 2005 8:56 AM
Additional Guide Information
To immediately download TV
Program Guide listings, select
To download and view Guide
Terms of Service, select
To download and view About
Guide Listings, select
Use the arrow key on your remote control to move to a menu option and press the
OK button to select the option.
41
Entertainment Book.book Page 42 Wednesday, December 7, 2005 8:56 AM
Set Up the TV
Start Menu | Settings | TV
Set Up the TV Signal
Media Center makes it easy to
set up your TV Signal for
viewing. Just read the on-screen
information and answer a few
questions—Media Center does
the rest!
As you answer the questions and
progress through the screens,
you are required to Confirm
Your Region and decide
whether to use Automatic TV
If you are notified that Media Center cannot
Signal Setup (recommended) or detect a TV signal, you cannot watch or record
complete a Manual Setup.
TV. Please go to Media Center Help for
additional instructions.
42
Entertainment Book.book Page 43 Wednesday, December 7, 2005 8:56 AM
Configure Your TV or Monitor
Start Menu | Settings | TV
Configure Your TV or
Monitor
Media Center makes it easy to
set up your TV or monitor for
viewing. Just read the on-screen
information and answer a few
questions—Media Center does
the rest!
A video is provided that contains
additional information on setting
up your display and improving
the quality of your video viewing.
As you answer the questions and progress through the screens, you are required to
Identify Your Display Type, identify your Connection Type, decide how to
Optimize Media Center for your Display, and Adjust your Display Settings. From
here, select Adjust Display Controls, then select Next to view the screen Display
Calibration. Here you can adjust the characteristics of your TV or monitor.
43
Entertainment Book.book Page 44 Wednesday, December 7, 2005 8:56 AM
Audio
Start Menu | Settings | TV
Audio
With Media Center, you can set
up options, such as Audio
(Stereo,SAP), Captioning (CC1,
CC2) and Caption Display (On,
Off, On when muted) that affect
your TV viewing.
Use the arrow keys on your remote control to move to the Audio, Captioning, or
Caption Display (+) or (-) buttons. Press the OK button to change the TV audio
selection. When finished, select Save.
44
Entertainment Book.book Page 45 Wednesday, December 7, 2005 8:56 AM
Start Menu | Settings
Pictures
Gain complete control over how
you view your digital pictures.
• Choose to view your pictures
in order or randomly.
• Choose to show pictures in
sub folders or the main folder.
• Choose to view picture
captions.
• Choose a slide transition type.
• Choose to add animation
when viewing your pictures
Once you decide how you want to view your pictures, select the appropriate buttons.
Use the arrows on your remote control to move to the desired option, then press the
OK button. When finished, select Save.
45
Entertainment Book.book Page 46 Wednesday, December 7, 2005 8:56 AM
Start Menu | Settings
Music
Visualizations
47
Visualizations Options
48
With Media Center, you can add a visual
component to your listening pleasure
with Visualizations.
Visualizations are visual interpretations
of an artist’s music that plays on your TV
or computer screen while you listen to
the music.
To enjoy Visualizations while you are listening to your favorite music, select one or
more viewing samples from the Visualizations page, and then make your selections
from the Visualization Options page.
46
Entertainment Book.book Page 47 Wednesday, December 7, 2005 8:56 AM
Visualizations
Start Menu | Settings | Music
Visualizations
To enhance your music enjoyment, Media Center provides eight different visual
interpretations of the musical performance.
Alchemy
Ambience
Bars and Waves
Battery
Particle
Plenoptic
Spikes
Musical Colors
47
Entertainment Book.book Page 48 Wednesday, December 7, 2005 8:56 AM
Visualizations Options
Start Menu | Settings | Music
Visualizations Options
Media Center “Visualizations” are
visual interpretations of an artist’s
music that play on your TV or
computer screen while you listen
to the music.
You decide if you want the
visualizations to start when the
music plays, and if song
information can be viewed during
the visualizations.
Once you decide on your visualizations and how they are viewed, select the
appropriate buttons. Use the arrows on your remote control to move to the desired
option, then press the OK button. When finished, select Save.
48
Entertainment Book.book Page 49 Wednesday, December 7, 2005 8:56 AM
Start Menu | Settings | DVD
DVD
DVD Language
50
DVD Audio
51
Close Captioning
52
Remote Control Options
53
Media Center gives you the control to
determine how best to create your
cinematic experience.
Enhance your experience by selecting
from these four topics that allow you to
choose and define how to view your
DVD movies.
49
Entertainment Book.book Page 50 Wednesday, December 7, 2005 8:56 AM
DVD Language
Start Menu | Settings | DVD
DVD Language
When viewing a DVD, Media
Center give you the option of
changing the language for
subtitles, the audio track, and
menus. Choose from a list of 70
different languages, or select
Title Default to play the DVD in
the original language it was
created in.
Use the arrow keys on your remote control to move to the Subtile, Audio track, or
Menu (+) or (-) buttons. Press the OK button to change the language selection. When
finished, select Save.
50
Entertainment Book.book Page 51 Wednesday, December 7, 2005 8:56 AM
DVD Audio
Start Menu | Settings | DVD
DVD Audio
Imagine yourself fully immersed
in rich Dolby® Digital surround
sound—not in a theatre, but in
your home. Sony, InterVideo, and
your Dolby Digital sources for
sound bring the theatre
experience to your living room.
Media Center and InterVideo
helps you set up your speakers
and environment to fully create
the cinematic experience.
Note: You must have a multi-channel sound
system to experience this feature.
Select Configuration to set up your speakers and channel mode, and select
Environment to choose your listening experience (Theatre, Normal, Late Night).
51
Entertainment Book.book Page 52 Wednesday, December 7, 2005 8:56 AM
Close Captioning
Start Menu | Settings | DVD
Close Captioning
Media Center gives you the
option of adding closed
captioning to your DVD viewing.
Enjoy DVD movies with those
who are hearing impaired, or
when sound in your environment
becomes a viewing factor.
You can choose the type of
captioning (CC1 or CC2), and
how the captions display (On,
Off, or On when muted).
Use the arrow keys on your remote control to move to the Captioning or Caption
Display (+) or (-) buttons. Press the OK button to change the selection. When
finished, select Save.
52
Entertainment Book.book Page 53 Wednesday, December 7, 2005 8:56 AM
Remote Control Options
Main Menu | Settings | DVD
Remote Control Options
When watching your favorite
DVD’s, you might want to watch
only certain parts of a movie or
skip forward or backward to
locate a specific scene. Media
Center makes this easy. You can
set your remote control to skip
chapters and skip forward and
back, giving you the control and
flexibility to watch exactly what
you want to.
For detailed information about these settings,
select Help.
Once you decide on your remote control options, select the appropriate buttons. Use
the arrows on your remote control to move to the desired option, then press the OK
button. When finished, select Save.
For additional information on using your remote control, go to the chapter titled
Getting Started.
53
Entertainment Book.book Page 54 Wednesday, December 7, 2005 8:56 AM
Start Menu | Settings
Messenger and Caller ID
Settings
Enjoy Media Center and keep in
contact with friends and family.
You can sign in or sign out of
Messenger at any time while in
Media Center. You can also:
• Turn on and off the Do Not
Disturb mode.
• Switch between Messenger
conversations.
• Turn off Messenger sounds.
Once you decide your options, select the appropriate buttons. Use the arrows on your
remote control to move to the desired option, then press the OK button.
54
Entertainment Book.book Page 55 Wednesday, December 7, 2005 8:56 AM
Start Menu | Settings
Help
Windows Media Center is very
easy to use when you follow the
on-screen instructions. However,
when you do need additional
information, Media Center
provides you with four areas of
assistance.
Media Center Help
Community Forums
Latest Tips
Help with your Hardware
Please visit each of these areas and experience
the quality assistance Media Center provides to
you and your family.
55
Entertainment Book.book Page 56 Wednesday, December 7, 2005 8:56 AM
Additional Help
Start Menu | Settings | Help
You can access Media’s Center’s Help areas by the following methods:
Remote Control - Press the More button, select Settings, then Help.
Remote Mouse - Move the Mouse to activate the Media Center tool bar, which
appears at top of the screen. Then click the Help icon.
56
Entertainment Book.book Page 57 Wednesday, December 7, 2005 8:56 AM
Helpful Hints
Windows® Updates
VAIO® Updates
Remember to check regularly for
Windows updates to keep the
operating system updated with the
latest software releases and security
updates.
Sony Support provides updates
designed specifically for your
computer. All you need to do is go to
Sony’s Internet support site and enter
the model number of your computer.
To start the Windows Update utility,
connect to the Internet, click Start,
All Programs, then click Windows
Update. The Windows Update Web
site opens. Follow the on-screen
instructions.
Support Internet Sites
Contact Sony Support
Windows Updates
Internet Support
http://microsoft.com/windowsxp/mediacenter/
https://e-support.vaio-link.com/eSupport/
PortalJSP/Portal.jsp
VAIO Link
Customer Support
http://www.vaio-link.com/
http://www.vaio-link.com/contacts/contacts.asp?l=en
57
Entertainment Book.book Page 58 Wednesday, December 7, 2005 8:56 AM
58
Entertainment Book.book Page 59 Wednesday, December 7, 2005 8:56 AM
Start Menu
Media Center Features
VAIO personal computers equipped
Experience Media Center
60
My DVDs
62
Online Spotlight
65
My Videos
66
My Pictures
73
My TV
81
My Music
93
Create DVD
98
More Programs
100
with Microsoft® Windows® XP Media
Center Edition 2005 lets you
experience the new and exciting world
of digital home entertainment.
Experience movies, TV, music, and
photos like never before.
Combine the easy to use, yet powerful
features of VAIO, and you can enjoy an
even more dynamic entertainment
experience.
Note: For information not shown in this
guide, go to Media Center Help.
59
Entertainment Book.book Page 60 Wednesday, December 7, 2005 8:56 AM
Experience Media Center
Review the following list for a
high-level overview of the
exciting features in Media
Center.
For in-depth information about
each feature, go to the specific
topic in this book or to the Media
Center help file.
View all the DVDs in your media library. Select a DVD to
view programing information or to watch.
The Online Spotlight provides Internet access to the
latest entertainment news and events.
60
Entertainment Book.book Page 61 Wednesday, December 7, 2005 8:56 AM
You can categorize your pictures in as many folders as
you wish. Then, select a group to view a single picture or
a slide of all pictures in the folder.
Take control of your TV viewing experience. Watch live
TV or record your favorite show for later viewing.
Enjoy access to all the music stored on your hard drive.
Organize, locate, and play your favorite music files in
Media Center.
Create DVDs from your favorite recorded TV series.
Select only the episodes you want to burn to DVD.
Review this section carefully to get the most out of your
digital entertainment experience.
Watch digital videos that you’ve previously loaded in a
folder on the hard disk drive recognized by Media Center.
61
Entertainment Book.book Page 62 Wednesday, December 7, 2005 8:56 AM
Start Menu | My DVD
My DVDs
DVD Movie Controls
63
Watching DVD movies in Media Center
lets you take control of your movie
experience.
Helpful Hints
64
Sit back and use the remote control to
play, pause, rewind, fast forward, stop,
and even eject your DVD movie.
62
Entertainment Book.book Page 63 Wednesday, December 7, 2005 8:56 AM
DVD Movie Controls
Start Menu | My DVD
Media Center offers you the flexibility of using the remote control, or keyboard and
mouse commands to simplify your DVD movie watching experience.
If you are enjoying the TV, Video, or Music options in Media Center and wish to view
a DVD movie, simply insert the DVD and the following image appears.
Using your remote control, select Play DVD. Your movie
automatically begins to play in full screen mode.
If you stop your movie using the remote control, the following options appear:
Continues playing from the stopping point.
Restarts the DVD movie from the beginning.
Returns to the DVD movie’s title or beginning menu.
Select the language preference for the Subtitle,
Audio track, and Menu for the DVD movie.
Ejects the DVD movie.
63
Entertainment Book.book Page 64 Wednesday, December 7, 2005 8:56 AM
Helpful Hints
Resize the Viewing Screen
Change DVD Languages
You can watch your DVD movie in a
small viewport screen, which allows
you access to other areas of Media
Center, by pressing the Windows
button on your remote control.
Change the language that your DVD
movie displays for subtitles, the audio
track and menus. If the movie is
playing, press Stop on the remote
control and then select DVD
Languages. Select the + or - buttons
to choose a language.
If you want to work and watch your
DVD movie and the same time, move
your mouse for the Windows resize
buttons to appear. Select the Resize
button.
More Movie Information
View additional information about the
DVD movie you are watching by
pressing the MORE INFO button on
the remote control.
Information includes title, chapter title,
genre, parental rating, length and
current position.
You can also change the DVD
languages in Media Center. Go to
Start | Settings | DVD.
Additional Settings for DVD
Viewing
For these additional settings that can
enhance your movie viewing, go to
Start | Settings | DVD.
• Audio
• Closed Captioning
• Remote Control Options
64
Entertainment Book.book Page 65 Wednesday, December 7, 2005 8:56 AM
Start Menu | Online Spotlight
Online Spotlight
Media Center and Online
Spotlight provide you direct
access to various Internet
entertainment sites. You can
view the sites by category by
selecting a menu option.
Use the arrows on your remote
control to move to a site button.
Information about the site
displays below the list. To select
the site, press the OK button.
65
Entertainment Book.book Page 66 Wednesday, December 7, 2005 8:56 AM
Start Menu | My Videos
My Videos
Organize Your Videos
67
Play Your Videos
68
More Information
69
Create a DVD/CD
70
Import/Edit Video
71
Helpful Hints
72
Watch your home movies and digital
videos stored on your hard disk drive
using the Media Center remote control
or your keyboard and mouse. View the
videos in full screen mode, within a
window, or from a viewport window.
Organize, store, and play videos stored
on your hard drive that you have
created, downloaded from the Internet,
or recorded from TV.
Share your video files with others by
creating DVDs or CDs.
66
Entertainment Book.book Page 67 Wednesday, December 7, 2005 8:56 AM
Organize Your Videos
Start Menu | My Videos
With Media Center, it is easy to store and organize videos that you have created with
your digital camera, digital recorder, or downloaded from the Internet.
For you to view your videos in Media
Center, the files must be stored in a
location that Media Center looks in.
To view videos in My Videos, first
copy and organize the files into the My
Videos or Shared Video folder.
In the My Videos folder, you can
create new folders or copy in other
folders to better organize your files.
If you are connected to a home
network and wish to share your video
files with others, copy the files to the
Shared Video folder.
If a video file is downloaded or stored
in a folder other than My Videos or
Shared Videos, you can add that
folder(s) to the folder list that Media
Center looks in.
From your remote control, press the
More Info button, or if you are using
your mouse, right- click anywhere in
My Videos to view this menu. Select
Add Videos and follow the on-screen
instructions.
67
Entertainment Book.book Page 68 Wednesday, December 7, 2005 8:56 AM
Play Your Videos
Start Menu | My Videos
With Media Center, it is easy to select and play a video stored anywhere on your hard
drive. You can view your videos in full screen, windowed, or in a viewport window.
Viewing from a viewport window gives you access to your computer or the Internet
outside of Media Center.
To view a video, do the following using your remote control:
1 Press the My Videos button.
2 Select the folder where the video is stored and press OK.
3 Select a video and press OK.
The video you selected will begin to play automatically.
When the video is finished playing, the following menu appears:
Restart: Restarts the video from the beginning.
Delete: Deletes the video from your computer.
Done: Returns you to your video list.
68
Entertainment Book.book Page 69 Wednesday, December 7, 2005 8:56 AM
More Information
Start Menu | My Videos
In Media Center, it’s easy to find
out more information about any
digital video in your library. It
doesn’t matter if you just want to
see the information before you
watch it, or if you’re already
watching the video.
Use the arrow keys on your
remote control to move to a
video icon button. Press the OK
button to select the video. From
here, you can press the OK
button again, or press MORE
and select View Details.
You can view the following video information:
• Thumbnail of the cover, if available
• Video title
• Video description
• Date the video was last created or modified
• Video length. (h:mm:ss format)
If are already watching a video,
simply press the MORE button
on your remote control.
69
Entertainment Book.book Page 70 Wednesday, December 7, 2005 8:56 AM
Create a DVD/CD
Start Menu | My Videos
With Media Center, it is easy to copy your digital videos to a CD or DVD for safe
keeping or to share with family and friends. Select a video, and then select Create
CD / DVD. Media Center will then take you through a series of screens, which contain
simple instructions to assist you in performing such tasks as:
Select your disc format. Make
sure you select the Data CD/
DVD format.
View CD / DVD information.
Give your video disc a title.
When you have finished
your choices, select
Create CD, then select
Yes for Initiate Copy.
You can view the creation progress and when
complete, select Finish. Use the remote control
arrows and OK button to make your selections.
Note: You must insert a blank CD/DVD before starting Create CD/DVD.
70
You can Select
All Videos or
only the ones
you want.
Entertainment Book.book Page 71 Wednesday, December 7, 2005 8:56 AM
Helpful Hints
Resize the Viewing Screen
Playing from an External Source
You can watch your DVD movie in a
viewport screen, which allows you
access to other areas of Media Center, by pressing the Windows button
on your remote control.
Media Center allows you to play video
off a disc, from a external storage
device, or off a network drive.
If you want to work and watch your
DVD movie at the same time, move
your mouse for the Windows resize
buttons to appear. Select the Resize
button.
Change Display View Quality
You can adjust your TV and monitor
from Settings | General | Media
Center Setup | Configure Your TV
or Monitor. Just follow the on-screen
instructions.
Separate My Videos Folders
Supported File Types
If you set up multiple users on your
computer, each user will have a
separate My Videos folder that can
only be opened by that user and a
Shared Videos folder for sharing
your videos with others.
Windows Media file - .wm, .asf
Windows Media A/V - .wmv,
Video file - .avi
Movie file - .mpeg, mpg, mpe, .mp1,
mp2, mpv2
71
Entertainment Book.book Page 72 Wednesday, December 7, 2005 8:56 AM
Start Menu | My Pictures
My Pictures
Media Center makes it easy and fun to
look at your digital photos. From My
Photos you can:
Organize Your Pictures
74
View Your Pictures
75
Edit Your Pictures
76
Play a Slide Show
77
• Edit, organize and sort your pictures
by name or date.
Create a CD/DVD
78
• Share your pictures with others
Picture Details
79
• Create CDs or DVDs
Helpful Hints
80
• Print your pictures
• View your pictures individually or as
a slide show.
• Protect your digital images
72
Entertainment Book.book Page 73 Wednesday, December 7, 2005 8:56 AM
Organize Your Pictures
Start Menu | My Pictures
Using My Pictures in Media Center, it is easy to store and organize pictures that you
have created with your digital camera or downloaded from the Internet.
For you to view your pictures in Media
Center, the files must be stored in a
location that Media Center looks in.
First, copy and organize the image
files into the My Pictures or Shared
Pictures folder.
In the My Pictures folder, you can
create new folders or copy in other
folders to better organize your files.
If you are connected to a home
network and wish to share your video
files with others, copy the files to the
Shared Pictures folder.
If an image file is downloaded or
stored in a folder other than My
Pictures or Shared Pictures, you can
add that folder(s) to the folder list that
Media Center looks in.
From your remote control, press the
MORE INFO button, select Add
Pictures and follow the on-screen
instructions.
When you save pictures from your
digital camera or scanner, Windows
automatically stores them in the My
Pictures folder.
73
Entertainment Book.book Page 74 Wednesday, December 7, 2005 8:56 AM
View Your Pictures
Start Menu | My Pictures
With Media Center, it is easy to
select and view digital images
stored in My Pictures or
anywhere else on your hard
drive. Before opening Media
Center and viewing your
pictures, you may want to spend
some time in Windows Explorer
organizing your pictures by
creating various subject folders
in the My Pictures folder.
Use the arrows on the remote
control to move to a menu
option or a picture folder.
Press OK to open a folder and view thumbnails of your pictures. Move to the picture
you want to view and press OK again. Press BACK to return to the list of thumbnails.
74
Entertainment Book.book Page 75 Wednesday, December 7, 2005 8:56 AM
Edit Your Pictures
Start Menu | My Pictures
Picture Details: Edit Your Pictures
It’s easy to edit your pictures directly in Media Center’s My Pictures. Use the arrow
keys on the remote control and move to a picture. Press MORE INFO and then select
Picture Details. From here you can:
Rotates picture
45 degrees.
If you select Touch Up, you can then choose the following:
Automatically removes red eye from people and pets.
Automatically sharpens the contrast or clarity of your picture.
The following tools are provided:
Shifts crop box in the direction of
the selected arrow.
Zooms picture in and out.
Shifts orientation of a picture.
75
Entertainment Book.book Page 76 Wednesday, December 7, 2005 8:56 AM
Play a Slide Show
Start Menu | My Pictures
Instead of viewing your digital
pictures individually, why not
add some fun. It’s easy to create
a slide show and even add
background music.
From Settings | Pictures, you
can customize the settings for
picture and song captions,
transition type and length,
background color, how pictures
are displayed, and what pictures
display.
Use the arrows on your remote
control to select a folder, single
picture or Play Slide Show
Press the OK button to select your option. For more information, see Helpful Hints.
76
Entertainment Book.book Page 77 Wednesday, December 7, 2005 8:56 AM
Create a CD/DVD
Start Menu | My Pictures
With Media Center, its easy to copy your digital pictures to a CD or DVD for safe
keeping or to share with family and friends. Simply select or open a picture folder, and
then select Create CD / DVD. Media Center will then take you through a series of
screens, which contain simple instructions to assist you in performing such tasks as:
Select disc format. Make sure
you select the Data CD/DVD
format. Data DVD also lets
you create a DVD slide show.
View CD / DVD information.
Give your picture disc a title.
You can Select
All Pictures or
only the ones
you want.
When you have finished
your choices, select
Create CD.Then select
Yes for Initiate Copy.
You can view the creation progress and when
complete, select Finish. Use the remote control
arrows and OK button to make your selections.
77
Entertainment Book.book Page 78 Wednesday, December 7, 2005 8:56 AM
Picture Details
Start Menu | My Pictures
In Media Center, it’s easy to find
out more information about any
digital picture in your library.
Use the arrow keys on your
remote control to move to a
picture icon button. Press the
OK button to select the picture.
From here, you can press the
OK button again, or press
MORE and select View Details.
If are already viewing a picture,
simply press the MORE button
on your remote control.
You can also edit your pictures
within Media Center. See the
next page Picture Details:
Editing your Pictures.
78
You can view the following picture information:
• Picture title
• Folder name, if stored in a folder
• Date the picture was created or modified
• Picture resolution
Entertainment Book.book Page 79 Wednesday, December 7, 2005 8:56 AM
Helpful Hints
Picture Zooming and Panning
Adding Music to a Slide Show
Select a picture from My Pictures.
Select music from your Media Library.
Play a CD or select a Playlist.
Press OK once to magnify 150%.
Press OK again to magnify 225%.
Now you can use the arrows to pan
around the picture.
Press OK again to return the picture
to its original size
Use the remote control to open My
Pictures and select the picture folder
you want to watch as a slide show.
Select Play Slide Show. Press OK.
Printing Pictures in Media Center
Supported File Types
Start Media Center and from My
Pictures, select the pictures you want
to print.
Joint Photographic Experts Group .jpg, .jpeg
Press the MORE button and then
select Pictures Details.
Select Print and then select Print
again.
Follow any on-screen instructions.
Tagged Image File - .tif
Graphics Interchange Format - .gif
Bitmap - .bmp
Windows Meta File - .wmf
Portable Networks Graphics - .png
79
Entertainment Book.book Page 80 Wednesday, December 7, 2005 8:56 AM
Start Menu | My TV
My TV
Watch Live TV
83
View the Guide
84
Guide Helpful Hints
85
Record and Schedule Programs 86
80
Record and Schedule Helpful
Hints
87
Watch Recorded Programs
88
Search for a Program
89
Search for a Feature Movie
92
Watching your favorite TV program or
movie in Media Center puts you in
complete control of your viewing
experience.
What do you want to do? Media Center
makes it easy to locate, watch, or
record your favorite TV program,
sporting event, or movie.
And best of all, you can do all of this
directly from your VAIO® computer and
a TV signal connection.
Entertainment Book.book Page 81 Wednesday, December 7, 2005 8:56 AM
My TV Features
Live TV
Watch your favorite TV show or movie LIVE. Use the Media
Center buffer feature to pause, rewind, fast forward, or continue
viewing your live program in progress. Use the MORE INFO
button on the remote control to display TV show information.
Recorded TV
Record any TV show or program for later viewing. Plus, view
a list of recorded programs by date or title, a list of programs
scheduled to be recorded, play a recorded program, find out why
a program wasn’t recorded, or add a TV recording.
Guide
Download a listing of current television programming from
your local television service provider. Set Media Center to
automatically update the program guide, or manually update
whenever you are connected to the Internet.
Search
Quickly find a TV program or a series to watch or record by
entering a descriptive word, program title, or program category.
Movies
Go online to find movies on TV to watch now or later. Get the
latest movie information, read reviews, see cast lists, find other
times the movie is broadcast, browse for related movies, and find
other movies with the same cast members.
81
Entertainment Book.book Page 82 Wednesday, December 7, 2005 8:56 AM
Watch Live TV
Start | My TV
Watch live TV or record your
favorite shows to view later. Use
the Guide to find the show you
want to watch or record.
When you watch live TV, Media
Center continuously captures 30
minute increments of the
program. This enables you to
rewind, replay, and fast forward
in a TV program. This TV
programming buffer is
temporary and is not saved.
To view TV, press LIVE TV on
your remote control or select the
LIVE TV menu option.
Note: You can watch TV in full screen, windowed, or in a viewport window.
82
Entertainment Book.book Page 83 Wednesday, December 7, 2005 8:56 AM
View the Guide
Start Menu | My TV
The Guide displays TV channel
and program information,
including titles, descriptions,
categories, ratings, and program
times.
You can view and scroll through
the list of current and future TV
shows in the Guide. When you
select a program, information
about the program displays
below the program listings.
You can choose to have Media Center download the Guide from your local
provider automatically, or download updated information yourself.
You can view the Guide listings at any time by pressing the Guide button on your
remote control. Use the arrows to move to a show time, and use the CHAN/PAGE
(+/-) buttons to move to any available channel. Press the OK button to select a
program. Press the MORE button to view program details or record the program.
83
Entertainment Book.book Page 84 Wednesday, December 7, 2005 8:56 AM
Guide Helpful Hints
Important Information
Removing Channels from Guide
Guide data may not be available in all
countries or regions. Please consult
your local TV signal provider.
From Media Center, select Settings,
TV, Guide, and then Edit Channels.
Make sure you are connected to the
Internet and check your TV signal and
guide settings in the Settings menu.
Add Missing Channels
Downloading the Guide
From Media Center, select Settings,
TV, Guide, and then Add Missing
Channels.
Automatically - Determine settings
for retrieving information for media
and Method of Download for the
Guide. From Media Center, select
Settings, General, and then
Automatic Downloads Options.
Select Add Channels and enter the
name of the missing channel.
Enter the correct channel number and
select Add.
Repeat to add all missing channels.
Select Done when complete.
84
Follow the on-screen instructions to
remove channels from the Guide
listing.
Manually - From Media Center, select
Settings, General, TV, Guide, and
then Get Latest Guide Listings.
Entertainment Book.book Page 85 Wednesday, December 7, 2005 8:56 AM
Record and Schedule Programs
Main Menu | My TV
Media Center lets you record the
program you are watching, one
scheduled to broadcast later, or
a recurring program series.
To verify your program is being
recorded, select My TV,
Recorded TV, and then select
Scheduled. The Record icon
appears next to the program
while you are recording.
• Record the program you are watching by pressing REC on the remote control.
• Record from the Guide by selecting a program, then select Record.
• Record from the Search menu, which allows you to define search criteria.
• Record manually by selecting Add Recording, then select Channel and Time.
The Add Recording button shows when no other recordings are scheduled.
85
Entertainment Book.book Page 86 Wednesday, December 7, 2005 8:56 AM
Record and Schedule Helpful Hints
Standby Mode and Scheduled
Recordings
Media Center will continue to record
your scheduled TV shows even if you
place the computer in standby or in
hibernation state. The recording of TV
shows will also continue even if Media
Center is closed.
From Media Center, select Settings,
General, TV, and then Recorder.
From Recorder you can define or
change settings for History,
Recorder Storage, and Recording
Defaults.
Copying Recorded Programs to
DVD or CD
Recording Quality and Hard Disk
Drive Storage Space
If you would like to copy or archive
your recorded TV shows to CD or
DVD, go to Create DVD located on
the Media Center Start menu and
follow all on-screen instructions.
Quality
Space
Best
2.7 GB/hr
Better
2.4 GB/hr
Good
1.4 GB/hr
Fair
1.2 GB/hr
Select Stop if you need to stop or
cancel a current recording.
86
Set Up Recording Preferences
Entertainment Book.book Page 87 Wednesday, December 7, 2005 8:56 AM
Watch Recorded Programs
Start | My TV | Recorded TV
Recorded TV is the storage place
for all your recorded programs. In
the Recorded TV window, you
can sort your programs by name,
date, or category. You can also
delete a recorded program or
series of programs.
To watch a recorded program,
simply locate and select the
program, and then select Play.
Use the arrows on your remote control to move
to a menu option or program. Press the OK
button to make your selection.
87
Entertainment Book.book Page 88 Wednesday, December 7, 2005 8:56 AM
Search for a Program
Start Menu | My TV
Media Center My TV has an easy
to use search feature that lets you
quickly locate the program you
want to watch or record.
You can search by Categories,
Title, or Keyword.
The results from your search can
be viewed in a list sorted by day
for the number of days remaining
on your current guide listing.
Once you locate the program you
want to watch or record, press the
OK button on your remote control.
Use the arrows on your remote controlto move to a menu option and press the OK
button to make your selection. Use the keypad to enter a Title or keyword. Results
displays on screen automatically.
88
Entertainment Book.book Page 89 Wednesday, December 7, 2005 8:56 AM
Search for a Feature Movie
Start | My TV | Movies
When you select the Movies
menu option, Media Center
searches your entire TV Guide
listing for movies based on your
input for what you want to see.
Once you make a movie
selection, you can watch the
movie, view additional
information about the movie, or
record the movie.
Note: Access to view restricted
channels must be given by your
TV signal provider.
Use the arrow keys on your
remote control to move to a menu
option or movie and press the OK
button.
89
Entertainment Book.book Page 90 Wednesday, December 7, 2005 8:56 AM
Start Menu | My Music
My Music
Organize Your Music Files
92
Play Music
93
Queue Music
94
Add Music
95
Create and Organize Playlists
96
Helpful Hints
97
Enjoy a complete listening experience
with My Music. You can listen to CDs,
view artist information, create and
organize your own music playlists,
categorize and listen to music by
genres, search for music selections,
and more.
With Media Center and My Music, you
can play your favorite music files and
CD’s you have added to the Windows
Media Player Library.
Note: You can also use the Windows Media Player to play music and add, delete, categorize, and
organize your music files. However, if you use Windows Media Center’s My Music for your listening
entertainment needs, you will have the added benefits of Sony’s VAIO enhanced features. Please see
Windows Media Player Help for additional information.
90
Entertainment Book.book Page 91 Wednesday, December 7, 2005 8:56 AM
Organize Your Music Files
Start | My Music
With Media Center, it is easy to store and organize music files that you have added
from your favorite CD’s or have downloaded from the Internet.
For you to listen to music in Media
Center, the files must be stored in a
location that Media Center looks in.
First, add and organize the music files
into the My Music or Shared Music
folders.
In the My Music folder, you can create
new folders or copy in other folders to
better organize your files.
If you are connected to a home
network and wish to share your music
files with others, copy the files to the
Shared Music folder.
If a music file is downloaded or stored
in a folder other than My Music or
Shared Music, you can add that
folder(s) to the folder list that Media
Center looks in.
From your remote control, press the
MORE INFO button, or right-click
using your mouse anywhere in My
Music to view this menu. Select Add
Music and follow the on-screen
instructions.
Play Music
91
Entertainment Book.book Page 92 Wednesday, December 7, 2005 8:56 AM
Start | My Music
Once you’ve placed your music
files in the My Music library, you
are ready to listen to your favorite
song, album (CD), or playlist.
Media Center provides you with
several categories in which to sort
your music files for easy locating.
Albums (CDs)
Shows thumbnail of cover and title, if connected to the Internet.
Artists
Lists artist name and additional information about the artist.
Playlists
Lists playlists that you’ve created from Media Center/-Player.
Songs
Lists song title, length, and additional information, if selected.
Genres
Lists genres categories, such as Classical, Jazz, and Rock.
To listen to your music, use the arrows on the remote control to move to a menu
option or music selection such as an album, artist, playlist, or song and press the OK
button. Then select the Play menu option.
Note: You can also listen to your music from the Windows Media Player.
92
Entertainment Book.book Page 93 Wednesday, December 7, 2005 8:56 AM
Queue Music
Start | My Music
In Media Center’s My Music, you can “line up” or
queue the music you want to hear. The Queue is
simply a temporary list of music. By using this
feature, you don’t have to keep selecting new
songs or albums. There can be several pieces of
music lined up to play one after the other.
To add music to the Queue, use the arrows on
the remote control to select music from any of
the categories and press the OK button. The
next screen shows information for that particular
piece of music. Move to the menu and select
Add to Queue and press the OK button,
Remember, the Queue is temporary and will go away if you do any of the following:
• Select Play instead of Add to Queue for another song or album in My Music
• Play media in My TV or My Videos.
• Close Media Center (This includes logging off, turning off or restarting the Media
Center computer, or putting the computer into Standby or Hibernate mode.)
93
Entertainment Book.book Page 94 Wednesday, December 7, 2005 8:56 AM
Add Music
Start | My Music
From a CD
1 Press the Media Center Start button
on the remote control, and then
select My Music.
• Follow all on-screen instructions from
the Internet site to download music
files to your computer.
2 Insert a CD into the CD drive of the
personal computer.
• If you download your music files
directly to the My Music or Shared
Music folders, Media Center will
automatically make the files available
to you.
3 Select the Albums category.
4 Select the Album or CD you want to
add to your music library.
5 Select Copy CD.
The first time you copy a music CD,
you must select your copy protection
options. Follow the on-screen
instructions.
As each song finishes copying, an
icon appears next to the title.
94
From the Internet
• If you download your music files to
any location on your computer, you
must add that location in Media
Center by pressing the MORE INFO
button on your remote control and
then selecting Add Music.
• Locate and select the folder where
you downloaded the music files and
then select Finish. Media Center will
add the folder to the My Music
library.
Entertainment Book.book Page 95 Wednesday, December 7, 2005 8:56 AM
Create and Organize Playlists
Start | My Music
A Playlist is a customized list of songs you can keep to play at a later time or record to
CD. Using Playlists, you can group your favorite digital music files together and
determine the order in which you want the files to play. You can create a Playlist that
includes several tracks from various CDs or even a Playlist that contains background
music for a slide show. To create a Playlist, do the following:
1 Select a song and add to the queue.
2 Move to the viewport screen and press
the OK button to select it.
3 From the Queue screen, select the
Edit Queue menu option.
4 From the Edit Queue screen, select
Save As Playlist.
5 Enter a name for your new Playlist and
select Save.
Use the arrows on your remote control to move to menu options, songs, or the
viewport window and press the OK button to make your selection. Use the numeric
keypad to enter a name for your new Playlist.
Note: You can create Playlists in Windows Media Center or from within Media Player.
95
Entertainment Book.book Page 96 Wednesday, December 7, 2005 8:56 AM
Helpful Hints
Selecting a Visualization
Add/Edit Queue Meta Data
From Media Center, select Settings,
and then Music. Go to
Visualizations Options to choose
when and how the visualizations
display.
From Media Center’s My Music,
select an album, artist, song, or
playlist. Press the MORE INFO button
on the remote control, and select the
Edit menu option.
Then go to Visualizations to choose
from eight different graphical patterns.
From the Edit screen, enter or modify
the Queue meta data as necessary.
Create a CD/DVD
Supported File Types
From Media Center, select My Music
and then select the music you want to
copy.
CD Audio - .cda
Select Create CD/DVD and follow the
on-screen instructions.
96
MP3 - .mp3, .m3u
Windows Audio File - .wav
Windows Media Audio Files - .asx,
.wm, .wma, .wmv, .wmp, .wmx
Entertainment Book.book Page 97 Wednesday, December 7, 2005 8:56 AM
Start Menu | Create DVDPlease note the following:
Create DVD
Main Screen
Your DLS computer provides you with
various methods of creating your own
99
DVDs. Create DVD, unique to VAIO®
PCs with MCE, is the only method
where you can control the entire
process with your remote control.
For additional methods for creating
DVDs, go to More Programs.
IMPORTANT: Sony supports the
.
lawful use of technology and does not
endorse or encourage the use of our
products for purposes other than
those permitted by copyright law.
TV programs and commercial DVDs
that have been encrypted (protected)
by the broadcaster cannot be copied
and played back on any player other
than the one recorded to.
97
Entertainment Book.book Page 98 Wednesday, December 7, 2005 8:56 AM
Main Screen
Start Menu | Create DVD
The Create DVD main screen
shows you a list of all of your TV
show recordings. To create a DVD,
select the desired recordings from
the list. With each recording
selected, information about the
recording and the DVD displays.
Once you have selected the recording, you can do the following from the menu:
Sort
Sort the list by date or name (title)
Option
Takes you to the DVD Settings screen where you can select a
theme or category and playback settings for the DVD. Select
Configuration to choose the drive for creating the DVD.
Burn
Starts the Creating DVD process. A progress bar displays.
Help
Opens the Click to DVD Help file for reference.
Please read and follow all on-screen instructions.
98
Entertainment Book.book Page 99 Wednesday, December 7, 2005 8:56 AM
Start | More Programs
More Programs
From More Programs, Sony’s advanced features offers you direct access to various
programs that can enhance your entertainment experience.
Create CD/DVD
Burn pictures for slide shows, video files, and recorded TV.
Create DVD
VAIO added value program to archive recorded TV shows.
Internet
Explorer
Opens a version of Internet Explorer that can be controlled
through your remote control.
InterVideo
Allows you to define audio and visual settings.
Messenger
Opens Windows Messenger for instant text messaging.
Sync to Device
Assists in synchronizing media to a portable media device.
More Programs: Helpful Hints
99
Entertainment Book.book Page 100 Wednesday, December 7, 2005 8:56 AM
Each of the programs that More Programs offers you access to, contains a Help file
to provide you with the assistance you need to complete your desired tasks. Please
review the help information to find out more about each of these programs.
Internet Explorer
Your VGX-XL1 personal computer allows you to search the Internet from the comfort
of your favorite chair using the wireless keyboard (recommended) or the VAIO
remote control.
To use your remote control, must perform the following setup procedures:
• From Internet Explorer, go to Tools > Remote Control Option and select the
Enable Remote Control ... check box.
When you first open Internet Explorer using your remote control, you will see an
Operation Guide located at the bottom of the screen. From here, you can access
various Modes such as scrolling, navigation and others.
• Use the Channel +/- button on the remote control to access the Operation Guide.
• Use the MORE button on the remote control to access a toolbar that contains
several functions button, including how to exit Internet Explorer.
Thank you for purchasing the Sony® VAIO® VGX-XL1 Living Room
Entertainment Computer.
100