1
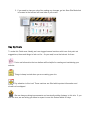
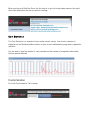
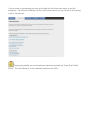
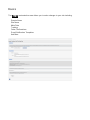
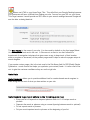
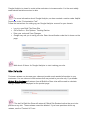
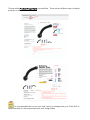
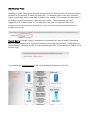
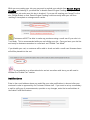
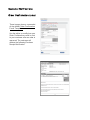
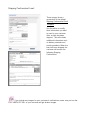
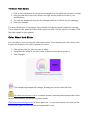
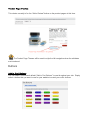
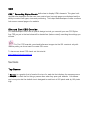
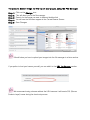
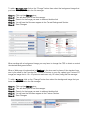
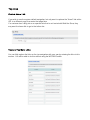
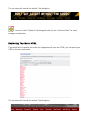
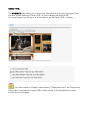
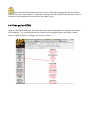
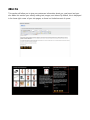
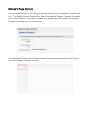
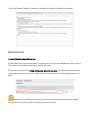
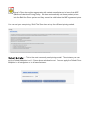
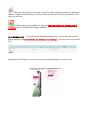
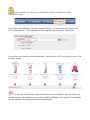
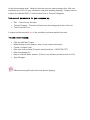
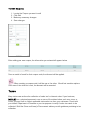
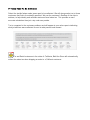
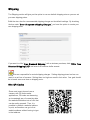
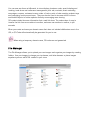
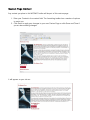
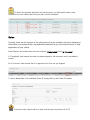
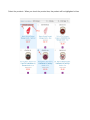
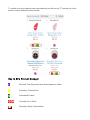
USER MANUAL Version 1.11.12 Introducing Build the Store. We created this platform to make it easy for anyone to set up, update, add and remove products to their own online stores. This user manual will give you the basics to setting up your own personal online store. It will also introduce you to some of the features, and will walk you through the setup process. Introduction Build the Store is a feature-rich, comprehensive eCommerce platform solution that offers you complete flexibility and control over the functionality of your online portal. Build the Store’s fully hosted, all-in-one shopping cart software is designed to help you build, manage, and grow a successful online adult toy store. With search engine optimization and advanced inventory management, Build the Store gives you the ability to create and provide an unrivaled shopping experience for your customers. Build the Store manages the product inventory, payment processing, shipping, and customer service so you can concentrate on marketing and selling. Quick Tips Here are some quick tips that will help you in creating your Build the Store eCommerce site. 1. Always save your changes before you switch to a different tab, leave your current page, or move from the Edit to the View Site mode. The “Save Changes” button is located on the bottom right hand side your screen. 2. If you make a mistake and have not saved your changes. Click the “Reset” button on the bottom left hand side and it will go back to the previous settings. 3. If you need to view your site after making any changes, go into View Site Mode that is located at the bottom left hand side of your menu. Key Symbols To make this Guide user friendly, we have tagged several sections with icons that point out suggestions, ideas and things to look out for. As you read, be on the lookout for them. Facts and information that we believe will be helpful in creating and maintaining your website. Things to keep in mind when you are creating your site. Pay attention to this icon! These sections are filled with important information and should not be skipped. We are always making improvements and constantly adding features to this site. If you see this icon, we are letting you know to expect to see this feature within 90 days. Getting Started Log in the Build the Store site at: http://www.buildthestore.com/cp/index.php?name=login&err=login_required You can have more than one person logged into your Build the Store site at the same time. Be careful that two people are not working on the same screens because you could override each other’s changes. Dashboard Menu The Dashboard is where you can find the latest news and updates about system changes, fixes, new features and the status of new products. When you log on to Build the Store, the first step is to go to the drop down menu at the top of the screen and select the site you want to manage. Cart Statistics The Cart Statistics is a snapshot of your online store’s activity. Your store’s snapshot is displayed on the Dashboard Menu section of your store’s administration page and is updated in real-time. You are able to view the number of carts created and the number of completed sales within the time period selected. Customization Go to the Customization Tab to begin. If you are new to customizing your site, go through the first three menu items on the left navigation. Just follow the directions at the top of each section and you will be up and running in just a few minutes. To get going quickly, we recommend you download and read the “Quick Start Guide” (QSG). This User Manual is a more detailed guide than the QSG . Basics The Basics customization area allows you to make changes to your site including: Domain Name Site Name Meta Data Tracking Order Confirmations E-mail Notification Templates And More Domain Name You can use your own domain in the “Domain Name” Field or you can create your site with an unknown hostname and switch it live at a later time by simply changing the domain name. If your site name has not yet been created, you can Generate a Random Name until you are ready to make your website active. Click the "Generate Random Name" button, and you will be given a temporary name to use for your site. Title And Site Name The Home Page Title (also known as a Page Name) is the title that appears in the tab of the browser window when someone visits your store and is also indexed by search engines that will use the text of your title tag for your site in their listings. Normally, it is a few words that include the title on the product pages and it helps to make the pages unique in search engines. The use of commas, colons and hyphens are all fine within the Home Page Title. Use punctuation where it is required and where it makes sense to do so. Never use HTML in your Home Page Title. This will affect your Google Ranking because your customers will have a difficult time finding your site. You can use your URL as your Home Title Page however it would provide no SEO value to your search rankings because Google will see the data as being identical. The Site Name is the name of your site. It is also used by default on the front page (About Us section), RSS Feeds and in the cart. A Site name is a word or two that follows the breadcrumb (a navigation technique that gives users a way to keep track of their location within a program or document) on the product pages and it helps to make the pages unique in search engines. If you create custom pages, this is the text used in the Site Name field for RSS (Really Simple Syndication –a web format that helps you syndicate your content) feeds. It is also used in the cart to give the customer confidence they are on the right site. Meta Data Meta Keywords allows you to provide additional text for crawler-based search engines to index along with the rest of what you have written on your site. Meta Keyword tags should adhere to the following guidelines: • Keep your list of keywords or keyword phrases down to 10-15 unique words or phrases • Separate the words or phrases using a comma (spacing between words is optional) • Do not repeat words or phrases • Put your most important word or phrases at the beginning of your list. Words such as “Sex” and “Toys” and “Sex Toys” are considered as repeating words. Meta Description Tags are words that provide concise explanations of the content of web pages. The various search engines’ result pages display a preview for a given page using these description tags. These short paragraphs are opportunities to advertise content to searchers and to let them know exactly what the given page has with regard to what they are looking for. These Meta Keywords and Descriptions are only displayed on the front page of your site to avoid duplicating data for search engines. This follows Google’s best practices. Meta Description Tags should use keywords intelligently, but also create a compelling description that entices the searcher to click and go to your site. The description should optimally be no more than 200 characters (including punctuation). Keep in mind; Google will only use the first 200 characters (about 20-25 words) of your Meta description as the default description in the search engine result pages. Use punctuation where it is required and where it makes sense to do so. Example: Naughty at Night - Bondage Boutique - Indulge Your Pleasures with Bondage Toys inspired by Fifty Shades of Grey Trilogy. Remember to “Save Changes” before going to the next section. Site Options Tracking If you are a Google Analytics user, you can use your Google Analytics code on your website. For more info visit: http://www.google.com/analytics/ Google Analytics is a free statistical reporting tool that is offered by Google that provides detailed statistics about the number of visitors that come to your website. The purpose of Google Analytics is aimed to assist online marketers to increase sales. It is the most widely used website statistics service to date. For more information about Google Analytics, we have created a section under Helpful Resources in the “Customization Tab.” Follow the instructions for setting up your Google Analytics account for your domain: • • • • Log in to your Build The Store Site Go to Basics > Site Options> Tracking Section Enter your code and Save Changes Google may ask you to verify your site. Enter the verification code that is shown on the page. Wait about 48 hours for Google Analytics to start tracking your site. Site Defaults Customer reviews can increase your sales and provide much needed information to your customers. You can choose to limit reviews that are posted to your site only. If you enable Global Site Reviews, all reviews from all Build the Store sites will be used to calculate ratings, reviews will be displayed on the product page. The staff at Build the Store will review all Global Site Reviews before they are to be posted on any site. These reviews cannot be deleted. If you have questions about any reviews, use the “Contact Us” form. Choose which Product Page Style you would like. There are two different ways to display products on the site. It is recommended that you try each style, save your changes and go to “View Site” to determine which of these styles best suits your design needs. Get Related From Upselling or cross selling gives the seller an opportunity for their customer to purchase related products for the purpose of making a larger sale. For example, when a fast-food customer orders a hamburger and the customer is asked by the cashier, “Do you want fries with that?” in an attempt to get the customer to purchase more items. When generating product suggestions for “Related Items” or “You May Also Like,” you can select products from categories that the customer is currently in, or you can chose from all categories that are enabled on your site. Social Media provides a way for businesses to increase their "word of mouth" advertising. Word of mouth advertising is a powerful method of promoting your products. “Enabling Social Media Buttons” will display the link to social media pages such as Facebook and Twitter on the product page. If you disable the Left Navigation, it will not be displayed anywhere on the site. While you are creating your site, you may want to exclude your website from Search Engine Crawling and Indexing. If you would like to disable Search Engine Crawling while you are creating your site make sure this box is checked. If you are still creating your “image” for the site, Google Robots or their Search Engine Crawling could incorrectly index your site thus resulting in incomplete or strange search results. Customers will NOT be able to make any purchases using a credit card if your site is in Test Mode. This is recommended while you are building your site. Once you have your site live and ready for business remember to come back and “Disable Test Mode.” If you disable your cart, no customer will be able to check out with a credit card. However items will still be placed into the cart. If your website is an informational site and not an online retail store, you will need to uncheck the “Enable Cart” section. Notifications Enter in the e-mail address where you would like your order notifications to be sent after your customer’s order is approved by our Customer Service staff. If you want to set up a secondary e-mail to notify you of announcements, specials or any changes, enter that e-mail address in the Admin E-mail Notifications. Customer Notifications Order Confirmation E-mail These images show a screenshot of the default Order Confirmation E-mail Template. Use the editor to modify how your Order Confirmation e-mail is sent to your customer after an order is approved. The customer will receive the following Purchase Receipt Notification. Shipping Confirmation E-mail These images show a screenshot of the default Shipping Confirmation Email Template. Use the editor to modify what information you want to send to your customer after an item has been shipped. This will include additional information such as delivery methods and tracking numbers. When the item has been shipped, the customer will receive the following Shipping Confirmation. If you include any images for your customer’s notifications, make sure you use the FULL ABSOLUTE URL or your customer will get broken images. Custom Packing Slips and Shipping Labels: If provide your Account Manager with your logo, your packing list and invoices will have your logo printed on them, please create your logo using the following Logo Specs: • Black & White Image • Bitmap format • 600 pixels width by 300 pixels Height You can also specify that your logo only be printed on packaging lists and NOT the shipping label to maintain privacy for your customers. Tokens Tokens are snippets of code used to create custom pages for additional dynamic content, such as “Featured Products” and other custom categories. When you enter in a token it is replaced with the current information that the token represents. For example, if you want to place the first name of the customer, and their name is “Fred,” you would use the token [%first%] in the place where you want the name “Fred.” The system automatically puts in the right information from the database when a token is used. If you need additional information, click to the Token Reference section. Here you will find a list of tokens, and what they produce. If there is no information for the token, the token is removed, displaying nothing (like some of the images and thumbnails below). These tokens are used in any of the custom pages, or places you can customize parts of a page. These tokens are not used in the category page. These are a sample of the following special Token codes that are available for Customer Notifications: Defaults The Default area allows you to make your site your own by customizing color and fonts, Buttons, CSS and the Shopping Cart. Color and Fonts Your page will look like this with the font changes. Note: This is in Style 1 format, and the font is set to 14pt. Changing the Font and size will affect the following: 1. Product Title 2. Category 3. Descriptions, including Lube Recommendations, Cleaning Instructions, Manufacturer and Material 4. Pricing 5. Upselling information 6. Reviews Your site default font is set to Arial. If you would like your font set differently simply click the box next to Default Font and select the font you would like used throughout your site. Your default font size is set to 12pts. If you would like your font size set bigger, simply select the down arrow next to the current setting and select the Default Font Size you would like to use. Changing the Font style and Shape will not affect your tabs or banners. If you want to make changes to each element of your site, you should use CSS to define each change you want. Understanding color choices, and how colors may render on different computers is the first step to ensuring that your site has the look you intended. Site Colors will allow you to not only control colors of key sections of your website, it will also allow you to preview your color selection before saving any changes. Pre-set Color Themes We have several color themes that are currently available for you to use. These complementary colors will create a vibrant look for your site. Color themes will continue to be added to the site. Selecting Custom Site Colors A website’s color scheme helps shape the identity of your store. If a site owner has a favorite color that they tend to gravitate towards, they will be able to create their own custom colors. We have created a mini site in this section for you to review your color choices. To Select Your Colors: 1. Click on the colored box at the top that corresponds to the table that you want to adjust. 2. Using the slide bar or the color wheel in the right column, adjust the color to your specifications. 3. The mini site display will show you the changes and how it will look on your webpage. 4. Save your changes The most difficult part of choosing a color scheme is finding the perfect shade for your site. This is where a color wheel and color slider comes into play. Use this section to create HTML Hex color codes for your website. Color Wheel And Slider You can select a color by using the color picker below. After selecting the color, click on the big box that displays your color to update your colors. 1. Click on the color box that you want to adjust 2. Using the color Wheel or the color slider, adjust the color where you like it. 3. Save Changes The sample page snippet will change, showing you how the colors will look. http://www.colourlovers.com/ is a creative shared community where people share color palettes and patterns, and discuss the latest trends. http://colorschemedesigner.com/ is also a great tool. You just pick a base color that you like and different types of color schemes are generated for you. Product Page Themes This choice currently is for the “Add a Review” button on the product pages at this time. The Product Page Themes will be used to style the left navigation when the attributes are introduced. Buttons Add to Cart Buttons You can select from several default “Add to Cart Buttons” to use throughout your site. Simply select a button that you want to use for your website to match your color choices. Custom Buttons If you have uploaded buttons to replace the system buttons, you can choose them here. Note: How to create custom buttons will be discussed in the File Manager Section. How to Upload Custom Buttons: Step 1: Locate which button you want to customize. Step 2: Click on the Change icon. Step 3: This will direct you to the file manager. Step 4: Search for the image you want to add and double-click. You will see the button you selected appear in the Customer Buttons section. Step 5: Repeat the above steps for each button you want to add. Step 6: Save Changes To remove any custom buttons, simply click on remove. This will go back to the default settings. CSS CSS or Cascading Styles Sheets define how to display HTML elements. This gives both the Web site developer and the user more control over how web pages are displayed and the ability to control font types, sizes and positioning. This helps Web developers create a uniform look across several pages of a website. Site and Cart CSS Override For Web developers who have a specific design in mind, you can add your own CSS Styles. Any CSS you put in the box below will be loaded last (unless noted), overriding the settings you choose. For Cart CSS override, you should reference images via the URL construct only with relative paths; you do not want to create SSL errors. To learn more about CSS check out this tutorial: http://www.w3schools.com/css/ Sections Top Banner A Banner is a graphic that is found at the top of a web site that displays the company name and logo. It is often the first thing a person sees when they open your website. Your banner can be any size but the default size is designed to work best at 920 pixels wide by 160 pixels high. To upload a banner image for the top of your pages, using the File Manager: Step Step Step Step Step 1: 2: 3: 4: 5: Click on the Change icon. This will direct you to the file manager. Search for the image you want to add and double-click. You will see the file name appear in the Current Banner Screen. Save Changes We will show you how to upload your images into the file manager in a later section. If you prefer to host your banner yourself, you can add it to the URL for Banner section. We recommend using a banner without the URL because it will create SSL (Secure Sockets Layer) issues during the checkout process. To add a Background, click on the “Change” button then select the background image that you have already uploaded in the file manager. Step Step Step Step Step 1: 2: 3: 4: 5: Click on the Change icon. This will direct you to the file manager. Search for the image you want to add and double-click. You will see the file name appear in the Current Background Section Save Changes When working with a background image, you may have to change the CSS to obtain or match the desired background effect. When a Web page is bookmarked, a Favicon is the icon used in place of the standard icon next to the name in the Favorites list. To add a Favicon to your site, upload your Favicon.ICO image (an image that is 16 x 16 pixel size and uses only 16 colors) using the file manager. To add a Favicon, click on the “Change” button then select the background image that you have already uploaded in the file manager. Step Step Step Step Step 1: 2: 3: 4: 5: Click on the Change icon. This will direct you to the file manager. Search for the image you want to add and double-click. You will see the file name appear in the Favicon Section. Save Changes To replace and upload a banner Image for the top of the CART pages using the File Manager: Step Step Step Step Step 1: 2: 3: 4: 5: Click on the Change icon. This will direct you to the file manager. Search for the image you want to add and double-click. You will see the file name appear in the Current Cart Banner Section. Save Changes If you leave this section empty, your banner will default to the Banner Image that you updated in the Current Banner section. If you want to disable your Top and/or Cart Banner, uncheck the boxes in the Banner Section. If you disable the Top Banner, It will not display anywhere on the site. If you disable the Cart Top Banner, it will not be displayed in the SSL portion of the cart pages. Top Area Custom Home Link If you wish to use the system default navigation, but only want to replace the “Home” link with a URL to a different page, then enter that page here. If a customer has a blog site or a separate site that is not hosted with Build the Store, they may want the home link to go to that other site. Replace Top Menu Links You can fully replace the links on the top navigation with your own by entering the links in this section. You will be able to do this without using the WYSIWYG editor. The top menu will override the default Top Navigation. You must select “Replace Top Navigation with this set of text and links” for these changes to take place. Replacing Top Menu HTML If you would like to replace your entire top navigation with your own HTML, you can paste your HTML in the text area below. The top menu will override the default Top Navigation. You must select “Replace Top Navigation with Below HTML” for these changes to take place. To get a drop-down effect, you will need to create your navigation in a way that matches the CSS and JavaScript you put into your top menu. Front Page Options If you want to “Display Featured Items,” “Display New Products” and/or “Best Selling Items,” check one or all of these boxes and these products will be displayed on the front page of your website. If you to want be creative and rename this section other than the default “Best Selling Items” or “Featured Products,” choose the heading that you would like to display for each section by typing the new name in the box provided. Style You can choose from three different table formats to display your products on the front page of your website. Select from the following Styles: Grid, 2 Per Line: The Default style for your website. This style will put your products in a grid with two products across per line. Grid, 6 Per Line: This style will put your products in a grid with six products across per line. This style will require you to select the products from the Products Section later on in this Manual. One Main Featured Product: This requires customization. This format will feature one product and will have a “Grid, 2 Per Line” under that featured product. Bronze level customers have limited abilities since they have no CSS controls at this level. If you would like to create a custom front page, and you are at the Gold Level, you can use the WYSIWYG (What You See Is What You Get format) editor to design a completely custom front page. There are also various options available to you on how the page is displayed. It is recommended that you try each style, save your changes and view your site so you can determine which of these styles best suits your design needs. Center HTML The WYSIWYG editor allows you to create your own center area of your home page. There are three options below the “Center HTML” on how to display the center HTML. You do not need to turn off any or all of the three to get the Center HTML to display. If you have turned off “Display Featured Items,” “Display New Items” and “Display Best Selling Items” and enable the center HTML contact as well, it will fully replace the center section of your home page. Custom Front Page You can fully replace the content on your home page by creating a custom front page with Build the Store’s WYSIWYG editor. Just drop in your text and graphics in the WYSIWYG editor, and then click "Save Changes." Your custom page is ready to go. Custom Front Page Options You have the • • • • • following setting options to help you create your Custom Front page: Replace Front Page with the above Content Show Left Navigation on Front Page Show Footer on Front Page Show Header on Front Page Show Top Menu on Front Page Left Navigation If you would like to replace the Left Navigation bar with your own HTML, do it here. The interface should be familiar to those that use popular word processing software. This is primarily used if you are utilizing custom pages or want to add links to your Facebook or Twitter feeds. You can add text, images, or any valid HTML. The possibilities are nearly endless. Our suggestion is to play around with this section and find what works for you. Best practices discourages creating a link to a different shopping site that would take visitors away from your website. Customers frequently will end up purchasing the item they are looking for from another site and result in lost sales for you. Left Navigation HTML Using the WYSIWYG interface, you can create your own left navigation or augment the system left navigation. You can fully replace the system’s left navigation; place the below content before or after or within a category list at top or bottom. About Us This section will allow you to give your customers information about you, your brand and your site. Make this section your own by adding text, images, and videos. By default, this is displayed in the lower right corner of your site pages, so there is a limited amount of space. Bottom Section If you would like to create a Custom Bottom Section, and you are at the Gold Level, you can use the WYSIWYG editor to design the bottom part of your page. You are likely going to need a <span style="clear both"> </span> (alignment CSS Code) as your first line, depending how you have laid out your front page. This is due to the use of floats on the front page by default. Categories System Categories Build the Store has created default categories and sub-categories for you to utilize. You can make any category active by checking the box next to each category or sub-category. To define a new category name for the left navigation to replace the default category name, enter your data in the New Category Name section. Creating SEO Blurbs will elevate your site's ranking in the search engines by including what are called targeted keywords and keyword descriptions right in the body of the text. These keywords are obtained by finding out how people phrase their requests when they input a request into the search engines. This does not change the URL for the category only the display. These categories are the system default categories and are not used if you have “Custom Categories” enabled. If you have a category disabled and a new release is added to that category. It will not show up on your store site. Custom Categories Custom Categories allows you to create your own side bar navigation with custom categories and products. You must create custom categories before turning this feature on or otherwise your sidebar will disappear. When you have set up your customer categories, make sure that the “Enable Customer Categories” is checked. You can create your custom categories. You can drag and drop your custom categories so that they will appear in the order that you put them into your left navigation. To add a 1. 2. 3. 4. 5. 6. new custom category: Click on “Add New Category” button Enter in your new category name. Enter in SEO Blurb, optional. Select where you want to place your Custom HTML (Top, Bottom or Disable). If you want to enable this category, click the Enable box. Click save You will then see your category in the current customer categories above. You do not have to use custom HTML in this section. It is optional. Category Page Options You can control the look of your category page by using one of our templates or creating your own. The default Products Displayed Per Row is four and the Category Template Thumbnail size is 140x140 pixels. If you want to display more products per row, reduce your Category Template Thumbnail size to 100x100 pixels. If it is unclicked, it will use the Category Template Code that you have written in the “Create Your Own Category Template” section. If the Use System Category Template is checked, it will use this default code below. Manufactures Enable/Disable Manufacturers At Build the Store, you have the option to select some or all of the manufacturers that Honey’s Place has in their vendor database to carry on your site. By checking the box under “Enable/Disable Manufacturers,” you are allowing the system to manage manufacturers for you. When the box is checked, none of the settings below are used. Unless you are creating a niche site, or you are a manufacturer that wants to display your products only, you may want to keep this boxed checked. All manufacturers are selected by default. To disable specific manufacturers, uncheck the box that allows the system to manage the manufacturers for you and the manufacturers in the boxes below and save changes. Products will be discussed in a later section. If you manage manufacturers yourself, you will have to manually add manufacturers. New manufacturers will be disabled by default. Tools Pricing Terms: Wholesale Price: This is your cost for the items. MSRP-Manufacturer’s Suggested Retail Price: This is the price that the manufacturer recommends that the retailer sell the product. MAP-Minimum Advertised Pricing: Agreements between the supplier and the manufacturer that requires retailers to adhere to a specific price. Honey’s Place has written agreements with certain manufacturers to honor their MAP (Minimum Advertised Pricing) Policy. We have automatically set these product prices into the Build the Store system and they cannot be sold below the MAP agreement price. You can set your own pricing. Build The Store has set up four different pricing models. Default Multiplier – This is the most commonly used pricing model. The minimum you can set the Default Multiplier is at 1.2 times above wholesale cost. You can apply the Default Price Multiplier to all categories or to all manufacturers. Category Price Multiplier – Sets pricing multipliers in each category. If a category price multiplier is selected, that multiplier will automatically override the Default Multiplier By Manufacturer – Set pricing multipliers for each manufacturer. When you set pricing on this page, it does not matter where this product is displayed; custom categories, feature items, or search results, the product will be priced based on the rules you set here. If a Manufacturer price multiplier is selected, that multiplier will automatically override both the Default and Category Multiplier. By Individual SKU – This section sets individual product prices. This is the most specific pricing category and will override all other price settings. You must enter the product’s SKU. Depending on the Style you choose, your custom pricing will appear on your site as: If you are unsure of a SKU, go to the Products Tab on you Build the Store’s Administration site. In the Site Product Manager, enter your Keyword Search. You can search by Product name, UPC, or Manufacturer. In this example we are using the Keyword Search “Clitoral Gel.”. Your search result comes up with five products: You will see the SKU on the top of each of the product’s image. You can use a combination of the three various pricing multipliers. Just remember that the Manufacturer Price Multiplier will override the Default Multiplier, the Category Price Multiplier and the individual SKU pricing will override everything else. Redirect Manager You would use this section only if you are transferring your old site to a new Build The Store site, and you have some old links you want to redirect, or if you had an old custom page and you want customers to come to the new one instead. Enter in only the path/page, do not enter your domain name or the http:// part of the URL here. Enter in only the information after the URL. Examples of a good redirect: /vibrators /1/c/32457/pink /product/Intense /404-errors-google-analytics Examples of a bad redirect: www.domain.com/vibrators www.domain.com//1/c/32457/pink http://www.demosite2.buildthestore.com/product/Intense http://www.antezeta.com/news/404-errors-google-analytics To add a New Redirect: 1. 2. 3. 4. Click the “Add New Redirect” button. A popup window will appear. Enter the old URL, and the new URL to redirect to Click “Enabled” so it is checked. Click “Save” You will see the redirect in your list. Now when customers come to the old URL, they will end up at the new URL instead. If you need a complete list of common page not found errors for your site and you are using Google Analytics, the 404 Page Log Events records the source of the error to Google Analytics so you can keep track of and fix errors. This additional information enables webmasters to deploy a missing page, or get the broken link on a referring page fixed. Coupon Manager Price sensitive customers are looking for deals, and smart website owners realize that coupons are a great way to attract new customers and to retain existing ones. Coupons are great tools to help you increase sales. Using this interface you can create coupons that offer your customers up to 25% off your customer’s order (not including shipping). Coupons can be created for individual SKU’s, Total Purchase Price or Custom Categories. You can set parameters for your coupons by: • • • SKU – Discount only this item Custom Category – Discount all items from that category that are in the cart Total Purchase Price A coupon will be honored if any of the conditions you have specified are met. To add a new coupon: • • • • • • • Click the Add New Coupon When the pop-up box appears, enter in your coupon information Create a Coupon Code Enter start and end date (Coupon’s end date will be 11:59:59 PM CST) Enter Percentage off Enter a minimum dollar amount. (If there is no minimum purchase, enter in 0.00) Save Changes Minimum pricing will be the total cost before shipping. To Edit Coupons: 1. 2. 3. 4. Locate the Coupon you want to edit Click Edit Make any necessary changes Save changes After adding your new coupon, the information you entered will appear below: Once a match is found for that coupon code, the discount will be applied. When creating a coupon code it will be one or the other. We will not combine options. Once one of the criteria’s is met, the discount will be enacted. Taxes Many states now enforce the collection of sales tax for Internet sales. If your business, (NEXUS) has a physical presence in one or more of the states below, such as a store, or office, you may have to collect applicable state sales tax from your customers. Check with your state’s Department of Revenue or your tax preparer to verify if sales tax needs to be collected. Build the Store and Honey’s Place cannot advise you with guidance pertaining to tax collection. If Taxes Need To Be Collected: Select the state(s) where sales taxes need to be collected. We will charge sales tax to those customers that live in the state(s) specified. We use the customer’s Rooftop of the ship-to address, to help identity and calculate state and local sales tax. This provides a more accurate calculation than just a zip code can provide. Tax is computed to the customers address and will appear in your sales reports indicating what jurisdictions were collected for and at what percent and amount. For end Retail customers in the state of California, Build the Store will automatically collect the sales tax when shipping an order to a California customer. Shipping The Shipping section will give you the option to use our default shipping rates or you can set your own shipping prices. Build the store has the recommended shipping charges as the default settings. By checking the box under “Override system shipping Charges,” you have the option to create your own shipping rates. If you want to offer “Free Standard Shipping” with a minimum purchase, click “Offer Free Standard Shipping (US)” and enter that minimum dollar amount. You are responsible for actual shipping charges. Setting shipping prices too low can result in a net loss of revenue. Setting them too high can result in lost sales. Your goal should be to break even over time on shipping costs. Site QR Codes Since most smart phones have a camera, with QR code reader applications, QR codes are becoming an increasingly way of converting data like website addresses into a form that can be easily scanned. Thus, it is possible to publish a website address in print, and readers can go to that website address without having to type in that address. You can now see them on billboards, in-store displays, business cards, event ticketing and tracking, trade-show and conference management, print ads, contests, direct marketing campaigns, coupons, restaurant menus, sides of trucks, point-of-sale receipts, products tags and packaging, and more and more. They can also be used to increase traffic to those searchable objects to further optimize them by encouraging more sharing. QR codes include the same information that a web link does. The code makes it easy to transfer the link from one machine to another, and even one medium to another, in just seconds. When you create and save your domain name that does not include buildthestore.com in the URL, a QR Code will automatically be generated for you to use. When using a temporary domain name, QR codes are not generated. File Manager The File Manager allows you to upload your own images and organize your images by creating folders. Use your images to change your top banner, add other banners or place images anywhere you can add HTML content in your store. How to upload files in the File Manager: Step 1: Create a New Folder or Navigate to the folder where you want to upload your files. Step 2: Click on the Upload icon. Step 3: Click on the word “Browse” next to one of the top fields. Step 4: Search for and double-click on the first file to upload. The upload will start automatically. Step 5: Repeat the above steps for each file you want to upload. Custom Pages To create a custom page, click “Create New Custom Page” and use the WYSIWYG editor to create the content for this page. Use the Options below the editor to specify how the page is displayed and where. Custom Page Options In the Title field enter the name of your page. A Friendly URL will be generated in the URL field that can be used for linking from external webpages. 1. Check/Uncheck Allow indexing by search engines. If your content is useful to visitors and will help with Search Engine Optimization, 2. Enter your Page Title, Page META Keywords and Page Meta Description in the text fields. (Remember, adding a keywords or a useful description will help with Search Engine Optimization) 3. Type in a short blurb about this page 4. Click Save to apply to your new Custom Page Options These settings apply only to this one custom page. Custom Page Content Any content you place in this WYSIWYG editor will be part of this custom page. 1. Enter your Content in the content field. The formatting toolbar has a number of options to assist you. 2. Click Save to apply your changes to your new Custom Page or click Save and Close if you are done making changes. It will appear on your site as: Reports Dictionary How many different ways can you spell cock ring? Is it Cockring, Cock-ring. Think of how many ways it can be misspelled? Cocring, Cokring. In the Dictionary section we will display all of your sites search and dictionary activity for the last 30 days. If you notice your customers are using the search box for spellings that are not creating results (and lost sales), you will be able to create new search inputs that will redirect the customer to the correct page. To Create a New Translation 1. 2. 3. 4. 5. Click on “Add New Translation” In the Search Input section, enter the alternative spelling. In the Translate To section, enter in the correct spelling. If you are using a custom page for this section, enter in the custom page information. Save your changes. To obtain the greatest benefits from the dictionary, you will need to enter a new translation for each search input that you wish to have translated. Sales Currently, there are two versions of the sales reports that are available, the first is displayed in the browser, the second will be a tab-delimited download that you can load into Excel, or other applications of your choice. Sales Reports are broken down into two sections: "Completed" and "In Process." A "Completed" sale means the order has been shipped to the customer, and is considered closed. An "In Process" order means that it is approved, but it has not yet shipped. To see a breakdown of an individual Order ID, simply click on that Order ID number. These two sales reports will be in near-real-time sync by the end of 2012. Selecting Featured Items Go to the Products Tab. Site Product Manager In the Site Product Manager, enter your Keyword Search. You can search by Product name, UPC, or Supplier. In this search we enter in the Keyword, “Candles,” Select the products. When you check the product box, the product will be highlighted in blue. In the “With Checked” drop down menu, choose how you want this product to be featured. In this example, we selected “Marked Featured.” You will see a pop-up window confirming the products by SKU that you want to add as a “Featured Item.” Simply click on “Apply Changes.” To confirm that your products have been selected, you will see an “F” colored icon in the bottom of each selected product screen. Key to Site Product Manager E Date and Time the product was lasted viewed or edited F Currently a Featured Item C Customized Product OOS Currently Out of Stock SF Currently a Super Featured Item Filters and Exclusions Check on the following boxes if you need to “Filter By Customized Products” and Hide Out of Stock Items.” For instructions on how to customize product descriptions and Images you will find these instructions in the Product Editor Manual that is available in the Helpful Resources section in the Customization Tab. Contact Us Form Customers want to have a method of contacting you. Contact forms are the simplest way of accomplishing this. By directing visitors to a contact form instead of e-mail, you can improve your visitor- to-customer conversion ratio. Contact forms also have the added benefit of making your website look more professional and trustworthy by showing that there is a person behind it that they can get in touch with. Helpful Links This page contains a list of helpful resource links that we consider to be some of the most useful tools for our customers. Check back often in this section. We will be constantly updating this information to continue to provide you with the best resource tools available. Questions For Additional Assistance, go to the Helpful Links Section to find additional information including: • • • • Google Analytics SEO Web Design And Much More If you have any questions, please e-mail Customer Support at [email protected], or use the “Contact Us” link in your customization area.