1
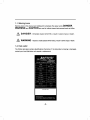
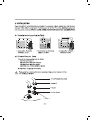
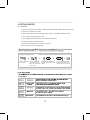
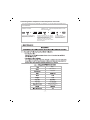
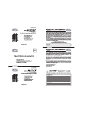
DBI-050-D
MINI
TITANIUM
CHILLER
5. GETTING STARTED
5-1. Start Up
1.) Once all connections are made, circulate water through chiller before turning on the unit.
2.) Check all connections for leaks.
3.) Verify electricity rating, and then plug power cord into a dedicated electrical outlet.
4.) This unit has been factory-set at 77F.
5.) The Digital Display will read the current water temperature.
6.) The light indicator will begin to blink.
7.) Chiller will automatically turn on within 3 minutes.
8.) Your chiller has now been activated.
℉
Changing setting temperature
Press the UP button
for 5 seconds.
Example: To change setting temperature rang from 77℉ to 79℉
The Decimal Point will
blink. Depress the UP
button once the number
starts to blink.
Set to desired temperature
setting by pressing UP or Down
buttons.
The new temperature setting
will blink and be stored in the
memory chip after 10 seconds.
Calibrating Water Temperature with Temperature Controller
It is recommended that you calibrate your chiller to your current water temperature upon
intial installation.
Calibration Procedure
Press the UP and DOWN buttons
simultaneously for 5 seconds. "CA"
will appear on display screen.
Example : The actual water temperature is 65℉ ,but the thermostat
indication is 70℉ . (The actual temperature differs from the
thermostat indication.)
Depress both buttons when "CA" changes
to numbers. The numbers on the display is
a reading of the current water temperature
from the chiller's integrated probe.
Calibrate to your tank's current water
temperature by pressing the UP or DOWN
buttons and depress.
The newly calibrated
temperature setting will blink
and be stored in the memory
chip after 10 seconds.
MINI
DBI-050-D
1/15HP
Electrical Diagram
DBI-050-D
DBI-050-D
MINI
TITANIUM CHILLER 1YEAR LIMITED WARRANTY
MINI
TITANIUM CHILLER 1YEAR LIMITED WARRANTY