Download C-400 - Clifford.cz
Transcript
United Kingdom customers: Please pardon our American English references and spellings. Trunk and hood
references indicate the boot and bonnet, respectively; parking lights are indicator lights; gas/gasoline is petrol; a
parking lot is a car park.
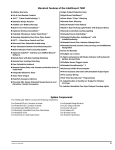
Standard Features
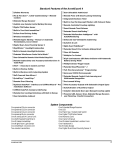
The following are standard features of this system. Some vehicles may require optional parts/wiring and a few are incompatible with some features.
þ
EC-approved (Europe)
þ
Power door lock control
þ
Lifetime warranty (see terms & conditions)
þ
Parking Lot HighLight vehicle locator*
þ
One master remote control, one companion remote
þ
Ignition-switch controlled AutoLocking/AutoUnlocking
þ
Remote panic feature
n Extended range
n ACG 2™ Anti-CodeGrabbing protection
n Smart panic locking/unlocking based on whether the engine is
n Low remote control battery warning
þ
on/off
PlainView 2™ coded valet mode
n Select your own secret code
þ
Built-in timer circuit for optional timed headlight activation
or turbo timer
þ
BlackJax anti-carjacking/self-recovery system
þ
Built-in parking light flasher
þ
Remote controlled valet mode
þ
Courtesy light(s) turn on when you disarm with the remote
þ
Built-in two-point AutoImmobilizer
þ
Smart AutoTesting self-diagnostics
þ
Remotely Adjustable Dual-Zone Proximity Sensor 4 detects
inside and outside the passenger compartment
n With specific trigger & sensor identification
þ
n Remote sensor zone override
þ
n Automatic trigger remonitoring if trunk/hood was open when
arming
Smart DataPort input
n For complete optional control of your system via your
þ
Windows PC
n For smart accessory interfacing
þ
FACT anti-false alarm circuitry
þ
Passive AutoArming if you forget to arm with the remote
control
þ
TotalRecall 8-event trigger/sensor memory report
n With specific trigger & sensor identification
n Visual AutoArming countdown confirmation
n Instant AutoArm bypass
þ
Remote control code learning
þ
Clear all remotes if ever lost or stolen
þ
LED status indicator
n Flash indications reveal status
High-Output Medallion Siren
n Automatic battery saving mode
n Selectable Personalized Siren Sounds*
n Remote controlled chirp muting
n Selectable QuietChirps/LoudChirps
n Long-term selectable chirp muting
n 30/60/90-second selectable siren duration*
þ
Multiple vehicle control from the same remote control
þ
Multiple sensor/trigger inputs
þ
User-programmable features
n SecureAccess coded programming
n Remote siren silencing without disarming if falsely triggered
þ
Smart Prior Intrusion Attempt Alert
n With specific trigger & sensor identification
n Lock upon AutoArming self-locking
þ
Malfunction AutoBypass
n Programmable even while driving
Smart optional remote trunk release prevents falsing
*Not available on European models in compliance with EC95/56
NOTE: Your system MUST be installed by an Authorized Clifford Dealer in accordance with the in structions we sup ply
them. The sys tem is intended for automobiles with a 12- volt battery and gasoline- or diesel-powered en gine. Other
than the re mote con trols, this system has no user-serviceable parts. Your Authorized Clifford Dealer can correct any
sys tem wir ing prob lems and, if ever needed, can return any malfunctioning com ponent to Clifford Electronics for
repair/replacement under the warranty terms and conditions noted in this manual.
2
Maintenance
Your Clifford system requires no maintenance except for periodic replacement of the remote control batteries. This product, like any electrical device in
your vehicle, requires your car battery be in proper working order and fully charged. To ensure proper operation, periodically have your vehicle battery
“load-checked” at any local garage/mechanic. Also make sure the battery cables and connections are tight and free from corrosion.
Welcome to the world of
high-technology vehicle security and convenience
C
ongratulations on the purchase of your Clifford Electronics mobile security/convenience system. Clifford Electronics has long been recognized as the
leading manufacturer of high-technology vehicle security systems. Our commitment to technological innovation, quality and reliability is clearly evident
in your Clifford system. Yet despite all its sophistication, your system is amazingly easy to use, never more difficult than a few presses of a button.
BlackJax vehicle recovery/anti-carjacking feature
Concept 400’s BlackJax feature provides a safe and effective means of recovering your vehicle after a theft or carjacking. In a carjacking situation, the sooner
you are out of the car the better. Don’t resist or take anything with you, just get out and get away. The instant the car door is opened, your Concept 400
takes charge. First it allows the carjacker to drive a short distance, ensuring your safety. Then it repeatedly flashes the brake lights and continuously sounds
the siren to caution nearby drivers and draw attention to your stolen vehicle. The system ignores the remote control at this point (since the carjacker
most likely has it). Then when the carjacker slows for a turn or traffic, BlackJax safely shuts down the engine and prevents it from being restarted.
Concept 400 assures the thief cannot restart the engine even if he were to find and remove the system control unit. Unable to restart the engine, and with
your vehicle stalled in the middle of traffic — siren wailing and lights flashing — the carjacker has no choice but to abandon your car. (The same occurs to
anyone who steals your parked car from you at a gas station or in a parking lot, which are the most common carjacking sites). To recover your vehicle,
you simply walk a block or two to your car, enter your PIN (personal identification number) code, and the system releases control of the vehicle to you.
Your secret PIN code tells the system that the car is being driven by an authorized person. If you or a passenger opens and closes a car door at any point
while the engine is running (as would occur in a carjacking attempt), you must again enter your secret code.
VERY IMPORTANT: The factory setting for the anti-carjacking feature is OFF. Once you are familiar with the
following, we suggest you turn this feature ON (see the User-selectable features section). When anti- carjacking is
on, each time you begin driv ing you MUST enter your PIN code via the PlainView 2 switch on the dashboard or
console (un less the system is in valet mode). You may turn this feature on or off any time.
IF YOU HAVE THE PAGEMATE 4 OPTION: PageMate 4’s phone-in STOP command eliminates the need to
enter your PIN every time you drive. Instead, if your vehicle is stolen at gunpoint, just call your toll-free PageMate 4
phone number from any touch-tone phone and spell out STOP to activate the BlackJax anti-carjacking electronics.
Enable/disable the anti-carjacking feature
You may enable or disable the BlackJax anti-carjacking feature (see User-selectable features) or temporarily override it via PlainView 2 Coded Valet Mode.
Your secret disarming PIN code
Unless the BlackJax anti-carjacking feature is turned off or the system is in valet mode, 20 seconds after you switch on the ignition and press the brake (or
open and close a door while the engine is running), you must enter your secret disarming PIN code on the PlainView 2 switch (mounted on the
dashboard or console) to let the system know it is you who is driving.
Your system’s factory-set PIN code is the single digit 2.
Entering a code
To enter your code, press the ✱ button the appropriate number of times on the PlainView 2 switch on the dashboard or console followed by the blank
button. To enter a zero, you simply press the blank button.
EX AM PLE: To enter the factory-set code of 2, you would press and release the switch in this man ner: ✱✱ blank.
EX AM PLE: To enter a code of 1203, you would press: ✱ blank, ✱✱ blank, blank, ✱✱✱ blank.
IMPORTANT: What you MUST do to drive your car
If you have the BlackJax feature turned on, until you set your own PIN code, you will use the factory-set code of “2.” To drive your car, do the following:
1. Shut all doors, then start the engine.
2. Enter the factory-set disarming code of 2: ✱✱ blank (you may do this while driving, if you wish).
3. The dashboard LED will flash on for an instant to confirm proper code entry. You may now drive or continue driving the vehicle.
What you MUST do if you hear 5 siren chirps while driving
If you forget to enter the code, the system will remind you 20 seconds after you begin driving by “chirping” the siren 5 times and flashing the LED. At this
point, you have another 20 seconds to enter your code. When entered, the LED will stop flashing and the siren will chirp once to confirm proper code
entry. If the proper code is not entered within 20 seconds after the 5-chirp signal, the engine will shut down as soon as you slow for traffic or a turn. You
may enter your disarming code even after the engine is shut down. Once the proper disarming code is entered, you will be able to resume driving.
3
“Guessing” your code won’t help a carjacker
What if the carjacker is familiar with Clifford’s patented PlainView 2 coding system and tries guessing codes at random? No problem. After three
incorrect codes are entered, the system will ignore any further code entries for a short time. So even if the carjacker were to actually stumble upon your
code during this time, he would still not be able to silence your system or restart the engine.
How to set your own valet/disarming PIN code
Your secret valet/disarming PIN code will be used to deactivate BlackJax, enter valet mode and enter programming mode. You may choose any 1-4-digit
PIN code, but the first digit must not be a zero (e.g., 1023 is a valid code, 0123 is not). See User-selectable features. Let’s say you want to set a PIN code of 4301:
1. From the Table of user-selectable features, you would note that the Set a new secret valet/disarming PIN code feature is in column 2, row 7.
2. Enter program mode by turning on the ignition, entering your current code, then pressing and holding the ✱ button of the PlainView 2 switch for 3
seconds until you hear a chirp.
3. Select column 2 by pressing the blank button twice. After a brief pause, you will hear 2 chirps to confirm that you have selected feature column 2.
4. Within 5 seconds, select row 7 by pressing and releasing the ✱ button 7 times. To help you count, you will hear a chirp each time you press the ✱
button. After 7 presses, immediately press the blank button, then immediately enter your new code.
Example: To enter 4301 as your new code, you would press the switch buttons in this manner: ✱✱✱✱ blank, ✱✱✱
blank, blank, ✱ blank.
5. Wait for the 2-chirp confirmation.
6. Turn off the ignition to exit program mode (you’ll hear a 3-chirp confirmation).
7. VERY IMPORTANT: You must immediately test your new valet/disarming PIN code: Turn on the ignition, enter your new code, then press and
hold the blank button for 4 seconds. The LED will illuminate to indicate that the system is in valet mode. Turn the ignition off. The system is now in valet
mode.
If the LED does not illuminate, the new code you programmed and the one you just entered do not match. In such a
case, the system will revert to the previous code.
8. To exit valet mode and return to normal operation, turn the ignition on and enter your code.
Your remote controls
The 5-button master remote control and the 4-button companion remote are sophisticated miniature radio transmitters each powered by a tiny battery
(12-volt alkaline for the master remote, a 3-volt lithium battery for the companion remote). A weak remote control battery will reduce range (the system
will warn you if the battery in your remote is nearing the end of its useful life, see the Low battery warning section for details). Electrical/radio frequency
interference, obstructions, weather conditions and even sunspots can interrupt the signal from your remote to the system.The remote controls are the keys to
your system. But these remote controls are much more secure than car keys because each incorporates our ACG 2 (Anti-CodeGrabbing 2) technology with
trillions of digital codes for the ultimate protection against remote control cloning devices. You will use your Concept 400 remote control to arm and disarm
the system, lock and unlock the doors, activate/deactivate the panic feature, enter/exit valet mode and command options such as a remote trunk release,
power window control, electric garage door interface or even remote starting of the engine and heater or air conditioner, among other options.
Remotely controlling your Clifford system
TO ARM:
Press button 1 (master remote) or button
(companion remote). Upon arming: two siren chirps, two
parking light flashes, dashboard LED flashes repeatedly and doors lock.
TO DISARM:
Press button 1 (master remote) or button
(companion remote). Upon disarming: one chirp, one
parking light flash, LED turns off, doors unlock and the interior lights turn on.
TO ARM OR
DISARM SILENTLY:
Simultaneously press button 3 (master remote) or both the
button and the ✱ button
(companion remote) to arm or disarm without chirp acknowledgments.
TO PANIC:
For three seconds, continually press button 1 (master remote) or button
(companion
remote). The parking lights will flash repeatedly and the siren will blare for 30 seconds
(American model) or until you press the button again (European model). If the ignition
is on (indicating you are in the car), the doors will automatically lock to prevent an
assailant from entering (note: some vehicles are unable to lock the doors while the
ignition is on). If the ignition is off, the doors will unlock, allowing you to enter immediately
without fumbling with your keys.
TO REMOTELY
OPEN THE TRUNK:
If you have this option, press button 2 (master remote) or button
remote) while the system is in its disarmed state.
TO ACTIVATE THE
PARKING LOT
HIGHLIGHT:
Press the master remote LevelShift button once, then button 1 or press button
(companion remote) to turn on the parking
lights for 10-sec. to help you locate your vehicle in a crowded parking area. (This feature is not available on European models).
TO REMOTELY
START THE ENGINE:
If you have this option, press button 4 (master remote) or button ✱ (companion remote) to remotely start the engine (or shut it
down if idling under the control of IntelliStart 4). Before remote starting, be sure to see the Remote Engine Starting DOs and
DON’Ts noted in the IntelliStart 4 user’s manual.
4
(companion
TO TURN VALET
MODE ON OR OFF:
Press the master remote LevelShift button twice, then button 1 or press buttons
valet mode.
and ✱ (companion remote) to enable/exit
TO REMOTELY OPEN If you have this option, press the master remote LevelShift button once, then button 2 or press buttons
and
OR VENT WINDOWS: (companion remote) after disarming to fully open the windows controlled by SmartWindows 4. On hot days, press this button
combination right after arming to vent the windows slightly while the system remains armed.
OTHER FEATURES
AND OPTIONS:
Other system features and options can be accessed as noted in the following Quick Reference table:
QUICK REFERENCE: REMOTE CONTROL FUNCTIONS
Companion Remote
Button(s)
Function
Master Remote
LevelShift?
Button
Arm or disarm and lock or unlock the doors
no
1
Optional wired accessory #1* (usually optional trunk release)
no
2
no
3
no
4
1 time
1
1 time
2
1 time
3
1 time
4
2 times
1
2 times
2
Unassigned or IntelliStart 4 LowTemp or LowBattery AutoStart, and manual transmission SafeStart
2 times
3
Unassigned*
2 times
4
Unassigned*
3 times
1
Unassigned*
3 times
2
Remotely adjust sensitivity of the optional Dual-Zone OmniSensor
3 times
3
Remotely adjust sensitivity of the Dual-Zone Proximity Sensor 4
3 times
4
+✱
Silently arm or disarm and lock or unlock the doors
✱
Unassigned or IntelliStart 4 accessory remote engine starting
Parking Lot HighLight turns on parking lights for 10-seconds**
Unassigned or SmartWindows 4 accessory full open or post-arm venting*
+
+✱
Optional wired accessory #3* (usually IntelliVoice 4 voice synthesis on/off)
Unassigned*
+
+✱
Remote valet mode entry/exit
Remote override of the Dual-Zone Proximity Sensor 4
+
* These buttons/channels can be assigned to control Clifford systems and accessories on your other vehicles.
** Not available on European models
ACG 2 (Anti-CodeGrabbing 2™)
ACG 2 protects you and your automobile from code-grabbing devices. Code-grabbers record, from hundreds of feet away, the code sent by your car alarm
remote control (code-grabbers are very similar to, but simpler than, cellphone “cloning” devices). The thief then plays back the code when you’re gone,
instantly disarming the alarm and unlocking the doors. It’s like leaving your keys and remote in the door. Many non-Clifford alarms can be defeated that
easily, and some of the latest “smart” code-grabbers can even decipher the code hopping/jumping sequence used by other car alarm manufacturers. In
contrast, your Concept 400 uses complex digital signal processing and unbreachable code encryption to randomly change the digital code every time you
use the remote control. Your remotes will never transmit the same code twice, and the control unit will never accept the same code twice. Thus the code
played back by the code-grabber — even the latest generation smart code-grabbers — will never be accepted by your Concept 400 system.
Adding new remote controls
For other drivers, or to control Clifford G4 systems on your other cars with the same remote, you can buy additional remote controls from any Clifford
Dealer (or direct from the Customer Service Department of your nearest Clifford Headquarters listed on the front cover) and program them into the
system yourself. Concept 400 will respond to as many as four remote controls.
NOTE: Clifford G4 systems will respond only to G4-type ACG 2 re mote con trols. Older Clifford ACG and non-ACG
re mote con trols are not com patible with G4 systems.
To add a new master 5-button remote control, use the Add new master remote feature (column 1, row 1) of the User-selectable features table. To add a new
companion 4-button remote, program each button and button combination to the specific functions noted in column 4.
5
Automatic remote control low-battery warning
If your remote control battery is low, you’ll hear an unusually low-pitched chirp when you remotely disarm your Concept 400. Replacement batteries are available
from any Authorized Clifford Dealer.
Remote control battery replacement
Replacement of a remote control battery is fairly easy, but any Authorized Clifford Dealer will be happy to do it for you without cost provided that you buy the
replacement battery at their shop (it’s also a good idea to keep a spare of each battery in your glove box just in case).
Master remote:
1. Unscrew the retaining screw on the back of the remote control.
2. Carefully pry apart the remote control case with your fingernails or a small, thin screwdriver blade near the keyring opening (you may leave the keyring
in place).
3. Remove the old battery noting the + and – indications and replace it with the new one.
4. Put the enclosure back together by first aligning the LevelShift button side, then the top of the remote, then snap the case back together at the
bottom.
5. Reinsert the retaining screw but DO NOT OVERTIGHTEN.
Companion remote:
1. Insert a small, thin screwdriver blade in the slot near the keyring opening (you may leave the keyring in place) and turn it to separate the two halves.
2. Remove the old battery noting the + and – indications and replace it with the new one.
3. Put the enclosure back together by first aligning the top of the remote, then snapping the case back together at the bottom.
Two-Point AutoImmobilization
While armed, your system immobilizes both the starter and ignition systems of your vehicle to prevent a thief from starting the engine. The engine will
remain immobilized even if a thief were to cut power to the system or find and remove the system control unit.
EC compliance in Europe only: Unlike the AutoArming feature noted above, AutoImmobilization occurs 30 seconds
after turning off the ignition regardless of opening/closing the doors. When you remotely disarm, you have 30
seconds to start the engine. If more than 30 seconds pass, AutoImmobilization occurs, as indicated by the LED
repeatedly flashing (but at a slower than normal “armed” rate). If AutoImmobilization occurs, use the remote
control to arm and then disarm or use the engine restart feature below.
Optional Wireless Immobilizer™
Clifford’s optional Wireless Immobilizer interrupts a third point in the vehicle, such as the fuel pump. This Clifford innovation provides immobilization
without any wires to the control unit, so a thief could not find the Wireless Immobilizer even if he tried tracing the system wires! Operation of the
Wireless Immobilizer is automatic and user-transparent.
BE sure to keep the record your Clifford installer provides as to the location of the Wireless Immobilizer in case your
vehicle needs future servicing.
NOTE: If your vehicle’s engine ever stalls, the Wireless Immobilizer WILL engage. You must turn the ignition all the
way to “OFF” in order to restart.
Engine Restart Feature: Europe only
In compliance with EC requirements, the Starter AutoImmobilization will automatically engage thirty seconds after shutting down the engine. Thus
AutoImmobilization may occur while waiting for a train to pass or other delay. To restart:
1. Turn the ignition switch to the “ON” position.
2. Press button 1 of the master remote control or button
of the companion remote.
3. You may now start the engine.
User-Selectable AutoArming™
If this feature is enabled and you forget to remotely arm, the system automatically arms itself 30 seconds after the vehicle doors are closed. For your
convenience, if you re-open any door(s) within the 30-second countdown, AutoArming restarts the 30-second delay from the beginning after all doors are
closed. Concept 400 has these additional features:
n AutoArming entry delay: If you temporarily lose the use of your remote controls, you may turn on the AutoArming entry delay feature. If this
feature and AutoArming are turned on, it allows you to enter the car (if it previously AutoArmed) and silently disarm the system by turning on the
ignition within 15 seconds of opening the door. See User-selectable features (column 3, row 3).
n Visual acknowledgment: Five seconds after you exit, close all the doors and the interior light has turned off, the indicator lights flash twice to
confirm the AutoArming countdown is progressing. Then, 25 seconds later, the system will AutoArm.
n Lock upon AutoArming: To ensure you can’t accidentally lock your keys inside the car, the system is factory-set not to lock the doors upon
AutoArming. To change this setting, see User-selectable features.
n Instant AutoArming bypass: Prevents AutoArming when fueling the vehicle and at other times when you wish to temporarily bypass
AutoArming. To activate Instant AutoArming Bypass, rapidly turn the ignition switch to “ON” then “OFF.” You will hear a siren chirp to confirm
that the system will not AutoArm. The system automatically reverts to its normal operating mode when you next start the engine.
6
PlainView 2 Coded Valet Mode
All car alarms have a valet mode that turns off the security features. This mode turns off the alarm if the system is not responding to the remote. However,
thieves disable other alarms by flicking this easy-to-find “hidden” valet switch. In contrast, your system has safeguards that ensure a thief cannot enable the
valet mode as a way of “turning off” your system. To enable valet mode, the driver must first enter the secret valet/disarming PIN (personal identification
number) code — the same PIN code described in the BlackJax anti-carjacking section — on the PlainView 2 switch mounted on your vehicle’s dash or
console. When the system is in valet mode, it overrides AutoArming and all other security features, which is handy when refueling or washing your car.
The system’s factory-set valet/disarming PIN code is 2: ✱✱ blank.
NOTE: If you temporarily lose the use of your remote controls, you can disarm the system by enabling valet mode.
Entering a code
To enter your PIN code, press the ✱ button the appropriate number of times on the PlainView 2 switch followed by the blank button. To enter a zero, you
simply press the blank button.
EX AM PLE: To enter a code of 1203, you would press: ✱ blank, ✱✱ blank, blank, ✱✱✱ blank.
To enable valet mode
1. Turn the ignition switch to its “ON” position or start the engine if it is not already running.
2. Enter your valet/disarming PIN code on the PlainView 2 switch.
3. Continue pressing the blank button for 4 seconds. Release the button. The LED will continue to remain on for ongoing visual confirmation of valet mode.
To exit valet mode and restore normal operation
1. Turn the ignition switch to its “ON” position or start the engine if it is not already running.
2. Enter your valet/disarming PIN code on the PlainView 2 switch. The LED will turn off.
Remote Controlled Valet Mode
Valet mode turns off all security features and prevents AutoArming when, for instance, having your car washed. To turn valet mode on/off, press the
LevelShift button twice, then button 1 (master remote) or simultaneously press the ✱ and
buttons (companion remote). Two parking light flashes
confirm valet mode on, one flash confirms valet mode off. The dashboard LED will glow continuously when valet mode is on. Your system remains in valet
mode until you again press this button combination to turn it off and restore normal operation. This is a user-selectable feature and may be programmed off if
you wish to use this button combination for a different function. There is a slight security risk associated with remote controlled valet mode in that a carjacker
familiar with Clifford systems could possibly engage valet mode via the remote control before the BlackJax anti-carjacking feature is triggered. Although this is
an unlikely scenario, you may prefer to turn off valet mode entry/exit via the remote control using the User-selectable features programming (column 2, row 3).
False Alarm Prevention & FACT™
With FACT (False Alarm Control and Test), you’ll never experience repeated false alarms. If the siren sounds, DO NOT disarm; allow it to run for the
full siren duration. Before sounding the siren a second time, the system automatically checks for another activated sensor or trigger to verify that an
intrusion is in progress. This feature is user-selectable.
High-Output Medallion Siren
This Clifford-engineered siren is more rugged than generic sirens and has these features:
n User-selectable chirp volume: You can control the volume of the arm and disarm chirps. From the factory, your system issues QuietChirps. If
you prefer, you may select the full-volume LoudChirp acknowledgments. See User-selectable features.
n Remote siren silencing: If triggered by a non-threatening event, you can silence the siren without remotely disarming. Press button 1 (master
remote) or button
(companion) while the siren is sounding. Two chirps confirm that the sensor activated the alarm and the system is
remaining armed. Four chirps confirm that the system is still armed, but that the ignition is on or the hood, trunk or a door is open and that this
may indeed be a genuine theft attempt.
n Automatic noise abatement: Alarm sounding is limited to five siren duration cycles even if a door is left open in the wake of an intrusion.
n Long-term chirp silencing: You may silence the arm and disarm chirps on a long-term basis until you decide to restore them. Your vehicle’s
parking light flashes will continue to provide visual confirmation of remote controlled system arming and disarming. See User-selectable features.
n Selectable siren duration (non-European models only*): You may change the factory set 30-second siren duration to 60 or 90 seconds via
the programming procedure or via the CliffNet Wizard software. See User-selectable features.
n Personalized Siren Sounds (non-European models only*): The Medallion siren sounds six different alarm sounds. You may turn any of the
six sounds on or off via the User-selectable features programming to create a different combination of sound patterns. So if you hear a siren at a
distance, you will know for sure whether it is your car or someone else’s. See User-selectable features (column 1, row 2). What’s more, with the
optional CliffNet Wizard software and DataPort Replicator Cable, you may select up to six sounds from more than a dozen different siren sound
choices for truly unique customization.
n Choose when your Personalized Siren Sounds* play: For more information at a distance, you may choose to have your Personalized Siren
Sounds “play” every time the alarm is set off, or you may set them to sound them only upon trigger activation. When set to “trigger only” the
basic siren wail will sound if a sensor is activated, but the Personalized Siren Sounds will play if the hood, trunk or a door is opened. See
User-selectable features (column 1, row 3).
*Not available on European models in compliance with EC95/56
7
Remotely Adjustable Digital Dual-Zone Proximity Sensor 4
Your system’s Digital Dual-Zone Proximity Sensor 4 detects movement inside the passenger compartment and very near your vehicle. If a thief lingers very
close to your windows, a warning tone sounds; if he were to lean into the passenger compartment, the primary zone of this sensor would trigger the full
alarm. This sensor uses radar waves to detect movement. These waves pass through nonmetallic materials like plastic, carpet, glass and wood. However,
metal and metallic paint, plastic and even some metallic film window tinting materials will interfere with or completely block the radar waves. As such, it
is not unusual that the Proximity Sensor zones may need a little readjustment when you first have the system installed. In some instances, your Clifford
installer may need to try a different location for the sensor.
If needed, you can adjust sensitivity of these sensor zones via your remote control as described in the following section. To prevent falsing, system sensors
are bypassed when the engine is remotely started (if you have the IntelliStart 4 option).
Metal above or near the Proximity Sensor will have a significant impact on operation. You should not place coins,
CDs, cassettes (due to the iron oxide tape) or other metallic objects above or near where the sensor is mounted.
Ask your Authorized Clifford Dealer about these optional sensors that will further enhance the security of your vehicle:
n Glass Tampering Sensor: Today’s thieves shatter vehicle windows with a small metal punch device that does not create any vibrations for an
impact sensor to detect. The Glass Tampering Sensor detects the sound of glass breaking, and glass tampering attempts, and will trigger the alarm.
n Dual-Zone OmniSensor: Uses our most advanced DSP (digital signal processing) to detect theft-related impacts and vibrations. Advanced
discrimination algorithms differentiate better than any other sensor between common environmental conditions (such as a heavy truck rolling by)
and genuine threats to your vehicle.
n Digital Tilt/Motion Sensor: Detects less than one degree of lifting or any minute motion of the vehicle while completely ignoring all other
conditions that falsely set off all other sensors. Even if you park on a hill, the Digital Tilt/Motion Sensor will accurately respond to the first hint of
tampering to reliably protect your wheels and entire vehicle.
Remote controlled sensor adjustments
If the setting(s) of the sensor zones are either too sensitive or not sensitive enough, you may test and adjust them with the master remote control:
1. Disarm the system with the remote control.
2. Select which sensor to adjust:
• Optional OmniSensor: Transmit channel 15 on the master remote (LevelShift three times, then button 3). You will hear one chirp and the LED will
turn on.
• Proximity Sensor: Transmit channel 16 on the master remote (LevelShift three times, then button 4). You will hear one chirp and the LED will turn on.
3. Adjustment of optional OmniSensor: To test the primary (alarm) zone, press button 4 (you will hear a 4-chirp confirmation), then firmly “thump” the
top of the A-pillar (the area between the side windows near the roof) heel of your fist. If the impact is strong enough to trigger the primary zone, you
will hear a siren chirp. To change sensitivity, press button 2 (you will hear a 2-chirp confirmation), then firmly thump the top of the A-pillar with the
amount of force that you want set off the alarm (a single chirp will acknowledge the thump). Press button 4 to lock in the new setting. You may now
press button 3 to adjust the warning zone (as noted in 3a. below), or press button 1 to fully exit the OmniSensor adjustment mode (you will hear 3
chirps).
a. For the OmniSensor warning zone, press button 3 (you’ll hear 1 chirp). Then use the same procedure as above, but thump less forcefully for the
warning zone. When done, press button 1 to reselect the primary zone (you will hear 2 chirps), then button 1 again to fully exit OmniSensor
adjustment mode (you will hear 3 chirps).
4. Adjustment of Proximity Sensor: You may test the Proximity Sensor primary zone by rapidly leaning through an open window into the passenger
compartment. You will hear a siren chirp when the primary zone is triggered. This should not occur near the window, but instead when you would be
in a position to touch the car stereo. To change sensitivity, press and release button 2 to increase sensitivity or button 4 to decrease sensitivity. To
rapidly increase or decrease several steps, press and hold the button. For each sensitivity increase, you will hear a higher and higher pitched
confirmation chirp. For each sensitivity decrease, you will hear a lower and lower pitched confirmation chirp. Two LoudChirps indicate minimum and
maximum settings of the 32-step range of settings. You may now press button 3 to adjust the warning zone (as noted in 4a. below), or press button 1
to fully exit the Proximity Sensor adjustment mode (you will hear 3 chirps).
a. For the Proximity Sensor warning zone, press button 3 (you’ll hear 1 chirp). Then use the same procedure as above, but this time bring your hands
and face to the window as a thief would to see what’s inside. The sensitivity of the warning zone should be set so that it is triggered when your face
and hands are within a few inches of the window, no further. When done, press button 1 to reselect the primary zone (you will hear 2 chirps), then
button 1 again to fully exit Proximity Sensor adjustment mode (you will hear 3 chirps).
Remote controlled zone override of the Proximity Sensor
Pressing LevelShift button twice, then button 2 on the master remote control or buttons
+
on the companion remote or anytime while the
system is armed will override the warning zone of the Proximity Sensor. This prevents the system from sounding warnings if you must park your vehicle in
an area with heavy pedestrian traffic. A second press of this button combination anytime afterward while the system is still armed will override both zones of
the Proximity Sensor. This comes in handy when you must temporarily leave a pet or a passenger in the vehicle. This remote zone override is visually
confirmed with 4 flashes of the indicator lights. The sensor zones are automatically restored the next time you arm.
User-Selectable AutoLock and AutoUnLock™
Some vehicles are incompatible with the AutoLock and AutoUnLock features.
For your safety and that of your passengers, the doors automatically lock the instant you turn on the ignition. When you turn the ignition off,
AutoUnLock automatically unlocks the doors. These are user-selectable features.
8
How to interpret the LED status indicator
The LED on your car’s dashboard or console will inform you of the system status:
LED Condition
Meaning
Off
System is disarmed and in normal operating mode (i.e., valet mode is off)
On
Valet mode is on, the vehicle may be entered without having to disarm
Flashing rapidly (ignition off) System is armed and protecting your vehicle
Flashing slowly
Flashes, pause, flashes
System is disarmed but the Two-Point AutoImmobilisation has been engaged (European models only)
Either an error (such as arming with the trunk open) or indicates the trigger or sensor that was tripped
Automatic Battery-Saving Mode
To conserve vehicle battery power (the LED actually draws more current than the entire control unit), if the system has remained continuously armed for
48 hours, the flash rate will automatically slow to half the normal rate. After 96 hours, it slows to one-quarter.
Smart trunk release option
If the optional remote trunk release was installed, you may use button 2 of the master remote control or the
button of the companion remote to release
the trunk latch. The system’s electronic interlock prevents unintentional activation of the remote trunk release when you drive, or when the system is armed.
The Smart Trunk Release feature requires installer programming, so if you have the optional trunk release installed, you may want to verify that it will NOT
activate when the system is armed. If it can be activated while armed, causing the alarm to sound, please return to your installing Clifford Dealer and have
them correct this (it only takes a couple minutes and there will be no charge to you).
Timer options
The system’s built-in electronic timer can be optionally wired to provide one of several different functions. Timer duration settings can be made by your
installing Clifford Dealer or by you via the CliffNet Wizard. Ask your Authorized Clifford Dealer for further details:
Remote controlled timed headlight activation option
The timer can be wired to provide remote controlled headlight activation for any duration you wish between 1 second and 4 minutes, allowing you to
remotely light your way to and from the vehicle by pressing the assigned button combination (your Clifford installer will have told you which he has
assigned to this function).
Window AutoClose option
The timer can automatically close the windows upon remote arming on vehicles with an “all-close” feature that raises them if the key is held in the driver's
door (a common feature on several European vehicle models).
NOTE: Although this timer circuit could be wired to control power windows on non-European cars that do not have
this key-in-the-door “all-close” feature, Clifford Electronics strongly recommends against this. If so wired, the timer
would force the window motors to “shut” the windows even if they were already closed. This places excessive strain
on the vehicle’s window motors, causing overheating, premature failure and even the possibility of fire. As such, if
you cannot close the windows of your vehicle by turning and holding the key in the driver’s door, do not permit the
system’s timer circuit to be wired to automatically close the windows.
If your car does not have an all-close feature, one or more SmartWindows 4 accessories are needed. One SmartWindows 4 module can control two power
windows. In addition to automatically closing the power windows every time you arm, SmartWindows 4 also allows you to remotely roll down the
windows after disarming and to remotely vent them open slightly for ventilation on hot days. Inside the car, SmartWindows 4 also provides one-touch full
open, one-touch full close and one-touch stop to each of your factory window control switches.
Window AutoClose Instant Bypass
If you have the timer-based window closure option noted above, you may choose to arm without automatically closing the windows. This is handy on hot
days by allowing you to leave one or more windows slightly open while the system remains armed. To do so, simply turn the ignition switch to “ON” and
then “OFF” rapidly. You will hear a chirp confirmation (this action also activates Instant AutoArming bypass previously noted). When you then exit and
arm, the system will not close the windows. Normal autoclose operation is restored the next time you arm.
Turbo timer option
Vehicles with turbocharged engines often require a cool-down period of one to several minutes after driving, particularly high-rev driving. Until now, drivers
of such vehicles had two choices: sit in the car after parking and wait several minutes to turn off the engine, or have an expensive turbo timer accessory
added that would often interfere with car alarm operation. But with the addition of an optional relay, your system’s timer output can save you money and
make turbo cool-down easy and convenient. If you have this option installed, just press the assigned button or button combination(your Clifford installer will
have told you which he has assigned to this function) on the remote control before shutting off the engine. Then remove your car key (the engine will
continue running), exit, and press button 1 of the master remote or the
button of the companion remote to arm the system and lock the doors. While
the system is armed, your Concept 400 will continue to idle the engine for any duration you choose up to 4 minutes. To ensure against any possibility of false
alarms, the system will keep the sensors off-line while the engine is idling, then automatically bring them back online right after the engine is shut down.
9
Smart AutoTesting™
Each time you remotely arm the system, it tests all triggers and sensors. If the hood or trunk is open, the system will immediately sound 4 chirps and 4
indicator light flashes instead of the usual 2 and 2. If a door is ajar, you’ll receive 2 chirps and 2 flashes, then, 5 seconds later, there will be 4 chirps and 4
flashes. If a sensor is malfunctioning, you will receive the usual 2 chirps and 2 flashes, then, 10 seconds later, there will be 4 chirps and 4 flashes.
NOTE: Since this is a warn ing indication, you will hear the 4 chirps even if you use the chirp muting fea ture.
n Specific malfunction identification: The system can also indicate the specific trigger or sensor that is malfunctioning. If you get the
4-chirp/4-flash signal upon arming, perform the following to identify the malfunctioning trigger or sensor:
1. Remotely disarm, then turn on the ignition. The LED status indicator inside your vehicle will be flashing, pause, then repeat.
2. Count the number of flashes in one cycle between pauses (for your convenience, the flash cycle repeats a total of 5 times) and refer to the chart below:
LED flashes
1 flash
Meaning
Activation of the Proximity Sensor
2 flashes
Activation of the optional OmniSensor
3 flashes
Activation of the optional Tilt/Motion Sensor
4 flashes*
Door open/ajar
5 flashes
Trunk open/ajar
6 flashes
Hood open/ajar
7 flashes
Ignition switch was turned on while the system was armed
8 flashes
Three or more incorrect valet codes were entered
9 flashes
BlackJax anti-carjacking countermeasure was triggered
10 flashes
Power tampering or the vehicle battery is very low
* If your vehicle has a factory-installed feature that turns off or dims the interior courtesy lights several seconds after you exit the vehicle, the system cannot provide this indication.
Automatic malfunction bypass with AutoReMonitoring™
The system automatically bypasses any faulty point and arms all other triggers and sensors for the utmost possible protection. If you accidentally arm with
the hood, trunk or a door open, just close it (no need to disarm-and-rearm) and the system will again monitor that point.
Smart prior intrusion attempt alert
If you hear three chirps when you disarm, it means that a trigger or sensor was activated in your absence. When you turn on the ignition, the LED will flash 1-10
times, pause, then repeat the flash cycle 4 more times. Count the flashes in one cycle and refer to the chart above.
Multiple-event TotalRecall™
The system’s memory records the identity of the last eight activated or malfunctioning triggers and sensors, which allows your installer to instantly track down
malfunctions. To identify the triggers and sensors held in the system’s memory, use the following procedure:
1. Remotely arm and disarm while pressing the blank button on the PlainView 2 switch.
2. The LED will flash 1-10 times to indicate the most recently activated point, pause, flash 1-10 times to indicate the second most recently activated
point, and so on.
3. Write down the number of flashes between pauses and refer to the chart above.
With the optional CliffNet Wizard, you’ll see this chronological report right on screen.
Parking Lot HighLight*
Press the master remote LevelShift button once, then button 1 or press button
in a crowded parking area.
to turn on the parking lights for 10-sec. to help you locate your vehicle
Headlights left on warning*
Your Concept 400 can be set to issue a warning sound if you shut off the engine and open a door without first turning off the headlights. This feature is
factory set to off since most vehicles already have a similar feature. To have this feature set on, please see your installing Authorized Clifford Dealer.
Optional CliffNet Wizard™ & DataPort Interface Connector
If you opted to have the Clifford DataPort interface connector installed with your system, you can use our CliffNet Wizard software to access your system
through your Windows PC. CliffNet Wizard will show you, on your PC screen, all your user-programmable feature settings. You can change settings
simply by mouse-clicking the graphical button for each feature. You can customize features, add or delete remote controls, change remote control button
assignments, view a chronological history of trigger and sensor activations, and much more. It’s actually fun! And secure. To learn more and download
this free software, go to www.clifford.com/wizard.
*Not available on European models in compliance with EC95/56
10
SmartPowerUp™ 2
If power is removed, SmartPowerUp 2 ensures the system automatically restores itself to its previous state when power is restored. So if a thief disconnects
the power and then restores it in an attempt to start the car, the system will re-arm and instantly sound the siren while continuing to immobilize the
starter. If your vehicle is to be serviced by a mechanic, just put the system in valet mode. If the mechanic needs to interrupt power, your system will
automatically return to its valet mode state when power is restored; there will be no alarm activation.
User-selectable features
You may set many of the features to your own preferences. Once you’ve changed a few settings, you’ll find that programming the system is so easy that
you can even do it while driving. The system comes with all of its features preprogrammed as noted by the bold type in the Table of user-selectable features. To
change any of the settings, use the steps noted below. To restore the feature to its factory setting, just repeat the procedure.
NOTE: For greater programming ease and even more system control, consider the CliffNet Wizard Windows PC
software interface: www.clifford.com/wizard.
How to change a user-selectable feature:
Briefly, here’s how it will work:
• You will pick a feature from the following Table of User-Selectable Features, noting the feature’s column and row numbers.
• You’ll enter program mode by entering your valet/disarming PIN code and pressing the ✱ button of the dash- or console-mounted
PlainView 2 switch until you hear a chirp.
• Press the blank PlainView 2 switch button the same number of times as the column number, then the ✱ button a number of
times equal to the row number.
Step-by-step programming instructions
Refer to the Table of User-Selectable Features and note the column (across) number and the row (down) number of the feature(s) you wish to program.
Turn the ignition on, or start the engine (skip this step if the engine is running).
Enter your valet/disarming PIN code, then press and hold the ✱ button of the PlainView 2 switch for about 4 seconds until you hear a siren chirp.
Select the feature column: Press the blank button of the PlainView 2 switch the same number of times as the column number you wish. Pause. You will
hear the same number of chirps as the column number, audibly confirming your selection.
5. Select the feature row: Press the ✱ button the same number of times as the row number. You’ll will hear a chirp each time you press to help you count.
1.
2.
3.
4.
NOTE: You have 5 seconds to en ter the row number after selecting the column number. If you wait too long, the system
jumps back to the “Feature Select” position (this is indicated with 3 chirps). If you wait another 60 seconds, the system
will exit program mode.
6. Pause. You will hear one or two chirps: Two chirps = ON, one chirp = OFF (If there is a NOTE for the selected feature, perform the actions noted).
NOTE: Some fea tures, such as AutoStart (column 2, row 4) used with the optional IntelliStart 4 accessory, have
multiple settings. Sim ply reselect the feature ad ditional times to prog ress through each possible setting.
7. You may now select another feature or exit program mode:
a. To select another feature in that same column, repeat step 5 within the next 5 seconds (after 5 seconds, 3 chirps mean you are back to the “Feature
Select” position).
b. To select a different feature column, go to step 4.
c. To exit program mode, turn the ignition off (you’ll hear 3 chirps and the LED will turn off). If driving, just wait 60 seconds and the system will
automatically exit program mode.
If you make an error, just turn off the ig nition and start again.
EXAMPLE: Turn on Lock upon AutoArming and turn off Remote Valet Mode and FACT:
In the following example, we will change the settings of three different features in just one programming session: We will turn on the Lock upon
AutoArming feature to set your vehicle’s power locks to automatically engage whenever the system AutoArms, turn off remote controlled valet mode and
turn off the FACT anti-falsing feature:
1. Enter program mode as previously noted (ignition on, enter your valet code, press and hold the ✱ button on the PlainView 2 switch until you hear
a chirp).
2. Since the Lock upon AutoArming feature is in column 3, row 2 of the Table, go to column 3 by pressing the blank button on the PlainView 2 switch
three times. Wait for the 3-chirp/column 3 confirmation. Then press the ✱ button twice (you’ll hear a chirp each time you press the ✱ button).
After a brief pause, you’ll hear 2 chirps to confirm that Lock upon AutoArming is now on.
3. Since FACT is also in column 3, there is no need to reselect column 3. Therefore, you can go straight to the row selection. Select row 4 by pressing
the ✱ button four times. After a brief pause, you’ll hear one chirp to confirm that FACT is now off.
4. You’ll note that the Remote valet mode feature is at column 2, row 3. To change to column 2, press the blank button twice, then wait for the
2-chirp/column 2 confirmation. Press the ✱ button three times to select row 3. After a brief pause, you’ll hear one chirp to confirm that the Remote
valet mode feature is now turned off.
5. To exit the program mode, turn the ignition off. You’ll hear 3 chirps to confirm program mode exit.
Reset All Features
If you wish to reset all the user-selectable features to their normal factory presets, you can do so simply by choosing the Reset all features selection (column
1, row 7) on the Table of User-Selectable Features. If you do so, all features — except the programmed remote controls and your valet code — will be reset
to the factory settings that are indicated in BOLD type on the Table of User-Selectable Features . To reset all remote controls, use the Clear all remotes feature
in column 2, row 6. To reset your valet code, use the Set a new valet/disarming PIN code feature in column 2, row 7.
11
Table of User-Selectable Features
Feature Select
1 blank press
2 blank presses
3 blank presses
4 blank presses
1 ✱ press
Add master remote control
Chirps: off/loud/quiet
(1/2/3 chirps)
AutoArming: off/on
NOTE 5 — Add companion remote:
arm/disarm (1 then 2 chirps)
2 ✱ presses
Personalized Siren Sounds**
NOT USED
Lock upon AutoArming: off/on
NOTE 6 — Add companion remote:
trunk release* (2 chirps)
3 ✱ presses
Play Personalized Siren Sounds**:
trigger only/always (1/2 chirps)
Valet mode entry/exit via the
remote control: off/on
AutoArming entry delay: off/on
NOTE 6 — Add companion remote:
silent arm and disarm (3 chirps)
4 ✱ presses
Siren duration: 30/60/90sec.**
(1/2/3 chirps)
AutoStart*: both off/both on/temp
only/battery only (1/2/3/4 chirps)
FACT: off/on
NOTE 6 — Add companion remote:
timed headlight activation* (4 chirps)
5 ✱ presses
AutoLock: off/on
BlackJax anti-carjacking: off/on
NOT USED
NOTE 6 — Add companion remote:
remote engine starting* (5 chirps)
6 ✱ presses
AutoUnLock: off/on
Clear all remotes
NOT USED
NOTE 6 — Add companion remote:
window rolldown/venting* (6 chirps)
NOT USED
NOTE 6 — Add companion remote:
remote valet mode (7 chirps)
7 ✱ presses
NOTE 1
NOTE 2
NOTE 3
Reset all features (except remotes Set a new valet/disarming PIN code
and valet code) to factory settings
NOTE 4
* Requires optional wiring or accessory; ask your Clifford Dealer for details.
** Not available on European models due to EC regulations
NOTE 1: Press button 1 of the new MASTER 5-button remote control. You will hear one chirp. Immediately press button
1 again. You will hear two chirps to confirm that the new remote control has been added.
NOTE 2: Selection of this feature will cause the system to sound a few seconds of siren sound #1. Press the blank
button to turn on this sound or the ✱ button to turn it off. The system will then sound a few seconds of sound #2.
Repeat: blank=ON, ✱ =OFF for each of the six sounds.
NOTE 3: You’ll hear two chirps to indicate all remotes have been cleared from memory. You must now add
new/existing remotes with the “Add master remote control” feature and/or the “Other vehicle‘s remote” feature.
NOTE 4: Immediately PRESS THE BLANK BUTTON, THEN enter your new code, wait for the two chirps, then turn off the
ignition (you’ll hear 3 chirps to confirm program mode exit). You MUST now turn the ignition back on and then
re-enter your new PIN code. If the LED flashes on, your new code has been accepted. If the LED does not light, the two
codes did not match and the system has reverted to your previous code.
NOTE 5: Lets you arm/disarm with a new companion remote control or ANY remote (including 5-button master type)
of a Clifford G4 system on your other vehicle(s). For instance, to set button ✱ of the other car’s companion remote to
arm and disarm your Concept 400, select column 4, row 1, then press button ✱ of the other vehicle’s remote (you’ll
hear one chirp). Immediately press button ✱ a second time (you will hear a 2-chirp confirmation). Button ✱ of the
other vehicle’s remote will now arm/disarm your Concept 400 on this vehicle.
NOTE 6: The features in this column allow you to control your system with the remote control of a G4 system on your
other vehicle(s). Just select the function you wish, then press the unused button or button combination on the other
remote that you want to use to perform that function on this system (you will then hear the chirps noted). NOTE: You
must first set a button or button combination on the other car’s remote that will arm/disarm the system (column 4, row
1) before these others will be accepted.
Lifetime limited factory warranty terms & conditions
Clifford vehicle security systems and accessories require professional installation by an Authorized Clifford Dealer. Unless the system is sold and installed by an
Authorized Clifford Dealer, all product warranties and guarantees are void. (UK: This does not affect your statutory rights.) As the manufacturer, Clifford
Electronics warrants to the original consumer purchaser, the system control unit and remote controls to be free from defects in material and workmanship for as
long as you own the vehicle in which the system was originally installed. All other parts of the system and accessories to the system are warranted to be free from
defects in material and workmanship for one (1) year from the date of purchase. Clifford Electronics will repair or replace, at its option and free of charge during
the warranty period, any system component that proves defective in material or workmanship under normal installation, use, and service, provided the product
is returned to our factory by an Authorized Clifford Dealer, transportation charges prepaid. Products returned to our factory must be accompanied by a
photocopy of the purchase receipt. In the absence of such purchase receipt, the warranty period shall be one (1) year from the date of manufacture. Any damage
to the product(s) as a result of misuse, abuse, neglect, accident, incorrect wiring, improper installation, destruction or alteration of the serial number, repair or
alteration outside our factory, or any use violative of instructions furnished by us will void the warranty. This warranty is limited to defective parts and
specifically excludes any incidental or consequential damages connected therewith. This warranty is not transferable. Clifford Electronics makes no warranty
against theft. This warranty is not to be construed as an insurance policy against loss. Warranty on installation labor, removal and reinstallation charges are not
the responsibility of Clifford Electronics, Inc.
12


