1
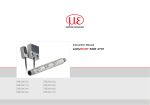
Adapting an Activity: Making It Your Own
How to use the Molecular Workbench (MW) authoring
environment to modify an existing activity.
NOTE: Versions of these pages are available both in the Blackboard
tutorial and within MW itself in its Documentation section. The
advantage of reading it within MW is that you can follow links to the
User’s Manual.
Many Molecular Workbench activities can be easily altered by
teachers and curriculum writers so that they better fit the needs
of particular classes. Some activities in our databases
(http://molo.concord.org and http://molit.concord.org),
however, have been specially programmed to make them more
effective. These activities cannot be changed.
1. Find an editable activity to modify, and open it.
Either A. Open the Molecular Workbench. You will need to have
downloaded the Molecular Workbench
(http://mw.concord.org/modeler/index.html) Then go to the
Molecular Workbench Home Page->Library of Models/Activity
Center and select activity that interests you. (They are all
editable here.)
or
B. Go to the Molit database (for the Molit project view)
http://molit.concord.org/database/browse/everything-list/
Or the Molo database (for the Molo project view)
http://molo.concord.org/database/browse/everything-list/
and pick an activity marked “editable”.
Editable activities will be marked at the top of their pages with an
icon:
You can also pull up a complete list of editable activities in the
databases by going to the bottom of the page:
When you click on View Complete List, you will see those that are
editable.
We suggest for the purpose of this lesson you use something as
simple as A Comparison of Liquid and Gas States
http://molit.concord.org/database/activities/201.html
2. Open/launch the activity by clicking on the “Launch
Activity” button (see the arrow beneath the picture)
3. Save your own copy of the activity into a folder
Make a new folder for the activity in an easy-to-find place, and
save the activity in it, . Click the Save button in the menu bar.
MW activities are made up of many files. The text and layout of
each page is stored in a .cml file, and each model is stored in a
.mml file.
More details: Consult the User’s Manual within the Molecular
Workbench: Saving a Page
4. Switch to Editor mode
Once you have saved the activity, an Editor button
will
appear on the left bottom of the menu bar (see picture below)
when you are in view mode.
When you want to edit the activity, click the editor button
to
enable the Edit mode. The red circle/slash will no longer appear
on the Edit button, and a set of new editing controls will appear.
5. Edit the text
MW's editor is a bit like Microsoft Word. For example, you can
select some text and delete it, then type in some new text. Easy!
You can even undo if you make a mistake (Edit->Undo or
Command-Z). Also, try out the text formatting options in the tool
bar. You can hold your mouse cursor over a tool button on the
menu bar and a pop-up textbox will tell you the purpose of that
tool button.
More details: Consult the User’s Manual within the Molecular
Workbench: Editing Text
Text can be entered either directly on the page or within a
textbox. If you can click on text and the cursor appears within
that text, you can edit it directly. If no cursor appears within the
text, you are dealing with a textbox and must right-click over the
text to be able to customize the textbox.
Textboxes sometimes have lines around them but sometimes the
lines are set to be invisible. If a textbox has lines around it that
are invisible, the borders will only show in Editor mode, not in
View mode.
6. Customize an Existing Text Box
Let’s say you want to keep the textbox, but change the text
within it. You need to Right-click (Windows) Apple-click (Mac) on
the textbox and the choice of customizing will come up. Select
“Customize This Text Box”
If you want to write in the text box, Right-click (Windows) or
command-click (Mac) on the box (Some find that it is important
to click outside of the left or right margin when selecting a
textbox.)
If you want to remove the textbox, just command-click (Mac) or
right-click (Windows) on the textbox and click the Remove This
Text Box.) In some computers it may be easier to just place
your cursor to the right of the textbox and press delete.
7. Editing a textbox with HTML code.
You can erase the text in a textbox, including all the HTML code.
You can make HTML in the textbox if you want, or you can simply
change the text and leave the HTML code (when, for example,
you like the font, images etc.) Just avoid changing a <tag>!
There is a default font that will appear if you do not include
HTML.
8. Add a picture
It is easy to delete pictures and insert your own. On the menu
bar, choose: Insert->Picture->From File. Select the image you
want to use and click OK.
Positioning pictures in any particular position is harder. The BEST
way to do it right now is to:
1. Make sure the picture you want to use is in the same
folder as the activity you are editing.
2. Insert a textbox into the activity where you want the
picture to be.
3. Right click on the textbox and select “Customize This Text
Box”.
4. The editable textbox now shows up. You must leave the
existing HTML code as it is, but you need to insert the
name of your file as shown below
<html>
<head>
</head>
<body>
<img src=”PUT_YOUR_FILENAME_HERE.gif”>
</body>
</html>
and your picture should now show up inside the textbox. If
the entire picture does not show, you may need to resize
your picture (if it is a very large file) or resize the textbox.
Resize a picture
An image within a text box can be resized by setting the width or
height attribute of the IMG tag: <img src="image.gif"
width="50%">. Absolute size can be specified as well: <img
src="image.gif" width="200">
9. Add a free response question
There are several different user input areas, the smaller being a
text field and the bigger being a text area. Suppose you want
to ask students an additional question, after the one at the
bottom of the page. Click to place the cursor where you want the
question to appear, then go to (in the menu bar):
Insert ->User Input Text Area (It is also possible to do this by
right clicking and selecting through that menu.)
In the dialog box that pops up, you can type in your question
(and format it using HTML, if you know how), and specify the size
of the answer box.
Once the question is there, you can modify it by right-clicking
(windows) or Apple-clicking (on mac) on it and selecting
"customize this text area." You can modify other components in
the same way.
More details: Consult the User’s Manual within the Molecular
Workbench: Adding a Text Area
10. Add a multiple choice question
Put the cursor where you'd like a multiple choice question, and
go to:
Insert->Multiple Choice (It is also possible to do this by right
clicking and selecting through that menu.)
More details: Consult the User’s Manual within the Molecular
Workbench: Adding a Multiple choice
11. Add Links
In MW you can hyperlink to another cml page. You can make it
(the other .cml page) open either in a new window or in the
current window (in which case you can come back by using the
Back button on the toolbar). You can also link to a web page
(which will launch a web browser).
To create a link, simply
(1) highlight some text
(2) select the Hyperlink tool in the toolbar, and set the
filename or URL.
Note that links do not work while you are in editor mode.
More details: Consult the User’s Manual within the Molecular
Workbench: Hyperlinks
12. Enable the Snapshot button
You can let students take a snapshot of a model (a picture of it at
a particular time) by including a snapshot button. Go to:
Insert->Standard Controller for Model->Button
Next to select an action, choose "take a snapshot" (way at the
bottom). You can customize the text on the button, and its color
and border.
More details: Consult the User’s Manual within the Molecular
Workbench: Snapshots
13. Enable Reports
MW activity reports gather together all of the answers a student
has typed in, as well as any snapshots they have taken. The
report is a single .cml file that the student can edit, print, or
submit to our database. To use a report in your activity, simply
add a "create an activity report" button, by going to:
Insert->Activity Controller->Activity Button
Where it says "select an action," choose "create an activity report
about this page in a new window." This will create a button that
students can press at the end of the activity to generate their
report. You can also create reports for multi-page activities, that
gather the students responses across several .cml pages.
More details: Consult the User’s Manual within the Molecular
Workbench: Creating a Report
14. Upload your page to a database
You can upload any .cml page you create to our database of user
uploads. It's a convenient way to share your model or activityany molecular workbench user can then access it! To upload,
simply go to (while not in editor mode):
Collaboration->Upload current page
To view uploads, you just go to:
Collaboration->View Uploads
You can also get to them from MW Home Page->User uploads
Taking care of your model.
If you run the model and save the page, the initial conditions
inherited from the original copy will be replaced by the model's
current state. You may not want this. In the case of Jmol, the
model can be replaced by the molecule's current view and
perspective angles etc.. So you should be careful about this and
know how to recover the initial conditions if you overwrite them
accidentally. You should go to the original page on the Web and
use the remote model (NOT the page) to overwrite the one with
changed initial conditions.
More Help
Check out the amazingly detailed, always up-to-date MW User's
Manual by going to:
Help->Online User's Manual
You can’t get there when you are in edit mode – the menu item
is not active under “Help” on the menu bar unless you are in view
mode.
Multi-page Activity Authoring Tips
Advanced users may want to create elaborate many-page
activities like the ones we have created for our projects Molecular
Logic and Molecular Literacy. Here are a few tips on how to do
this that aren't currently collected in one place in the user's
Manual:
• Store all files used for an activity in one folder. This allows
you to automatically upload the whole thing by using
Collaboration->Upload Current Activity Folder.
• Use relative path (just the file name and not the complete
URL) references, when creating links between .cml pages or
using tags.
• Use a reasonable file-naming scheme, such as appending
sequential numbers to the name of the file for each activity
page. This makes it much easier to link pages together and
keep track of them.
• Use the multi-page report button, to gather together
questions and snapshots across all pages of the activity.
• Use page titles (set them by going to Edit->Title)
• On each page, include a link to a table of contents page or
some reference to location in the activity, such as "page 3 of 5."