1
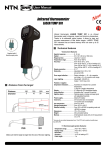
KIRAY 200
Infrared thermometer
Infrared thermometer KIRAY 200 is an infrared thermometer used
to diagnose, inspect and check any temperature. Thanks to its
elaborated optical system, it allows an easy and accurate
measurement of little distant targets. KIRAY 200 instrument has
an internal memory which can save up to 20 measurements.
Technical features
●
Supplied with
thermocouple K probe
Distance from the target
Distance
Diameter
150
5
300
10
900
30
mm
mm
D:S=30:1
50 mm at 1500 mm
Instrument features
Spectral response.......................8 -14 µm
Optical..........................................D.S : 30:1 (50 mm at 1500 mm)
Response time.............................Less than 1 second
Temperature range......................From -50 to +850°C
Accuracy*....................................From -50 to -20°C : ±5°C
From -20 to +200°C : ±1.5% of reading ±2°C
From +200 to +538 °C : ±2% of reading ±2°C
From +538 to +850°C : ±3.5% of reading ±5°C
Display resolution.......................0.1 C°
Emissivity....................................Adjustable from 0.10 to 1.00
(pre-set at 0.95)
Over range indication.................Display indication : « -0L » for a negative
over range, « 0L » for a positive over range.
Laser sighting.............................Wavelength : 630-670 nm
Output < 1mW, Class 2 (II)
Positive or negative
temperature indication................Automatic (no indication for a positive
temperature)
(-) sign for a negative temperature
Display.........................................4 ½ digits with LCD backlighted display
Auto-extinction............................Automatic after 7 seconds of inactivity
High/low alarm.............................Flashing signal on display and beep signal
with adjustable thresholds
Power supply...............................Alkaline 9V battery
Autonomy....................................38 h (inactive laser and backlight)
15 h (active laser and backlight)
Use temperature..........................From 0 to +50°C
Storage temperature...................From -20°C to +60°C
Relative humidity........................From 10% to 90%RH in operating mode and
>80%RH in storage
Dimensions..................................175 x 110 x 45 mm
Weight..........................................230 g (included battery)
Memory........................................20 temperature values with unit of measurement
(°C or °F)
*Accuracy for an ambient temperature from 18 to 28°C (with a relative humidity lower
than 80% RH)
●
YES
NO
Make sure that the target is larger than the size of the laser sighting.
K thermocouple probe features
Temperature range......................From -40 to +400°C
Display range...............................From -50 to +1370°C
Resolution...................................0.1°C
Accuracy......................................±1.5% of reading ±3°C
Cable length................................1 m
Description
Modes flow chart
LCD
backlighted
display
MODE
button
MODE==mode
bouton
mode
SET
buttonSET
SET==set
bouton
ENT==trigger
gâchette
ENT
Up button
MODE
Down button
Backlight and
laser button
Mode button
0.95
E MS
Set
Réglage
emissivity
de l’émissivité
(EMS) with
(EMS)
up
avecdown
les touche
and
buttonshaut et bas.
MODE
Laser sighting output
35.2
MAX
Display
Affichage
of de
maximum
la température
maximum
temperature
MODE
17.3
MIN
Display
of de
minimum
Affichage
la température
minimum
temperature
MODE
Infrared sensor
17.9
DIF
MODE
AVG
MODE
Trigger (ENT)
Set technical unit
(°C/°F)
Battery
compartment
Set continuous
measurement (On/Off)
Set alarm (On/Off)
20.3
HAL
Display
of the difference of
Affichage de la température
temperature
max.
and
différentielle between
(entre MIN
et MAX)
min. temperatures
Affichage
la température
Display
of de
average
temperature
moyenne calculée pendant une
calculated
over
a measurement
prise de mesure
period
Display
and
of thedealarm
of
Affichage
et set
réglage
l’alarme
de température
high
temperaturehaute
030
MODE
LAL
Display
and
of thedealarm
of
Affichage
et set
réglage
l’alarme
de température
low
temperaturebasse
015
MODE
23.5
TK
Probe input
Display ofde
thelatemperature
Affichage
température given
donnée
par
la sonde
thermocouple
K
by the
K thermocouple
probe
MODE
LOG
KIRAY 200 buttons
1
23.5
Display and
recording of des
Affichage
et enregistrement
temperaturesavec
with SET
buttonSET
températures
le bouton
MODE
Display
1
4
2
3
1 – Up button. It allows to increment emissivity and the
thresholds of high and low alarm and to move to the
next recorded value.
2 – Set button. It allows to activate or deactivate laser
and backlight of the screen. It also allows to record
a temperature.
3 – Mode button. It allows to navigate through the
modes (emissivity, max. value, min. value,
difference, average, high alarm, low alarm, TK value
and recorded values).
4 – Down button. It allows to decrement emissivity and
the thresholds of high and low alarm and to move to
the previous recorded value.
1 - Continuous measurement indicator
2 - Unit of measurement (°C / °F)
3 - Low battery indicator
4 - Low alarm indicator
5 - Temperature value : MAX, MIN, DIF (difference between
MAX and MIN values), AVG (average), HAL (high alarm),
LAL (low alarm),TK (K thermocouple probe temperature)
and LOG (recorded value)
6 - High alarm indicator
7 - EMS, MAX, MIN, DIF, AVG, HAL, LAL, TK and LOG indicator
8 - Temperature value
9 - Current measurement indicator
10 - HOLD indicator (fixed measurement)
11 - Emissivity value
12 - Laser in operation indicator
Settings before measurement
Before measuring temperature, it is recommended to make some
settings:
- Set technical unit (°C or °F)
- Set the continuous measurement (On or Off)
- Set the alarm (On or Off)
To set these 3 parameters, open the battery door by pushing on both
sides of the trigger. It is not necessary to disconnect the battery to
make these settings.
Set technical unit (°C or °F)
Set the selector unit to °C or °F with a
screwdriver.
●
Set the continuous measurement
This setting allows to let the Kiray200
instrument in measurement. It does not
shut off after 7 seconds.
Set the selector on On (continuous
measurement is active) or on Off
(continuous measurement is inactive) with
a screwdriver.
Unit
●
Set the alarm
This setting allows to activate or
deactivate high and low alarm.
Set the selector on On (alarms are active)
or on Off (alarms are inactive) with a
screwdriver.
●
Lock
MODE Mode button
Allows to define the required measurement : Max, Min, AVG, DIF,
etc. ... pressing as many times on this button.
- EMS : when KIRAY200 instrument is turned on, press MODE button
until EMS appears at the bottom left of the screen. Set emissivity by
pressing on UP button to increment it or DOWN button to decrement it.
By default, the emissivity is set to 0.95.
- MIN ou MAX : select the Min or Max. temperature.
During a measurement period, keep ENT pressed : the KIRAY200
instrument displays the temperature of the area sighted by the laser.
Press MODE button until MAX or MIN is displayed at the bottom of the
screen. These values relate to the temperatures taken by the
instrument and the thermocouple probe.
- DIF : during a measurement period, press MODE button until DIF
appears at the bottom left of the screen. The displayed value
corresponds to the difference between MAX value and MIN value.
-AVG : during a measurement period, press MODE button until AVG
appears at the bottom left of the screen. The displayed value
corresponds to the average temperature calculated during a
measurement period.
Alarm
- HAL : when KIRAY200 instrument is turned on, press MODE button
until HAL appears at the bottom left of the screen. The displayed value
corresponds to the alarm of high temperature. Set this alarm by
incrementing it with up button or by decrementing it with down
button.
- LAL : when KIRAY200 instrument is turned on, press MODE button
until LAL appears at the bottom left of the screen. The displayed value
corresponds to the alarm of low temperature. Set this alarm by
incrementing it with up button or by decrementing it with down
button.
Operating mode
-Press ENT trigger to turn on the instrument. The backlighted screen,
indicating the temperature, and the laser turn on.
-Keep ENT pressed. Place the laser sighting at the center of the area
to be measured.
-Release ENT.
-Read the displayed temperature. (The display stays on for 7 seconds
after the last manipulation).
-HOLD appears at the top left of the screen ; measurement stays
displayed.
-The KIRAY200 instrument keeps in memory the last function used.
Command buttons
ENT Trigger
- Turning on the device.
- ENT pressed : activation of the laser sighting and temperature
measurement.
- ENT released : display is on HOLD (HOLD fixed), and give the last
measurement. Display stays on for 7 seconds. If no buttons are
activated and continuous measurement is inactive, the instrument
turns off after 7 seconds.
Alarms must be activated (see paragraph Settings
before measurement)
- TK : when KIRAY200 instrument is turned on, press MODE button
until TK appears at the bottom left of the screen. The displayed value
corresponds to the measured temperature by the K thermocouple
probe.
- LOG : when KIRAY200 instrument is turned on, press MODE
button until LOG appears at the bottom left of the screen.
Next to LOG, a number between 1 and 20 also appears ; it
corresponds to LOG location. If no temperature has been recorded in
the shown LOG location, 4 dashes will appear in the lower right corner.
To record a temperature, you have to be on LOG mode, then choose
an empty LOG location (---- visible) and press SET button during the
measurement or when the measurement is fixed (HOLD).
From this mode, you can also clear all the recorded temperatures :
press and keep the trigger pressed and press down button at the
same time until reaching the zero recording, then press SET button
while keeping ENT pressed. A beep is emitted by KIRAY200
instrument and the LOG location moves automatically to 1, signifying
that all data have been cleared.
To avoid any inconvenience:
Emissivity is a term used to describe the energy-emitting
characteristics of materials.
Most (90% of typical applications) organic materials and painted or
oxidized surfaces have an emissivity of 0.95 (pre-set in the unit).
Inaccurate readings will result from measuring shiny or polished
metal surfaces. To compensate; cover the surface to be measured
with masking tape or flat black paint. Allow time for the tape to reach
the same temperature as the material underneath it. Measure the
temperature of the tape or painted surface.
See table below for values of emissivity of specific materials :
Aluminium
Asbestos
Asphalt
Basalt
Brass
Brick
Carbon
Ceramic
Concrete
Copper
Dirt
Frozen food
Hot food
Glass
Water
0.30
0.95
0.95
0.70
0.50
0.90
0.85
0.95
0.95
0.95
0.94
0.90
0.93
0.85
0.93
Ice
Iron
Lead
Limestone
Oil
Paint
Paper
Plastic
Rubber
Sand
Skin
Snow
Steel
Textile
Wood
0.98
0.70
0.50
0.98
0.94
0.93
0.95
0.95
0.95
0.90
0.98
0.90
0.80
0.94
0.94
• Do not aim directly or indirectly (reflection on reflective surfaces) the
laser in the eyes.
• Change the batteries when the indicator blinks.
• Do not use the thermometer around explosive gas, vapor or dust
• Do not leave the device with the lock on (lock at the top right of the
screen) because in this configuration, the instrument does not turn
off automatically.
To prevent damage on your instrument or equipment please
carefully respect these conditions :
non
ToAprotect
protéger
from
des
electric
champs
and
électriques
magnétiques
magneticet
fields
of static et
de l'électricité
electricitystatique
CE certification
This device meets with following standards' requirements.
• EN 50081-1 : 1992, Electromagnetic compatibility, Part 1
• EN 50082-1 : 1992, Electromagnetic compatibility, Part 2
Maintenance
Important information
For correct measurements :
• Do not take any measurement on metal or shiny or reflective
surfaces.
• Do not measure through transparent surfaces such as glass, for
example.
• Water vapor, dust, smoke, etc ... may prevent correct
measurements because they obstruct the optic of the instrument.
• Make sure that the target is larger than the size of the laser
sighting.
Protect from thermal
shock
To install or change the 9V battery, open the part near the trigger
and put it in the battery compartment.
Accessories
Case holster with passer-by belt
User manual
●
K thermocouple probe
●
●
Infrared thermometer, how it works?
Infrared sensor
Infrared thermometers can measure the surface temperature of an
object. Its optic lens catches the energy emitted and reflected by the
object. This energy is collected and focused onto a detector. This
information is displayed as temperature. The laser pointer is only used to
aim at the target.
Emitted energy by the
Laser sighting object in the form of
radiation
Once returned to KIMO, required waste collection will be assured in the respect of the environment in accordance to 2002/96/CE guidelines relating to WEEE.
Ref. NTang - KIRAY200 - 07/09 B - RCS (24) Périgueux 349 282 095 Non-contractual document – We reserve the right to modify the characteristics of our products without prior notice.
Emissivity