1
Air Flow Measurements (CMM / CFM)
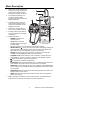
1. Connect the sensor to the sensor input jack on top of the meter.
2. Turn on the meter using the Power button.
3. Select the FLOW mode using the FLOW/VELOCITY button. The LCD will display
FLOW when the Flow function has been properly selected.
4. Select the desired air flow units: CMM (cubic meters per minute) or CFM (cubic feet
per minute) using the UNIT button. The LCD will reflect the selection.
2
2
5. Press the AREA button to begin entering the area in m or ft . Use the
button to
increment the flashing digit, use the button to decrement the flashing digit, use the
button to select the next digit, and use the RECORD/RECALL button to set the
decimal point. Press the ENTER/RESET button when the area has been entered. The
bottom display (normally used for the temperature display) will indicate the area
2
2
entered in ft or m . The main LCD displays the air flow in CFM (cubic feet per minute)
or CMM (cubic meters per minute). If the CFM or CMM reading exceeds 9999, use the
displayed X10 or X100 multiplier to calculate the reading.
6. For Air Flow measurements, three modes apply: The normal (default mode) where the
actual flow is indicated, and the two modes described below: Press the FLOW/MODE
button to select one of the two modes listed below:
2/3V MAX MODE: LCD displays 2/3 the measured value.
AVG MODE: Up to 20 readings can be taken separately and averaged. Select the AVG
mode via the FLOW/MODE button and then press the AVG/START button to take a
reading. Up to 20 readings can be taken and averaged. The lower LCD display
provides a 1 to 20 counter and each time a reading is taken the counter is
incremented. The main LCD displays the averaged air flow.
7. Note that the temperature function is not active in the Air Flow mode.
Automatic Power OFF
The Model 407114 turns off automatically after 15 minutes of operation. This feature was
designed to conserve battery power. Note that when the meter is in the RECORD/RECALL
mode, the Automatic Power OFF feature is disabled.
Battery Replacement
When LBT appears on the LCD, the 9V battery must be replaced.
1. Disconnect the sensor and the RS-232 PC Interface cable from the meter.
2. Remove the meter’s rubber protective jacket
3. Use a flat blade screwdriver or a coin to open the rear battery compartment
4. Replace the 9V battery
5. Close the battery compartment and replace the meter’s protective jacket
RS-232 PC Interface
The 407114 is equipped with a 3.5mm phono jack (meter top) for connection to a PC. To
TM
obtain the Model 407001 Windows data acquisition kit, contact Extech Instruments. The
kit includes a cable that connects the meter to a PC. Instructions for use are provided with
the 407001 kit.
6
Model 407114 Version 2.0 November 2005