1
nugget
c o d e Installing
39 and Configuring the Terminal
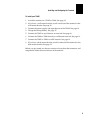
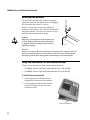
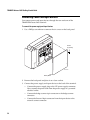
To install the wall-mount bracket
1. Install the wall-mount bracket and the terminal.
For help, see the accessory instruction sheet.
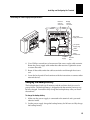
2. Connect power and all other devices through
the back panel of the terminal.
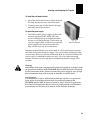
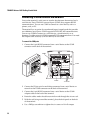
To mount the power supply
•
The T248X and the power supply are dust and
moisture protected to IEC 60529/IP53 only
when installed properly in the Intermec deskmount or wall-mount bracket. The brackets use
a power supply holder to effectively protect the
power supply from dust and moisture. For
help, see the accessory instruction sheets.
248XG.021
Wall-mount bracket
Intermec recommends that you use the desk or wall-mount bracket to mount
the T248X and protect the power supply. You can use other mounting brackets
or enclosures. However, without the Intermec desk or wall-mount bracket, the
power supply is intended for indoor use only. Use of any other mounting
brackets or enclosures will void the environmental protection ratings of the
terminal.
Warning
Installation of the power supply must be performed strictly in accordance with
the procedures contained in the TRAKKER Antares 248X desk and wall-mount
bracket instruction sheets. Failure to protect the power supply in areas of high
dust and moisture may result in injury or death due to electric shock.
Avertissement
L’installation de la source d’alimentation doit être exécutée en respectant de
façon stricte les procédures décrites dans les feuilles d’instruction du
TRAKKER Antares 248X de bureau et monté au mur. L’échec de la protection
de la source d’alimentation dans des zones de grande poussière et d’humidité
peut entraîner des blessures ou la mort en raison d’un choc électrique.
13