1
LinkSprite Technologies,.Inc.
pcDuino V2
pcDuino V2
1
LinkSprite Technologies,.Inc.
pcDuino V2
2
LinkSprite Technologies,.Inc.
pcDuino V2
Contents
Board Overview...............................................................................................................................3
System Features..............................................................................................................................4
Single-Board Computer Configuration...........................................................................................5
Pin Assignments..............................................................................................................................7
Single-Board Computer Setup........................................................................................................9
Required Hardware.....................................................................................................................9
Optional Hardware......................................................................................................................9
Adjusting Screen Settings...........................................................................................................9
The Ubuntu Operating System......................................................................................................10
Accessing the Debug Port..............................................................................................................10
Re-Installing the Operating System...............................................................................................11
Glossary................................................................................................. .........................................12
3
LinkSprite Technologies,.Inc.
pcDuino V2
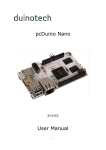
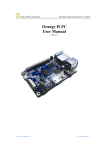
Board Overview
You can use the Single-Board Computer with various open-source projects, but you can do
much more. The Single-Board Computer features a fully functional operating system (OS) that
can simultaneously run multiple processes, giving you a much more robust and versatile
experience than a dedicated microprocessor board.
The Single-Board Computer provides several ports so you can quickly and easily set up a
monitor, keyboard, and mouse to create a complete computing solution.
The HDMI port lets you connect to any HDTV or monitor with an HDMI port.
The USB A port lets you connect USB peripherals. For example, you can use a USB hub to
connect a keyboard, mouse, and other USB devices. The Micro USB port provides additional
connectivity.
The MicroSD slot provides an easy way to add additional memory (up to 32 GB).
Note: Your Single-Board Computer is shipped in protective anti-static packaging. The board must
not be subjected to high electrostatic potentials. A grounding strap or similar protective device
should be used when handling the board.5
System Features
System on a Chip (SoC)
AllWinner A10
Central Processor (CPU)
1 GHz ARMv7 Cortex A8 Single Core
Graphics Processor (GPU)
Mali 400
SDRAM Memory
1 GB, DDR3-800
Flash Memory
2 GB NAND
Mass Storage
Max
Type
Video Output
32 GB
MicroSDHC
HDMI Up to 720p, 60 Hz
Network Interface
Ethernet 10/100M via RJ45
Wireless Connectivity
802.11b/g/n
Communications I/O
USB 2.0
Extension Interfaces
perating System
ADC, UART, GPIO, PWM, I2C, SPI, Power
Ubuntu
4
LinkSprite Technologies,.Inc.
pcDuino V2
Single-Board Computer Configuration
Pin
5
LinkSprite Technologies,.Inc.
pcDuino V2
6
LinkSprite Technologies,.Inc.
pcDuino V2
Assignments
J11
1
GPIO8
2
GPIO9/PWM9
3
SPI_SS (Subordinate/Chip Select)/GPIO10/PWM10
4
SPI0_MOSI (Master Output, Subordinate Input)/GPIO11/PWM11
5
SPI0_MISO (Master Input, Subordinate Output)/GPIO12
6
SPI0_CLK (Clock)/GPIO13
7
GND
8
AREF
9
TWI2_SDA (Data)
10
TWI2_SCK (Clock)
J8
1
GPIO0/UART2 RX
2
GPIO1/UART2 TX
3
GPIO2
4
GPIO3/PWM3
5
GPIO4
6
GPIO5/PWM5
7
GPIO6/PWM6
8
GPIO7
P6
1
SPI1_MISO (Master Input, Subordinate Output)
2
+5 VDC
3
SPI1_CLK (Clock)
4
SPI1_MOSI (Master Output, Subordinate Input)
5
RESET
6
GND
J9
1
(NC)
2
IOREF
3
RESET
4
3.3 VDC output
5
5 VDC output
6
GND
7
GND
8
+5VIN
7
LinkSprite Technologies,.Inc.
pcDuino V2
J12
1
A0
2
A1
3
A2
4
A3
5
A4
6
A5
P10
1
GPIO14
2
GPIO15
3
GPIO16
4
GPIO17
P3
(Debug Port)
1
TX (Square Pad)
2
GND
3
RX
Single-Board Computer Setup
Make USB and HDMI connections before connecting power to the Single-Board Computer. If
the board does not recognize your keyboard or mouse, unplug the device and plug it back in.
Note: To ensure that your Single-Board Computer boots properly, use a short, heavy-gauge USB
cable and a power supply that delivers at least 2 A.
Required Hardware
• Monitor
• HDMI cable
• USB hub
• Keyboard/Mouse
• DC power (Micro USB)
Adjusting Screen Settings
In some cases, the Ubuntu desktop may extend beyond the visible area of your monitor.
To adjust the size of your desktop:
1. Open LX Terminal.
2. At the command prompt, type: sudo setwindow 95 1 0 0
8
LinkSprite Technologies,.Inc.
pcDuino V2
3. Press Enter.
Note: The “95” parameter sets the percentage of screen size, and the “1” activates
auto-center; the remaining values are inactive for auto-center, but are still necessary for the
command.
The Ubuntu Operating System
Your Single-Board Computer is preloaded with the Ubuntu 12.07 operating system. Ubuntu is
a robust, fully functional operating system that provides an open-source productivity suite.
Terminal
• Run standard Linux commands
• Launch GCC to open the C/C++ compiler
File browser
• Built-in file manager
Internet browser
• Chromium web browser
• Support for HTML5
Productivity Suite
• Document Viewer for PDFs
• Gnumeric for spreadsheets
• AbiWord for documents.
If your system asks for an authentication password, the default password is “ubuntu.”
For full support go to www.ubuntu.com
Accessing the Debug Port
If you are a more experienced user, you can communicate with the Single-Board Computer
directly by using a USB-to-Logic Level Serial cable to connect the board’s debug port to your
computer’s USB drive.
1. Go to the Single-Board Computer website and install the drivers onto your PC.
2. Connect the debug cable to the USB port on your computer and to the board’s debug port
(P3). TX connects to Pin 1, which has the square pad.
3. On your PC, locate the COM port. For help locating the COM port, refer to your operating
system’s online help.
4. After you locate the COM port, access the serial communications package. Verify the
following settings:
• COM Port: 8,N,1
• Baud Rate (Speed): 115200
9
LinkSprite Technologies,.Inc.
pcDuino V2
• All Flow Controls: Off
5. You can now access the board’s system level.
Re-Installing the Operating System
As you consider new projects, you may decide to restore your Single-Board Computer to its
original state. To accomplish this, you may need to re-install the operating system.
Note: Re-installing the Ubuntu operating system will erase all saved data from the Single-Board
Computer.
To install the operating system:
1. Disconnect the power to the Single-Board Computer.
2. Insert a MicroSD card that contains a Linux kernel image into the Single-Board Computer’s
MicroSD card slot.
3. Restore power to the board and wait at least 2 minutes. During this time, the TX light
blinks as the Single-Board Computer installs the Linux kernel.
4. When TX stops blinking, disconnect the power to the Single-Board Computer and remove
the kernel image MicroSD card.
Note: The Single-Board Computer will always check for a kernel image when power is restored.
Do not insert the kernel image SD card in the slot unless you intend to install the entire operating
system and erase all data on the board.
5. Restore power to the board. The RX and TX lights will remain lit for a moment, and then
the TX light will begin to blink slowly while the RX light remains lit.
6. Insert a MicroSD card that contains an Ubuntu image. The TX light will begin to blink
rapidly. Do NOT remove the Ubuntu image MicroSD card during this process. After the TX
light stops flashing rapidly, both the RX and TX lights will blink slowly. This indicates a
good image load.
7. Disconnect power to the Single-Board Computer and then remove the Ubuntu image
MicroSD card.
8. Restore power to the Single-Board Computer. The operating system will boot up properly,
the desktop will appear on your monitor, and the board will be ready to use.
10
LinkSprite Technologies,.Inc.
pcDuino V2
Glossary
ADC
Analog-digital converter
CPU
Central processing unit
DDR
Double Data Rate, Type 3. SDRAM configuration with high bandwidth
ESD
Electrostatic discharge
Linux
An open source operating system
GB
Gigabyte. Capacity in bytes. 1×10⁹ Bytes
GHz
Gigahertz. Frequency in hertz. 1×10⁹ hertz
GPIO
General purpose input/output. A digital port that can be selected by the user
to function as either an input or an output.
GPU
Graphics processing unit
HDMI
High-Definition Multimedia Interface
I2C
Inter-Integrated Circuit, generically referred to as “two-wire interface”
(TWI)
I/O
Input/Output
MB
Megabyte. Capacity in bytes. 1×106 bytes
Flash NAND Memory
Electronic non-volatile computer storage that can be electrically erased and
reprogrammed. NAND-type flash memory may be written and read in blocks (or
pages).
PC
Personal computer
PWM
Pulse-width modulation
RoHS
Restriction of Hazardous Substances Directive (EU)
SDHC
Secure Digital High-Capacity memory card
SDRAM
Synchronous dynamic random access memory
SoC
System on a chip
SPI
Serial Peripheral Interface
Ubuntu
An open source operating system
UART
Universal Asynchronous Receiver/Transmitter. A serial communication port.
USB
Universal Serial Bus
VDC
Volts of direct current
11