1
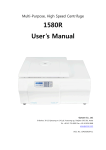
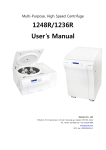
Multi-Purpose, High Speed Centrifuge 1580/1248 User’s Manual Gyrozen Co., Ltd. BStation, 30-12 Gyeryong-ro 141-gil, Yuseoung-gu, Daejeon 305-301, Korea Tel: +82-42-719-8200 Fax: +82-42-826-9848 www.gyrozen.com DOC. No.: C07DC00204-11 Multi-Purpose High-Speed Centrifuge 1580/ 1248 2 Multi-Purpose High-Speed Centrifuge 1580/ 1248 3 CONTENTS Page # 1. Meanings of Symbols & Safety Precautions ............................................................................................................................... 6 1-1. Meanings of Symbols ....................................................................................................................................................................... 6 1-2. Safety Precautions .............................................................................................................................................................................. 7 2. Product Description & Technical Specifications ....................................................................................................................... 8 2-1. Product Description ........................................................................................................................................................................... 8 2-2. Technical Specifications ................................................................................................................................................................... 9 3. Installation ..................................................................................................................................................................................................10 3-1. Power On/Off and Door Release 3-2. Rotor Coupling and Disassembling .........................................................................................................................................11 3-3. Positioning of Sample Tubes ........................................................................................................................................................12 4. ...........................................................................................................................................10 Operation ....................................................................................................................................................................................................13 4-1. Key Functions of Control Panel .................................................................................................................................................13 4-2. Setting RPM/RCF.................................................................................................................................................................................14 4-3. Setting Time ..........................................................................................................................................................................................15 4-4. Acceleration / Deceleration ...........................................................................................................................................................15 4-5. Program Saving & Recalling .......................................................................................................................................................16 4-6. Pulse ..........................................................................................................................................................................................................17 4-7. Start / Stop ............................................................................................................................................................................................17 4-8. Emergency Door Open ....................................................................................................................................................................17 4-9. Fuse Replacement (only for 1248) .............................................................................................................................................18 5. Maintenance ..............................................................................................................................................................................................18 5-1. Outer part of Instrument ..............................................................................................................................................................18 5-2. Chamber ...............................................................................................................................................................................................18 5-3. Shaft ........................................................................................................................................................................................................18 5-4. Rotor .......................................................................................................................................................................................................19 Multi-Purpose High-Speed Centrifuge 1580/ 1248 4 5-5. 6. Transportation of Instrument........................................................................................................................................................19 Trouble Shooting ..................................................................................................................................................................................19 6-1. Check List .............................................................................................................................................................................................19 6-2. Error Code ..............................................................................................................................................................................................20 7. Rotors & Accessories ............................................................................................................................................................................22 8. Product Range .........................................................................................................................................................................................30 9. CE ....................................................................................................................................................................................................................31 Multi-Purpose High-Speed Centrifuge 1580/ 1248 5 1. Meanings of Symbols & Safety Precautions 1-1. Meanings of Symbols 1-1-1. Symbols on the device Symbol Meaning Symbol Attention and warning. Meaning Attention and warning for electric shock. Attention and warning Attention and warning for door opening and for rotor coupling. closing. Attention and warning Attention and warning for correct way of for correct way of sample balancing in the buckets position. rotor. Indicate a hole for manual door opening in case of emergency. 1-1-2. Symbols in this document Symbol Meaning Symbol This symbol refers to safety relevant warnings and indicates possible dangerous outcomes. ☞ Meaning Note. This symbol refers to the important reminder. Multi-Purpose High-Speed Centrifuge 1580/ 1248 6 1-2. Safety Precautions Before using the instrument, please read this operation manual to ensure correct usage through understanding. Incorrect handling of the instrument could possibly result in personal injury or physical damage on the instrument or its accessories. 1. ALWAYS locate the instrument on a flat, rigid and stable table capable of withstanding the weight of the instrument and its spinning operation. 2. ALWAYS make a safety zone of 30 cm around the centrifuge to indicate that neither hazardous materials nor persons should be permitted within the area during operation. ALWAYS position the instrument with enough space on each side of instrument to ensure proper air circulation. 3. ALWAYS install the instrument within a temperature and humidity controlled environment. (Permissible ambient temperature: +5°C ~ +35 °C, Relative humidity: ≤ 85%) 4. Before connecting the power, check the rated voltage. 5. Should not use unapproved rotors and accessories. Only use rotors from Gyrozen Co., Ltd. with appropriate centrifugal tubes and suitable adaptors to embrace sample containers tightly enough inside rotors. 6. Before operating the instrument, check if the rotor and the rotor lid are securely fastened. Should operate the instrument with a rotor properly installed and secured to the motor shaft. 7. Mount the rotor on the motor shaft properly, check it with spinning manually. 8. Do not stop the rotor by touching with hand during the instrument is running. 9. Emergency door open should be performed only when spinning is completely stopped. 10. Should not exceed the rated speed or specific gravity. Samples whose density is greater than 1.2g/ml must have reduced maximum rotational speed to avoid rotor failure. 11. The sample content should not exceed 80% of total capacity of a tube. Otherwise, it would cause spillage of sample fluid and even the tube breakage. 12. ALWAYS load the tubes symmetrically with evenly weighted samples to avoid rotor imbalance. If necessary, use the water blank to counterbalance the unpaired sample. 13. The operation speed should not exceed the highest value of the individual guaranteed g-forces of each centrifuge, rotor, bucket or adaptors and sample container, especially the guaranteed g-force Multi-Purpose High-Speed Centrifuge 1580/ 1248 7 of sample container should not be neglected. 14. The rotors should be cleaned and kept dry after every use for longer life and safety. 15. ALWAYS disconnect the power supply prior to maintenance care and service to avoid electrical shock. 16. ALWAYS use proven disinfection procedures after centrifuging biohazardous materials. 17. Should not centrifuge flammable, toxic, radioactive, explosive, or corrosive materials. 18. When it is necessary to use toxic or radioactive materials or pathogenic micro-organisms which belong to the Risk Group II of WHO: “Laboratory Bio-safety Manual,” should follow national regulations. Do not place dangerous materials within 30 cm distance around the instrument, and that is also recommended by IEC 61010-2-020. Use the emergency door open function only when the door button on the control panel is dumb under the condition of complete stop of rotor running. Never try to open or move the instrument if it is not completely stopped. If the power input is more than +/- 10% of the recommended voltage or fluctuates frequently, it may cause malfunction of the instrument and often result serious damage. Install the instrument at the place without any kinds of corrosive gases. 2. Product Description & Technical Specifications 2-1. Product Description Multi-Purpose High-Speed Centrifuge 1580/ 1248 8 2-2. Technical Specifications Fixed angle 15,000 rpm / 21,206 xg 12,000 rpm / 115,520 xg Max. RPM/RCF Swing out Max. capacity 5,000 rpm / 5,394 xg Fixed angle Swing out Time control 6 x 85 ml 4 x 750 ml 4 x 250 ml/250 ml conical Pulse < timed 100 min or continuous RPM/RCF conversion Yes Noise level (dB) ≤60 Acc/Dec 9/10steps Program memory 100 Rotor Identification Automation Imbalance cutout Yes Display Blue LCD Automatic door release Yes Safety lid lock Yes Lid drop protection Yes Radius correction Yes Power supply(V/Hz) Power requirement(VA) Dimension(W x D x H, mm) Weight without rotor (Kg) 220/50~60 (110V optional) 1500 900 540 x 650 x 380 475 x 561 x 330 57 40 CE mark Cat. No. Yes GZ-1580 GZ-1248 Multi-Purpose High-Speed Centrifuge 1580/ 1248 9 3. Installation 3-1. Power On/Off and Door Release Action 3-1-1. Power On/Off 1. After connecting the AC Power cord at the power socket on the right back of the instrument, turn on the Earth Leakage Breaker Switch (1580 only). Check the proper power. 2. Turn on the instrument by pressing a switch on the right side of the instrument. The default values are Max. rpm, 10 min, ACC 4, DEC 4. 3-1-2. Door Release 1. For opening the door, touch the [DOOR] button. Should touch the [DOOR] button when the door is closed (Door LED shows off). ☞ Close the door until hearing clank shut. When the door is opened, the door LED turns on. The door is not opened while the instrument is running. If the door is opened, the instrument could not be operated even with pressing the [Start] button. For operational safety, this instrument has the automatic rotor recognition function. When you supply the power, "Searching Rotor" /“Change to Rotor ID” will be appeared. If the rotor is absent, the “Error 9” will be appeared. This message will be cleared after rotor coupling and running. Power Failure: If there is any power failure during operation, door is not opened with ‘Door’ button. Door can be opened only when the operation is completely stopped and the power is on again. If you want to open the door at the power failure, please refer to ‘4-8. Emergency Door Open’. Multi-Purpose High-Speed Centrifuge 1580/ 1248 10 3-2. Rotor Coupling and Disassembling Action 1. Before coupling a rotor, clean the motor shaft and chamber with soft dry towel. 3-2-1. Swing-Out Rotor 2. Mount a proper rotor into the motor shaft. 3. Grasp the rotor with one hand, and place Rotor Locking Tool at the center hole of the rotor. To assemble the rotor: Rotate the Rotor Locking Tool clockwise until tightly assembled. To disassemble the rotor: Rotate the Rotor Locking Tool counterclockwise. 4. Hang the appropriate buckets into the rotor. Load the identical bucket at each wing for safety. (Do not leave a vacant wing without bucket. All wings should hold identical bucket. ) Remove dirt and dust around hooks of rotor and hanging part of bucket. 5. Spin the rotor manually to check if bucket swinging is free enough and ever. If they do not swing freely, apply the Lubricant (grease) to the linking area. 3-2-2. Fixed Angle Rotor 2. Mount a proper rotor into the motor shaft. Grasp the rotor with one hand, and place Rotor Locking Tool at the center hole of the rotor. To assemble the rotor: Rotate the Rotor Locking Tool clockwise until tightly assembled. To disassemble the rotor: Rotate the Rotor Locking Tool counterclockwise. 3. To close of the rotor lid, rotate the rotor lid nut clockwise. For opening lid: rotate the rotor lid nut counterclockwise. When you run a fixed angle rotor, make sure that the rotor lid is tightly closed. If you don’t close the rotor lid completely, it will be crushed. Multi-Purpose High-Speed Centrifuge 1580/ 1248 11 ☞ For operational safety, this instrument has the automatic rotor recognition function. 3-3. Positioning of Sample Tubes 1. Before loading sample tubes, check the water drop or dirt in the rotor hole or inner adaptor. If there is a water drop or dirt in the rotor hole or inner adaptor, remove it with soft dry cloth. 2. Tubes should be placed in the rotor with same amount of samples at symmetrical positions. Only use appropriate centrifugal tubes and do not exceed the speed beyond the tube’s max. g-force. For safety, fill the sample for 70~80% in the tubes. Correct Way of Sample Balancing & Tube Usage If the number of samples is not in pair, please load the control tubes at each symmetrical position. Otherwise, it results noise and vibration, which eventually damage the instrument. ☞ For safety, the ‘Imbalance Cut Off’ function will be occurred, if there is imbalance of loading tubes (Error 8, Imbalance error). Please refer to 6. Trouble Shooting. Multi-Purpose High-Speed Centrifuge 1580/ 1248 12 4. Operation 4-1. Key Functions of Control Panel □ RPM/RCF For automatic conversion of RPM/RCF and to set the speed □ TIME Use to set time, available range up to 99 min. 59 sec. (00:00: continuous) □ Temp Use to set temperature (-20°C ~ 40°C) □ ACC/DEC Use to set the acceleration & deceleration level from 1 to 9 steps. ‘0’ in deceleration step means natural deceleration. Larger number means faster acceleration or deceleration. □ PROG Use to save a set of setting values or recall the saved program number □ Fast Cool Use to reach rapid refrigeration up to the setting temperature. □ Pulse Use for quick runs □ Rotor g-value confirmation for using tube adaptors □ Enter Use for completion of data setting □ Start/Stop Use to start and stop operation □ Door Use to open instrument lid Multi-Purpose High-Speed Centrifuge 1580/ 1248 13 4-2. Setting RPM/RCF Action 4-2-1. Setting RPM ▶ Speed setting unit: 10 rpm or 100 rpm 1. Touch the [RPM/RCF] button once. RPM MODE is generated by pressing a [RPM/RCF] button once. 2. RPM LED is flickering on the display window. Touch the [▲▼] buttons to change input value. After keeping holding finger on the [▲▼] buttons for 5 seconds, the unit of setting value is changed to 100 rpm from 10 rpm. If you do not touch the [▲▼] button for 5 seconds, the setting mode is cleared. 3. Touch the [Enter] button to complete the setting. Touch [Enter] to save the setting value. 4-2-2. Setting RCF ▶ Speed setting unit: 1 rcf or 10 rcf 1. Touch the [RPM/RCF] button once. RPM MODE is generated by touching a [RPM/RCF] button twice. 2. RPM LED is flickering at the display window. Touch the [▲▼] buttons to change input value. After keeping holding finger on the [▲▼] buttons for 5 seconds, the unit of setting value is changed to 10 rcf from 1 rcf. If you do not touch the [▲▼] button for 5 seconds, the setting mode is cleared. 3. Touch the [Enter] button to complete the setting. Multi-Purpose High-Speed Centrifuge 1580/ 1248 14 4-3. Setting Time ▶ Speed setting unit: 1min. or 10 min./ 1 sec. or 10 sec. Action Time is down-counted after starting centrifugation. 1. Touch the [TIME] button once. 2. ‘MIN’ on LED is flickering. Touch the [▲▼] buttons to change input value. After keeping holding finger on the [▲▼] buttons for 5 seconds, the unit of setting value is changed to 10min. from 1 min. If you do not touch the [▲▼] button for 5 seconds, the setting mode is cleared. 3. Touch the [Enter] button to pass ‘SEC’ value setting. 4. Touch the [▲▼] buttons to change input value. After keeping holding finger on the [▲▼] buttons for 5 seconds, the unit of setting value is changed to 10 sec from 1 sec. 5. If you do not touch the [▲▼] button for 5 seconds, the setting mode is cleared. Touch the [Enter] button to complete the setting. 4-4. Acceleration / Deceleration Use the adjustment function of acceleration & deceleration levels to protect sensitive samples. Action 1. Touch [ACC/DEC] button. 2. Touch the [▲▼] buttons to change input ACC value. ACC blinks on the ACC/DEC display. Input the desired level of ACC from 1 to 9. (Level 9: The fastest acceleration) If you do not touch the [▲▼] button for 5 seconds, the setting mode is cleared. 3. Fix the ACC level by touching [Enter] button. Multi-Purpose High-Speed Centrifuge 1580/ 1248 15 4. Touch the [▲▼] buttons to change input DEC value. DEC blinks on the ACC/DEC display. Input the desired level of DEC from 0 to 9. (Level 0: Natural deceleration / Level 9: The fastest deceleration) 5. If you do not touch the [▲▼] button for 5 seconds, the setting mode is cleared. Fix the DEC level by touching [Enter] button. 4-5. Program Saving & Recalling Action 4-5-1. Saving 1. 2. Set parameters. (Refer to 4-2 ~ 4-4 ) Touch the [PROG] button longer than 3 seconds. Check the message of “PROGRAM SAVE: ##” on the display window. 3. Touch the [▲▼] buttons to change input Program number. If you do not touch the [▲▼] button for 5 seconds, the setting mode is cleared. 4. Save up to 100 programs. (Program numbers from 00 to 99) Touch the [Enter] button to complete the saving. 4-5-2. Recalling 1. To recall the saved program, just touch the [PROG] button shortly (less than 1 sec.). Check the message of “PROGRAM CALL: ##”, on the display window. 2. Touch the [▲▼] buttons to select program number you want to recall and then touch the [Enter] button. If you do not touch the [▲▼] button for 5 seconds, the setting mode is cleared. When you touch the [Enter] button, display window show the saved setting parameters (RPM/RCF, TIME, TEMP). Multi-Purpose High-Speed Centrifuge 1580/ 1248 16 4-6. Pulse ▶ It is for quick and short spin down. Action 1. If you touch [Pulse] button and release at the point you want to stop, the centrifuge decelerates immediately. 4-7. Start/Stop Action 4-7-1. Start 1. After setting RPM/RCF, Time and Temp., touch [Start] button. During running, a ‘Start LED’ is turned on. The instrument is running only when the door is closed. 4-7-2. Stop 1. In case of touching the [Stop] button, the operation is stopped. 4-8. Emergency Door Open For emergency door opening, you can use the Emergency Door Open Tool only when the instrument is completely stopped. The door can be unlocked manually with the Emergency Door Open Tool through the emergency door opening hole. 1. Find the emergency door open hole in left side of the instrument. 2. Insert Emergency Door Open Tool into the hole and push it until the door is released. Manual opening should be performed only when spinning is completely stopped. Otherwise, harmful damage will be accompanied to not only operators but samples. After opening the door manually, it is recommended to wait until normal electricity comes back. Multi-Purpose High-Speed Centrifuge 1580/ 1248 17 4-9. Fuse Replacement (Only for 1248) When the power is not turned on, please check the connection of power consent / power switch. Replace the fuse as following instruction, if the power is still not turned on. Action 1. Separate the AC Power Cord at the back of the instrument and push the flat-head screwdriver for bring out the fuse case. 2. Replace the damaged fuse with new one from the fuse case and then connect in the power. 5. Maintenance 5-1. Outer part of Instrument 1. Clean the outside of the instrument with dry soft cloth. If necessary, dip the cloth in neutral detergent and clean contaminated area. Keep completely dry after cleaning. 2. Do not use any volatile chemicals such as alcohol and benzene, etc. 3. Be careful not to make scratches on the surface of the instrument. The scratches can cause corrosion on the surface of the instrument. If any rust appears, clean it with neutral detergents and keep dry. 5-2. Chamber 1. Keep dry inside the chamber after every use. 2. If the chamber is contaminated, dip the cloth in neutral detergent and clean contaminated area. 5-3. Shaft 1. Always make special attention to clean the motor shaft to avoid any imbalance problem due to the contaminants. 2. After using the instrument, take out the rotor from the shaft, and clean the shaft with dry soft cloth to keep dry. Multi-Purpose High-Speed Centrifuge 1580/ 1248 18 5-4. Rotor 1. If any parts are contaminated with samples, clean the rotor with soft wet cloth and keep the rotor dry. 2. Be careful not to make scratches inside or on the surface of rotors. Any small scratches can cause corrosion of the rotor and big damage to the instrument. 3. If you do not use the instrument, keep the rotor separately from the motor shaft and stand it upside down. 5-5. Transportation of Instrument 1. If you need to move or ship the instrument, be cautious to protect the motor shaft from any physical impact or turbulence. 2. Do not mount a rotor in any cases of movement. Fill inside the chamber with proper materials to keep the motor shaft on place and not to be influenced by physical pressure. 6. Trouble Shooting 6-1. Check list Symptom Check list Connect the AC Power cord and make sure that the line is completely Power failure connected between the instrument and power outlet. Check the power switch is turned on. (Please refer to 3-1. Power On/Off and Door Release) Can’t be started If the door is not closed completely, the instrument can’t run. Check the Door LED on the display window and close the door completely. If the power is out, check the main fuse for the laboratory to supply the power. Can’t open the door If it is not solved in shortly, open the door with emergency door tool manually for safety of sample. (Please refer to 4-8. Emergency Door Open) Remove the dirt at the door latch and then close the door completely again. Can’t close the door If the door seems not being closed by mechanical reason, please contact our service team. Noise and vibration during Please check the balanced status of both the table and the instrument. Multi-Purpose High-Speed Centrifuge 1580/ 1248 19 running Please re-check the coupling status of the following three matches to minimize the noise 1. the balanced way of coupling of the rotor into the motor shaft 2. the completeness of fixing of the Rotor Locking Nut on the rotor 3. the matching status of Rotor Lid with the rotor (Please refer to 3-2. Rotor Coupling and Disassembling) Check balances of samples in the rotor. (Please refer to 3-3. Positioning of Sample Tubes) and load the same weight of samples symmetrically. 6-2. Error Code If the instrument shows the error code with beeping sound, press ‘STOP’ button to stop the beeping sound and press ‘Enter’ button to release of the error status and make the instrument go to the default setting again. Error Possible Causes Actions - Shut off the power supply, and then, turn on the power switch again Error 1 RPM Sensor to check the instrument. - If the error code shows continuously although you try to operate again, please call Gyrozen Field Service Engineer. - If the door is not closed completely, this message is appeared. -Remove the dirt at the door latch and then close the door completely Error 2 Door again. Check the Door LED on the display window. If it is not solved in shortly, open the door with emergency door tool manually for safety of sample. (Please refer to 4-8. Emergency Door Open) - If the motor is overheated, this message is appeared. -Shut off the power supply for an hour, and then turn on the power Error 3 Motor Overheating switch for checking the instrument. - If the error code shows continuously, please call Gyrozen Field Service Engineer.. - If the power input of Power supply (V/Hz) is 10% less than required power, this message is appeared. Error 4 Low Voltage - Shut off the power supply and then check the voltage of the Power supply (V/Hz). - Use AVR to provide proper power. Error 5 High Voltage - If the power input of Power supply (V/Hz) is 10% more than required power, this message is appeared. Multi-Purpose High-Speed Centrifuge 1580/ 1248 20 - Shut off the power supply and then check the voltage of the Power supply (V/Hz). - Use AVR to provide proper power. - If the instrument is spun with over speed, there will be some Error 6 problems in the overload of motor and the output of motor. Over Speed - Shut off the power supply, and then, turn on the power switch again to check the instrument. Error 7 Software Error 8 Imbalance - If the installed software has bugs, this message is appeared. - Tuning the firmware (Download)* - Check weight-balances of samples (Please refer to 3-3. Positioning of Sample Tubes) and then turn off and on the instrument for checking. - If the function of rotor recognition is failed, this message is appeared. Coupling the proper rotor exactly (Please refer to 3-2. Rotor Coupling Error 9 Rotor ID Sensor or RPM and Disassembling) - Check the existence of the rotor. If the rotor is absent, mount a rotor - If the error code shows continuously, please call Gyrozen Field Service Engineer. * Any wire disconnection or tuning of the instrument must be performed only by a service engineer who is authorized by GYROZEN Co., Ltd. Multi-Purpose High-Speed Centrifuge 1580/ 1248 21 7. Rotors & Accessories Multi-Purpose High-Speed Centrifuge 1580/ 1248 22 Multi-Purpose High-Speed Centrifuge 1580/ 1248 23 Multi-Purpose High-Speed Centrifuge 1580/ 1248 24 Multi-Purpose High-Speed Centrifuge 1580/ 1248 25 Multi-Purpose High-Speed Centrifuge 1580/ 1248 26 Multi-Purpose High-Speed Centrifuge 1580/ 1248 27 Multi-Purpose High-Speed Centrifuge 1580/ 1248 28 Multi-Purpose High-Speed Centrifuge 1580/ 1248 29 8. Product Range Multi-Purpose High-Speed Centrifuge 1580/ 1248 30 9. CE Multi-Purpose High-Speed Centrifuge 1580/ 1248 31 Multi-Purpose High-Speed Centrifuge 1580/ 1248 32