1
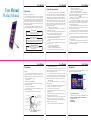
User Manual
User Manual
Product Manual
User Manual
Operation precautions
Special note
Please read carefully before operating.
For easy understanding and attracting your attention, we will prompt
you according to the following grades and special warning languages in
this or following chapters when it relates to product safety or requires
attention. The safety information in this chapter isn't complete. For your
safety and benefits, we will describe certain safety information in the
following chapters in this manual. Please read them carefully no matter
where the safety information is.
In addition to the precautions stated in special warnings, you also
need to pay attention to other content and introduction in this manual.
Do not disassemble
Do not disassemble and maintain this device by yourself,
or else the warranty is violated.
Battery safety warning
If the battery isn't replaced properly, it may cause explosion.
Please replace same battery according to the manual and dispose
the used battery according to the manufacturer's instruction.
Do not splash liquid on the device
Do not splash or approach the liquid, rain water or damp the
device. This product isn't designed with waterproof or
oil-proof materials.
1. To ensure the safety of yourself and the device, please earth the
external power supply properly. If you won't use the device for a long
time, please pull out the plug to avoid temporary overvoltage and
damaging the system. The local power supply should be stable and isn't
interfered with. If you don't know the specification of local power supply,
please consult local retailer or power plant. For your safety, do not
damage the plug of the power plug. Do not pull the power cord to
disconnect the power supply. Please hold the plug to ensure the safety.
Please pull out the plug before cleaning the computer. Do not
disassemble the power adapter.
2. Do not put the computer near water.
3. Install the computer on stable support, or else the computer may
fall off and cause serious damage.
4. Do not put the wires at the places where people come and go, to
avoid trampling the wires. Do not put any object on the wires.
5. Follow all the warnings and labels on the computer.
6. If you won't use the device for a long time, please pull out the plug
to avoid damage caused by temporary overvoltage.
7. Do not splash any liquid on the computer, which may cause fire or
electric shock.
8. If any of the following conditions occur, please ask qualified
personnel for help:
a. The power cord or plug is damaged or worn
b. The liquid is splashed on the computer
c. The computer is drenched or splashed with water
d. You have been following the operation instructions, but the
User Manual
Put the LCD in the center in front of you. If you read documents more
frequent than the display, you can put the documents in front of you
[Attention]
directly and put the display on the side.
When you are working or playing games with the computer, please
You can use document shelf and put the documents close to eye level.
adjust the environment and the computer to keep your body in a
Keep the screen top close to eye level. The people suffering from
comfortable and flexible state. The following suggestions can help you
astigmatism may need to keep the screen lower, or consult the qualified
to have a more comfortable environment.
health experts about the glasses suitable for working with computer.
1. Support your back:
4. Reduce eye fatigue:
Select a chair that supports lower back.
Put the display in the distance of your arm and sit in front of the
Adjust the height of work surface and the chair to keep them in a
comfortable and natural state.
Front view
Please refer to the figure below and understand the function and
description of the components on front panel.
display comfortably.
may cause glare, or control the light intensity with curtain.
Clear the articles under the table to make the position and movement
of your legs more comfortable.
Please clean the screen, as well as your glasses.
Please adjust the brightness, contrast and font size of the display to
If you can't rest your feet on the floor, please use a footstool.
the comfortable state.
When you are operating the keyboard, please press the keys gently
45cm-70cm
Eyesight and top screen
keep in one horizontal
level or a little lower
Forearm and hand keep in
one horizontal level
and keep your hands and fingers relaxing.
Do not put your palms or wrists on the objects with large angle to rest
when you are typing. If necessary, take a rest when you are typing.
When you are not typing, relax your arms and hands. Do not rest on
Forearm keeps flat
or decline
Change screen direction
in case of reflecting
strong lights.
Support waist
Spare certain spaces
under work plat.
A little decline of thigh
User Manual
Avoid glare. The display should be away from the light source that
2. Keep the legs in a comfortable state:
Relax your shoulders
computer still can't work normally
e. The computer ever fell off or the shell is damaged
f. The computer has been damaged obviously
9. Please refer to the product specifications for the operating and
storage temperature. The computer may be damaged permanently if the
temperature isn't in specified range (0 -40 ).
10. Do not use the computer at the places near water or other liquids.
Do not splash liquids on the computer.
11. Do not remove the hard disk when the computer is running, or
else the data may be lost or damaged. Back up the data before
formatting the hard disk. Back up important data in time and we are not
responsible for the data loss hereby.
12. Only the qualified personnel of our Computer can assemble and
disassemble the computer. Please keep the seal intact, or else the
warranty or guarantee will be violated.
13. If you have set password, please remember the password and
enter it to turn on the computer. If you have forgotten the password,
please contact the supplier or service center. However, the data may be
lost.
14. If you use extension power cord, please make sure that the total
amperage of all the devices connected to the extension cord doesn't
exceed the rated power.
15. Keep the vents in the computer unblocked. Do not block or cover
these vents, or insert any object into the vents, so as to keep the space
around the computer ventilated.
User Manual
3. Reduce the bend and turn of neck:
Ergonomics
User Manual
Feet lay flat on the floor
or lay on footrest
the edge of objects, such as desk edge.
Adjust your chair and do not make the seat squeeze knees back.
1. Digital camera (Optional )
The built-in digital camera allow you to transmit video connection.
2. Display Screen (Some models have touch function)
High quality LCD display
3 . Power Light
4 . Harddisk light
User Manual
User Manual
4 . Network Port
7. Built-in Speaker
Rear view
Please refer to the figure below and understand the function and
description of the components on rear panel.
User Manual
No need the earphone to enjoy much musics,chats and movies
contents ,It fits for your casual auditory experience.
8. Flip and Built-in USB Port
Connect USB peripheral devices, e.g.keyboard,Mouse,etc
9. The Stand
Supporting AIO function,The angle can be according to your requires
to adjust from 90 degree to 180 degree by free.
For network connection LAN This computer integrates a RJ-45
network connector,which can be connected the network cable and used
to access Internet.
Usage
Step 1: Insert the network cable plug from the server or hub into the
RJ-45 network port in the rear of the computer.
Step 2: Install the network Drivers, as well as the fax or Network
Applications.
User Manual
Product Package List
5 . Earphone Port
This stereo earphone port provides audio output to sound system or
earphone. When the sound system or earphone is connected, the
embedded speaker will be deactivated.
Bottom view
Please refer to the figure below and understand the function and
description of the components on rear panel.
All In One
Wired Keyboard(optional)
User Manual
6 . Cooling Hole
All in one cooling air hole, reinforce the cooling effect, effective
approach to reducing the AIO using temperature more high situation .
1 . Power Input Port
1. Cooling Hole
Connect power supply
All in one cooling air hole, reinforce the cooling effect, effective
approach to reducing the AIO using temperature more high situation .
2. AUTO Button
According to VGA setting up to self-adjusting display mode to the
best effect.
3. MENU Button
Press this button to adjust the menu display function .
4. Minimize Button
Press this button to adjust subside the display brightness .
5. Increase Button
Press this button to adjust increase the display brightness.
6. Power Button
Turn on/off the PC
2 . USB Port
3 . HDMI Port
A kind of digital video/
The audio port
technology,it s suitable for
the special digital image
transmission port
,meanwhile transmit audio
and video signals,the highest
data transmission speed
5Gbps.
User Manual
Starting Computer
Connecting wired keyboard and mouse
Connect the wired keyboard and mouse to the USB interface in rear
panel of the computer.
Product Package List
All In One
Wired Keyboard(optional)
User Manual Wired Mouse(optional)
The driver disk(optional)
The Power Adapter(optional)
The Power Cable (optional)
Remark:Keyboard and mouse may be cause of different countries
configuration requires difference ,it depends on goods .
Connect USB peripheral
devices,
e.g.keyboard,Mouse,etc
Wired Mouse(optional)
The Power Cable (optional)
User Manual
Connecting power and starting Special model
Connect the power cord to the DC IN port in the rear panel and then
slide the power switch below front panel to start the computer.
User Manual
BIOS instructions:
System Time
Time setting
System Date
Date setting
Change Supervison Password
Change the password of super user
Change User Password
Change user password
Boot Device Priority
Press the power button to
starting the AIO, Long press the
power button 3 seconds to shut
down the AIO .
Warning:
Before the computer boot
completely, The power
disconnect there will cause the
next starting power has a error .
Boot sequence of drives
Hard Disk Drives
HDD
Removable
Mobile HDD
PXE SUPPOT
PXE support
The Power Adapter(optional)
Remark Keyboard and mouse may be cause of different
countries configuration requires difference ,it
depends on goods .
User Manual
The installation pictures of keybord & mouse below are for illustrative
purpose only, please refer to the actual status and spec of keyboard &
mouse when you operate it.
Using The Power Button
The driver disk(optional)
Save Change and Exit
Save change and exit
USB2.0 Controller Mode
Discard Changes and Exit
USB2.0 control center
Exit without saving
Load Optimal Defaults
Restore default settings