1
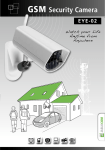
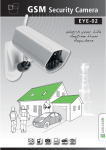
GSM Security Camera
EYE-02
A
Camera EYE-02:
3
Green light
1
Camera lens
B
10
Battery cover
6
GSM Antenna
2
PIR motion sensor
7
Power button
8
AC adaptor socket
Red light
9
USB connector
5
Infra red illumination
Package content:
1
EYE-02 camera
2
4
6
8
User manual
3
Battery
Instalation CD
Screwdriver
Remote control
5
7
9
II.
4
USB cable
Wall mounting screws
AC adapter
10
Connecting cable
Index
Index..................................................................... 1
4.3 Event Reports.......................................................... 10
4.4 Video Record Setting (Available through JabloTool
only)........................................................................ 11
4.5 GSM Network Setting ............................................ 12
1. EYE-02 Camera - Introduction . ..................... 1
1.1 Basic Features............................................................ 1
1.2 EYE-02 Camera Description...................................... 1
1.3 EYE-02 Camera Internal Parts.................................. 2
5. Other Features............................................... 13
5.1 Call Control.............................................................. 13
5.2 Night View............................................................... 13
5.3 Monitoring . ............................................................ 13
5.4 Switching OFF and ON............................................. 14
5.5 Battery..................................................................... 14
5.6 Micro SD card.......................................................... 14
5.7 Reset to Factory Defaults....................................... 15
5.8 External Wireless Devices...................................... 15
2. Camera Installation........................................ 2
2.1 Package Contents...................................................... 2
2.2 Installation................................................................. 3
3. Camera Function............................................. 4
3.1 Working Modes......................................................... 4
3.2 Remote Control......................................................... 4
3.3 CONFIG Mode............................................................ 5
3.4 Profiles....................................................................... 5
3.5 Detectors................................................................... 6
3.6 Reports & Contacts................................................... 7
3.7 SECURITY SETTINGS.................................................. 8
6. Maintenance ................................................. 16
7. Troubleshooting............................................ 16
8. Technical Specification................................. 17
8.1 Battery Information................................................ 18
8.2 Warranty................................................................. 18
4. Camera Configuration................................... 8
4.1 Set-Up and Configuration via PC.............................. 8
4.2 SMS Commands........................................................ 9
1. EYE-02 Camera - Introduction
1.1 Basic Features
EYE-02 is a security and monitoring camera that communicates wirelessly via the GSM network.
EYE-02 integrates the following built-in detectors that allows to detect an intruder:
PIR motion detector
Glass-break detector
Tilt and vibration detector
Motion-in-Picture detector
Detects movement by sensitive detection of human body temperature.
Recognizes the specific sound of breaking window glass
Recognizes any unwanted change in the camera‘s position and angle
Detects changes in a scene by taking snapshots regularly and comparing them
• EYE-02 is simple to install and configure (suitable for DIY installations)
• EYE-02 sends an alarm record using MMS, e-mail, SMS or voice call. Copies of pictures and videos can be
stored on the memory card or can be stored at a web server. Alarm Receiving Centers are also supported.
• EYE-02 allows 24 hour monitoring via its night view mode.
• EYE-02 is compatible with a wide range of external wireless devices (refer to the table on the inside back
cover of this manual).
1.2 EYE-02 Camera Description
Please refer to the picture A on the inside front cover of this manual.
1
2
3
4
5
Camera lens
PIR motion sensor
Green light (LED)
Red light (LED)
Infra red illumination (LEDs)
JR_EYE-02.ENG.MAN.Manual.16.A
6
7
8
9
10
-1-
GSM antenna
Power button
AC adaptor socket
USB connector
Battery cover
1.3 EYE-02 Camera Internal Parts
Please refer to the EYE-02 camera picture D on the back cover of this manual.
1
Dual band GMS antenna
7
2
EDGE/GSM module
- Picture transfer to mobile phones via MMS
or e-mail
- Data connection to monitoring servers
and ARC
8
3
Buzzer
• Built-in acoustic indicator
9
4
5
6
Li-Ion battery
• Provides back-up energy during electricity
failure
SD memory card
• Extends memory capacity up to 32 GB
SIM holder
• For a standard GSM SIM card
10
11
12
Microphone + digital signal processing
• Glass-break detection
Short range radio
• Free band 868 MHz
• Allows cooperation with remote controls
• Possible extension with JABLOTRON professional
wireless security system
Tilt and vibration detector
• Protects against intruder manipulation with the
camera
Infrared reflector
• Illuminates the scene by non-visible beams for
camera night vision
PIR infrared detector
• Excellent sensitivity for human body detection
VGA camera
• CMOS chip with 2.9 mm lens
2. Camera Installation
Before installing the camera, ensure you have a SIM card provided by your GSM operator with an
activate EDGE/GPRS internet connection and MMS service.
Some SIM cards are protected by PIN code. It is necessary to disable the PIN code protection of
the SIM card. To do this, insert the SIM into your mobile phone and disable the PIN security code.
If this is not observed, the EYE-02 camera may not operate correctly.
2.1 Package Contents
Unpack the camera and check the package contents. Please refer to the picture B on inside front cover of this
manual.
1
2
3
4
5
EYE-02 camera
Battery
Remote control
Installation CD
USB cable
6
7
8
9
10
Screwdriver
Wall mounting screws
User manual
AC adapter
Connecting cable
Use only batteries, chargers and accessories approved by JABLOCOM for use with this particular
model. The use of any unapproved device may invalidate any approval or warranty, and may be
dangerous.
JR_EYE-02.ENG.MAN.Manual.16.A
-2-
2.2 Installation
For an extended graphic version of the installation procedure, see the Quick Guide manual.
Before inserting SIM card into camera make sure that:
- PIN protection is disabled
- MMS service is enabled
- Internet data access is enabled
• Insert SIM card and battery into camera
Unscrew and open the battery cover.
Insert the SIM card.
Insert battery and screw cover back.
• Install the camera to the selected position
Mark and drill-out fixing holes on a wall.
Mount the camera holder firmly.
Adjust the camera position.
Remove the lens protection.
• Connect camera to power source
Plug the power cable to the camera.
Plug the power adaptor to a wall socket. The camera will automatically turn on. Wait 30 seconds
and check the EYE-02 camera LED lights on the front panel.
• Enroll your mobile phone and remote control to the camera
Call the camera number from
your mobile phone.
JR_EYE-02.ENG.MAN.Manual.16.A
On the remote control, press the button
-3-
.
3. Camera Function
3.1 Working Modes
The EYE-02 camera has three main working modes: S L EEP, WATC H and CO NFIG .
Mode
SLEEP
WATCH
CONFIG
Button on
the Remote Control
Description
SLEEP mode is a stand-by mode of the camera. The camera doesn’t
detect any movement in the targeted area and the major detectors
are disabled. The only active detectors are those that protect camera
itself against an unwanted manipulation by an intruder.
In WATCH mode camera guards fully the targeted area, all detectors
are active.
CONFIG mode allows user to change camera settings and switch the
camera to other special modes (ENROLL, TEST, USB).
and
together
The chosen camera mode is terminated by switching to a different camera mode.
3.2 Remote Control
The package contains a wireless remote control (RC-86 type), which can be used to
switch between camera modes.
Changing a mode by using the remote control is signaled both by the LED lights on
the camera front panel, and by an acoustic signal. Meaning of the LEDs and acoustic
signals is as follows:
Remote control
ENROLL
WATCH
CONFIG
SLEEP
TEST
REPORT
Remote control navigation
Camera Mode
WATCH
SLEEP
LED lights signaling
Acoustic signal
Lights are Off.
One long beep
Green light is permanently On.
Two long beeps
CONFIG
Red and Green lights blink
slowly together.
Three long beeps
ENROLL
Red and Green lights swap
blinks slowly.
One short beep
ERROR
Red light is permanently On.
Four short beeps
The progress of the camera startup and shutdown and also the USB mode is indicated by fast green light
flashing. Entering USB mode is signalized by four long beeps.
JR_EYE-02.ENG.MAN.Manual.16.A
-4-
3.3 CONFIG Mode
CONFIG mode allows the user to change camera’s settings.
To enter the CONFIG mode by the remote control, press
and
buttons simultaneously – red and green
LED lights on the front panel will start to blink slowly at once.
From the CONFIG mode is possible to switch to other special modes (ENROLL, TEST, REPORT, USB).
MODE
ENROLL
TEST
REPORT
USB
DESCRIPTION
COMMAND
In the ENROLL mode, the camera allows to enroll new external wireless
devices such as remote controls, detectors, sirens, etc. Also a new contact
– phone number can be enrolled in this mode by just a simple call to the
camera. ENROLL mode is terminated automatically after one new items has
been enrolled.
TEST mode is a special mode for testing functionality of all detectors
without causing number of unwanted alarm reports. Camera beeps
and blinks after activation of any sensor.
In the REPORT mode, the camera sends a special report to all contacts
(call, MMS etc.) according to the camera settings.
and
buttons
press
Example of an SMS from the camera: Camera EYE-02 reports:
simultaneously for about
User originated camera test External wireless device RC-80(1),
4 sec
Time:13/11/2008 11:33:49.
In this special mode camera behaves as a standard USB flash disk. It
Shortly power button
allows to access files on the SD memory card without installation of
on camera back panel with
a special camera driver to PC.
connected power or USB
cable
To protect the camera’s safety, special modes will be closed automatically after a 5 minutes timeout
and the camera returns to CONFIG mode.
3.4 Profiles
The EYE-02 camera allows fast and simple setting of all necessary detector parameters by selecting one of
the pre-defined PROFILEs. These profiles are suitable for most camera applications. If necessary, the profile
may be further adjusted by the user.
HOME
HOME profile has been designed for camera installation inside
a building (house, flat, office). During the WATCH mode, there are
no movements of people, no wind drafts, no significant temperature changes, or loud noises etc. expected.
The TILT detector is active also in the SLEEP mode to protect the
camera against an unwanted manipulation.
OUTDOOR
OUTDOOR profile fits best camera installation outside your home.
The camera significantly reduces its detectors’ sensitivity in the
OUTDOOR profie as there are many possible sources that could
cause a false alarm triggering (sunshine, animals, street noise,
wind, etc.).
For outdoor installation see chapter 5.9.
JR_EYE-02.ENG.MAN.Manual.16.A
-5-
GARAGE
This profile is suitable for installation inside your garage. It is similar to the HOME profile. Additionally, the GARAGE profile provides
a 30-second entrance delay. It allows you to open the garage or
home entrance door first and switch the camera to the SLEEP
mode during this delay.
CARE
Profile CARE has been especially designed for monitoring small
children and elderly or disabled people.
The camera used in the CARE profile allows
the user to leave its home, stay in a short
distance away from the home and watch its
sleeping baby or ill grandmother etc.
at the same time.The camera is activated
by any movement or by a PANIC alarm
(triggered by a personal wrist button)
The internal acoustic camera signals are disabled in the CARE profile. Also the TILT detector is blocked to allow the camera manipulation.
SHOP
The most powerful profile is SHOP. In this profile, all detectors are
active, including the permanent process of “Motion in Picture” detection. This profile offers the highest quality of permanent monitoring;
consequently it is the highest energy consumption profile.
This profile perfectly fits places requiring a whole day monitoring and
a full protection during the night time, such as shops, office corridors
and reception areas, etc.
The default profile is HOME. For switching the profile use SMS command PROFILE (For details see chapter
4.2). You can switch mode and make some additional sensor customization also in JabloTool software.
3.5 Detectors
The EYE-02 camera integrates a wide range of detectors. This sophisticated solution of combining various
types of detectors enables the user to protect the desired area from a wide range of threats. This chapter
briefly describes individual detector principles necessary for a correct setting of detection.
PIR motion detector (PIR)
PIR detector (Passive InfraRed sensor) or a Human Body Detector is the most common type of professional security systems detectors. PIR can detect even very small changes of temperature differences in front of the camera.
Motion-In-Picture detector (MIP)
The key principle of this detector is derived from a professional surveillance camera system. It analyzes the
scene and detects any change in the picture permanently.
A sophisticated digital algorithm provides an excellent resistance to false alarms caused by non-essential
changes in pictures (getting dark, switching on the street lamps, etc).
The user can simply mask-out (hide) a part of a picture in order not to detect changes in this part (mask of
the street traffic, etc.) and set the sensitivity according to the size and speed of change in the picture.
As the DSP method is energy demanding, MIP is usually activated after some alert from the PIR detector.
Glass-break detector (GBS)
Glass-break detector uses a digital signal analysis from the microphone and is able to detect a characteristic
sound of the window breaking up to 9 meters away.
The Door-Opening-Detection is a special type of the detection that uses the acoustic signal filtering. It allows
detection of the infrasonic wave (pressure wave) caused by a door or window opening.
GBS sensor can be used for indoor installations only.
JR_EYE-02.ENG.MAN.Manual.16.A
-6-
Tilt and vibration detector (TILT)
Built-in tilt and vibration detector can detect a tampering or an unwanted manipulation of the camera.
Example: Stealing the camera body or changing camera position.
As vibration detectors are very sensitive, it should not be use for outdoor installation to prevent
the false alarms caused by the wind gusts. The vibration detector sensitivity reduction may be
necessary also for indoor installation with usual vibrations in some cases.
The detectors are optimized for application in rooms with a maximum distance up-to 10 meters.
Detector configuration
Each detector can be configured to 3 sensitivity levels and 3 levels of analysis.
Higher sensitivity settings mean that detector si activated more easily.
Example: Smaller movement or smaller vibration will be interpreted as activation.
Higher analysis level means that for activation more analysis has to be made before it is rated as activation.
Example: The movement or sound have to last longer or object (person) has to cross more detection zones etc..
3.6 Reports & Contacts
The EYE-02 camera can report events to mobile phones (via voice call
, text message
, MMS
) or to
e-mail addresses. Up to 10 different phone numbers and 10 e-mail addresses can be saved to the camera list.
Report levels
Each stored contact can have its own report level set. Three levels (Normal, Extended, All Details) indicate
how many events are reported to the contact. Normal level reported contacts will receive ALARMS only,
Extended will get also some troubleshooting information (power failure, flat battery...) and All Details level
contacts will receive all additional events (mode changes, startup/shut down...)
By default settings, camera sends alarm report as MMS and makes a call to all enrolled contacts. All other
reports come as SMS to the user.
The extended level of reporting is assigned only to the first enrolled contact, all additional contacts get
normal level.
Editing contacts
To add a new contact by calling, you can call the EYE-02 camera directly from a new phone number while the
camera is in the ENROLL mode.
New contacts may also be added via an SMS command (see chapter 4.2, CONFIG commands).
The most comfortable way of editing contacts is JabloTool software. You may simply edit the numbers or
e-mail adresses and completely customise what events will be reported at which reporting level.
Jablotool DESKTOP - contacts configuration
JR_EYE-02.ENG.MAN.Manual.16.A
-7-
If there are no phones saved in the contact list (after installing a new EYE-02 camera or after using the
factory reset function), the camera switches automatically to ENROLL mode (after power on) and waits for an
incoming call.
Camera sends e-mails with the reply address [email protected]. Please check your e-mail
client SPAM filter to accept e-mails from this address.
3.7 SECURITY SETTINGS
Camera is not protected by any password in the factory settings.
Without setting a password the camera processes incomming SMS messages or receives calls only from
phone numbers stored in Contacts. It is possible to setup two passwords. For password setting or changing
use JabloTool or configuration SMS commands (chapter 4.2).
Remote Access Password
This password protects any access to your camera (SMS, JabloTool).
If it is used, camera process SMS messages that begins with the password from any phone number.
Configuration Password
This password protects camera configuration. (The contacts are not part of configuration.)
Password can contain 4-31 characters, allowed symbols are 0..9, a..z, A..Z. Password is not case
sensitive.
Protect your camera by setting the Remote Access Password.
4. Camera Configuration
4.1 Set-Up and Configuration via PC
The most convenient way to set-up the EYE-02 camera and configure its parameters is by using PC and the
JabloTool software.
JabloTool DESKTOP is available as a software on the installation CD included in the camera package.
JabloTool WEB server works remotely with the camera from www.jablotool.com.
Function of both JabloTool versions are the same, the only difference is in the method of connection to the
camera - JabloTool WEB requires a connection to the internet and establishes a cable-free connection with
the camera, JabloTool DESKTOP interconnects the camera with the PC by a USB cable. The advantage of the
USB connection is a faster data transfer from the camera.
JabloTool DESKTOP
Load the installation CD to your computer, start
the “INSTALL.EXE” and follow the program
instructions.
USB Cable
EYE-02 connection wit JabloTool DESKTOP
Do not connect the EYE-02 camera to the USB on your computer until you have finished installing
the JabloTool software from the CD!
The latest version of the installation software can be downloaded from
www.jablotool.com/download.
Turn the camera On and connect it to the computer by the USB cable. Wait until the
operating system recognizes the camera. Click on the JabloTool icon on the desktop than
to load the program and follow instructions on the screen.
JabloTool
The maximum length of a USB cable is usually 5 meters. If your EYE-02 camera is too far, you may
need to remove it temporarily from its location or bring your PC nearer.
JR_EYE-02.ENG.MAN.Manual.16.A
-8-
JabloTool WEB
SERVER
JabloTool WEB is a service at www.jablotool.com.
User accessing its EYE-02 camera trough the JabloTool WEB will be guided to establish the connection
to the camera. If the user is not registered or if the
EYE-02 camera is not protected by a Remote Access
Password, the user will have to send a special SMS
authorization command from his mobile phone
first to initiate the EYE-02 camera connection to
JabloTool.
Internet
EYE-02 connection wit JabloTool WEB
4.2 SMS Commands
Basic EYE-02 camera functions can be operated by text message (SMS) commands sent to the camera. Commands are accepted only when sent from a mobile phone number stored in the contact list.
If the EYE-02 camera is protected by the Remote Access Password or the Configuration Password, each
SMS must be introduced with the appropriate password. Using the password the camera can be operated
from any phone.
Please note passwords and commands are case insensitive.
Control commands
Control commands report or change the camera state.
COMMAND
DESCRIPTION
Switches EYE-02 camera to the WATC H mode.
Example: <Remote Access Password> WATCH
WATCH
SLEEP
If the camera remote access is protected by the password MIKE, the command must be
send as: MIKE WATCH
Camera will confirm the message with a status SMS.
Switches EYE-02 camera to the S L EEP mode.
EYE-02 camera will return an SMS indicating the current camera status.
Example of a response: Camera EYE-02 status: SLEEP mode, Time: 12/11/2009 13:56:31,
SwitchX : Off, SwitchY: On
STATUS
PICTURE
REPORT SMS
REPORT MMS
CREDIT
<USSD>
HELP
WEB
Camera EYE-02
Name of your camera
SLEEP mode
Current camera status
Time:12/11/2009 13:56:31
Time (date) of status report
SwitchX: Off
Indication that SwitchX is curretnly off.
SwitchY: On
Indicates that SwitchY is currently on.
The name SwitchX (SwitchY) can be changed to whatever you want need - see the table below.
The EYE-02 camera returns a multimedia message with a picture of the current scene in
front of the camera. The message also contains current camera status.
The EYE-02 camera sends a report of the 10 latest events . Camera sends up to 5 SMS.
EYE-02 camera sends an MMS with the last alarm event recorded in the camera history.
This command has been designed especially for the prepaid SIM cards. The EYE-02 camera
will return a text message with information about the current credit on your SIM card.
This function is provided by your network operator and might not work correctly on some
networks.
After the first using of this command camera keeps the USSD part. It’s possible to send
CREDIT command only since then.
Camera returns a text message with a list of the SMS commands.
Command is for connecting the camera to the JabloTool server. The server describes detailed syntax for the command.
JR_EYE-02.ENG.MAN.Manual.16.A
-9-
COMMAND
SwitchX
_______
SwitchY
DESCRIPTION
If the camera is enrolled to a wireless relay, this command switches its programmable output. Parameters are ON or OFF. If you would like to make a pulse on the output, send the
command ON <time in seconds>.
Please see chapter OASiS wireless devices.
Example: SwitchX ON
Switches on the PGX output of the wireless relay.
Example: <Configuration Password> SwitchY OFF
Example: SwitchX ON 30
Switches on the PGX output for 30 seconds
CONFIG commands
CONFIG commands change the EYE-02 camera settings. Camera confirms configuration commands with an
SMS.
COMMAND
CONFIG PROFILE
<profile>
DESCRIPTION
Profile setting, <profile> is H O ME , OU T D O O R , G AR AG E , S H O P or C ARE
Example:
CONFIG PROFILE SHOP
Camera switches to the profile S H O P
Example:
<Configuration Password> CONFIG PROFILE HOME
Camera will switches to the profile H O ME
CONFIG CONTACT
Add a new contact.
Example:
CONFIG CONTACT [email protected]
Example:
<Configuration Password> CONFIG CONTACT +555 888 770 551
The e-mail address [email protected] will be added to the EYE-02 camera
contact list, ALARM reports will be sent to this e-mail address including the video
records.
CONFIG LANG
<language>
The phone number +555 888 770 551 will be added to the EYE-02 camera contact
list. ALARMs will be reported to this phone number in accordance with default settings via a voice call and anMMS.
Changes the EYE-02 camera language settings.
Camera sets the language according to the inserted SIM card automatically. If the
SIM card language is not installed in the camera, English texts remains.
Example:
CONFIG LANG GER changes the default language to German.
Possible languages: ENG, GER, SPA, FRE, FIN, SWE, NOR, SQI, ARA, CZE, DAN, GRE,
HRV, HUN, ITA, DUT, POL, POR, RUM, RUS, SLK, SWE, TUR.
For the list of currently installed languages in your camera send an SMS: HELP LANG
Example of an answer from the camera:
Camera EYE-02 help: LANG ENG, CZE, GER, SPA, FRE
CONFIG DELAY
<time>
CONFIG POWER
<mode>
CONFIG DATE
Changes the Exit delay timer setting, <time> is time in seconds.
Example:
CONFIG DELAY 25
sets the exit delay to 25 seconds
Changes the power mode, <mode> can be NORMAL or BATTERY.
Example:
CONFIG POWER BATTERY changes power mode to BATTERY mode
Sets date and time in format YYYY-MM-DD HH:MM:SS.
Example:
CONFIG ACCESS
CONFIG PASSWORD
CONFIG DATE 2009-10-24 08:34:02
Sets or changes the Remote Access Password.
Example:
CONFIG ACCESS 1234
for setting the password
Example:
1234 CONFIG ACCESS 5555 for changing the password
Sets or changes the Configuration Password.
Example:
CONFIG PASSWORD 5555
for setting the password
Example:
5678 CONFIG PASSWORD 8888
for changing the password
When the camera is switched to other language than English, it still accepts English commands as
well.
4.3 Event Reports
Every event detected by the EYE-02 camera is recorded into the camera’s memory.
The event record consists of the date and time mark, detail description of the event including its source and
a video record.
JR_EYE-02.ENG.MAN.Manual.16.A
- 10 -
Example of Events history viewed by the JabloTool software:
Jablotool Desktop - events list
There are many types of event records. The most important are ALARM reports, which are reported
to the contacts from the contact list immediately. Other types of records are the ALERT records
(similar to ALARM, but ALERTs are not reported to the contacts) or some technical reports (Example:
information about the AC power failure).
4.4 Video Record Setting (Available through JabloTool only)
The EYE-02 camera allows a detail setting of all important parameters for collecting video records under
many conditions.
Parameter
Snapshoot interval
After ALARM keep on
recording video for Save pictures only when
a motion is detected
Image size
Image quality
Settings
Description
from 20 frames per sec, to 1 frame
The frequency of snapshots. Higher freper 5 sec
quency increases the video record file size.
(0 sec, 5sec, 10sec ,... 2 min, 5 min,
Camera keeps video recording for some
10 min)
time period after an ALARM.
Default value is 20 seconds
Next snapshot (frame) will be saved to the video record file only if a change there
has been detected a changing to the previous snapshot. If the pictures are almost
the same, it will not be stored. This setting SIGNIFICANTLY reduces the video file size.
160x120, 320x240, 640x480 pixels
Default value is 320x240 pixels
5 levels of JPEG compression
(OFF, 50Hz, 60Hz), default OFF
Filter fluorescent lamps
JR_EYE-02.ENG.MAN.Manual.16.A
- 11 -
Image resolution in pixels. Higher resolution
increases the quality of recorded pictures
but it also increases the size of video files
and lengthens the time for transfer it via
GSM network.
Level of JPEG compression. Higher compression reduces the file size and slightly decreases the detail resolution in the picture.
If the scene is illuminated by standard
fluorescent lamps, this will filter undesirable
lamp blinks. Set the standard AC power
frequency in your country.
Parameter
Brightness compensation
Expected speed of the
objects (Shutter speed)
Disable build-in infrared
lamp
Insert date and time into
the picture
Capture video during
PIR or MIP activity
in SLEEP mode
Send video as separate
JPEG pictures
Settings
+/- 2EV, with step 0.5EV, default 0
Description
A camera calculates the best brightness of
pictures automatically. This setting allows
changing the pre-set level of brightness.
(fast, normal, slow), default normal
Default setting is NORMAL. Set of FAST
in case there may be some fast moving
objects in front of the camera (cars, running
persons, etc.), SLOW is suitable mainly for
door control and dark rooms.
An internal IR lamp is automatically switched on when the lightness of the scene is
too low for normal camera function. This option disables this automatic function
and it is mostly used if the illumination is done by an external lamp.
A small timestamp will be inserted into the left top corner of the picture. This helps
to determinate exactly the time of the snapshot.
The video recording continues also in SLEEP mode if there is some activity detected
in front of the camera. This is well usable for shops, petrol stations and other places
where permanent watching is required.
5 JPEG pictures will be sent by e-mail instead of AVI video files.
Please consider that even though the size of MMS and email is limited to 300 kB and 1 MB respectively, sending such MMS or e-mail may take up to several minutes according to your local network
conditions. To reduce the file size and fasten sending you can choose a lower image resolution,
snapshot interval or recording duration.
Jablotool DESKTOP - video recording configuration
4.5 GSM Network Setting
The EYE-02 camera needs correct settings of some GSM network parameters. These parameters depend on
the country you live in and on the GSM network you use.
The EYE-02 camera can automatically adjust the correct setting for most of GSM networks. In case there are
some specific settings of your GSM network, which you got from you GSM network operator, you can configure it manually in JabloTool, Device configuration, GSM network folder.
Please contact your GSM service provider for detail parameters setting.
JR_EYE-02.ENG.MAN.Manual.16.A
- 12 -
5. Other Features5. Other Features
Jablotool DESKTOP - GSM network configuration
5. Other Features
5.1 Call Control
The EYE-02 camera provides a basic control function when it is called from a user’s phone. When a phone
saved in the contacts calls the EYE-02 camera, the camera answers the call and plays the basic navigation
menu:
Welcome to Camera menu:
To listen to the sound from the camera microphone................................. press 1,
to receive an MMS with a current picture.................................................. press 2,
to receive an MMS with the last alarm record .......................................... press 3,
to receive the latest events history in a text message............................... press 4,
to switch the camera to the WATCH mode................................................ press 7,
to switch the camera to the SLEEP mode................................................... press 9.
The user can select a requested action by pushing the appropriate number key on his mobile phone.
a
5.2 Night View
The EYE-02 camera is equipped with a Night View function, which allows taking the infra-red spectrum
photos.
The EYE-02 camera has a built-in infrared LED lamp, which can illuminate the scene by non-visible
infrared light. Thought the human eye can’t see such light, the camera chip can collect a picture in this
spectrum.
The infra lamp illumination is activated automatically when taking a picture is requested and the level of
ambient light is too low.
The night scene may be overexposed by IR lamp reflection from close located objects. In such case
the internal IR lamp should be disabled in the camera configuration and an external IR lamp should
be used instead. For more information about IR illumination see application notes on www.jablocom.com .
5.3 Monitoring
The EYE-02 camera can report all events from the system to the professional Alarm Receiving Centre - ARC
(also known as Central Monitoring Station).
Refer to the picture “E” on the back cover page of this manual for understanding of the EYE-02 communication with a commercial security agency ARC.
Reports are done in accordance with international standard communication protocols. Protocol settings will
be done by authorized ARC service provider once you subscribe to their service. For supported protocols see
application notes on www.jablocom.com .
JR_EYE-02.ENG.MAN.Manual.16.A
- 13 -
5.4 Switching OFF and ON
To switch the EYE-02 camera OFF, switch it to the CO NFIG mode (see chapter 3.3). Disconnect the power
and USB cables from the camera and press and hold the power button on the back panel for 3 seconds.
When the green light on the front panel switches off, the camera shuts down.
To switch the EYE-02 camera ON, press and hold the power button on the back panel of the camera. Keep
holding the button until the green light on the front panel switches on. The start-up process has started and
you can release the button.
The camera also starts up automatically after it is connected to the AC adaptor or to PC by a USB cable.
Whenever the camera is expected to be switched off for a longer period of time or for transportation, it is strictly recommended to remove the backup battery from the EYE-02 camera.
The camera starts in the same mode it was before switching off with the following exception: In
case you do not have enrolled any remote control and contact (phone number) camera starts in
ENROL mode in place of CONFIG or SLEEP mode. For normal operation there must be minimum 1
remote control and 1 number enrolled in the camera.
5.5 Battery
The EYE-02 camera has an internal backup Li-Ion battery, which allows operating in case of the loss of AC
power. If used in any of the predefined profiles, the backup battery allows the camera to operate for approximately 24hours. Any individual sensor configuration may shorten this period accordingly.
In case of active MIP sensor, the backup time may be as short as 40 % of the original value. In case of simultaneous use of IR illuminator working during AC failure, the backup time may drop to 20 %.
Please, note that each item of network communication will shorten the backup time rapidly, especially if the
camera is operated in a poor network coverage area.
In certain cases, for example when used in locations where AC power isn’t available, it may be desired to
extend the battery operation duration. In such case you may use the special BAT T ERY mode.
When in the BAT T ERY mode, the EYE-02 camera reduces dramatically its power consumption in WATCH. It
logs out from the GSM network, switches off the short range radio receiver and switches on the motion-inpicture detector only after ALERT. It means that the EYE-02 camera, while in the BAT T ERY mode, can not be
reached by calls or by SMS commands. Additionally, the external detectors and remote controls cannot be
used for the BATTERY mode, too.
The EYE-02 camera keeps all the internal detectors working and reports all events as in the N O RMAL mode.
After an ALARM, the EYE-02 camera switches on the radio and logs onto the GSM network for 2 minutes. It
reacts to calls, SMS commands and remote controls during these 2 minutes only.
A fully charged battery in the BATTERY mode can operate the EYE-02 camera for up to 30 days.
5.6 Micro SD card
The EYE-02 camera is equipped with an SDmicro memory card slot allowing further extension of the internal
storage capacity. The EYE-02 Camera comes with an inserted 1 or 2GB memory card.
JabloTool DESKTOP software allows you to switch the EYE-02 camera into the USB mode in which you can access the SD card as a standard flash disc from an attached PC. To switch to the USB mode, display the device
state screen, switch it into the Advanced user mode, choose CONFIG and USB mode.
Other EYE-02 camera functions are blocked during the PC direct access to the SD card.
When exploring the SD card, you will find the following folder structure:
HISTORY
PICTURE
VIDEO
config.txt
This folder contains files with complete (all details) log of event history. Files are stored
sequentially in the “ev00001.txt” format.
Archive of static JPEG files recorded at ALARMs (For example: “p0065401.jpg”)
Archive of AVI video files recorded during ALARMs (For example: “vid01021.avi”)
A file with the current configuration of EYE-02 – can be used for backup or restore of
configuration.
JR_EYE-02.ENG.MAN.Manual.16.A
- 14 -
Camera keeps more than 10% of free space on the memory card. Automatically deletes old files.
The SDmicro memory card also contains some esential data for camera. In case you replace your
card with another one always use Jablotool to restore data structures.
5.7 Reset to Factory Defaults
If necessary, the EYE-02 camera can be RESET to the factory default settings following this guide:
Warning: All user settings, contacts and events will be deleted! Memory card will be formated.
Events an files downloaded into the JabloTool DESKTOP software remain in PC.
•
•
•
•
•
•
•
Switch off the camera, remove the battery
Wait at least 10 seconds
Press the power button and while holding it, do the following steps.
Insert the battery
Within 10 seconds connect the AC power adaptor
Camera starts producing fast beeps
Wait until the camera makes 3 longer beeps and both LEDs (R+G) start flashing. Release the power
button.
• Camera resets and restarts into the ENROLL mode.
5.8 External Wireless Devices
The EYE-02 camera has a built-in short range radio transceiver, which allows communication with a wide
range of professional security wireless devices from OASiS system produced by JABLOTRON ALARMS (see
www.jablotron.com).
This is a very simple way to extend your camera function to provide additional services such as:
• heating control by a mobile phone
• PANIC button function for elderly or disabled people.
Refer to the table on the inside back cover page of this manual for a brief review of available types of wireless devices.
For enrolling a new device use JabloTool software (EYE-02/Configuration/External devices/Add new device)
or switch the camera to the ENROLL mode.
For installing all wireless components follow their manual.
• Remote controls / panic buttons: switch the camera to the ENROLL mode, press any button on the
remote control.
• Detectors: switch the camera to the ENROLL mode, insert the battery in to the detector.
• JA-80L Siren: switch the camera to the ENROLL mode, plug the siren to the wall socket.
• JA-80A Siren: switch the camera to the ENROLL mode, connect the battery in the siren socket.
• AC-82 Wireless relay: switch the camera to the ENROLL mode, follow the manual of AC-82. For activating
the transmitter of EYE-02 press the power button on the camera shortly.
Once the camera is enrolled into the wireless relay, you can choose function of the relay outputs. Outputs
can be managed by an SMS, can signal the mode of camera, etc. For settings go to JabloTool EYE-02/Configuration/External devices/ Programmable outputs.
For more information about wireless devices see application notes on www.jablocom.com
JR_EYE-02.ENG.MAN.Manual.16.A
- 15 -
5.9 Outdoor Installation
Although the EYE-02 camera housing provides a basic humidity resistance, it is required to use an additional
plastic housing when mounted outdoors to protect the camera against rain and snow. If an external housing
with a front glass is used, the internal IR illumination must be switched off and an external IR lamp must be
used.
Please visit the www.jablocom.com web page to see the detail application notes about outdoor installation
or usage with a solar power panel.
6. Maintenance
The EYE-02 camera doesn’t require any special maintenance.
• Check the event reporting function by the REPORT command at least once a month.
• Regularly test the basic function of all detectors by the TEST mode.
• Regularly test the battery of the remote control by pressing any button. If the light on your remote does
not switch on, the battery is discharged and should be replaced. Replace the battery with a new one of
same or equivalent type.
1
2
1
2
Remote control - battery replace procedure
• Once a year, check the camera‘s battery capacity – see chapter 8.1 Battery information.
7. Troubleshooting
JABLOCOM will periodically release new versions of the EYE-02 camera software as well as the JabloTool software. Visit www.jablocom.com to find the latest version of the EYE-02 camera firmware, supporting software
and detailed guide to troubleshooting.
Problem / Error message
Solution
•
•
RED light on the front
camera panel
•
•
The EYE-02 camera
doesn’t react to
remote control
•
Your SIM card is out-of-service or blocked by a PIN code – remove the SIM card the camera,
put it into your GSM phone and try to make a call and send an SMS. If PIN protected, please
remove the PIN or set it to default network value.
Your SIM card isn’t placed in the SIM holder correctly, or the camera doesn’t support your
SIM card type. Check if the SIM card is placed in the holder correctly or contact your GSM
service provider.
Camera location is not covered by GSM network signal - check the quality of GSM network
signal directly at the place of the camera installation: place your mobile phone close to the
camera, wait a few seconds and read the signal strength from your phone display. If the
signal is too low you might try to replace original camera GSM antenna by another approved
type of GSM antenna with a higher gain.
Flat battery in your remote control – press a button and check if the light on your control
goes on. If not, replace the remote control internal battery.
The remote control has been accidently deleted from the EYE-02 camera configuration. Use
PC with JabloTool software, open the ENROLL mode and press any button of your remote
control to enroll it in to the EYE-02 camera.
If you discover abnormal EYE-02 camera behavior, please try to update EYE-02 camera firmware to the latest
version. To do this, use JabloTool, Configuration, Control panel, Firmware upgrade.
JR_EYE-02.ENG.MAN.Manual.16.A
- 16 -
8. Technical Specification
Camera dimension
Package dimensions
Extended memory capacity
Image resolution
Picture format
Video format
Lens
Infra reflector
PIR motion detector
MMS support
Events history
Operating temperature
AC power adaptor
Input power (range)
Back-up battery
GSM system
GSM antenna
Data connectivity
Audio parameters
Audio monitoring
PC connectivity
Internal alarm detectors
Short range radio
Remote control type JR_EYE-02.ENG.MAN.Manual.16.A
155x75x55 mm, 300 g
300x215x75 mm, 950 g
SD micro card slot, maximum capacity 32 GB
Standard Package includes 1GB SD memory card
VGA (640x480), QVGA (320x240), QQVGA (160x120)
JPEG, EXIF 2.2
MJPEG
AB29, view angle 95°
6x Infra LED, 6x 100mW, wavelength 850nm, emitting angle 80°
detection range 10m / 140°
MMS version 1.2 over WAP 2.0
min 100 records in an internal memory + extension to SD card
-20°C to +55°C; 25 to 75 % humidity
100 - 240 V AC, 50 to 60 Hz, 5 V / 2 A DC
5.0 - 6.7 V / 1 A DC
Li-Ion battery, 1300 mAh
Quad band 850/900/1800/1900 MHz
External GSM antenna +2.5 dBi, SMA connector
EDGE class 10; GPRS class 10: max. 85.6 kbps, CS1, CS2, CS3 and CS4,
AGC and Noise reduction system, HR, FR, EFR and AMR audio codec
Built-in high sensitivity omni-directional microphone with DSP processing
USB port 2.0
Motion-in-Picture detector
PIR motion detector
Glass break detector
Tilt and vibration detector
868 MHz, Operated according to ERC REC 70-03
RC-86
Alkaline battery type L1016 (6.0 V), Typical battery lifetime approx. 3 years
Complies with ETSI EN 300220,EN 55022, EN 50134-2,EN50130-4, EN60950-1
- 17 -
8.1 Battery Information
The camera is powered by an AC adaptor and has a backup rechargeable battery. The battery provides power to the camera when the
AC power fails. The battery may wear out after some time period. The capacity of the battery should be tested at least once a year:
disconnect the AC power adaptor and measure the time until camera announces the battery low state. Replace the battery if the time
is shorter than 10 hours for predefined profiles. See chapter 5.5 if you use customised profile. Always switch off the camera before
replacing battery!
Do not short-circuit the battery. Accidental short-circuiting can occur when a metallic object such as a coin, clip or pen connects the
battery contacts. Short-circuiting may damage the battery or the connecting object; it may even cause a fire.
Exposing the battery to extremely cold or hot temperature will reduce the battery capacity and lifetime. Optimally, try to keep the
battery at temperature between 5°C and 35°C. Device with extremely hot or cold battery may not work temporarily, even if the battery
is fully charged. Battery performance is particularly limited in temperatures well below freezing.
Do not dispose the batteries into fire as they may explode. Batteries may also explode if damaged. Dispose the batteries according to
local regulations – please recycle when possible and do not dispose them as household waste.
Do not dismantle or shred cells or batteries. In case of battery leak, do not allow the liquid to come in contact with the skin or eyes. In
case of being contacted by such leak, flush affected place with a lot of water and seek the medical help.
Use the battery and power adaptor only for its intended purpose.
Never use any adaptor or battery that is damaged.
Your camera may become warm during charging and during normal use. The camera is designed to be powered
by AC power permanently. The battery gradually decreases its capacity during its lifetime. To reach the optimal
parameters the battery should be kept in an environment between 5°C and 35°C.
Never expose the battery to temperature out of the operating temperature range -20°C to +55°C. A device with
a hot or cold battery may temporarily not work, even when the battery is fully charged.
A battery’s performance is particularly limited in temperatures well below freezing.
8.2 Warranty
Hereby, JABLOCOM s.r.o., declares that this EYE-02 GSM Camera is in compliance with the essential requirements
and other relevant provisions of Directive 1999/5/EC.
The original conformity assessment document can be found at the web site
www.jablocom.com.
RF Exposure - Specific Absorption Rate (SAR):
This product is designed not to exceed the limits for exposure to radio waves recommended by international guidelines developed by
the independent scientific organization ICNIRP and include safety margins designed to assure the protection of all persons, regardless
of age and health. The guidelines use a unit of measurement known as the Specific Absorption Rate, or SAR. The SAR limit for wireless
devices is 2 W/kg and the highest SAR value for this camera when tested complied with this limit.
This product is in compliance with the basic restrictions as specified in the European Council Recommendation [1999 519 EC] for the
measured GSM 900, GSM 1800 and GSM 1900 standards.
Regulatory information:
This camera is only intended for use in the country which it was sold in.
Limited warranty:
Subject to the conditions of this Limited warranty JABLOCOM s.r.o. warrants this product to be free from defects in design, material
and workmanship at the time of its original purchase by a customer and for a subsequent minimal warranty period under the national
legislation in force. Should your product need warranty service, please return it to the dealer from whom it was purchased. The defects
will be eliminated free of charge by repairing or, at our discretion, replacing it.
Warranty conditions:
If you wish to make a claim under the warranty, please return the Product with all accessories in the original packaging to your dealer.
The warranty is valid only if the original receipt issued to the original purchaser by the dealer, specifying the date of purchase and the
IMEI corresponding with the Product, is presented with the Product to be repaired or replaced. Plastic parts, cables or accessories of
the Product must not be visibly damaged, the Product must not show marks of the contact with liquid, the warranty seal must not be
broken and the fault must be described.
This warranty doesn’t cover any failure of the Product due to misuse, including but not limited to use in other than the normal and
customary manner, in accordance with instructions for use and maintenance of the Product. Nor does this warranty cover any failure of
the product due to accident, modification, adjustment, improper repair or acts of God.
This warranty doesn’t apply to limited-life consumable components, such as batteries or accessories. It also doesn’t apply to modules
of other suppliers, such as SIM cards from the GSM provider.
The warranty provided doesn’t affect the consumer’s statutory rights under applicable national legislation in force, or the consumer’s rights against the dealer arising from their sales/purchase contract.
Under no circumstances shall JABLOCOM be responsible for any loss of data or income or any special, incidental, consequential or
indirect damages howsoever caused.
As the product is under continuous development, JABLOCOM reserves the right to make changes and improvements to any of the
products described in this document without prior notice.
Operations and some features are SIM card and/or network dependent.
JR_EYE-02.ENG.MAN.Manual.16.A
- 18 -
8.3 Safety Instructions
Read these guidelines. Not following them may be dangerous and/or illegal.
You alone are responsible for how you use your device and any consequences of its use. Do not switch the device on wherever the
use of a wireless device is prohibited or when it may cause interference or danger.
Small Children
Do not leave your device and its accessories within the reach of small children or allow them to play with it. They could hurt themselves or others, or could accidentally damage the device. Your device contains small parts with sharp edges that may cause an injury or
which could become detached and create a choking hazard.
Some countries may regulate the security camera usage by special laws. Please study the possible law restrictions for certain country
before installing the camera.
Interference
Your device contains a transmitter and a receiver. When it is ON, it receives and transmits RF energy. Care must be taken when using
the device in close proximity to personal medical devices, such as pacemakers and hearing aids. All wireless devices are susceptible to
interference, which could affect performance.
We (JABLOCOM) are not responsible for any radio or TV interference caused by unauthorized modifications to this equipment. Such
modifications could void the user’s authority to operate the equipment.
Your device is designed not to exceed the limits for exposure to radio waves recommended by international guidelines. These guidelines were developed by the independent scientific organization ICNIRP and include safety margins designed to assure the protection of
all persons, regardless their age and health.
This device complies with part 15 of the FCC Rules. Operation is subject to the following two conditions: (1) This
device may not cause harmful interference, and (2) this device must accept any interference received, including
interference that may cause undesired operation.
This equipment generates, uses and can radiate radio frequency energy, and if not installed and used in accordance with the instructions, may cause harmful interference to radio communications. However, there is no guarantee that interference will not occur in
a particular installation. If this equipment does cause harmful interference to radio or television reception, which can be determined by
turning the equipment off and on, the user is encouraged to try to correct the interference by one or more of the following measures:
- Reorient or relocate the receiving antenna.
- Increase the separation between the equipment and receiver.
- Connect the equipment into an outlet on a circuit different from that to which the receiver is connected.
- Consult the dealer or an experienced radio/TV technician for help.
Pacemakers
Pacemaker manufacturers recommend that a minimum separation of 15 cm to be maintained between a mobile device and a pacemaker to avoid potential interference with the pacemaker. To achieve this use the device body in distance more than 15cm from your
pacemaker.
Hearing Aids
People with hearing aids or other cochlear implants may experience interfering noises when using wireless devices or when one is
nearby. The level of interference will depend on the type of hearing device and the distance from the interference source, increasing
the separation between them may reduce the interference. You may also consult your hearing aid manufacturer to discuss alternatives.
Medical devices
Please consult your doctor and the device manufacturer to determine if operation of your device may interfere with the operation of
your medical device.
Hospitals
The device isn’t designed to be used in hospitals, clinics or health care facilities without a consultancy with the staff or medical equipment producers. This request is designed to prevent possible interference with sensitive medical equipment
Wireless devices can cause interference in aircraft.
Explosive environments
In locations with potentially explosive atmospheres, obey all posted signs to turn off wireless devices such as your device or other radio
equipment.
Areas with potentially explosive atmospheres include fuelling areas, below decks on boats, fuel or chemical transfer or storage facilities, areas where the air contains chemicals or particles, such as grain, dust, or metal powders.
Blasting Caps and Areas
The device isn’t recommended to be used in a blasting area or in areas posted turn off “two-way radios” or “electronic devices” to
avoid interfering with blasting operations. Observe restrictions, and follow all regulations and rules.
Do not attempt to disassemble your device or its accessories - only qualified personal may install or repair device equipment. If
your device or its accessory has been submerged in water, punctured, or subjected to a severe fall, do not use it until you have taken it
to be checked at an authorized service centre.
Always treat your device and its accessories with care and keep it in a clean and dust-free place.
Do not paint your device or its accessories.
Do not expose your device or its accessories to open flames or lit tobacco products.
Do not expose your device or its accessories to liquid, moisture or high humidity.
JR_EYE-02.ENG.MAN.Manual.16.A
- 19 -
Do not drop, throw or try to bend your device or its accessories.
Do not use harsh chemicals, cleaning solvents, or aerosols to clean the device or its accessories.
Do not expose your device or its accessories to extreme temperatures, minimum -10 and maximum +55 degrees Celsius.
Battery and Charger Handling & Safety
Use only JABLOCOM approved accessories and batteries. Do not connect incompatible products or accessories. Take care not to touch
or allow metal objects, such as coins or key rings, to contact or short-circuit the battery terminals.
Use the battery and power adaptor only for its intended purpose. Never use any adaptor or battery that is damaged.
The device is designed to be powered from the power adaptor. The limited capacity of the backup battery should power the device for
approx. 24 hours. Your device may become warm during charging and during normal use.
Remember to make backup copies of all important data.
When connecting to any other device, read its users guide for detailed safety instructions.
8.4 Disposal Information
Before disposing of the camera, render it unusable.
During liquidation of material, it is necessary to adhere to the pertinent national regulations for the disposal
of waste.
All used packaging materials are ecological and may be reused or
recycled. Please contribute actively to saving the environment and
pay special attention to the correct liquidation and reuse of packaging materials.
© Copyright 2010 by JABLOCOM. All rights reserved
JR_EYE-02.ENG.MAN.Manual.16.A
- 20 -
C
Wireless devices:
Controlers
1
2
personal HELP! button
3
remote control
4
wall button
doorbell button
Detectors
Sirens
9
5
motion detector
6
door (window)
opening detector
7
smoke detector
10
11
8
gas leak detector
For more information about
internal siren
outdoor siren
relay
12
thermostat
wirelles devices see www.jablotron.cz
III.
D
1
2
Inside parts:
Short range radio
• 868 MHz band
• Allows cooperation with remote
control and detectors
• Compatible with JABLOTRON
professional wireless
security system
Dual band GSM antenna
7
EDGE/GSM module
• Picture transfer to mobile
phones via MMS or e-mail
• Data connection to monitoring
servers and ARC
8
Buzzer
• Built-in acoustic indicator
Tilt and vibration detector
• Protects against intruder
manipulation with camera
9
3
Li-Ion battery
• Provides back-up energy
within electricity failure
4
SD memory card
• Extends memory capacity
up to 4 GB
SIM holder
• For standard GSM SIM card
5
E
IV.
Security:
6
Audio: Sensitive microphone +
digital signal processing (DSP)
Detection of:
• Glass-break
• Door-opening
Infrared LEDs
• Illuminates the scene by
non-visible IR beams for
camera night vision
10
Passive infrared (PIR)
detector
• Excellent sensitivity for
human body detection
11
VGA camera
• CMOS chip 640 × 480
• 2.9 mm lens (95˚)
12
Motion-in-picture
detector
• DSP analysis provides
excellent detection of the
scene changes
13