1
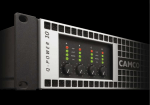
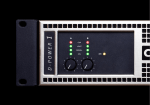
i-SERIES DSPControl SOFTWARE MADE IN GERMANY i - S e r i e s DSPControl SOFTWARE CONTENTS User manual for the DSPControl software Contents TDA30XDSPCGBD 1.Welcome! 3 Revision D, 2015-01-07 2. Installation Instructions 4 3. Release Notes Please visit our website www.camcoaudio.com for the latest version of this user manual. Please note that the leading version of CAMCO manuals is always the English one. © Copyright 2014 by CAMCO Produktions- und Vertriebs-GmbH für Beschallungs- und Beleuchtungsanlagen Fischpicke 5, D-57482 Wenden, Germany Telephone +49 (0) 27 62 / 4 08-0 2 / 30 www.camcoaudio.com 8 4. The GUI Elements 11 5. The Menu Structure 17 6. Backup & Restore Presets 21 7. Access rights & Passwords 22 8. Access Rights Hierarchy 23 9. Access Right Options 24 10.Unit Settings 25 11.Preset Settings 26 12.Unit Conversion Equations 27 13.Company Information 28 i-Series i - S e r i e s DSPControl SOFTWARE 1. WELCOME! Welcome to the DSPControl remote application for your iD4 / iD7 amplifier! This manual will guide you through the user interface elements and will explain how to organise, backup and restore your Presets and amplifier settings. 1 Efficient loudspeaker excursion control and long-term RMS power limiting for low, mid and high frequency are the key benefits of the powerful limiting section, thus allowing you to create tailored Presets with full loudspeaker protection and at the same time maximum output power performance. Additionally, it will describe the iD4 / iD7 Preset and amplifier protection concept. This can be used for example to efficiently keep your Preset’s EQ and limiting settings safe, or if you simply want to prevent normal User’s from changing any important amplifier settings they shouldn’t touch. We assume that you are familiar with basic Pro Audio signal processing options, so the functionning and available parameters of the rich EQing, filtering and limiting settings will not be outlined in detail in this manual. But be assured that you have purchased a product featuring the latest state-of-the-art DSP performance with full 96 kHz / 24 Bit resolution. Especially the 6-channel multiband-compressor in the output section gives you an outstanding tool to control and protect your loudspeakers. i-Series www.camcoaudio.com 3 / 30 2 i - S e r i e s DSPControl SOFTWARE 2. INSTALLATION INSTRUCTIONS DSPControl software installation instructions This chapter describes the installation of the DSPControl software and updating of the amplifier’s firmware. For installing the DSPControl software there is no need to have an amplifier connected. But for updating the firmware on your iD4 / iD7 amplifier, those units have to be connected via Ethernet of course. Installation requirements The following operating systems are supported: – Windows XP with Service Pack 2 – Windows 7 (32 bit and 64 bit) – Windows 8 (32 bit and 64 bit) – Mac OS X 10.5.8 or higher Hold down the Windows key on your keyboard and press the letter “C to open the Charm menu, then click on “Settings”. Click “Change PC Settings”. Click “General” und then under Advanced startup click “Restart Now”. l Note In Windows 8.1, the “Restart Now” button has moved to “PC Setting Update & Recovery à Recovery”. Windows Download the installation package for your Windows version from our website and open it. The installer will guide you through the installation procedure. It is not needed to remove any older versions, they will be removed automatically. You will need administrator privileges for installation. Windows 8 (Disabling Signed Driver Enforcement) Unlike previous versions of the Windows, Windows 8 imposes strict limitations on driver signing. Because of this, unsigned drivers require some extra steps for installation. You will need to restart your computer several times throughout the course of these instructions. 4 / 30 www.camcoaudio.com à After restarting, click “Troubleshoot”. Click “Advanced options” and afterwards “Startup Settings”. i-Series 2 i - S e r i e s DSPControl SOFTWARE 2. INSTALLATION INSTRUCTIONS Click “Restart”. After restarting your computer a 2nd time, choose “Disable driver signature enforcement” from the list by typing the number 7 on your keyboard. Your computer will restart automatically. OS X Download the installation package for OS X from our website, unpack and open it. With OS X 10.7 or higher you might get a message () that you can’t open the installer due to the standard security settings under OS X. After restarting, you will be able to install the DSPControl application normally; however, Windows will display a warning message. When the warning message appears, click “Install this driver software anyway”. l Note The next time you restart your computer, driver signature enforcement will be in effect again. i-Series 1 2 If you see that message, just rightclick the installer icon and select “Open” from the context-menu. Then click the “Open”-button of the verification-dialog () and there you go. The installer will guide you through the installation procedure. During the installation process you will get asked to enter your system password, so it will be handy to have this ready. It is not needed to remove any older versions, they will be removed automatically. www.camcoaudio.com 5 / 30 2 i - S e r i e s DSPControl SOFTWARE 2. INSTALLATION INSTRUCTIONS ! Attention When updating the firmware from the network window, all connected amplifiers will be reset to factory settings and all amplifier Presets will be erased. Demonstration mode Once installed, the DSPControl software offers a fully functional demonstration mode, which allows you to explore all features without having to connect an amplifier. In this mode it is possible to load and save Presets from and to your computer. The demonstration mode is limited to the User mode access level. It can be activated from the network window menu bar “Tools à Enter Demo Mode”. Backing-up Presets Installing a new version of the DSPControl software will not touch any Presets stored on your iD4 / iD7 or computer. But we recommend to create a backup of all amplifier Presets and settings in case you want to update the amplifier firmware. Note that if the current access level doesn’t have the access right to update the amplifier’s firmware, you will not be able perform firmware updates of course. Updating the iD4 / iD7 firmware There are three ways to start the firmware update procedure: All at once via the network window’s menu bar By selecting “Tools à Firmware Update All Units“ from the network window’s menu bar, you have the possibility to update the firmware of all connected iD4 / iD7 amplifiers with just one click. The update will only be carried out in case there is a newer version available. Via the main control panel’s menu bar Open the amplifier’s main control panel and select the menu “Unit à Firmware Update” to start the update. Starting the firmware update from the amplifier’s panel will always carry out an update, even if the firmware is already up-to-date. If you perform a firmware-update on your iD4 / iD7 amplifier from the main control panel, the update process has the option to backup and restore the amplifier’s Presets automatically (availbale from version v3.6.5 or higher – please see the release notes for details). Update process During the update process, ticks and pops may occur, dependig on the hardware. So please disconnect your loudspeakers to avoid discomfort or even damage. Make sure that no other units are power cycled during the update process, this may disturb the process. If the update process is interrupted or fails for any reason (even in case your unit would not start up anymore) you can repeat the process at any time. Switch off your hardware and close the software, restart your unit and repeat the process. The update of your iD4 / iD7’s firmware without the automatic backup and restoring should be finished in about one minute (depending on your hardware and connection speed). Using the feature to automatically backup and restore the amplifier’s Presets might increase the updating time considerably, depending on how much Presets are stored inside the iD4 / iD7 amplifier. Via the network window’s update button for a specific amplifier From the network window’s menu bar you can select “Tools à Enable Update” to display the update buttons. If the update button is shown orange, the unit’s firmware can be updated, otherwise the button is greyed out (which means the firmware is already up-to-date or that you don’t have the right to do the update). Simply click on the update button (orange) of the unit you want to update. 6 / 30 www.camcoaudio.com i-Series i - S e r i e s DSPControl SOFTWARE 2. INSTALLATION INSTRUCTIONS 2 Uninstalling the DSPControl software Windows To uninstall the CAMCO DSPControl software from your computer, select “Start à All Programs à CA MCO à Uninstall DSPControl”. Alternatively, you can run the installation setup again to repair or remove the application. OS X Just go to your applications folder (standard) or the folder in which you have the software installed and remove the DSPControl application by moving it to the trash. Windows 7 On some Windows 7 installations, you have to run the program as administrator to connect to the hardware correctly. New versions / updates Please visit the downloads section of our website to check for new versions of the DSPControl software. i-Series www.camcoaudio.com 7 / 30 3 i - S e r i e s DSPControl SOFTWARE 3. RELE ASE NOTES Release notes This is a list of changes, bugfixes, and known issues since version v3.1.9 related to your DSPControl software and the firmware for your iD4 / iD7. ! Important Due to some changes in the Preset structure it is neccesary to follow a certain procedure to transfer your old Presets from version v3.1.9 / v3.1.9.1 to the the new version v3.6.5 (or higher). Old Factory files created in these versions and prior are not compatible anymore and need to be re-created with the new version v3.6.5 (or higher). How to transfer my old Presets from version v3.1.9 / v3.1.9.1 to the new version v3.6.5 (or higher)? Save your Presets with the old version v3.1.9 or v3.1.9.1 (one by one or use the Backup Presets option). Install the new version v3.6.5 (or higher) on your computer. Open the software and carry out a firmware update without creating an automatic backup of all amplifier settings. l Note Locking Input and Output channel access now is stored inside each Preset individually, not anymore inside the Unit access rights. How to create a new Factory File? Load the Factory File in to your amplifier with version v3.1.9 or v3.1.9.1 Transfer all your Presets to the new version and set the Preset access rights as decribed above With v3.6.5 (or higher) restore all Unit level access rights and passwords to your previous settings manually Create a new factory file (from Developer mode) l Note The automatic backup and restore function (available when doing a firmware update from the amplifier panel) will not work for transferring old Presets. This feature should only be used for updates from v3.6.5 to the same or higher versions. Then manually load your Presets back into the amplifier (one by one or with the “Backup all Presets from Folder” option). Optional: Switch to Developer mode. Set the new Preset level access rights (to lock / unlock input and output access) to your needs for each Preset individually by: à Loading the Preset in the amplifier à Setting the desired User and Admin access rights and Admin and Developer custom passwords (optional) à Saving the Preset inside the amplifier 8 / 30 www.camcoaudio.com * unpublished version i-Series 3 i - S e r i e s DSPControl SOFTWARE 3. RELE ASE NOTES v3.7.0 Changes > Support for iD7 amplifiers > Encryption of Presets, backups and factory files when storing to computer’s hard drive for enhanced security > Option to clear all user or factory Presets in Developer mode ! Important Presets, backups and factory files once stored with v3.7.0 (or higher) will not be readable with any previous versions. But stored files from previous software versions are fully compatible of course. v3.5.6* Changes > GUI (Graphical User Interface) facelift > Dual bargraph scaling in dBu and dBFS for all input bargraphs > All parameters can be accessed and changed again from the amplifier display (Filters, PEQ’s, Limiters ect.) > BLC limiter improvement > Threshold settings of output BLC now done in Vpeak Fixed issues > Auto Standby function now working correctly > “Popping sound” at powerup removed v3.6.6 v3.5.4* Fixed issues > Compatibility issue with OS X Mavericks: When restarting the application, previous versions would not reconnect without a restart of the system v3.6.5 Changes > Factory files and backups now support locked Presets > Added trim gain for selected models Fixed issues > Setting Bridge Mode from the DSPControl software Changes > Simplified Unit and Preset access rights options > Automatic backup and restore of all amplifier settings when doing a firmware update (optional) > Reorganised menu structure and renamed menu entries > Possibility to erase all Presets in Developer mode Fixed issues > Improved Preset backup and restore functions. Now more robust even with bad network connection > Several bugfixes and improvements * unpublished version i-Series www.camcoaudio.com 9 / 30 3 v3.4.7* Changes > Unit panels are restored and brought to front when trying to launch them while they already exist > Demo password does not need to be entered anymore after entering Demo mode from the network window > When making factory files, the supported units can be selected Fixed issues > Making factory files did not work in version v3.3.X to v3.4.0 > Added “0” to choices of read-only Preset range > Restored “Invalid Password” error dialog when entering an invalid password (this includes the Preset passwords) > Removed low-level compressor distortion (audible in LF channels) i - S e r i e s DSPControl SOFTWARE 3. RELE ASE NOTES Fixed issues > Group power button > Group mute > Slope indication in PEQ Q text box corrected when changing between Bell and Shelf filters > Group rename > Many smaller bug fixes v3.2.1* Changes > Faster update of PC interface when changing values via front panel > Possibility to set end user access rights per Preset v3.2.0* v3.3.8* Changes > Major performance improvements on all operating systems, especially when using more than 10 connected units with a Windows PC > Major sound quality performance improvement on AES input > Added “Firmware Update All Units” under “Tools”. This process simultaneously updates all connected units and can take several minutes. > Mutes can be controlled even if a channel is locked > In Developer mode, the number of factory Presets (write-protected Presets) can be set > Units can be renamed in the network window > Groups and units are alphabetically ordered in the network window > When loading a Preset from computer, the progress dialog closes automatically > Units are no longer indicated to be muted while they are in standby > Clicking the icon of the minimized program in the dock in OS X restores the windows 10 / 30 www.camcoaudio.com Fixed issues > Log in via amplifier display > Preset save / reload issue i-Series 4 i - S e r i e s DSPControl SOFTWARE 4. THE GUI ELEMENTS The network window Mute button Unit group edit / delete and open / close buttons Group name Locate button Unit name (editable) Unit MAC address Unit IP address Open main control panel Standby button List with all connected units Caption of the icons states Sound is not muted VU level meter (left bar: in / right bar: out) Display in normal state Unit firmware update button Unit is offline Open panel disabled Update not available (because unit is offline) Sound is muted Display is blinking Unit is off Open panel enabled Unit is on Open panel locked Update available (panel already open) Unit is starting up i-Series www.camcoaudio.com 11 / 30 4 i - S e r i e s DSPControl SOFTWARE 4. THE GUI ELEMENTS The Main control panel Load and save buttons Amplifier Preset list Main navigation buttons Input 1 to 4 fader Output 1 and 2 fader Link buttons for Input 1/2, 3/4 and Output 1/2 Preset name (editable) Current access level indicator Amplifier name (editable) Input selection dropdown lists Numerical gain inputs for Input 1 to 4 and Output 1 and 2 Mute buttons for all Input and Output channels Network link status with amplifier selection dropdown list 12 / 30 www.camcoaudio.com i-Series 4 i - S e r i e s DSPControl SOFTWARE 4. THE GUI ELEMENTS The Input 1 to 4 control panels Compressor button PEQ-Filter type selection Main navigation buttons PEQ numerical gain inputs PEQ Q / BW-switch and numerical inputs PEQ numerical inputs for frequency i-Series Graphical realtime settings screen with full window and full screen mode HPF and LPF On / Off-switches with filter type selection Mute button (also accessible from the Main panel) Input channel fader and numerical gain input (also accessible from the Main panel) Input channel limiter control Input delay control On / Off-switches for each PEQ www.camcoaudio.com 13 / 30 4 i - S e r i e s DSPControl SOFTWARE 4. THE GUI ELEMENTS The Crossover control panel Mute buttons (also accessible from the Main and Output panel) Main navigation buttons Numerical gain inputs LPF and HPF numerical inputs and filter selection 14 / 30 www.camcoaudio.com Graphical realtime settings screen with full window and full screen mode Numerical delay inputs Output VU level meter Output link button (also accessible from the Main panel) Phase invert buttons (also accessible from the Output panel) i-Series 4 i - S e r i e s DSPControl SOFTWARE 4. THE GUI ELEMENTS The Output 1 and 2 control panels PEQ Filter type selection Main navigation buttons PEQ numerical gain inputs PEQ Q / BW-Switch and numerical gain inputs PEQ numerical inputs for frequency i-Series Input channel mixer/ routing section with numerical inputs Phase invert buttons (also accessible from the X-Over panel) Graphical realtime settings screen with full window and full screen mode HPF and LPF On / Off-switches with filter type selection Mute button (also accessilble from the Main panel) Compressor button Output fader and numerical input (also accessible from the Main panel) Output channel limiter control Output delay control On / Off-switches for each PEQ www.camcoaudio.com 15 / 30 4 i - S e r i e s DSPControl SOFTWARE 4. THE GUI ELEMENTS The compressor control panels Output 1 and 2 compressor navigation Input 1 to 4 compressor navigation buttons Back to Input panel button BLC* filter type selection for compressor band 1 to 6 Input compressor level and gain reduction meter Compressor controls for threshold, attack, hold, release, ratio and makeup gain with numerical inputs Back to Output panel button Output compressor level and gain reduction meter BLC compressor controls for frequency, Q, threshold, attack, release and ratio with numerical inputs Compressor controls for threshold, attack, hold, release, ratio and makeup gain with numerical inputs * BLC = Bandwidth Limited Compressor 16 / 30 www.camcoaudio.com i-Series 5 i - S e r i e s DSPControl SOFTWARE 5. THE MENU STRUCTURE The network window menu bar > Firmware Update All Units This will update all conneted amplifiers to the newest version in case they are still running an older firmware version. “File”-menu > Quit Closes the application including all amplifier panel windows. “Help”-menu > About: Shows the application information window with the application version and build number. “Tools”-menu > Set Software Password Set a password to prevent unauthorized execution of the DSPControl software. To reset the software password just overwrite the old by leaving the input blank. > New Group Adds a new amplifier group. > Enter Demo Mode This menu item enables a virtual iD4 and iD7 demo-amplifier. > Enable Update Activates visibility of the firmware update button for the connected amplifiers. i-Series www.camcoaudio.com 17 / 30 5 i - S e r i e s DSPControl SOFTWARE 5. THE MENU STRUCTURE The amplifier panel menu bar USER ADM DEV USER ADM DEV “File”-menu “Unit”-menu > Load Preset from File Load a Preset from your computer into the amplifier. > Save Preset to File Save the currently loaded Preset from the amplifier to your computer. l Note Please note that not all menu entries might be available depending on the current access level and access right settings. Also the menu structure (i.e. where to find the menu entries) is a little different in User, Admin and Developer mode. > Load Factory File USER ADM / Create Factory File DEV Load a factory file from your computer into the amplifier in User or Administrator mode or create a factory file with the current configuartion of the amplifier and save it to your computer in Developer mode. > Change Access Level Change the access level of the Amplifier to User, administrator or Developer mode by using the appropriate passwords. > Restore Presets from Folder Load a backup-folder with multiple Presets at once into the amplifiers memory. > Change Password Change the default unit password of the current access level. > Backup all Presets to Folder Save a backup of all Presets from the amplifiers memory to your computer. > User Password Change the default unit User level password. > Quit Close the amplifier panel window. > Admin Password Change the default unit Administrator level password. USER 18 / 30 www.camcoaudio.com = User mode ADM = Administrator mode DEV = Developer mode i-Series 5 i - S e r i e s DSPControl SOFTWARE 5. THE MENU STRUCTURE > Developer Password Change the default unit Developer level password. > Go to Standby / Exit Standby Enters or exits standby mode. > Network Settings Configure the network IP settings from automatic (DHCP) to manual. > Firmware Update Performs a firmware update (even if you have the newest firmware already) with the options to restore a previous backup (if available) and restore your current settings and Presets after the firmware update. Updating the firmware also can be used to reset the iD4 / iD7 amplifier to a blank state with default passwords and access rights. Also all Presets will be erased after firmware update. > Power on Preset Choose the Preset which will be loaded automatically on startup of the amplifier. > Read-Only Preset Range Set the range of Presets which are read-only in User and Administrator access level. > Locked Access Rights Configure the unit access rights for the locked-state of the amplifier. > Status Details Opens a window with the current amplifier status (temperature per channel, load impedance and possible faults). > User Access Rights Configure the unit access rights for the user-state of the amplifier. > Admin Access Rights Configure the unit access rights for the administrator-state of the amplifier. > Auto Standby Set the delay time after which the amplifier will go to standby automatically if no signal is present. > Output Mode Set the amplifier stage output mode to “Stereo” or “Bridge Mono”. > Display Change the state of the display-backlight between “On”, “Delayed Off” or “Dimmed”. > Lock Unit The unit will be set to the locked-state and can only unlocked with a correct access level password. i-Series www.camcoaudio.com 19 / 30 5 “Preset”-menu i - S e r i e s DSPControl SOFTWARE 5. THE MENU STRUCTURE DEV > Admin Password Change the Administrator password of the currently loaded Preset. This password will override the default unit Administrator password. “Help”-menu > About Shows unit and application information (name, serial number, IP address, MAC address, firmware version, interface version, application version and build number). > Developer Password Change the Developer password of the currently loaded Preset. This password will override the default unit Developer password. ! Important If set, Preset passwords always have a higher priority then the unit passwords! For details see chapter “7. ACCESS RIGHTS & PASSWORDS”. > User Access Rights Set the User access rights for input- and output channel. > Admin Access Rights Set the Administrator access rights for input- and output channel. > Clear All User Presets Deletes all Presets from the amplifiers memory that are not set as ready-only Presets. > Clear All Factory Presets Deletes all Presets from the amplifiers memory that are set as read-only Presets (Factory Presets). USER 20 / 30 www.camcoaudio.com = User mode ADM = Administrator mode DEV = Developer mode i-Series i - S e r i e s DSPControl SOFTWARE 6. BACKUP & RESTORE PRESETS For managing your Presets the DSPControl software allows you to … > “Save” – Save all Preset-related stuff inside the amplifier The Preset is then stored to the Preset location currently selected in the Preset list, with the name typed in the “Currently Loaded Preset”-field in the upper left corner. Any previous Preset stored at this location will be lost when overwriting it with a new Preset. > “Load” – Load a Preset from the amplifier’s Preset list Loads the selected Preset into the amplifier. Any unsaved changes to the previous Preset will be lost. > “Save to File” – Save all Preset-related stuff to your computer’s hard drive Pressing this button does not automatically store the Preset inside the amplifier. So if you want to store any changes both on your hard drive and inside the amplifier don’t forget to press the “Save” button as well. > “Load from File” – Load a single Preset from your computer’s hard drive into the amplifier Pressing this button will not automatically store the Preset inside the amplifier. So if you want to store the freshly loaded Preset permanently inside the amplifier don’t forget to choose a location from the amplifier’s Preset list and to press the “Save” button. > “Backup all Presets to Folder” (accessible in the “File”-menu) Creates a backup of all Presets stored inside the amplifier to a folder on your computer’s hard drive. This procedure can take some time depending on the amount of Presets to be backuped. Only the Preset-related settings will be stored, not the Unit level settings. See the chapter “11. PRESET SETTINGS” for details. > “Restore all Presets from Folder” (accessible in the “File”-menu) Restores a previously created backup from a folder on your computer’s hard drive. This procedure can take some time depending on the amount of Presets to be restored. Only the Preset-related settings will be restored, not the Unit level settings. i-Series 6 > “Create Factory File” (accessible in the “File”-menu in Developer mode only) Creates a complete backup of all amplifier settings into a single file. This includes all Unit level access rights, passwords and settings, the amplifier name and all amplifier’s Presets with their specific access rights and passwords. Only the amplifier’s display backlight setting cannot be stored inside a factory file. The Factory File should only be used if you want to create an image or clone of all amplifier settings. This gives you the option to easily set up your rolling stock of amplifier’s to a defined state, without having to worry about configuring every amplifier individually. Please do not use the Factory-File if you only want to publish a set of Presets for your customers. This should be done with the backup/restore Presets function. > “Load Factory File” Loads a previously created Factory File into your amplifier. Note that loading a factory file will automatically change all access rights, passwords and settings to the values stored inside the factory file. But be aware that a certain combination of deactivated Unit access rights can effectively lock you out of the unit permanently if you don’t know the new passwords! So please make sure to only load factory files from trusted sources, which either: à will allow at least a firmware update in User mode (which gives you the option to effectively reset the iD4 / iD7 amplifier to a blank state with all access rights granted) or … à will have their specific Administrator and Developer passwords published. The best way to load a Factory File would be to carry out a firmware update first, in order to erase all old Presets. Otherwise all Presets stored to locations not included in the new Factory File will not be deleted. l Note It is possible to lock some or all of those load, save, backup and restore options in User and Administrator mode through the Unit Access Rights. For details see the chapter “10. Unit Settings” below. www.camcoaudio.com 21 / 30 7 i - S e r i e s DSPControl SOFTWARE 7. ACCESS RIGHTS & PASSWORDS How are the access rights and passwords managed? In order to understand how the access rights are managed in the iD4 / iD7 amplifier, it is important to know that all passwords and access right settings are always stored and checked inside the amplifier. This means that everytime you will for example switch to Developer mode in the software, the password is transferred to the amplifier and validated there. If the password is correct, the amplifier (and in turn also the DSPControl software) will switch to Developer mode, thus giving full access to all functions and settings. If the password was wrong, the amplifier will deny Developer access and the software will show the message “Invalid Password”. > Example 1 If you are not allowed to access the output settings of the currently loaded Preset, it will not be possible to change any output settings on the amplifier’s LCD screen either. Once entered the correct password in the DSPControl software, both the amplifier’s display and the software will allow full access to the output settings. > Example 2 If you enter Developer mode from the amplifier’s display (through "P”-MENU à Access Level), the DSPControl software (if connected) will also automatically switch to Developer mode. Secondly it is important to know that the Administrator and Developer password can be different for each Preset individually. This means for example that if you load a Preset which has custom Admin and/ or Developer passwords you will need those passwords to access Admin or Developer mode. The default password stored at Unit level will not work anymore as long as this preset is active. By loading any another Preset without custom passwords (or an empty preset) you will again be able to access Admin or Developer Level with your well-known default Unit level passwords. 22 / 30 www.camcoaudio.com i-Series i - S e r i e s DSPControl SOFTWARE 8. ACCESS RIGHTS HIERARCHY 8 What are the access levels? DEV The Developer mode always gives access to all functions of the iD4 / iD7 amplifier. Especially setting individual Preset access rights and passwords can only be done in Developer mode. The Developer always has the right to change all access rights and passwords for the lower access levels (Admin, User and Locked). The default Developer mode password is: CamcoDev The default access rights are: all active (cannot be restricted) ADM The Administrator mode (abbreviation ‘Admin’) gives the option to allow a configurable intermediate access level which has less rights that the Developer level but more than the User level. It’s up to the system Developer to decide which access rights are granted to system Administrators. Setting Admin access rights can only be done in the higher Developer mode, changing the default Admin password can be done directly in Admin mode (and in Developer mode of course). The Administrator is normally allowed to change all access rights and passwords for the lower access levels (User and Locked). The default Admin mode password is: CamcoAdm The default access rights are: all active USER This is the default access level when powering up the iD4 / iD7 amplifiers. So the amplifier will typically be operated in User mode. Setting the User access rights can only be done in the higher Admin or Developer mode, changing the default User password can be done directly in User mode (and in the higher Admin or Developer levels of course). The User can be allowed to change all access rights for the lower Locked level, provided the User himself has been granted the specific access right. > Example If the User has not the right to change the amplifier name, he cannot in turn give the right to change the amplifier name in the locked state. The option will then not be available. The default User password is: User The default access rights are: all active LOCK This mode is typically used to prevent any intentional or unintentional changes both inside the DSPControl software and the amplifier’s display, when for example leaving the DSPControl computer unsupervised. Once entered, a password for any higher access level (User, Admin or Developer) is needed to exit the locked mode. The default access rights are: all inactive (locked) l Note It is basically possible to restrict the Administrator and User access rights to less than the lower access mode. But then the lower access level would have more rights then the higher level, which might be confusing. This is up to the Developer or Administrator to decide. i-Series www.camcoaudio.com 23 / 30 9 i - S e r i e s DSPControl SOFTWARE 9. ACCESS RIGHT OPTIONS UNIT PRESET Stored inside Stored inside These are the Unit and Preset level access right options Developer mode Admin mode User mode Locked mode Load Presets Select if it’s allowed to load any Presets from the amplifier’s Preset list or from your computer’s hard drive always allowed configurable in configurable in DEV & ADM configurable in DEV , ADM & USER Save Presets Select if it’s allowed to save any Presets inside the amplifier or to your computer’s hard drive always allowed configurable in DEV & ADM configurable in DEV , ADM & USER Enable Display Lock Control Select if it’s allowed to lock the Unit from the amplifier’s display always allowed configurable in DEV & ADM not available Change User Access Rights Select if it’s allowed to change the User access rights in Admin mode available not available not available not available Change Locked Access Rights Select if it’s allowed to change the Locked access rights in Admin or User mode always allowed configurable in configurable in DEV & ADM not available Change Unit Name Select if it’s allowed to change the amplifier’s name always allowed configurable in DEV & ADM configurable in DEV , ADM & USER Change Unit Configuration Select if it’s allowed to change the network settings, the autostandby time and the power-on Preset always allowed configurable in DEV & ADM configurable in DEV , ADM & USER Load an Empty Preset Select if it’s allowed to load an empty Preset from the amplifier always allowed configurable in DEV & ADM configurable in DEV , ADM & USER Update the Unit firmware* Select if it’s allowed to update the Unit firmware always allowed configurable in configurable in DEV & ADM configurable in DEV , ADM & USER Access Input channel always allowed configurable in configurable in always locked Acess X-Over and Output channels always allowed configurable in DEV configurable in DEV configurable in DEV DEV configurable in DEV configurable in DEV configurable in DEV DEV DEV DEV DEV L configurable in always locked DEV L * Updating the firmware also can be used to reset the iD4 / iD7 amplifier to a blank state with default passwords and access rights. Also all Presets will be erased after firmware update. USER 24 / 30 www.camcoaudio.com = User mode ADM = Administrator mode DEV = Developer mode LOCK = Locked mode L = Always locked i-Series 10 i - S e r i e s DSPControl SOFTWARE 10. UNIT SETTINGS These are the settings which are stored at Unit level Meaning that those are always the same no matter which Preset currently is loaded, with one exception for the passwords, please see below. l Note Changes to any of these settings will be stored immediately inside the amplifier. > Default User, Administrator and Developer Passwords ! Attention Password override possible inside each Preset if programmed! > Locked, User and Administrator Access Rights Please see dedicated access rights table at chapter “9. ACCESS RIGHTS HIERARCHY”. > Unit Name Just type the desired name inside the text box on the left side of the amplifier panel or change it directly in the Network window (provided you have the right to change it). > Auto-Standby Set the time after which the amplifier will go to Standby mode if no analoge and digital input signal was fed to the amplifier. If the amplifier has been set into standby through the auto-standby function, automatic wakeup will only work if digital AES input signal is applied again. Applying analogue signal again will not wakeup the amplifier. When unsing analogue input signal, exiting the automatic standby mode must be done manually through the amplifier’s display or the DSPControl application. So please consider this carefully before using this function with analogue input signal. > Display Set the amplifier’s display backlight status: à On à Delayed Off à Dimmed The display setting is the only parameter which cannot be stored inside a factory file or be restored after a firmware update! > Network Settings Either select automatic IP adress configuration through your DHCP server or select a fixed IP address and subnet mask. > Power On Preset Select which Preset shall be loaded automatically after powering up the iD4 / iD7 amplifier. > Read-Only Preset Range (only accessible in Developer mode) Set a range of Presets which cannot be overwritten in Admin, User or Locked mode. Saving to those Preset locations will not be possible. i-Series www.camcoaudio.com 25 / 30 11 i - S e r i e s DSPControl SOFTWARE 11. PRESET SETTINGS These are the settings which are stored inside each Preset individually. Meaning that those settings might change when another Preset is loaded. l Note Changes to any of these settings are not automatically stored inside the currently loaded Preset. So please don’t forget to save all changes inside the amplifier by clicking on the “Save” button. If you don’t save, all settings and changes will be lost if you switch the unit off or if you load another preset. > Custom Administrator and Developer passwords (only accessible in Developer mode) à Blank / empty = Unit default: The Admin or Developer level can be accessed through the default Unit passwords. à Any custom password: If this Preset is loaded, then the Admin or Developer level can only be accessed with the custom password. > User and Administrator Access Rights (only accessible in Developer mode): Please see dedicated access rights table at chapter “9. ACCESS RIGHTS HIERARCHY”. > Amplifier Output Mode (Stereo or Mono Bridged) Accessible through the menu “Unit à Configure à Output Mode à …” > And of course all settings configurable in the Main, Input, X-Over and Output panels (e.g. input selection, volume, mute, EQ, delay, crossover, limiter settings and many more) 26 / 30 www.camcoaudio.com i-Series 12 i - S e r i e s DSPControl SOFTWARE 12. UNIT CONVERSION EQUATIONS Unit Conversion Equations and Lookup Table Lookup Table Output power Output power Output power Unit Conversion Equations VRMS VPeak dBu dBV Unit conversion 1 1,41 2,22 0 0,13 0,25 2 2,83 8,24 6,02 0,5 1 2 3 4,24 11,76 9,54 1,13 2,25 4,5 4 5,66 14,26 12,04 2 4 8 5 7,07 16,2 13,98 3,13 6,25 13 6 8,49 17,78 15,56 4,5 9 18 7 9,9 19,12 16,9 6,13 12 25 8 11,31 20,28 18,06 8 16 32 9 12,73 21,3 19,08 10 20 41 10 14,14 22,22 20 13 25 50 12 16,97 23,8 21,58 18 36 72 15 21,21 25,74 23,52 28 56 113 20 28,28 28,24 26,02 50 100 200 30 42,43 31,76 29,54 113 225 450 40 56,57 34,26 32,04 200 400 800 50 70,71 36,2 33,98 313 625 1 250 60 84,85 37,78 35,56 450 900 1 800 70 98,99 39,12 36,9 613 1 225 2 450 80 113,14 40,28 38,06 800 1 600 3 200 90 127,28 41,3 39,08 1 013 2 025 4 050 100 141,42 42,22 40 1 250 2 500 5 000 125 176,78 44,16 41,94 1 953 3 906 7 813 150 212,13 45,74 43,52 2 813 5 625 11 250 175 247,49 47,08 44,86 3 828 7 656 15 313 200 282,84 48,24 46,02 5 000 10 000 20 000 (in W / 8 Ω) (in W / 4 Ω) (in W / 2 Ω) Equation VRMS à dBu VRMS à dBV dBu à VRMS dBV à VRMS 2Ω VRMS à Output power 4Ω 8Ω VRMS à VPeak 0,5 Values in grey are calculated only. The iD4 / iD7 is not able to deliver these output powers. i-Series www.camcoaudio.com 27 / 30 13 i - S e r i e s DSPControl SOFTWARE 13. COMPANY INFORMATION Company information Mailing address: CAMCO Produktions- und Vertriebs-GmbH für Beschallungs- und Beleuchtungsanlagen Fischpicke 5 57482 Wenden Germany Telephone: +49 (0) 27 62 / 4 08-0 Facsimile: +49 (0) 27 62 / 4 08-10 Internet: www.camcoaudio.com E-Mail: [email protected] 28 / 30 www.camcoaudio.com i-Series i - S e r i e s DSPControl SOFTWARE i-Series www.camcoaudio.com 29 / 30 www.camcoaudio.com i-Series DSPControl SOFTWARE MADE IN GERMANY