1
TURNKEY PRINTING SOLUTIONS
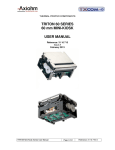
TPSK PRINTER SERIES
24 & 12V
USER MANUAL
Reference 31 08 972
Issue Z
July 2007
!"
##$
% % % &'!"
##$
% %
EVOLUTIONS
Date
08/2006
07/2007
Issue
Preliminary
Z
Modifications
TPSK 12 & 24 V User’s Manual
Page 1 / 66
Reference: FDE 31 08 972 Issue Z
INTRODUCTION
The TPSK series is part of the "Compact Kiosk" printer family. The wide range of temperature and humidity
operating conditions allows integration to a system used indoors or outdoors.
The TPSK printers are turnkey units that contain the printing head, the interface controller board, the paper roll
bucket and a cutter / paper chute assembly to protect and display the printed ticket.
The main characteristics are:
Easy connection (12V or 24V power supply and serial interface)
Easy paper loading with a font printer door, a bucket to set the roll of paper, and a “Clamshell” system to
easily set the paper under the print head.
Different ways to install the printer, including a possible sliding system for sealing.
Compact size in which 4 inch paper rolls can be used.
Many information sent back to the host system such as : jam, low paper, out of paper …
A specific cutter patented by Axiohm with which the ticket can be cut when the user pulls it.
This protects the ticket in a chute while it is printed. The chute on the existing units is optimized for a 4
inch ticket length.
Please contact Axiohm for other needs.
Note: This manual is not applicable to the version TPSK2401 (User Manual ref 3109472/Z)
that is driven with a different command set.
TPSK 12 & 24 V User’s Manual
Page 2 / 66
Reference: FDE 31 08 972 Issue Z
CONTENTS
1
2
3
4
5
TECHNICAL SPECIFICATIONS ................................................................................................6
1.1
Features .................................................................................................................................................7
2.1
External Dimensions ............................................................................................................................8
2.2
Housing features for ticket access.....................................................................................................10
2.3
Paper Loading ....................................................................................................................................10
2.4
Self test ................................................................................................................................................11
2.5
CUTTER SYSTEM / PAPER CHUTE ............................................................................................12
3.1
Overview: ............................................................................................................................................13
3.2
Power supply connector location ......................................................................................................14
3.3
Serial HE10 Pinout.............................................................................................................................15
3.4
Self test ticket description..................................................................................................................15
5.1
Command conventions.......................................................................................................................20
5.2
Reset commands .................................................................................................................................21
5.3
Vertical positioning and print commands........................................................................................22
5.4
Horizontal positioning commands ....................................................................................................25
5.5
Print characteristics commands .......................................................................................................31
5.6
Font commands ..................................................................................................................................33
5.7
Graphics commands...........................................................................................................................34
5.8
Logo commands..................................................................................................................................34
MECHANICAL FEATURES.........................................................................................................8
INTERFACE BOARD FEATURES............................................................................................13
LIST OF CONTROL CODES ......................................................................................................18
COMMAND DESCRIPTION.......................................................................................................20
Initialize Printer ...........................................................................................................................................................21
Reset Firmware ............................................................................................................................................................21
Print and Feed One Line ..............................................................................................................................................22
Activate Carriage Return..............................................................................................................................................22
Feed n Print Lines ........................................................................................................................................................22
Feed n Dot Rows..........................................................................................................................................................23
Set Line Spacing to 1/6 Inch ........................................................................................................................................23
Set Line Spacing ..........................................................................................................................................................23
Print and Feed Paper ....................................................................................................................................................24
Print and Feed n Lines .................................................................................................................................................24
Horizontal Tab .............................................................................................................................................................25
Set Right-Side Character Spacing ................................................................................................................................25
Set Absolute Starting Position .....................................................................................................................................26
Set Horizontal Tab Positions .......................................................................................................................................27
Set Relative Print Position ...........................................................................................................................................28
Select Justification .......................................................................................................................................................29
Set Left Margin ............................................................................................................................................................29
Set Printing Area Width...............................................................................................................................................30
Select Print Mode.........................................................................................................................................................31
Select or Cancel Underline Mode ................................................................................................................................32
Select Or Cancel White/Black Reverse Print Mode.....................................................................................................32
Select International Character Set ................................................................................................................................33
Print Raster Graphics ...................................................................................................................................................34
TPSK 12 & 24 V User’s Manual
Page 3 / 66
Reference: FDE 31 08 972 Issue Z
Select the Current Logo ...............................................................................................................................................34
Define Downloaded Bit Image.....................................................................................................................................35
Print Downloaded Bit Image........................................................................................................................................36
Return Logo Checksum................................................................................................................................................36
5.9
Printer status commands...................................................................................................................37
Transmit Paper Sensor Status.......................................................................................................................................37
Transmit Printer ID ......................................................................................................................................................38
Transmit Printer ID, Remote Diagnostics Extension ...................................................................................................39
Transmit Status ............................................................................................................................................................40
SET Sensor Threshold .............................................................................................................................................40
Send Printer Software Version.....................................................................................................................................41
Return SRAM Size.......................................................................................................................................................41
Transmit Selected A/D Channel...................................................................................................................................41
5.10
Real time commands ......................................................................................................................42
5.11
Bar code commands........................................................................................................................48
5.12
Flash firmware download commands ..........................................................................................51
5.13
User flash memory commands ......................................................................................................56
5.14
Peripheral control commands .......................................................................................................57
5.15
Font Download................................................................................................................................62
Rules for Using Real Time Commands........................................................................................................................42
Moving Data Through the Buffer.................................................................................................................................43
Busy Line and Fault Conditions...................................................................................................................................43
Real Time Recovery from Fault...................................................................................................................................44
Real Time Status Transmission....................................................................................................................................45
Select Printing Position of HRI Characters..................................................................................................................48
Select Pitch of HRI Characters ....................................................................................................................................48
Select Bar Code Height................................................................................................................................................48
Select Bar Code Width.................................................................................................................................................49
Print Bar Code .............................................................................................................................................................49
Firmware Download Sequence .................................................................................................................................51
Commands ...................................................................................................................................................................52
Switch to Flash Download Mode .........................................................................................................................52
Request Flash Memory Size................................................................................................................................52
Select Flash Memory Sector to Download.........................................................................................................52
Get Flash Firmware CRC Status.........................................................................................................................53
Return Boot Sector CRC ......................................................................................................................................53
Erase All Flash Contents Except Boot Sector ...................................................................................................53
Return Main Program Flash CRC .......................................................................................................................53
Erase Selected Flash Sector ...............................................................................................................................54
Download to Active Flash Sector ........................................................................................................................54
Erase Boot Sector + Download New Boot Code...............................................................................................55
Erase User Flash Sector ...............................................................................................................................................56
Return User Flash Memory Allocation Status..............................................................................................................56
Set Communication Interface Parameters ....................................................................................................................57
SET AUTOTEST AFTER CLOSE MODE................................................................................................................58
Set Voltage Mechanism ...............................................................................................................................................58
Paper Low Sensor Option ............................................................................................................................................58
Enable/ disable paper feed button ................................................................................................................................59
Set Pre-Heating Mode..................................................................................................................................................59
set paper pass (FLAPPER) sensor threshold................................................................................................................59
Set Print Density ..........................................................................................................................................................60
Reset EEPROM ...........................................................................................................................................................60
Print Test Form ............................................................................................................................................................61
Jam Sensor Calibration ................................................................................................................................................61
Download Font.............................................................................................................................................................62
Read Font information .................................................................................................................................................63
Check Easyfont compatibility ......................................................................................................................................63
TPSK 12 & 24 V User’s Manual
Page 4 / 66
Reference: FDE 31 08 972 Issue Z
6
7
RECOMMENDATIONS ..............................................................................................................64
6.1
Storage: ...............................................................................................................................................64
6.2
Duty cycle:...........................................................................................................................................64
6.3
Grounding:..........................................................................................................................................64
6.4
Print head Cleaning: ..........................................................................................................................64
6.5
Ticket access / Housing features:......................................................................................................64
6.6
Paper recommendations:...................................................................................................................65
TROUBLESHOOTING ................................................................................................................66
TPSK 12 & 24 V User’s Manual
Page 5 / 66
Reference: FDE 31 08 972 Issue Z
1 TECHNICAL SPECIFICATIONS
The following table gathers the main characteristics of the printing unit.
ITEM
12 V Version
24 V Version
Static thermal dot line
printing
Clamshell
384
8 horizontal & vertical
48
100 maximum*
+0.1
60
-1
By Thermistor
1
0.125
Opto-sensor
Static thermal dot line
printing
Clamshell
384
8 horizontal & vertical
48
100
+0.1
60
-1
By Thermistor
1
0.125
Opto-sensor
-Motor steps
mm
--
4.75-5.25
4.75-5.25
V DC
Vch (dot)
10.8-13.2
(max 16 stand by)
20 - 26.4
(max. 30 stand by)
V DC
Current Consumption: Vch
28
22.6
mA per resistor dot "on"
at nominal voltage
42
42
mA
Printing method
Paper loading
Number of resistor dots
Resolution
Printing width
Printing speed
Paper width
Head T° detection
Paper feed pitch
Paper empty detection
Operating voltage range Vcc
(logic)
Current Consumption: Vcc
(all dots "on")
Nominal dot energy (High
sensitivity paper)
Current Consumption: Stepping
motor
Current Consumption: interface
board
Stand-by 12 or 24V
Peak print head current
(all dots ”on ” at nominal value)
Over all dimensions: Width
Depth
Height
Weight
Storage range*2
*1
Relative humidity*2
Operating range*2
Electrical lifetime *3
Mechanical lifetime *3
Specified standards
*1
UNIT
--dots
Dots/mm
mm
mm/s
mm
0.34
0.32
300
300
mA per activated phase
at nominal voltage
80
40
mA
10.8
8.8
A
102
160,5
204,37
1700
-20 to +85
20 to 95
no condensing
0 to +70
108
102
160,5
204,37
1700
-20 to +85
20 to 95
no condensing
0 to +70
108
mm
mm
mm
g
°C
50
50
UL60950 ; CSA 22.2-60950 (cUL) ; CE class
B, ROHS, IEC60950 ; C-Tick, FCC class B.
mJ
%
°C
pulses on OE signal
km
*1 In standard conditions: Nominal Volts, 25°C, for a print head with a resistance of 1000 Ω (24V) or 480 Ω
(12V), at 800 PPS. When used with 12V the maximum is not reached at room temperature and nominal
voltage.
*2 Contact Axiohm for recommendations if extended conditions are required
*3 Per AXIOHM conditions
TPSK 12 & 24 V User’s Manual
Page 6 / 66
Reference: FDE 31 08 972 Issue Z
1.1 Features
Flash Memory Size
128kb / 1 Mb / 2Mb
Amount of Flash Memory accessible for user
storage
48 kb
Resident character set
PC Code Pages: 858 and 43737
Bar code support
Code 39, UPC-A, UPC-E, JAN8 (EAN), JAN13
(EAN), Interleaved 2 of 5 (ITF), Codabar, Code
128
Drivers available
Windows 98, 2000, XP
Human Interface
Configuration software commands for easy setup
TPSK 12 & 24 V User’s Manual
Page 7 / 66
Reference: FDE 31 08 972 Issue Z
2 MECHANICAL FEATURES
2.1 External Dimensions
Paper
Feed
button
TPSK 12 & 24 V User’s Manual
Page 8 / 66
Reference: FDE 31 08 972 Issue Z
The support for this printer needs to be "U
shaped" to allow the paper roll bucket to
protrude through.
The printer can be either fixed (four holes
underneath & two above the unit), or free to
slide with its guiding tabs (for sealing issue if
needed).
Holes of fixation (binding) were
placed on the chassis
TPSK 12 & 24 V User’s Manual
Page 9 / 66
Reference: FDE 31 08 972 Issue Z
2.2 Housing features for ticket access
See section «Recommendations».
2.3 Paper Loading
Maximum paper roll diameter is 102 mm. Paper / roll width must be 59 to 60 mm.
The following steps are needed to load the paper:
- Open the door by pulling it
- Remove the core of the preceding roll if necessary
- Place the new roll
- Set the paper end through the door chute over the platen
- Close the door, keeping the paper end tight to avoid a possible paper loop.
- Pull the paper end to cut; it the paper is loaded.
Step n°1
Step n°2
Step n°3
TPSK 12 & 24 V User’s Manual
Step n°4
Page 10 / 66
Reference: FDE 31 08 972 Issue Z
Step n°5
Step n°6 (you must check if you see
the paper in the hole)
Step n°7: Push the door until complete closing
2.4
Self test
By opening and closing the door, a ticket is printed. Printer setting can be checked on it.
TPSK 12 & 24 V User’s Manual
Page 11 / 66
Reference: FDE 31 08 972 Issue Z
2.5
CUTTER SYSTEM / PAPER CHUTE
The paper is fed into a chute. The user has access to the ticket end at the chute exit. The user then cuts the
receipt when he pulls the ticket.
With this system (on existing units), the distance between the printing line and the cutting line is between 20
and 21 mm. It is possible to print a header (or footer) of the next ticket in this area.
The chute hides the ticket from the user until it is fully printed; the length of ticket with the existing TPSWS002
PRINTER is 4 inches. With tickets shorter than 3.75 inches, the user would not access the ticket end. It is
possible to print a ticket longer than 4 inches; sensors and software provide security to avoid jam when the
ticket is pulled during printing.
Chute length optimised
for 4 inch tickets:
- for ticket protection
- for ticket end access
TPSK 12 & 24 V User’s Manual
Page 12 / 66
Reference: FDE 31 08 972 Issue Z
3 INTERFACE BOARD FEATURES
3.1 Overview:
Printer connections are
available directly on the board
connectors at the printer rear.
The power supply must be a
switch power supply AC/DC 24V 3A mean, with minimum
recommended power 55VA
(possible peak of 8.8A during
1.5ms) or 12V 6A mean with
minimum recommended power
55VA (possible peak of 10.8A
during 1.5ms).
A missing pin on the connector
allows an easy locating.
The communication is serial
RS232. Communication
parameters can be modified
(see the control code list).
Default setting is 115200
Bauds, N, 8, 1.
TPSK 12 & 24 V User’s Manual
Page 13 / 66
Reference: FDE 31 08 972 Issue Z
3.2 Power supply connector location
Serial HE10
communication
24 V Power
Connection
- -- - --- --+ NC
++
+ NC
- - - + NC +
Warning: Please use the missing pin as a locating: a reversed connection can destroy the PCB.
TPSK 12 & 24 V User’s Manual
Page 14 / 66
Reference: FDE 31 08 972 Issue Z
3.3 Serial HE10 Pinout
Pinout Description
1:
2:
3:
4:
5:
6:
7:
8:
9:
HE10 (board side)
GND
TXD
GND
RXD
NC
NC
DSR
GND
DTR
Recommended Connector
HE10: 10 points with locating and holding clips
3M ref.: 89110-0103HA or equivalent
3.4 Self test ticket description
To print a self ticket:
- open and close the door
Here is the description of the self test print out.
- Model Number
- Serial Number
:
:
BOOT FIRMWARE
Revision
CRC
Flash FIRMWARE
Revision
CRC
HARDWARE
- Flash Memory Size
- Flash Size User
:
- SRAM Size
- CPU Clock Freq.
MECHANISM
- Type
- Voltage
- This is a 15 digit number fixed by Axiohm.
- This is a 10 digits number fixed by Axiohm
First letter:
always D
Next two digits:
year of production
Next two digits:
week of production
Next 5 digits:
incremental number that is reset
every Monday morning.
-Vx.xx
This a 4 digits check sum
-Vx.xx
This a 4 digits check sum
:
- Total size of the main flash memory.
- Amount of Flash memory allocated to logos or user defined fonts.
:
:
- Total size of the RAM Memory
- Microprocessor Clock frequency.
- CHTP/HTP
- 24V
:
- Print Density
:
- Percentage of the nominal heating time value for specified paper.
- Partial Cut
:
- Indicate the number of motor steps to perform a partial cut.
TPSK 12 & 24 V User’s Manual
Page 15 / 66
Reference: FDE 31 08 972 Issue Z
- Paper Low Sensor
:
- Enable Paper Low sensor management.
- Pre Heating
:
- Max Speed
:
- This mode is used to maintain print head temperature above
minimum value.
- Printer top speed limit.
COMMUNICATION
- RX Buffer Size
:
- This indicates the size of the data Input buffer (Bytes).
- Interface Type
:
- Indicates if RS232 or USB interface is used.
Automatic detection of USB interface
Baud rate Value.
Data Bits
:
Number of data bits.
Stop Bit(s)
:
Number of stop bit(s).
Parity
:
Type of parity to control frame validity.
Flow Control
:
Hardware or software handshaking.
:
Baud rate
Reception Errors
:
Indicates which action is to be done when a wrong data is received.
PRINT OPTIONS
- User Logo defined
:
- Current status = Yes if at least one logo is defined.
- User Char defined
:
- Current status = Yes if at least one font is defined.
- Code Page (437,858) :
Indicates default internal code page selected upon reset.
(For further information, please contact your distributor or Axiohm Technical Support Team at
www.axiohm.com)
TPSK 12 & 24 V User’s Manual
Page 16 / 66
Reference: FDE 31 08 972 Issue Z
Example:
TPSK 12 & 24 V User’s Manual
Page 17 / 66
Reference: FDE 31 08 972 Issue Z
4 LIST OF CONTROL CODES
Code (Hexadecimal)
Command
Page
09
Horizontal Tab
25
0A
0D
Print and Feed One Line
Activate Carriage Return
22
22
10 04 n
11 n1...nl
Real Time Status Transmission
Print Raster Graphics
45
34
14 n
15 n
Feed n Print Lines
Feed n Dot Rows
22
23
1B 20 n
1B 21 n
Set Right-Side Character Spacing
Select Print Mode
25
31
1B 24 n1 n2
1B 2D n
Set Absolute Starting Position
Select or Cancel Underline Mode
26
32
1B 32
1B 33 n
Set Line Spacing to 1/6 Inch
Set Line Spacing
23
23
1B 40
1B 44 [n]...k NUL
Initialize Printer
Set Horizontal Tab Positions
21
27
1B 4A n
1B 52 n
Print and Feed Paper
Select International Character Set
24
33
1B 5B 7D
1B 5C n1 n2
Switch to Flash Download Mode
Set Relative Print Position
52
28
1B 61 n
1B 64 n
Select Justification
Print and Feed n Lines
29
24
1B 76
1D 01
Transmit Paper Sensor Status
Request Flash Memory Size
37
52
1D 02 nn
1D 06
Select Flash Memory Sector to Download
Get Flash Firmware CRC Status
52
53
1D 07
1D 08
Return Boot Sector CRC
Return SRAM Size
53
41
1D 0E
1D 0F
Erase All Flash Contents Except Boot
Sector Main Program Flash CRC
Return
53
53
TPSK 12 & 24 V User’s Manual
Page 18 / 66
Reference: FDE 31 08 972 Issue Z
LIST OF CONTROL CODES (continued)
Code (Hexadecimal)
Command
Page
1D 10 n
Erase Selected Flash Sector
54
1D 11 al ah cl ch d1...dn
1D 23 n
Download to Active Flash Sector
Select the Current Logo
54
34
1D 2A n1 n2 d1...dn]
1D 2F m
Define Downloaded Bit Image
Print Downloaded Bit Image
35
36
1D 3B n1 n2 n3 n4
1D 40 n
Jam sensor calibration
Erase User Flash Sector
61
56
1D 42 n
1D 48 n
Select or Cancel White/Black Reverse Print Mode
Select Printing Position of HRI Characters
32
48
1D 49 n
1D 49 40 n
Transmit Printer ID
Transmit Printer ID, Remote Diagnostics Extension
38
39
1D 4C nL nH
Set Left Margin
29
1D 57 nL nH
1D 66 n
Set Printing Area Width
Select Pitch of HRI Characters
30
48
1D 68 n
1D 6B m d1...dn
Select Bar Code Height
Print Bar Code
48
49
1D 6B m d1...dk NUL
1D 72 n
Print Bar Code
Transmit Status
49
40
1D 73 n
1D 77 n
Set Sensor Threshold
Select Bar Code Width
40
49
1D FF
1F 01 d1.. d8192
Reset Firmware
Erase Boot Sector + Download New Boot Code
21
55
1F 02 n1 n2 n3 n4 n5 n6
1F 03 AA n
Set Communication Interface Parameters
Set Autotest Mode
57
58
1F 03 A1 n
1F 03 03 n
Set Voltage Mechanism
Paper Low Sensor Option
58
58
1F 03 B2 n
1F 03 0B n
Enable/Disable Paper Feed Button
Set Preheating Mode
59
59
1F 03 96 n
1F 0B 4E 52 4A n
Set Paper Pass (flapper) sensor Threshold
Set Print Density
59
60
1F 0D 43 4C 45 n
1F 56
Reset EEPROM
Send Printer Software Version
60
41
1F 65 n
1F 74
Return Logo Checksum
Print Test Form
36
61
1D 6C m
1F 77 n
Transmit Selected A/D Channel
Return User Flash Memory Allocation Status
41
56
TPSK 12 & 24 V User’s Manual
Page 19 / 66
Reference: FDE 31 08 972 Issue Z
5 COMMAND DESCRIPTION
5.1 Command conventions
The following information describes how each command is organized:
Command Name
A designation (not the ASCII code) used to identify the command.
Description
A brief summary of the command, followed by detailed information, if necessary.
ASCII
Hexadecimal
Decimal
the ASCII control code
the Hexadecimal control code
the Decimal control code
Value or Values
a description of the command operand values
Range
the upper and lower limits of the command operand
Default
the command operand default after printer reset
Formulas
any formula used for this command.
Exceptions
Describes any exceptions to the command, for example, other commands with which that one cannot be used.
Related Information
This section describes any related information for this command and provides references to other sections for
additional information.
TPSK 12 & 24 V User’s Manual
Page 20 / 66
Reference: FDE 31 08 972 Issue Z
5.2 Reset commands
INITIALIZE PRINTER
Clears the print line buffer and resets the printer to the default settings for the startup configuration (refer to
Default settings below).
Single Wide, Single-High and Left-Aligned characters and reset active logo.
Default bar code settings
ASCII
Hexadecimal
Decimal
Default
ESC @
1B 40
27 64
Character Pitch
Number of Columns Width
Extra Dot Rows
Character Set
Printing Position
12.7 CPI
24 characters
3
Default
Column One
RESET FIRMWARE
Reboots the printer.
ASCII
Hexadecimal
Decimal
GS (SPACE)
1D FF
29 255
TPSK 12 & 24 V User’s Manual
Page 21 / 66
Reference: FDE 31 08 972 Issue Z
5.3 Vertical positioning and print commands
The vertical positioning and print commands control the vertical print positions of characters on the receipt.
PRINT AND FEED ONE LINE
Prints the buffer contents and feeds one line.
ASCII
Hexadecimal
Decimal
LF
0A
10
ACTIVATE CARRIAGE RETURN
Prints the buffer contents and feeds one line.
ASCII
Hexadecimal
Decimal
CR
0D
13
Note: this command is almost similar to the previously described <0A>, it was originally made to be compatible
with impact printers on which an actual carriage return was necessary.
Some applications expect the command to be ignored, while others use it as print command.
FEED N PRINT LINES
Feeds n lines of paper with the current line/character height.
ASCII
Hexadecimal
Decimal
DC4 n
14 n
20 n
Value of n
The number of lines to feed at current line height setting.
Range of n
255
Exception(s)
The command is ignored when it is not sent at the beginning of a line.
TPSK 12 & 24 V User’s Manual
Page 22 / 66
Reference: FDE 31 08 972 Issue Z
FEED N DOT ROWS
Feeds n dot lines: (the dot height is 0.125mm, the paper feeding with this command is: n/203 inch, n/8 mm).
ASCII
NAK n
15 n
21 n
Hexadecimal
Decimal
Value of n
n/203 inch
Range of n
0-255
Example: <15> <CB> will feed 203 lines thus one inch of paper.
SET LINE SPACING TO 1/6 INCH
Sets the default line spacing to 1/6 of an inch (4,23 mm).
ASCII
Hexadecimal
Decimal
ESC 2
1B 32
27 50
SET LINE SPACING
Sets the line spacing to n/406 inch (n/16 mm).
The minimum line spacing is 8.5 lines per inch. The line spacing equals the character height when n is too
small.
ASCII
Decimal
ESC 3 n
1B 33 n
27 51 n
Value of n
n/406 inch
Range of n
0-255
Default
0.13 inch (3.37 mm)
Hexadecimal
Exception(s)
The command is valid only at the beginning of a line.
TPSK 12 & 24 V User’s Manual
Page 23 / 66
Reference: FDE 31 08 972 Issue Z
PRINT AND FEED PAPER
Prints buffer contents and feeds n/203 inch (n/8 mm) of paper.
Sets the print starting position to the beginning of the line (when printing and feeding are completed).
ASCII
Decimal
ESC J n
1B 4A n
27 74 n
Value of n
n/203 inch
Range of n
0-255
Hexadecimal
Exception(s)
If n is too small, the line height equals the character height.
PRINT AND FEED N LINES
Prints the buffer contents and feeds paper n lines at the current line height.
ASCII
ESC d n
Hexadecimal
1B 64 n
Decimal
27 100 n
Range for n
0-255
TPSK 12 & 24 V User’s Manual
Page 24 / 66
Reference: FDE 31 08 972 Issue Z
5.4 Horizontal positioning commands
The horizontal positioning commands control the horizontal print positions of characters on the receipt.
HORIZONTAL TAB
Moves the print position to the next tab position set by the Set Horizontal Tab Positions (1B 44 n1 n2 ... 00)
command. The print position is reset to column one after each line.
When no tabs are defined to the right of the current position, or if the next tab is past the right margin, Line
Feed is executed.
Print initialization sets 32 tabs at column 9, 17, 25,
ASCII
Hexadecimal
Decimal
HT
09
9
SET RIGHT-SIDE CHARACTER SPACING
Sets the right side character spacing to [n].
ASCII
Decimal
ESC SP n
1B 20 n
27 32 n
Range for n
0 – 32
Default
0
Hexadecimal
Note: n has to be a multiple of 4.
TPSK 12 & 24 V User’s Manual
Page 25 / 66
Reference: FDE 31 08 972 Issue Z
SET ABSOLUTE STARTING POSITION
Sets the print starting position to the specified number of dots (up to the right margin) from the beginning of the
line. The print starting position is reset to the first column after each line.
ASCII
Hexadecimal
Decimal
Value of n
ESC $ nL nH
1B 24 nL nH
27 36 nL nH
n = Number of dots to be moved from the beginning of the line
nL = Remainder after dividing n by 256
nH = Integer after dividing n by 256
The values for nL and nH are two bytes in low byte, high byte word orientation.
Note: nL has to be a multiple of 4.
Formulas
The example shows how to calculate 280 dots as the absolute starting position.
280/256 = 1, remainder of 24
nL = 24
nH = 1
TPSK 12 & 24 V User’s Manual
Page 26 / 66
Reference: FDE 31 08 972 Issue Z
SET HORIZONTAL TAB POSITIONS
Sets up to 32 horizontal tab-position n columns from column one, but does not move the print position. See the
Horizontal Tab command (09).
The tab positions remain unchanged if the character widths are changed after the tabs are set. The command
ends with hexadecimal 00; hexadecimal 1B 44 00 clears all tabs.
ASCII
Hexadecimal
Decimal
Value of n
Value of k
Default
ESC D [n]…k NUL
1B 44 [n]…k NUL
27 68 [n]…k 0
Column number for tab minus one
(n is always less than or equal to the current selected column width)
0-32
Every 8 characters from column. 1 (9, 17, 25, etc.) for normal print
Formulas
Set the tab positions in ascending order and put Hex 00 at the end.
Hex 1B 44 00 (number of tabs not specified) clears all tab positions.
Exceptions
The tabs cannot be set higher than the column width of the current pitch:
1-24= Standard pitch
1-37= Compressed pitch
Example:
1B 44 03 04 07 0A 0D 18 00
09 41 09 42 09 43 09 44 09 45 09 46 0A
To obtain (in standard pitch):
---A---B--C--D----------EF
TPSK 12 & 24 V User’s Manual
Page 27 / 66
Reference: FDE 31 08 972 Issue Z
SET RELATIVE PRINT POSITION
Moves the print-starting position the specified number of dots either right (up to the right margin) or left (up to
the left margin) of the current position.
The print starting position is reset to the first column after each line.
Any setting that exceeds the printable area is ignored.
ASCII
Hexadecimal
Decimal
ESC \ nL nH
1B 5C nL nH
27 92 nL nH
Value of n
To Move the Relative Starting Position Right of the Current Position:
n = Number of dots to be moved right of the current position
nL = Remainder after dividing n by 256
nH = Integer after dividing n by 256
The values for nL and nH are two bytes in low byte, high byte word orientation.
To Move the Relative Starting-Position Left of the Current Position:
n = Number of dots to be moved left of the current position
nL = Remainder after dividing (65536-n) by 256
nH = Integer after dividing (65536-n) by 256
The values for nL and nH are two bytes in low byte, high byte word orientation.
Note: where nL is a multiple of 4.
Formulas
To move to the left:
The example shows how to set the relative position 20 dots to the left of the current position.
65536-20 = 65516
65516/256 = 255, remainder of 236
nL = 236, nH = 255
To move to the right:
The example shows how to set the relative position 260 dots to the right of the current position.
260/256 = 1, remainder of 4
nL = 04, nH = 01
TPSK 12 & 24 V User’s Manual
Page 28 / 66
Reference: FDE 31 08 972 Issue Z
SELECT JUSTIFICATION
Specifies the alignment of characters, logos, and bar codes (see the value of n table).
ASCII
Hexadecimal
Decimal
Value of n
ESC a n
1B 61 n
27 97 n
Range of n
0, 48 = Left aligned
1, 49 = Center aligned
2, 50 = Right aligned
0-2, 48-50
Default
0 (Left aligned)
Exceptions
The command is valid only at the beginning of a line.
SET LEFT MARGIN
Sets the left margin of the printing area. The left margin is set to ((nH X 256) + nL) dots.
The Set Printing Area Width command (1D 57), sets the width of the printing area. See the Set Printing Area
Width command (1D 57) in this document for a description of that command.
If the setting exceeds the printable area, the maximum value of the printable area is used. The maximum
printable area is 384. See the illustration.
The command is ignored if it is not at the beginning of the line.
ASCII
Hexadecimal
Decimal
GS L nL nH
1D 4C nL nH
29 76 nL nH
Range of nL
0-255
Range of nH
0-255
384 dots (the maximum printable area)
Default
Note: where nL is a multiple of 4.
Formulas
To set the left margin to one inch, send the four-byte string: GS L 203 0
Or, to set the left margin to two inches, send the four-byte string: GS L 150 1
Where 2 inches = 406/203, and 406 = (1 X 256) + 150.
Printable area 384 dots
Left margin
TPSK 12 & 24 V User’s Manual
Printing area width
Page 29 / 66
Reference: FDE 31 08 972 Issue Z
SET PRINTING AREA WIDTH
Sets the width of the printing area. If the setting exceeds the printable area, the maximum value of the printable
area is used. The width of the printing area is set to ((nH X 256) + nL) dots.
The width of the printing area follows the Set Left Margin command (1D 4C). See the Set Left Margin
command (GS L) earlier in this document for a description.
The command is ignored if it is not at the beginning of the line.
ASCII
Hexadecimal
Decimal
Range of nL
GS W nL nH
1D 57 nL nH
29 87 nL nH
Range of nH
0-255
0-255
Default
384 dots (the maximum printable area)
Note:
where nL is a multiple of 4.
Minimum print area width = 4
Formulas
To set the width of the printing area to one inch, send the four-byte string: GS W 203 0
Or, to set the width of the printing area to two inches, send the four-byte string: GS W 150 1
Where 2 inches = 406/203, and 406 = (1 X 256) + 150.
←
Printable area 384 dots ------------→
←Left margin→
←Printing area width→
Exceptions
This command is effective only at the beginning of a line.
If the setting exceeds the printable area, the maximum value of the printable area is used. The maximum
printable area is 384 dots.
TPSK 12 & 24 V User’s Manual
Page 30 / 66
Reference: FDE 31 08 972 Issue Z
5.5 Print characteristics commands
These commands control what the printed information looks like, selection of character sets, and setting of
margins. The commands are described in order of their hexadecimal codes.
SELECT PRINT MODE
Selects the print mode: standard, compressed, underlined, double high or doublewide.
ASCII
Decimal
ESC ! n
1B 21 n
27 33 n
Value of n:
See table
Hexadecimal
Value of n
1
Bit
Function
0
1
Bit 0
Pitch
Standard Pitch
Compressed Pitch
(See chart below)
Bit 4
Double High
Canceled
Set
Bit 5
Double Wide
Canceled
Set
Bit 7
Underlined Mode
Canceled
Set (bar thickness = 2)
1
Bits 1, 2,3 and 6 are not used
Default
0 (for bits 0, 4, 5, 7)
This command affects the pitch selection.
Pitch
CPI
Standard
Compressed
12.7
16.9
Exceptions
Refer to the above table for exceptions.
Related Information
See the Print Specifications Guide for a description of standard and compressed character pitches.
TPSK 12 & 24 V User’s Manual
Page 31 / 66
Reference: FDE 31 08 972 Issue Z
SELECT OR CANCEL UNDERLINE MODE
Turns underline mode on or off.
Underlines cannot be printed for spaces set by: the Horizontal Tab, Set Absolute Start Position, Set Relative
Print Position commands, or in white/black reverse print mode.
Underline mode may also be turned ON and OFF with the Select Print Mode(s) command (1B 21).
ASCII
Hexadecimal
Decimal
Value of n
Default
ESC - n
1B 2D n
27 45 n
0.48 = Cancel underline mode
1-49 =
Select underline mode and bar thickness = 2
2-50 =
(Cancel underline mode)
SELECT OR CANCEL WHITE/BLACK REVERSE PRINT MODE
Turns on White/Black reverse printing mode.
In White/Black reverse printing mode, print dots and non-print dots are reversed, which means that white
characters are printed on a black background. When the White/Black reverse printing mode is selected it is
also applied to character spacing which is set by Right-Side Character Spacing (ESC SP).
This command can be used with built-in characters and user-defined characters, but does not affect the space
between lines.
White/Black Reverse Print Mode does not affect graphics, logos, bar code, HRI characters, and spacing
skipped by Horizontal Tab (HT), Set Absolute Starting Position (ESC $), and Set Relative Print Position (ESC
\).
ASCII
GS B n
1D 42 n
Decimal
29 66 n
n is the least significant Bit, LSB
Hexadecimal
Value of n
0 = Off
Default
1 = On
0 (Off)
Exceptions
Only the lowest bit of n is valid.
TPSK 12 & 24 V User’s Manual
Page 32 / 66
Reference: FDE 31 08 972 Issue Z
5.6 Font commands
SELECT INTERNATIONAL CHARACTER SET
Selects the character set mapping to be used.
ASCII
Decimal
ESC R n
1B 52 n
27 82 n
n
Country
Hexadecimal
0
1
2
3
4
5
6
7
8
9
10
USA
France
Germany
UK
Denmark I
Sweden
Italy
Spain
Japan
Norway
Denmark II
Default = 0
Additional codes
n
U.S.A.
France
Germany
U.K.
Denmark I
Sweden
Italy
Spain
Japan
Norway
Denmark II
0
1
2
3
4
5
6
7
8
9
10
35D
23H
#
#
#
£
#
#
#
Pt
#
#
#
36D
24H
$
$
$
$
$
¤
$
$
$
¤
$
TPSK 12 & 24 V User’s Manual
64D
40H
@
à
§
@
@
É
@
@
@
É
É
91D
5BH
[
°
Ä
[
Æ
Ä
°
i
[
Æ
Æ
92D
5CH
\
ç
Ö
\
Ø
Ö
\
Ñ
¥
Ø
Ø
Page 33 / 66
93D
5DH
]
§
Ü
]
Å
Å
é
¿
]
Å
Å
94D
5EH
^
^
^
^
^
Ü
^
^
^
Ü
Ü
96D
60H
`
`
`
`
`
é
ù
`
`
é
é
123D
7BH
{
é
ä
{
æ
ä
à
"
{
æ
æ
124D
7CH
ù
ö
ø
ö
ò
ñ
ø
ø
125D
7DH
}
è
ü
}
å
å
è
}
}
å
å
126D
7EH
~
"
ß
~
~
ü
i
~
~
ü
ü
Reference: FDE 31 08 972 Issue Z
5.7 Graphics commands
These commands are used to enter and print graphics data and are described in order of their hexadecimal
codes.
PRINT RASTER GRAPHICS
Prints one row of data. n1 . .. nl: bytes describing the line to print.
<11> has to be sent at the beginning of each dot line, the following 48 bytes give the status of the 384 dots.
ASCII
Decimal
DC1 n1 ...n48
11 n1 ...n48
17 n1 ...n48
Value of n
n1…n48 = Data bytes
Range for ni
0 - 255
Hexadecimal
Note: to convert a bmp file so that it can be sent to the printer using this graphic command. The bmp must be
defined ‘black and white’, 384 pixels wide (or less but multiple of 8). The <11> must be added to the file every
48 bytes (or less depending on the number of pixels on the image width).
5.8 Logo commands
SELECT THE CURRENT LOGO
Selects a logo to be defined or printed. The active logo n remains in use until this command is sent again with
a different logo n, or command 1B40 is sent, or printer is rebooted.
When this command precedes a logo definition, that definition is stored in flash memory as logo n. if there is
already a different definition in flash memory for logo n, the first is inactivated and the new definition is used.
The inactive definition is not erased from flash and continues to use memory space in the flash.
When this command precedes a logo print command and n is different from the previously active logo
selected, the printer retrieves the logo definition for n from memory and prints it. If there is no definition for logo
n, then no logo is printed.
An application using multiple logos, into flash memory, is responsible for erasing the flash memory page when
the logo area is full.
ASCII
Decimal
GS # n
1D 23 n
29 35 n
Range of n
0 – 64
Hexadecimal
TPSK 12 & 24 V User’s Manual
Page 34 / 66
Reference: FDE 31 08 972 Issue Z
DEFINE DOWNLOADED BIT IMAGE
Enters a downloaded bit image (such as a logo) into Flash with the number of dots specified by n1 and n2. The
downloaded bit image is available until another bit image is defined, or either Initialize Printer (1B 40 or 1D 40
31), command is received.
See the illustration below for a graphic representation of the downloaded bit image.
Top of Graphic
Column
One
Column
48
8 x 8 Max.
Row
One d1 d
65
d2
MS B
dn
Row 64 d
Max. 64
dn
LSB
ASCII
Hexadecimal
Decimal
GS * n1 n2 d1 ... dn
1D 2A n1 n2 d1 ... dn
29 42 n1 n2 d1 ... dn
Value of n
Value of n1
Value of n2
Value of d
1-48 (8 x n1 = Number of
1-255 (Number of
Bytes of Data (Printed
Vertical Bytes)1
Down, Then Across)
Horizontal Dot Columns)
1
The number of bytes sent is represented by the following formula:
n = 8 x n1 x n2 (n1 x n2 must be less than or equal to 49138).
Exceptions:
See the illustration for the Print Downloaded Bit Image command (1D 2F) for a representation of the bit image.
TPSK 12 & 24 V User’s Manual
Page 35 / 66
Reference: FDE 31 08 972 Issue Z
PRINT DOWNLOADED BIT IMAGE
Prints the downloaded bit image at a density specified by m. It is ignored if any data is in the print buffer, if the
downloaded bit image is undefined.
See the illustration on the previous page for a representation of the bit image.
ASCII
Hexadecimal
Decimal
GS / m
1D 2F m
29 47 m
Value and Range of m
Value of
m
Print Mode
Vertical
1
DPI
0
Normal
203
1
Double Wide
203
2
Double High
101
3
Quadruple
101
1
Dot density measured in dots per inch
Horizontal
DPI*
203
101
203
101
RETURN LOGO CHECKSUM
Returns the checksum of a logo downloaded using “Define Downloaded Bit Image”.
ASCII
Hexadecimal
Decimal
US e n
1F 65 n
31 101 n
Returns 4 Bytes:
Command ID + Flag + checksum of the logo specified by n.
Byte 1
Byte 2
= 65h
= 01
- if logo n exists
- if logo n doesn’t exist.
Byte 3 = Checksum (LSB) or 00h if logo n doesn’t exist.
Byte 4 = Checksum (MSB) or 00h if logo n doesn’t exist.
Checksum is two’s complement of sum of all bytes in the download sequence.
Ex: Checksum = -(0x1D + 0x2A + … )
for the “Define Downloaded Bit Image” command.
TPSK 12 & 24 V User’s Manual
Page 36 / 66
Reference: FDE 31 08 972 Issue Z
5.9 Printer status commands
These commands enable the printer to communicate with the host computer. They are stored in the printer'
s
data buffer as they are received, and are handled by the firmware in the order in which they were received.
When a fault occurs, the printer will go busy at the communication interface and not respond to either of the
Printer Status commands. If the fault causing the busy condition can be cleared, such as by loading paper, or
letting the thermal print head cool down, the printer will resume processing the data in its reception buffer.
Real Time commands allow the printer to respond immediately, even though it is busy at the communication
interface. See the following section, Real Time Commands, for details about these commands.
TRANSMIT PAPER SENSOR STATUS
Sends status data to the host computer. The printer sends one byte to the host computer when it is not busy or
in a fault condition. See the following table.
ASCII
Hexadecimal
Decimal
ESC v
1B 76
27 118
Values
Status
Byte
Bit
Function
0 Signifies
1 Signifies
0
Paper Low
OK
Low
1
Door/Lid
Closed
Opened
2
Paper Out
Present
Out
3
JAM
OK
JAM
4
High position
Down position
5
Flapper on paper
path
Temperature
In valid range
Too hot or too cold
6
Voltage
In valid range
Too high or too low
7
Not Used
Fixed to Zero
Fixed to Zero
Related Information
See Busy Line and Fault Conditions in the Real Time Commands section of this document for details about
fault condition reporting.
Note: in the case of : an opened lid, a paper out, a Jam, and a flapper down; the printer will stop feeding paper
before reporting the status.
TPSK 12 & 24 V User’s Manual
Page 37 / 66
Reference: FDE 31 08 972 Issue Z
TRANSMIT PRINTER ID
Transmits the printer model, type of version as defined below. This command is processed as normal printer
data.
ASCII
GS I n
1D 49 n
29 73 n
Hexadecimal
Decimal
Operand:
Limit:
n = printer ID select
Decimal:
1 ≤ n ≤ 2; 49 ≤ n ≤ 50 ; n = 66,67,68
Hex:
01 ≤ n ≤ 02; 31 ≤ n ≤ 32 ; n = 42,43,44
“GS I” OPERAND AND RETURNED STATUS DEFINITION
Value
Decimal
n
Decim
al
Hex
Printer ID
Function
1, 49
01, 31
Model
TPSK
Bit
2, 50
66
67
68
02, 32
42
43
44
Type
Manufacturer
Printer name
Serial number
0
1
2
3
4
5
6
7
53
Function
2-byte character code
Undefined
Undefined
Undefined
Fixed
Undefined
Undefined
Fixed
AXIOHM
TPSK
Depends on actual S/N
Hex
35
Value
0
1
Not installed
Installed
Always 0
-
Always 0
-
Note: for n = 66, 67, 68 the printer response is sent back in the following format.
Header:
Data:
NULL:
5F (hex)
ASCII string
00 (hex)
TPSK 12 & 24 V User’s Manual
Page 38 / 66
Reference: FDE 31 08 972 Issue Z
TRANSMIT PRINTER ID, REMOTE DIAGNOSTICS EXTENSION
Performs the remote diagnostic functions specified by n.
Each returned message is defined as:
n + data + <CR>
ASCII
Hexadecimal
Decimal
GS I @ n
1D 49 40 n
29 73 64 n
Values of n (Refer to table)
Value of n
Hex
Dec
Remote diagnostic item
20
Serial #,
10 digit ASCII
32
Function
* Write to NVRAM
Example, send 14 bytes to printer:
GS I @ 0x20 1234567890
Return Serial #, preceded by n to identify
Printer returns 12 bytes in above example:
#1234567890<CR>
23
35
Serial #
24
36
27
39
Class/model #,
15 digit ASCII
Class/model #
2F
47
Boot firmware CRC,
4 digit ASCII
Return Boot firmware CRC, returns 6 bytes
37
55
Flash firmware CRC,
4 digit ASCII
Return Flash firmware CRC, returns 6 bytes
97
151
Boot firmware version
Return Boot firmware version, returns 6 bytes
A3
163
Flash firmware version
Return Flash firmware version, returns 6 bytes
* Write to NVRAM
Return Class/model #, returns 17 bytes
* 0 x 20 ≤ digit ≤ 0 x 7A
If any digit is out of the defined range, Write to NVRAM is ignored.
TPSK 12 & 24 V User’s Manual
Page 39 / 66
Reference: FDE 31 08 972 Issue Z
TRANSMIT STATUS
Transmits the status specified by n.
This is a batch mode command which transmits the response after all prior data in the reception buffer has
been processed. There may be a time lag between the printer receiving this command and transmitting the
response, depending on the reception buffer status.
ASCII
Hexadecimal
Decimal
Value of n
GS r n
1D 72 n
29 114 n
4, 52
= Flash memory User Sector status
The status bytes to be transmitted are described in the following two tables.
Flash memory User Sector Status (n = 4 or n = 52)
Bit
Off/On
Hex
Decimal Status for Transmit Status
0
Undefined.
1
Undefined.
2
Off
00
0
Not Used. Fixed to off
3
Off
00
0
Logo(s) defined.
On
08
8
No logo defined.
4
Off
00
0
Not used. Fixed to off.
5
Undefined
6
Off
00
0
Not used. Fixed to off.
7
Undefined.
Exceptions
When n is out of the specified range, the command is ignored.
SET SENSOR THRESHOLD
Synopsis: This command configures the sensors (except Flapper sensor, see page detection threshold.
ASCII
GS
s
m
n
Hexadecimal
1D
73
m
n
Decimal
29
115
m
n
m = sensor select
Operand:
n = threshold value
Limit:
Decimal
m=6; m=8; m=9
0 n 255
Hex:
m=06; m=08; m=09
00 ≤ n ≤ FF
Default:
Decimal:
n = 102
Hex:
n = 66
Description: This command will store the sensor detection threshold in non-volatile memory.
Note: This command must be followed by a reset.
m
Decimal
6
8
9
TPSK 12 & 24 V User’s Manual
Hex
06
08
09
“GS s” OPERAND DEFINITION
Sensor
Connecto
Sensor
r
Low Paper
Opto jam
Hyst opto jam
Page 40 / 66
Mechanism
-
Reference: FDE 31 08 972 Issue Z
SEND PRINTER SOFTWARE VERSION
The printer returns 8 bytes containing the boot and flash software version.
The first 4 bytes returned are an ASCII string for the boot version.
The second 4 bytes are an ASCII string for the flash version.
Example: the printer returns 1.07 1.15
This means the boot version is 1.07 and the flash version is 1.15.
ASCII
Hexadecimal
Decimal
US V
1F 56
31 86
RETURN SRAM SIZE
Returns the size of SRAM on board, on one byte as number of 64 Kbytes sectors.
ASCII
Hexadecimal
Decimal
GS BS
1D 08
29 08
SRAM sizes
4 kb (internal RAM only)
128 kb (w/extension)
0
2
TRANSMIT SELECTED A/D CHANNEL
Returns the size of SRAM on board, on one byte as number of 64 Kbytes sectors.
ASCII
Hexadecimal
Decimal
GS l m
1D 6C m
29 108 m
Returns the voltage.
* m = 0 x 08
Sends an octet of between 0 and 255
= value measured on the A-D converter
= AD measure
Voltage (V) = 0.11274 x AD measure
Example:
AD measure = 213 =>Voltage = 24.01V
AD measure = 186 => Voltage = 21.00V
* m = 0 x 09
Sends an octet of between 0 and 255
= value measured on the temperature converter
= AD measure
RTH = 100 / ((255 / AD measure) - 1)
Temp (°C) = (3950 / (ln (RTH / 30) + 13.255)) - 273
Example:
AD measure = 60 => Temp = 24.43°C
AD measure = 27 => Temp = 47.47°C
Note: tolerance not taken into consideration and calculation not precise
TPSK 12 & 24 V User’s Manual
Page 41 / 66
Reference: FDE 31 08 972 Issue Z
5.10 Real time commands
The Real Time commands provide an application interface to the printer even when the printer is not handling
other commands.
Real Time Status Transmission: DLE (Hex 10) Sequence
Real Time Request to Printer: DLE (Hex 10) Sequence
Real Time Printer Status Transmission
The original Printer Status commands, Transmit Printer Status (Hex 1B 76, ASCII ESC v) are placed in the
printer’s data buffer as they are received and handled by the firmware in the order in which they were received.
If the paper exhausts while printing data that was in the buffer ahead of the status command, the printer goes
busy at the communication interface and suspends processing the data in the buffer until paper is reloaded.
This is true for all error conditions: thermal print head overheating, etc. In addition, there is no way to restart the
printer after a paper jam or other error.
The Real Time commands are provided to overcome these restrictions.
RULES FOR USING REAL TIME COMMANDS
Three situations must be understood when using real time commands:
1) The printer executes the Real Time command upon receiving it and will transmit status regardless of the
condition of the host being ready to receive or not.
2) The printer transmits status whenever it recognizes a Real Time Status Transmission command sequence,
even if that sequence happens to occur naturally within the data of another command, such as graphics data.
In this case the sequence will be processed both ways: as a real time command and as the graphics data it is
intended to be when the graphics command is executed from the buffer. The result is that the host might
receive status messages it has not requested.
3) If the printer is in error condition, meaning that the communication interface is likely to be busy, the host
must be able to send the real time commands regardless of this busy state at the interface. Otherwise those
commands wouldn’t be received and processed.
TPSK 12 & 24 V User’s Manual
Page 42 / 66
Reference: FDE 31 08 972 Issue Z
MOVING DATA THROUGH THE BUFFER
Applications should not let the buffer filled up with Real Time commands when the printer is detected busy at
the communication interface. A busy condition can be determined by bit 3 of the response to DLE EOT 1.
Other responses to DLE EOT n can determine the reason for a particular busy condition.
Although the printer responds to Real Time commands when it is busy, it will place them into the buffer
following the other data already there.
When the printer is only busy because the buffer is full (meaning it cannot print data as fast as it can
receive them), then data continue to be processed out of the buffer (approximately at the print speed), the
Real Time commands will eventually get flushed out.
When the printer is busy due to an error condition, then data stops being processed off the buffer (until the
error condition is cleared)
In both cases the buffer can be filled with Real Time commands; it will be quicker in the case of an error
condition.
To avoid this situation, the application must determine the cause of a busy condition and take appropriate
action with sending the Real Time commands to avoid filling the buffer. There is a minimum of 256 bytes
available in the printer buffer when it turns busy.
BUSY LINE AND FAULT CONDITIONS
If the printer is in error condition (cover is open, out of paper…), the printer will turn busy immediately. It will
then stay busy and stop processing data out of the reception buffer until the error condition is cleared. It will
respond to the Real Time commands as described below.
TPSK 12 & 24 V User’s Manual
Page 43 / 66
Reference: FDE 31 08 972 Issue Z
REAL TIME RECOVERY FROM FAULT
This command will select the recovery mode when the printer detects a fault condition. Any fault condition that
prevents the printer from printing requires one of these commands to allow printing to resume.
DLE Sequence
DLE ENQ n
10 05 n
16 5 n
ASCII
Hexadecimal
Decimal
Operand
Limit
n = recovery mode
Decimal: n
Hex:
n
“DLE ENQ” OPERAND DEFINITION
n
Decimal
2
Hex
02
Fault recovery mode
Recovers from a fault after clearing the reception and print buffers. Print
settings that are normally preserved from line to line, such as character
height and width, are still preserved with this operand.
Notes:
•
•
•
This command will attempt recovery from any fault that prevents printing, including jams and paper out.
Recovering from a print head over temperature condition is only accomplished by waiting until the print
head has returned to its operating temperature range.
This command will be ignored until manual intervention has occurred to clear the fault condition. The
indication of manual intervention for clearing paper out, paper jams, cutter fault, consists of opening and
closing the clamshell door.
TPSK 12 & 24 V User’s Manual
Page 44 / 66
Reference: FDE 31 08 972 Issue Z
REAL TIME STATUS TRANSMISSION
Transmits in real time the selected one byte printer status. It is specified by n according to the following
parameters.
DLE Sequence
DLE EOT n
10 04 n
16 4 n
ASCII
Hexadecimal
Decimal
Value of n
DLE Sequence
1 = Transmit printer status
2 = Transmit communication interface busy status
3 = Transmit error status
4 = Transmit receipt paper status
Exceptions
The command is ignored if n is out of range.
Related Information
1 = Transmit Printer Status
Bit
Status
Hex
Decimal
Function
0
1
2
3
Off
On
On
Off
On
00
02
04
00
08
0
2
4
0
8
4
5
6
7
On
10
16
Off
00
0
Fixed to Off.
Fixed to On.
Fixed to On.
Not busy at the communication interface.
Printer is Busy at the communication
interface.
Fixed to On.
Undefined.
Undefined.
Fixed to Off.
TPSK 12 & 24 V User’s Manual
Page 45 / 66
Reference: FDE 31 08 972 Issue Z
2 = Transmit communication interface Busy Status
Bit
Status
Hex
Decimal
Function
0
1
2
Off
On
Off
On
Off
On
On
Off
On
Off
On
Off
00
02
00
04
00
08
10
00
20
00
40
00
0
2
0
4
0
8
16
0
32
0
64
0
Fixed to Off.
Fixed to On.
Cover closed.
Cover open.
Paper feed button is not pressed.
Paper feed button is pressed.
Fixed to On.
Printing not stopped due to paper condition.
Printing stopped due to paper condition.
No error condition.
Error condition exists in the printer.
Fixed to Off.
3
4
5
6
7
3 = Transmit Error Status
Bit
Status
Hex
Decimal
Function
0
1
2
Off
On
UP
Down
OK
JAM
On
Off
On
Off
00
02
00
04
00
08
10
00
20
00
0
2
0
4
0
8
16
0
32
0
Fixed to Off.
Fixed to On.
Flapper on Paper Path
On
40
64
Off
00
0
3
4
5
6
7
TPSK 12 & 24 V User’s Manual
Opto JAM
Fixed to On.
No unrecoverable error.
Unrecoverable error occurred.
Thermal print head temperature and power
supply voltage are in range.
Thermal print head temperature or power
supply voltage is out of range.
Fixed to Off
Page 46 / 66
Reference: FDE 31 08 972 Issue Z
4 = Transmit Receipt Paper Status
Bit
Status
Hex
Decimal
Function
0
1
2
Off
On
Off
On
Off
On
On
Off
On
Off
On
Off
00
02
00
04
00
08
10
00
20
00
40
00
0
2
0
4
0
8
16
0
32
0
64
0
Fixed to Off
Fixed to On
Paper not low
Paper low
Paper not low
Paper low
Fixed to On
Paper present
Paper out
Paper present
Paper out
Fixed to Off
3
4
5
6
7
TPSK 12 & 24 V User’s Manual
Page 47 / 66
Reference: FDE 31 08 972 Issue Z
5.11 Bar code commands
These commands format and print bar codes.
SELECT PRINTING POSITION OF HRI CHARACTERS
Prints HRI (Human Readable Interface) characters above or below the bar code.
ASCII
Hexadecimal
Decimal
GS H n
1D 48 n
29 72 n
Value of n Printing position
0 = Not printed
1 = Above the bar code
2 = Below the bar code
3 = Both above and below the bar code
Default
0 (Not printed)
SELECT PITCH OF HRI CHARACTERS
Select font used to print HRI characters.
ASCII
Hexadecimal
Decimal
GS f n
1D 66 n
29 102 n
Value of n
0 = Standard Pitch at 12.7 CPI
1 = Compressed Pitch at 16.9 CPI
Default
1 (Standard Pitch at 16.9 CPI)
SELECT BAR CODE HEIGHT
Sets the bar code height to n dots or n/203 inch (n/8 mm).
ASCII
Hexadecimal
Decimal
GS h n
1D 68 n
29 104 n
Value of n Number of dots
Range of n
1-255
Default
216
TPSK 12 & 24 V User’s Manual
Page 48 / 66
Reference: FDE 31 08 972 Issue Z
SELECT BAR CODE WIDTH
Sets the bar code module to n/203 inch (n/8 mm).
ASCII
Decimal
GS w n
1D 77 n
29 119 n
Value of n
1 2, 3, 4, 5,6
Default
n=3
Formulas
n/203 inch (n/8 mm).
Hexadecimal
PRINT BAR CODE
Selects the bar code type and prints a bar code for the ASCII characters entered.
If the width of the bar code exceeds one line, the bar code is not printed.
There are two variations to this command. The first variation uses a NULL character to terminate the string; the
second uses a byte at the beginning of the string that determines the string length.
Bar codes can be aligned left, centered, or aligned right using the Align Positions command (1B 61).
The check digit is calculated for UPC and JAN (EAN) codes if it is not sent from the host computer. Sixcharacter zero-suppressed UPC-E tags are generated from full 11 or 12 characters sent from the host
computer according to standard UPC-E rules. Start/Stop characters are added for Code 39 if they are not
included.
First Variation
GS k m d1…dk NUL
Hexadecimal
1D 6B m d1…dk NUL
Decimal
29 107 m d1 dk NUL
(0 = End of command)
ASCII
Second Variation
GS k m n d1…dn
1D 6B m n d1…dn
29 107 m n d1…dn
Exceptions
The command is only valid at the beginning of a line - Illegal data will cancel the command.
TPSK 12 & 24 V User’s Manual
Page 49 / 66
Reference: FDE 31 08 972 Issue Z
Print Bar Code (continued)
Values
First Variation: Data string terminated with NULL Character
M
Bar Code
D
n, Length
0
UPC-A
48- 57 (ASCII numerals)
Fixed Length: 11, 12
1
UPC-E
48- 57
Fixed Length: 11, 12
2
JAN13 (EAN)
48- 57
Fixed Length: 12, 13
3
JAN8 (EAN)
48- 57
Fixed Length: 7,8
4
Code 39
Variable Length
5
Interleaved 2 of 5
48- 57,
65- 90 (ASCII alphabet),
32, 36, 37, 43, 45, 46, 47 (ASCII special
characters)
d1 = dk = 42 (start/stop code is supplied by
printer if necessary)
48- 57
Variable Length
(Even Number)
Second Variation Length of Byte Specified at Beginning of String
The value of m selects the bar code system as described in the table.
The variable d indicates the character code to be encoded into the specified bar code system. See the table. If
character code d cannot be encoded, the printer prints the bar code data processed so far, and the following
data is treated as normal data.
m
Bar Code
D
n, Length
65
66
67
68
69
UPC-A
UPC-E
JAN13 (EAN)
JAN8 (EAN)
CODE39
Fixed Length: 11, 12
Fixed Length: 11, 12
Fixed Length: 12, 13
Fixed Length: 7, 8
Variable
70
Interleaved 2 of 5
(ITF)
Code 128
48- 57 (ASCII numerals)
48- 57
48- 57
48- 57
48- 57,
65- 90 (ASCII alphabet),
32, 36, 37, 43, 45, 46, 47 (ASCII special
characters)
d1 = dk = 42 (start/stop code is supplied by
printer if necessary)
48- 57
73
0-105
d1 = 103-105 (must be a Start code)
d2 = 0-102 (data bytes)
(Stop code is provided by the printer)
TPSK 12 & 24 V User’s Manual
Page 50 / 66
Variable (Even
Number)
Variable
Reference: FDE 31 08 972 Issue Z
5.12 Flash firmware download commands
These commands are used to load firmware into the printer.
There are two ways to enter the download mode.
While the printer is running normally, send the command, “Switch to Flash Download Mode (1B 5B 7D)” to
leave normal operation and enter the download mode.
If the Flash if found corrupted during Level 0 diagnostics the download mode is automatically entered after a
printer reset.
The printer never goes directly from the download mode to normal operating mode. To return to normal printer
operation, the operator must turn the unit off and on to reboot, or the application must send a command to
cancel download mode and reboot (1D FF).
When each flash download command is received, the printer returns either ACK or NAK to the host computer:
ACK (hexadecimal 06)
Is sent when the printer has received a host transmission and has successfully completed the request.
NAK (hexadecimal 15)
Is sent when a request is unsuccessfully completed.
Each command is described in the following pages.
Firmware Download Sequence
By providing a set of low-level commands, great freedom of implementation is given to customer application to
customize the sequence to match its specific requirements.
The main steps of a typical Firmware download sequence are shown here after:
Error checking and error recovery are not described
1) Switch to Flash Download Mode
2) Check Flash Memory Size
3) Erase all Flash Memory sectors, except Boot Sector
4) Download Code to Active Flash Sector
4.1) Select Flash memory sector #n (each sector contains 64kbytes)
4.1.1) Program segment of N bytes
4.1.2) if more segments, loop back to 4.1.1)
4.2) if more sectors to program, loop back to 4.1)
5) Check Flash CRC
6) Reboot Printer
TPSK 12 & 24 V User’s Manual
Page 51 / 66
Reference: FDE 31 08 972 Issue Z
COMMANDS
SWITCH TO FLASH DOWNLOAD MODE
Sets the printer in flash download mode.
When this command is received, the printer leaves normal operation and can no longer print transactions until
the Reboot the Printer command (1D FF) is received or the printer is rebooted.
This command does not affect the current communication parameters. Once the printer is in flash download
mode, this command is no longer available.
ASCII
Hexadecimal
Decimal
ESC [ }
1B 5B 7D
27 91 125
Related Information
See Entering Flash Download Mode elsewhere in this book to put the printer in flash download mode using the
Configuration Menu.
REQUEST FLASH MEMORY SIZE
Returns the size of the flash used. There may be 2 sectors (64K each) in flash memory. This command
assures that the firmware to be downloaded has the appropriate size for flash memory.
ASCII
Hexadecimal
Decimal
GS SOH
1D 01
29 1
The returned value corresponds to the highest sector number that can be accepted by the Select Sector to
Download (1D 02 nn) command :
1 = 128 Kbytes Flash
Exceptions
Available only in download mode.
SELECT FLASH MEMORY SECTOR TO DOWNLOAD
Selects the flash sector (nn) for which the next download operation applies. The values of the possible sector
are restricted, depending upon the flash part type. The printer transmits an ACK if the sector number is
acceptable or an NAK if the sector number is not acceptable. Sector numbers start at 0
ASCII
GS STX nn
Hexadecimal
1D 02 nn
Decimal
29 2 nn
Value and Range of n
0-1
= 128k bytes Flash
Exceptions
Available only in download mode.
TPSK 12 & 24 V User’s Manual
Page 52 / 66
Reference: FDE 31 08 972 Issue Z
GET FLASH FIRMWARE CRC STATUS
This command gives the Flash firmware CRC.
This is performed normally after downloading completely a new firmware to verify that the downloaded
firmware is valid
The printer transmits ACK if the calculated CRC is correct; NAK if the CRC is incorrect
ASCII
Hexadecimal
Decimal
GS ACK
1D 06
29 6
RETURN BOOT SECTOR CRC
Returns the CRC calculated over the boot sector code area.
ASCII
Hexadecimal
Decimal
GS BEL
1D 07
29 7
Formulas
ACK <low byte> <high byte>
ERASE ALL FLASH CONTENTS EXCEPT BOOT SECTOR
Erases the entire flash memory.
The printer returns ACK if the command is successful; NAK if it is unsuccessful.
ASCII
Hexadecimal
Decimal
GS SO
1D 0E
29 14
Exceptions
Available only in download mode.
RETURN MAIN PROGRAM FLASH CRC
Returns the CRC calculated over the flash firmware code area. The format of the response is ACK <low byte>
<high byte>.
ASCII
Hexadecimal
Decimal
GS SI
1D 0F
29 15
TPSK 12 & 24 V User’s Manual
Page 53 / 66
Reference: FDE 31 08 972 Issue Z
ERASE SELECTED FLASH SECTOR
Erases the previously selected sector. The printer transmits ACK when the sector has been erased. If the
previous sector is not successfully erased, or if no sector was selected, the printer transmits NAK.
ASCII
Hexadecimal
Decimal
GS DLE n
1D 10 n
29 16 n
Value and Range of n
0-1
= 128k bytes Flash
Exceptions
Available only in download mode.
DOWNLOAD TO ACTIVE FLASH SECTOR
Contains a start address (ah x 256 + al) and count (ch x 256 + cl) of binary bytes to load into the selected
sector, followed by that many bytes. The start address is relative to the start of the sector. Addresses run from
0 to 64K.
The printer may return one of several responses. ACK means that the data was written correctly and the host
should transmit the next block. NAK means that, for some reason, the data was not written correctly. This
could mean that communications failed or that the write to flash failed. The alternatives seem to be to retry the
block or halt loading and assume a hardware failure.
ASCII
GS DC1 al ah cl ch d1…dn
Hexadecimal
1D 11 al ah cl ch d1…dn
29 17 al ah cl ch d1…dn
Decimal
Value of al
Value of ah
Value of cl
Value of ch
Value of d
= low byte of the address (it is sent before the high byte)
= high byte of the address (it is sent after the low byte)
= low byte of the count (it is sent before the high byte)
= high byte of the count (it is sent after the low byte)
= data bytes, from 1 to n
Value of n
(for number of data bytes)
Range of Address (al ah)
Range of Count (cl ch)
((ch * 256) + cl)
0000-FFFF (hexadecimal)
0001-FFFF (hexadecimal)
Range Addresses run from 0 to 64K.
Related Information
Available only in download mode.
TPSK 12 & 24 V User’s Manual
Page 54 / 66
Reference: FDE 31 08 972 Issue Z
ERASE BOOT SECTOR + DOWNLOAD NEW BOOT CODE
Waits for new boot code to be downloaded, then if CRC on this new boot code is valid, the boot code sector is
erased and reprogrammed with new code.
Printer automatically reboots after program sequence is complete.
ASCII
Hexadecimal
Decimal
US SOH d1 .. d8192
1F 01 d1 .. d8192
31 01 d1 .. d8192
Exceptions
Available only in download mode.
Note:
During erase and download sequence, power supply must be maintained and no reset sequence should be
performed.
TPSK 12 & 24 V User’s Manual
Page 55 / 66
Reference: FDE 31 08 972 Issue Z
5.13 User flash memory commands
ERASE USER FLASH SECTOR
Erases a section of user flash memory and sends a carriage return when the operation is complete.
ASCII
Decimal
GS @ n
1D 40 n
29 64 n
Value of n
49
Hexadecimal
n = 49 (ASCII n = 1)
This command erases all 64K Flash memory sectors allocated to logo storage.
Those sectors should be erased when the logo definition area is full and the driving application is attempting to
define new logos. All logo definitions are erased and must be redefined.
Important: While erasing flash memory, all communication is disabled. The printer responds to the application
only when the erase sequence is completed. After sending the Erase User Flash Sector (1D 40-n) command,
an application should wait for the printer response before sending new data. Otherwise, data will be lost. If an
application is unable to receive data, it should wait a minimum of five seconds after sending the Erase User
Flash Sector (1D 40 n) command before sending data.
RETURN USER FLASH MEMORY ALLOCATION STATUS
Returns the amount of Flash memory available in user section.
ASCII
Decimal
US w n
1F 77 n
31 119 n
Value of n
49
Hexadecimal
Returns the number of bytes available as a zero terminated ASCII string. Each digit is coded in decimal.
TPSK 12 & 24 V User’s Manual
Page 56 / 66
Reference: FDE 31 08 972 Issue Z
5.14 Peripheral control commands
SET COMMUNICATION INTERFACE PARAMETERS
Synopsis:
Setting communication parameters
ASCII
Hexadecimal
Decimal
US
1F
31
STX
02
2
n1
n1
n1
n2
n2
n2
n3
n3
n3
n4
n4
n4
n5
n5
n5
n6
n6
n6
Description:
n1
00h
Interface
RS232
n2, bit [0..2]
03h
04h
05h
06h
07h
RS232 Baudrate
9600
19200
38400
57600
115200
n2, bit 4
0
1
RS232 Number of stop bits
1
2
n2, bit 5
0
RS232 Number of data bits
8
n3
0x00
0x01
RS232 Parity
Odd parity
Even parity
n4
0x00
0x01
RS232 Parity mode
No parity
Enabled and set using parameter described above
n5
0x00
0x01
RS232 Handshaking
Xon/Xoff
DTR/DSR
n6
0x00
0x01
RS232 Parity Error Processing
Ignore
Print '
?'
Notes: 1) This command is processed only in boot mode.
If the printer is running in normal mode, send first command “switch to Boot Mode” (1B 5B 7D).
2) This command must be followed by “Printer Reset” command (1D FF).
TPSK 12 & 24 V User’s Manual
Page 57 / 66
Reference: FDE 31 08 972 Issue Z
SET AUTOTEST AFTER CLOSE MODE
ASCII
US
ETX
Hexadecimal
Decimal
1F
31
03
3
Value of n
0 = disable
1 = enable
Range of n
0-1
Default
1 (enable)
n
AA
178
n
n
SET VOLTAGE MECHANISM
This command will store the Voltage Mechanism parameter setting in non-volatile memory.
ASCII
Hexadecimal
Decimal
Operand:
Value
Decimal
US
1F
31
n
0
1
Default
1
Limit :
Dec:
ETX
03
3
í
A1
161
n
n
n
= Mode selection
12 Volts
10.8V ≤ voltage range ≤ 13.2V (On
Average)
24 Volts
20.0V ≤ voltage range ≤ 26.4V (On
Average)
0≤n≤1
Hex:
Note :
00 ≤ n ≤ 01
Voltage range: components tolerance not taken into consideration.
This command must be followed by a reset.
PAPER LOW SENSOR OPTION
This command will store the paper low sensor option in non-volatile memory (NVRAM).
ASCII
Hexadecimal
Decimal
Operand:
Value
Decimal
Default:
Limit:
US
1F
31
n
0
1
2
0
Dec:
ETX
03
3
ETX
03
3
n
n
n
= mode Selection
Disabled
Enabled (Sensor)
Enabled (switch)
0≤n≤2
Hex:
Note:
00 ≤ n ≤ 02
This command must be followed by a reset.
TPSK 12 & 24 V User’s Manual
Page 58 / 66
Reference: FDE 31 08 972 Issue Z
ENABLE/ DISABLE PAPER FEED BUTTON
This command turns the paper feed button enable or disable.
ASCII
US
ETX
Hexadecimal
Decimal
1F
31
03
3
Value of n
0 = disable
1 = enable
Range of n
0-1
Default
1 (enable)
n
B2
178
n
n
SET PRE-HEATING MODE
Synopsis:
ASCII
Hexadecimal
Decimal
Operand:
Value
Decimal
Default
Limit:
Description:
Note:
Set Print head pre – Heating mode (NVRAM).
US
ETX
VT
n
1F
03
0B
n
31
3
11
n
n
0
1
0
= Mode selection
Disabled
Enabled
0≤n≤1
Dec:
00 ≤ n ≤ 01
Hex:
This command will store the print-head pre-heating option in non-volatile memory (NVRAM).
When this mode is enabled, the controller monitors the print-head temperature and keeps it above
19-24°C.
If the temperature is around 0°C and the preheating mode is active, the preheating will be
automatically start until the temperature will be around 19-24°C. After the preheating will become
not active again.
This command must be followed by a reset.
SET PAPER PASS (FLAPPER) SENSOR THRESHOLD
ASCII
US
ETX
û
n
Hexadecimal
Decimal
1F
31
03
3
96
150
n
n
Limit:
Decimal:
10 ≤ n ≤ 60
& n = 255 will disable the sensor
Hex:
0A ≤ n ≤ 3C
TPSK 12 & 24 V User’s Manual
Page 59 / 66
Reference: FDE 31 08 972 Issue Z
SET PRINT DENSITY
Synopsis:
Setting Print density
ASCII
US
1F
31
Hexadecimal
Decimal
Limit:
VT
0B
11
N
4E
83
R
52
80
Decimal:
80 ≤ n ≤ 120
Hex:
50 ≤ n ≤ 78
J
4A
69
n
n
n
This command must be followed by a reset (1D FF).
Note: where n must be a multiple of 5.
Description: Set the print density ( energy applied to paper ) in percent relative to nominal energy.
WARNINGS !!
Choose a print density setting no higher than necessary to achieve acceptable
print density.
Failure to observe this rule may result in a printer service call.
Failure to observe this rule may void the printer warranty.
Consult your Axiohm technical support specialist if you have questions.
RESET EEPROM
Synopsis:
Reset EEPROM
ASCII
Hexadecimal
Decimal
Operand:
US
1F
31
CR
0D
13
C
43
67
n = security byte
L
4C
76
Limit:
E
45
69
n
n
n
n=0
Description: This command will reset the non-volatile memory configuration items to their default values.
Note:
This command must be sent while the printer is in its boot-operating mode.
Once the configuration parameters are downloaded to the printer using this command,
the printer must be reset before they take effect.
RESET EEPROM
OPERAND DEFINITION
n
Decimal
Hex
Reset
0
00
Reset EEPROM
TPSK 12 & 24 V User’s Manual
Page 60 / 66
Reference: FDE 31 08 972 Issue Z
PRINT TEST FORM
Prints the current configuration settings on the receipt.
ASCII
Hexadecimal
Decimal
US t
1F 74
31 116
This command is effective only at the beginning of a line.
JAM SENSOR CALIBRATION
Calibrate the Paper Jam opto sensor.
This command feeds paper to create a loop when using a cover in production.
ASCII
Hexadecimal
Decimal
GS ; n1 n2 n3 n4
1D 3B n1 n2 n3 n4
29 59 n1 n2 n3 n4
This command must be used for production or maintenance only. Contact a tech support if needed.
TPSK 12 & 24 V User’s Manual
Page 61 / 66
Reference: FDE 31 08 972 Issue Z
5.15 Font Download
DOWNLOAD FONT
Synopsis
Syntax
Operand
Limit
Returns
Description
Download single byte printer font
ASCII:
FS
L
f8 t w h {d}
Hex:
1C
4C f8 t w h {d}
f:
8 character font name
t:
font storage Id
w:
font character width in dots, including inter-character
space
h:
font character height in dots, not including inter-line space
d:
downloaded data bytes
Hex:
0x20 ≤ f ≤ 0x7F
0x30 ≤ t ≤ 0x33
0x01 ≤ w ≤ 0x30
0x01 ≤ h ≤ 0x40
0x00 ≤ d ≤ 0xFF
ASCII:
OK:
ACK
Fault:
NAK
Hex:
OK:
0x06
Fault:
0x15
This command will download a single byte font code page to the
printer. If the download is successful, an ACK will be returned. If
unsuccessful, a NAK will be returned.
A font must always be downloaded completely, which corresponds to
224 characters.
The font name is used to identify the font. It will be printed on the
diagnostics or configuration form. When a downloaded font is to be
deleted, the font name is used to identify the font. Two fonts cannot
have the same name.
Each character is downloaded as rasters, from top to bottom, and for
each raster, from leftmost byte to rightmost byte.
The storage Id provides the operand for the ‘ESC t n’ (1Bh 74h n)
command that will be used to select this code page. Two fonts
cannot have the same storage Id.
TPSK 12 & 24 V User’s Manual
Page 62 / 66
Reference: FDE 31 08 972 Issue Z
READ FONT INFORMATION
Synopsis
Syntax
Operand
Limit
Returns
Description
Read Font information and checksum
ASCII:
FS
F
t
Hex:
1C
46
t
t:
Font storage Id
Hex:
0x30 ≤ t ≤ 0x34
ASCII:
OK:
ACK followed by
font name = 8 bytes ASCII string
font width = 1 byte
font height = 1 byte
number of characters = 2 bytes (little endian)
16 bit checksum = 2 bytes (little endian)
Fault: NAK
If selected font exists, this command returns ACK followed by font
information.
Else it returns NAK.
CHECK EASYFONT COMPATIBILITY
Synopsis
Syntax
Returns
Description
Check EasyFont compatibility
ASCII:
FS
H
Hex:
1C
48
ASCII:
OK: ACK + list of available font Ids + 00
Fault: NAK
Hex:
OK: 06 + list of available font Ids + 00
Fault: 15
This command asks the printer whether it supports or not Easyfont. If
it does, it also returns the list of available font Ids (single byte, double
byte) that can be used to download a font.
TPSK 12 & 24 V User’s Manual
Page 63 / 66
Reference: FDE 31 08 972 Issue Z
6 RECOMMENDATIONS
6.1 Storage:
If the printer has been stored for a long time with paper set below the print head, it may be necessary to
re-load the paper before operating.
6.2 Duty cycle:
If the temperature is greater than 60°C, the printer must not be used to print more than one ticket (with
maximum length 5 inches) per minute.
If the temperature is lower than 60°C, the printer can be used up to 3 tickets (with maximum length 5
inches) per minute.
Higher duty cycle can destroy the paper feed motor.
Printing is stopped thanks to a software security feature, if the temperature of the print head becomes
too high. Printing will re-start after cooling.
6.3 Grounding:
The printer must be grounded. This can be done either by setting it on a grounded metal support or by
connecting its external chassis.
6.4 Print head Cleaning:
This printer is designed with the print head facing down, this avoid dust accumulation. However, in heavy
duty condition or if the paper used has a poor quality, it is recommended to clean the print head. The
print head is visible and accessible when the door is opened.
To clean the heating dots of the head, use a cotton stick containing a solvent alcohol (ethanol, methanol,
or IPA), but do not touch the print head with your fingers!
AXIOHM can provide cleaning kits, ref.: CK60000A
6.5 Ticket access / Housing features:
To maintain printer reliability, the pressure on the Clamshell door must be limited. In case of sealing
needs, make sure the pressure applied to the door is lower than 6 lbs.
This pressure must be applied around the ticket exit chute.
Please contact Axiohm Technical Support team for specific integration.
TPSK 12 & 24 V User’s Manual
Page 64 / 66
Reference: FDE 31 08 972 Issue Z
6.6 Paper recommendations:
•
KP440 KANZAN paper
Property
Method
Unit
Value
Grams
Thickness
Surface smoothness
Brightness
Whiteness
Tensile strength
ISO 536
ISO 534
ISO 5627 (Beck)
R457Macbeth RD 914
ISO 1924/1
g/m2
µm
sec
%
OD
KN/m
Tear Strength
ISO 1974
mN
Color Image
Saturation Density
Initiation T°
Saturation T°
Moisture content
Dynamic test
Heated platen
Heated platen
ISO 287
Macbeth RD914
°C
°C
%
TPSK 12 & 24 V User’s Manual
Page 65 / 66
58 +/- 5
64 +/- 4
300 min
75 min
0.09 min
> 3.3 MD
> 2 CD
> 250 MD
> 250 CD
Black
1 min
75 ± 5
100 ± 5
6.5 ± 1.0
Reference: FDE 31 08 972 Issue Z
7 TROUBLESHOOTING
Situation
Problem
Solution
Paper loading:
When the paper is
correctly loaded and the
printer is powered, closing
the door will generate a
self-test ticket.
The self-test ticket is not
printed.
Check if the printer is powered.
Printing tickets:
Printer prints blank tickets.
Check if the paper end is tight enough:
- Open the door.
- Keep the paper end tight from the chute
outlet.
- Close the door; printing of the self-test
should begin.
Make sure the paper roll is not set upside
down; see the instruction label inside the
printer.
Tickets do not come out:
Even though no error
message is sent.
Even though tickets are
required, and the printer
makes noise as if it was
printing.
Open the printer door.
Check if there is a small black plastic part
(paper guide) between the roller and the white
plastic flap.
This guide is clipped to the roller axle and
attached to the white flap; if it is missing, there
is a gap between the roller and the flap in
which the paper can be fed.*
Printer prints erratic
characters.
A wrong baud rate could be the cause:
Printer does not start printing,
even though paper path is
clear and there is no visible
jam.
The baud rate is indicated on the self-test
ticket, which can be printed by closing the
door.
If your application can detect status return,
check the sensor status.
If your application does not detect the status
return, or you cannot easily check them:
Make sure that all sensors are plugged in
correctly
- Four connectors on the right side of the PCB,
from top to bottom:
4 contacts, 3 contacts, 2 contacts with red
wires, 2 contacts with black wires.
Check the door switch for contact (small
mushroom switch on the left of the printer
mechanism). When applying pressure to the
switch, it should make a noise; if it does not,
there is no contact and the switch may need to
be replaced.
* For replacement of this part, call maintenance.
TPSK 12 & 24 V User’s Manual
Page 66 / 66
Reference: FDE 31 08 972 Issue Z