1
Operating Instructions
About This Machine
1
Simple Search
2
Guide to the Machine
3
Getting Started
4
Installing Options
5
Adding Paper
6
Replacing the Consumables
7
Entering Text
8
On-screen Operating Instructions
9
Remarks
10 Appendix
Read this manual carefully before you use this machine and keep it handy for future reference. For safe and correct use, be sure to read the Safety
Information in "Manuals and Safety Information for This Machine" before using the machine.
TABLE OF CONTENTS
Manuals for This Machine.................................................................................................................................7
Manuals List......................................................................................................................................................10
What You Can Do with This Machine............................................................................................................12
Using This Machine as a Copier................................................................................................................12
Using This Machine as a Printer..................................................................................................................13
Utilizing Stored Documents.........................................................................................................................13
Paperless Fax Transmission and Reception...............................................................................................14
Fax Transmission and Reception Over the Internet...................................................................................15
Using the Facsimile and the Scanner in a Network Environment.............................................................16
Administrating the Machine/Protecting Documents (Security Functions)...............................................17
Monitoring and Setting the Machine Via Computer.................................................................................18
Preventing an Unauthorized Copy.............................................................................................................19
Notice................................................................................................................................................................20
Important......................................................................................................................................................20
How to Read This Manual...............................................................................................................................21
Symbols........................................................................................................................................................21
Machine Types.............................................................................................................................................21
Notes............................................................................................................................................................22
Names of Major Items.................................................................................................................................22
List of Options...............................................................................................................................................22
Safety Information............................................................................................................................................24
Safety During Operation.............................................................................................................................24
Safety Precautions to Be Followed.............................................................................................................24
Safety Labels of This Machine.........................................................................................................................31
Positions of WARNING and CAUTION labels on Types 1 and 2..........................................................31
Positions of WARNING and CAUTION labels on Type 3......................................................................34
Power Switch Symbols.................................................................................................................................37
Laws and Regulations......................................................................................................................................38
Legal Prohibition..........................................................................................................................................38
Model-Specific Information.............................................................................................................................39
1. Simple Search
Searching by What You Want to Do.............................................................................................................41
I Want to Save my Paper Document!.........................................................................................................41
1
I Want to Convert Documents to Electronic Formats Easily!.....................................................................42
I Want to Register Destinations!..................................................................................................................43
I Want to Operate the Machine More Effectively!...................................................................................43
Searching by Keyword....................................................................................................................................45
Paper.............................................................................................................................................................45
Register/Change/Delete............................................................................................................................45
Color Scanning............................................................................................................................................46
Check............................................................................................................................................................46
Install.............................................................................................................................................................47
Envelope.......................................................................................................................................................47
2. Guide to the Machine
Guide to Components......................................................................................................................................49
Exterior Components...................................................................................................................................49
Interior Components....................................................................................................................................52
Control Panel....................................................................................................................................................54
Adjusting the Angle of the Control Panel (Types 2 and 3 Only).............................................................57
Display Panel....................................................................................................................................................58
Simplified Display........................................................................................................................................58
Changing the Display Language................................................................................................................59
When the Authentication Screen is Displayed...............................................................................................61
User Code Authentication (Using the Control Panel)................................................................................61
User Code Authentication (Using a Printer Driver)....................................................................................62
Login (Using the Control Panel)..................................................................................................................62
Logout (Using the Control Panel)................................................................................................................63
Login (Using a Printer Driver)......................................................................................................................63
Login (Using Web Image Monitor)............................................................................................................64
Logout (Using Web Image Monitor)..........................................................................................................64
3. Getting Started
Installing the Machine......................................................................................................................................65
Where to Put Your Machine.......................................................................................................................65
Unpacking....................................................................................................................................................69
Turning On/Off the Power..........................................................................................................................74
Loading Paper into Tray 1...........................................................................................................................80
2
Changing Modes.........................................................................................................................................83
Multi-Accessing............................................................................................................................................84
Installing the SD Card Provided with the Machine...................................................................................86
Connecting the Machine.................................................................................................................................89
Connecting to the Ethernet Interface
(mainly Europe and Asia).........................................89
Connecting to the Ethernet Interface
(mainly North America)............................................90
Connecting to the USB (Type B) Interface.................................................................................................91
Connecting a Device to the Machine's USB Host Interface.....................................................................92
Connecting the Machine to a Telephone Line and Telephone................................................................93
Inserting and Removing a Removable Memory Device................................................................................95
Inserting an SD Card...................................................................................................................................95
Inserting a USB Memory.............................................................................................................................96
Removing an SD Card.................................................................................................................................96
Removing a USB Memory...........................................................................................................................97
Downloading Utility Software.........................................................................................................................98
SmartDeviceMonitor for Admin..................................................................................................................98
DeskTopBinder.............................................................................................................................................98
SmartDeviceMonitor for Client...................................................................................................................99
4. Installing Options
Options...........................................................................................................................................................101
External Options........................................................................................................................................101
Internal Options.........................................................................................................................................102
Order of Option Installation.....................................................................................................................103
Installing the Paper Feed Unit (Optional)....................................................................................................104
Installing the Board (Optional).....................................................................................................................108
Installing the Gigabit Ethernet Board
(mainly Europe and Asia).....................................108
Installing the Gigabit Ethernet Board
(mainly North America).........................................111
Installing the Wireless LAN Interface Board...........................................................................................113
Installing the File Format Converter..........................................................................................................116
Installing the SD Card (Optional).................................................................................................................118
5. Adding Paper
Loading Paper................................................................................................................................................121
Loading Paper into Trays 1 - 4.................................................................................................................121
3
Loading Orientation-Fixed Paper or Two-Sided Paper.........................................................................123
Changing the Paper Size..............................................................................................................................125
Changing the Paper Size in Trays 1 - 4..................................................................................................125
Changing to a Size That Is Not Automatically Detected.......................................................................130
Changing Paper Thickness Settings..............................................................................................................134
Recommended Paper Sizes and Types........................................................................................................136
Envelopes.......................................................................................................................................................141
Thick Paper.....................................................................................................................................................143
Unusable Paper.............................................................................................................................................144
Paper Storage................................................................................................................................................146
6. Replacing the Consumables
Handling the Print Cartridge.........................................................................................................................147
Replacing the Print Cartridge...................................................................................................................148
Sending Faxes or Scanned Documents When Toner Has Run Out......................................................149
Used Print Cartridge..................................................................................................................................150
Adding Staples...............................................................................................................................................151
Replacing Machine Parts..............................................................................................................................153
7. Entering Text
Entering Text...................................................................................................................................................155
Available Characters................................................................................................................................155
Keys
(mainly Europe and Asia)..........................................................................................155
Keys
(mainly North America)..............................................................................................156
How to Enter Text......................................................................................................................................157
8. On-screen Operating Instructions
Formats of the Operating Instructions..........................................................................................................161
Reading the HTML Manuals on the CD-ROMs...........................................................................................162
Installing and Opening the HTML Manuals................................................................................................163
Reading the PDF Manuals on the CD-ROM................................................................................................165
9. Remarks
Dos and Don'ts...............................................................................................................................................167
Moving the Machine.....................................................................................................................................169
Moving the Machine.................................................................................................................................170
Cleaning the Machine...................................................................................................................................171
4
Cleaning the Friction Pad and Paper Feed Roller...................................................................................171
Cleaning the Registration Roller...............................................................................................................173
Cleaning the Exposure Glass...................................................................................................................175
Cleaning the Auto Document Feeder.......................................................................................................176
Cleaning the Power Cord Plug.................................................................................................................177
Backing Up Hard Disk Data.........................................................................................................................179
Changing the Timing for Prompting Users to Prepare Replacement Supplies..........................................180
Counter...........................................................................................................................................................182
Enquiry............................................................................................................................................................183
Disposal..........................................................................................................................................................185
Consumables..................................................................................................................................................186
Print Cartridges..........................................................................................................................................186
Staple Cartridges......................................................................................................................................187
Maintenance Kit........................................................................................................................................187
10. Appendix
Software and Utilities Included on the CD-ROM........................................................................................189
Viewing the Contents of the CD-ROM.....................................................................................................189
Printer Drivers for This Machine................................................................................................................189
TWAIN Driver............................................................................................................................................190
LAN-Fax Driver..........................................................................................................................................191
Specifications for the Main Unit...................................................................................................................192
Auto Document Feeder.............................................................................................................................196
Document Server.......................................................................................................................................197
Internal Tray 2 (Type 2 Only)...................................................................................................................197
Finisher (Type 3 Only)...............................................................................................................................198
Specifications for Paper Feed Unit (Optional)............................................................................................199
Specifications for Paper Feed Unit with the Casters (Optional).................................................................200
Specifications for Wireless LAN Board (Optional).....................................................................................201
Specifications for Gigabit Ethernet (Optional)............................................................................................202
Specifications for Other Options..................................................................................................................203
Electromagnetic Interference........................................................................................................................204
ENERGY STAR Program................................................................................................................................205
Energy Saving Functions...........................................................................................................................205
5
Trademarks.....................................................................................................................................................207
INDEX...........................................................................................................................................................209
6
Manuals for This Machine
Read this manual carefully before you use this machine.
Refer to the manuals that are relevant to what you want to do with the machine.
• Media differ according to manual.
• The printed and electronic versions of a manual have the same contents.
• Adobe® Acrobat® Reader®/Adobe Reader must be installed in order to view the manuals as PDF
files.
• A Web browser must be installed in order to view the html manuals.
Manuals and Safety Information for This Machine
(mainly Europe and Asia)
Contains introductions of the manuals and information about safe usage of this machine.
Before using the machine, be sure to read the section of this manual entitled Safety Information to
avoid injury and prevent damage to the machine.
Manuals and Safety Information for This Machine
(mainly North America)
Contains introductions of the manuals and information about safe usage of this machine.
Before using the machine, be sure to read the section of this manual entitled Safety Information to
avoid injury and prevent damage to the machine.
This manual is provided in English only.
Quick Installation Guide
Contains procedures for unpacking and installing the machine.
Initial Guide for Scanner and Fax
Explains how to set up the Scanner and Facsimile functions and use their basic features. Details
about these functions that are not included in this manual are provided in Scanner Reference,
Facsimile Reference, and Network and System Settings Reference.
About This Machine
This manual introduces the machine's various functions. It also explains preparation procedures for
using the machine, the control panel, how to install options, how to enter text, how to install the
CD-ROMs provided, and how to replace paper, print cartridge, staples, and other consumables.
Troubleshooting
Provides a guide for resolving common usage-related problems.
Copy and Document Server Reference
Explains Copier and Document Server functions and operations. Also refer to this manual for
explanations on how to place originals.
7
Facsimile Reference
Explains Facsimile functions and operations.
Printer Reference
Explains Printer functions and operations.
Scanner Reference
Explains Scanner functions and operations.
Network and System Settings Reference
Explains how to connect the machine to a network and how to configure and operate the machine
in a network environment. It also explains how to change System Settings and how to register
information in the Address Book.
Security Reference
This manual is for administrators of the machine. It explains security functions that you can use to
prevent unauthorized use of the machine, data tampering, or information leakage. For enhanced
security, we recommend that you first make the following settings:
• Install the Device Certificate.
• Enable SSL (Secure Sockets Layer) Encryption.
• Change the user name and password of the administrator using Web Image Monitor.
For details, see “Setting up the Machine”, Security Reference.
Be sure to read this manual when setting the enhanced security functions, or user and administrator
authentication.
VM Card Extended Feature Settings Device Reference
Explains how to set up the extended features settings with the machine.
VM Card Extended Feature Settings Web Reference
Explains how to set up the extended features settings using Web Image Monitor.
UNIX Supplement
Explains how to set up and use a network printer using UNIX.
To obtain the “UNIX Supplement”, visit our Web site or consult an authorized dealer.
This manual includes explanations of functions and settings that might not be available on this
machine.
This manual is provided in English only.
Other manuals
• Quick Reference Copy Guide
• Quick Reference Printer Guide
• Quick Reference Fax Guide
• Quick Reference Scanner Guide
8
• App2Me Start Guide
• The following software products are referred to using general names:
Product name
General name
DeskTopBinder Lite and DeskTopBinder
Professional *1
DeskTopBinder
ScanRouter EX Professional *1 and ScanRouter
EX Enterprise *1
the ScanRouter delivery software
SmartDeviceMonitor for Client
SmartDeviceMonitor for Client
*1 Optional
9
Manuals List
(mainly Europe and Asia)
Printed Manuals
Provided
HTML Manuals
Provided
PDF Manuals
Provided
Manuals and Safety Information for
This Machine
Yes
No
No
Quick Installation Guide
Yes
No
No
Initial Guide for Scanner and Fax
Yes
No
No
About This Machine
No
Yes
No
Troubleshooting
No
Yes
No
Copy and Document Server
Reference
No
Yes
No
Facsimile Reference
No
Yes
No
Printer Reference
No
Yes
No
Scanner Reference
No
Yes
No
Network and System Settings
Reference
No
Yes
No
Security Reference
No
No
Yes
VM Card Extended Feature Settings
Device Reference
No
Yes
No
VM Card Extended Feature Settings
Web Reference
No
Yes
No
UNIX Supplement
No
No
Yes *1
Manual Name
*1 To obtain the “UNIX Supplement”, visit our Web site or consult an authorized dealer.
10
(mainly North America)
Printed Manuals
Provided
HTML Manuals
Provided
PDF Manuals
Provided
Yes *4
No
Yes *2 *4
Yes
No
Yes *2
Yes *4
No
Yes *2
About This Machine
No
Yes
Yes *2
Troubleshooting
No
Yes
Yes *2
Copy and Document Server
Reference
No
Yes
Yes *2
Facsimile Reference
No
Yes
Yes *2
Printer Reference
No
Yes
Yes *2
Scanner Reference
No
Yes
Yes *2
Network and System Settings
Reference
No
Yes
Yes *2
Security Reference
No
No
Yes *3
VM Card Extended Feature Settings
Device Reference
No
Yes
Yes *2
VM Card Extended Feature Settings
Web Reference
No
Yes
Yes *2
UNIX Supplement
No
No
Yes *1 *4
Manual Name
Manuals and Safety Information for
This Machine
Quick Installation Guide
Initial Guide for Scanner and Fax
*1 To obtain the “UNIX Supplement”, visit our Web site or consult an authorized dealer.
*2 To obtain the PDF manuals, visit our Web site or consult an authorized dealer.
*3 You can install the PDF manuals on your computer from the supplied CD-ROMs. However, depending
on the language, some PDF manuals may not be available on the CD-ROMs. To obtain these PDF
manuals, visit our Web site.
*4 This manual is provided in English only.
11
What You Can Do with This Machine
This section introduces the features of this machine.
• For details about options, see “Options”.
• page 101 "Options"
Using This Machine as a Copier
You can make copies of originals.
CFE053
• You can print stamps on copies. Stamps can include background numbers, scanned images, dates,
and page numbers.
• You can reduce or enlarge the copy image. With the Auto Reduce/Enlarge function, the machine
automatically calculates the reproduction ratio based on the sizes of the originals and the paper
you have specified.
• Copier functions such as Duplex, Combine, Booklet, and Magazine allow you to save on paper by
copying multiple pages onto single sheets.
• You can copy onto various types of paper such as envelopes and OHP transparencies.
• The finisher allows you to sort and staple in your copies (type 3 only). For details about type 3, see
“Machine Types”.
• page 21 "Machine Types"
• See Copy and Document Server Reference.
12
Using This Machine as a Printer
You can print documents created in applications.
CFE054
• This machine supports network and local connections.
• You can send PDF files directly to the machine for printing, without having to open a PDF
application.
• You can print or delete print jobs stored on the machine's hard disk, which have been previously
sent from computers using the printer driver. The following types of print jobs can be selected:
Sample Print, Locked Print, Hold Print, and Stored Print.
• The finisher allows you to collate and staple in your prints (type 3 only). For details about type 3,
see “Machine Types”.
• You can print files stored on a removable memory device and specify print conditions such as print
quality and print size.
• page 21 "Machine Types"
• See Printer Reference.
Utilizing Stored Documents
You can store files scanned in copier, printer, or scanner mode on the machine's hard disk. With Web
Image Monitor, you can use your computer to search for, view, print, delete, and send stored files via
the network. You can also change print settings and print multiple documents (Document Server).
13
CFE055
• You can retrieve stored documents scanned in scanner mode.
• Using the file format converter (optional), you can download documents stored in copier,
Document Server, or printer mode to your computer.
• For details about machine's settings, see “Network Settings Required to Use Document Server”,
Network and System Settings Reference.
• For details about Document Server in copier mode, see “Storing Data in the Document Server”,
Copy and Document Server Reference.
• For details about Document Server in printer mode, see “Saving and Printing Using the Document
Server”, Printer Reference.
• For details about Document Server in fax mode, see “Storing a Document”, Facsimile Reference.
• For details about Document Server in scanner mode, see “Storing Files Using the Scanner
Function”, Scanner Reference.
• For details about Document Server, see “Document Server”, Copy and Document Server
Reference.
Paperless Fax Transmission and Reception
You can send and receive fax messages without printing them.
Reception
You can store and save received fax documents as electronic formats in the machine's hard disk
without printing them.
14
CFE056
You can use Web Image Monitor to check, print, delete, retrieve, or download documents using
your computer (Storing received documents).
• See “Confirming/Printing/Deleting Received and Stored Documents”, Facsimile Reference.
Transmission
You can send a fax from your computer over the network (Ethernet or wireless LAN) to this
machine, which then forwards the fax via its telephone connection (LAN-Fax).
CFE057
• To send a fax, print from the Windows application you are working with, select LAN-Fax as
the printer, and then specify the destination.
• You can also check the sent image data.
• For details about the machine's settings, see “Network Settings Required to Use the Printer/
LAN-Fax”, Network and System Settings Reference.
• For details about how to use the function, see “Fax via Computer”, Facsimile Reference.
Fax Transmission and Reception Over the Internet
You can send and receive faxes over your LAN and the Internet.
15
CFE058
E-mail Transmission
This machine converts scanned document images to e-mail format, and transmits and receives this
data over the Internet.
• To send a document, specify an e-mail address instead of dialing the destination telephone
number (Internet Fax and e-mail transmission).
• This machine can receive e-mail messages via Internet Fax or from computers (Internet Fax
Reception and Mail to Print).
• Internet Fax compatible machines and computers that have e-mail addresses can receive email messages via Internet Fax.
IP-Fax
The IP-Fax function sends or receives documents between two facsimiles directly via a TCP/IP
network.
• To send a document, specify an IP address or host name instead of a fax number (IP-Fax
Transmission).
• This machine can receive documents sent via Internet Fax (IP-Fax Reception).
• Using a VoIP gateway, this machine can send to G3 facsimiles connected to the public
switched telephone network (PSTN).
• For details about settings, see “Network Settings Required to Use Internet Fax”, Network and
System Settings Reference.
• For details about how to transmit and receive documents over the Internet, see “Transmission” and
“Reception”, Facsimile Reference.
Using the Facsimile and the Scanner in a Network Environment
You can use a facsimile and a scanner over the network.
16
CFE059
• You can send scan files to a specified destination using e-mail (Sending scan files by e-mail).
• You can send scan files directly to folders (Sending scan files by Scan to Folder).
• You can use this machine as a delivery scanner for the ScanRouter delivery software*1 (Network
delivery scanner). You can save scan files in the delivery server or send them to a folder in a
computer on the same network.
• You can use Web Services on Devices (WSD) to send scan files to a client computer.
*1 For details to purchase ScanRouter delivery software, contact your local dealer.
• For details about sending scan files by e-mail, see “Specifying a Destination”, Facsimile Reference,
and “Sending Scan Files by E-mail”, Scanner Reference.
• For details about file storage, see Scanner Reference.
• For details about sending scan files by Scan to Folder, see “Specifying a Destination”, Facsimile
Reference, and “Sending Scan Files to Folders”, Scanner Reference.
• For details about the machine's settings for network delivery scanner, see “Network Settings
Required to Use the Network Delivery Scanner”, Network and System Settings Reference.
• For details about how to use the network delivery scanner function, see “Delivering Scan Files”,
Scanner Reference.
• For details about sending using WSD, see “Sending Scan Files Using WSD”, Scanner Reference.
Administrating the Machine/Protecting Documents (Security Functions)
You can prevent information leakage by managing the machine and protecting documents.
17
CFE060
• You can protect documents from unauthorized access and stop them from being copied without
permission.
• You can control the use of the machine, as well as prevent machine settings from being changed
without authorization.
• By setting passwords, you can prevent unauthorized access via the network.
• You can erase the data on the hard disk to prevent the information from leaking out.
• You can limit the volume of the usage of the machine for each user.
• See Security Reference.
Monitoring and Setting the Machine Via Computer
You can change the machine's settings and monitor its status from a connected computer.
CFE061
• Web Image Monitor lets you configure and operate the machine using a Web browser on a
computer.
• Using Web Image Monitor, you can register information in the Address Book, specify the
machine's settings, and check the machine's status with ease.
18
• Using Web Image Monitor, you can check and specify the initial settings (System Settings, Printer
Features, network settings, security settings/certificate management, and e-mail notification),
control print jobs, display the print job journal, and protect the data in the machine using
authentication.
Preventing an Unauthorized Copy
You can print embedded pattern on paper to prevent them from being copied.
CFE062
Unauthorized Copy Prevention
You can configure this machine to detect and reproduce anti-copy patterns or text embedded in a
source document by a device using a copy prevention function. Detection occurs when the machine
is copying, faxing, scanning, or storing a document in Document Server. If the machine detects an
embedded anti-copy pattern or text, it will reproduce the pattern or text at visible resolution to
discourage unauthorized copying. Note that this machine cannot embed reproducible anti-copy
patterns or text.
Data Security for Copying
You can configure this machine to print over copies if it detects an anti-copy pattern or text
embedded in a source document by a device using a copy prevention function. Detection occurs
when the machine is copying, faxing, scanning, or storing a document in Document Server. If the
machine detects an embedded anti-copy pattern or text, it will print over the copies of the source
document with solid gray to discourage unauthorized copying. If you want the machine to print
over copies of documents in which anti-copy patterns or text have been embedded, you must install
the optional copy data security unit. Note that this machine cannot embed anti-copy patterns or
text that will cause copies to be printed over. For details about data security for copying, see “Data
Security for Copying”, Security Reference.
• See Security Reference.
19
Notice
Important
In no event will the company be liable for direct, indirect, special, incidental, or consequential damages
as a result of handling or operating the machine.
For good output quality, the manufacturer recommends that you use genuine toner from the
manufacturer.
The manufacturer shall not be responsible for any damage or expense that might result from the use of
parts other than genuine parts from the manufacturer with your office products.
20
How to Read This Manual
Symbols
This manual uses the following symbols:
Indicates points to pay attention to when using the machine, and explanations of likely causes of paper
misfeeds, damage to originals, or loss of data. Be sure to read these explanations.
Indicates supplementary explanations of the machine's functions, and instructions on resolving user
errors.
This symbol is located at the end of sections. It indicates where you can find further relevant information.
[]
Indicates the names of keys on the machine's display or control panels.
(mainly Europe and Asia)
(mainly North America)
Differences in the functions of Region A and Region B models are indicated by two symbols. Read the
information indicated by the symbol that corresponds to the region of the model you are using. For
details about which symbol corresponds to the model you are using, see “Model-Specific Information”.
Machine Types
This machine comes in three models with different copy and print speeds, and different units installed.
(mainly Europe and Asia)
To check which model you are using, see Manuals and Safety Information for This Machine.
(mainly North America)
To check which model you are using, see Manuals and Safety Information for This Machine.
Machine type
Type 1
Copy/print speed
45 sheets/minute (A4 )
Finisher
Cannot be installed
Internal tray 2
Cannot be installed
47 sheets/minute (81/2 × 11 )
21
Machine type
Type 2
Copy/print speed
50 sheets/minute (A4 )
52 sheets/minute (81/
2 × 11
Type 3
Finisher
2 × 11
Cannot be installed
Standard
Standard
Cannot be installed
)
50 sheets/minute (A4 )
52 sheets/minute (81/
Internal tray 2
)
Notes
Contents of this manual are subject to change without prior notice.
Some illustrations in this manual might be slightly different from the machine.
Certain options might not be available in some countries. For details, please contact your local dealer.
Depending on which country you are in, certain units may be optional. For details, please contact your
local dealer.
Names of Major Items
Major items of this machine are referred to as follows in this manual:
• Auto document feeder
ADF
List of Options
This section provides a list of options for this machine, and how they are referred to as in this manual.
Option list
22
Referred to as
Fax Option Type SP5200
Fax unit
Memory Unit Type B 32MB
Expansion memory
Browser Unit Type E
Browser unit
File Format Converter Type E
File format converter
Paper Feed Unit TK1090
Paper feed unit
Paper Feed Unit TK1100
Paper feed unit with the casters
Option list
Referred to as
Wireless LAN board
IEEE 802.11a/g Interface Unit Type J
IEEE 802.11g Interface Unit Type K
IEEE 802.11a/g Interface Unit Type J
Gigabit Ethernet
Gigabit Ethernet Board Type A
Gigabit Ethernet Board Type C
Copy Data Security Unit Type F
Copy data security unit
23
Safety Information
When using this machine, the following safety precautions should always be followed.
Safety During Operation
In this manual, the following important symbols are used:
Indicates a potentially hazardous situation which, if instructions are not followed, could result in death
or serious injury.
Indicates a potentially hazardous situation which, if instructions are not followed, may result in minor
or moderate injury or damage to property.
Safety Precautions to Be Followed
This section explains safety precautions that should always be followed when using this machine.
Environments where the machine can be used
This section explains safety precautions about environments where the machine can be used.
• Do not use flammable sprays or solvents in the vicinity of this machine. Also, avoid placing these
items in the vicinity of this machine. Doing so could result in fire or electric shock.
• Do not place vases, plant pots, cups, toiletries, medicines, small metal objects, or containers
holding water or any other liquids, on or close to this machine. Fire or electric shock could result
from spillage or if such objects or substances fall inside this machine.
• Keep the machine away from humidity and dust. Otherwise a fire or an electric shock might
occur.
• Do not place the machine on an unstable or tilted surface. If it topples over, an injury might
occur.
24
• Do not place heavy objects on the machine. Doing so can cause the machine to topple over,
possibly resulting in injury.
• Make sure the room where you are using the machine is well ventilated and spacious. Good
ventilation is especially important when the machine is used heavily.
• Keep the machine away from salt-bearing air and corrosive gases. Also, do not install the
machine in places where chemical reactions are likely (laboratories, etc.), as doing so will
cause the machine to malfunction.
• Do not obstruct the machine's vents. Doing so risks fire caused by overheated internal
components.
• Machine sound levels exceeding LWAd > 63 dB (A) are not suitable for desk work
environments, so place the machine in another room.
• Keep the machine in an area that is within optimum environmental conditions. Operating the
machine in an environment that is outside the recommended ranges of humidity and
temperature can cause an electrical fire hazard. Keep the area around the socket free of dust.
Accumulated dust can become an electrical fire hazard.
Handling power cords and power plugs
This section explains safety precautions about handling power cords and power plugs.
• Do not use any power sources other than those that match the specifications shown in this
manual. Doing so could result in fire or electric shock.
• Do not use any frequencies other than those that match the specifications shown. Doing so could
result in fire or electric shock.
• Do not use multi-socket adaptors. Doing so could result in fire or electric shock.
• Do not use extension cords. Doing so could result in fire or electric shock.
• Do not use power cords that are damaged, broken, or modified. Also, do not use power cords
that have been trapped under heavy objects, pulled hard, or bent severely. Doing so could
result in fire or electric shock.
25
• Touching the prongs of the power cable's plug with anything metallic constitutes a fire and
electric shock hazard.
• The supplied power cord is for use with this machine only. Do not use it with other appliances.
Doing so could result in fire or electric shock.
• It is dangerous to handle the power cord plug with wet hands. Doing so could result in electric
shock.
• Disconnect the power plug (by pulling the plug, not the cable) if the power cable or plug
becomes frayed or otherwise damaged.
• If the power cord is damaged (exposure of the core, disconnection, etc.), contact your service
representative to change a new one. Operating the machine with a damaged power cord may
cause an electric shock or fire.
• Be sure to push the plug of the power cord fully into the wall outlet. Partially inserted plugs
create an unstable connection that can result in unsafe buildup of heat.
• If this machine is not going to be used for several days or longer at a time, disconnect its power
cord from the wall outlet.
• When disconnecting the power cord from the wall outlet, always pull the plug, not the cord.
Pulling the cord can damage the power cord. Use of damaged power cords could result in fire
or electric shock.
• Be sure to disconnect the plug from the wall outlet and clean the prongs and the area around
the prongs at least once a year. Allowing dust to build up on the plug constitutes a fire hazard.
• When performing maintenance on the machine, always disconnect the power cord from the
wall outlet.
Handling the main machine
This section explains safety precautions about handling the main machine.
• Be sure to locate the machine as close as possible to a wall outlet. This will allow easy
disconnection of the power cord in the event of an emergency.
26
• If the machine emits smoke or odours, or if it behaves unusually, you must turn off its power
immediately. After turning off the power, be sure to disconnect the power cord plug from the
wall outlet. Then contact your service representative and report the problem. Do not use the
machine. Doing so could result in fire or electric shock.
• If metal objects, or water or other fluids fall inside this machine, you must turn off its power
immediately. After turning off the power, be sure to disconnect the power cord plug from the
wall outlet. Then contact your service representative and report the problem. Do not use the
machine. Doing so could result in fire or electric shock.
• Do not touch this machine if a lightning strike occurs in the immediate vicinity. Doing so could
result in electric shock.
• Keep the polythene materials (bags, etc.) supplied with this machine away from babies and
small children at all times. Suffocation can result if polythene materials are brought into contact
with the mouth or nose.
• If the machine topples, or if a cover or other part gets broken, you must turn the power switch to
off and disconnect the power cord plug from the wall outlet. Then contact your service
representative and report the problem. Do not use the machine. Doing so could result in fire or
electric shock.
• Unplug the power cord from the wall outlet before you move the machine. While moving the
machine, take care that the power cord is not damaged under the machine. Failing to take these
precautions could result in fire or electric shock.
• After you move the machine, use the caster fixture to fix it in place. Otherwise the machine might
move or come down to cause an injury.
• Before installing or removing options, always disconnect the power cord plugs from the wall
outlet and allow time for the main unit to fully cool. Failing to take these precautions could result
in burns.
• Do not look into the lamp. It can damage your eyes.
• Protect the machine from dampness or wet weather, such as rain and snow.
• For environmental reasons, do not dispose of the machine or expended supply waste at
household waste collection points. Disposal can take place at an authorized dealer.
27
• Wait at least one hour after power off before replacing parts. Not allowing the machine to
cool may result in burns.
• Type 1 weighs approximately 45 kg (99.2 lb.), type 2 weighs approximately 47 kg (103.7
lb.), and type 3 weighs approximately 52 kg (114.7 lb.). When moving the machine, use the
inset grips on both sides, and lift slowly. The machine will break or cause injury if dropped.
• When moving the machine after use, do not take out the print cartridge to prevent toner spill
inside the machine.
• Do not connect the Ethernet port of the machine to a network that may supply excess voltage,
such as a telephone line. Doing so may result in fire or electric shock.
Handling the machine's interior
This section explains safety precautions about handling the machine's interior.
• Do not remove any covers or screws other than those explicitly mentioned in this manual. Inside
this machine are high voltage components that are an electric shock hazard and laser
components that could cause blindness. Contact your sales or service representative if any of the
machine's internal components require maintenance, adjustment, or repair.
• Do not attempt to disassemble or modify this machine. Doing so risks burns and electric shock.
Note again that exposure to the laser components inside this machine risks blindness.
• Be sure to turn off the power switch and wait for about 15 minutes before cleaning the
registration roller. Not waiting for the machine to cool down can result in a burn.
• Some of this machine's internal components get very hot. For this reason, take care when
removing misfed paper. Not doing so could result in burns.
• The inside of the machine could be very hot. Do not touch the parts with a label indicating the
“hot surface”. Otherwise, an injury might occur.
• When loading paper, take care not to trap or injure your fingers.
• During operation, rollers for transporting the paper and originals revolve. A safety device has
been installed so that the machine can be operated safely. But take care not to touch the
machine during operation. Otherwise, an injury might occur.
28
• If the machine's interior is not cleaned regularly, dust will accumulate. Fire and breakdown can
result from heavy accumulation of dust inside this machine. Contact your sales or service
representative for details about and charges for cleaning the machine's interior.
• The fusing section of this machine might be very hot. Caution should be taken when removing
misfed paper.
• Lifting the paper feed unit carelessly or dropping it may cause injury.
• Do not pull out the paper tray forcefully. If you do, the tray might fall and cause an injury.
Handling the machine's supplies
This section explains safety precautions about handling the machine's supplies.
• Do not incinerate toner (new or used) or toner containers. Doing so risks burns. Toner will ignite
on contact with naked flame.
• Do not store toner (new or used) or toner containers anywhere near naked flames. Doing so
risks fire and burns. Toner will ignite on contact with naked flame.
• Do not incinerate spilled toner or used toner. Toner dust might ignite when exposed to an open
flame.
• Keep the polythene materials (bags, gloves, etc.) supplied with this machine away from babies
and small children at all times. Suffocation can result if polythene materials are brought into
contact with the mouth or nose.
• Do not crush or squeeze toner containers. Doing so can cause toner spillage, possibly resulting
in dirtying of skin, clothing, and floor, and accidental ingestion.
• Store toner (new or used), toner containers, and components that have been in contact with
toner out of reach of children.
• If toner or used toner is inhaled, gargle with plenty of water and move into a fresh air
environment. Consult a doctor if necessary.
29
• If toner or used toner gets into your eyes, flush immediately with large amounts of water. Consult
a doctor if necessary.
• If toner or used toner is swallowed, dilute by drinking a large amount of water. Consult a doctor
if necessary.
• When removing jammed paper or replacing toner, avoid getting toner (new or used) on your
clothing. If toner comes into contact with your clothing, wash the stained area with cold water.
Hot water will set the toner into the fabric and make removing the stain impossible.
• When removing jammed paper or replacing toner, avoid getting toner (new or used) on your
skin. If toner comes into contact with your skin, wash the affected area thoroughly with soap and
water.
• Do not attempt to print on stapled sheets, aluminum foil, carbon paper, or any kind of
conductive paper. Doing so risks fire.
• Our products are engineered to meet the highest standards of quality and functionality. When
purchasing expendable supplies, we recommend using only those specified by an authorized
dealer.
• Keep SD memory cards out of reach of children. If a child swallows an SD memory card,
consult a doctor immediately.
30
Safety Labels of This Machine
This section explains the machine's safety information labels.
Positions of WARNING and CAUTION labels on Types 1 and 2
This machine has labels for WARNING and CAUTION at the positions shown below. For safety,
please follow the instructions and handle the machine as indicated.
1
CFE084
1
CFE005
Type 1 weighs approximately 45 kg (99.2 lb.) and type 2 weighs approximately 47 kg (103.7 lb.).
When moving the machine, use the inset grips on both sides. At least four people are needed to lift the
machine.
31
2
3
CFE019
2
CFE006
Do not incinerate spilled toner or used toner. Toner dust is flammable and might ignite when exposed to
an open flame.
Disposal should take place at an authorized dealer or an appropriate collection site.
Keep toner (used or unused) and toner containers out of reach of children.
3
CFE003
32
Do not put your hands inside the machine. The inside of this machine becomes very hot. Do not touch
parts with this label (indicating a hot surface).
4
5
CFE072
4
CFE001
The inside of this machine becomes very hot. Do not touch parts with this label (indicating a hot surface).
5
CFE002
The inside of this machine becomes very hot. Do not touch parts with this label (indicating a hot surface).
33
Positions of WARNING and CAUTION labels on Type 3
This machine has labels for WARNING and CAUTION at the positions shown below. For safety,
please follow the instructions and handle the machine as indicated.
1
CFE073
1
CFE004
Type 3 weighs approximately 52 kg (114.7 lb.). When moving the machine, use the inset grips on both
sides. At least four people are needed to lift the machine.
34
3
2
4
CFE018
2
CFE006
Do not incinerate spilled toner or used toner. Toner dust is flammable and might ignite when exposed to
an open flame.
Disposal should take place at an authorized dealer or an appropriate collection site.
Keep toner (used or unused) and toner containers out of reach of children.
3
CCS037
35
Keep your hands clear of the finisher when removing the staple cartridge. You might trap your fingers if
you do not.
4
CFE003
Do not put your hands inside the machine. The inside of this machine becomes very hot. Do not touch
parts with this label (indicating a hot surface).
5
6
CFE020
5
CFE001
The inside of this machine becomes very hot. Do not touch parts with this label (indicating a hot surface).
6
36
CFE002
The inside of this machine becomes very hot. Do not touch parts with this label (indicating a hot surface).
Power Switch Symbols
The meanings of the symbols for the switches on this machine are as follows:
•
: POWER ON
•
: STANDBY
37
Laws and Regulations
Legal Prohibition
Do not copy or print any item for which reproduction is prohibited by law.
Copying or printing the following items is generally prohibited by local law:
bank notes, revenue stamps, bonds, stock certificates, bank drafts, checks, passports, driver's licenses.
The preceding list is meant as a guide only and is not inclusive. We assume no responsibility for its
completeness or accuracy. If you have any questions concerning the legality of copying or printing
certain items, consult with your legal advisor.
38
Model-Specific Information
This section explains how you can identify the region your machine belongs to.
There is a label on the rear of the machine, located in the position shown below. The label contains
details that identify the region your machine belongs to. Read the label.
CFE052
The following information is region-specific. Read the information under the symbol that corresponds to
the region of your machine.
(mainly Europe and Asia)
If the label contains the following, your machine is a region A model:
• CODE XXXX -67, -69
• 220-240V
(mainly North America)
If the label contains the following, your machine is a region B model:
• CODE XXXX -57
• 120-127V
• Dimensions in this manual are given in two units of measure: metric and inch. If your machine is a
Region A model, refer to the metric units. If your machine is a Region B model, refer to the inch
units.
39
40
1. Simple Search
You can search for a procedure either by keyword or by what you want to do.
Searching by What You Want to Do
You can search for a procedure by what you want to do.
I Want to Save my Paper Document!
This section explains the functions and procedures that you can use to reduce your printing and running
costs easily.
BRL059S
Printing multi-page documents on both sides of sheets (Duplex Copy)
See Copy and Document Server Reference for details.
Printing multi-page documents and received faxes on a single sheet (Combine (Copier/Fax))
See Copy and Document Server Reference for details.
See Facsimile Reference for details.
Printing received faxes on both sides of sheets (2 Sided Print)
See Facsimile Reference for details.
Converting received faxes to electronic formats (Paperless Fax)
See Facsimile Reference for details.
41
1. Simple Search
Sending files from the computer without printing them (LAN-Fax)
See Facsimile Reference for details.
I Want to Convert Documents to Electronic Formats Easily!
This section explains the functions and procedures you can use to convert documents to electronic
formats easily.
BQX138S
Sending scan files
See Scanner Reference for details.
Sending the URL of the folder in which scan files are stored
See Scanner Reference for details.
Storing scan files in a shared folder
See Scanner Reference for details.
Storing scan files on media
See Scanner Reference for details.
Converting transmitted faxes to electronic formats and sending them to a computer
See Facsimile Reference for details.
Managing and using documents converted to electronic formats (Document Server)
See Copy and Document Server Reference for details.
42
Searching by What You Want to Do
I Want to Register Destinations!
You can find explanations of the functions and procedures that you can use to register destinations
easily.
BRL060S
Using the control panel to register destinations in the Address Book
See Facsimile Reference for details.
See Scanner Reference for details.
Using Web Image Monitor to register destinations from a computer
See Facsimile Reference for details.
Downloading destinations registered in the machine to the LAN-Fax driver destination list
See Facsimile Reference for details.
I Want to Operate the Machine More Effectively!
This section explains the functions and procedures that you can use to operate the machine more
effectively.
43
1. Simple Search
BQX139S
Registering and using frequently-used settings (Program)
See Copy and Document Server Reference for details.
See Facsimile Reference for details.
See Scanner Reference for details.
Registering frequently-used settings as initial settings (Program as Defaults (Copier/Fax/
Scanner))
See Copy and Document Server Reference for details.
See Facsimile Reference for details.
See Scanner Reference for details.
44
Searching by Keyword
Searching by Keyword
You can search for a procedure by keyword.
Paper
I want to load paper.
page 121 "Loading Paper"
I want to change the paper size.
page 125 "Changing the Paper Size"
I want to know what the paper specifications are.
page 136 "Recommended Paper Sizes and Types"
The paper has jammed.
See Troubleshooting for details.
I want to change the initial paper settings.
See Network and System Settings Reference for details.
Register/Change/Delete
I want to register a fax number.
See Network and System Settings Reference for details.
See Facsimile Reference for details.
I want to register an IP-Fax number.
See Network and System Settings Reference for details.
I want to register an e-mail address.
See Network and System Settings Reference for details.
I want to register an SMB folder.
See Network and System Settings Reference for details.
I want to register multiple addresses as a group.
See Network and System Settings Reference for details.
I want to register frequently-used copier functions.
See Copy and Document Server Reference for details.
I want to copy the contents of the machine's Address Book to the LAN-Fax address book.
See Facsimile Reference for details.
45
1. Simple Search
Color Scanning
I want to scan a color original (Normal Color Scan)
See Scanner Reference for details.
I want to minimize the amount of storage required when scanning color originals (High
Compression PDF)
See Scanner Reference for details.
Check
I want to display the fax transmission status.
See Facsimile Reference for details.
I want to print a report of the fax transmission status.
See Facsimile Reference for details.
I want to check which destinations the machine failed to send faxes to.
See Facsimile Reference for details.
I want to check which files have been sent by memory transmission.
See Facsimile Reference for details.
I want to check which files are stored in the Document Server.
See Copy and Document Server Reference for details.
I want to check which faxes have been received.
See Facsimile Reference for details.
I want to view the received faxes that are stored in the machine.
See Facsimile Reference for details.
To avoid sending faxes to wrong destinations, I want to check fax transmission details before
sending.
See Facsimile Reference for details.
I want to check the settings for scanning and sending files before sending a scan file.
See Scanner Reference for details.
I want to check the scan image before sending it.
See Scanner Reference for details.
I want to view the transmission result.
See Scanner Reference for details.
46
Searching by Keyword
Install
I want to install the printer driver so I can use the SmartDeviceMonitor for Client port.
See Printer Reference for details.
I want to install the printer driver so I can use the Standard TCP/IP port.
See Printer Reference for details.
I want to install the printer driver so I can use as a Windows Network Printer.
See Printer Reference for details.
I want to install the printer driver so I can use the machine by USB.
See Printer Reference for details.
Envelope
I want to copy onto envelopes.
See Copy and Document Server Reference for details.
See Copy and Document Server Reference for details.
I want to print onto envelopes.
See Printer Reference for details.
47
1. Simple Search
48
2. Guide to the Machine
This chapter describes the names and functions of this machine's components.
Guide to Components
This section describes the names and functions of the components.
Exterior Components
This section describes the names and functions of the exterior components.
• Do not obstruct the ventilation holes by placing objects near them or leaning things against them. If
the machine overheats, a fault might occur.
Front and right view
1
9
3
4
2
5
10
11
13
12
6
7
8
14
CFE021
1. ADF
Lower the ADF over originals placed on the exposure glass.
If you load a stack of originals in the ADF, the ADF will automatically feed the originals one by one. This ADF
can be used for two-sided originals.
2. Operation switch
Press to turn the power on (the operation switch indicator lights up). To turn the power off, press again (the
operation switch indicator goes off). See “Turning On/Off the Power”.
3. Control panel
See “Control Panel”.
49
2. Guide to the Machine
4. Internal tray 1 (types 1 and 2 only)/ Finisher shift tray (type 3 only)
(The illustration shows the finisher shift tray.)
Copied/printed paper and fax messages are delivered here.
Pull out the extender when printing on A4 or 81/2 × 11 size paper or larger.
5. Front cover
Open to access the inside of the machine. To open this cover, push the front cover release button.
6. Tray 1
Load paper here print side down.
7. Paper feed unit (optional)
Load paper here print side down.
8. Paper feed unit with the casters (optional)
Load paper here print side down.
9. Exposure glass
Place originals face down here.
10. Front cover release button
Push this button to open the front cover.
11. Internal tray 2 (type 2 only)/ finisher (type 3 only)
(The illustration shows the finisher.)
If you select internal tray 2 as the output tray, copied/printed paper and fax messages are delivered here.
Pull out the extender on internal tray 2 when printing on A4 or 81/2 × 11 size paper or larger.
The finisher sorts, stacks, and staples multiple sheets of paper.
12. Ventilation holes
Prevent the machine from overheating.
13. Bypass tray
Use to print onto plain paper, thick paper, OHP transparencies, label paper (adhesive labels), and custom
size paper. Pull out the extender when loading A4 or 81/2 × 11 size paper or larger in the bypass tray.
14. Main power switch
If the machine does not operate after turning on the operation switch, check if the main power switch is turned
on. If it is off, turn it on. See “Turning On/Off the Power”.
50
Guide to Components
Rear and left view
1
2
8
3
5
4
9
6
7
10
11
CFE022
1. Ventilation holes
Prevent the machine from overheating.
2. Rear cover
Open this cover to remove misfed paper.
3. Rear cover lever
Pull up on this lever to open the rear cover.
4. Power connector
Connect the power cord to the machine here. Insert the other end of the cable into a nearby wall outlet.
5. SD card slots
There are two SD card slots. Install SD cards here.
6. USB 2.0 [Type B] port
Connect the USB2.0 [Type B] interface cable here.
7. USB Host Interface
Connect the USB interface cable here.
Use this interface to connect the machine to a card authentication device.
8. 10BASE-T/100BASE-TX port
Connect the 10BASE-T or 100BASE-TX cable here.
9. Optional board slot
Install an optional board in this slot.
10. External telephone connector (Standard for type 2, and optional for types 1 and 3)
Connect an external telephone here.
11. G3 interface unit connector (Standard for type 2, and optional for types 1 and 3)
Connect a G3 line here.
51
2. Guide to the Machine
• page 54 "Control Panel"
• page 74 "Turning On/Off the Power"
Interior Components
This section describes the names and functions of the interior components.
Front and right view
3
4
1
5
2
6
CFE023
1. Print cartridge
Contains toner and the photo conductor unit.
When "Replacement of Print Cartridge is now necessary." appears, replace this unit.
2. Friction pad
This ensures only one sheet of paper is fed in at a time. If multi-sheet feeds occur, clean the friction pad
carefully.
3. Registration roller
Feeds in sheets of paper for copying or printing. Be sure to clean this roller if it becomes dirty.
4. Transfer roller
When "Replacement Required: Maintenance Kit" appears, replace this roller.
5. Guide board
Open this to remove jammed paper.
6. Paper feed roller
Feeds in sheets of paper for copying or printing. Be sure to clean this roller if it becomes dirty.
52
Guide to Components
Rear and left view
2
1
3
3
CFE024
1. Fusing unit
Fuses print images onto paper.
When "Replacement Required: Maintenance Kit" appears, replace this unit.
2. Envelope lever
Raise this lever when loading envelopes in trays 1 4 or the bypass tray.
3. Fusing unit lock levers
Lift these levers to replace the fusing unit.
• For details about how to replace the print cartridge, transfer roller, and fusing unit, see “Replacing
Machine Parts”.
• page 153 "Replacing Machine Parts"
53
2. Guide to the Machine
Control Panel
This section introduces the names and functions of the components on the control panel.
• Do not turn off the main power switch while the operation switch indicator is lit or blinking. Doing so
may damage the hard disk.
This illustration shows the control panel of the machine with options fully installed.
1
2
3
4
5
6
7
8
19
9
10
18
11
17 16
15
14
13
12
21
20
CCS029
1. Display panel
Displays keys for each function, operation status, or messages. See “Display Panel”.
2. Main power indicator
The main power indicator goes on when you turn on the main power switch.
3. Operation switch
Press to turn the power on (the operation switch indicator goes on). To turn the power off, press again (the
operation switch indicator goes off). See “Turning On/Off the Power”.
54
Control Panel
4. [Energy Saver] key
Press to switch to and from Energy Saver mode. See “Saving Energy”.
5. [Login/Logout] key
Press to log in or log out.
6. [User Tools/Counter] key
• User Tools
Press to change the default settings to meet your requirements. See “Accessing User Tools”, Network
and System Settings Reference.
• Counter
Press to check or print the counter value. See “Counter”.
• Enquiry
Press to find out where to order expendable supplies and where to call when a malfunction occurs. You
can also print these details. See “Enquiry”.
7. [Program] key (copier, Document Server, facsimile, and scanner mode)
• Press to register frequently used settings, or to recall registered settings.
See “Registering Frequently Used Functions” and “Registering Frequently Used Functions for Printing
Stored Documents from the Document Server”, Copy and Document Server Reference.
See “Registering Frequently Used Settings”, Facsimile Reference.
See “Registering Frequently Used Settings”, Scanner Reference.
• Press to program defaults for the initial display when modes are cleared or reset, or immediately after
the operation switch is turned on.
See “Changing the Default Functions of the Copy's Initial Display”, Copy and Document Server
Reference.
See “Changing the Default Functions of the Fax's Initial Display”, Facsimile Reference.
See “Changing the Default Functions of the Scanner's Initial Display”, Scanner Reference.
8. [Interrupt] key
Press to make interrupt copies. See “Interrupt Copy”, Copy and Document Server Reference.
9. [Simplified Display] key
Press to switch to the Simplified Display. See “Simplified Display”.
10. [Clear Modes] key
Press to clear the current settings.
11. [Sample Copy] key
Press to make a single set of copies or prints to check print quality before making multiple sets. See “Sample
Copy”, Copy and Document Server Reference.
12. [Start] key
Press to start copying, printing, scanning, or sending.
13. [Clear/Stop] key
• Clear
55
2. Guide to the Machine
Press to delete a number entered.
• Stop
Press to stop a job in progress, such as copying, scanning, faxing, or printing.
14. [ ] key (Enter key)
Press to confirm values entered or items specified.
15. Number keys
Use to enter the numbers for copies, fax numbers and data for the selected function.
16. Alert indicator
Lights continuously if an error has occurred.
17. Data In indicator (facsimile and printer mode)
Flashes when the machine is receiving print jobs or LAN-Fax documents from a computer. See Facsimile
Reference and Printer Reference.
18. Communicating indicator, Receiving File indicator, Confidential File indicator
• Communicating indicator
Lights continuously during data transmission and reception.
• Receiving File indicator
Lights continuously while data other than personal box or Memory Lock file is being received and stored
in the fax memory.
See “Substitute Reception”, Facsimile Reference.
• Confidential File indicator
Lights continuously while personal box data is being received.
Blinks while Memory Lock file is being received.
See “Personal Boxes” and “Printing a File Received with Memory Lock”, Facsimile Reference.
19. Function keys
Press to display the operation screen of one of the following functions: copy, Document Server, facsimile,
printer, or scanner.
The indicator of the selected function goes on. See “Changing Modes”.
20. Media access lamp
Lights up when a removable memory device is inserted in the media slot or accessed.
21. Media slots
Use to insert an SD card or a USB memory.
• page 58 "Display Panel"
• page 58 "Simplified Display"
• page 74 "Turning On/Off the Power"
• page 79 "Saving Energy"
• page 83 "Changing Modes"
56
Control Panel
• page 182 "Counter"
• page 183 "Enquiry"
Adjusting the Angle of the Control Panel (Types 2 and 3 Only)
This section describes how to adjust the angle of the control panel for easier use (types 2 and 3 only).
1. Position the control panel at the vertical angle that you require.
CFE025
57
2. Guide to the Machine
Display Panel
The display panel shows machine status, error messages, and function menus.
• Don't apply strong impact or force to the screen. Or it may be damaged. Maximum force
allowable is approx. 30N (approx. 3 kgf). (N = Newton, kgf = Kilogram force. 1 kgf = 9.8N.)
The function items displayed serve as selector keys. You can select or specify an item by lightly pressing
them.
When you select or specify an item on the display panel, it is highlighted like
as
cannot be used.
. Keys appearing
The copy display is set as the default screen when the machine is turned on.
• The display panels shown in this manual's illustrations are taken from a machine on which all
options are installed.
Simplified Display
This section explains how to switch to the simplified display.
When you press the [Simplified Display] key, the screen changes from the initial display to the simplified
display.
Letters and keys are displayed at a larger size, making operations easier.
58
Display Panel
1. Press the [Simplified Display] key.
CCS002
This illustration shows the copier function's simplified display.
1
CFE067
1. [Key Colour]
Press to increase screen contrast by changing the color of the keys.
This is available only for the simplified display.
• To return to the initial display, press the [Simplified Display] key again.
• Certain keys do not appear on the simplified display.
Changing the Display Language
You can change the language used on the display. English is set as default.
59
2. Guide to the Machine
1. Press the [User Tools/Counter] key.
CCS003
2. Press the language key.
3. Press the exit key.
The menu appears in the language that you specified.
• If you want to return the display language to “English”, repeat the step above.
60
When the Authentication Screen is Displayed
When the Authentication Screen is Displayed
This section explains the authentication screen.
• Ask the user administrator for the Login User Name, Login Password, and User Code. For details
about user authentication, contact your administrator.
• User Code to enter on User Code Authentication is the numerical value registered in the Address
Book as “User Code”.
If Basic Authentication, Windows Authentication, LDAP Authentication, or Integration Server
Authentication is active, the authentication screen appears on the display. The machine only becomes
operable after entering your own Login User Name and Login Password. If User Code Authentication is
active, you cannot use the machine until you enter the User Code.
If you can use the machine, you can say that you are logged in. When you go out of the operable state,
you can say that you are logged out. After logging in the machine, be sure to log out of it to prevent
unauthorized usage.
• If authentication fails, the "Authentication has failed." message appears. Check that the Login User
Name and Login Password are correct.
User Code Authentication (Using the Control Panel)
This section explains the procedure for logging in to the machine using the control panel while User
Code Authentication is active.
If User Code Authentication is active, a screen prompting you to enter a User Code appears.
1. Enter a User Code (up to eight digits), and then press [OK].
• To log out, do one of the following:
• Press the operation switch.
61
2. Guide to the Machine
• Press the [Energy Saver] key after jobs are completed.
User Code Authentication (Using a Printer Driver)
This section explains the procedure for logging in to the machine using a printer driver while User Code
Authentication is active.
If User Code Authentication is active, specify the User Code in the printer properties of the printer driver.
For details, see the printer driver Help.
• When logged in through User Code Authentication, you do not have to log out.
Login (Using the Control Panel)
This section explains the procedure for logging in to the machine when Basic Authentication, Windows
Authentication, LDAP Authentication, or Integration Server Authentication is set.
1. Press [Login].
2. Enter a Login User Name, and then press [OK].
62
When the Authentication Screen is Displayed
3. Enter a Login Password, and then press [OK].
When the user is authenticated, the screen for the function you are using appears.
• If authentication fails, the "Authentication has failed." message appears. Check that the Login User
Name and Login Password are correct.
Logout (Using the Control Panel)
This section explains the procedure for logging out the machine when Basic Authentication, Windows
Authentication, LDAP Authentication, or Integration Server Authentication is set.
• To prevent use of the machine by unauthorized persons, always log out when you have finished
using the machine.
1. Press the [Login/Logout] key.
CCS001
2. Press [Yes].
Login (Using a Printer Driver)
This section explains the procedure for logging in to the machine using a printer driver.
63
2. Guide to the Machine
If Basic Authentication, Windows Authentication, LDAP Authentication, or Integration Server
Authentication is active, make encryption settings in the printer properties of the printer driver, and then
specify a Login User Name and Login Password. For details, see the printer driver Help.
• When logged in using a printer driver, you do not have to log out.
Login (Using Web Image Monitor)
This section explains the procedure for logging in to the machine via Web Image Monitor.
1. Click [Login].
2. Enter a Login User Name and Login Password, and then click [Login].
• For User Code Authentication, enter a User Code in [Login User Name], and then click [Login].
Logout (Using Web Image Monitor)
This section explains the procedure for logging out the machine via Web Image Monitor.
1. Click [Logout] to log out.
• Delete the cache memory of a Web browser after logging out.
64
3. Getting Started
This chapter explains how to set up the machine for operation.
Installing the Machine
Where to Put Your Machine
This section describes precautions for installation and movement.
Choose your machine's location carefully. Environmental conditions greatly affect its performance.
• Do not use flammable sprays or solvents in the vicinity of this machine. Also, avoid placing these
items in the vicinity of this machine. Doing so could result in fire or electric shock.
• Do not place vases, plant pots, cups, toiletries, medicines, small metal objects, or containers
holding water or any other liquids, on or close to this machine. Fire or electric shock could result
from spillage or if such objects or substances fall inside this machine.
• Be sure to locate the machine as close as possible to a wall outlet. This will allow easy
disconnection of the power cord in the event of an emergency.
• Keep the machine away from humidity and dust. Otherwise a fire or an electric shock might
occur.
• Do not place the machine on an unstable or tilted surface. If it topples over, an injury might
occur.
• Do not place heavy objects on the machine. Doing so can cause the machine to topple over,
possibly resulting in injury.
• Make sure the room where you are using the machine is well ventilated and spacious. Good
ventilation is especially important when the machine is used heavily.
• Keep the machine away from salt-bearing air and corrosive gases. Also, do not install the
machine in places where chemical reactions are likely (laboratories, etc.), as doing so will
cause the machine to malfunction.
65
3. Getting Started
• Do not obstruct the machine's vents. Doing so risks fire caused by overheated internal
components.
• Machine sound levels exceeding LWAd > 63 dB (A) are not suitable for desk work
environments, so place the machine in another room.
• After you move the machine, use the caster fixture to fix it in place. Otherwise the machine might
move or come down to cause an injury.
• Protect the machine from dampness or wet weather, such as rain and snow.
• Keep the machine in an area that is within optimum environmental conditions. Operating the
machine in an environment that is outside the recommended ranges of humidity and
temperature can cause an electrical fire hazard. Keep the area around the socket free of dust.
Accumulated dust can become an electrical fire hazard.
Optimum environmental conditions
This section describes acceptable and recommended temperature and humidity ranges of the
environment where this machine will be installed.
CBK019
• Temperature: 10 32 °C (50 89.6 °F) (humidity to be 54% at 32 °C, 89.6 °F)
• Humidity: 15 80% (temperature to be 27 °C, 80.6 °F at 80%)
• A strong and level base.
• The machine must be level within 5 mm, 0.2 inches: both front to rear and left to right.
66
Installing the Machine
Environments to avoid
This section describes environments to avoid when locating the machine.
• Locations exposed to direct sunlight or other sources of strong light (more than 1,500 lux).
• Locations directly exposed to cool air from an air conditioner or heated air from a heater. (Sudden
temperature changes can cause condensation to form inside the machine.)
• Locations close to machines generating ammonia, such as a diazo copy machine.
• Places where the machine will be subject to frequent strong vibration.
• Dusty areas.
• Areas with corrosive gases.
Access to the machine
This section describes the space required for the machine.
Place the machine near the power source, providing the clearance areas shown.
3
1
4
2
5
CFE069
1. Left: 10 cm (4.0 inches) or more
2. Front: 35 cm (13.8 inches) or more
3. Above: 35 cm (13.8 inches) or more
4. Rear: 30 cm (11.9 inches) or more
5. Right: 10 cm (4.0 inches) or more
• For the required space when options are installed, contact your service representative.
Power Connection
This section describes power supply.
67
3. Getting Started
• Do not use any power sources other than those that match the specifications shown in this
manual. Doing so could result in fire or electric shock.
• Do not use any frequencies other than those that match the specifications shown. Doing so could
result in fire or electric shock.
• Do not use multi-socket adaptors. Doing so could result in fire or electric shock.
• Do not use extension cords. Doing so could result in fire or electric shock.
• Do not use power cords that are damaged, broken, or modified. Also, do not use power cords
that have been trapped under heavy objects, pulled hard, or bent severely. Doing so could
result in fire or electric shock.
• Touching the prongs of the power cable's plug with anything metallic constitutes a fire and
electric shock hazard.
• The supplied power cord is for use with this machine only. Do not use it with other appliances.
Doing so could result in fire or electric shock.
• It is dangerous to handle the power cord plug with wet hands. Doing so could result in electric
shock.
• Disconnect the power plug (by pulling the plug, not the cable) if the power cable or plug
becomes frayed or otherwise damaged.
• If the power cord is damaged (exposure of the core, disconnection, etc.), contact your service
representative to change a new one. Operating the machine with a damaged power cord may
cause an electric shock or fire.
• Be sure to push the plug of the power cord fully into the wall outlet. Partially inserted plugs
create an unstable connection that can result in unsafe buildup of heat.
• If this machine is not going to be used for several days or longer at a time, disconnect its power
cord from the wall outlet.
• When disconnecting the power cord from the wall outlet, always pull the plug, not the cord.
Pulling the cord can damage the power cord. Use of damaged power cords could result in fire
or electric shock.
68
Installing the Machine
• Be sure to disconnect the plug from the wall outlet and clean the prongs and the area around
the prongs at least once a year. Allowing dust to build up on the plug constitutes a fire hazard.
• When performing maintenance on the machine, always disconnect the power cord from the
wall outlet.
• Power Source
•
(mainly Europe and Asia)
220 240 V, 50/60 Hz, 7 A
•
(mainly North America)
120 127 V, 60 Hz, 12 A
Please be sure to connect the power cord to a power source as above.
• Voltage tolerance
•
(mainly Europe and Asia)
Voltage must not fluctuate by more than 10%.
•
(mainly North America)
Voltage must not fluctuate by more than +8.66% or less than -10%.
Unpacking
To protect it from shock and vibration during transit, this machine comes packaged in cushioning foam
and secured with tape. Remove these protective materials after bringing the machine to where it will be
installed.
• Keep the polythene materials (bags, gloves, etc.) supplied with this machine away from babies
and small children at all times. Suffocation can result if polythene materials are brought into
contact with the mouth or nose.
• Do not remove any covers or screws other than those explicitly mentioned in this manual. Inside
this machine are high voltage components that are an electric shock hazard and laser
components that could cause blindness. Contact your sales or service representative if any of the
machine's internal components require maintenance, adjustment, or repair.
• Do not attempt to disassemble or modify this machine. Doing so risks burns and electric shock.
Note again that exposure to the laser components inside this machine risks blindness.
69
3. Getting Started
• Do not incinerate toner (new or used) or toner containers. Doing so risks burns. Toner will ignite
on contact with naked flame.
• Do not place the machine on an unstable or tilted surface. If it topples over, an injury might
occur.
• Type 1 weighs approximately 45 kg (99.2 lb.), type 2 weighs approximately 47 kg (103.7
lb.), and type 3 weighs approximately 52 kg (114.7 lb.). When moving the machine, use the
inset grips on both sides, and lift slowly. The machine will break or cause injury if dropped.
• Do not crush or squeeze toner containers. Doing so can cause toner spillage, possibly resulting
in dirtying of skin, clothing, and floor, and accidental ingestion.
• Store toner (new or used), toner containers, and components that have been in contact with
toner out of reach of children.
• If toner or used toner is inhaled, gargle with plenty of water and move into a fresh air
environment. Consult a doctor if necessary.
• If toner or used toner gets into your eyes, flush immediately with large amounts of water. Consult
a doctor if necessary.
• If toner or used toner is swallowed, dilute by drinking a large amount of water. Consult a doctor
if necessary.
• Removed tape is dirty. Be careful not to let it touch your hands or clothes.
• Leave the tape holding the paper tray and cover in place while moving the machine.
• Do not grip on the tray area when lifting the machine.
• Do not allow small objects such as paper clips to fall into or become stuck inside the machine.
• Keep the uncovered print cartridge away from direct sunlight.
• When you use this machine for the first time, use the print cartridge packaged with the machine.
1. Remove the plastic bag.
2. Lift the machine by the inset grips on its sides.
At least four people are needed to lift the machine.
70
Installing the Machine
CFE026
3. Lower the machine slowly and carefully to prevent trapping your hands.
4. Remove the adhesive tape attached on the machine's exterior.
5. Carefully pull out tray 1 (type 3 only).
CFE075
6. Remove the extender from tray 1 (type 3 only).
CFE076
71
3. Getting Started
7. Carefully push tray 1 fully in (type 3 only).
CFE080
8. Attach the extender to the finisher tray (type 3 only).
CFE027
9. Lift the ADF.
CFE077
10. Remove the protective material attached on the exposure glass.
72
Installing the Machine
11. Lower the ADF.
CFE081
12. Push the button on the right side of the machine to open the front cover.
2
1
CFE078
13. Hold the print cartridge's front handle to lift and pull it out.
2
1
CFE068
Place the print cartridge on a stable, flat surface.
14. Remove the protective material attached on the machine's interior.
73
3. Getting Started
15. Hold the grips of the cartridge, and then insert it into the machine until it stops.
CFE071
16. Close the front cover.
CFE074
• Print cartridges (consumables) are not covered by warranty. However, if there is problem, contact
the store where they were purchased.
• The actual machine may come with protective materials attached in different positions. Make sure
to check the machine for all protective materials, and remove them completely.
Turning On/Off the Power
This section describes how to turn on/off the power.
Power supply
This machine has two power switches: operation switch and main power switch.
• Operation switch (right side of the control panel)
Press to activate the machine. When the machine has finished warming up, you can make use
of each function.
• Main power switch (right side of the machine)
74
Installing the Machine
This switch turns off the main power to the machine and causes the main power indicator on
the right side of the control panel go off. When your machine is type 2, or types 1 and 3 with
the optional fax unit installed, fax files in the memory may be lost if you turn this switch off. Use
this switch only when necessary.
• This machine automatically enters Energy Saver mode or turns itself off if you do not use it for a
while. To specify the time that the machine waits before it enters Energy Saver mode and/or turns
itself off, configure the Energy Saver Timer and/or Auto Off Timer setting, respectively. See
“System Settings”, Network and System Settings Reference.
Turning On the Main Power
This section explains how to turn on the main power.
• Do not use any power sources other than those that match the specifications shown in this
manual. Doing so could result in fire or electric shock.
• Do not use any frequencies other than those that match the specifications shown. Doing so could
result in fire or electric shock.
• Do not use multi-socket adaptors. Doing so could result in fire or electric shock.
• Do not use extension cords. Doing so could result in fire or electric shock.
• Do not use power cords that are damaged, broken, or modified. Also, do not use power cords
that have been trapped under heavy objects, pulled hard, or bent severely. Doing so could
result in fire or electric shock.
• Touching the prongs of the power cable's plug with anything metallic constitutes a fire and
electric shock hazard.
• The supplied power cord is for use with this machine only. Do not use it with other appliances.
Doing so could result in fire or electric shock.
• It is dangerous to handle the power cord plug with wet hands. Doing so could result in electric
shock.
• Be sure to push the plug of the power cord fully into the wall outlet. Partially inserted plugs
create an unstable connection that can result in unsafe buildup of heat.
75
3. Getting Started
• Do not turn off the main power switch immediately after turning it on. Doing so may result in
damage to the hard disk or memory, leading to malfunctions.
• Make sure the power cord is plugged securely into the wall outlet.
• Turn off the main power when plugging and unplugging the power plug.
1. Make sure the main power switch is turned off.
CFE028
2. Plug a power cord into the machine, and then securely insert the plug of the power cord
into the wall socket.
1
2
CFE029
3. Turn on the main power switch.
The main power indicator goes on.
76
Installing the Machine
CFE030
• After you switch the main power on, a screen may appear to indicate that the machine is
initializing. Do not switch the power off during this process. Initialization takes about three minutes.
Turning On the Power
This section explains how to turn on the power.
1. Press the operation switch.
The operation switch indicator goes on.
CCS004
• If the power does not come on when the operation switch is pressed, check the main power switch
is on. If it is off, turn it on.
Turning Off the Power
This section explains how to turn off the power.
1. Make sure the ADF is in the right position.
2. Press the operation switch.
The operation switch indicator goes off.
77
3. Getting Started
CCS004
• Even if you press the operation switch, the operation switch indicator does not go out, but blinks in
the following cases:
• During communication with external equipment.
• When the hard disk is active.
• When the internal cooling fan is active.
Turning Off the Main Power
This section explains how to turn off the main power.
• Make sure to turn off the main power switch before pulling out the power plug. Not doing so may
result in damage to the hard disk or memory, leading to malfunctions.
• The “Shutdown” function stops the machine and powers it down safely. Shutdown prevents
damage to the memory and hard disk occurring if the main power switch is turned off during an
operation or while the machine is in an energy saving state. The following screen will appear when
the machine is performing shutdown.
• Do not turn off the main power switch while the machine is saving data. Doing so risks data
corruption and damage to the hard disk.
• After turning the machine's power off, wait at least a few seconds before turning it back on. If the
message “Turn main Power Switch off” appears, turn the machine's power off, wait three seconds
78
Installing the Machine
or more, and then turn it back on again. Never turn the power back on immediately after turning it
off.
1. Make sure the operation switch indicator is not lit.
2. Turn off the main power switch.
The main power indicator goes out.
• When the main power switch is turned off while using the fax function, waiting fax and print jobs
may be cancelled, and incoming fax documents not received. If you have to turn off this switch for
some reason, make sure 100% is shown as available memory on the screen before turning off the
main power switch or unplugging the power cord. Fax files in memory are deleted an hour after
you turn off the main power switch or unplug the power cord.
• For details, see “Turning Off the Main Power / In the Event of Power Failure”, Troubleshooting.
Saving Energy
This section explains the machine's energy saving functions.
This machine has the following energy saving functions.
Energy Saver
If you do not use the machine for a certain period after an operation, or when you press the
[Energy Saver] key, the display disappears and the machine goes into Energy Saver mode. When
you press the [Energy Saver] key again, the machine returns to the ready condition. The machine
uses less electricity in Energy Saver mode.
You can change the amount of time the machine waits before switching to Energy Saver mode after
copying has finished or the last operation is performed under Panel Off Timer.
Auto Off
If the machine remains inactive for a specified period, it automatically enters the same low power
state that it enters when the operation switch is pressed (indicator unlit). This function is called “Auto
Off”.
You can change the Auto Off time under Auto Off Timer.
• See “System Settings”, Network and System Settings Reference.
• The Energy Saver and Auto Off functions will not operate in the following cases:
• When a warning message appears
• When the service call message appears
• When paper is jammed
• When the cover is open
79
3. Getting Started
• When the "Replace Print Cartridge." message appears
• When the print cartridge is being replaced
• When the User Tools screen is displayed
• When fixed warm-up is in progress
• When data is being processed
• When operations are suspended during printing
• When the On-hook dialing function is in use
• When a recipient is being registered in the address list or group dial list
• When the Data In indicator is on or blinking
• When the screen of a document that was stored under the printer function appears. (The
machine enters Energy Saver mode if this happens.)
• When the sample print, locked print, hold print, or stored print screen is displayed
• When the internal cooling fan is active
Loading Paper into Tray 1
This section describes how to load paper into tray 1.
• When loading paper, take care not to trap or injure your fingers.
• Do not stack paper over the limit mark.
• If a paper tray is pushed vigorously when putting it back into place, the position of the tray's side
fences may slip out of place.
1. Lift and pull tray 1 carefully, and then pull it out with both hands.
CFE013
Place the tray on a flat surface.
80
Installing the Machine
2. While pressing down the release lever, slide the side fences outward.
CFE011
3. While pressing down the release lever, slide the end fence until it is aligned with the size
of paper you want to load.
CEC011
4. Fan the paper before loading paper in the tray.
CBK254
5. Square the paper and load it print side down.
Do not stack paper over the limit mark.
81
3. Getting Started
CEC006
6. Align the side fences gently against the paper you loaded.
CFE012
7. Hold the tray with both hands, slide it along the rails of the machine, and then push it
straight in.
CFE014
8. Check the paper size on the display.
• Straighten curled or warped paper before loading.
• For details about paper sizes and types, see “Recommended Paper Sizes and Types”.
• For details about how to add paper, see “Loading Paper into Trays 1 4”.
• For details about how to change the paper size, see “Changing the Paper Size in Trays 1 4”.
82
Installing the Machine
• page 121 "Loading Paper into Trays 1 - 4"
• page 125 "Changing the Paper Size in Trays 1 - 4"
• page 136 "Recommended Paper Sizes and Types"
Changing Modes
This section explains how to change modes.
Press the function key that you want to use.
Copier
Document Server
Facsimile
Printer
Scanner
CFE064
• You cannot switch modes in any of the following situations:
• When scanning a fax message for transmission
• During immediate transmission
83
3. Getting Started
• When accessing User Tools
• During interrupt copying
• During On-hook dialing for fax transmission
• While scanning an original
• The copy display is set as the default screen when the machine is turned on. You can change this
default setting under Function Priority. See “System Settings”, Network and System Settings
Reference.
System Reset
This section explains System Reset.
After finishing a job, the machine waits a specified length of time and then restores its settings to the
default values specified under Function Priority. This function is called “System Reset”. For the procedure
for specifying default settings under Function Priority, see “System Settings”, Network and System
Settings Reference.
To change the length of time that the machine waits before restoring its settings to their default values,
use the System Auto Reset Timer setting. See “System Settings”, Network and System Settings Reference.
Multi-Accessing
If you are not able to carry out your job, it may be that the machine is being used by another function.
Wait until the current job is completed before trying again. In certain cases, you can carry out another
job using a different function while the current job is being performed. Performing multiple functions
simultaneously like this is called “Multi-accessing”.
Combination Chart
The chart shows function compatibility when print priority is set to [Interleave]. For details about
Print Priority, see “General Features”, Network and System Settings Reference.
: Simultaneous operations are possible.
: Operation is enabled when the relevant function key is pressed and remote switching (of the
scanner/external extension) is done.
: Operation is enabled when the [Interrupt] key is pressed to interrupt the preceding operation.
: Operation is performed automatically once the preceding operation ends.
: The operation must be started once the preceding operation ends. (Simultaneous operations
are not possible.)
84
Installing the Machine
BHL002S
*1 Simultaneous operations are only possible after the preceding job documents are all scanned and [New Job]
appears.
*2 You can scan a document after the preceding job documents are all scanned.
*3 Operation is possible when extra lines are added.
*4 During stapling, printing automatically starts after the current job.
*5 Stapling is not available.
*6 Simultaneous operation becomes possible after you press [New Job].
*7 During parallel reception, any subsequent job is suspended until the reception is completed.
• Stapling cannot be simultaneously used for multiple functions.
• The bypass tray cannot be simultaneously used for multiple functions. Also, you cannot
simultaneously print documents using the printer function and print from the bypass tray using
85
3. Getting Started
another function if “Apply Auto Paper Select (Printer Only)” under [Paper Type: Bypass Tray] in
User Tools is set to [Yes] and “Input Tray” is set to [Auto Tray Select] in the printer driver.
• If the machine is capable of executing multiple functions simultaneously, specify which function
should have priority in “Print Priority”. The default is “Display Mode”. For details about Print
Priority, see “General Features”, Network and System Settings Reference.
• You can specify the output tray where documents are delivered (type 2 only). For details about
Output Tray Settings, see “General Features”, Network and System Settings Reference.
• While printing is in progress, scanning a document using another function may take longer than
usual.
Installing the SD Card Provided with the Machine
This section describes how to install the SD card.
• Do not remove any covers or screws other than those explicitly mentioned in this manual. Inside
this machine are high voltage components that are an electric shock hazard and laser
components that could cause blindness. Contact your sales or service representative if any of the
machine's internal components require maintenance, adjustment, or repair.
• Do not attempt to disassemble or modify this machine. Doing so risks burns and electric shock.
Note again that exposure to the laser components inside this machine risks blindness.
• Keep SD cards out of reach of children. If a child swallows an SD card, consult a doctor
immediately.
• Do not subject the card to physical shocks.
• Security&Encryption Unit is factory-installed in an upper slot.
The following SD cards are provided with the machine:
• VM Card & App2Me Provider
Allows you to install embedded software architecture applications on the machine.
• Security&Encryption Unit
Allows you to erase or encrypt data that is stored on the hard disk.
86
Installing the Machine
1. Check the contents of the package.
BFL308S
2. Turn off the main power switch, and then unplug the machine's power cord from the wall
outlet.
3. Loosen and remove the screw, and then carefully remove the cover of the SD card slot.
2
1
CFE031
4. Carefully push in the SD card (notched corner downward and leading), until it clicks into
place.
CFE032
Insert the SD card in the lower slot.
87
3. Getting Started
5. Reattach the cover over the SD card. Fasten the screw to secure the cover.
1
3
2
CFE033
• You can confirm that VM Card & App2Me Provider was installed correctly by checking the User
Tools menu. For details, see VM Card Extended Feature Settings Device Reference or VM Card
Extended Feature Settings Web Reference.
• You can confirm that Security&Encryption Unit was installed correctly by checking the User Tools
menu.
• Erasing data function: Make sure [Auto Erase Memory Setting] and [Erase All Memory]
appears under [Administrator Tools] in [System Settings].
• Encrypting data function: Make sure [Machine Data Encryption Settings] appears under
[Administrator Tools] in [System Settings] after logging in the machine.
• Other SD cards may be provided depending on which country you are in.
88
Connecting the Machine
Connecting the Machine
This section explains how to connect the machine to the network or the telephone lines.
Connecting to the Ethernet Interface
(mainly Europe and Asia)
This section describes how to connect an Ethernet cable to the Ethernet interface.
Caution:
A network interface cable with a ferrite core must be used for RF interference suppression.
• If the main power switch is on, turn it off.
• Use the following Ethernet cables.
• Unshielded Twisted Pair Cable (UTP) or Shielded Twisted Pair Cable (STP) and Category type
5 or more
1. A ferrite core for the Ethernet interface cable is supplied with this machine. Attach the
ferrite core at the machine end of the Ethernet cable.
CFE092
2. Make sure the main power is switched off.
3. Connect the Ethernet interface cable to the 10BASE-T/100BASE-TX port.
CFL007
89
3. Getting Started
4. Connect the other end of the Ethernet interface cable to a network connection device such
as a hub.
5. Turn on the main power switch of the machine.
1
CFL014
1. Indicators
When 100BASE-TX or 10BASE-T is operating, the green LED is lit and the orange LED flashes. If the
machine is not connected to the network, both LEDs are turned off.
• For details about how to turn on the main power switch, see “Turning On/Off the Power”.
• For details about installing the printer driver, see "Preparing the Machine", Printer Reference.
• page 74 "Turning On/Off the Power"
Connecting to the Ethernet Interface
(mainly North America)
This section describes how to connect an Ethernet cable to the Ethernet interface.
• If the main power switch is on, turn it off.
• Use the following Ethernet cables.
• Unshielded Twisted Pair Cable (UTP) or Shielded Twisted Pair Cable (STP) and Category type
5 or more
1. Make sure the main power is switched off.
90
Connecting the Machine
2. Connect the Ethernet interface cable to the 10BASE-T/100BASE-TX port.
CFL007
3. Connect the other end of the Ethernet interface cable to a network connection device such
as a hub.
4. Turn on the main power switch of the machine.
1
CFL014
1. Indicators
When 100BASE-TX or 10BASE-T is operating, the green LED is lit and the orange LED flashes. If the
machine is not connected to the network, both LEDs are turned off.
• For details about how to turn on the main power switch, see “Turning On/Off the Power”.
• For details about installing the printer driver, see "Preparing the Machine", Printer Reference.
• page 74 "Turning On/Off the Power"
Connecting to the USB (Type B) Interface
This section describes how to connect the USB2.0 (Type B) interface cable to the USB2.0 port.
91
3. Getting Started
Caution:
Properly shield twisted pair cable (STP cable) must be used for connections to a host computer
(and/or peripheral) in order to meet emission limits.
1. Connect the USB2.0 (Type B) interface cable to the USB2.0 port.
CFL009
2. Connect the other end to the USB2.0 port on the host computer.
• This machine does not come with a USB interface cable. Make sure you purchase the appropriate
cable for the machine and your computer.
• The USB2.0 interface board is supported by Windows XP/Vista/7, Windows Server 2003/2003
R2/2008/2008 R2, Mac OS X 10.3.3 or higher.
• When used with Mac OS X 10.3.3 or higher, a transfer speed of USB2.0 is supported.
• For details about installing the printer driver, see "Preparing the Machine", Printer Reference.
Connecting a Device to the Machine's USB Host Interface
This section explains how to connect a device to the machine's USB host interface.
1. Connect one end of the USB interface cable to the machine's USB host interface.
CFL010
92
Connecting the Machine
2. Connect the other end of the USB interface cable to a card authentication device or media
slot.
• This machine does not come with a USB interface cable. Make sure you purchase the appropriate
cable.
Connecting the Machine to a Telephone Line and Telephone
This section describes how to connect the machine to the telephone lines.
• Make sure the connector is the correct type before you start.
To connect the machine to a telephone line, use a snap-in modular type connector.
1. Connect a telephone line cord to the G3 interface unit connector (LINE).
CFL017
2. If using an external telephone, connect the telephone to the external telephone connector
(TEL).
CFL018
• After connecting the machine to the telephone line, specify the country code, telephone line type,
and fax information. For details, see “Initial Settings”, Facsimile Reference.
93
3. Getting Started
• If you are using an external telephone, specify the reception mode. For details about specifying the
reception mode, “Reception Settings”, Facsimile Reference.
• If your telephone has functions that are not compatible with this machine, those functions cannot be
used.
94
Inserting and Removing a Removable Memory Device
Inserting and Removing a Removable Memory
Device
This section discusses how to insert/remove a removable memory device.
• Do not turn off the main power switch while the machine is saving data to a removable memory
device. Doing so may damage the device. If you turned off the main power switch while data was
being saved, be sure to check whether the data in your device was saved correctly.
• This machine supports SD cards with a maximum capacity of 2 GB.
• If the media access lamp does not light when a removable memory device is pushed into the media
slot, do the following:
• Reinsert the removable memory device.
• The removable memory device may be broken. Contact the shop where you bought it.
Inserting an SD Card
This section describes how to insert an SD card.
1. Align the SD card in the correct direction, and then push it straight into the media slot until
it clicks.
CCS050
When it is inserted correctly, the media access lamp beside the media slot lights.
• The media access lamp lights up only when the SD card is being accessed.
95
3. Getting Started
Inserting a USB Memory
This section describes how to insert a USB memory.
• Certain types of USB memory cannot be used.
1. Align the USB memory in the correct direction, and then push it straight into the media
slot.
CCS051
When it is inserted correctly, the media access lamp beside the media slot lights.
• The media access lamp lights up and remains lit as long as a USB memory is inserted.
Removing an SD Card
This section describes how to remove an SD card.
1. Make sure the media access lamp is not lighted.
2. Push and release the SD card.
CCS052
3. Pinch the SD card, and then pull it carefully out of the slot.
96
Inserting and Removing a Removable Memory Device
Removing a USB Memory
This section describes how to remove a USB memory.
1. Make sure the machine is not reading from or writing to the USB memory.
2. Pull the USB memory carefully out of the slot.
CCS053
97
3. Getting Started
Downloading Utility Software
This section explains the utility software for this machine.
SmartDeviceMonitor for Admin
This section describes the functions available with SmartDeviceMonitor for Admin.
SmartDeviceMonitor for Admin is an application that monitors network printers. It can monitor multiple
network printers using IP address. We recommend that network administrators use this application.
SmartDeviceMonitor for Admin has the following functions:
• Group management for the machines
• Monitoring the machines
• Operation restriction
• Managing the Address Book
• Per-user counters
• User restriction
SmartDeviceMonitor for Admin with full functionality can be purchased from your local dealer. Contact
your local dealer for information on purchasing the software.
SmartDeviceMonitor for Admin with limited functionality is available as a free download. Contact your
local dealer for information on downloading the software.
• For details about the functionality, see the manual for SmartDeviceMonitor for Admin.
DeskTopBinder
This section describes the functions available with DeskTopBinder.
• DeskTopBinder is not available for 64-bit operating systems.
DeskTopBinder is to be installed on the client computers for integration and management of various
kinds of files such as scan files, files created with applications, and existing scan files. This software
allows you to use various functions for stored scan files such as viewing stored files. Also, with the
ScanRouter delivery software*1, you can view the files stored in in-trays of the delivery server, or use
other functions for stored files.
DeskTopBinder Professional provides the full functionality of the software. Contact your local dealer for
information on purchasing the software.
98
Downloading Utility Software
DeskTopBinder Lite with limited functionality is available as a free download. Contact your local dealer
for information on downloading the software.
*1 For details to purchase ScanRouter delivery software, contact your local dealer.
• For details about the functionality, see Help of DeskTopBinder.
SmartDeviceMonitor for Client
This section describes the functions available with SmartDeviceMonitor for Client.
SmartDeviceMonitor for Client allows you to manage and print various data such as files created with
an application, images scanned with a scanner, and existing images as one document.
SmartDeviceMonitor for Client has the following functions:
• Checking printer supplies such as paper or toner
• Checking results of print jobs executed from the computer
SmartDeviceMonitor for Client is available as a free download. Contact your local dealer for
information on downloading the software.
• For details about the functionality, see Help of SmartDeviceMonitor for Client.
99
3. Getting Started
100
4. Installing Options
This chapter describes how to install various options for this machine.
Options
This section introduces the names and functions of main optional parts.
External Options
This section provides explanations about external options.
1
2
CFE010
1. Paper feed unit
Holds up to 550 sheets of paper. Up to two units can be stacked.
2. Paper feed unit with the casters
Holds up to 550 sheets of paper. Stack the paper feed unit with the casters to the bottom of the machine. To
set the machine directly on the floor, install this unit to the bottom of the machine.
• Install the options in recommended order. For details, see “Order of Option Installation”.
• For details about how to install the paper feed unit, see “Installing the Paper Feed Unit (Optional)”.
• page 103 "Order of Option Installation"
• page 104 "Installing the Paper Feed Unit (Optional)"
101
4. Installing Options
Internal Options
This section describes the options that can be installed in the machine.
• The Bluetooth interface unit (optional) will be available from 2011. Information about this option is
subject to change. For the latest information, refer to the documentation provided when you
purchase the Bluetooth option.
Fax options
• Fax unit (types 1 and 3 only)
Allows you to use the facsimile function.
• Expansion memory
Provides more memory for the facsimile function.
SD card options
• Browser unit
You can use this function to display data from the server in HTML format on the machine's
control panel. You can also use this function to send scan files from the control panel.
Board options
• Wireless LAN board
Allows you to install a wireless LAN interface.
• Gigabit Ethernet (1000BASE-T)
Allows you to communicate over 1000BASE-T.
• File format converter
Allows you to download documents from the Document Server stored by copier, Document
Server, or printer. See “Downloading Stored Documents with Web Image Monitor”, Copy
and Document Server Reference.
• Copy data security unit
If a document containing embedded text for unauthorized copy guard is copied, protected
pages are grayed out in the copy.
USB options
• Bluetooth interface unit
Allows you to expand the interface.
• Install the options in recommended order. For details, see “Order of Option Installation”.
• To install fax options and the copy data security unit, contact your service representative.
• For details about how to install the board options, see “Installing the Board (Optional)”.
102
Options
• For details about how to install the SD card options, see “Installing the SD Card (Optional)”.
• page 103 "Order of Option Installation"
• page 108 "Installing the Board (Optional)"
• page 118 "Installing the SD Card (Optional)"
Order of Option Installation
When installing multiple options, the following order is recommended:
1. Attach the paper feed unit.
Attach the paper feed unit to the bottom of the machine.
You can attach up to three paper feed units. Up to 2300 sheets of paper can be loaded in total.
For details, see “Installing the Paper Feed Unit (Optional)”.
2. Install the optional board.
Install the Gigabit Ethernet board, Wireless LAN interface unit, or File Format Converter in the slot.
For details, see “Installing the Board (Optional)”.
3. Insert SD card options.
Insert the browser unit into the SD card slot.
If you want to use two or more SD cards that can be inserted in the same slot, contact your sales
and service representative.
For details, see “Installing the SD Card (Optional)”.
• page 104 "Installing the Paper Feed Unit (Optional)"
• page 108 "Installing the Board (Optional)"
• page 118 "Installing the SD Card (Optional)"
103
4. Installing Options
Installing the Paper Feed Unit (Optional)
This section describes how to install the paper feed unit.
• If the machine topples, or if a cover or other part gets broken, you must turn the power switch to
off and disconnect the power cord plug from the wall outlet. Then contact your service
representative and report the problem. Do not use the machine. Doing so could result in fire or
electric shock.
• Type 1 weighs approximately 45 kg (99.2 lb.), type 2 weighs approximately 47 kg (103.7
lb.), and type 3 weighs approximately 52 kg (114.7 lb.). When moving the machine, use the
inset grips on both sides, and lift slowly. The machine will break or cause injury if dropped.
• When disconnecting the power cord from the wall outlet, always pull the plug, not the cord.
Pulling the cord can damage the power cord. Use of damaged power cords could result in fire
or electric shock.
• Unplug the power cord from the wall outlet before you move the machine. While moving the
machine, take care that the power cord is not damaged under the machine. Failing to take these
precautions could result in fire or electric shock.
• After you move the machine, use the caster fixture to fix it in place. Otherwise the machine might
move or come down to cause an injury.
• Before installing or removing options, always disconnect the power cord plugs from the wall
outlet and allow time for the main unit to fully cool. Failing to take these precautions could result
in burns.
• Lifting the paper feed unit carelessly or dropping it may cause injury.
• Do not grip on the tray area when lifting the machine.
• When three paper feed units are installed, they are detected as “Tray 2”, “Tray 3”, and “Tray 4”,
starting from the upper unit.
• The same procedure applies when installing the paper feed unit with the casters (optional).
• The number of optional trays that can be installed differs depending on the location where the
machine is installed.
• If the machine is installed on a desk or other elevated surface, up to one paper feed unit can
be stacked.
104
Installing the Paper Feed Unit (Optional)
1
CFE007
1. Paper feed unit
• If the machine is installed directly on the floor, up to three paper feed units can be stacked.
Stack the paper feed unit with casters to the bottom of the machine.
1
2
CFE008
1. Paper feed unit
2. Paper feed unit with the casters
1. Check the package contains the following:
1
2
CFE034
1. Paper feed unit
2. Paper feed unit with the casters
105
4. Installing Options
2. Remove the adhesive tape from the paper feed unit.
3. Turn off the main power switch, and then unplug the machine's power cord from the wall
outlet.
4. Lift the machine by the inset grips on its sides.
At least four people are needed to lift the machine.
CFE079
When moving the machine, do not hold on the following parts as doing so could cause a
malfunction:
• The handle onto the standard paper feed tray.
• The underside of the bypass tray.
5. There are four upright pins on the paper feed unit. Align them with the holes on the
underside of the machine, and then carefully lower the machine.
CFE035
When installing two or more units, first connect the units together, and then attach them as a single
unit to the machine.
6. After installing the paper feed unit, check the paper tray on the display.
• If the paper feed unit is not installed properly, reinstall it following this procedure. If you cannot
install it properly even after attempting reinstallation, contact your sales or service representative.
106
Installing the Paper Feed Unit (Optional)
• If the print area is not centered correctly, adjust the printing position for the paper feed unit. For
details, see “Adjusting Printing Position”, Troubleshooting.
• For details about loading paper onto the paper tray, see “Loading Paper into Trays 1 4” or
“Changing the Paper Size in Trays 1 4”.
• After a new paper feed unit has been installed, the driver settings might need to be reconfigured.
For details, see the printer driver Help.
• page 121 "Loading Paper into Trays 1 - 4"
• page 125 "Changing the Paper Size in Trays 1 - 4"
107
4. Installing Options
Installing the Board (Optional)
• Do not remove any covers or screws other than those explicitly mentioned in this manual. Inside
this machine are high voltage components that are an electric shock hazard and laser
components that could cause blindness. Contact your sales or service representative if any of the
machine's internal components require maintenance, adjustment, or repair.
• Do not attempt to disassemble or modify this machine. Doing so risks burns and electric shock.
Note again that exposure to the laser components inside this machine risks blindness.
• Keep the polythene materials (bags, gloves, etc.) supplied with this machine away from babies
and small children at all times. Suffocation can result if polythene materials are brought into
contact with the mouth or nose.
• When disconnecting the power cord from the wall outlet, always pull the plug, not the cord.
Pulling the cord can damage the power cord. Use of damaged power cords could result in fire
or electric shock.
• Before installing or removing options, always disconnect the power cord plugs from the wall
outlet and allow time for the main unit to fully cool. Failing to take these precautions could result
in burns.
• Wait at least one hour after power off before replacing parts. Not allowing the machine to
cool may result in burns.
• Before beginning work, ground yourself by touching something metal to discharge any static
electricity. Static electricity can damage the interface board.
• Do not subject the board to physical shocks.
Installing the Gigabit Ethernet Board
(mainly Europe and Asia)
This section describes how to install the Gigabit Ethernet board.
• The machine's Ethernet and USB ports are not available when the Gigabit Ethernet board is
installed into the machine. Use the Ethernet and USB ports on the Gigabit Ethernet board.
108
Installing the Board (Optional)
1. Check the contents of the package.
CEC233
1. Gigabit Ethernet board
2. Protective caps (one each for the Ethernet port and the USB port)
3. Ferrite core
Design of the ferrite core varies according to machine model.
2. Turn off the main power switch, and then unplug the machine's power cord from the wall
outlet.
3. Disconnect the cables from the Ethernet port and the USB port of the machine, and cover
each port with its protective cap.
CFE036
109
4. Installing Options
4. Loosen two screws and remove the cover of the slot in which the Gigabit Ethernet board is
installed.
CFE037
5. Fully insert the Gigabit Ethernet board.
CFE038
6. Tighten two screws to secure the Gigabit Ethernet board.
Check the Gigabit Ethernet board is connected firmly to the board slot.
CFE039
• Confirm that the Gigabit Ethernet board was correctly installed by printing the configuration page.
If it is correctly installed, “Gigabit Ethernet Board” will appear for “Device Connection” on the
configuration page. For details about printing the configuration page, see “Interface Settings”,
Network and System Settings Reference.
110
Installing the Board (Optional)
• If the board was not installed properly, repeat the procedure from step 4. If it cannot be installed
correctly even after reattempting installation, contact your sales or service representative.
• For details about how to connect the Ethernet interface cable to the Gigabit Ethernet port, see
“Connecting to the Gigabit Ethernet Interface”, Network and System Settings Reference.
Installing the Gigabit Ethernet Board
(mainly North America)
This section describes how to install the Gigabit Ethernet board.
• The machine's Ethernet and USB ports are not available when the Gigabit Ethernet board is
installed into the machine. Use the Ethernet and USB ports on the Gigabit Ethernet board.
1. Check the contents of the package.
CFE088
1. Gigabit Ethernet board
2. Protective caps (one each for the Ethernet port and the USB port)
2. Turn off the main power switch, and then unplug the machine's power cord from the wall
outlet.
111
4. Installing Options
3. Disconnect the cables from the Ethernet port and the USB port of the machine, and cover
each port with its protective cap.
CFE036
4. Loosen two screws and remove the cover of the slot in which the Gigabit Ethernet board is
installed.
CFE037
5. Fully insert the Gigabit Ethernet board.
CFE038
6. Tighten two screws to secure the Gigabit Ethernet board.
Check the Gigabit Ethernet board is connected firmly to the board slot.
112
Installing the Board (Optional)
CFE039
• Confirm that the Gigabit Ethernet board was correctly installed by printing the configuration page.
If it is correctly installed, “Gigabit Ethernet Board” will appear for “Device Connection” on the
configuration page. For details about printing the configuration page, see “Interface Settings”,
Network and System Settings Reference.
• If the board was not installed properly, repeat the procedure from step 4. If it cannot be installed
correctly even after reattempting installation, contact your sales or service representative.
• For details about how to connect the Ethernet interface cable to the Gigabit Ethernet port, see
“Connecting to the Gigabit Ethernet Interface”, Network and System Settings Reference.
Installing the Wireless LAN Interface Board
This section describes how to install the wireless LAN interface board.
1. Check the contents of the package.
1
2
3
CFE040
1. Wireless LAN board
113
4. Installing Options
2. Hook and loop fasteners
3. Cable clamps
2. Turn off the main power switch, and then unplug the machine's power cord from the wall
outlet.
3. Remove the seals from the hook and loop fasteners, and then attach them to the left side
of the machine.
CFE085
4. Remove the seals from the cable clamps, and then attach them to the left side of the
machine.
CFE086
5. Loosen two screws and remove the cover of the slot in which the wireless LAN interface
board is installed.
CFE041
114
Installing the Board (Optional)
6. Fully insert the wireless LAN interface board.
CFE042
7. Tighten two screws to secure the interface board.
Check the wireless LAN interface board is connected firmly to the board slot.
CFE043
8. Attach the antennas of the wireless LAN with the hook and loop fasteners that you
attached in step 3, and then place the cables in the cable clamps and close the clamps.
CFE087
• Confirm that the wireless LAN interface board was correctly installed by printing the configuration
page. If it is correctly installed, “Wireless LAN” will appear for “Device Connection” on the
configuration page. For details about printing the configuration page, see “Interface Settings”,
Network and System Settings Reference.
115
4. Installing Options
• If the board was not installed properly, repeat the procedure from step 3. If it cannot be installed
correctly even after reattempting installation, contact your sales or service representative.
• Before using the wireless LAN interface board, you must configure settings. For details, see
“Interface Settings”, Network and System Settings Reference.
Installing the File Format Converter
This section describes how to install the file format converter.
1. Check the contents of the package.
CFE009
2. Turn off the main power switch, and then unplug the machine's power cord from the wall
outlet.
3. Loosen two screws and remove the cover of the slot in which the file format converter is
installed.
CFE041
116
Installing the Board (Optional)
4. Fully insert the file format converter.
CFE045
5. Tighten two screws to secure the file format converter.
Check the file format converter is connected firmly to the board slot.
CFE046
• You can confirm that the file format converter was installed correctly by checking the User Tools
menu. Make sure [Capture Server IPv4 Address] appears under [File Transfer] in [System Settings].
• If the board was not installed properly, repeat the procedure from step 3. If it cannot be installed
correctly even after reattempting installation, contact your sales or service representative.
117
4. Installing Options
Installing the SD Card (Optional)
This section describes how to install the optional SD card.
• Do not remove any covers or screws other than those explicitly mentioned in this manual. Inside
this machine are high voltage components that are an electric shock hazard and laser
components that could cause blindness. Contact your sales or service representative if any of the
machine's internal components require maintenance, adjustment, or repair.
• Do not attempt to disassemble or modify this machine. Doing so risks burns and electric shock.
Note again that exposure to the laser components inside this machine risks blindness.
• Keep SD cards out of reach of children. If a child swallows an SD card, consult a doctor
immediately.
• Do not subject the card to physical shocks.
• If you want to use two or more SD cards that can be inserted in the same slot, contact your sales
and service representative.
1. Check the contents of the package.
BFL308S
2. Turn off the main power switch, and then unplug the machine's power cord from the wall
outlet.
118
Installing the SD Card (Optional)
3. Loosen and remove the screw, and then carefully remove the cover of the SD card slot.
2
1
CFE031
4. If an SD card is already inserted, push and release the SD card, pinch it, and then pull it
carefully out of the slot.
CFE047
5. Carefully push in the SD card (notched corner downward and leading), until it clicks into
place.
CFE032
Insert the SD card in the lower slot.
119
4. Installing Options
6. Reattach the cover over the SD card. Fasten the screw to secure the cover.
1
3
2
CFE033
• Do not touch the card while the machine is in use. It may come loose, even if pushed only slightly.
The slot cover must be reattached.
• You can confirm that the browser unit was installed correctly by checking the User Tools menu. For
details, see the manuals provided with the browser unit.
• If the card is not installed properly, repeat the procedure from the beginning. If it cannot be
installed correctly even after reattempting installation, contact your sales or service representative.
120
5. Adding Paper
This chapter describes recommended paper sizes and types, and how to load paper into the paper tray.
Loading Paper
This section describes how to load paper into the paper tray.
• When loading paper, take care not to trap or injure your fingers.
• Do not stack paper over the limit mark.
• Straighten curled or warped paper before loading.
• For details about paper sizes and types, see “Recommended Paper Sizes and Types”.
• To load paper in the bypass tray, see “Copying from the Bypass Tray”, Copy and Document
Server Reference.
• page 136 "Recommended Paper Sizes and Types"
Loading Paper into Trays 1 - 4
This section describes how to load paper into trays 1 4.
Every paper tray is loaded in the same way.
In the following example procedure, paper is loaded in tray 1.
• If a paper tray is pushed vigorously when putting it back into place, the position of the tray's side
fences may slip out of place.
• During copying or printing, do not open or close the covers or bypass tray, or pull out or push in
the paper tray.
121
5. Adding Paper
1. Lift and pull tray 1 carefully, and then pull it out with both hands.
CFF032
Place the tray on a flat surface.
2. Fan the paper before loading paper in the tray.
CBK254
3. Square the paper and load it print side down.
Do not stack paper over the limit mark.
CEC006
122
Loading Paper
4. Hold the tray with both hands, slide it along the rails of the machine, and then push it
straight in.
CFE070
• Various sizes of paper can be loaded in trays 1 4 by adjusting the positions of side fences and
end fence. For details, see “Changing the Paper Size in Trays 1 4”.
• You can load envelopes in trays 1 4. For details about how to load envelopes, see “Changing
the Paper Size in Trays 1 4”. For details about various details about and recommendations
concerning envelopes, see “Envelopes”.
• Each tray can hold up to 550 sheets.
• page 125 "Changing the Paper Size in Trays 1 - 4"
• page 141 "Envelopes"
Loading Orientation-Fixed Paper or Two-Sided Paper
This section describes loading paper that has a specified orientation and printing side (such as
letterhead paper).
Orientation-fixed (top to bottom) or two-sided paper (for example, letterhead paper, punched paper, or
copied paper) might not print correctly, depending on how the originals and paper are placed. Set
[Letterhead Setting] to [Yes] in [Input / Output] under [Copier / Document Server Features], and then
place the original and paper as shown below. For details about Letterhead Setting, see “Copier and
Document Server Features”, Copy and Document Server Reference. For details about printing with the
printer function, see “Printing on Orientation-Fixed or Two-Sided Paper”, Printer Reference.
123
5. Adding Paper
Original Orientation
Exposure glass
ADF
• Copy
• Scanner
Paper Orientation
Paper tray
Paper orientation
Copy mode
Trays 1 - 4
Bypass tray
One sided
Two sided
: Shows to load the
paper print side up.
: Shows to load the
paper print side down.
CFE063
124
Changing the Paper Size
Changing the Paper Size
This section describes how to change the paper size.
• When loading paper, take care not to trap or injure your fingers.
• Do not stack paper over the limit mark.
• Straighten curled or warped paper before loading.
• For details about paper sizes and types, see “Recommended Paper Sizes and Types”.
• page 136 "Recommended Paper Sizes and Types"
Changing the Paper Size in Trays 1 - 4
This section describes how to change the paper size in trays 1 4.
The paper size setting is changed in the same way for trays 1 4.
In the following example procedure, the paper size setting for tray 1 is changed.
• If a paper tray is pushed vigorously when putting it back into place, the position of the tray's side
fences may slip out of place.
• During copying or printing, do not open or close the covers or bypass tray, or pull out or push in
the paper tray.
Various sizes of paper can be loaded in trays 1 4 by adjusting the positions of the side fences and end
fence.
125
5. Adding Paper
1. Lift and pull tray 1 carefully, and then pull it out with both hands.
CFF032
Place the tray on a flat surface.
2. Remove paper if loaded.
3. While pressing down the release lever, slide the side fences outward.
CFE011
4. While pressing down the release lever, slide the end fence until it is aligned with the size
of paper you want to load.
CEC011
126
Changing the Paper Size
5. Fan the paper before loading paper in the tray.
CBK254
6. Square the paper and load it print side down.
Do not stack paper over the limit mark.
CEC006
7. Align the side fences gently against the paper you loaded.
CFE012
127
5. Adding Paper
8. Hold the tray with both hands, slide it along the rails of the machine, and then push it
straight in.
CFE070
9. Check the paper size on the display.
• When loading a low number of sheets, be sure not to squeeze the side fences in too tightly. If the
paper bows, it might not feed in properly.
• You can load envelopes in trays 1 4. Set envelopes so that their flaps are closed.
CFE016
• When loading envelopes in trays 1 4 or the bypass tray, open the rear cover, and then raise the
envelope lever.
CFE050
128
Changing the Paper Size
• For details about various details about and recommendations concerning envelopes, see
“Envelopes”.
• If you load a paper size that is not selected automatically, you will need to specify the paper size
with the control panel. For details, see “Changing to a Size That Is Not Automatically Detected”.
• To load 81/2 × 13 or 81/2 × 14 , extend the tray.
• Be sure to select the paper type with System Settings. If you do not, misfeeds might occur. For
details about Paper Type, see “Tray Paper Settings”, Network and System Settings Reference.
• page 130 "Changing to a Size That Is Not Automatically Detected"
• page 141 "Envelopes"
Changing to 81/2 × 13 or 81/2 × 14 size paper
When loading 81/2 × 13 or 81/2 × 14 size paper in trays 1 4, extend the tray as follows.
1. Lift and pull tray 1 carefully, and then pull it out with both hands.
Place the tray on a flat surface.
2. Slide the catches inwards to unlock the tray.
CEC007
3. Slide the tray until it stops.
CEC008
129
5. Adding Paper
4. Return the catches to their original positions.
CEC009
5. Square the paper and load it print side down.
Do not stack paper over the limit mark.
CFE015
6. Align the end and side fences gently against the paper you loaded.
7. Hold the tray with both hands, slide it along the rails of the machine, and then push it
straight in.
Changing to a Size That Is Not Automatically Detected
If you load a paper size that is not selected automatically, you need to specify the paper size with the
control panel. This section describes how to specify such paper.
130
Changing the Paper Size
1. Press the [User Tools/Counter] key.
CCS003
2. Press [System Settings].
3. Press the [Tray Paper Settings] tab.
131
5. Adding Paper
4. Select the tray for which you want to change the paper settings.
5. Select the loaded paper size and feed direction, and then press [OK].
The set paper size and feed direction is displayed.
6. Press the [User Tools/Counter] key.
The initial display is shown.
• For details about paper sizes selected automatically, see “Recommended Paper Sizes and Types”.
• If you want to print on paper that is selected automatically after printing on a paper size that is not
selected automatically, you must return the setting to “Auto Detect”. Reload the paper, and select
“Auto Detect” in step 5. The setting is returned to “Auto Detect”.
132
Changing the Paper Size
• page 136 "Recommended Paper Sizes and Types"
133
5. Adding Paper
Changing Paper Thickness Settings
Select [Plain Paper 1] or [Plain Paper 2] depending on the type of plain paper.
If in System Settings, [Tray Paper Settings], you set “Paper Thickness” to [Plain Paper] for each tray's
[Paper Type], you must then select [Maintenance], [Plain Paper Setting] and specify either [Plain Paper
1] or [Plain Paper 2], depending on the thickness of the loaded paper.
The default setting is Plain Paper 2.
• Select [Plain Paper 1] when paper weight is between 60 69 g/m2 (16 18 lb. Bond).
• Select [Plain Paper 2] when paper weight is between 70 90 g/m2 (19 24 lb. Bond).
1. Press the [User Tools/Counter] key.
CCS003
2. Press [Maintenance].
134
Changing Paper Thickness Settings
3. Press [Plain Paper Setting].
4. Select the plain paper type for each tray depending on the paper to be set and press
[OK].
5. Press [Exit].
6. Press [Exit].
• In System Settings, [Tray Paper Settings], for each tray's [Paper Type] you can specify “Paper
Thickness”. For details about paper thickness, see “Recommended Paper Sizes and Types”.
• page 136 "Recommended Paper Sizes and Types"
135
5. Adding Paper
Recommended Paper Sizes and Types
This section describes recommended paper sizes and types.
• Do not use paper designed for inkjet printers, as these may stick to the fusing unit and cause a
misfeed.
• If you use damp or curled paper, a staple clogging or paper jam may occur.
Tray 1
Paper type and weight
52 220 g/m2
14 lb. Bond 80 lb. Cover
Thin Paper Thick Paper 3
Paper size
Paper sizes that can be detected
automatically:
Paper capacity *1
550 sheets
A4 , A5 , B5 JIS , 81/2 × 14 ,
81/2 × 11
A4 , B5 JIS , 81/2 × 14 , 81/2 ×
11 , 51/2 × 81/2
52 220 g/m2
14 lb. Bond 80 lb. Cover
Thin Paper Thick Paper 3
Paper sizes that you need to
specify*3:
550 sheets
A5 , A6 , B6 JIS , 81/2 × 13 ,
81/4 × 13 , 8 × 13 , 71/4 ×
101/2 , 51/2 × 81/2
, 16K
A5
, A6 , B6 JIS , 81/2 × 13 ,
81/4 × 13 , 8 × 13 , 71/4 ×
101/2 , 51/2 × 81/2 , 16K
52 220 g/m2
Paper sizes that you need to enter*2:
14 lb. Bond 80 lb. Cover
Thin Paper Thick Paper 3
Vertical: 140.0 356.0 mm
Horizontal: 98.0 216.0 mm
Vertical: 5.52 14.01 inches
Horizontal: 3.86 8.50 inches
136
550 sheets
Recommended Paper Sizes and Types
Paper type and weight
Envelopes *7
Paper size
Sizes of envelopes that you need to
specify*3:
Paper capacity *1
10 sheets
41/8 × 91/2 , 37/8 × 71/2 , C5
Env , C6 Env , DL Env
Trays 2 4
Paper type and weight
52 220 g/m2
14 lb. Bond 80 lb. Cover
Thin Paper Thick Paper 3
Paper size
Paper sizes that can be detected
automatically:
Paper capacity *1
550 sheets
A4 , A5 , B5 JIS , 81/2 × 14 ,
81/2 × 11
A4 , B5 JIS , 81/2 × 14 , 81/2 ×
11 , 51/2 × 81/2
52 220 g/m2
14 lb. Bond 80 lb. Cover
Thin Paper Thick Paper 3
Paper sizes that you need to
specify*3:
550 sheets
B6 JIS , 81/2 × 13 , 81/4 × 13 ,
8 × 13 , 71/4 × 101/2 , 51/2 ×
81/2 , 16K
A5 , B6 JIS , 81/2 × 13 , 81/4 ×
13 , 8 × 13 , 71/4 × 101/2 ,
16K
52 220 g/m2
Paper sizes that you need to enter*2:
550 sheets
14 lb. Bond 80 lb. Cover
Thin Paper Thick Paper 3
Vertical: 160.0 356.0 mm
Horizontal: 98.0 216.0 mm
Vertical: 6.30 14.01 inches
Horizontal: 3.86 8.50 inches
137
5. Adding Paper
Paper type and weight
Envelopes *7
Paper size
Sizes of envelopes that you need to
specify*3:
Paper capacity *1
10 sheets
41/8 × 91/2 , 37/8 × 71/2 , C5
Env , C6 Env , DL Env
Bypass tray
Paper type and weight
52 220 g/m2
14 lb. Bond 80 lb. Cover
Paper size
Paper sizes that you need to
specify*4:
Thin Paper Thick Paper 3
A4 , A5
, A6 , B5 JIS , B6 JIS
1
, 8 /2 × 14 , 81/2 × 13 , 81/2
× 11 , 81/4 × 13 , 8 × 13 , 71/4
× 101/2 , 51/2 × 81/2
, 16K
52 220 g/m2
Paper sizes that you need to enter*5:
Paper capacity *9
100 sheets
100 sheets
14 lb. Bond 80 lb. Cover
Thin Paper Thick Paper 3
Vertical: 140.0 900.0 mm
Horizontal: 64.0 216.0 mm
Vertical: 5.52 35.43 inches
Horizontal: 2.52 8.50 inches
OHP transparencies *6
A4
100 sheets*8
Label paper (adhesive
labels)
A4
1 sheet
Envelopes *7
Paper sizes that you need to
specify*4:
10 sheets
41/8 × 91/2 , 37/8 × 71/2 , C5
Env , C6 Env , DL Env
*1 When loading paper, make sure the stack height does not exceed the limit mark of the paper tray.
*2 Enter the paper size under Tray Paper Size: Tray 1 4 in System Settings. See “System Settings”, Network
and System Settings Reference.
*3 Select the paper size under Tray Paper Size: Tray 1 4 in System Settings. See “System Settings”, Network
and System Settings Reference.
138
Recommended Paper Sizes and Types
*4 Select the paper size. For details, see “Copying onto Regular Size Paper”, Copy and Document Server
Reference, or “Setting the Paper Size Using the Control Panel”, Printer Reference.
*5 Enter the paper size using the number keys. For details, see “Copying onto Custom Size Paper”, Copy and
Document Server Reference, or “Setting Custom Size Paper Using the Control Panel”, Printer Reference.
*6 Select [OHP (Transparency)] for paper type. For details, see “Copying onto OHP Transparencies or Thin
Paper”, Copy and Document Server Reference, or “Setting Thick Paper, Thin Paper or OHP Transparencies
Using the Control Panel”, Printer Reference.
*7 For details about loading envelopes, see “Envelopes”.
*8 It is recommended to place one sheet at a time when a misfeed occur.
*9 Load only as much paper as can be held between the paper guides on the bypass tray.
Paper Thickness
Paper Thickness *1
Paper weight
Thin Paper
52 59 g/m2 (14 16 lb. Bond)
Plain Paper 1
60 69 g/m2 (16 18 lb. Bond)
Plain Paper 2
70 90 g/m2 (19 24 lb. Bond)
Middle Thick
91 105 g/m2 (24 28 lb. Bond)
Thick Paper 1
106 130 g/m2 (28 35 lb. Bond)
Thick Paper 2
131 163 g/m2 (35 lb. Bond 90 lb. Index)
Thick Paper 3
164 220 g/m2 (90 lb. Index 80 lb. Cover)
*1 Print quality will decrease if the paper you are using is close to the minimum or maximum weight.
Change the paper weight setting to thinner or thicker.
• When loading paper in trays 1 4, place the print side down. When loading paper in the bypass
tray, place the print side up.
• When loading thick paper, see “Thick Paper”.
• When using translucent paper or label paper, make sure to select the appropriate paper type
under Paper Type: Bypass Tray. See “System Settings”, Network and System Settings Reference.
• Certain types of paper produce noise when delivered. This noise does not indicate a problem and
print quality is unaffected. (OHP transparencies can produce noise when delivered.)
• When you load OHP transparencies, check the front and back of the sheets, and place them
correctly, or a misfeed might occur. For details, see Copy and Document Server Reference, and
Printer Reference.
• When you use OHP transparencies, fan them for each use.
139
5. Adding Paper
• We recommend that you use a 4000 ANSI lumen or brighter overhead projector to project OHP
transparencies.
• When copying or printing onto OHP transparencies or thick paper, the copy/print speed is slower
than usual.
• Flatten out curled sheets before loading them.
• If multiple sheet feeding occurs, load sheets one by one.
• When copying or printing onto letterhead paper, the paper placing orientation is different
depending on which function you are using. See “Loading Orientation-Fixed Paper or Two-Sided
Paper”.
• If you load paper of the same size in two or more trays, the machine automatically shifts to the
other tray when the first tray in use runs out of paper. This function is called Auto Tray Switching.
(However, if the paper type of one tray is recycled or special paper, the settings of the other trays
must be the same for the Auto Tray Switching function to work.) This saves interrupting a copy run to
replenish paper when making a large number of copies. You can set the paper type of trays 1 4
under Paper Type: Tray 1 4. See “System Settings”, Network and System Settings Reference. For
the setting procedure of the Auto Tray Switching function, see “Copier and Document Server
Features”, Copy and Document Server Reference.
• page 123 "Loading Orientation-Fixed Paper or Two-Sided Paper"
• page 141 "Envelopes"
• page 143 "Thick Paper"
140
Envelopes
Envelopes
This section gives you various details about and recommendations concerning envelopes.
• Misfeeds might occur depending on the length and shape of the flaps.
• Do not use window envelopes.
When loading envelopes in trays 1 - 4 or the bypass tray, open the rear cover, and then raise the
envelope lever.
CFE050
Load envelopes in the portrait ( ) orientation and print side down with their flaps closed and facing the
left side of the machine.
• Trays 1 4
CFE016
• Bypass tray
141
5. Adding Paper
CFG016
When copying onto envelopes, see “Copying onto Envelopes from Trays 1 - 4” or “Copying onto
Envelopes from the Bypass Tray”, Copy and Document Server Reference.
When printing onto envelopes, see “Setting Envelopes Using the Control Panel”, Printer Reference.
The following sizes can be used: 41/8 × 91/2 , 37/8 × 71/2 , C5 Env , C6 Env , DL Env
• Load only one size and type of envelope at a time.
• Before loading envelopes, press down on them to remove any air from inside, flatten out all four
edges. If they are bent or curled, flatten their leading edges (the edge going into the machine) by
running a pencil or ruler across them.
• Fan the envelopes before loading them to separate them and prevent the glue on them from
causing them to stick together.
• Some kinds of envelope might cause misfeeds, wrinkles or print poorly.
• Print quality on envelopes may be uneven if parts of an envelope have differing thicknesses. Print
one or two envelopes to check print quality.
• To get better print quality, it is recommended that you set the leading-edge print margin to at least
15 mm (0.6 inches) and the other margins to at least 10 mm (0.4 inches) each.
• High temperature and high humidity conditions can reduce print quality and cause envelopes to
become creased.
142
Thick Paper
Thick Paper
This section gives you various details about and recommendations concerning thick paper.
When loading thick paper of 106 220 g/m2 (28 lb. Bond 80 lb. Cover) in trays 1 4 or the bypass
tray, follow the recommendations below to prevent misfeeds and loss of image quality.
• Store all your paper in the same environment - a room where the temperature is 20 25 °C (68
77 °F) and the humidity is 30 65%.
• When loading thick sheets in trays 1 4, be sure to load at least 20 sheets. Also, be sure to
position the side fences flush against the paper stack.
• Smooth out any curls in the paper before loading it.
• Jams and misfeeds can occur when printing on thick glossy sheets. To prevent such problems, be
sure to fan glossy sheets thoroughly before loading them. If sheets continue to become jammed or
feed in together even after they are fanned, load them one by one from the bypass tray.
• Even if thick paper is loaded as described above, normal operations and print quality might still not
be possible, depending on the paper type.
• Prints might have prominent vertical creases.
• Prints might be noticeably curled. Flatten out prints if they are creased or curled.
143
5. Adding Paper
Unusable Paper
This section describes paper unusable on this machine.
• Do not attempt to print on stapled sheets, aluminum foil, carbon paper, or any kind of
conductive paper. Doing so risks fire.
• To prevent faults, do not use any of the following kinds of treated paper:
• Paper for inkjet printers
• Thermal fax paper
• Art paper
• Aluminum foil
• Carbon paper
• Conductive paper
• Paper with perforated lines
• Hemmed-edge paper
• OHP transparencies for color copying
• Window envelopes
• Faults can occur if you copy or print onto sides that are already printed. Take care to copy or print
onto unprinted sides only.
• To prevent misfeeds, do not use the following kinds of paper:
• Bent, folded, or creased paper
• Perforated paper
• Slippery paper
• Torn paper
• Rough paper
• Thin paper with little stiffness
• Paper with a dusty surface
• Even supported types of paper may cause paper jams or malfunctions if the paper is not in good
condition.
• If you copy or print onto rough grain paper, the output image might be blurred.
144
Unusable Paper
• Do not load sheets that have already been printed onto by another machine. (Sheets can become
jammed if they have been improperly stored.)
145
5. Adding Paper
Paper Storage
This section describes how to store paper.
• When storing paper, the following precautions should always be followed:
• Do not store paper where it will be exposed to direct sunlight.
• Avoid storing paper in humid areas (humidity: 70% or less).
• Store on a flat surface.
• Do not store paper vertically.
• Under high temperature and humidity conditions, or low temperature and humidity conditions, store
paper in plastic bags.
146
6. Replacing the Consumables
This chapter describes how to replace the consumables.
Handling the Print Cartridge
This section describes how to replace and store the print cartridge.
• If metal objects, or water or other fluids fall inside this machine, you must turn off its power
immediately. After turning off the power, be sure to disconnect the power cord plug from the
wall outlet. Then contact your service representative and report the problem. Do not use the
machine. Doing so could result in fire or electric shock.
• Do not incinerate toner (new or used) or toner containers. Doing so risks burns. Toner will ignite
on contact with naked flame.
• Do not store toner (new or used) or toner containers anywhere near naked flames. Doing so
risks fire and burns. Toner will ignite on contact with naked flame.
• Do not incinerate spilled toner or used toner. Toner dust might ignite when exposed to an open
flame.
• Do not crush or squeeze toner containers. Doing so can cause toner spillage, possibly resulting
in dirtying of skin, clothing, and floor, and accidental ingestion.
• Store toner (new or used), toner containers, and components that have been in contact with
toner out of reach of children.
• If toner or used toner is inhaled, gargle with plenty of water and move into a fresh air
environment. Consult a doctor if necessary.
• If toner or used toner gets into your eyes, flush immediately with large amounts of water. Consult
a doctor if necessary.
• If toner or used toner is swallowed, dilute by drinking a large amount of water. Consult a doctor
if necessary.
• When removing jammed paper or replacing toner, avoid getting toner (new or used) on your
clothing. If toner comes into contact with your clothing, wash the stained area with cold water.
Hot water will set the toner into the fabric and make removing the stain impossible.
147
6. Replacing the Consumables
• When removing jammed paper or replacing toner, avoid getting toner (new or used) on your
skin. If toner comes into contact with your skin, wash the affected area thoroughly with soap and
water.
• The print cartridge might need to be replaced even if there is toner remaining in it. This is due to
depletion or wear of other components.
• Do not shake or shock the print cartridge.
• When removing print cartridge, be careful not to drop it.
• Fault may occur if you use the print cartridge other than the recommended type.
• When replacing the print cartridge, do not turn off the operation switch. If you do, settings will be
lost.
• Store the print cartridge where it will not be exposed to direct sunlight, temperatures above 35 °C
(95 °F), or high humidity.
• Store the print cartridge on a flat surface.
• If "Replacement of Print Cartridge is now necessary." appears, replace the print cartridge.
• If "Replacement of Print Cartridge will soon be necessary." appears, have a replacement print
cartridge at hand.
• You can check the name of the required print cartridge and the replacement procedure using the
"Replace Print Cartridge" screen.
• Press [System Status] to check contact number where you can order supplies. See “Checking
Machine Status and Settings”, Troubleshooting.
Replacing the Print Cartridge
This section describes how to replace the print cartridge.
148
Handling the Print Cartridge
1. Push the button on the right side of the machine to open the front cover.
2
1
CFF004
2. Hold the print cartridge's front handle to lift and pull it out.
2
1
CFF008
3. Take the new print cartridge out of the box.
4. Hold the grips of the cartridge, and then insert it into the machine until it stops.
CFE071
5. Close the front cover.
Sending Faxes or Scanned Documents When Toner Has Run Out
When the machine has run out of toner, the indicator on the display lights. Note that even if there is no
toner left, you can still send faxes or scanned documents.
149
6. Replacing the Consumables
• If number of communications executed after the toner has run out and not listed in the automatically
output Journal exceeds 200, communication is not possible.
1. Make sure the machine is in facsimile or scanner mode.
2. Press [Exit], and then perform transmission operation.
The error message disappears.
• Any reports are not printed.
• If the fax or scanner screen does not appear in step 1, press the [Facsimile] key or the [Scanner]
key.
Used Print Cartridge
This section describes what to do with used print cartridge.
A print cartridge cannot be re-used.
Bring the stored used print cartridge to your sales representative or service representative for recycling
through our recycling system.
150
Adding Staples
Adding Staples
This section describes what to do when staples need replacing.
• Stapling failures or jams may occur if you use a staple cartridge other than that recommended.
1. Open the finisher cover on the right side of the machine.
CFF035
2. Hold the lever, and then gently pull out the cartridge.
CFF036
3. Hold both sides of the empty refill, pull up, and remove it.
CCS022
151
6. Replacing the Consumables
4. Push the new refill into the cartridge until it clicks.
CCS023
5. Hold the lever, and then push in the cartridge until it clicks.
CFF037
6. Close the finisher cover.
• If you cannot remove the refill, there are staples remaining. Use all the staples, and do not add
more.
152
Replacing Machine Parts
Replacing Machine Parts
Replace the paper feed roller, transfer roller, and fusing unit when they are worn.
Refer to the maintenance guide provided with the new items for the replacement maintenance kit.
• Do not remove any covers or screws other than those explicitly mentioned in this manual. Inside
this machine are high voltage components that are an electric shock hazard and laser
components that could cause blindness. Contact your sales or service representative if any of the
machine's internal components require maintenance, adjustment, or repair.
• Do not attempt to disassemble or modify this machine. Doing so risks burns and electric shock.
Note again that exposure to the laser components inside this machine risks blindness.
• Wait at least one hour after power off before replacing parts. Not allowing the machine to
cool may result in burns.
• The inside of the machine could be very hot. Do not touch the parts with a label indicating the
“hot surface”. Otherwise, an injury might occur.
The maintenance kit contains parts for maintaining the machine.
If the message "Replacement Required: Maintenance Kit" appears, replace the maintenance kit.
When the message "Replacement Required Soon: Maintenance Kit" appears, the maintenance kit
should be replaced soon. Prepare a new maintenance kit.
• You can change the timing that the message appears prompting the user to replace supplies. For
details, see “Changing the Timing for Prompting Users to Prepare Replacement Supplies”.
• page 180 "Changing the Timing for Prompting Users to Prepare Replacement Supplies"
153
6. Replacing the Consumables
154
7. Entering Text
This chapter describes how to enter characters.
Entering Text
This section explains how to enter text.
When you enter a character, it appears at the position of the cursor. If there is a character already at the
cursor position, the entered character appears before that.
Available Characters
This section explains which characters are available.
You can enter the following characters:
• Alphabetic characters
(mainly Europe and Asia)
•
Symbols
• Numerals
0123456789
Keys
(mainly Europe and Asia)
This section explains the entry screen and the keys displayed on it.
You can change the entry screen using the keys below.
155
7. Entering Text
CFE065
• When entering uppercase or lowercase letters continuously, use [Shift Lock] to lock the case.
Keys
(mainly North America)
This section explains the entry screen and the keys displayed on it.
You can change the entry screen using the keys below.
156
Entering Text
CFE066
• When entering uppercase or lowercase letters continuously, use [Shift Lock] to lock the case.
How to Enter Text
This section explains text entry more specifically.
Entering letters
This section explains how to enter letters.
1. Press [Shift] to switch between uppercase and lowercase.
2. Press the letters you want to enter.
Entering symbols
(mainly Europe and Asia)
This section explains how to enter symbols.
157
7. Entering Text
1. Press [Symbol Entry] to enter into the Symbol Entry mode.
2. Press the symbols you want to enter.
• Depending on the machine type, this function may not be available.
Entering numbers
This section explains how to enter numbers.
1. Press numbers you want to enter.
• You can also use the number keys to enter numbers, regardless of mode.
Deleting characters
This section explains how to delete characters.
1. Press [Backspace] or [Delete All] to delete characters.
Adding user text
You can select and use a User Text that is registered in [Program / Change / Delete User Text].
158
Entering Text
For the registration procedure under Program / Change / Delete User Text, see “System Settings”,
Network and System Settings Reference.
1. Press [User Text].
2. Select the User Text you want to use.
159
7. Entering Text
160
8. On-screen Operating Instructions
This chapter describes the on-screen operating instructions of this machine. The on-screen operating
instructions are included in the supplied manual CD-ROMs.
Formats of the Operating Instructions
The operating instructions of this machine are provided in the following formats:
• Printed manuals
• HTML manuals
• PDF manuals
The printed and electronic versions of a manual have the same contents. For details about the contents of
each manual, see “Manuals for This Machine”. The various manuals are available in different formats.
For details about availability, see “Manuals List”.
• page 7 "Manuals for This Machine"
• page 10 "Manuals List"
161
8. On-screen Operating Instructions
Reading the HTML Manuals on the CD-ROMs
This section describes how to read the HTML manuals on the supplied manual CD-ROMs.
1. Insert the CD-ROM in the CD-ROM drive of your computer.
2. Select a language and a product, and then click [OK].
3. Click [Read HTML manuals].
4. Click the title of manual you want to read.
The browser opens, and then the manual appears.
• Recommended browsers:
• Internet Explorer 6 or later
• Firefox 3.5 or later
• Safari 4.0 or later
• Non-recommended browsers can display the simplified manual only.
• If you are using an earlier or non-recommended browser and the simplified version of the
documentation does not appear automatically, open index.htm, which can be found in the
following folder on the CD-ROM: MANUAL_HTML\LANG\(language)\(manual)\unv
• Depending on your computer's operating environment, the HTML manual you select will be one of
the following:
• Standard version
• Simplified version
• If you want to read the HTML manuals on a Macintosh, insert the CD-ROM in the CD-ROM drive,
and then click [Read HTML manuals].
• If JavaScript is disabled or unavailable in your browser, you will not be able to search or use
certain buttons in the HTML documentation.
162
Installing and Opening the HTML Manuals
Installing and Opening the HTML Manuals
This section describes how to install and open the HTML manuals on your computer.
For your convenience, we recommend you install these manuals on your computer.
1. Insert the CD-ROM in the CD-ROM drive of your computer.
2. Select a language and a product, and then click [OK].
3. Click [Install manuals].
4. Install the HTML manuals by following the on-screen instructions.
5. When the installation is complete, click [Finish].
6. Click [Exit].
7. Open the HTML manuals that you installed.
To open the manuals from an icon, double-click the icon on the desktop. To open the manuals from
the [Start] menu, point to [All Programs], and then [Product Name].
8. Click the title of the manual you want to read.
• You need administrator permissions to install the manuals. Log in as an Administrators group
member.
• The system requirements for installing the manuals are as follows:
• Operating system: Windows XP/Vista/7, Windows Server 2003/2003 R2/2008/2008
R2
• Minimum display resolution: 800 × 600 pixels
• Hyperlinks might not work and referenced sections might not appear unless all the HTML manuals
have been installed. To display referenced sections, be sure to install all the HTML manuals.
• If you cannot install a manual, copy the “MANUAL_HTML” folder to your computer's hard drive,
and then run “Setup.exe”.
163
8. On-screen Operating Instructions
• To delete an installed manual, on the [Start] menu, click [All Programs], then [Product Name], and
then uninstall the data.
• Depending on the settings made during installation, menu folder names may differ.
164
Reading the PDF Manuals on the CD-ROM
Reading the PDF Manuals on the CD-ROM
This section describes how to read the PDF manuals on the supplied manual CD-ROM.
File path
The manuals are included in the following folder on the CD-ROM:
MANUAL_PDF\(language)
1. Insert the CD-ROM in the CD-ROM drive of your computer.
2. Select a language and a product, and then click [OK].
3. Click [Read PDF manuals].
4. Click the title of the manual you want to read.
• To view the PDF manuals, you need to have Adobe Acrobat Reader/Adobe Reader installed on
your computer.
• If you want to read the PDF manuals on a Macintosh, insert the CD-ROM in the CD-ROM drive,
and then click [Read PDF manuals].
165
8. On-screen Operating Instructions
166
9. Remarks
This chapter describes how to maintain and operate the machine.
Dos and Don'ts
The following items should be followed during use of this machine.
• Do not use flammable sprays or solvents in the vicinity of this machine. Also, avoid placing these
items in the vicinity of this machine. Doing so could result in fire or electric shock.
• If the machine emits smoke or odours, or if it behaves unusually, you must turn off its power
immediately. After turning off the power, be sure to disconnect the power cord plug from the
wall outlet. Then contact your service representative and report the problem. Do not use the
machine. Doing so could result in fire or electric shock.
• If metal objects, or water or other fluids fall inside this machine, you must turn off its power
immediately. After turning off the power, be sure to disconnect the power cord plug from the
wall outlet. Then contact your service representative and report the problem. Do not use the
machine. Doing so could result in fire or electric shock.
• Do not touch this machine if a lightning strike occurs in the immediate vicinity. Doing so could
result in electric shock.
• Do not place heavy objects on the machine. Doing so can cause the machine to topple over,
possibly resulting in injury.
• Make sure the room where you are using the machine is well ventilated and spacious. Good
ventilation is especially important when the machine is used heavily.
• Do not obstruct the machine's vents. Doing so risks fire caused by overheated internal
components.
• Do not look into the lamp. It can damage your eyes.
• Do not turn the power off while the operation switch indicator is lit or blinking. Doing so may
damage the hard disk.
• Before unplugging the power cord or turning off the main power switch, make sure remaining
memory space is at 100%, as shown on the screen. See “Turning On/Off the Power”.
167
9. Remarks
• After scanning originals continuously, the exposure glass may become warm - this is not a
malfunction.
• The area around the ventilation holes might feel warm. This is caused by exhaust air and is not a
malfunction.
• If the machine is moved from a cold to a warm place, condensation may form inside it. After
moving the machine, do not use it for at least an hour. The machine requires this time to adapt to its
new environment.
• The machine will malfunction if its internal temperature becomes too high. Be sure not to block the
intake and exhaust vents.
• Do not turn off the power while the machine is in operation. See “Turning On/Off the Power”.
• Do not open the covers of the machine when it is in operation. If you do, misfeeds might occur.
• Do not move or tilt the machine when the power is on.
• Do not allow small objects such as paper clips to fall into or become stuck inside the machine.
• Do not knock the machine while it is operating (for instance, do not use the machine's surfaces to
knock stacks of paper into square).
• Depending on the ambient temperature and humidity, steam may come from the exhaust vent
behind the control panel during printing. This is water vapor from the paper, not a sign of
malfunction.
• Be sure to make a note of the registered machine settings in case they are lost due to accident or
malfunction.
• The manufacturer shall not be liable for any loss or damage resulting from a failure of the machine,
loss of settings, or use of the machine.
Ventilation
When you use this machine in a confined space without good ventilation for a long time or print
large quantities, you might detect an odd smell.
This might cause the output paper to also have an odd smell.
When you detect an odd smell, regularly ventilate in order to keep the workplace comfortable.
• Set up the machine so that it does not directly ventilate towards people.
• Ventilation should be more than 30 m3/hr/person.
New machine smell
When a machine is new, it might have a unique smell. This smell will subside in about one week.
When you detect an odd smell, sufficiently ventilate and circulate the air in the room.
• page 74 "Turning On/Off the Power"
168
Moving the Machine
Moving the Machine
This section describes precautions when moving the machine.
• Be sure to locate the machine as close as possible to a wall outlet. This will allow easy
disconnection of the power cord in the event of an emergency.
• Do not place the machine on an unstable or tilted surface. If it topples over, an injury might
occur.
• Keep the machine away from salt-bearing air and corrosive gases. Also, do not install the
machine in places where chemical reactions are likely (laboratories, etc.), as doing so will
cause the machine to malfunction.
• When disconnecting the power cord from the wall outlet, always pull the plug, not the cord.
Pulling the cord can damage the power cord. Use of damaged power cords could result in fire
or electric shock.
• Unplug the power cord from the wall outlet before you move the machine. While moving the
machine, take care that the power cord is not damaged under the machine. Failing to take these
precautions could result in fire or electric shock.
• After you move the machine, use the caster fixture to fix it in place. Otherwise the machine might
move or come down to cause an injury.
• Before installing or removing options, always disconnect the power cord plugs from the wall
outlet and allow time for the main unit to fully cool. Failing to take these precautions could result
in burns.
• Be careful when moving the machine. Take the following precautions:
• Turn off the main power. For details about how to turn the main power off, see “Turning
On/Off the Power”.
• Close all covers and trays, including the front cover and bypass tray.
• Keep the machine level and carry it carefully, taking care not to jolt or tip it. Rough handling
may cause a malfunction or damage the hard disk or memory, resulting in loss of stored files.
• Protect the machine from strong shocks. Impact can damage the hard disk and cause stored
files to be lost. As a precautionary measure, files should be copied to another computer.
• The machine is a piece of precision machinery. Take care to avoid damage during transportation.
169
9. Remarks
• If paper feed units (optional) are attached, remove them from the machine and move them
separately.
• page 74 "Turning On/Off the Power"
Moving the Machine
This section describes precautions when moving the machine.
1. Be sure to check the following points:
• The power switch is turned off.
• The power cord is unplugged from the wall outlet.
• The interface cable is unplugged from the machine.
2. If any external options are attached, remove them.
See the relevant sections in this manual and reverse the steps to remove options.
3. Lift the machine by the inset grips on its sides.
At least four people are needed to lift the machine.
CFE079
4. Move the machine horizontally to the place where you want to install it.
5. If you removed options, reattach them.
For details, see the relevant sections in this manual.
• Be sure to move the machine horizontally. To prevent toner from scattering, move the machine
slowly.
170
Cleaning the Machine
Cleaning the Machine
If parts of the machine is dirty, copy clarity may be reduced or misfeed may occur. Clean them if they
are dirty.
• Do not remove any covers or screws other than those explicitly mentioned in this manual. Inside
this machine are high voltage components that are an electric shock hazard and laser
components that could cause blindness. Contact your sales or service representative if any of the
machine's internal components require maintenance, adjustment, or repair.
• Do not attempt to disassemble or modify this machine. Doing so risks burns and electric shock.
Note again that exposure to the laser components inside this machine risks blindness.
• When disconnecting the power cord from the wall outlet, always pull the plug, not the cord.
Pulling the cord can damage the power cord. Use of damaged power cords could result in fire
or electric shock.
• When performing maintenance on the machine, always disconnect the power cord from the
wall outlet.
• The inside of the machine could be very hot. Do not touch the parts with a label indicating the
“hot surface”. Otherwise, an injury might occur.
• Do not pull out the paper tray forcefully. If you do, the tray might fall and cause an injury.
• Do not use chemical cleaners or organic solvents, such as thinner or benzene. If such substances
get inside the machine or melt plastic parts, a failure might occur.
Wipe the machine with a soft, dry cloth. If this does not remove the dirt, wipe the machine with a damp
and tightly wrung cloth. If a damp cloth still does not remove the dirt, try using a mild detergent. Wipe
the machine with a dry cloth to remove the moisture, after using a damp cloth.
Cleaning the Friction Pad and Paper Feed Roller
This section describes how to clean the friction pad and paper feed roller.
If the friction pad or paper feed roller is dirty, a multiple sheet feeding or misfeed might occur. In this
case, clean them.
The following example uses tray 1 as an example. The same procedure can be used for trays 2 4.
1. Turn off the main power switch, and then unplug the power plug.
171
9. Remarks
2. Remove all the cables from the machine.
3. Lift and pull tray 1 carefully, and then pull it out with both hands.
CFF032
Place the tray on a flat surface.
4. Remove paper if loaded.
5. Wipe the friction pads with a soft damp cloth. After that, wipe it with a dry cloth to
remove the moisture.
CEC041
6. Wipe the rubber part of the roller with a soft damp cloth. After that, wipe it with a dry
cloth to remove the moisture.
CFE051
7. Reload the removed paper into the tray.
172
Cleaning the Machine
8. Hold the tray with both hands, slide it along the rails of the machine, and then push it
straight in.
CFE070
9. Insert the power plug into the wall outlet securely.
10. Connect all the cables that were removed.
11. Turn on the main power.
• If a misfeed or multiple sheet feeding occur after cleaning the friction pad or paper feed roller,
contact your sales or service representative.
Cleaning the Registration Roller
This section describes how to clean the registration roller.
If the registration roller is dirty, a misfeed might occur or dots (caused by specks of paper stuck to the
roller) appear on printed OHP transparencies. In this case, clean the roller as follows:
• Be sure to turn off the power switch and wait for about 15 minutes before cleaning the
registration roller. Not waiting for the machine to cool down can result in a burn.
1. Turn off the main power switch, and then unplug the power plug.
173
9. Remarks
2. Push the button on the right side of the machine to open the front cover.
2
1
CFF004
3. Hold the print cartridge's front handle to lift and pull it out.
2
1
CFF008
4. Wipe around the metallic registration roller by turning with a soft damp cloth. After that,
wipe it with a dry cloth to remove the moisture.
CEC040
174
Cleaning the Machine
5. Hold the grips of the cartridge, and then insert it into the machine until it stops.
CFE071
6. Close the front cover.
CFF007
Cleaning the Exposure Glass
This section describes how to clean the exposure glass and the scanning glass.
1. Wipe the exposure glass and the scanning glass.
1 2
CFE090
1. Scanning glass
2. Exposure glass
175
9. Remarks
Cleaning the Auto Document Feeder
This section describes how to clean the ADF.
1. Open the upper cover of the ADF.
CFF020
2. Lift the original feed unit.
CFE082
3. Wipe the paper pickup roller, paper feed roller, and friction pad with a soft damp cloth.
After that, wipe them with a dry cloth to remove the moisture.
1
2
3
CFE083
1. Paper pickup roller
2. Paper feed roller
176
Cleaning the Machine
3. Friction pad
4. Return the original feed unit to its original position.
5. Close the upper cover of the ADF.
6. Lift the ADF.
CFF024
7. Wipe the sheet and guide plate of the ADF.
1
2
CFE089
1. Guide plate
2. Sheet
8. Lower the ADF.
• If a misfeed or multiple sheet feeding occur after cleaning the paper pickup roller, paper feed
roller, and friction pad, contact your sales or service representative.
Cleaning the Power Cord Plug
This section describes precautions for cleaning the power cord plug.
177
9. Remarks
• Be sure to disconnect the plug from the wall outlet and clean the prongs and the area around
the prongs at least once a year. Allowing dust to build up on the plug constitutes a fire hazard.
178
Backing Up Hard Disk Data
Backing Up Hard Disk Data
You can store data such as images and Address Book information on the machine's hard disk.
This section describes how to back up or download this data.
• If the machine's hard disk fails, data stored on it, including Address Book information might be lost.
For this reason, do not save important data on the machine's hard disk without backing it up or
downloading it. We also recommend backing up fonts, forms, and any other downloaded
resources that are stored on the hard disk. The manufacturer is not liable for damages resulting
from lost data.
• You can use SmartDeviceMonitor for Admin or Web Image Monitor to back up the machine's
Address Book. For details about SmartDeviceMonitor for Admin, see the manual for
SmartDeviceMonitor for Admin. For details about Web Image Monitor, see the Help for Web
Image Monitor.
• You can use Web Image Monitor to download data stored on the Document Server to your
computer. For details about how to do this, see “Downloading Stored Documents with Web Image
Monitor”, Copy and Document Server Reference, or the Help for Web Image Monitor.
179
9. Remarks
Changing the Timing for Prompting Users to
Prepare Replacement Supplies
The machine displays a message prompting the user to prepare a replacement print cartridge or
maintenance kit.
This section describes how to change the timing when the machine displays the message.
1. Press the [User Tools/Counter] key.
CCS003
2. Press [Maintenance].
3. Press [Print Cartridge / Maintenance Kit].
180
Changing the Timing for Prompting Users to Prepare Replacement Supplies
4. Specify the timing.
To notify sooner, press [Notify Sooner]. To notify later, press [Notify Later].
5. Press [OK].
6. Press [Exit] twice.
181
9. Remarks
Counter
You can display the total counter value used for all functions.
1. Press the [User Tools/Counter] key.
CCS003
2. Press [Counter].
3. To print a counter list, press [Print Counter List].
4. Press the [Start] key.
A counter list prints out.
5. Press [Exit] twice.
• Depending on your maintenance contract, the Counter function is not available. For details, contact
your local dealer.
182
Enquiry
Enquiry
The Enquiry function allows you to check the machine's serial number under “Machine Maintenance/
Repair”.
In addition, the following items appear after your sales or service representative enters them:
Consumables
• Telephone No. to order
• Toner
• Staple
Machine Maintenance/Repair
• Telephone No.
Sales Representative
• Telephone No.
1. Press the [User Tools/Counter] key.
CCS003
2. Press [Enquiry].
Enquiry information appears.
183
9. Remarks
3. Press [Print Enquiry List].
4. Press the [Start] key.
Enquiry information prints out.
5. Press [Exit] twice.
• Contact your sales or service representative for further information about topics covered in this
manual or to enquire about topics not covered in manuals provided with the machine.
184
Disposal
Disposal
• For environmental reasons, do not dispose of the machine or expended supply waste at
household waste collection points. Disposal can take place at an authorized dealer.
Ask your sales or service representative for information about correct disposal of this machine.
185
9. Remarks
Consumables
• Our products are engineered to meet the highest standards of quality and functionality. When
purchasing expendable supplies, we recommend using only those specified by an authorized
dealer.
Print Cartridges
Print cartridge
Black
Average printable number of pages per cartridge *1
25,000 pages
*1 The printable number of pages is based on pages that are compliant with ISO/IEC 19752 and the image
density set as the factory default. ISO/IEC 19752 is an international standard on measurement of printable
pages, set by the International Organization for Standardization.
• If print cartridges are not changed when necessary, printing will become impossible. We
recommend keeping a stock of cartridges or purchasing them soon.
• The actual number of printable pages varies depending on the image volume and density, number
of pages to be printed at a time, paper type and paper size used, and environmental conditions
such as temperature and humidity.
• Print cartridges may need to be changed sooner than indicated above due to deterioration over
the period of use.
• Print cartridges (consumables) are not covered by warranty. However, if there is a problem,
contact the store where they were purchased.
• Numbers of pages that can be printed using the print cartridge supplied with this machine are as
follows:
Name
Print Cartridge
Average printable number of pages per cartridge
6,000 pages
• This machine routinely performs cleaning and uses toner during operation to maintain quality.
186
Consumables
Staple Cartridges
Name
Number of shots
Staple cartridge
5,000 shots × 1 with cartridge
Staple Refill cartridge
Refill 5,000 shots × 2
Maintenance Kit
Name
Maintenance Kit SP 5200 (includes a
fusing unit, transfer roller, and paper
feed roller)
Average printable number of pages
120,000 pages
• The actual number of printable pages varies depending on the image volume and density, number
of pages to be printed at a time, paper type and paper size used, and environmental conditions
such as temperature and humidity.
• The maintenance kit is not covered by warranty. However, if there is problem, contact the store
where they were purchased.
187
9. Remarks
188
10. Appendix
This chapter describes the provided software and utilities CD-ROM, and specifications.
Software and Utilities Included on the CD-ROM
This section explains the software and utilities CD-ROM provided with this machine.
The following is included in the CD-ROM:
Font Manager
For installing new screen fonts, or organizing and managing fonts already in the system. For details
about Font Manager, see the manual on the CD-ROM.
Viewing the Contents of the CD-ROM
This section explains how to view the contents of the CD-ROM.
1. Insert the CD-ROM in the CD-ROM drive of your computer.
2. Select a language and a product, and then click [OK].
3. Click [Browse This CD-ROM].
Explorer starts and displays the contents of the CD-ROM.
Printer Drivers for This Machine
This section explains printer drivers for this machine.
• You can install the PCL printer drivers (PCL 5e and PCL 6), and the Adobe PostScript® printer driver
from the CD-ROM provided with this machine or download them from the manufacturer's Web site.
Printing requires installation of a printer driver for your operating system. The following drivers are
included on the CD-ROM.
PCL 5e
PCL 6
PostScript 3TM
Windows XP *1
OK
OK
OK
Windows Vista *2
OK
OK
OK
Windows 7 *3
OK
OK
OK
Windows Server 2003 *4
OK
OK
OK
Printer Language
189
10. Appendix
Printer Language
PCL 5e
PCL 6
PostScript 3TM
OK
OK
OK
Windows Server 2008 *5
Mac OS X *6
OK
*1 Microsoft Windows XP Professional Edition/Microsoft Windows XP Home Edition/Microsoft Windows XP
Media Center Edition/Microsoft Windows XP Tablet PC Edition
*2 Microsoft Windows Vista Ultimate/Microsoft Windows Vista Enterprise/Microsoft Windows Vista Business/
Microsoft Windows Vista Home Premium/Microsoft Windows Vista Home Basic
*3 Microsoft Windows 7 Home Premium/Microsoft Windows 7 Professional/Microsoft Windows 7 Ultimate/
Microsoft Windows 7 Enterprise
*4 Microsoft Windows Server 2003 Standard Edition/Microsoft Windows Server 2003 Enterprise Edition/
Microsoft Windows Server 2003 R2 Standard Edition/Microsoft Windows Server 2003 R2 Enterprise
Edition
*5 Microsoft Windows Server 2008 Standard/Microsoft Windows Server 2008 Enterprise/Microsoft
Windows Server 2008 R2 Standard/Microsoft Windows Server 2008 R2 Enterprise
*6 Mac OS X 10.2 or later (Native mode)
PCL printer drivers
Two kinds of PCL printer driver (PCL 5e and PCL 6) are included. These drivers allow your
computer to communicate with this machine via a printer language.
Adobe PostScript printer driver and PPD files
Adobe PostScript printer driver allows the computer to communicate with the printer using a printer
language. PPD files allow the printer driver to enable specific printer functions.
PPD files
PPD files allow the printer driver to enable specific printer functions.
• Some applications may require installation of the PCL 5e printer driver. In this case, you can install
PCL 5e without having to install PCL 6.
• For details, see “Preparing the Machine”, Printer Reference.
TWAIN Driver
This section describes the file path and system requirements of the TWAIN driver.
This driver is required to scan an original using a scanner. To use the machine as a network TWAIN
scanner, this driver must be installed.
File path
The driver is included in the following folder on the CD-ROM:
190
Software and Utilities Included on the CD-ROM
\DRIVERS\TWAIN
System requirements
• Hardware
PC/AT-compatible machines that support the following operating system properly
• Operating system *1
Windows XP/Vista/7
Windows Server 2003/2003 R2/2008/2008 R2
*1 Operates in 32-bit compatibility mode on 64-bit operating systems
• Display resolution
800 × 600 pixels, 256 colors or higher
LAN-Fax Driver
This section describes the file path and system requirements of the LAN-Fax driver.
• You can install the LAN-Fax driver from the CD-ROM provided with this machine or download it
from the manufacturer's Web site.
This driver is required to use LAN-Fax functions.
File path
The driver is included in the following folder on the CD-ROM:
\DRIVERS\LAN-FAX\XP_VISTA
System requirements
• Hardware
PC/AT-compatible machines that support the following operating system properly
• Operating systems
Windows XP/Vista/7
Windows Server 2003/2003 R2/2008/2008 R2
• Display
VGA 640 × 480 pixels or more
• Before beginning installation, exit all other applications.
191
10. Appendix
Specifications for the Main Unit
Configuration:
Desktop
Original scanning:
One-dimensional solid scanning system through CCD
Copy process:
Laser beam scanning and electro-photographic printing
Development:
Monocomponent Nonmagnetic Development System
Fusing:
Heating roll pressure system
Resolution:
• Scanning:
Exposure glass: 600 × 600 dpi
ADF: 600 × 300 dpi
• Printing:
600 × 600 dpi, 1,200 × 600 dpi
Exposure glass:
Stationary original exposure type
Original reference position:
Rear left corner
Warm-up time (23 °C (73 °F), rated voltage):
20 seconds or less
Originals:
Sheet/book/objects
Maximum original size:
A4 , 81/2 × 11
Paper size:
• Tray 1:
, A6 , B5 JIS , B6 JIS , 81/2 × 14 , 81/2 × 13 , 81/2 × 11 , 81/4 × 13
A4 , A5
, 8 × 13 , 71/4 × 101/2 , 51/2 × 81/2
, 16K
41/8 × 91/2 , 37/8 × 71/2 , C5 Env , C6 Env , DL Env
192
Specifications for the Main Unit
• Tray 1 (custom size):
Vertical: 140.0 356.0 mm (5.52 14.01 inches)
Horizontal: 98.0 216.0 mm (3.86 8.50 inches)
• Bypass tray:
A4 , A5
, A6 , B5 JIS , B6 JIS , 81/2 × 14 , 81/2 × 13 , 81/2 × 11 , 81/4 × 13
, 8 × 13 , 71/4 × 101/2 , 51/2 × 81/2
, 16K
41/8 × 91/2 , 37/8 × 71/2 , C5 Env , C6 Env , DL Env
• Bypass tray (custom size):
Vertical: 140.0 900.0 mm (5.52 35.43 inches)
Horizontal: 64.0 216.0 mm (2.52 8.50 inches)
• Duplex:
A4 , A5 , B5 JIS , B6 JIS , 81/2 × 14 , 81/2 × 13 , 81/2 × 11 , 81/4 × 13 , 8 × 13
, 71/4 × 101/2 , 51/2 × 81/2 , 16K
• Duplex (custom size):
Vertical: 160.0 356.0 mm (6.30 14.01 inches)
Horizontal: 98.0 216.0 mm (3.86 8.50 inches)
Paper weight:
• Tray 1 and bypass tray: 52 220 g/m2 (14 lb. Bond 80 lb. Cover)
• Duplex: 60 163 g/m2 (16 lb. Bond 90 lb. Index)
For details about and recommendations concerning thick paper, see “Thick Paper”.
Non-reproduction area (Copier):
• Leading edge: 1 5 mm (0.04 0.20 inches)
• Left and right: 0.5 3.5 mm (0.02 0.14 inches)
• Trailing edge: 0 4 mm (0.00 0.16 inches)
First copy/print time:
•
(mainly Europe and Asia)
• Types 1 and 3: 8.6 seconds
• Type 2: 8.4 seconds
•
(mainly North America)
• Types 1 and 3: 8.4 seconds
• Type 2: 8.5 seconds
(A4 , 81/2 × 11 , 100% reproduction, feeding from tray 1, on the exposure glass)
Copy/print speed:
• Type 1: 45 sheets/minute (A4 ), 47 sheets/minute (81/2 × 11 )
193
10. Appendix
• Types 2 and 3: 50 sheets/minute (A4 ), 52 sheets/minute (81/2 × 11 )
Reproduction ratio:
•
(mainly Europe and Asia)
Preset reproduction ratios:
• Enlargement: 200%, 141%
• Full size: 100%
• Reduction: 93%, 71%, 50%
•
(mainly North America)
Preset reproduction ratios:
• Enlargement: 155%, 129%
• Full size: 100%
• Reduction: 93%, 78%, 65%
• Zoom:
• ADF: From 25 to 200% in increments of 1%
• Exposure glass: From 25 to 400% in increments of 1%
Maximum continuous copy run:
999 sheets
Paper capacity (75 g/m2, 20 lb. Bond):
• Tray 1: 550 sheets
• Bypass tray: 100 sheets
Stack capacity for Internal tray 1 (80 g/m2, 21 lb. Bond):
500 sheets
Power requirements:
•
(mainly Europe and Asia)
220 240 V, 50/60 Hz, 7 A
•
(mainly North America)
120 127 V, 60 Hz, 12 A
Power consumption:
• Main unit only
194
Specifications for the Main Unit
Type 1
Type 2
Type 3
Stand-by
About 200 W
About 200 W
About 160 W
About 194 W
About 197 W
About 159 W
About 843 W
About 869 W
About 833 W
About 863 W
About 892 W
About 858 W
1,500 W
1,500 W
1,500 W
During printing
Maximum
• Complete system
Type 1
Maximum
1,500 W
Type 2
1,500 W
Type 3
1,500 W
• The complete system of types 1 and 3 consists of the main unit, Gigabit Ethernet, fax unit,
two paper feed units, and paper feed unit with the casters.
• The complete system of type 2 consists of the main unit, Gigabit Ethernet, two paper feed
units, and paper feed unit with the casters.
Dimensions (W × D × H up to ADF):
• Types 1 and 2: 460 × 510 × 686mm (18.2 × 20.1 × 27.0 inches)
• Type 3: 460 × 615 × 686mm (18.2 × 24.3 × 27.0 inches)
Noise emission:
• Sound power level:
• Main unit only
Type 1
Type 2
Type 3
Stand-by
Less than 41.8 dB(A)
Less than 41.8 dB(A)
Less than 41.8 dB(A)
Copying
Less than 72.0 dB(A)
Less than 73.0 dB(A)
Less than 73.0 dB(A)
Type 1
Type 2
Type 3
Less than 41.8 dB(A)
Less than 41.8 dB(A)
Less than 41.8 dB(A)
• Complete system
Stand-by
195
10. Appendix
Type 1
Type 2
Type 3
Less than 72.0 dB(A)
Less than 73.0 dB(A)
Less than 73.0 dB(A)
Type 1
Type 2
Type 3
Stand-by
Less than 35.8 dB(A)
Less than 35.8 dB(A)
Less than 35.8 dB(A)
Copying
Less than 66.0 dB(A)
Less than 67.0 dB(A)
Less than 67.0 dB(A)
Type 1
Type 2
Type 3
Stand-by
Less than 35.8 dB(A)
Less than 35.8 dB(A)
Less than 35.8 dB(A)
Copying
Less than 66.0 dB(A)
Less than 67.0 dB(A)
Less than 67.0 dB(A)
Copying
• Sound pressure level:
• Main unit only
• Complete system
• Sound power level and sound pressure level are actual values measured in
accordance with ISO 7779.
• Sound pressure level is measured from the position of the bystander.
• The complete system consists of the main unit, two paper feed units, and paper feed
unit with the casters.
Weight:
• Type 1: 45 kg (99.2 lb.) or less
• Type 2: 47 kg (103.7 lb.) or less
• Type 3: 52 kg (114.7 lb.) or less
• page 143 "Thick Paper"
Auto Document Feeder
Mode:
ADF mode, Batch mode, SADF mode, Custom Size originals mode
Original size:
A4
196
A5
, 81/2 × 14
51/2 × 81/2
Specifications for the Main Unit
Original weight:
• 1-sided originals: 52 128 g/m2 (14 34 lb. Bond)
• 2-sided originals: 60 105 g/m2 (16 28 lb. Bond)
Number of originals to be set:
50 sheets (80 g/m2, 21 lb. Bond)
Document Server
HDD (Document Server):
Approx. 78 GB
Maximum: 9,000 pages
(Total number of pages that can be accommodated stored with all functions combined)
Copier/B&W/A4 original: Approx. 9,000 pages
Printer/B&W/A4 original/600 dpi, 2 bits: Approx. 9,000 pages
Scanner/Full Color/A4/200 dpi, 8 bits/JPEG: Approx. 2,000 pages
(Under the printer and scanner functions, the number of the pages that can be stored depends on
the print image and original.)
Maximum number of stored documents:
Maximum 3,000 documents
Number of pages supported by memory sorting:
Maximum: 2,000 pages
(Under the printer function, the number of the pages that can be sorted depends on the print
image.)
Internal Tray 2 (Type 2 Only)
Number of bins:
1
Paper size:
A4 , A5
, A6 , B5 JIS , B6 JIS , 81/2 × 14 , 81/2 × 13 , 81/2 × 11 , 81/4 × 13 , 8 ×
1
, 16K
13 , 7 /4 × 101/2 , 51/2 × 81/2
41/8 × 91/2 , 37/8 × 71/2 , C5 Env , C6 Env , DL Env , custom size
Paper weight:
52 220 g/m2 (14 lb. Bond 80 lb. Cover)
197
10. Appendix
Stack capacity (80 g/m2, 21 lb. Bond):
100 sheets
Finisher (Type 3 Only)
Paper size:
A4 , A5
, A6 , B5 JIS , B6 JIS , 81/2 × 14 , 81/2 × 13 , 81/2 × 11 , 81/4 × 13 , 8 ×
13 , 71/4 × 101/2 , 51/2 × 81/2
, 16K
41/8 × 91/2 , 37/8 × 71/2 , C5 Env , C6 Env , DL Env , custom size
Paper weight:
52 220 g/m2 (14 lb. Bond 80 lb. Cover)
Stack capacity (80 g/m2, 21 lb. Bond):
250 sheets
Staple paper size:
A4 , B5 JIS , 81/2 × 14 , 81/2 × 13 , 81/2 × 11 , 81/4 × 13 , 8 × 13 , 71/4 × 101/2 ,
16K
Staple paper weight:
52 90 g/m2 (14 24 lb. Bond)
Staple capacity (80 g/m2, 21 lb. Bond):
• 30 sheets: 81/2 × 14 , 81/2 × 13 , 81/4 × 13 , 8 × 13
• 50 sheets: A4 , B5 JIS , 81/2 × 11 , 71/4 × 101/2 , 16K
Stack capacity after stapling (80 g/m2, 21 lb. Bond):
• 2 sheets: 33 sets
• 30 sheets: 7 sets
• 50 sheets: 4 sets
Staple position:
Top
198
Specifications for Paper Feed Unit (Optional)
Specifications for Paper Feed Unit (Optional)
Paper size:
A4 , A5 , B5 JIS , B6 JIS , 81/2 × 14 , 81/2 × 13 , 81/2 × 11 , 81/4 × 13 , 8 × 13 ,
71/4 × 101/2 , 51/2 × 81/2 , 16K
41/8 × 91/2 , 37/8 × 71/2 , C5 Env , C6 Env , DL Env , custom size
Paper weight:
52 220 g/m2 (14 lb. Bond 80 lb. Cover)
Paper capacity (75g/m2, 20 lb. Bond):
550 sheets × 1 tray
Power consumption:
20 W or less (Power is supplied from the main unit)
Dimensions (W × D × H):
450 × 515.6 × 150 mm (17.8 × 20.3 × 5.9 inches)
Weight:
9 kg (19.9 lb.) or less
199
10. Appendix
Specifications for Paper Feed Unit with the
Casters (Optional)
Paper size:
A4 , A5 , B5 JIS , B6 JIS , 81/2 × 14 , 81/2 × 13 , 81/2 × 11 , 81/4 × 13 , 8 × 13 ,
71/4 × 101/2 , 51/2 × 81/2 , 16K
41/8 × 91/2 , 37/8 × 71/2 , C5 Env , C6 Env , DL Env , custom size
Paper weight:
52 220 g/m2 (14 lb. Bond 80 lb. Cover)
Paper capacity (75 g/m2, 20 lb. Bond):
550 sheets × 1 trays
Power consumption:
20 W or less (Power is supplied from the main unit)
Dimensions (W × D × H):
627 × 635 × 220 mm (24.7 × 25.0 × 8.7 inches)
Weight:
12 kg (26.5 lb.) or less
200
Specifications for Wireless LAN Board (Optional)
Specifications for Wireless LAN Board
(Optional)
Transmission spec.:
•
(mainly Europe and Asia)
• Based on IEEE 802.11a/b/g (wireless LAN)
• Based on IEEE 802.11b/g (wireless LAN)
•
(mainly North America)
• Based on IEEE 802.11a/b/g (wireless LAN)
Protocol:
TCP/IP, IPX/SPX
Transmission Rate:
Auto select from the following speed:
1 Mbps, 2 Mbps, 5.5 Mbps, 6 Mbps, 9 Mbps, 11 Mbps, 12Mbps, 18Mbps, 24 Mbps, 36
Mbps, 48 Mbps, 54 Mbps
Frequency range (Center Frequency):
•
(mainly Europe and Asia)
• IEEE 802.11a/b/g wireless LAN:
• 2412 2472 MHz (1 13 channels)
• 5180 5320 MHz (36, 40, 44, 48, 52, 56, 60, and 64 channels)
• IEEE 802.11b/g wireless LAN:
• 2412 - 2462 MHz (1 - 11 channels)
•
(mainly North America)
• IEEE 802.11a/b/g wireless LAN:
• 2412 2462 MHz (1 11 channels)
• 5180 5320 MHz (36, 40, 44, 48, 52, 56, 60, and 64 channels)
Transmission mode:
• Ad hoc mode
• Infrastructure mode
• Web Image Monitor is supported.
• The channel in use might differ depending on the country.
201
10. Appendix
Specifications for Gigabit Ethernet (Optional)
Interface connector:
10Base-T, 100Base-TX, 1000Base-T
Data transmission speed:
1000 Mbps, 100 Mbps, 10 Mbps
Protocol:
TCP/IP, IPX/SPX
Distance between devices:
100 m
202
Specifications for Other Options
Specifications for Other Options
Copy data security unit
The copy data security unit deletes images and prints the gray ground color of the paper when the
documents marked unauthorized are copied.
203
10. Appendix
Electromagnetic Interference
If this machine is located close to another electronic device, both devices may malfunction due
electromagnetic interference.
Televisions and radios may produce noise if located too close to this machine. If this happens, do the
following:
• Move the television or radio as far as possible from the machine.
• Change the position of the antenna of the television or radio.
• Use a different wall outlet on a different circuit.
204
ENERGY STAR Program
ENERGY STAR Program
ENERGY STAR® Program Requirements for Imaging Equipment
This company is a participant in the ENERGY STAR® Program.
This machine is compliant with the regulations specified by the
ENERGY STAR® Program.
The ENERGY STAR® Program Requirements for Imaging Equipment encourage energy conservation
by promoting energy efficient computers and other office equipment.
The program backs the development and dissemination of products that feature energy saving
functions.
It is an open program in which manufacturers participate voluntarily.
Targeted products are computers, monitors, printers, facsimiles, copiers, scanners, and multi-function
devices. Energy Star standards and logos are internationally uniform.
Energy Saving Functions
To reduce its power consumption, this machine has the following functions:
Sleep Mode
• If this machine remains idle for a specified period, it automatically enters Sleep Mode to
reduce its electrical consumption.
• The default delay time the machine waits before entering Sleep Mode is 1 minute. This default
time can be changed.
• The machine can print jobs from computers and receive faxes while in Sleep Mode.
Specifications
Type 1
Type 2
Type 3
Reduced Electrical Consumption by Sleep
Mode
4.3 W
5.9 W
4.3 W
Time of Switch into Sleep Mode
1 minute
1 minute
1 minute
205
10. Appendix
Type 1
Time of Switch out from Sleep Mode
206
20 seconds
Type 2
20 seconds
Type 3
20 seconds
Trademarks
Trademarks
Adobe, Acrobat, PostScript, PostScript 3, and Reader are either registered trademarks or trademarks of
Adobe Systems Incorporated in the United States and/or other countries.
Macintosh, Mac OS, and Safari are trademarks of Apple Inc., registered in the U.S. and other countries.
The Bluetooth® word mark and logos are registered trademarks owned by Bluetooth SIG, Inc. and any
use of such marks by Ricoh Company, Ltd. is under license.
Firefox® is a registered trademark of the Mozilla Foundation.
Microsoft®, Windows®, Windows Server®, Windows Vista®, and Internet Explorer® are either
registered trademarks or trademarks of Microsoft Corporation in the United States and/or other
countries.
PCL® is a registered trademark of Hewlett-Packard Company.
UNIX is a registered trademark in the United States and other countries, licensed exclusively through X/
Open Company Limited.
IPX and IPX/SPX are either registered trademarks or trademarks of Novell, Inc.
Java, JavaScript, and all trademarks and logos based on Java are trademarks or registered trademarks
of Sun Microsystems, Inc. in the U.S. and other countries.
Other product names used herein are for identification purposes only and might be trademarks of their
respective companies. We disclaim any and all rights to those marks.
The proper name of Internet Explorer 6 is Microsoft® Internet Explorer® 6.
The proper names of the Windows operating systems are as follows:
• The product names of Windows XP are as follows:
Microsoft® Windows® XP Professional Edition
Microsoft® Windows® XP Home Edition
Microsoft® Windows® XP Media Center Edition
Microsoft® Windows® XP Tablet PC Edition
• The product names of Windows Vista are as follows:
Microsoft® Windows Vista® Ultimate
Microsoft® Windows Vista® Business
Microsoft® Windows Vista® Home Premium
Microsoft® Windows Vista® Home Basic
Microsoft® Windows Vista® Enterprise
• The product names of Windows 7 are as follows:
Microsoft® Windows® 7 Home Premium
Microsoft® Windows® 7 Professional
207
10. Appendix
Microsoft® Windows® 7 Ultimate
Microsoft® Windows® 7 Enterprise
• The product names of Windows Server 2003 are as follows:
Microsoft® Windows Server® 2003 Standard Edition
Microsoft® Windows Server® 2003 Enterprise Edition
• The product names of Windows Server 2003 R2 are as follows:
Microsoft® Windows Server® 2003 R2 Standard Edition
Microsoft® Windows Server® 2003 R2 Enterprise Edition
• The product names of Windows Server 2008 are as follows:
Microsoft® Windows Server® 2008 Standard
Microsoft® Windows Server® 2008 Enterprise
• The product names of Windows Server 2008 R2 are as follows:
Microsoft® Windows Server® 2008 R2 Standard
Microsoft® Windows Server® 2008 R2 Enterprise
208
INDEX
1 bin tray..............................................................197
1000BASE-T.......................................................102
10BASE-T/100BASE-TX port..............................51
A
Access to the machine...........................................67
Adding staples.....................................................151
Address book............................................18, 43, 45
ADF.................................................22, 49, 176, 196
Adhesive labels...................................................136
Alert indicator........................................................56
Angle of the control panel....................................57
Authentication screen............................................61
Auto Document Feeder.................22, 49, 176, 196
Auto Off..................................................................79
Auto Reduce / Enlarge.........................................12
Available characters...........................................155
B
Backing up hard disk data.................................179
Bluetooth interface unit.......................................102
Board...................................................................108
Booklet...................................................................12
Browser unit.........................................................102
Bypass tray....................................................50, 143
C
Caution labels.................................................31, 34
CD-ROM...................................162, 163, 165, 189
Change..................................................................45
Changing modes...................................................83
Changing Paper Thickness Settings...................134
Changing the paper size...................125, 129, 130
Changing the timing for prompting users to
prepare replacement supplies...........................180
Check.....................................................................46
Checking before sending......................................46
Cleaning.............................................175, 176, 177
Cleaning the friction pad and paper feed roller.....
..............................................................................171
Cleaning the registration roller...........................173
Cleaning your machine......................................171
Clear key................................................................55
Clear Modes key...................................................55
Clear/Stop key.....................................................55
Collate....................................................................13
Color.......................................................................46
Color originals.......................................................46
Combine..........................................................12, 41
Communicating indicator......................................56
Components...........................................................49
Computer...............................................................18
Confidential File indicator..................................... 56
Connecting the Machine......................................89
Connecting the telephone line..............................93
Consumables.......................................................186
Contents of the CD-ROM...................................189
Control panel...............................49, 54, 61, 62, 63
Converting documents to electronic formats.......42
Copier..............................................................12, 83
Copy data security unit..............................102, 203
Copy speed...........................................................21
Counter................................................................182
Counterfeit bank bills............................................38
D
Data In indicator....................................................56
Delete.....................................................................45
Deleting characters.............................................158
DeskTopBinder......................................................98
DeskTopBinder Lite................................................98
DeskTopBinder Professional.................................98
Destinations............................................................43
Display language..................................................59
Display panel..................................................54, 58
Disposal...............................................................185
Document Server.......................13, 42, 46, 83, 197
Dos and Don'ts....................................................167
Downloading utility software................................98
Duplex..............................................................12, 41
E
E-mail address.......................................................45
E-mail transmission................................................15
Electromagnetic interference..............................204
Energy Saver.........................................................79
Energy Saver key..................................................55
209
Energy saving functions......................................205
ENERGY STAR Program.....................................205
Enlarge...................................................................12
Enquiry.................................................................183
Enter key (# key)...................................................56
Entering letters.....................................................157
Entering numbers.................................................158
Entering symbols.................................................157
Entering text................................................155, 157
Entry screen.................................................155, 156
Envelope......................................47, 125, 136, 141
Envelope lever.......................................................53
Environments to avoid...........................................67
Ethernet..........................................................14, 202
Ethernet interface
connecting..................................................................89, 90
Expansion memory..............................................102
Exposure glass..............................................50, 175
Exterior components..............................................49
External options...................................................101
External telephone connector...............................51
F
Facsimile....................................................14, 15, 83
Fax number............................................................45
Fax transmission status..........................................46
Fax unit.................................................................102
File format converter............................13, 102, 116
File type..................................................................42
Finisher...........................................................50, 198
Finisher shift tray (type 3 only).............................50
Font Manager......................................................189
Formats of the operating instructions.................161
Frequently-used settings........................................43
Friction pad...................................................52, 171
Front cover.............................................................50
Front cover release button....................................50
Function keys.........................................................56
Fusing unit..............................................................53
Fusing unit lock levers............................................53
G
G3 interface unit connector..................................51
Genuine parts........................................................20
210
Genuine toner........................................................20
Gigabit Ethernet..........................................102, 202
Gigabit Ethernet board..............................108, 111
Grain....................................................................143
Guide board..........................................................52
H
Handling the print cartridge...............................147
Hard disk.............................................................179
High Compression PDF.........................................46
Hold Print................................................................13
How to enter text.................................................157
HTML manuals.............................10, 161, 162, 163
I
Image quality.........................................................12
Important................................................................20
Initial settings..........................................................43
Inserting a USB memory.......................................96
Inserting an SD card..............................................95
Inserting and removing a removable memory
device.....................................................................95
Install......................................................................47
Installing.................................................................69
Installing the board.............................................108
Installing the file format converter......................116
Installing the Gigabit Ethernet board........108, 111
Installing the HTML manuals..............................163
Installing the machine............................................65
Installing the paper feed unit..............................104
Installing the SD card...................................86, 118
Installing the wireless LAN interface board......113
Interior components...............................................52
Internal options....................................................102
Internal tray 1 (types 1 and 2 only).....................50
Internal tray 2................................................50, 197
Internet Fax............................................................15
Interrupt key...........................................................55
IP-Fax......................................................................15
IP-Fax number........................................................45
Items........................................................................22
J
Job is not performed..............................................84
K
Key arrangement........................................155, 156
Key Colour.............................................................59
L
Label paper (adhesive labels)...........................136
LAN-Fax..................................................14, 41, 191
LAN-Fax driver....................................................191
LAN-Fax driver destination list.............................43
Laws........................................................................38
Legal prohibition.................................................... 38
Legality of copying or printing.............................38
List of Options........................................................22
Loading paper............................................121, 123
Loading paper into tray 1.....................................80
Local connection....................................................13
Locked Print............................................................13
Login..........................................................62, 63, 64
Login key................................................................55
Login/Logout key..................................................55
Logout..............................................................63, 64
Logout key..............................................................55
M
Machine smell.....................................................167
Machine types.......................................................21
Magazine..............................................................12
Mail to Print............................................................15
Main power..............................................74, 75, 78
Main power indicator...........................................54
Main power switch.........................................50, 74
Main unit..............................................................192
Maintenance kit..........................................153, 187
Manuals.....................................161, 162, 163, 165
Manuals for Administrators................................163
Manuals for this machine........................................7
Manuals list............................................................10
Media...................................................................161
Media access lamp...............................................56
Media slot..............................................................56
Memory transmission............................................46
Model-specific information...................................39
Moving.................................................................169
Moving the machine in a short distance............170
Multi-Accessing.....................................................84
N
Names of major items...........................................22
Network.................................................................16
Network connection..............................................13
Network delivery scanner....................................16
Normal Color Scan...............................................46
Notes......................................................................22
Notice..................................................................... 20
Number keys..........................................................56
Numbers..............................................................158
O
OHP transparencies.....................................12, 136
Operating instructions.........................................162
Operation switch......................................49, 54, 74
Optimum environmental conditions.....................66
Option installation...............................................103
Optional board slot...............................................51
Options........................................................101, 102
Order of option installation................................103
Orientation-fixed paper......................................123
P
Paper.....................................................45, 121, 125
Paper feed roller...........................................52, 171
Paper feed unit.....................................50, 104, 199
Paper feed unit with the casters...................50, 200
Paper grain..........................................................143
Paper setting direction........................................143
Paper size...........................................125, 130, 136
Paper size that is not automatically detected.... 130
Paper sizes and types for bypass tray...............138
Paper sizes and types for tray 1........................136
Paper sizes and types for trays 2 - 4.................137
Paper storage......................................................146
Paper trays...........................................................143
Paper types..........................................................136
Paperless fax..........................................................41
Paperless fax reception.........................................14
Paperless fax transmission....................................14
Password................................................................17
211
PCL........................................................................189
PDF manuals..................................................10, 165
Plug.......................................................................177
Positions of WARNING and CAUTION labels on
type 3.....................................................................34
Positions of WARNING and CAUTION labels on
types 1 and 2.........................................................31
PostScript 3..........................................................189
Power...............................................................74, 77
Power connection...........................................67, 74
Power connector....................................................51
Power cord plug..................................................177
Power supply...................................................67, 74
PPD.......................................................................189
Preventing an unauthorized copy........................19
Print cartridge..............................52, 147, 148, 150
Print cartridges.....................................................186
Print job function....................................................13
Print speed..............................................................21
Printed manuals.............................................10, 161
Printer...............................................................13, 83
Printer driver............................................62, 63, 189
Printing a PDF file directly.....................................13
Printing with the finisher.........................................13
Program..................................................................43
Program as Defaults..............................................43
Program key...........................................................55
R
Rear cover..............................................................51
Rear cover lever....................................................51
Receiving File indicator.........................................56
Recommended paper sizes and types..............136
Reduce...................................................................12
Reducing costs.......................................................41
Register...................................................................45
Registering destinations.........................................43
Registration roller..........................................52, 173
Regulations.............................................................38
Removing a USB memory.....................................97
Removing an SD card...........................................96
Replacing machine parts....................................153
Replacing the print cartridge..............................148
212
S
Safety labels of this machine................................31
Sample Copy key..................................................55
Sample Print...........................................................13
Saving paper.........................................................12
Scan files................................................................42
Scanner............................................................16, 83
Scanning color originals.......................................46
ScanRouter......................................................16, 98
SD card.............................................86, 95, 96, 118
SD card slot............................................................51
Searching by keyword..........................................45
Searching by what you want to do......................41
Security functions...................................................17
Security&Encryption Unit......................................86
Sending faxes when toner has run out..............149
Sending scan files by e-mail.................................16
Sending scan files by Scan to Folder...................16
Sending scanned documents when toner has run
out.........................................................................149
Simplified display..................................................58
Simplified Display key....................................55, 58
Size notation..........................................................22
SmartDeviceMonitor for Admin...........................98
SmartDeviceMonitor for Client.............................99
SMB folder.............................................................45
Smell.....................................................................167
Software included on the CD-ROM..................189
Sort.........................................................................12
Space required for the machine...........................67
Specifications. 192, 196, 197, 198, 199, 200, 201,
202, 203
Specifying the paper size...................................130
Stamp.....................................................................12
Standard TCP/IP...................................................47
Staple......................................................12, 13, 151
Staple cartridges.................................................187
Start key.................................................................55
Stop key.................................................................55
Stored Print.............................................................13
Storing paper......................................................146
Storing received documents.................................14
Symbol Entry........................................................157
Symbols..................................................................21
System Reset..........................................................84
T
Text..............................................................155, 157
Thick paper.................................................136, 143
Toner..........................................147, 148, 149, 150
Total counter........................................................182
Trademarks..........................................................207
Transfer roller.........................................................52
Tray 1.....................................................................50
Turning off the main power...................................78
Turning off the power......................................74, 77
Turning on the main power...................................75
Turning on the power......................................74, 77
TWAIN driver......................................................190
Two-sided paper.................................................123
Two-Sided Print......................................................41
W
WARNING labels..........................................31, 34
Web Image Monitor..........................13, 14, 18, 64
Web Services on Devices.....................................16
When toner has run out......................................149
Where to put your machine..................................65
Windows Network Printer....................................47
Wireless LAN................................................14, 201
Wireless LAN board..................................102, 201
Wireless LAN interface board...........................113
WSD.......................................................................16
U
Unauthorized copy prevention............................19
Unpacking..............................................................69
Unusable paper..................................................144
USB.........................................................................47
USB 2.0 [Type B] port...........................................51
USB Host Interface................................................51
connecting..........................................................................92
USB interface
connecting..........................................................................91
USB memory.............................................95, 96, 97
Used Print Cartridge............................................150
User Code Authentication..............................61, 62
User Text..............................................................158
User Tools key.......................................................59
User Tools/Counter key.................................55, 59
Utilities included on the CD-ROM.....................189
Utility software.......................................................98
V
Ventilation............................................................167
Ventilation holes..............................................50, 51
Viewing the HTML manuals................................162
VM Card & App2Me Provider.............................86
213
MEMO
214
MEMO
215
MEMO
216
EN GB
EN US
EN AU
M052-7006A
© 2011-2014
Operating Instructions About This Machine
M052-7006A
US
EN


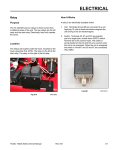

![e, em seguida, clique em [OK].](http://vs1.manualzilla.com/store/data/006041527_1-e60f27174a145f9678da70caa82fcb7d-150x150.png)