1
User Manual
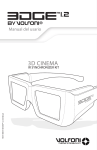
3D CINEMA
MUV110064-V1R2 EDGETM 1.2 User Manual
IR SYNCHRONIZER KIT
02.
SUMMARY
I. 3D KIT PRESENTATION
1. General presentation
2. 3D kit composition
II. PRODUCT DESCRIPTION
1. Glasses
2. IR emitter
3. Tester
4. Synchronizer
III. 3D KIT FASTENING
IV. CONNECTION & SYNCHRONIZATION
03.
I.
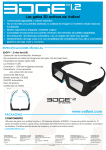
1. GENERAL PRESENTATION
As a result of Volfoni's long experience in managing the world's
largest stock of active 3D glasses, EDGE 1.2 benefits from the
latest ergonomic and technical innovations. EDGE 's comfort
and easy use is unmatched.
TM
TM
The power of EDGE 1.2
Exceptional image quality without ghosting, wherever
you sit.
The brightest light level on the market.
The 3D kit (infra-red emitter) allows easy integration in
less than 30 min with existing digital theaters using a standard
screen.
TM
EDGE 1.2 offers all the benefits of active glasses
A full EDGE system includes
EDGE 3D glasses
3D kit (emitter system)
TM
TM
TM
Accessories are available
Antibacterial cleaning wipes
Battery replacement tool
Adaptable "arms" to fit any head size
In option: Anti-theft panels & anti-theft tagged glasses
04.
I. 3D KIT PRESENTATION
2. 3D KIT COMPOSITION
EDGE 1.2 GLASSES
+ battery tool
+ removable arms
TM
IR EMITTER
+ fixing
+ wire
TESTER
SYNCHRONIZER
+ power cord
+ GPIO synchronizer cable
05.
II.
1. GLASSES
Operating Temperature: 0°C -40°C (32F-104F)
Storage Temperature: -10°C -50°C (14F-122F)
The VOLFONI Active 3D Glasses use fast-response liquid crystal lenses to create
the best image quality. It is the brightest and most cost-saving 3D solution currently
on the market.
IR CAPTOR
keep it clean
for optimal
efficiency
Low power consumption
(battery lasts up to 800 hours)
Rubber nosepiece
Stylish and rugged
Unbeatable receiving angle
Automatic ON/OFF
Standard size, replaceable battery
Adaptively synchronizing
Optimal circuit layout
CE certified
+
NOSEPIECE
LITHIUM
BATTERY
BATTERY AREA
battery tray
Note: Please, make sure that there is no
obstacle in front of the IR captor during
3D projection.
USE AND SETUP
The 3D glasses do not need any setup to start. It is nevertheless necessary to check
all settings and connections of the 3D digital cinema system before projection. When
started, the lenses need 2 seconds to warm up and turn into working mode. Then the
lenses appear clear. When the 3D projection is finished or turned into 2D, the lenses will
remain clear for about 5 minutes. They will go directly into operation mode again
when a new signal is received.
ARMS
The glasses come with L size arms, and M & S size arms are available upon request.
For easy removal, just push in the new arms until you hear the "click".
S size
M size
L size
06.
II. PRODUCT DESCRIPTION
BATTERY REPLACEMENT
To open the battery encasement on the right arm of the glasses:
-Use an instrument such as the Volfoni's battery tool, a paper clip or a prong.
-Put the glasses on a desk/table as it will be more convenient and easy
-Find the small hole on the right arm of the glasses, where the arm connects
with the battery encasement. 1 2
-Put the prong inside and when you hear a "click," you can pop open the
battery encasement 3
make sure you install the
battery in the right position
BATTERY TOOL
to unlock the battery
LITHIUM BATTERY
CR2032
3V
HL
k
clic
STEP 1
Insert the tool into the hole in the
under right side of glasses. You feel
some resistance, then push and
feel/hear the unlocking "click".
STEP 2
PULL OUT
STEP 3
clic
k
Pull towards you
with your nail to remove
the battery tray
PUSH
Reinsert the battery and
push to hear the "click" to
lock it.
Note: When the battery has less than three hours remaining, the lenses will
flash once a second to indicate that you must change the battery. It is
recommended to check the battery life before distributing to viewers.
07.
II.
Thank you for using our STANDARD ACTIVE 3D DIGITAL CINEMA SYSTEM.
Before starting, please check if the following parts are included in
the package.
2. IR EMITTER
Long Range IR Emitter
Long Range IR Emitter VAIK-0100 is a compact and powerful unit. The
emitter, with many built-in infrared LEDs, allows coverage all types of theater
rooms, regardless of the number of seats. 4 emitters can be linked up.
Thanks to its lightweight design, VAIK-0100 enhances the heat dissipation
(LED life protection). It is provided with a universal mounting head for security,
and is easy to install. It is simple to target the screen with the emitter laser pointer.
Please do not put the emitter in front of the audience.
Emitter at a Glance
08.
SYNC IN(DB9)
Laser Pointer
Mounting Hole
Power LED
II. PRODUCT DESCRIPTION
Basic Specification
IR Wavelength: 940 nm
Power Consumption: 10W in active status
Laser: Max Output: 0.5mW, Wavelength: 650 nm± 10
Dimension: 361 mm x 70 mm x 44 mm
WARNING : The laser pointer of this emitter emits Class IIIA laser.
Please DO NOT stare into beam or view directly with optical instruments.
3. TESTER
IR Signal LED
Power LED
Power Switch
Battery Room
Tester
Active 3D Glasses VAIK-0300 is a handy unit to be carried by a cinema
technician to check performance of 3D glasses. Turn on the power, then
the tester emits low rate IR signal to activate 3D glasses. Working 3D
glasses will then show a flickering.
Additional Specification
Power supply: 3xAA batteries
09.
II.
4. SYNCHRONIZER
Power Module
Multi-function Distribution Module
The multi-function Distribution Module is a unit specially designed for mid
size and large digital 3D cinemas. This unit is plugged into the digital
projector and receives frame synchronizing signal via GPIO (DB-37). It extends
to four DB-9 emitter outputs. It also supports the extension of the Distribution
Module thanks to a DIN-3 cable, that simplifies cinema wiring. Each port is
equipped with an error diagnosis indicating LED.
10.
II. PRODUCT DESCRIPTION
LASER POINTER
LOCAL IR EMITTERS
ON
OFF
LOCAL IR EMITTERS
ON
OFF
SETUP FRAME SYNC
QUICK FRAME SYNC
POWER
CH2
CH3
OFF
EYE ROTATION
ON
OUTPUT TO IR EMITTERS
CH1
ON
CH4
OFF
FRAME SYNC FROM PROJECTOR
Power Input Port
Power Switch
Laser Pointer ON/OFF
Local IR Emitters ON/OFF
Frame SYNC Setup Switch
Eye Rotation Switch
Distribution Module Extension Port
CH1,2,3,4 SYNC Port to IR Emitter
Frame SYNC From Projector
Switch Function Description
LASER POINTER: ON/OFF switch for each emitter laser.
LOCAL IR EMITTERS: ON/OFF switch for local IR emitters. Location IR emitters
are very convenient to check 3D effect on screen.
SETUP FRAME SYNC: Switch on to detect frame synchronizing range.
EYE INVERSION: Switch left/right eye image.
POWER: Turn ON/OFF the power of the Distribution Module.
Indication LED status definition
POWER: LED lights come on when power is on, otherwise lights are out.
CH1: Red LED lights come on when channel 1 IR emitter is detected,
Green LED lights come on if the IR emitter is activated, otherwise
CH2: Red LED lights come on when channel 2 IR emitter is detected,
Green LED lights come on if the IR emitter is activated, otherwise
CH3: Red LED lights come on when channel 3 IR emitter is detected,
Green LED lights come on if the IR emitter is activated, otherwise
CH4: Red LED lights come on when channel 4 IR emitter is detected,
Green LED lights come on if the IR emitter is activated, otherwise
lights are out.
lights are out.
lights are out.
lights are out.
SETUP FRAME SYNC: LED always light when input frame is synchronized
between 130Hz to 150Hz, otherwise LED flickers.
FRAME SYNC FROM PROJECTOR: LED light on when frame synchronizing
signal is detected from projector.
Basic Specification
Power Input: 24VDC, 3A
Default Sync In: PIN9 (+) and PIN28 (-) of GPIO(DB-37)
Dimension: 106 mm x 36 mm x 23 mm
11.
III.
WALL FASTENER
Before installing the emitter in the front of the screen, make sure you
have all the needed tools and the instruction manual. This wall fixing
part is provided with all the screws and wall anchors you might need.
Follow the instructions to fasten this kit.
2
1
4
3
Parts Qty
1
2
2
2
3
1
4
1
5
1
5
Product description
Mounting plate
Screw covers
Extension
Adjusting Knuckle
Emitter plate
WALL TYPES & HOLES SIZES
1/2” drywall
NOT
INCLUDED
INCLUDED
32 mm (1 1/4”)
solid concrete
NOT
INCLUDED
4.7 mm
(3/32”)
2.5 mm
(3/32”)
6.35 mm
(1/4”)
12.
13 mm
(1/2”)
wood stud
44 mm (1 3/4”)
III. 3D KIT FASTENING
INSTALLATION
STEP 1
use the wall base to
mark each hole to drill
with a pencil.
STEP 3
Insert wall anchors
STEP 2
drill the holes with the given bit
(for wood surface only)
STEP 4
tightly screw the base to the wall
(For solid concrete and drywall only)
STEP 5
assemble the arm to the base
and then screw the emitter on it
13.
IV.
Digital Projector
GPI/O(DB37-F)
GPI/O Extension
(DB37-M)
PowerAdapter
24VDC/3A
Power Adapter
24VDC/3A
Distribution Module
Distribution Module(Extension)
DIN-3
DIN-3 Extension Cable
Distribution Module
Cable
DB-9
IR Emitter 3
DB-9
IR Emitter 2
IR Emitter Cable
DB-9
IR Emitter 1
14.
IV. CONNECTION & SYNCHRONIZATION
Please refer to the following technical board for the digital projector.
These parameters are for information purpose only. They may
be adapted if necessary.
TECHNICAL SPECIFICATIONS
Fall time
500µs
Rise time
1.5 ms
Contrast
> 200 (no ghosting)
Transmission in the clear state
Chromaticity
Standard parameters
EDGE 1.2
Double flash (4.2)
33%
Color correction not mandatory
TM
Triple flash (6.2)
Darktime:
Delay:
Darktime:
Delay:
500
-320
800
-320
Weight
56 grs (less than 2 ounces)
Battery
Disposable
Autonomy
800 hrs
Warning: Depending on your equipment and the room configuration,
you may have to adjust these parameters. We recommend that you confine
the setup of 3D parameters and color adjustments directly to integrators.
For further information please visit our website www.volfoni.com,
or send us an email to [email protected].
15.
VOLFONI SAS
29, Rue Jean Jaques Rousseau
75001 Paris
France
VOLFONI GmbH
Erzgießereistraße 38
80335 München
Germany
VOLFONI Ltd
21, Tower one
Lippo center 89,
Queensway
Hong-Kong
VOLFONI Inc
3450, Cahuenga Bd West.
UNIT 504
Los Angeles, CA, 90068
USA
VOLFONI Ltd.
90 Long Acre
Covent Garden
London
WC2E 9RZ
UK
VOLFONI AEIE
Ronda Guglielmo Marconi, 4
46980 Paterna (Valencia)
Spain
[email protected]
[email protected]
www.volfoni.com