1
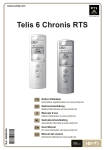
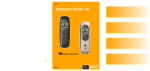
somfy.com Impresario Chronis RTS GB USER MANUAL 5015235A 8 ( N) 6 (C ) 8 (ok) 7 (N) 3 (S ) 2 (Q) 1 (i) 9 (R) 4 (P) 5 12 10 ( ) 11 (g) 13 14 16 17 18 19 20 21 15 22 23 24 25 26 27 28 29 30 REMOTE CONTROL PRESENTATION GB Description of the remote control 1 2 3 4 5 6 Selection key (i) Move up ( Q ) Move left ( S ) Move right ( R ) Move down ( P ) Cancel or back to a previous screen ( C ) 7 Validation (ok) 8 Help/Information on the screen displayed ( N ) 9 10 11 12 13 14 15 Display Play a scenario ( ) Stop the current scenario (g) Programming key (Prog.) Wall mount Mount compartment Battery compartment cover Description of the symbols used in Impresario Chronis RTS menus: 16 Scenarios 17 Days 18 Weeks 19 Solar sensors 20 Settings 21 Motors Symbols 22 , 23 and 24 indicate the ability to move within the screen in the direction shown by the arrows to access other set up elements not visible on-screen. Description of the symbols used to set up scenarios, days and weeks: 25 Up order 26 Down order 27 Go to favourite position order 28 No order 29 Programming at a set time 30 Programming at a time indexed to nightfall 5015235A-GB.qxd 25/01/07 15:11 Page 1 CONTENTS Presentation Technical specifications Fitting/replacing batteries QUICK START GUIDE Introduction Scenarios for your home Definitions Scenarios: Examples: Daily programming (typical days) Weekly programming (typical weeks) Operating modes 2 2 2 2 2 3 3 3 3 3 3 4 4 5 Manual mode operation (off the wall mount) Running a scenario Automatic mode operation (on the wall mount) Moving through the menus 5 5 5 6 PROGRAMMING Setting into service and configuring 7 7 Prior conditions that must be met before setting into service Using the data entry screen Renaming a motor PROGRAMMING SCENARIOS Table 1: Creating scenarios Creating your own scenarios Creating a scenario Modifying / Duplicating / Renaming / Deleting a scenario Modifying an existing scenario Duplicating an existing scenario Renaming an existing scenario Deleting an existing scenario PROGRAMMING THE CLOCK Daily programming (Typical days) Weekly programming (Typical weeks) Programming days and weeks Table 2: Programming the clock Programming days Creating a day Previewing day programming Modifying / Duplicating / Renaming / Deleting a day Modifying an existing day Duplicating an existing day Renaming an existing day Deleting an existing day 7 7 8 9 9 10 10 11 11 11 11 11 12 12 12 13 Programming weeks Creating a week Modifying / Duplicating / Renaming / Deleting a week Modifying an existing week Duplicating an existing week Renaming an existing week Deleting an existing week 17 17 18 18 18 18 18 MEMORY AVAILABLE 18 PROGRAMMING SOLAR SENSORS 19 Manual solar sensor operation Automatic solar sensor operation 19 19 SETTINGS Language Date and time Daylight saving time Simulating presence Twilight Screen Reset Your contact 20 20 20 20 20 20 20 20 20 INSTALLATION Setting into service and configuring 21 21 Prior conditions that must be met before setting into service Setting into service for the first time 21 21 Pairing and naming motors Adding a motor Deleting a motor Radio frames Mode TILT Attaching the wall mount Procedure for attaching the wall mount Contact information 22 22 23 24 24 25 25 25 INDEX 26 NOTES 27 13 14 14 16 16 16 16 16 16 1 GB GENERAL PRESENTATION General characteristics 5015235A-GB.qxd 25/01/07 15:11 Page 2 GENERAL PRESENTATION Presentation Impresario Chronis RTS is a remote control that lets you drive up to 20 products compatible with Somfy (RTS) radio technology. The following product categories can be controlled by the Impresario Chronis RTS remote control: • roller shutters • terrace awnings • blinds (roller or pleated) • venetian blinds (interior or exterior) • garage doors and gates • lights (with a suitable radio receiver) Technical specifications DIMENSIONS OPERATING TEMPERATURE 174 mm PROTECTION LEVEL RADIO RANGE +60 °C (140 ° F) 77 mm GB General characteristics 55 mm 26 mm 0 °C (32 ° F) 29 mm 0-60°C Indoor use Twenty metres even through two concrete walls Fitting/replacing batteries Open the battery compartment cover. No tools are required for this operation. Insert three brand new type AAA (LR03) 1.5 V alkaline batteries from the same source and with the same expiry date. Be sure to comply with the polarity indications shown on the remote control. Never use rechargeable batteries. A low battery condition is shown on the display by the ( p ) symbol. During battery replacement operations, the date and time are retained in memory for two minutes. All programmed settings remain in memory with no time limit. If the remote control is not to be used for an extended period, we recommend removing the batteries. Used batteries should always be recycled and never disposed of with regular waste . 2 5015235A-GB.qxd 25/01/07 15:11 Page 3 QUICK START GUIDE Scenarios for your home The Impresario Chronis RTS remote control lets you create your own scenarios to match your needs (amount of light, degree of heat, simulating a presence, etc.). Whether wall mounted in automatic mode or hand held in manual mode, your Impresario Chronis RTS remote control will drive your products to reproduce the scenarios recorded at the right time. The animated sequences used are called “Scenarios”. Definitions Scenarios A scenario lets you define a particular atmosphere for your home by combining the individual movements of various products. In a scenario, some products will receive up orders while others will receive down orders. Some will move to a so-called favourite position ”e“ (a favourite position must be memorised ahead of time: refer to the instructions for the local control points or visit the web site at www.mysomfy.com), while others will be unaffected. This way, in just one move, you can set the desired position for all of your products. Examples: “Wake up” scenario To wake-up softly, with just one move, all of the roller shutters in the living areas open (kitchen, dining room, living room, etc.) while the shutter on the bedroom window will move to your preset favourite position to let in a little light while retaining a cosy atmosphere. The shutters for the children’s windows are not affected by this scenario to avoid waking them right away. “Sun” scenario To keep your home cool through the height of the afternoon summer sun, the roller shutters on the south-facing rooms move to the preset favourite position; the terrace awning is lowered to cast a shadow on the living room window and to protect the furniture from the harsh sunlight. “Night time” scenario To go to bed with peace of mind, this scenario lets you close all of the roller shutters and raise the terrace awning, with just one touch of a key. You can create up to 16 different scenarios to meet your needs and assign them the name of your choice. Each scenario can be selected individually and run manually or run automatically at a programmed time thanks to the built-in clock (for daily or weekly programming). Two preset scenarios are available as soon as your system is set into service: • Open-sy: this scenario sends an up order to all registered products. • Close-sy: this scenario sends a down order to all registered products. 3 GB Introduction 5015235A-GB.qxd 25/01/07 15:11 Page 4 QUICK START GUIDE GB Daily programming (typical days) Using the scenarios created, you can assign times to some of them to create typical days. Every typical day can run up to four scenarios a day. You can freely create and name up to six typical days. For example: “Weekday”, “Weekend”, “Away” days… Two preset typical days are available as soon as you set your system into service: “Work-sy” and “Home-sy” (described in Table 2 in the “Programming” chapter). Note: If your equipment includes solar sensors, the programming of your typical days may include up to four solar sensor changes of state (activation or deactivation) in addition to the four scenarios. A day can therefore comprise four scenarios and/or four changes in solar sensor state. START Create your scenarios Create Créer your days vos journées Create your weeks Weekly programming (typical weeks) From the typical days programmed, you can make up typical weeks. This way, for every day of the week, you can assign it a Your remote typical day of your choice, or none at all. control is The Impresario Chronis RTS remote control lets you create three programmed different typical weeks (Work, Vacation, Gone away…). A preset typical week is available as soon as you set your system into service: “Week-sy” (described in Table 2 in the “Programming” chapter). Note: The preset programs in the Impresario Chronis RTS remote control automatically integrate each new motor paired with the remote control. These programs can be modified and deleted. If they are renamed or modified, they loose their capacity to automatically integrate any new motor paired to the remote control. 4 5015235A-GB.qxd 25/01/07 15:11 Page 5 QUICK START GUIDE Operating modes GB Manual mode operation (off the wall mount) When off its wall mount, the Impresario Chronis RTS remote control is in manual mode. This mode lets you: • Choose a scenario • Run the selected scenario • Stop the current scenario • Call up the programming and setting menus Running a scenario Select the desired scenario using the arrow keys (n) and run it by pressing ( ). To stop a scenario that is running, press “Stop” (g). Automatic mode operation (on the wall mount) Placing the Impresario Chronis RTS remote control on its wall mount activates the automatic mode. Programmed days and weeks can be selected using the arrow keys (n). After three seconds the selected sequence is accepted by the clock. When the remote control is placed on its wall mount, automatic mode can also be disabled. Day screen Week screen Clock off Day program symbol Programming in progress Next scenario at nightfall Name of the next scenario to run Time of the next scenario Week program symbol (second day running = Tuesday) When a day or week is being run, the next programmed event (within a maximum period of 24 hours) is indicated at the bottom of the screen. You can display the full make up of the current day by pressing (i). To return to manual mode, take the Impresario Chronis RTS remote control off its wall mount. 5 5015235A-GB.qxd 25/01/07 15:11 Page 6 QUICK START GUIDE GB Moving through the menus The (m) keys are used to move the cursor to access the menus and submenus or to scroll through the various Impresario Chronis RTS programming and setting choices. Press (i) or (ok) to call up the next screen. ( C ) returns you to the previous screen. Press ( C ) as many times as necessary to return to the main screen. 8 ( N) 6 (C ) 3 2 1 8 (ok) 7 (N) (S ) (Q) (i) (R) 4 (P) 5 As a rule, (i) lets you choose the element that the cursor is pointing to and (ok) confirms an action. The Impresario Chronis RTS menu and submenu layout looks like this: 6 5015235A-GB.qxd 25/01/07 15:11 Page 7 PROGRAMMING Prior conditions that must be met before setting into service The Impresario Chronis RTS remote control must be set into service after all of the motor drive systems are operational. The various motors must be individually set up and paired with a local control unit. To get the full benefit from the functions offered by the Impresario Chronis RTS remote control, we strongly recommend programming favourite positions ”e“ for the motors where appropriate (refer to the instructions for the local control points or visit the web site at www.mysomfy.com). Refer to the “Installation” section for instructions on setting into service. To customise your Impresario Chronis RTS remote control, you can assign names to all of your scenarios, days or weeks. The names of the motors used by your installation can also be customised. Wherever necessary, the appropriate data entry screen will be displayed. Using the data entry screen Select the desired character using the arrow keys (n) and validate by pressing (i). The cancel key ( C ) lets you delete an incorrect character. Select “Xx” and press (i) to choose a character type: upper or lower case. The arrow key ( Q ) lets you access accented characters. Once you have finished entering the name, validate with the (ok) key. TIP • The (o ) keys let you move from one line of characters to the next, faster. • You can enter a new name in full (Enter name) or from a preset, customisable list using (Choose name). 7 GB Setting into service and configuring 5015235A-GB.qxd 25/01/07 15:11 Page 8 PROGRAMMING Renaming a motor GB From the “System > Motor > Motor name” (s ) menu, use the (o ) keys to select the motor to rename and confirm with (i) or (ok). TIP Name mot. • To check which motor corresponds to the selected motor name, press (i): every time you press (i) the motor successively receives the following orders: up / stop / down / up / stop, etc. From the “System > Motor > Organise list” (s) menu, use the (o ) keys to position the cursor on the motor to move in list and select it using (i). The name of the selected motor is displayed in the shaded banner line. Using the (o ) keys, position the cursor where the motor is to be positioned in the list and confirm with (i) to move the motor to its new position in the list. Validate the new motor list organisation using (ok). 8 5015235A-GB.qxd 25/01/07 15:11 Page 9 PROGRAMMING SCENARIOS To make programming easier, you can use or copy the table below to prepare your scenarios. Programming scenarios GB (a) Table 1: Creating scenarios all motors) all motors) (list the motor names below) Your scenarios c : Up order e : Favourite position order a : Down order --- : No order Exam ple Preset scenarios Lists of motors stored in memory in the Open-sy Close-sy Impresario Chronis RTS: (Up order to (Down order to c a c c a c c a a c a --- c a --- c a e c a --- c a e c a c a c a c a c a c a c a c a c a c a c a c a Display the list of motors in the “System > Motors > Motor name” (s) menu. 9 5015235A-GB.qxd 25/01/07 15:11 Page 10 PROGRAMMING SCENARIOS GB Creating your own scenarios Creating a scenario Scenarios are programmed from the “System > Scenarios” (a) menu. Creating a scenario Select “---New---” using the (o ) keys and confirm with (i) or (ok). You can name your new scenario by entering a name in full (Enter name) or by selecting one from a preset list using (Choose name). Once you have finished entering the name, confirm with (ok). Use the (n) keys to assign the required order to each motor: • Up c • Favourite positione • Down a • No order --Finish programming the scenario by validating with (ok). TIP • To create a new scenario faster, you can duplicate and modify a previously created scenario. 10 5015235A-GB.qxd 25/01/07 15:11 Page 11 PROGRAMMING SCENARIOS Modifying /Duplicating / Renaming / Deleting a scenario GB You can modify, duplicate, rename or delete any existing scenario. From the “System > Scenarios” (a) menu, select the required scenario using the (o ) keys and validate by pressing (i) or (ok). Modifying an existing scenario Select “Edit” and press (i) or (ok) to access the scenario content and modify the settings (c, e, a, ---). To validate the modifications made to the scenario press (ok). Duplicating an existing scenario Select “Duplicate” and press (i) or (ok) to quickly create a new scenario from an existing scenario (whether created or previously saved). Assign a name to the newly created scenario using its data entry screen. Validate the choice of name by pressing (ok). Modify the parameters ( c, e, a, ---) and validate your new scenario by pressing (ok). Renaming an existing scenario Select “Rename” and press (i) or (ok) to access the data entry screen. Assign a new name and validate by pressing (ok). Deleting an existing scenario Place the cursor on “Delete” and press ( i) or (ok) to delete the scenario. Deletion of the selected scenario must be confirmed by pressing (ok). To cancel the current deletion, press ( C ). Note: The scenario cannot be deleted if it is used in the programming for a typical day. In this case, an information screen is displayed. Press ( C ) to return to the previous screen. 11 5015235A-GB.qxd 25/01/07 15:11 Page 12 PROGRAMMING THE CLOCK GB The clock built into the Impresario Chronis RTS remote control is used to assign times to the previously created scenarios so as to make up “Typical days”. These “Typical days” can in turn be used to make up “Typical weeks”. In automatic mode, once the Impresario Chronis RTS remote control is set in its wall mount, it becomes possible to select a “Typical day” or “Typical week”. The scenarios will then be run automatically at the programmed times. Daily programming (Typical days) From among the scenarios created, select up to four scenarios and assign them a time in order to create a typical day. Six different “Typical days” can be created in this way. Examples of typical days: - 07:00: “Wake-up” scenario - 08:30: “Morning” scenario - 14:00: “Afternoon” scenario - 22:00: “Evening” scenario Weekly programming (Typical weeks) From “Typical days”, the Impresario Chronis RTS remote control lets you make up “Typical weeks”. For every day of the week, it becomes possible to assign a “Typical day” from among the six previously created days. For example: from Monday to Friday, the “Work” day scenario will be run, while on Saturday and Sunday the “Weekend” day scenario will be run. Three different “Typical weeks” can be programmed in this way. 12 5015235A-GB.qxd 25/01/07 15:11 Page 13 PROGRAMMING THE CLOCK To simplify programming, you can use or copy the table below to prepare your “Typical days” and “Typical weeks”. GB Programming days and weeks Table 2: Programming the clock Days Weeks Name Function Name Work-sy 7 h 30 : Open-sy V : Close-sy Week-sy Home-sy ........................... ........................... ........................... ........................... ........................... Function 1 : Work-sy 2 : Work-sy 3 : Work-sy 4 : Work-sy 8 h 00 : Open-sy 5 : Work-sy V : Close-sy 6 : Home-sy 7 : Home-sy ..... : . . . . . . . . . . ........................... 1 : . . . . . . . . . . . . ..... : . . . . . . . . . . 2: ............ ..... : . . . . . . . . . . 3: ............ ..... : . . . . . . . . . . 4: ............ ..... : . . . . . . . . . . 5: ............ ..... : . . . . . . . . . . ..... : . . . . . . . . . . 6: ............ ..... : . . . . . . . . . . 7: ............ ..... : . . . . . . . . . . ........................... 1 : . . . . . . . . . . . . ..... : . . . . . . . . . . 2: ............ ..... : . . . . . . . . . . 3: ............ ..... : . . . . . . . . . . 4: ............ ..... : . . . . . . . . . . 5: ............ ..... : . . . . . . . . . . ..... : . . . . . . . . . . 6: ............ ..... : . . . . . . . . . . 7: ............ ..... : . . . . . . . . . . ........................... 1 : . . . . . . . . . . . . ..... : . . . . . . . . . . 2: ............ ..... : . . . . . . . . . . 3: ............ ..... : . . . . . . . . . . ........................... ..... ..... ..... ..... : : : : .......... .......... .......... .......... 4: ............ 5: ............ 6: ............ 7: ............ 13 5015235A-GB.qxd 25/01/07 15:11 Page 14 PROGRAMMING THE CLOCK GB Days are programmed from the “System > Days” (c) menu. Programming days Creating a day Select “New” with the (o ) keys and confirm with (i) or (ok). TIP • To create a new day faster, you can duplicate and modify a previously created day. You can name the new day by entering its name in full (Enter name) or from a preset list using (Choose name). Once you have finished entering the name, confirm with (ok). Select “Prog. scenario” and confirm with ( i) or (ok) to start programming the day. A day can comprise one to four scenarios. A fixed time (U) or one corresponding to nightfall (V) can be assigned to each scenario. Select the first field and press (i) to use the (n) keys to define the symbol that corresponds to the required programming mode (U) or (V). Validate the choice with (i). Then select the field immediately to the right and press (i). Scroll the scenarios using the (n) keys until you find the scenario you are looking for. Validate the choice with (i). 14 5015235A-GB.qxd 25/01/07 15:11 Page 15 Set the hours and minutes for running a scenario at a set time (U): Select the hour setting field and confirm with (i). Scroll the hours using (n) and validate the chosen hour setting using (i). Lastly, select the minute setting field and confirm with (i). Scroll the minutes using (n) and confirm with (i). Finish and validate the programming with (ok). TIP • A time that matches twilight can be assigned to a scenario. This function will, for example, let you automatically close all or part of the roller shutters in the winter twilight, even if you are not yet home, and thereby help to save energy. The security of your home is also enhanced. The original setting can be modified from the “System > Settings > Twilight mode” (g) menu. Refer to “Settings”. The Impresario Chronis RTS remote control also lets you set day programming to activate and deactivate the solar sensors (refer to “Programming solar sensors”). 15 GB PROGRAMMING THE CLOCK 5015235A-GB.qxd 25/01/07 15:11 Page 16 PROGRAMMING THE CLOCK GB Previewing day programming Select “Preview” and press (i) or (ok) to preview the settings programmed for a day. Preview provides a complete vision of the day: scenarios and solar sensors, where programmed. Modifying / Duplicating / Renaming / Deleting a day You can modify, duplicate, rename or delete any existing day. From the “System > Days” (c) menu, select the desired day using the (o ) keys and validate by pressing (i) or (ok). Modifying an existing day Select “Prog. Scenarios” or “Prog. sol. sensors” and confirm with (i) or (ok). Modify the programming settings and confirm with (ok). Duplicating an existing day Select “Duplicate” and press (i) or (ok). Assign a new name to the newly created day using the data entry screen. Validate the name by pressing (ok). Modify the programming settings and validate the new day by pressing (ok). Renaming an existing day Select “Rename” and press (i) or (ok). Assign a new name using the data entry screen and validate by pressing (ok). Deleting an existing day Select “Delete” and press (i) or (ok). Confirm by pressing (ok) or cancel the deletion by pressing ( C ) Note: You cannot delete the day if it is used as part of the programming for a typical week. In this case, an information screen is displayed. Press ( C ) to return to the previous screen. 16 5015235A-GB.qxd 25/01/07 15:11 Page 17 PROGRAMMING THE CLOCK (e) Programming weeks GB Creating a week Weeks are programmed from the “System > Weeks” (e) menu. Select “New” using the (o ) keys and confirm with (i) or (ok). You can name your new week by entering its name or selecting a name from a preset list of names. Once you have finished entering the name, confirm with (ok). For each day of the week, select the typical day to run using the (n) keys. Days can also be left blank (---). Validate the programming for the week with (ok). Note: A week starts on Monday (1 = Monday). TIP • To create a new week faster, you can duplicate and modify an existing week. 17 5015235A-GB.qxd 25/01/07 15:11 Page 18 PROGRAMMING THE CLOCK GB Modifying / Duplicating / Renaming / Deleting a week You can modify, duplicate, rename or delete any existing week. From the “System > Weeks” (e) menu, select the desired week using the (o ) keys and validate by pressing (i) or (ok). Modifying an existing week Select “Edit” and confirm with (i) or (ok). Modify the programming parameters and confirm with (ok). Duplicating an existing week Select “Duplicate” and press (i) or (ok). Assign a new name to the newly created week using the data entry screen. Validate the name by pressing (ok). Modify the programming parameters and validate the new week by pressing (ok). Renaming an existing week Select “Rename” and press (i) or (ok). Assign a new name using the data entry screen and validate by pressing (ok). Deleting an existing week Select “Delete” and press (i) or (ok). Confirm by pressing (ok) or cancel the deletion by pressing ( C ). MEMORY AVAILABLE The Impresario Chronis RTS remote control lets you store: • 20 motors • 16 scenarios • 6 days • 3 weeks Release memory space by deleting a programmed function to replace it with another of the same kind. 18 5015235A-GB.qxd 25/01/07 15:11 Page 19 Solar sensors can be assigned to a home’s motor driven products to ensure effective protection from the sun. When selected, the solar sensors control the products they are assigned to, as the sun rises and sets. Among other functions, solar sensors make it possible to keep the indoor temperature down in summer and to protect furniture from harsh sunlight. The Impresario Chronis RTS remote control makes it possible to activate or deactivate all solar sensors manually or automatically using the clock. Manual solar sensor operation “System > Solar sensor” (T) menu. Select “Activate” or “Deactivate” and confirm with (i). Automatic solar sensor operation Using solar sensors, in addition to the four possible scenarios, every day can comprise 1 to 4 changes in solar sensor state. This makes it possible, for example, to automatically activate the solar sensors from 14:00 a “set time” (U) and to deactivate them automatically at nightfall (V). From the “System > Days” (c) menu, select the desired day and confirm with (i). Select “Prog. sol. sensors” and confirm with (i) or (ok) to start programming. Select the first field and press (i) to use the (n) keys to define the symbol that corresponds to the required programming mode (U) or ( V). Validate the choice with (i). Then select the field immediately to the right and press (i). Select “On” or “Off” mode with the (n) keys. Validate the choice with (i). Set the hours and minutes for running a set time scenario (U) (proceed just like when setting the time for running a scenario). Confirm with (i). Finish and validate programming with (ok). 19 GB PROGRAMMING SOLAR SENSORS 5015235A-GB.qxd 25/01/07 15:11 Page 20 SETTINGS “System > Settings” (g) menu. GB Language Seven languages are offered by the Impresario Chronis RTS remote control: French, English, German, Spanish, Italian, Portuguese, Dutch. Select the language with the (n) keys and validate with (ok). Date and time Use the (m) keys to set each of the settings and confirm with (ok). Daylight saving time Activate or deactivate the automatic time change function for daylight saving time. The Impresario Chronis RTS remote control is factory set to change time automatically. Select the chosen option with (i) and confirm with (ok). Simulating presence The presence simulation function will randomly vary the time when the programmed scenarios (days or weeks) are triggered, within a range of +1 to +30 minutes. This function is specially recommended when you are away from home for an extended period of time. Select the chosen option with ( i) and confirm with (ok). Twilight In automatic mode, the “Twilight modeV“ function makes it possible to change a scenario time in line with the time when the sun sets. Specify the time when the scenario should be run in June and in December. The impresario Chronis RTS remote control will vary this time day after day, automatically. Select the chosen option with (i) and confirm with (ok). Note: To allow a correct calculation of the daily time shift, the maximum deviation between the two times cannot exceed nine hours. Screen The screen display can be set up without back lighting or with back lighting lasting 5 or 15 seconds after the last key is pressed. The Impresario Chronis RTS remote control is factory set for 5 second back lighting. Select the chosen option with (i) and confirm with (ok). Reset Resetting the Impresario Chronis RTS remote control returns it to the original factory set up. All of the scenario, day and week settings are lost. All of the products paired with the Impresario Chronis RTS remote control are retained after reset. Your contact Use this location to find or record the contact information for your installation specialist. 20 5015235A-GB.qxd 25/01/07 15:11 Page 21 INSTALLATION Prior conditions that must be met before setting into service The Impresario Chronis RTS remote control must be set into service after all of the motor drive systems are operational. The various motors must be individually set up and paired with a local control unit. To get the full benefit from the functions offered by the Impresario Chronis RTS remote control, we strongly recommend programming favourite positions ”e“ for the motors where appropriate (refer to the instructions for the local control points or visit the web site at www.mysomfy.com).) The procedures for pairing motors with the Impresario Chronis RTS remote control described here require a good knowledge of RTS radio technology. Your installation specialist knows these procedures and we therefore recommend that you let him set your Impresario Chronis RTS remote control into service. IMPORTANT: • The following steps are necessary and must be performed in chronological order. • The wall mount must be removed from the remote control during the entire setting into service phase. Setting into service for the first time Open the battery compartment cover, no tools are required to do so. Insert three brand new type AAA (LR03) 1.5 V alkaline batteries from the same source and with the same expiry date. Be sure to comply with the polarity indications shown on the remote control. Never use rechargeable batteries. (g) Setting the language Select the language with the (n) keys and confirm with (ok). (g) Setting the date and time Set each element using the (n) keys. Use the (o ) keys to move from one element to the next. Confirm with (ok). The time display can be set to 12 or 24 hour mode. 21 GB Setting into service and configuring 5015235A-GB.qxd 25/01/07 15:11 Page 22 INSTALLATION GB (s) Pairing and naming motors The “System > Motors > Pairing” (s) menu lets you add or delete motors from the Impresario Chronis RTS remote control memory. Adding a motor Select “Add motors” and confirm with (i) or (ok). You can name each new motor by entering its name in full or from a preset list of names (refer to the “Programming” chapter for further information on how the data entry screen works). Once you have finished entering the name, confirm with (ok). The pairing procedure is performed as follows: 1- Press the (Prog.) key on the local control (for approximately 2 seconds) until brief product movement is observed (a light receiver blinks): then you have two minutes left to perform the next step. Local Control Options 2s 2s 2s 2- Press the (Prog.) key on the Impresario Chronis RTS remote control for 0.5 seconds. The corresponding product is again activated (a brief movement or blinking) confirming the end of the procedure. 3- Validate by pressing (ok). 22 5015235A-GB.qxd 25/01/07 15:11 Page 23 INSTALLATION GB 4- Test pairing by pressing (i). 4 - The product will activate if the procedure was successful. If not, repeat steps 1 and 2 if necessary and re-test pairing. 5- Finish with (ok). ➡ Repeat the procedure from the start (“System > Motors > Pairing > Add motors” menu) as many times as there are products to pair. Deleting a motor Select “Cut out motor” and confirm with (i) or (ok). Select the motor to be deleted from the list and confirm with (ok). The procedure for unpairing is performed as follows: 1- Press the (Prog.) key on the local control (for approximately 2 seconds) until brief product movement is observed (a light receiver blinks): then you have two minutes left to perform the next step. Local Control Options 2s 2s 2s 2- Press the (Prog.) key on the Impresario Chronis RTS remote control for 0.5 seconds. The corresponding product is again activated (a brief movement or blinking) confirming the end of the procedure. 3- Validate by pressing (ok). 23 5015235A-GB.qxd 25/01/07 15:11 Page 24 GB INSTALLATION 4 - Test unpairing by pressing (i). 4 -If the product no longer actuates, then the procedure was successful. Repeat steps 1 and 2 if necessary and re-test unpairing. ➡ Only confirm with (ok) once the procedure for unpairing is successful. 5 - Finish with (ok) or start again if the procedure failed. Radio frames To optimise battery service life, the Impresario Chronis RTS remote control is configured as standard to work with an installation comprising up to 12 products. This setting can be modified for installations comprising more than 12 products (up to a maximum of 20). From the “System > Motors > List size” (s) menu, select the setting with (i) and validate the selection with (ok). The number of radio frames sent when a scenario is run is increased by increasing the number of products to 20. Mode TILT If the installation comprises products with moving blades (indoor or outdoor Venetian blinds), the way the blades are moved (using European or US mode) can be set in the “System > Motors > Tilt mode” (s) menu. For powered indoor blinds other than blinds with moving blades (roller blinds, screens, etc.), we recommend setting the TILT mode to the US mode. ➡ Refer to the instructions provided with the receiver for the recommended setting. 24 5015235A-GB.qxd 25/01/07 15:11 Page 25 INSTALLATION Attaching the wall mount GB Choosing a location for the wall mount Choose an accessible location where it is easy to see and use. As the Impresario Chronis RTS remote control is intended to drive all of the automation systems covering the opening and closing systems in a home, the wall mount must be installed at a location that is within radio range of all of the products to control. To ensure this, run a scenario from the location where you plan to install the wall mount before attaching it to the wall. This test can easily be run using the scenarios that are automatically generated by the Impresario Chronis RTS remote control after setting into service: Use the (n ) keys to select one of the two scenarios available immediately after setting into service (“Close-sy” or “Open-sy”). Run the selected scenario with ( ). Repeat the operation with the second scenario available. Make sure that all of the products have received the orders. Procedure for attaching the wall mount Attach the wall mount to the wall using the two screws supplied. Attach it at a convenient height for reading the display. Contact information Fill in the contact information for your installation specialist using the “System > Settings > Your contact” (g) menu. Setting into service is completed. Refer to the section on additional settings. 25 5015235A-GB.qxd 25/01/07 15:11 Page 26 INDEX Heading GB AUTOMATIC MODE AUTOMATIC TIME CHANGES pages 5 20 BATTERIES 2 BROWSING 6 CONTACT 20, 25 DATE AND TIME 20, 21 FAVOURITE POSITION LANGUAGE 3, 7, 10, 21 20, 21 MANUAL MODE 5 MENUS (LAYOUT) 6 MOTORS Renaming Organising the list Pairing Deleting 8 8 22 23 SCENARIO Définition Preset scenarios Running Creating Modifying Duplicating Renaming Deleting 3 3, 9 5 10 11 11 11 11 SCREEN BACK LIGHTING 20 SETTING INTO SERVICE 21 SIMULATING PRESENCE 20 SOLAR SENSORS 19 26 Heading pages TWILIGHT 20 TYPICAL DAY Definition Preset scenarios Creating Modifying Duplicating Renaming Deleting 4 4, 13 14 16 16 16 16 TYPICAL WEEK Définition Preset scenarios Creating Modifying Duplicating Renaming Deleting 4 4, 13 17 18 18 18 18 WALL MOUNT 5, 25 5015235A-GB.qxd 25/01/07 15:11 Page 27 GB NOTES 27 Lists of subsidiaries/Lista de filiales/Lista das filiai/Κατάλογοι των θυγατρικών Australia : SOMFY PTY LTD (61) 2 9638 0744 Hungary : SOMFY Kft (36) 1814 5120 Singapore : SOMFY PTE LTD (65) 638 33 855 Austria : SOMFY GesmbH (43) 662 62 53 08 India : SOMFY INDIA PVT Ltd (91) 11 51 65 91 76 Slovaquia : cf. Czech Republic - SOMFY Spol s.r.o. (420) 296 372 486-7 Belgium : SOMFY BELUX (32) 2 712 07 70 Italy : SOMFY ITALIA s.r.l (39) 024 84 71 84 Brasil : SOMFY BRASIL STDA (55 11) 6161 6613 Japan : SOMFY KK +81-45-475-0732 Canada : SOMFY ULC (1) 905 564 6446 Lebanon : cf. Cyprus - somfy middle east (961) 1 391 224 Sweden : SOMFY AB (46) 40 165900 Mexico : SOMFY MEXICO SA de CV (52) 55 5576 3421 Switzerland : SOMFY A.G. (41) 18 38 40 30 Morocco : SOMFY MAROC (212) 22 95 11 53 Taïwan : SOMFY TAIWAN (886) 2 8509 8934 Netherlands : SOMFY BV (31) 23 55 44 900 Turkey : SOMFY TURKEY +90 216 651 30 15 Cyprus : SOMFY MIDDLE EAST (357) 25 34 55 40 Czech Republic : SOMFY Spol s.r.o. (420) 296 372 486-7 Denmark : SOMFY AB DENMARK (45) 65325793 Finland : SOMFY AB FINLAND (358) 957 13 02 30 France : SOMFY FRANCE (33) 820 374 374 Germany : SOMFY GmbH (49) 7472 930 0 Greece : SOMFY HELLAS (30) 210 614 67 68 Hong Kong : SOMFY Co. Ltd (852) 25236339 Norway : SOMFY NORWAY (47) 67 97 85 05 Poland : SOMFY SP Z.O.O (48) 22 618 80 56 Portugal : cf. Spain - SOMFY ESPANA SA (351) 229 396 840 South Korea : SOMFY JOO (82) 2 594 4333 Spain : SOMFY ESPANA SA (34) 934 800 900 UAE : SOMFY GULF +971 4 88 32 808 United Kingdom : Somfy LTD (44) 113 391 3030 United States : SOMFY SYSTEMS Inc (1) 609 395 1300 Russia : cf. Germany - SOMFY GmbH (7) 095 781 47 72, (7) 095 360 41 86 PATENTS AND DESIGN PATENTS PENDING FOR SOME COUNTRIES (e.g. : US) © SOMFY 2006 - Réalisation : Ameg - 04 76 70 05 55 somfy.com SOMFY SAS Capital 20 000 000 euros RCS Bonneville 303.970.230 - 12 -2006